Haolepinoy's Very First Ever Before Build Thread (No Really)

July 2015 | 181,250 miles

With the daily AND adventure duties safely in the hands of the MPV, it was time to break ground on the Jeep Cherokee Moonshot Project. And what better tool to begin with than the DEATH WHEEL.

Note the stupidity right off the bat…first time using this fabled implement of destruction and of course I would use it to shoot sparks all over oily cardboard and drain pans. Nothing like cutting your arm off AND catching on fire at the same time.

If you noticed in the pictures, the rear axle is already out, and I’m giving it the third or fourth attempt at getting these rusty, seized leaf spring bolts out. Removal would require the nuclear option, but since I didn’t have a space-age plasma cutter I opted for the medieval tools at hand. Well, medieval if you ignore electricity.

With the leaves finally cut free I still needed to get the bolts out, and the grinder and sawzall were called back into action.

Some of the bolt fragments were easier to retrieve than others.

At the end of things I had the rear end of the Cherokee taken much further apart than I’d ever attempted before. But even at this point I knew enough to know that disassembly is often the easiest and quickest part of the project. The can of worms was officially opened.

1 Like

The build thread we all aspire to be like, imo.

And yet, how can you even spend a minute away from the van, man? Such an incredible machine.

Hahaha…you should do an article about it then. I could be interviewed “in character” for a cheekier look into the real deal of the minivan subculture.

I’ve been working hard to catch this thread up to the van’s so that I can start interweaving the stories, and now finally have them both sync’ed together. Yet getting them to the current day is another story that I’m working hard to do, but that will require many more posts and the eventual introduction of a third character (soon).

I will be doing some actual work on the van tomorrow to get it ready for a Spring Break road trip adventure with the family…if the coronavirus doesn’t kill us all first, that is.

Aww shucks man. You’re making my head swell. Thanks for the nod on the podcast the other day. I’ll repay the kind words with a beer or two at Expo West…if, again, the coronavirus doesn’t kill us all first.

Believe it or not, you just reminded me I’ve been meaning to reach out to Odyssey and Sienna owners. Why not ask about the almighty MPV? :stuck_out_tongue:

This would be so much fun. I can see the insane commentary in my head now, and am having trouble holding back the chuckles here at work.

Let’s do it up right, then.

Message sent on Instagram. :stuck_out_tongue:

September 2015 | 181,250 miles

Rust…

You’re going to run into it eventually, and it sucks. It makes everything harder. It never sleeps. It’s always spreading…it’s spreading somewhere right now as I type. It makes your eyes hurt when it falls into them laying under your beloved car, and it makes them hurt when you cry your little heart out when the cancer finally takes your beloved car from you.

I’m not sure what stage of rust my Jeep was in, but as I took things apart it was clear that the cancer was everywhere. When I bought this Cherokee the Carfax said that it had spent most of its life in Georgia, but originated somewhere up in Ohio. I guess the disease set in early then, only slowly spreading down South rather than going Stage 4 before coming into my hands.

As already seen I had to cut out the rear leaf springs because of the rust, but had also already lost the rear bump stops due to rusted off studs on the uni-frame rails. The upper studs for the rear shocks snapped off as well. This was going to be an uphill battle, but also a learning experience in how to prevent, remediate, and repair the ravages of rust. Every gearhead needs to know how to deal with this common foe.

1 Like

September 2015 | 181,250 miles

With the back axle and leaf springs out of the way I could get after several other items wrapped up in the back end project. One of these was the rear trailer hitch. Though it was an OEM hitch, judging by the way it was wired in I’d have to assume it was a half-ditched effort by somebody after the fact.

The goal here was to grind back the rust and repaint the hitch, as well as repair the wiring mess. I’d found an OEM loom at the junkyard that I hoped I could splice into whatever was already on my Jeep so that things looked a bit more clean and tucked in than the twisty twist and tape install.

The rear uni-frame rails were going to be a busy piece of real estate with the tow hitch, gas tank skid plate, and rear leaf spring hanger brackets all incorporated into it in some way. I refinished and cleaned up the threads on the rear nut strips so that there’d be no trouble bolting things up once everything was ready to go back in.

But before anything else could get bolted back up there was still more cutting, grinding, painting, and pounding to do. So far so good.

1 Like

September 2015 | 181,250 miles

After getting the hitch and rear bumper out of the way it was time to get the death wheel back out. These rear leaf spring hanger brackets were the next thing needing to go, and when they did it would mean no turning back on the suspension modifications.

What was going back in would be a bit stronger than the original design. The side by side comparison gives you an idea.

I treated the surface rust on the uni-frame rails and painted before setting the new hanger boxes in place. They are designed to be 100% bolt-in, but could also be welded in if you’ve got the skills for that. I didn’t (and still don’t), so that meant I’d need to put two new holes up through the boot floor to secure the top of the hangers.

One more item to sort before everything rear related could be bolted back onto the uni-frame.

1 Like

September 2015 | 181,250 miles

I have no idea how my fuel tank got this dent in it. I was not a rock crawler, nor had I ever been in any kind of accident that would have left this kind of damage. It must have been something lost to history, known only by the previous owners.

Well, in an effort to prevent future damage similar to this sort in the likelihood that this Jeep did get off-road in the future, a gas tank skid plate would be needed. Luckily for me I had recently found an OEM tank skid at the junkyard. But since it was for the older generation of XJ (pre-'96), it would require a bit of modification to fit the newer tank. More death wheel work ahead.

Those relief cuts were needed to allow the rear of the tank to bend over a bit. I knew just the guy to do this part of the operation, and he even volunteered to mount the tank up for me when he was done.

While in there (and since the leaf springs were still out of the way) I wanted to also tackle the fuel filler hoses. They were old and falling apart by this stage of their life, and the protective cover needed a little rust remediation and modification with the death wheel to fit the new leaf spring perches anyways.

With those final items taken care of I could start hanging things off the rear of the Jeep again. Trailer hitch, trailer wiring loom, gas tank skid plate, and rear leaf spring hangers completed and installed. Next time I’d turn my attention to the rear axle and the bits that keep it stuck under the rear of the Cherokee.

2 Likes

Nice! I love it when a plan comes together!

October 2015 | 181,250 miles

Next item needing attention would be the rear axle. Rusty like all the rest, so in addition to a drain & fill on the fluid I’d strip it down and repaint the housing. Again, I’m not a fan of pink or lime green underwear on a Jeep so it would be chassis black all around.

Another item I dealt with (with the help of a friend with a welder) was to repair some wear spots on my rear brake backing plates. If you remember I pulled the disc brake assemblies from a junkyard Grand Cherokee to upfit my XJ. Something that I learned to be a common problem on older cars is that the spots where the brake pads land can become worn and grooved over time, leading to pads that don’t slide smoothly.

I had him fill those grooves with weld so that I could file the lands back down smooth. Hope that helps things out. Brake issues got me into this moonshot fiasco, so might as well fix the brakes as well as possible since I was disassembling and re-configuring the entire vehicle in an effort to fix a single brake line.

…and while doing that I figured I’d paint all the new brake bits in a futile effort to prevent them from rusting in the future. Prevent is a bit of hyperbole. Hinder might be a better description of the actual efficacy of all this. But progress was happening. Very slowly, but certainly. Looked like the MVP MPV would have to fill in on the adventure duties since this Jeep would likely not be ready for a while.

1 Like

These pictures are from 2015. Did I hear you say something today about how the Jeep is still in pieces?

The attention to detail is worth it, though. Here’s hoping you put the rust into remission.

Still…pieces galore.

You’ll see as the story catches up. More Gearhead Project lessons with hindsight’s advantage.

1 Like

November 2015 | 181,250 miles

With the rear axle painted it was time to put it back underneath the Cherokee. The suspension I chose to go with consisted of several ARB’s Old Man Emu bits. As it pertains to the rear, Dakar leaf springs (with an integrated helper leaf) and Nitrocharger Sport shocks.

I didn’t have any extreme plans in mind for my Jeep. I wasn’t building a rock crawler. But I also wasn’t building a high school budget shitbox. I wanted to wade into the quality aftermarket parts world, and by all accounts at the time Old Man Emu was hard to beat for expedition-style Cherokees.

I snaked some bolts up into the holes left over by the broken-off studs so I could secure the new shocks. In hindsight I might go back and do something a bit more sturdy, but at the time it seemed like an adequate solution.

The heavier leaf springs should do away with the need for the rear sway bar, which by all accounts is pretty useless on a Cherokee. In fact, earlier trim packages that came with the trailer package or unicorn Dana44 axle didn’t even have them from factory (I’m a little out of date on the specifics here, but you get the idea).

With everything bolted in it looked pretty good, and felt good to be this far along. Still loads to do, but much of it will have to wait until other items are done at a later date. At least it was back on four wheels again…at least for a little while.

2015 Randomly

Junkyards are marvelous places, but sometimes Craigslist can be a pretty good dumpster dive too. There were several items that I was constantly on the lookout for, and with the right amount of patience I was able to pick up a few treasures for the build.

As already shown I had found an OEM gas tank skid plate, but had also picked up two other OEM bits of protection. The transfer case “skid” is a glorified slab of steel that runs diagonally from the transmission crossmember over to the uniframe rail. I guess it protects things, but no matter since I’ve got an aftermarket t-case skid that does a better job. The big one in the picture is the front skid.

I grabbed a spare Ecco rim with the intention of having a full-size spare with the finished project. I’m not intending to buy some fancy aftermarket wheels for the Jeep, and since these 15" wheels clear my brakes with no issue I don’t see the need to go bigger. I’ll paint it up black to match the others.

And since I’m going to use a full-size spare and a larger tire size than stock, the spare will have to find a home outside the rear cargo area. Here’s where my first Craigslist score came. I found an OEM rear swing out tire carrier for sale. There are two OEM styles of this, and both are engineered for the pre-'96 style Cherokees. Those had a fiberglass rear hatch, while the newer style has a steel door. This is the “less-desirable” version that mounts to the corner of the rear bumper. Not sure If I’ll be able to make it work, but it’s worth a try.

I also met a guy that had a whole basement full of junkyard plundered Cherokee parts. Part of me wanted to hate the guy for grabbing all the goodies and hoarding them, but I did manage to grab a few interior panels that I had managed to booger up over the years.

In keeping with the parts bin upgrades I was able to snag a ZJ Grand Cherokee tie rod. It is the same dimensions as the XJ Cherokee tie rod, but the ZJ unit is a thicker, solid piece of steel, while the XJ’s is a thin, hollow tube. They’re very prone to bending, and while the ZJ’s isn’t bomb-proof, it is at least a cheap and significant upgrade.

And the best junkyard score I came across for the build were these leather seats out of a WJ Grand Cherokee. So rare to find leather seats that aren’t already shredded, soaking wet, or already gone at the local pick-n-pull. They’ll make the interior much better when they finally get repurposed to fit.

2015 Randomly

Tires…

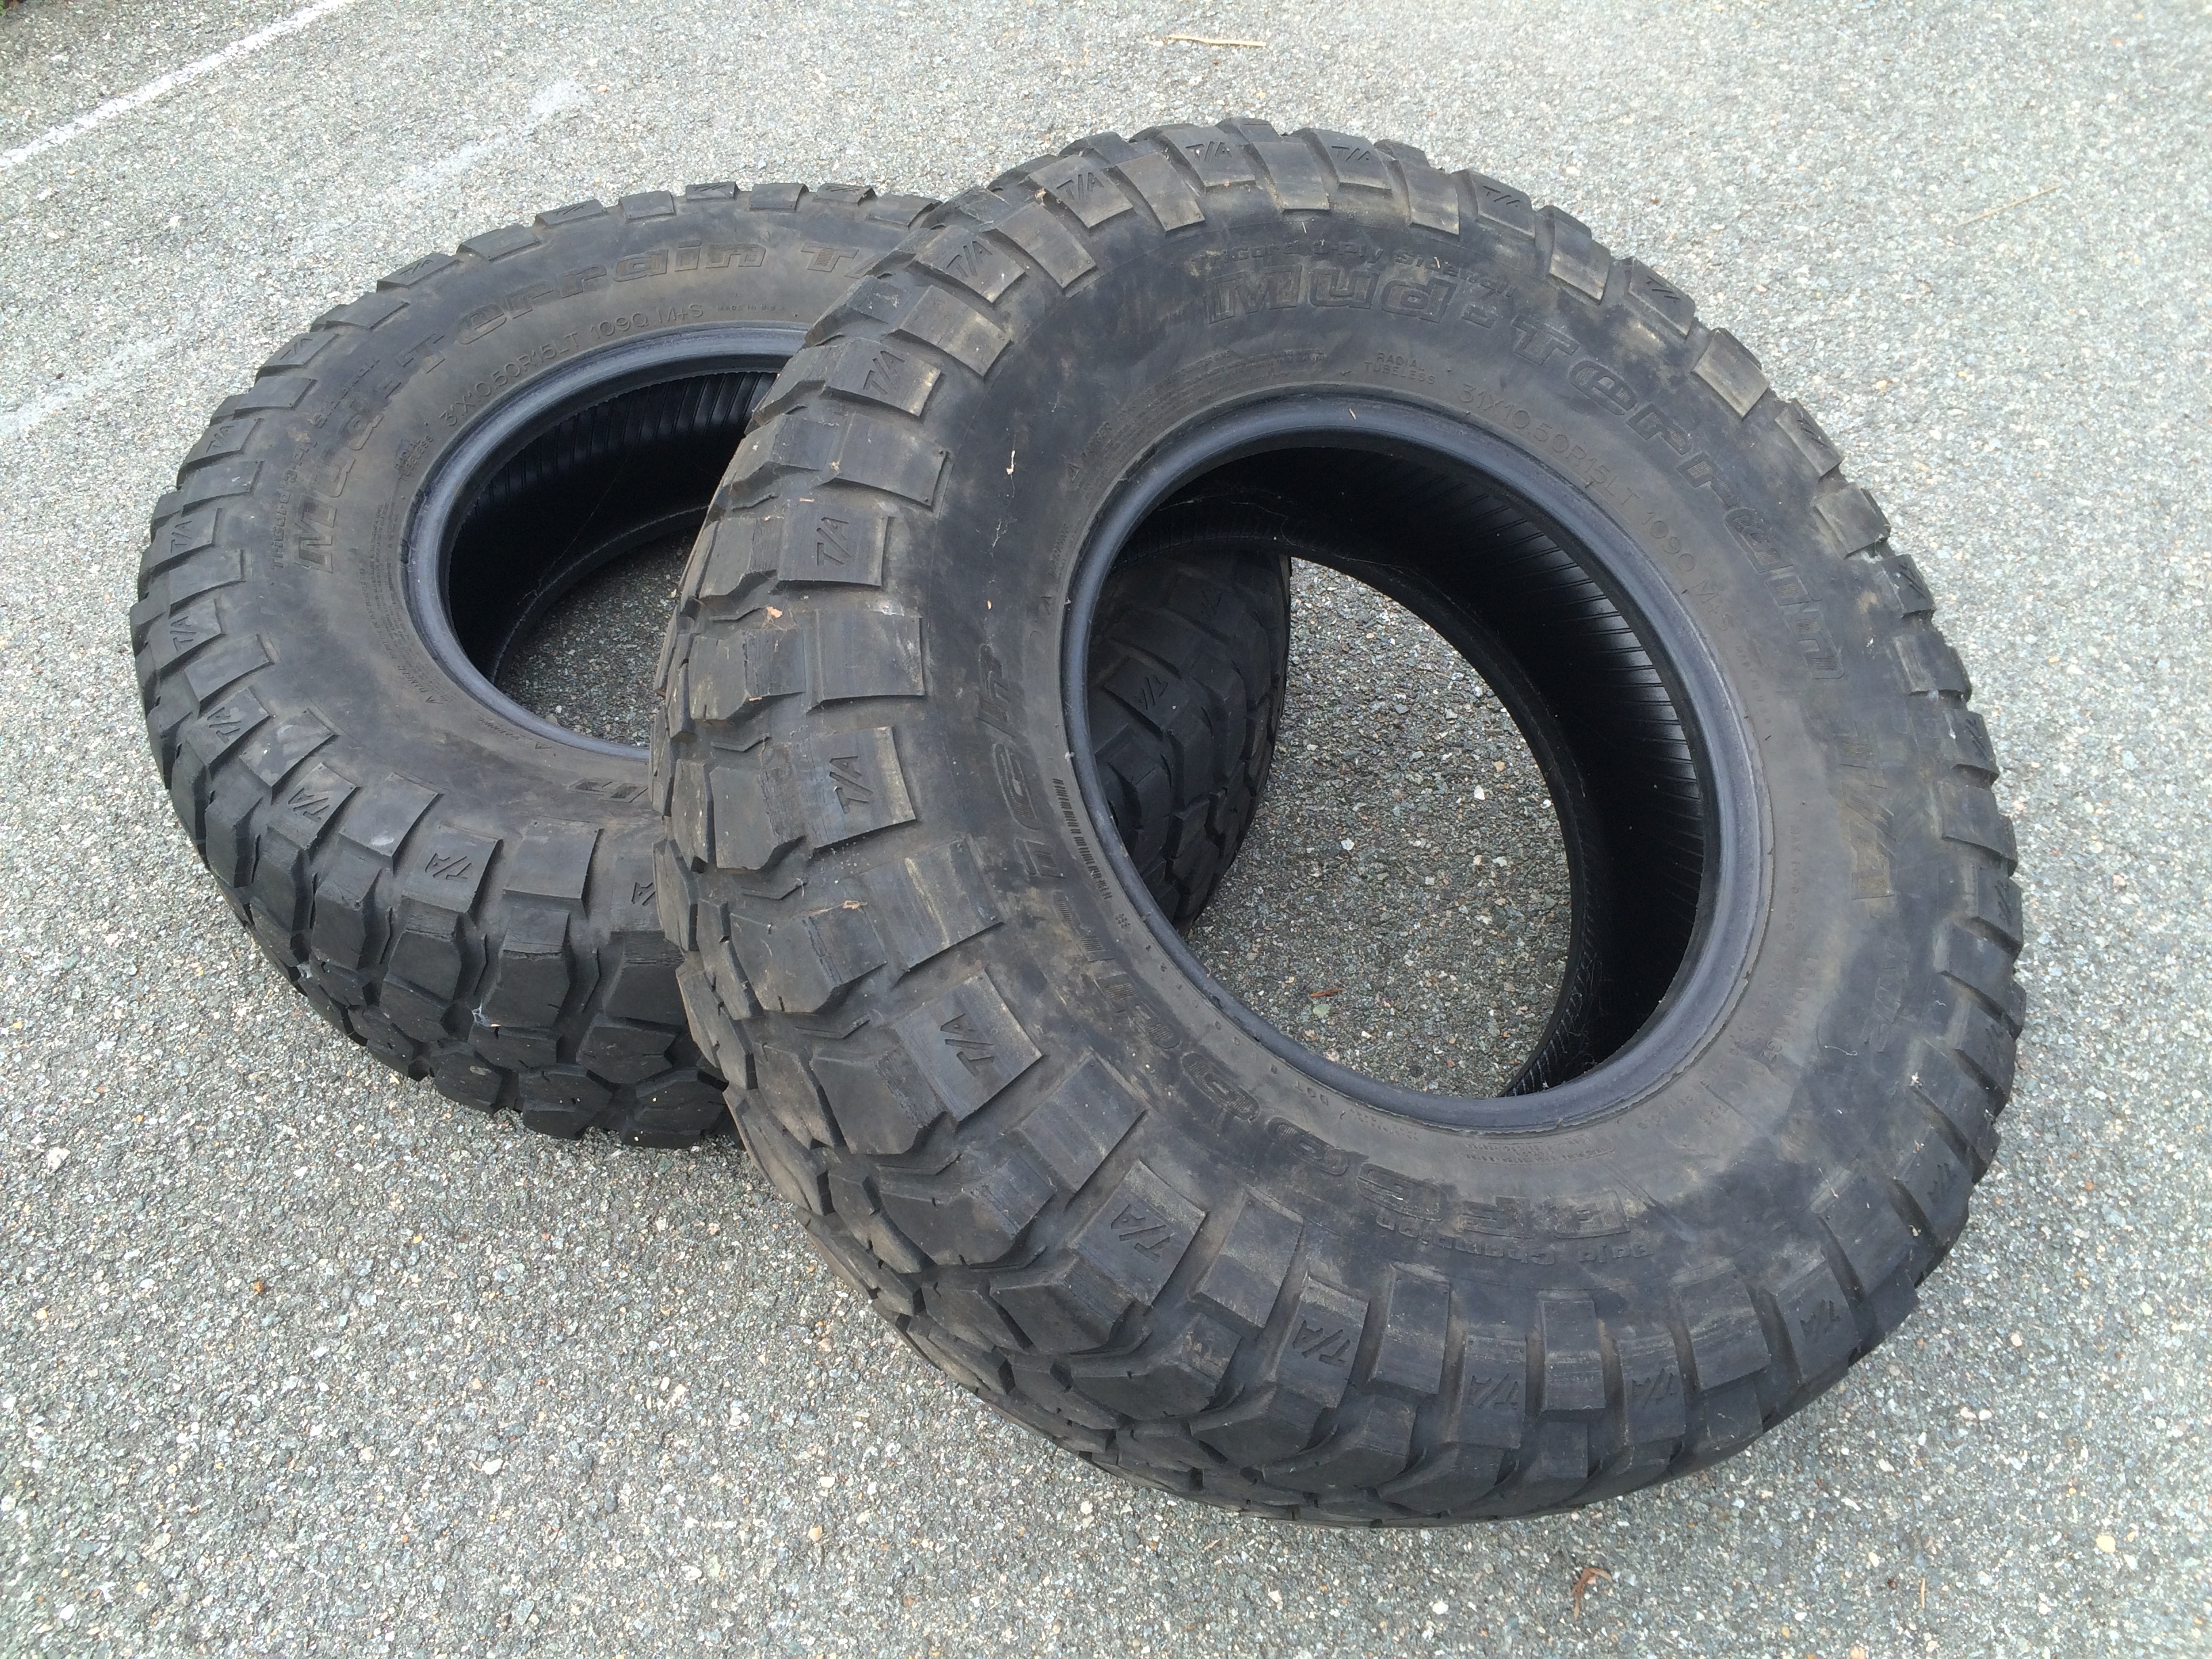
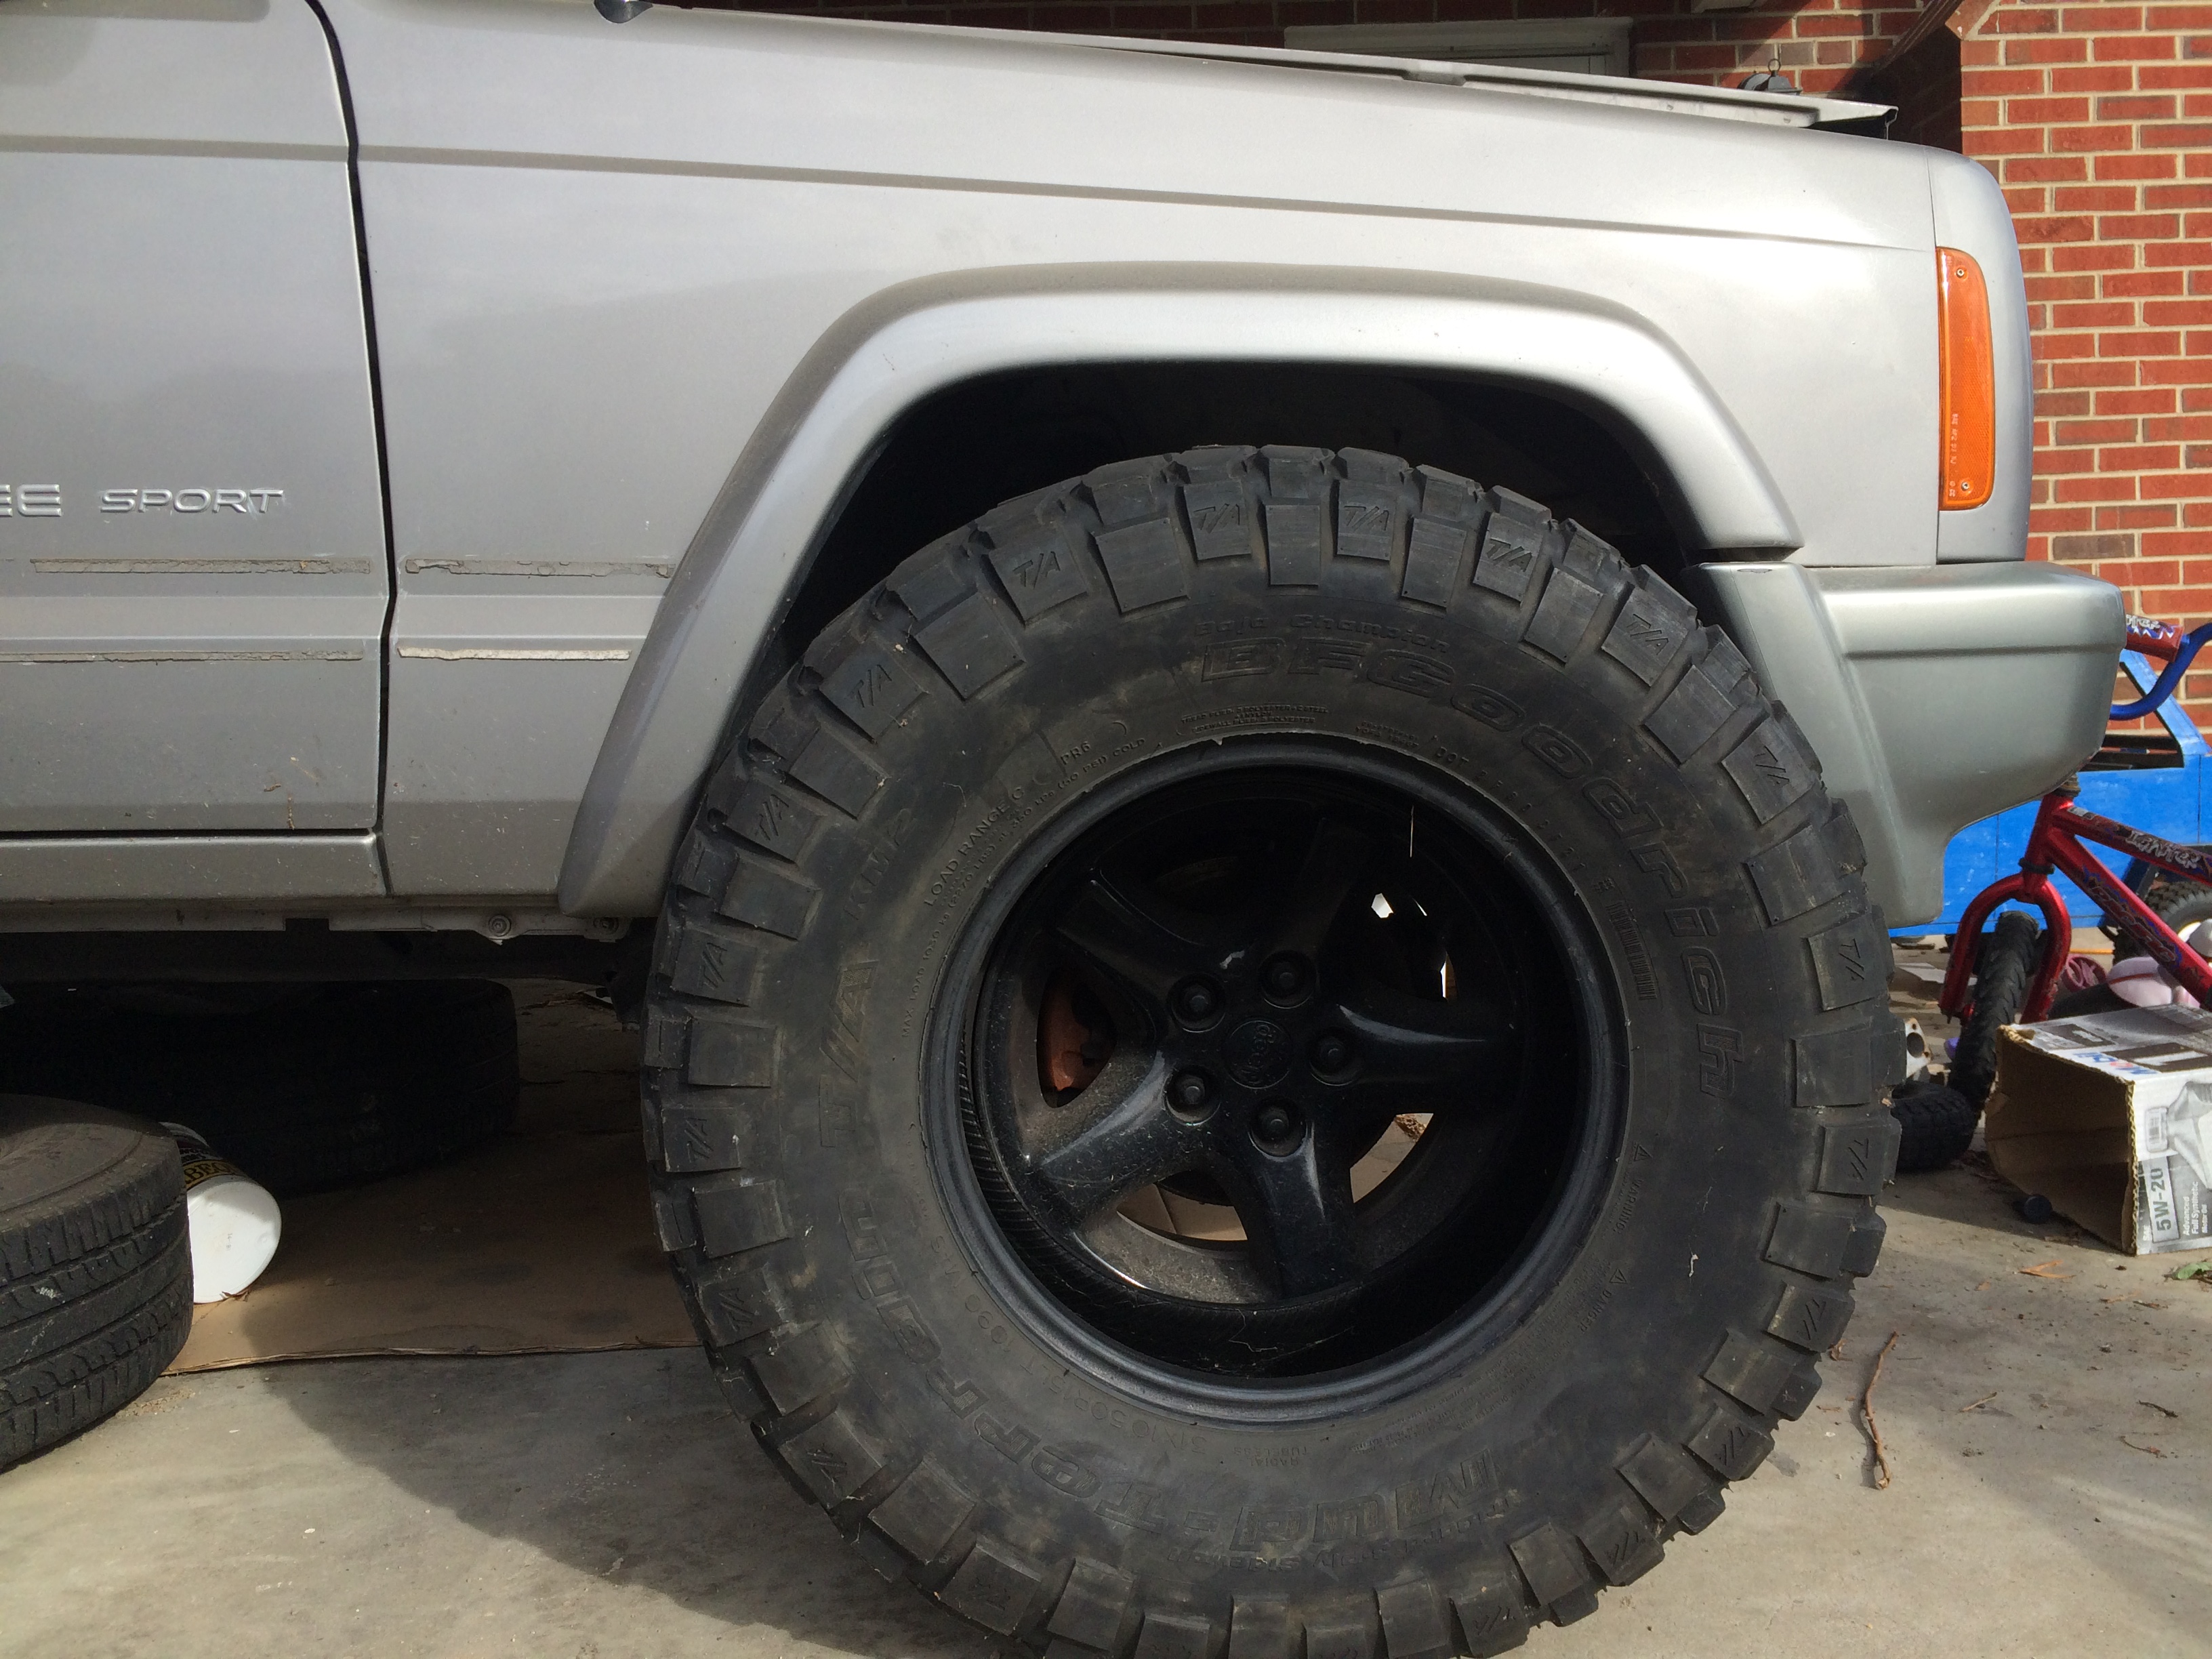
So I found these 31" tires for sale on Craigslist for a few bucks and decided to pick them up in the off chance that maybe I’d find two more later. After a few months of waiting I stumbled on these four…

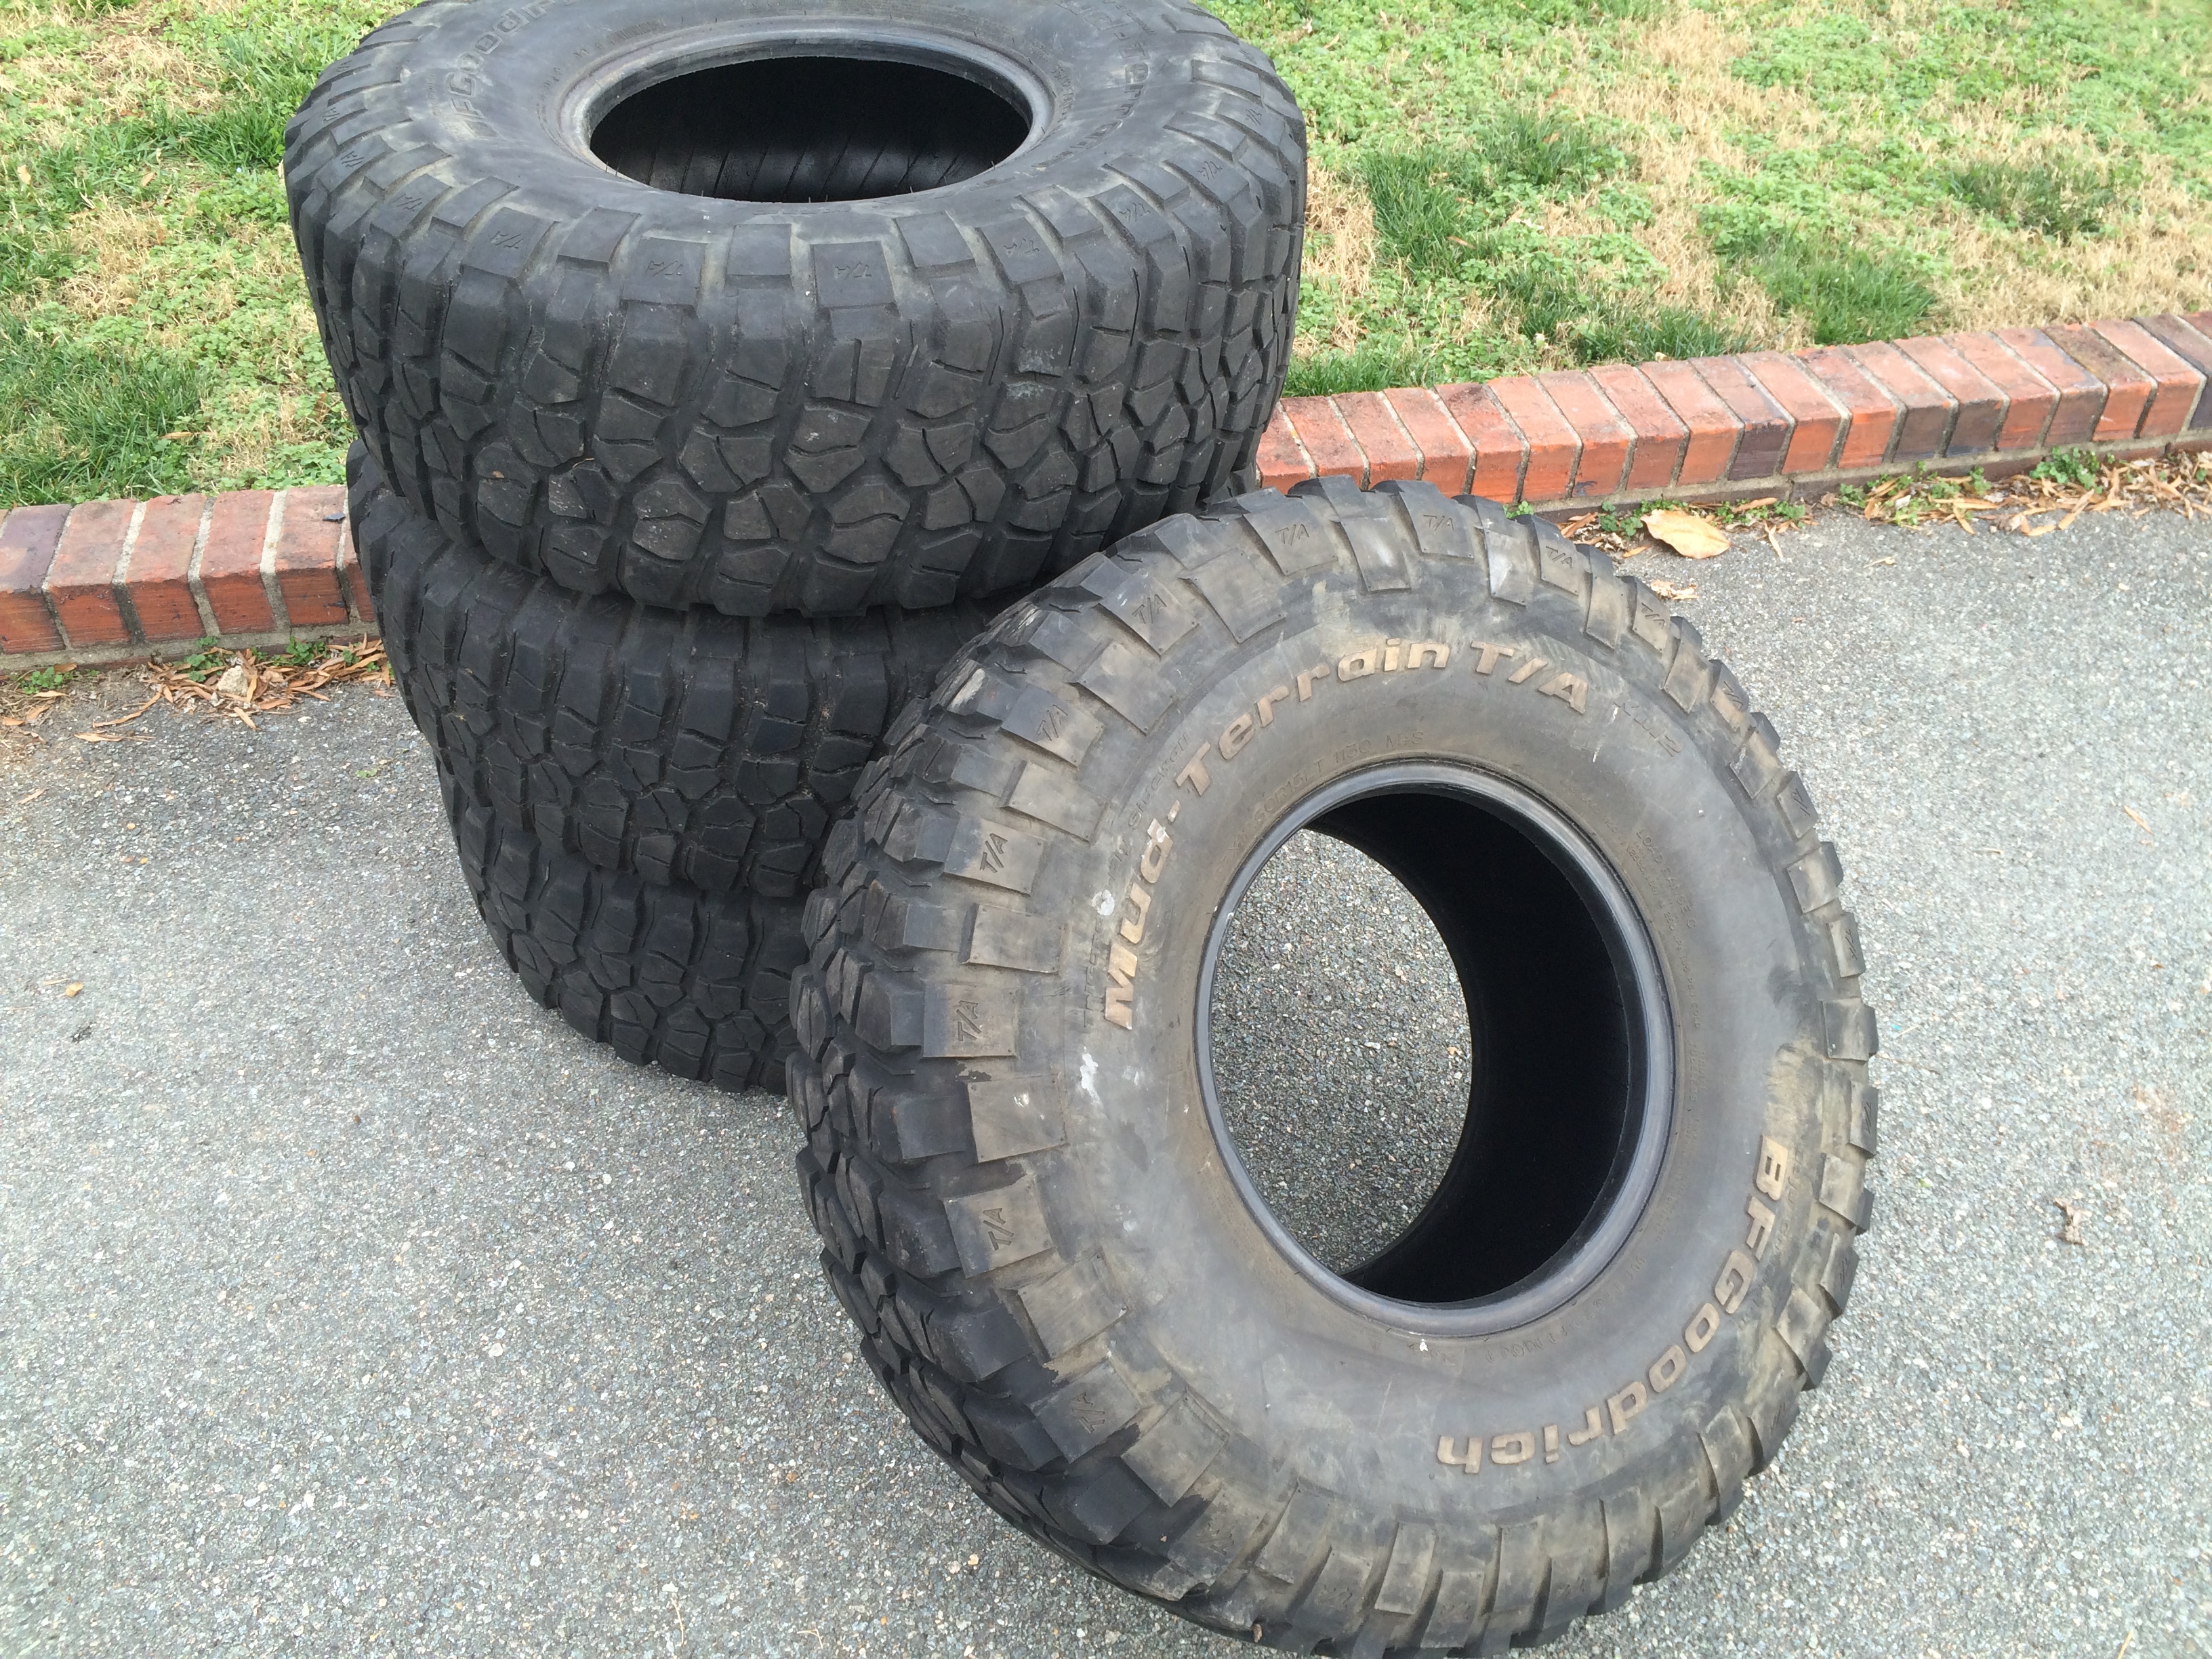
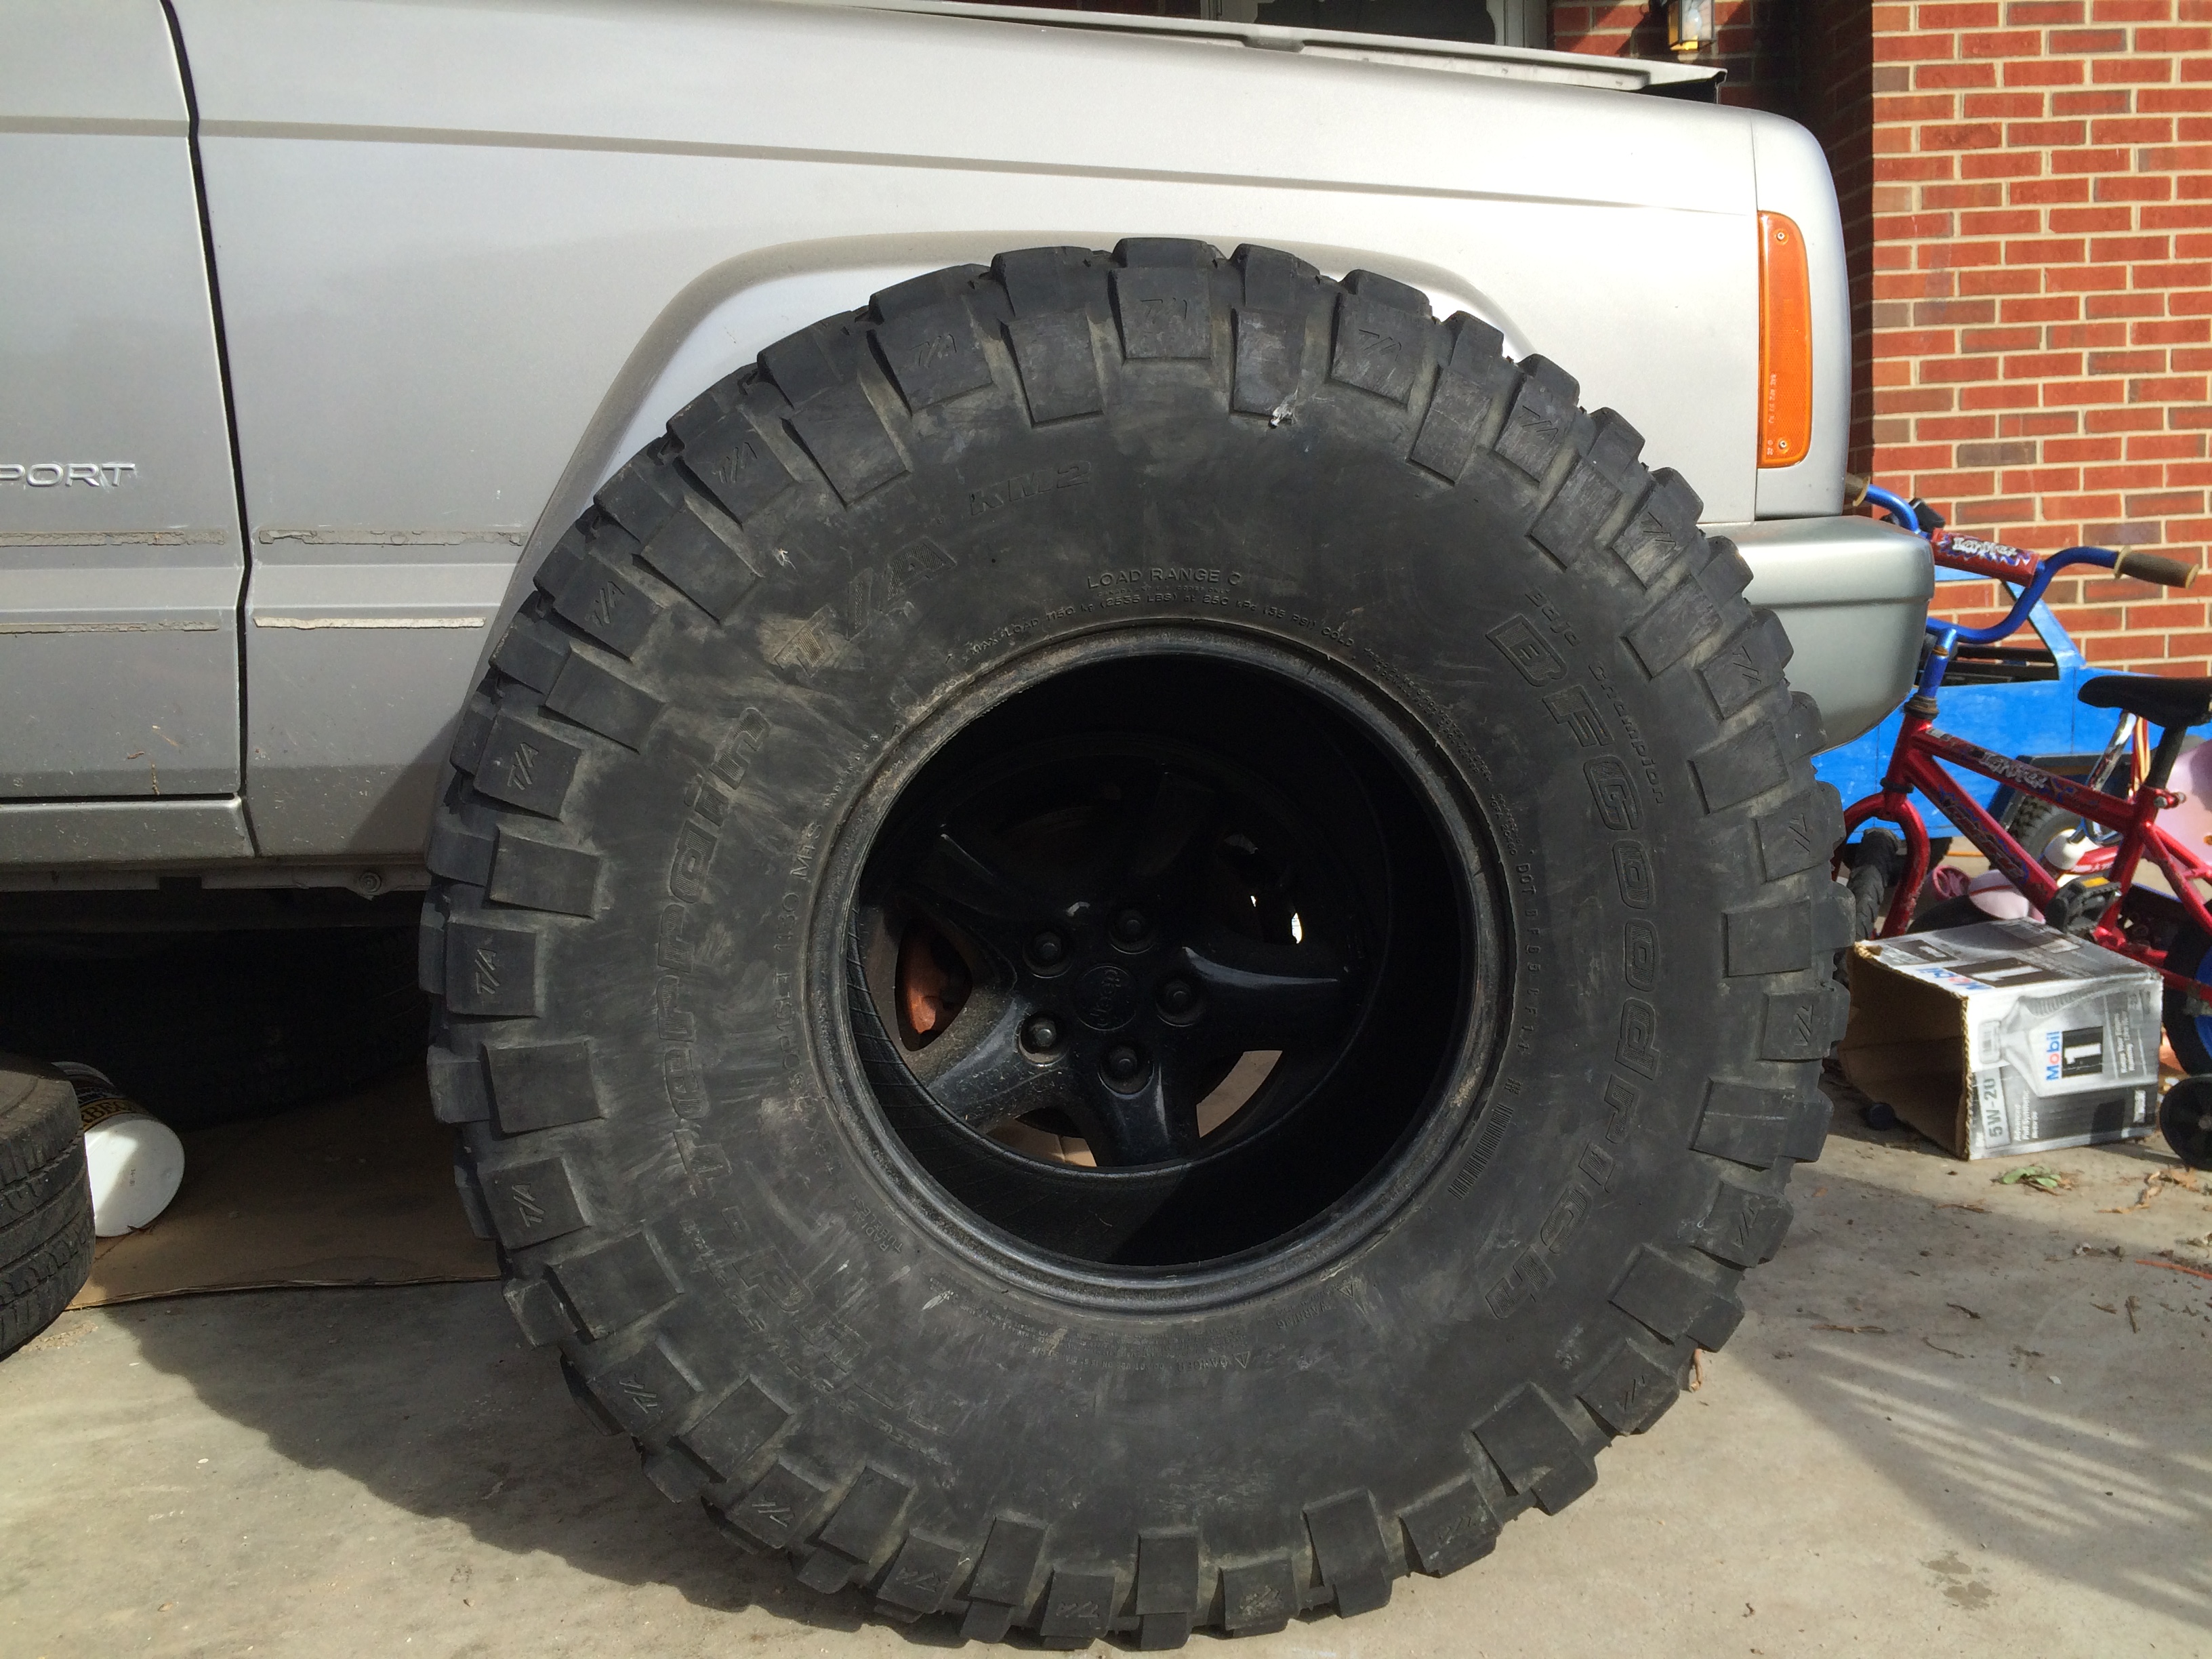
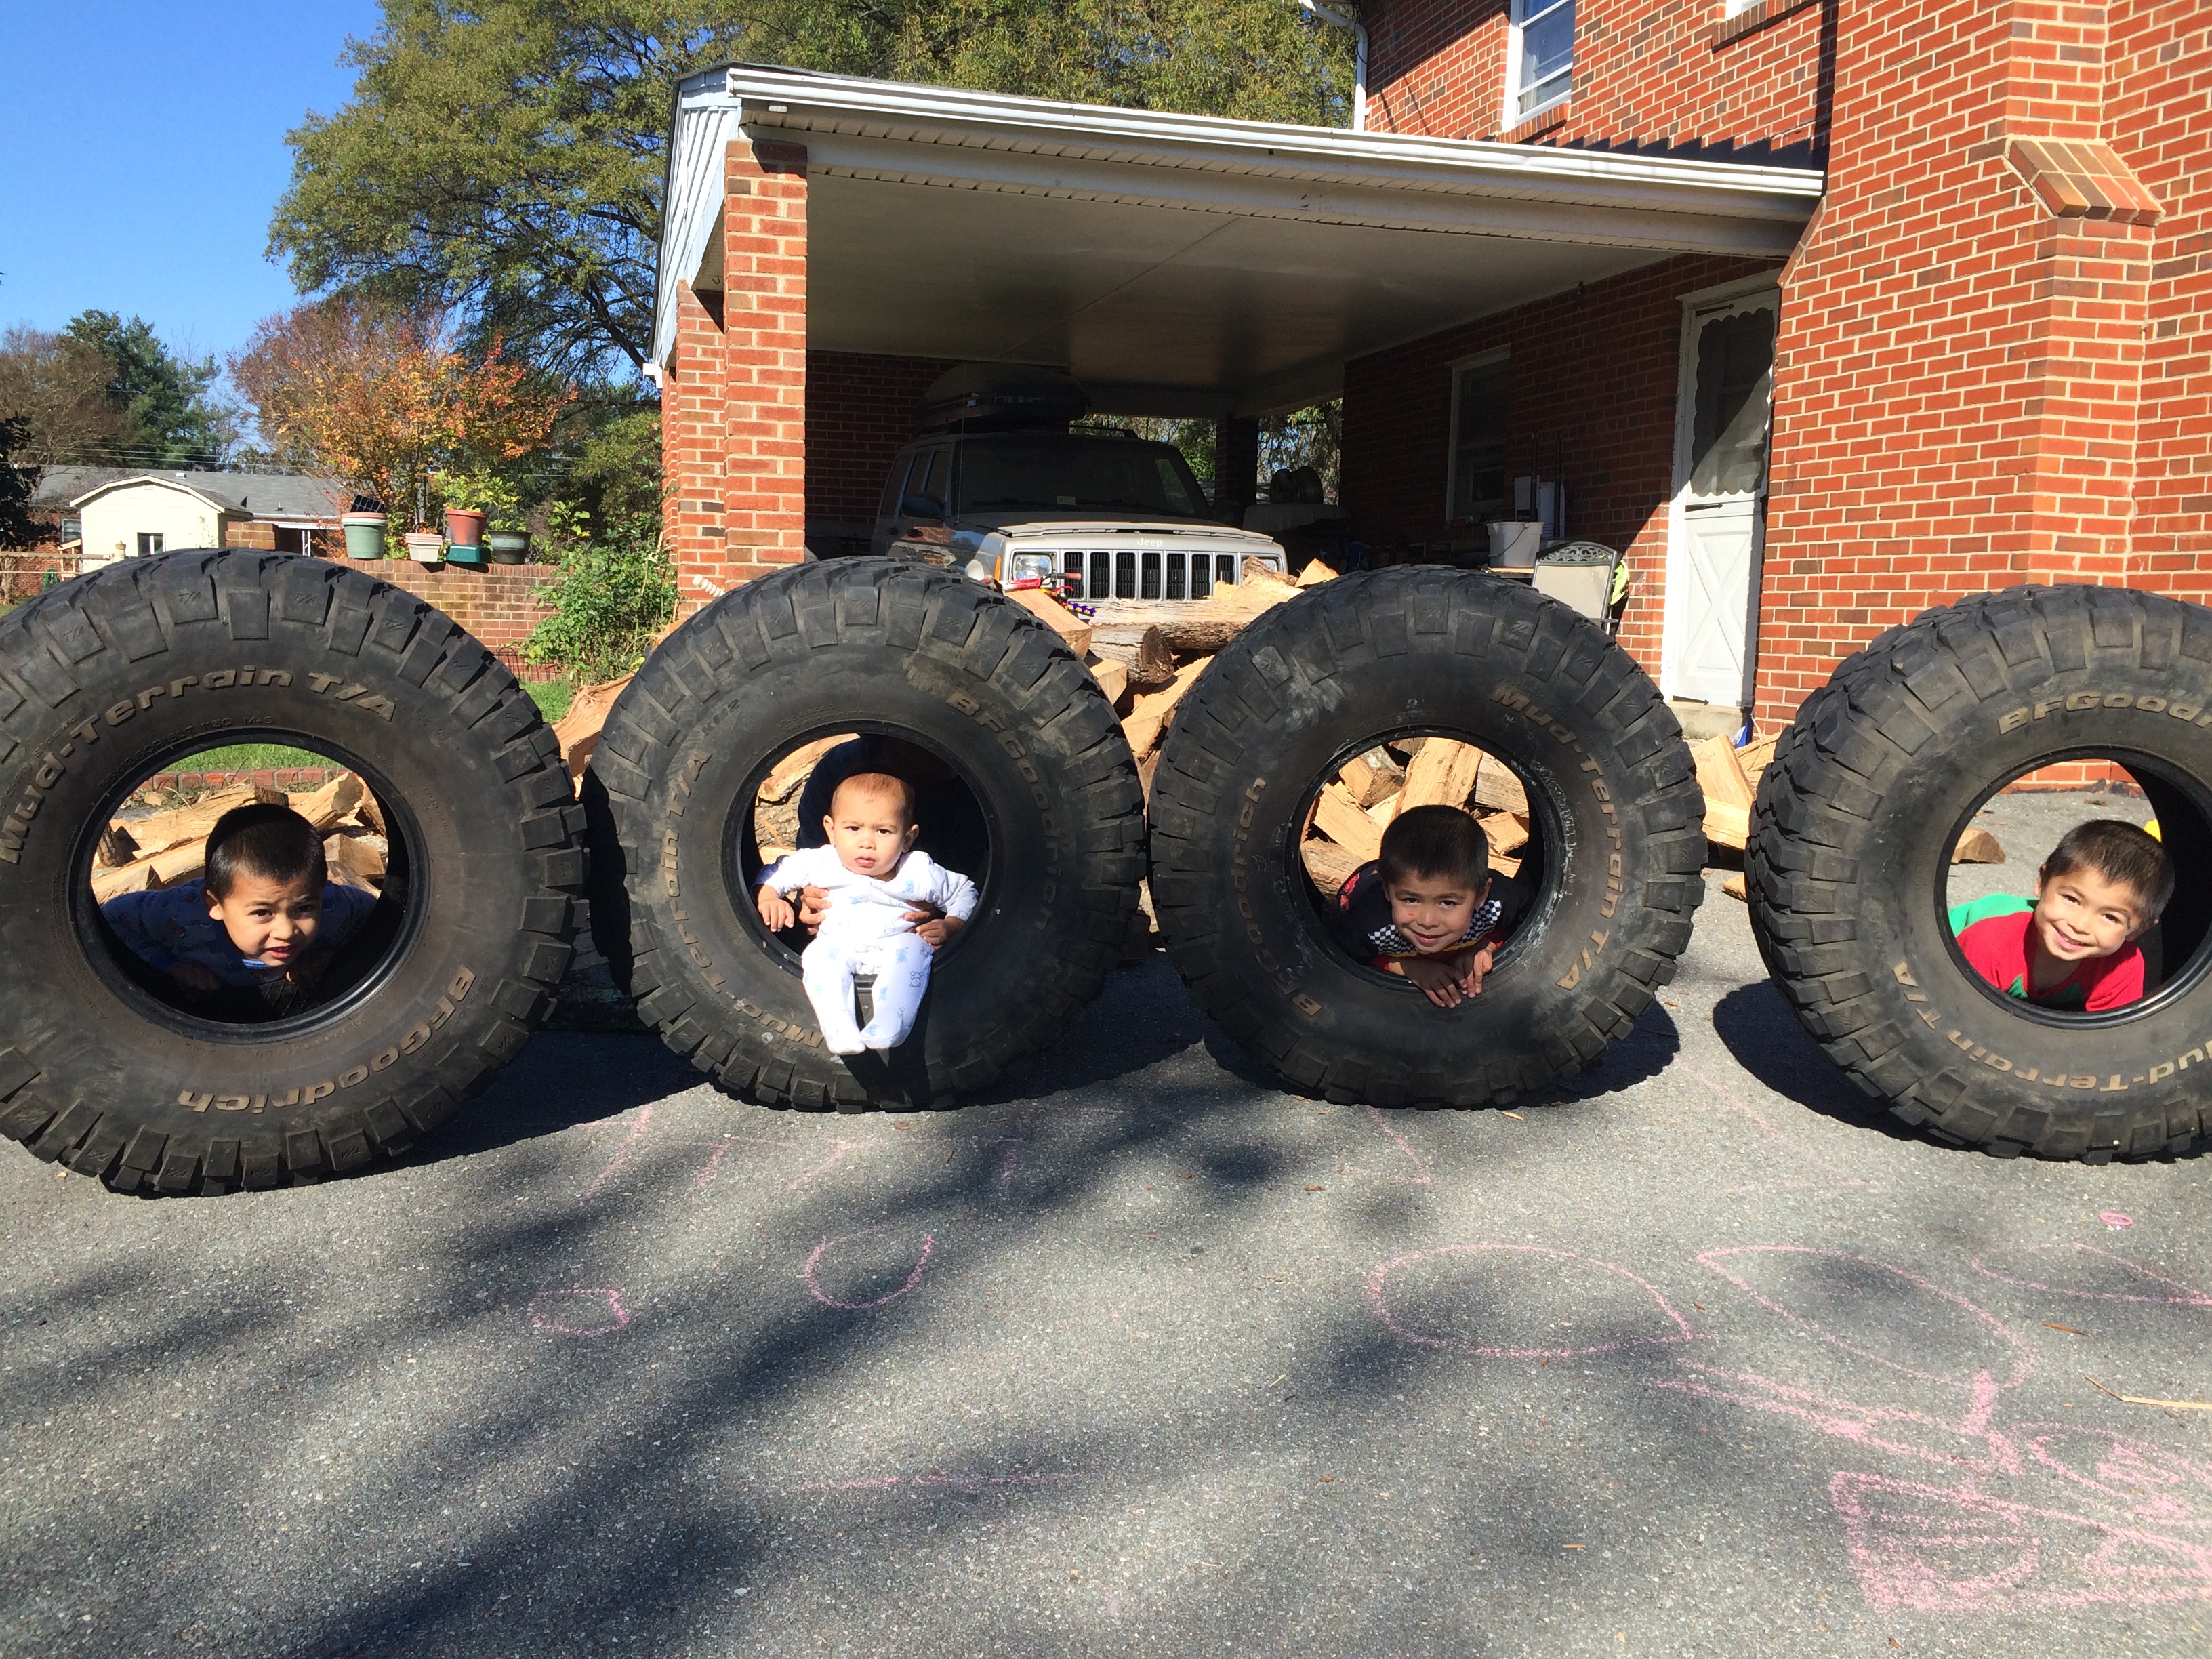
35" BFG Mud-Terrains, again off Craigslist for a few shiny nickles. I knew when I got these that I had no intention of ever putting them on the Cherokee. I had no intention of going deep down the rabbit hole of additional modificatons it would require to run such large tires. I wanted them mainly as a visual aid before putting them back on sale later.

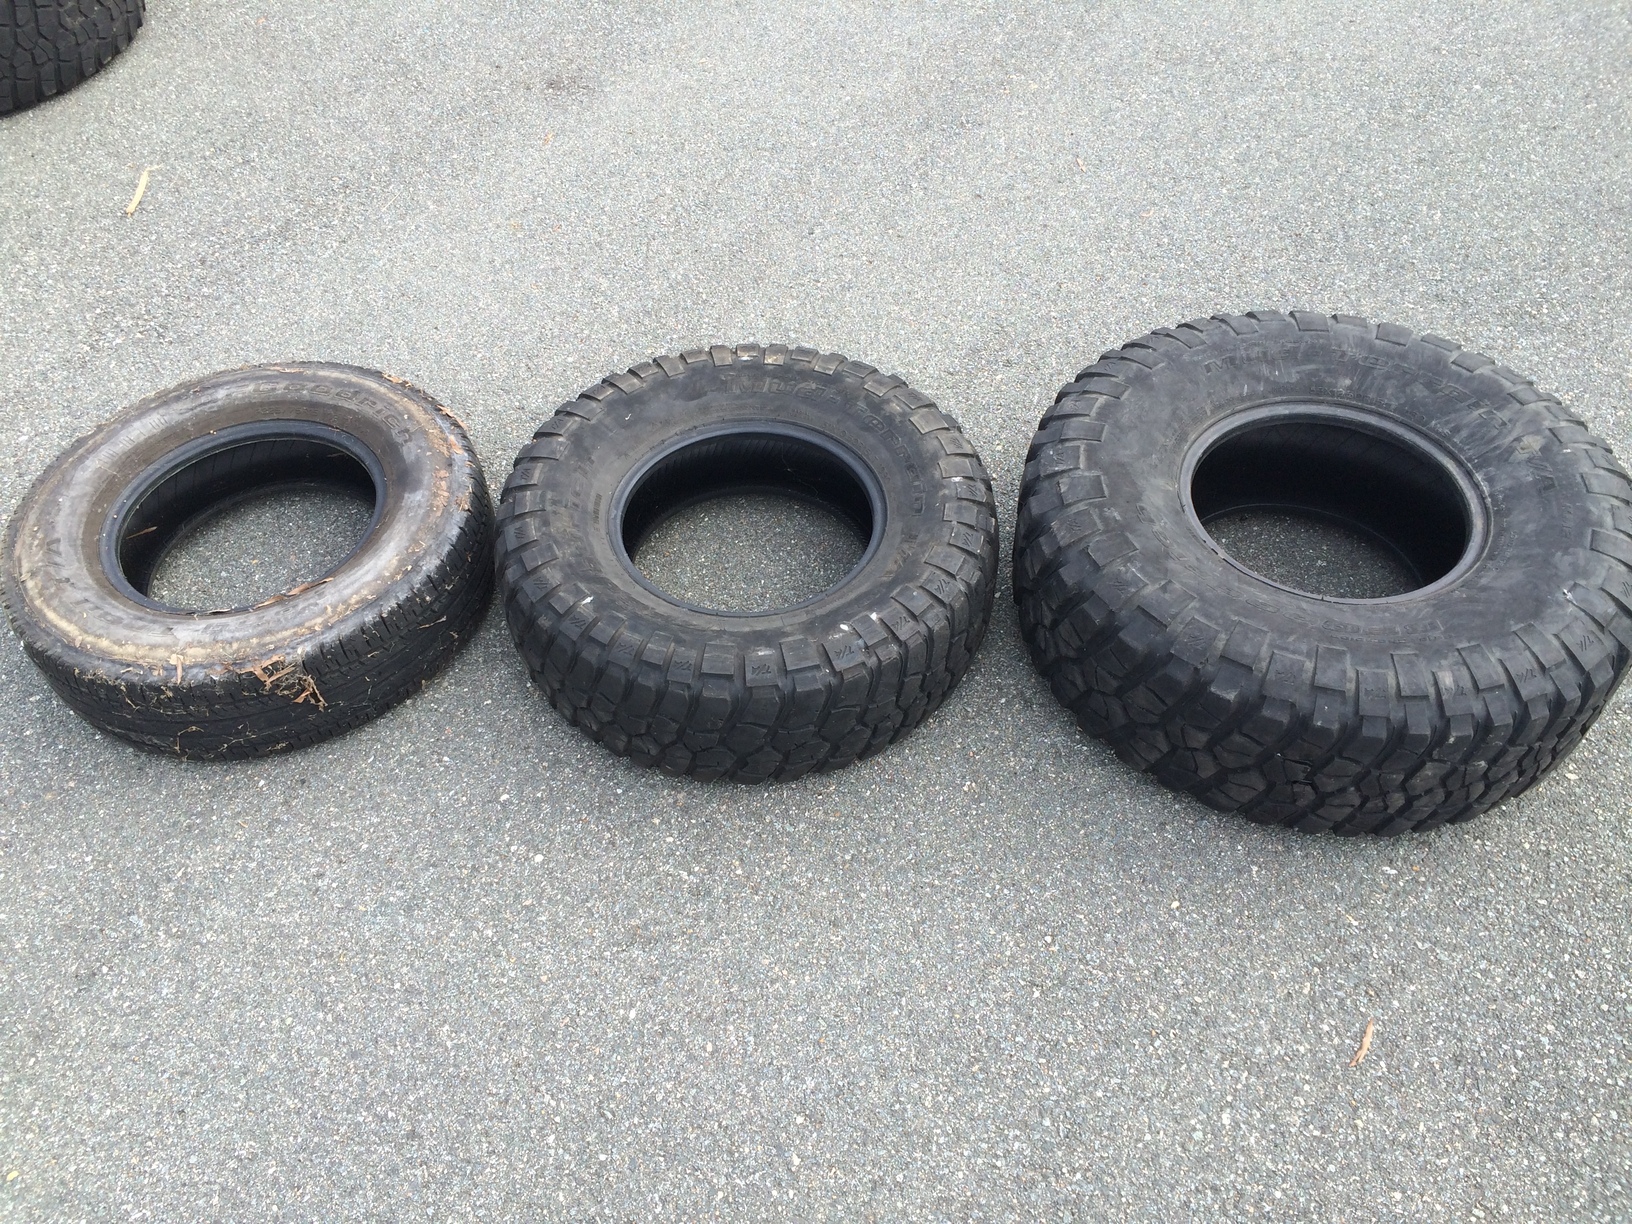
Here’s what the stock 29" tire looks like beside the 31" and 35".

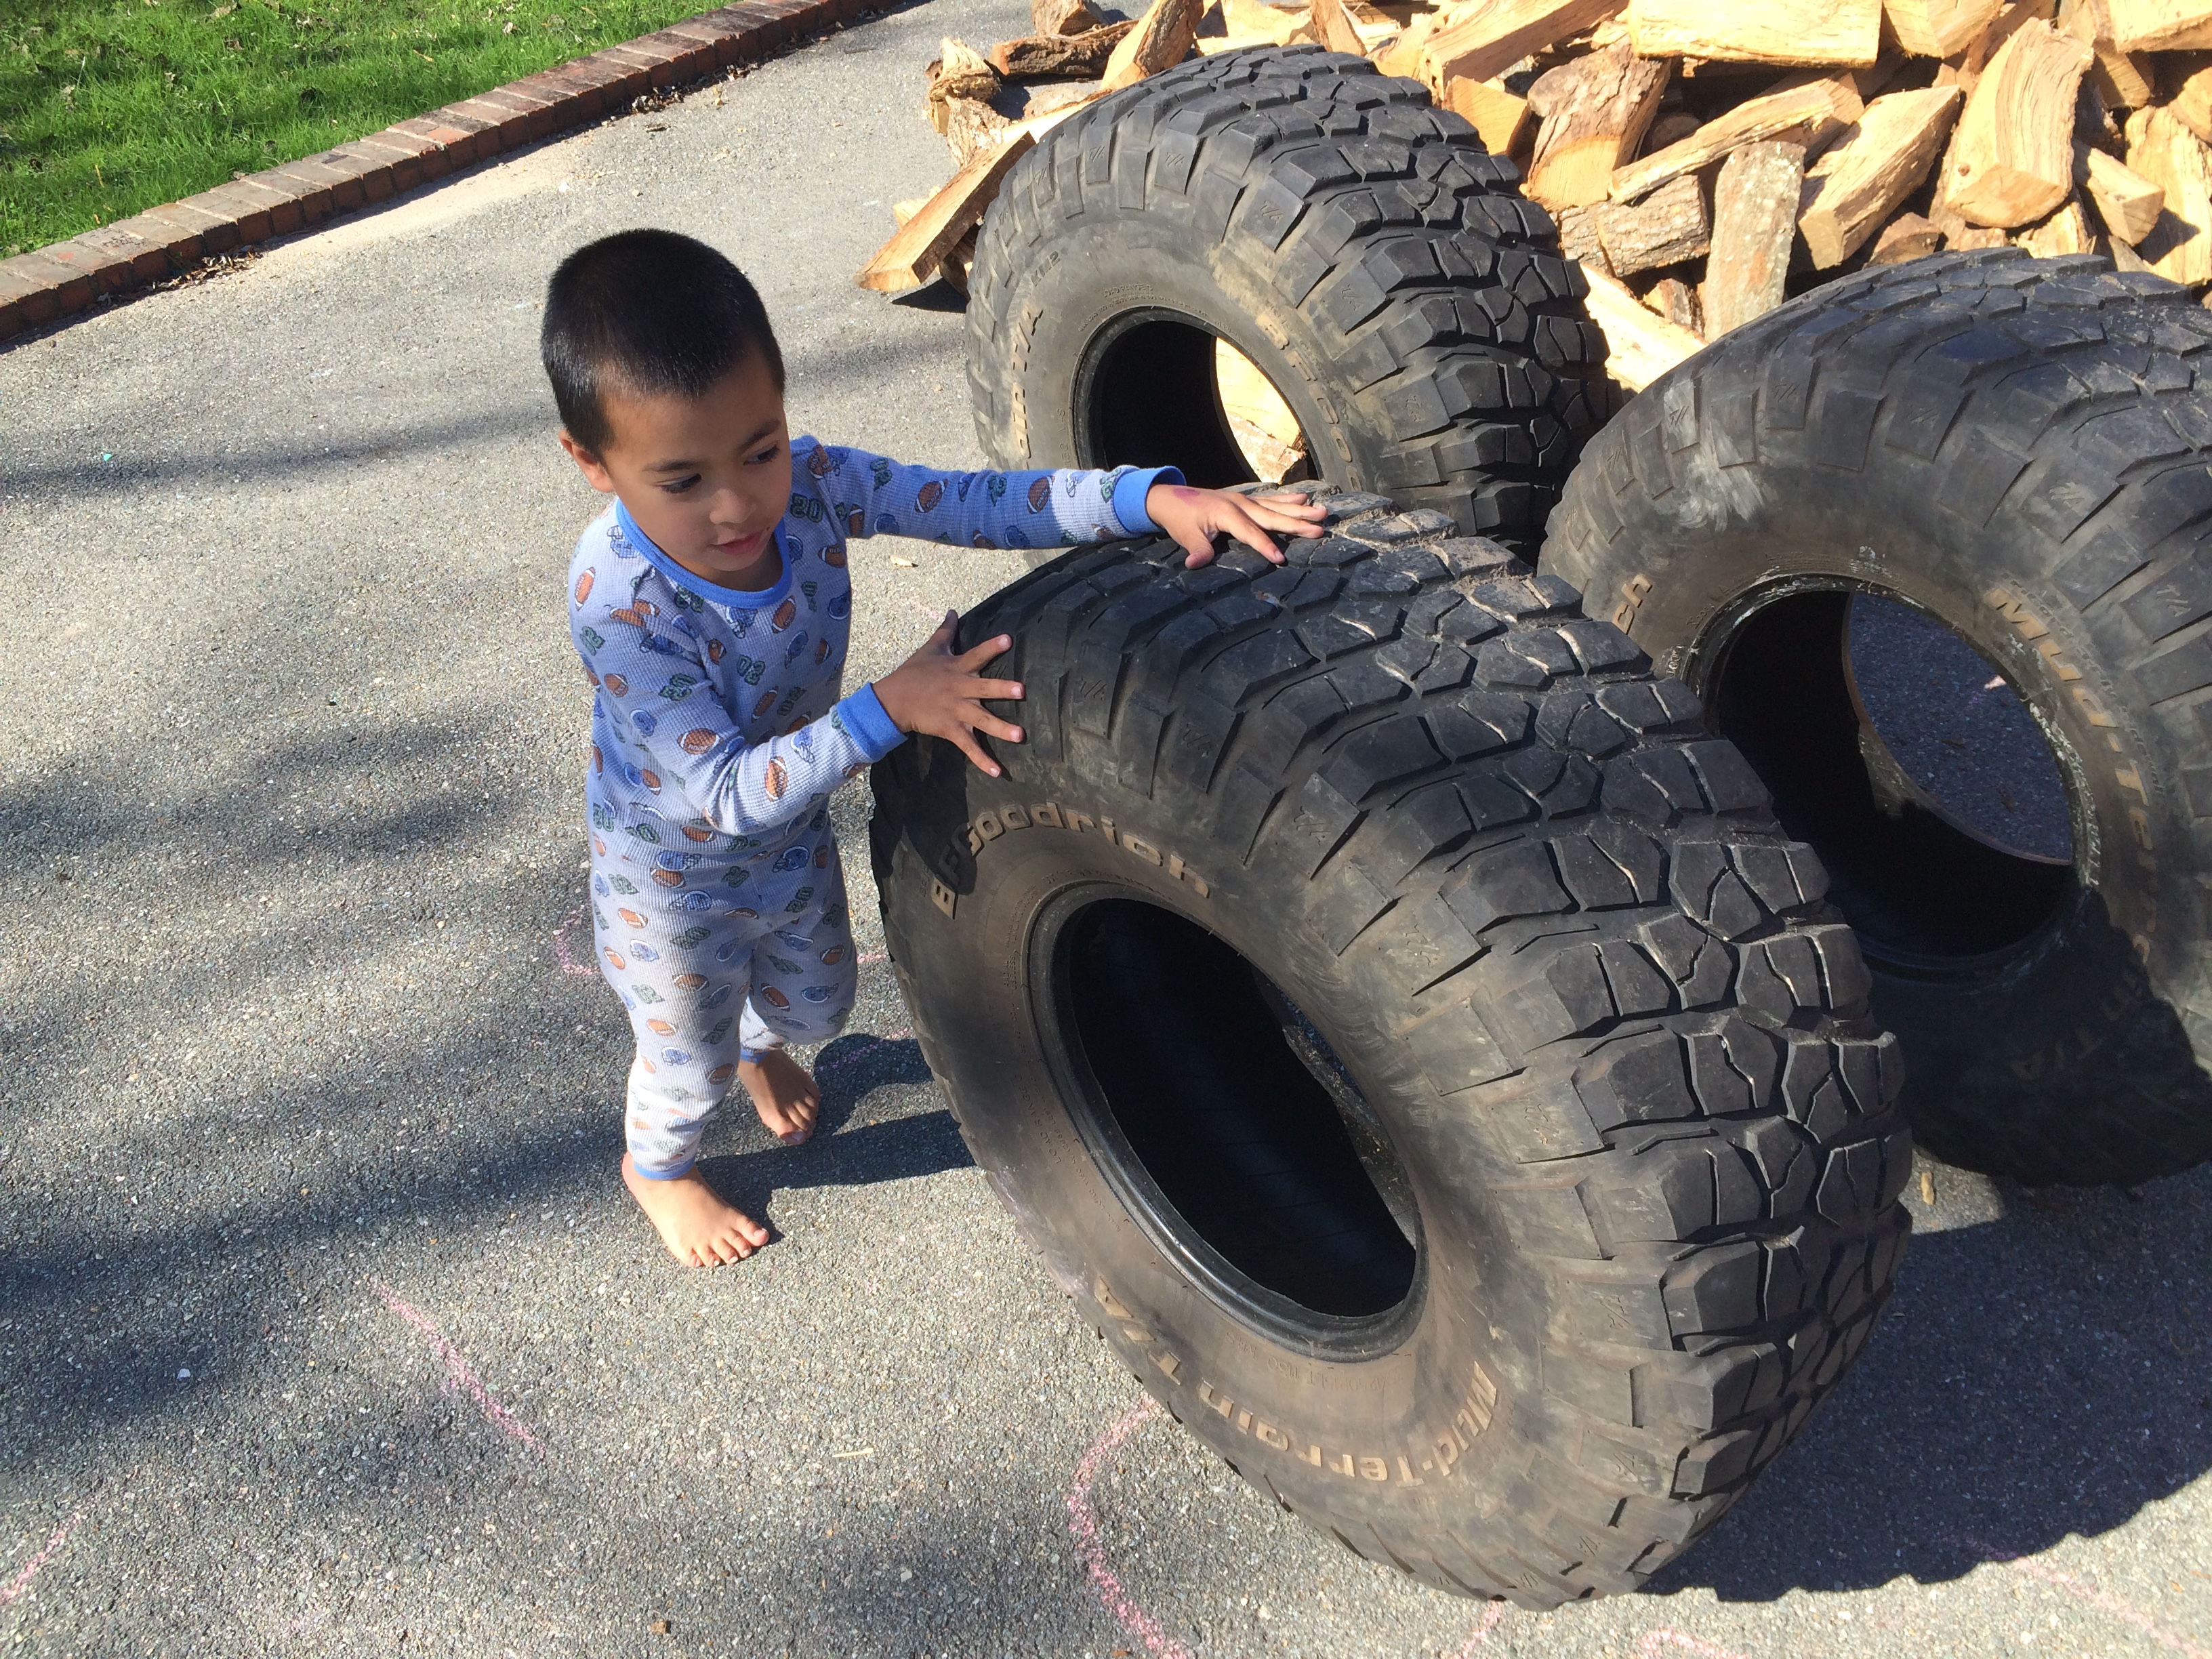
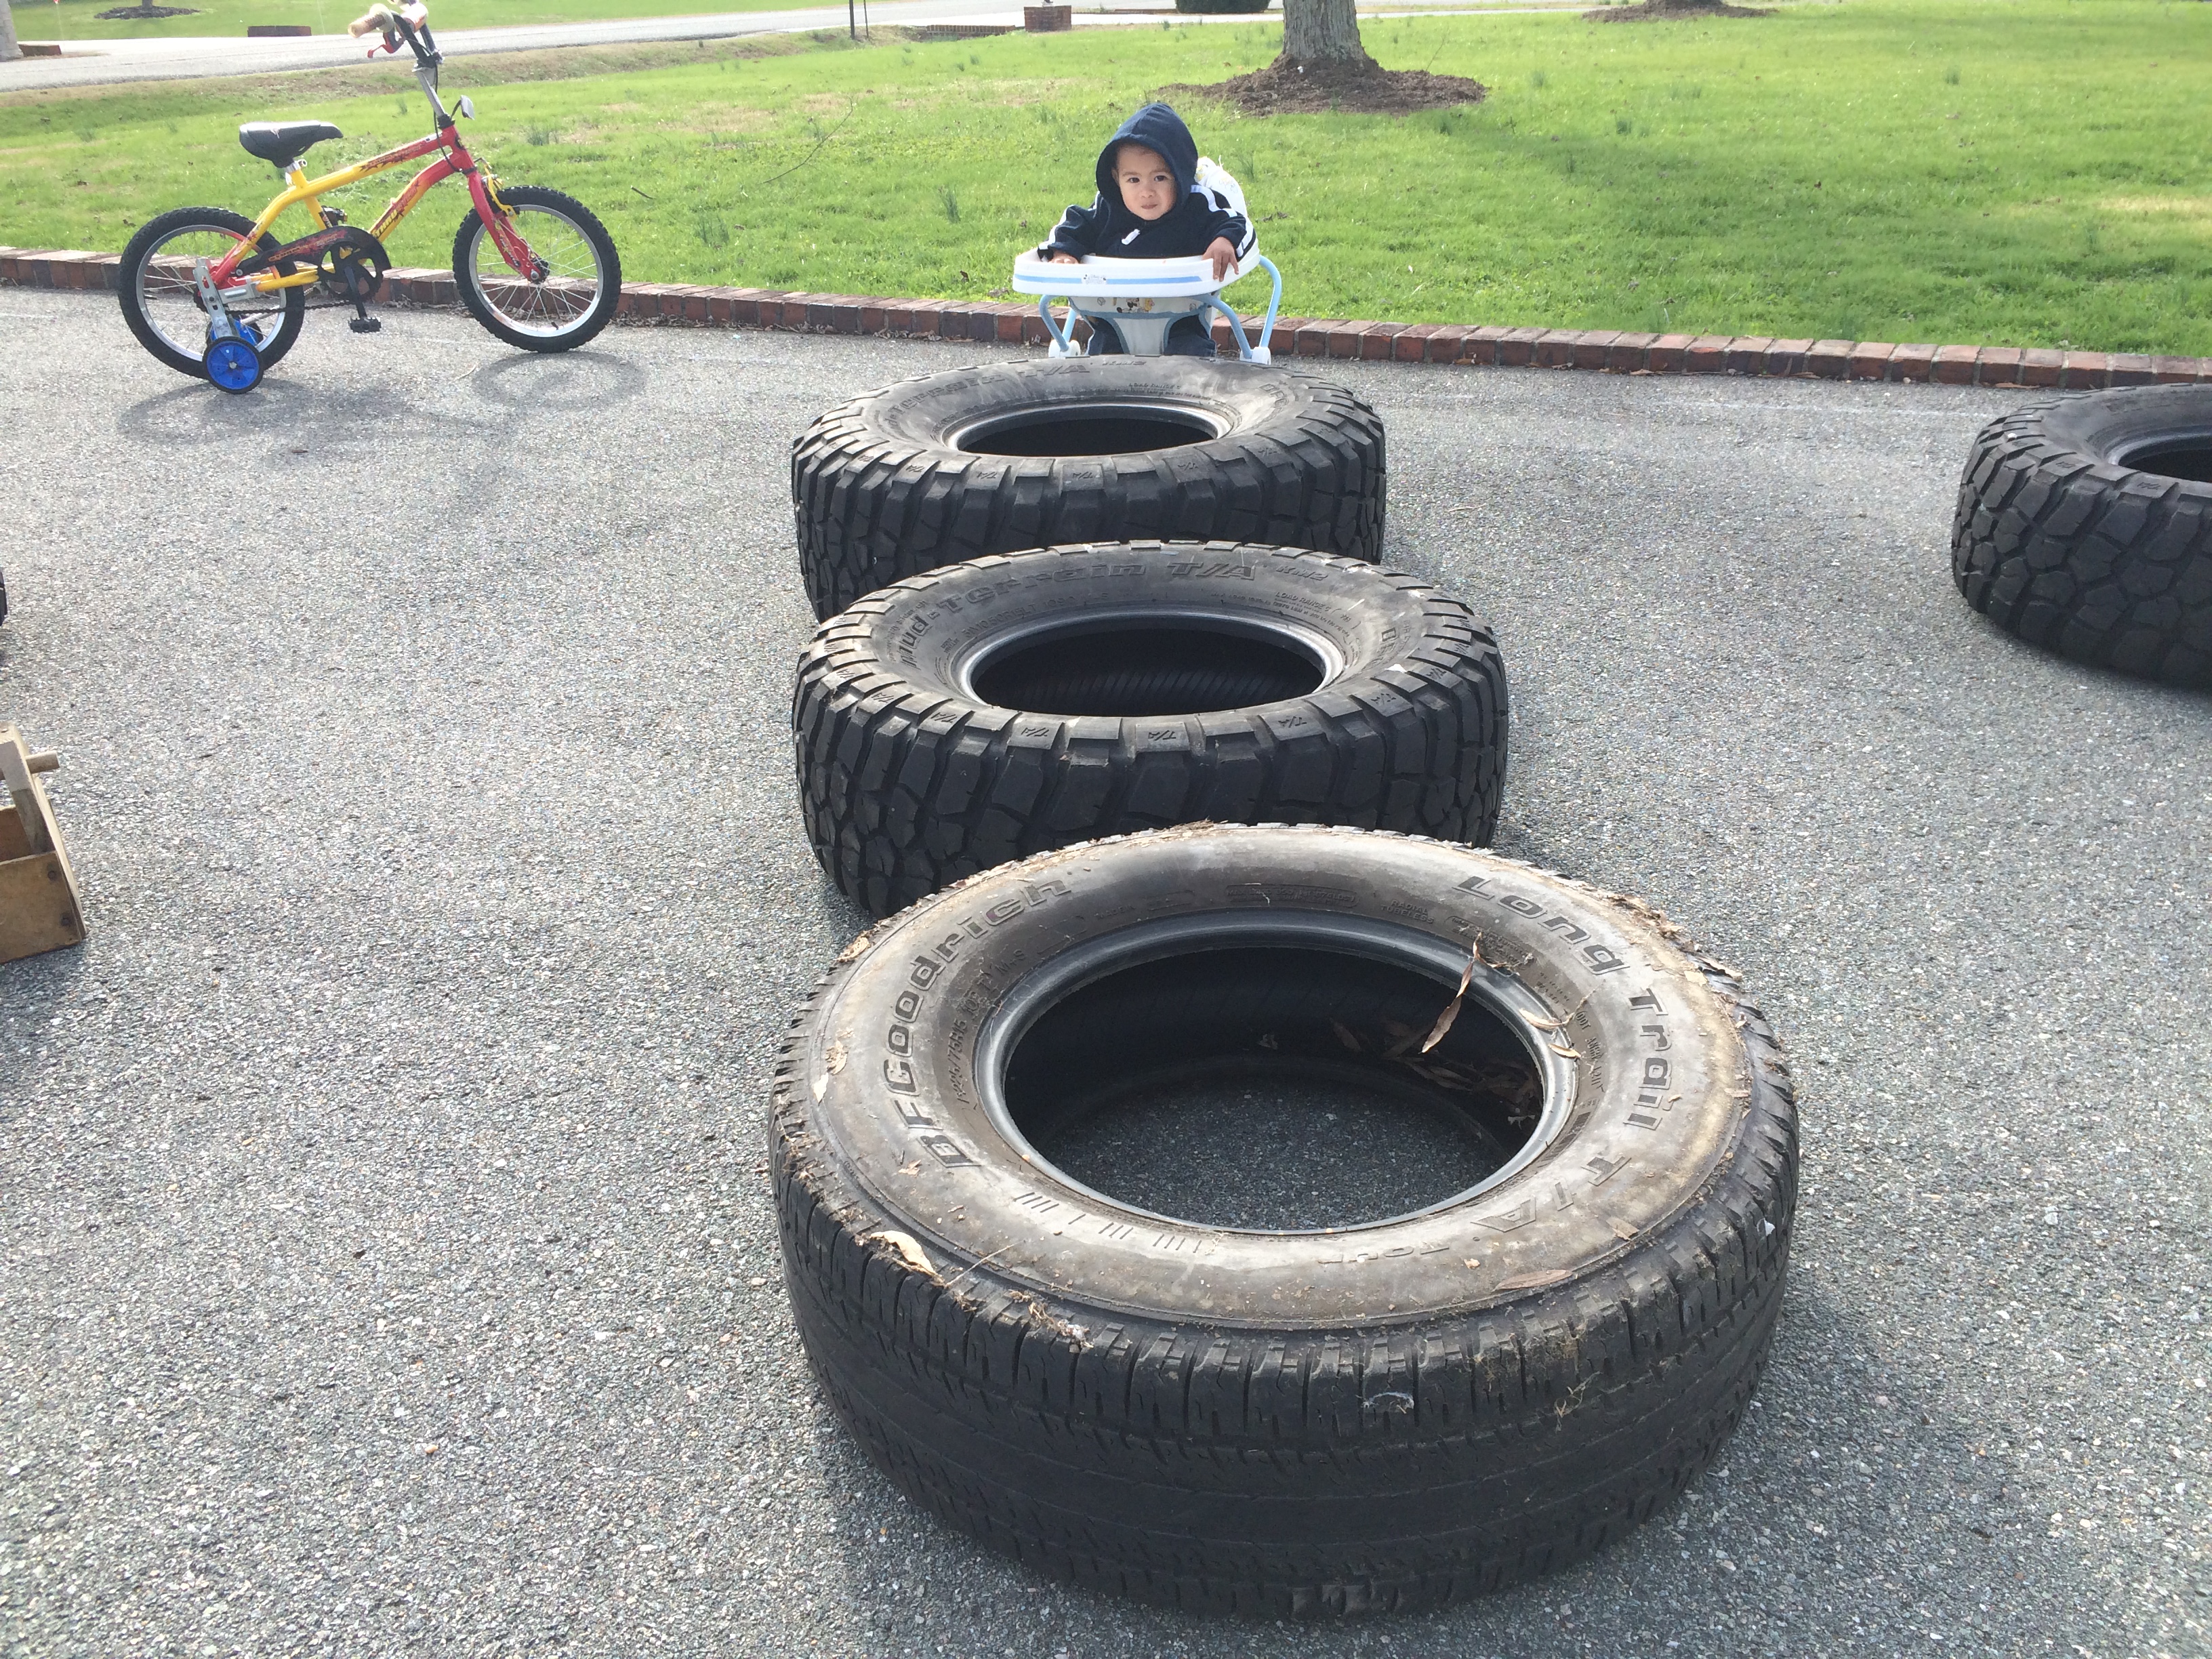
The plan was to land somewhere between 31" and 33" on about 4" of suspension lift. But 35" tires look really cool, especially to little boys. They got a kick out of playing with these things for a few weeks before I resold them for a profit later that year.

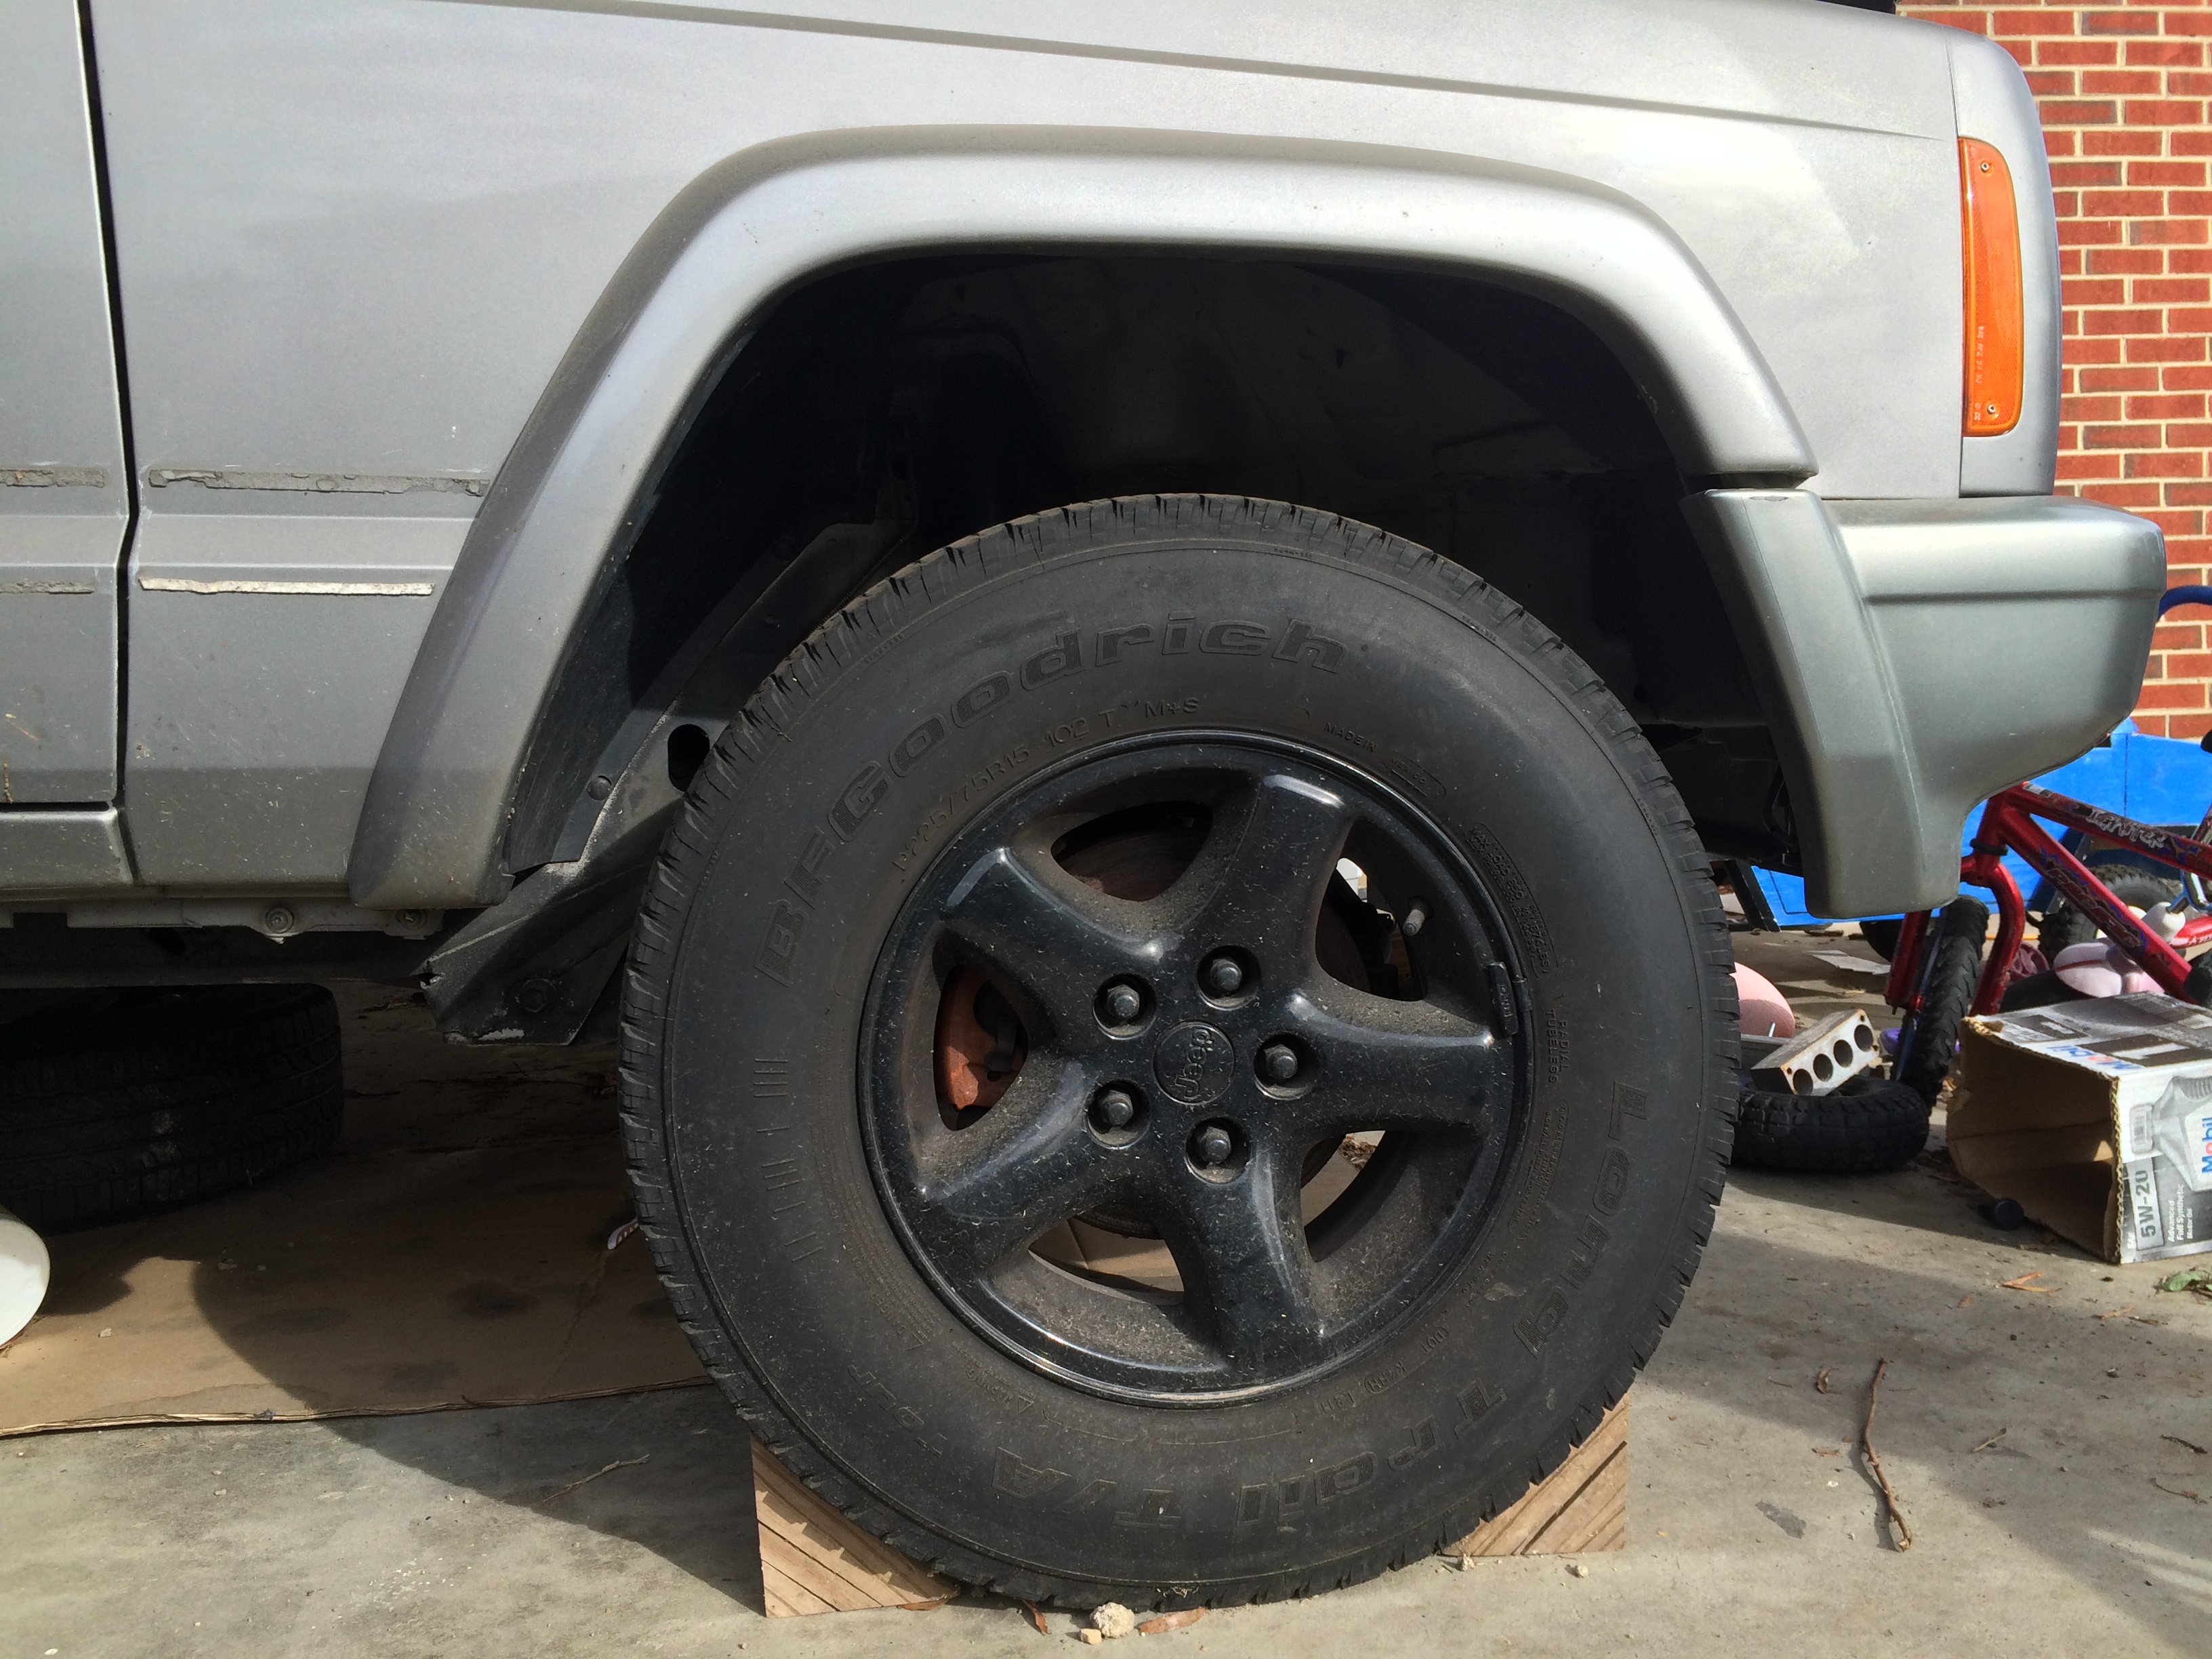
I had enough sense to know then that the one area you didn’t want to cheap out on was in the rubber department. I’d buy some brand name quality tires eventually. In hindsight I’m glad I didn’t purchase any tires then, as will become more apparent soon.

1 Like

February 2016 | 181,250 miles

With the rear end back on two wheels and mostly buttoned up it was now time to tear into the front end. This was going to be a whole 'nother animal, since there’s just so much extra stuff going on up there. And in addition to all that noise I had the grand plan to completely disassemble and re-engineer the suspension by adding a long arm setup.

I mentioned a few posts back that I had opened a can of worms with this moonshot project. At this point the worms began to all spill out at once. Like the rear end, I was going to begin by totally removing the front axle, which meant disconnecting all the steering and driveline components attached to it.

As the spanners turned and the bolts either sheared or rounded off, I realized that this was not going to be as simple as was the stone-age suspension in the rear. There was rust everywhere. Ugh, everything was covered in it, making me realize that there was a lot of “while I am in here” kind of decisions to consider.

A rusty starter or steering gear was one thing, but those transmission fluid lines made me wince. They were about in the same state as the rusty steel brake lines that had originally sent me down this insane edition of project creep. Might have to fix them too, I guess…

After many a busted knuckle and a few blunted sawzall blades the front axle was finally out. The next phase of this project was underway, with the end in sight. Or was it? Where was the end exactly?

I was eight months into this, and as far as I could tell I was barely a quarter of the way into all of the planned items I wanted to address. After the month or two it would take me to get this front end back together I still needed to disassemble the transfer case and install a slip yoke eliminator kit. Then there was the slew of engine items I wanted to “freshen up” on the 180,000 mile old tractor engine. And not to forget all of the interior stuff awaiting my attention (seat swap, headliner repair, etc.).

Oh, and lets not forget the thing that got us into all of this mess in the first place: the brakes. I still needed to replumb that whole system with new steel lines and soft lines, reinstall all the calipers and rotors, and then go through the bleeding process…

The scary thing was that every inch forward I crept on this thing, the further away the goal line seemed to drift off over the horizon. Not to mention that there wasn’t as much wind in the sails these days. The Cherokee was full long before the start of this project.

And by the time I pulled that front axle out I was a year into having one more kid than the Jeep could handle. So what was I doing this for? Even if I did finish it three, six, twelve months from now, what good would it do for a family full of six adventurers?

Honestly these thoughts had been running around inside and outside of my mind for months by this point. Our Mazda MPV was handling the adventure and daily driving duties flawlessly the past year, but it was against my newly acquired ethics to be down to one running vehicle (remember the Two Is One, One Is None motto).

And no matter how amazing that brilliant machine was, there could come a day when it would need some kind of nitrous oxide upgrade or get impounded by all the haters in the Medellin Cartel. We needed another vehicle that made sense for a family of six…with a heavy dose of adventure on our minds.

Needless to say, while this axle lay sprawled out in my carport, there were already things in motion that would change the state of our family fleet for the much, much better…depending on how you look at it. And of course it would fall on the shoulders of our amazing MPV to get that ball rolling.

1 Like

I have to say, I love a good XJ and I love a good story. This is a good one all around. Passing the love onto the next generation too, good on you!

2 Likes

Thank you, sir. This story is tangled all up inside other ones, and will take a little while to fully resolve. But it does go on, even into the present day.

1 Like