EPISODE FIVE IS ALIVE

Greetings YouTube
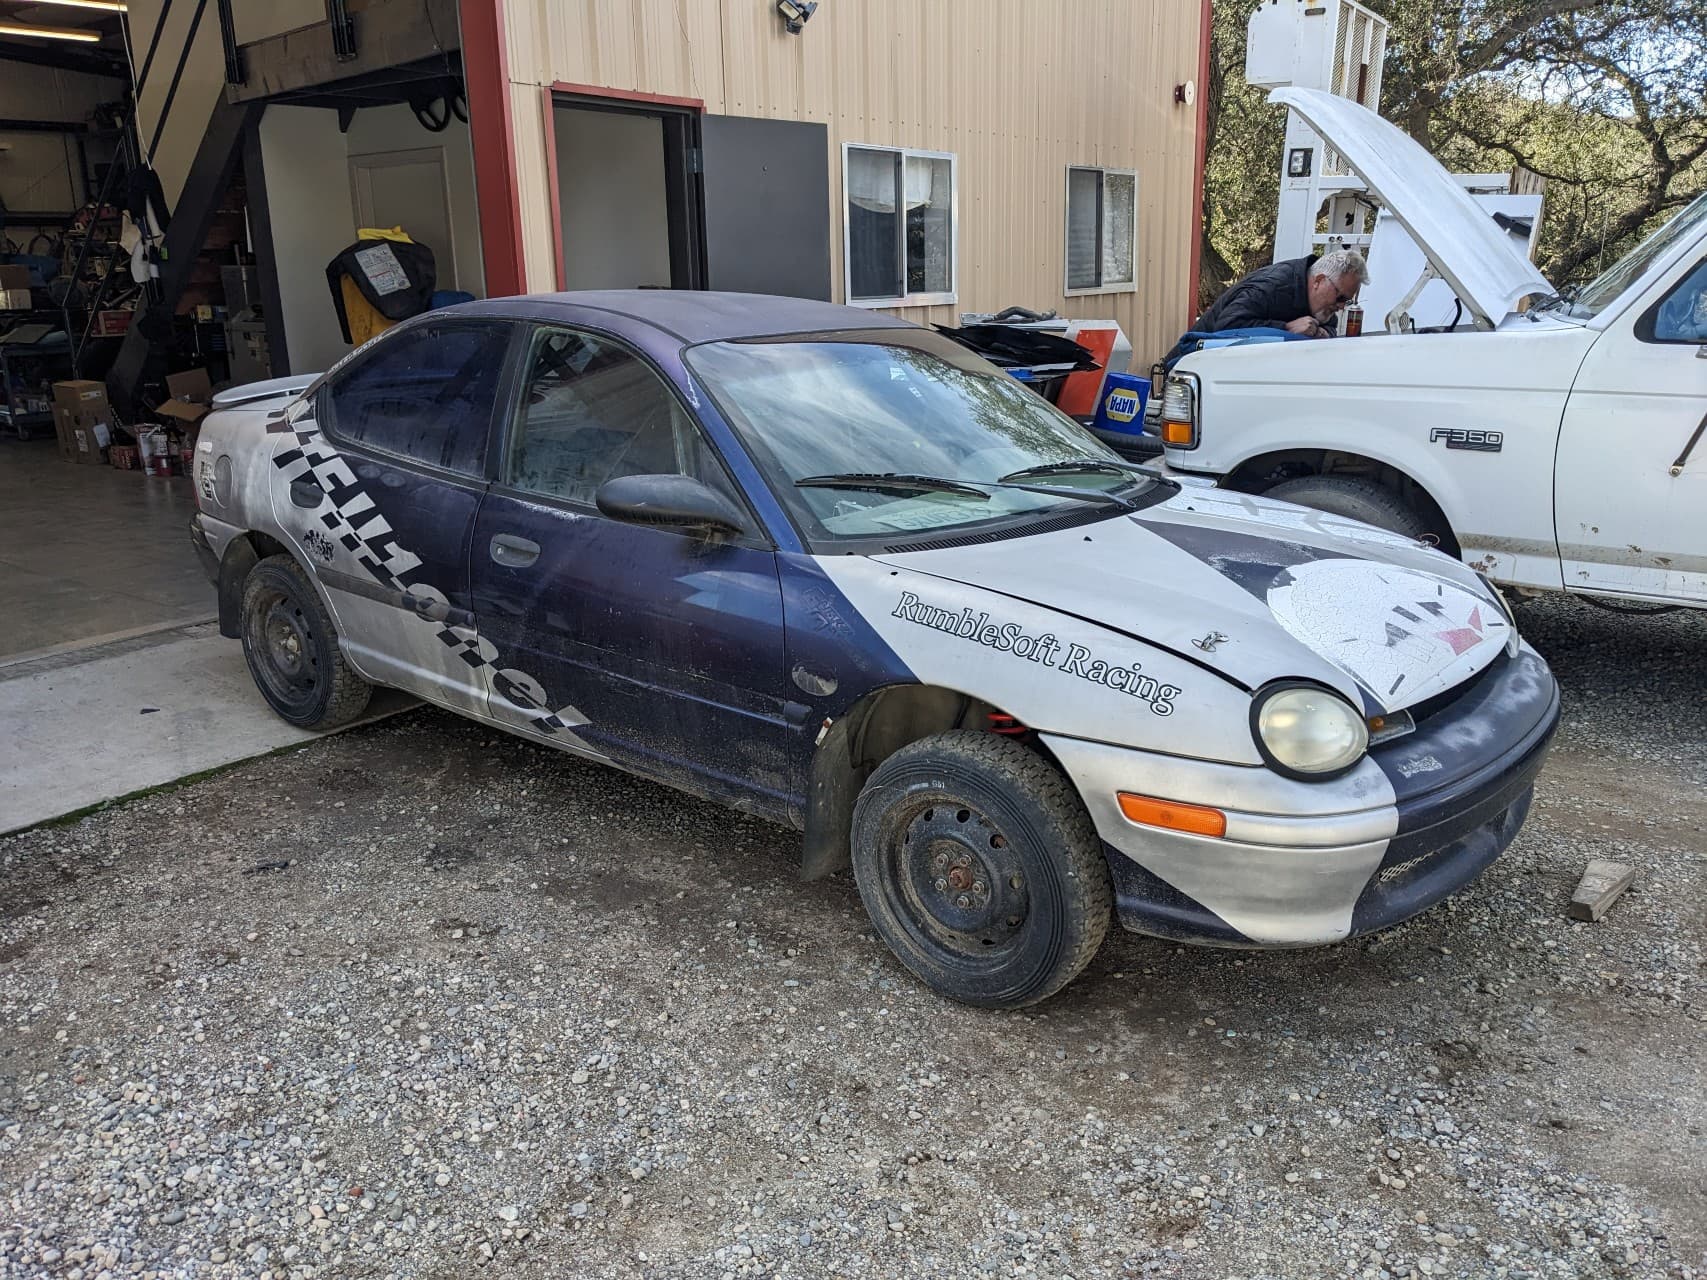
If you’re just joining us, welcome to episode FIVE of the Purple Plymouth Project!
You may have missed the previous 4 episodes of this series - where we’re going to take this car, and get it ready for US rally competition once again. I’ve got a link to the playlist - in the description below.
On this episode, we repair most of the wiring trouble and figure out why the fans weren’t coming on.
I clean up the engine bay AGAIN,
we power-wash the inside of the co-drivers door for reasons,
and we set out to test the best methods for removing 1000 year old vinyl. I actually got some surprising results. (HMM face)
Remember tho, this is not a training video, this is a just some random amateur rally racer in his garage, screwing up the paint of a 20 year old car. All of the products seen in this video I’ve purchased myself, and there is no product sponsorship happening here.
(With that disclaimer out of the way - Let’s get started!)
INTRO
The electrical in this car is in good shape and pretty much stock for the most part. The two issues that I’ve discovered so far is the power wire from the kill switch to the battery was in rough shape. If you caught my wiring video, some heavy gauge wire needed to be properly crimped and a new battery terminal was installed.
The fans were not coming on when the engine was warmed up, and I suspected right away this was because at one time the battery was installed backwards (positive to negative). All the relays in this car would have isolated everything from reverse voltage except for the fan relay. It’s a big mosfet solid state relay that can’t handle reverse voltage. I tested the resistance of the fans themselves using a multimeter. I tested that they make DC voltage when you spin them. I then powered up each of the fans on the bench. The high speed fan is sounding a little rough, but we’ll replace it later. I also checked the continuity from the fan relay connector to the battery and ground. I then jumped the connector without the relay installed to test the circuit from the 30AMP fuse in the car. The fans came on - so I knew the wiring was good - now just to install a new relay and see if the fans came on when the car got up to temp.
[[Shot of fans coming on]]
Now that the engine fans are working and the battery cables and bracket have been cleaned up - it’s time to wash the engine. I sprayed about half a bottle of Simple Green - instead of that nasty spray engine de-greaser that smells like a petroleum refinery. Let it soak on a warm motor, and then rinsed. I didn’t need to use the power washer for this.
On its way back inside I knocked the co-driver door panel and this happened.
More mouse poop. Door was full of it.
After vacuuming as much as possible out I rolled it back into the driveway and just hit the inside of the door full blast.
[Shot of power-wash door]
So, so gross.
[back to me in the garage]
Now it’s time to take some old stickers off the car. After inspecting it, I really think I’m just going to have someone re-paint it. I don’t paint cars, and the effort of trying to build a paint booth inside your home garage just isn’t worth it for me. I will paint the interior, but I’ll leave the exterior authentic and un-restored for now - ready for it’s concor d’elegance debut.
I split up the number panel on the co-drivers door into sections where we could test the following methods:
First up - Steam
This is a household Bissel steamer that may already be in a closet somewhere in your house. I suggest locating the bag of tip attachments and outfitting it with one that no one will miss later because you ruined it taking stickers off your race car.
2nd Method - A 3M rubber wheel attached to a power drill.
I say 3M here specifically the [model] because I think it matters.
I also picked up these plastic razor blades.
Not only did I not know THIS was a thing, but I didn’t remember how useful one of these holders are.
3rd on the test - A heat gun.
Gets absolutely stupid hot - in a matter of seconds.
Great for heat shrink, reflow soldering, turning plastic into liquid.
On top of the plastic razorblades, I also got a hold of a spray bottle of GOO GONE.
This is for getting the sticky reside off the car after the vinyl is gone. You may have to resort to harsher chemicals, but this works pretty well, and again, I didn’t realize this existed and only thought you could get those little squeeze bottles of it.
[Round 1 - Steam]
Steam was slow gong at first, but I think that’s because it took a few minutes to warm the surface. Once I got an edge started, I was able to peel decent chunks off. I found that it worked differently on different ages and types of vinyl. The one on the top is an event sticker and it’s one of those cheaply printed temporary kinds, where as the main white number backer was a better quality vinyl. The big take away so far is there is no sticky residue left when using the steamer.
[Round 2 - 3M Rubber wheel]
I get the hang of it, and then check out how fast I cut a quarter of this sticker off the car.
I’m using light pressure here and slowly working back and forth. Just amazing results!
Not only did I not have to scrape, but there is zero residue left over. It’s just crumbs of vinyl on the garage floor now. The only downside is the hard to reach corners and seams. Even parallel with the trim, there is just no way I’m getting in there to remove anything.
[Round 3 - The heat gun]
The heat gun has two settings - melt things into ash - and off. It really requires some skill and patience to slowly heat the area without damaging anything (or yourself). The vinyl peeled off quickly once it was started, but that’s not the whole story here. Every inch of this left a sticky residue that I had to soak multiple times with Goo Gone, and then finally resorted to Acetone to remove the sticky mess. This got the vinyl itself off faster than the other two methods, but the cleanup time was easily DOUBLE.
On the rest of the panel I decided to go with my new favorite method, the rubber wheel. I also had a softer wheel that was a little better for dealing with the remaining sticky glue. This one smells like a giant pencil eraser By The Way, but this was still not as good at the [3M part number] - It just absolutely chews through vinyl without picking or scraping, heating or melting. Plus the cleanup (even WITH the leftover hard to reach spots) was faster than the heat gun.
I found myself reaching for the steamer after this test - a big takeaway here is that it ONLY gets to “steam temp” so 100C 212F - this is hot enough to soften the sticker, but not hot enough to remove the adhesive from the vinyl. A much more enjoyable experience that needs much less skill to “control the temp”.
I’m sure you’ve seen videos of people installing vinyl wraps with a heat gun - this takes practice and skill. 1 second too long with a heat gun full blast and that plastic is vapor. These are hot enough to start fires - too much risk with a tool like this on a cars paint-job. Hat tip to those of you that can acquire the skill of wielding the paint destroying heat laser.
Next time on Rallynotes
We’ll get started on cleaning up the interior, removing the sound deadening, the dashboard, and prepping it for interior paint.
Thanks for watching - if you enjoyed it, or learned anything, give us a like.
If you want to see more - hit subscribe.
Join us in the comments for discussion and questions. Let us know what you liked so far, and what things you’d like to see more of!
The California Rally Series, Virtual Rally School registration is open and starts on March 2nd - so if you’d like to know everything you need to get started in this sport, check out crsrallyschool.com, I’ll be presenting from the garage on March 9th for the car prep section, and hope to see you there!