Fezzik: Life Begins at 200K

That’s how you did it? Sweet! I might get started this weekend! Among the more pressing projects on my automotive to-do list that could go in this way (approx. purchase date):

  • front seat heaters (Oct 22)
  • under-seat subwoofer (Mar 22)
  • second row reading lights (Nov 21)
  • (maybe all the aux lighting)

Other projects that feel pressing at the moment:

  • make sure front fenders are cleaned out (rust prevention)
  • install rubber sheeting to seal off chassis from wheel wells (Dec 22)
  • install Rally Armor splash guards (Mar 22)
  • install Noico insulation (weak heater)
  • install amber/white emergency flashers (for low-visibility recovery action)

I should also post an official, 6-months anniversary update. Working on it!

1 Like

8AM. 5 inches of snow on the ground. Eight more hours of snow predicted.
And Fezzik is barely drivable due to TPS-related bullshit.
Here’s what I’ve tried so far…

1 - Verified behavior.

  • Feels like the transmission is slipping, but it’s really just awful shift points.
  • Transmission won’t upshift without aggressive, almost-to-redline pulls and snap throttle lift-off.
  • TPS reading constant 99%, no matter how throttle moved—even when disconnected. :grimacing:
  • CEL P0120 for TPS (which also contains the closed throttle switch).

2 - Replaced the TPS sensor.

  • Fortunately, I had three spares lying around.
  • Two of these were DOA losers I bought from Amazon.
  • One was a Beck Arnley and tested good. Problem persists (except the 99% TPS reading).

3 - Followed TPS troubleshooting steps in FSM.


  • Confirmed TPS harness integrity
    – continuity of ground circuit to chassis
    – continuity of power and signal circuits to ECU
  • Confirmed ECU health
    – visual inspection of clean, dry ECU, harness, & connectors
    – confirmation of 5VDC to TPS from ECU

4 - Reinstalled both good TPS sensors multiple times.

  • Only two of the sensors I had on-hand gave a full sweep range of 0-100%.
    – Beck Arnley: 0-100% loose, 5-93% installed
    – “SKETCH” (the one I removed): 0-100% loose, 5-93% installed
  • Shitty, aggro shift pattern persists.

And this is where I stopped for the night, after nearly three hours of fruitless attempts in a cold garage with no garage door opener remote, two heaters going, and at least four test drives through the neighborhood at 4000-5000rpm in first/second gear.

So what do we know?

  • TPS is used more for determining transmission shift points than fueling.
  • TPS also incorporates a throttle closed switch that appears more lift-related than actually 100% closed.
  • The harness between the TPS and ECU is good.
  • The ECU is sending the correct 5VDC to the sensor.
  • I have two presumably good TPS sensors
    – Both are within spec for resistance, gain-over-range, and power.
    – Both have been installed/reinstalled at least 3X with increasing meticulousness.

All of the above leads me to believe I’m looking at one of two options:

  1. Both sensors have the same throttle closed failure, or
  2. I am doing something wrong at install.

It seems more likely to me that I’m the problem, here. I’ve always had TPS troubles. The only time I’ve ever installed one correctly without issue was when I had the MUT-II connected. I don’t have that luxury anymore, and so have been using a digital multi-meter.

I have tried adjusting the TPS by logger output through the ECU, trying to get the maximum range across the actual throttle blade sweep. Best I can do is 4-5% to 93%. (I’ve also tried a baseline of 25% to see if that affected the behavior. It didn’t.)

I’ve also tried adjusting the TPS by back-probing the sensor while connected to try setting things to where the throttle closed switch engages, but the FSM actually says to start that process by turning the sensor fully clockwise, then slowly turning back clockwise until the switch closes (OL). I’ve tried both directions. No joy.

There’s not a lot of ways to install these things. I am frustrated. Now I’m gonna go use my snow thrower so we can maybe get the new car with the 45-series tires on 20s out if we need to go anywhere in half a foot of snow.

1 Like

Ugh.

Built myself a test harness to go between the chassis harness connector and the sensor on the throttle body so I could check voltages while the sensor was connected (without back-probing the connector with needles).

Suspecting the throttle closed switch being the culprit (and I was back on the sketchy sensor that developed the issues earlier last week since it showed the same TPS sweep range as the NIB Beck-Arnley), I pulled the sketch TPS and swapped on the NIB again.

Now it was reading 0-93% sweep—but reporting WOT at closer to 50% actual throttle position.What. The actual. Fuck. I tried reinstalling it six ways from Sunday. It only goes on one way. I’m not sure why these things are adjustable, when they invariably can’t rotate far enough counter-clockwise to sit at <4% throttle at idle and I’ve never had a single one need rotating further clockwise whatsoever.

So I swapped the sketch unit back on to use my new harness to test the throttle closed switch. Only to find IT was now doing the same fucking thing—0-93% throttle input over about 50% of the available sensor sweep.

Still have a code for TPS. And it makes sense, too. If the ECU is seeing 93% throttle input despite my foot only being into the pedal about 45%, it would hold the gears and not upshift unless it physically had to.

The nearest Mitsubishi dealer is in Moline, IL, an hour away. (Near the dispensary, btw.) All the Mitsubishi OE Parts peddlers online apparently use the same inventory/pricing system and want >$200 for the TPS, so I had to buy one from PartSouq in Dubai. $147 and it will be here in about two weeks.

257k

  • installed new, OEM TPS
  • properly adjusted kickdown cable

57,000 miles on the rebuilt engine. And last night Kevin Roy asks me if I’ve adjusted the transmission kickdown cable.

Long story short it was seriously out of spec. The stopper ferrule should rest against the cable end when closed, with a max distance of 35-38mm at WOT.

Damn truck has never shifted so smoothly in the entire time I’ve owned it. I’m excited to see what I can do with it now. I never felt it was a bad slushbox, but it’s such an improvement, I’m changing the way I drive it.


I might have kissed Fezzik tonight.

1 Like

10 Days Later I got stuck in Des Moines.

With Fezzik running so smoothly, I took advantage of the opportunity to drive 130 miles to Ames (basically a Des Moines suburb) to attend the literal passing of the baton between the founding CEO and his replacement. It was a great day. Until I went to leave that night.


4:30PM. Cloudy. Cold. Freezing rain turning to snow predicted. I leave the office parking lot and I’ll be damned if Fezzik didn’t start doing that no-shift bullshit again. Long story short, I spent 2 hours trying every trick in the book to get Fez drivable so I could get home. Nothing worked.

I called AAA, expecting to burn through two of my three, 100-mile tows for the year to get the truck home. Sadly, Mom neglected to renew everyone’s memberships as she was preparing to move to Iowa last November, so the best they could do for me was a 5-mile tow for $150 if I signed up over the phone.

Having spent enough time in the muddy, Iowa State University stadium RV parking lot re-re-re-adjusting the transmission control cable in the cold, I finally gave up and did the two miles back to the office parking lot at 25mph in a 45mph (40km in a 70) at 4,500rpm so I could abandon ship in the brightly lit, secure office parking lot.

7:00PM. Fully dark. Intermittent flurries. V was picking up her mom to stay with P while she did the 4-hour drive to pick me up and we’d count on the Des Moines Mitsubishi dealer (who still hasn’t returned my call) to collect and fix Fezzik in the morning. With two hours to kill, I considered watching Netflix or listening to music, but I was so pissed I just decided to check the logger one more time.

My bluetooth OBD scanner dongle wouldn’t connect, so I pulled it and reconnected it.

Suddenly, all systems were go again. TPS read right. Truck drove right.

I went around the block. Everything was okay.

I got on the highway to go home. Everything was okay.

I called V, who was now leaving town, telling her I was coming home and to stand down. I didn’t drop below 65mph until I got off the highway back in Iowa City. And Fezzik ran fine after that… for about a week.

In the next installment, I’ll get into why I’m pulling the entire interior to hopefully fix this phantom TPS issue once and for all…

TPS / ECU drama continues…

The two+ hours drive home provided plenty of time to think about (read: obsess over) what had happened, why it happened, and what it meant for the future. It didn’t make sense—and yet it did?

  • I thought the problem was Amazon TPS—but the problem came back with an OEM TPS.
  • I thought the problem was the cable adjustment—but the problem came back after it was set.

Staring out into the abyss through the windshield, I found myself wondering if the OBD scanner dongle was to blame. I mean, let’s see now…

  • I re-installed the TPS and re-adjusted the cable. The logger read 60% or 90% no matter what. Just like it had done on four other TPS I had lying around. Mechanically, I was set. Electrically, something was off.

  • But I had already traced the harness between the TPS and ECU a couple weeks before and verified it was intact and secure.; at least at either end where things were most likely to be moved. I also confirmed the ECU was sending the proper voltage to the TPS. So I should have been set, electrically, too.

:thinking: The only thing I did between the 4500rpm, 25mph drive to the office parking lot and the drive home was reconnect the scanner dongle to the OBD port under the dash. And here’s what THAT looked like…

  1. The logger was connected to my phone, but failed to connect to the ECU (for the first time ever).
  2. I disconnected from the dongle, closed the app, and then physically removed the dongle to reset it.
  3. The logger connected to the ECU first try, and then showed all systems nominal and ready.
  4. I drove around the block. Truck drove perfectly.
  5. I re-checked the logger. Now it was still logging, but ALL signals were frozen midstream. That is, the scales were still tracking time, but the signals were static/constant.

At that point, I was out of Ames and well on my way to Des Moines and the I-80 interchange. I closed the app and left the dongle installed because I wasn’t about to stop until I got home, let alone change something about the electrical system under these circumstances.

Was my ECU going bad? Did late-90s Mitsubishis have the same, leaky capacitor in the ECU issue as the early-90s Mitsubishis did? Was the no-name, $30 bluetooth dongle from Amazon—that had been connected and power-cycled almost daily for at least two years—acting up and somehow backfeeding noise through the OBD port?

Upon getting home, I pulled the dongle. The truck drove flawlessly for about a week. When the problem came back, it did so in the middle of an otherwise normal drive.

It was a rainy day. Fezzik had been outside in all of it. I took a dog to the groomer. As I was leaving the parking lot, I thought I felt the transmission slipping a bit, but I was getting on the highway so I crossed my fingers. 2 miles down the road, I exited the highway and it was clear things were about to get shitty again.

Over the course of maybe 5 miles, Fezzik went from driving perfectly fine to right back to being undriveable over 10mph. I roared the last two blocks home at 5000rpm at 20mph and he’s been in the garage ever since.

The kick panel was still off from when I traced the harness so I decided to pull the ECU and check for leaky caps. There were none. In fact, the ECU looked great, except for a stripe of rusty-brown surface corrosion across the back of the board. This corrosion cleaned up nicely, with minimal scrubbing with a new toothbrush and 99% isopropyl rubbing alcohol.


Removing the mud-crusted WeatherTech floormat in the process of getting in there, I discovered the carpet was wet (again). I pulled it back and found the insulation behind the rubber pad on the footwell was soaking wet. (Not seen, it was soaking wet all the way over to the center tunnel below the heater core, too, but did not smell at all like coolant. This was just water.) Was the windshield seal leaking? Had leaves or acorns or something gotten into my sunroof drains since I cleaned them in the fall? Where is the water coming from, and is it the cause of the fresh corrosion, and is that the cause of my struggles?


It’s looking like hanging the ECU over a sopping wet sponge for six months of winter might be taking a toll on the ECU. I’m hoping I can confirm the leaks, patch them, and get on with my life.

In the meantime, I’ve had the following items waiting on install, some of which going back to the fall of 2021:

  • sound insulation for the walls and ceiling
  • fiber optic, twinkle light headliner kit
  • powered subwoofer (under seat)
  • JL Audio 6x9 speakers
  • seat heaters & switches for front row
  • white/red LED reading lights for second row
  • gently used door gaskets from an AZ junkyard

So, as much as I hate the thought of taking my truck apart to this extent without being abso-friggin-lutely sure it’s the right thing to do, it’s something I’ve been wanting to do for almost two years and this is probably the best time of year to do it (before it gets hot and humid in the garage).

I figure, IF the issue is caused by a damp environment—and I KNOW I’ve got water ingress issues—it certainly can’t hurt to address the water-inside-the-cabin issue. Fortunately, I have a lot of neat shit to install that should make this project relatively fun. (It’s been years since I’ve installed any actual mods myself.) If I do all this and the truck STILL acts up, then I think I can probably start ECU shopping. Hell. I might keep an eye out for a spare CA-spec ECU just in case.

(sigh)

Omg fezzik! Why damn you!?

Sunroof drains would be my first guess too. I also think you’re on the right track suspecting the water causing the issue. It sucks. But…

Might’ve been like this in az forever but with a “dry heat” 90% of the time how would you ever know?

1 Like

All sounds fairly sucky. IMO, a spare ECU is a must. They’re not getting any more common or cheaper. I keep a spare properly packaged up in my truck at all times, and then have another in the garage. Overkill? Time will tell. See above for my reasoning.

What did you find out about the moisture? Where’s it coming from?

1 Like

No news on the water ingress, but I suspect we’re about to find out.

They’ve already announced school getting out an hour early because they’re so sure it’s coming.

I taped the windshield up with foil tape, so if the floor gets wet, I think we’ll be able to rule it out (but I’m hoping it stays dry so I can just re-seal the windshield.

1 Like

The windshield tape worked!

We had a couple-three days of shit weather, punctuated by some relatively heavy rain. I’m talking, wake you up in the middle of the night to look out the window at the river flowing down the sidewalk kinda rain. When I checked the carpet the next morning, it was bone dry all the way to the floorboard.

To seal or not to seal. That is the question!

I have several feet of thick, adhesive windshield gasket material I could use to reseal the windshield. But I also have a nice little crack coming from the edge of the windshield at the top suggesting I could (should?) get the windshield replaced, at which point, presumably, professionals would reseal the new windshield right.

I’ll probably try the stuff I bought from Amazon and see how it does for a couple months. A new windshield is at least $200 and I have gardening stuff to do. In the meantime, Brother Keith (not a member) recommended some silicone conformal coating spray to waterproof the ECU board.

A couple notes on that conformal coating stuff :point_up::

  1. It’s like liquid wax. Don’t get it on any contacts or connectors.
  2. This is apparently what they do to the insides of “Marine” electronics.

Upcoming Plans

I’ve got a lot of fun stuff to do and am excited to get started. The first step, however, is kinda cleaning up the garage to make room for complete interior removal, so that’s been my biggest deterrent so far. Thinking through things in a rough order, though…

  1. Make room in the garage for truck projects.
  2. Empty out the truck. Glovebox, door pockets, every nook and cranny.
  3. Remove the seats, center console, headliner, plastic trim, and carpet.
  4. Install new audio equipment (rear speakers, sub, possible amp).
  5. Install new house lighting (2nd row reading lights, etc.)
  6. Wire up new exterior aux lighting switch panel.
  7. Clean interior for insulation installation.
  8. Clean interior pieces for reinstallation.
  9. Fix headliner and install fiber optics.
  10. Put it all back together successfully.

I’ve also got a shit-ton of rear suspension bushings to go in. :thinking:

Miles to go before I sleep!

1 Like

259,XXX

  • upper & lower radiator hoses
  • heater hoses

One day before the Mazda is ready, Fez decides to piss coolant all over the driveway. Fortunately, this was after V&P ran errands.

Turned out the lower radiator hose relaxed into the AC clutch and was moments away from splitting wide open.

So I installed the new, silicone jobbers from ADD. I also used mule tape to tie the lower hose back out of the way, just in case.

Wouldn’t you know it–I drive to DSM for a work conference, get home, and the very next day, I’m smelling coolant again.

This time it was the heater hoses. Not sure why I used “PCV” hose instead of proper, glycol-resistant heater hose last time.

I’m looking for 5/8in (16mm) ID silicone heater hose with 90° bends on one end now…

1 Like

It was probably a temp setup when you swapped out the motor, yeah?

Could be. The shop that did the timing belt and all that before the move made a special call just to tell me I had the wrong kind of hose for all my coolant lines and I asked them to swap em all out. No idea why I would have had them skip those two–so why do I feel like I maybe might have?

The world may never know. For now, I’ve got to replace the heater core. It’s leaking pretty badly.

:point_up: That’s dripping from the puddle on the carpet in the second row. Between 8am and 1pm.

Freaking gross.

1 Like

Awww man, that just sucks. There is no eloquent way to say anything about it.

1 Like

07.31.23 — Heater Core & Interior Refurb Begins

As much as I’m not looking forward to replacing the heater core, it’s just what I needed. Parts have been piling up for years while I waited for sufficient impetus to remodel the garage and strip the interior.

Fiber optic, starlight headliner, LED reading lights, 60lbs of sound insulation, and new 6x9s are all worth doing, but the sheer amount of shit that has to come out of the truck to do them, ya know? I considered it a Wyld Stallyns Dilemma. Just as Bill and Ted could not make a triumphant video without Eddie Van Halen on guitar—but could not get Eddie Van Halen on guitar without a triumphant video, I couldn’t spend a month taking Fezzik apart without remodeling the garage—but I couldn’t remodel the garage until I needed to spend a month in the garage taking Fezzik apart.

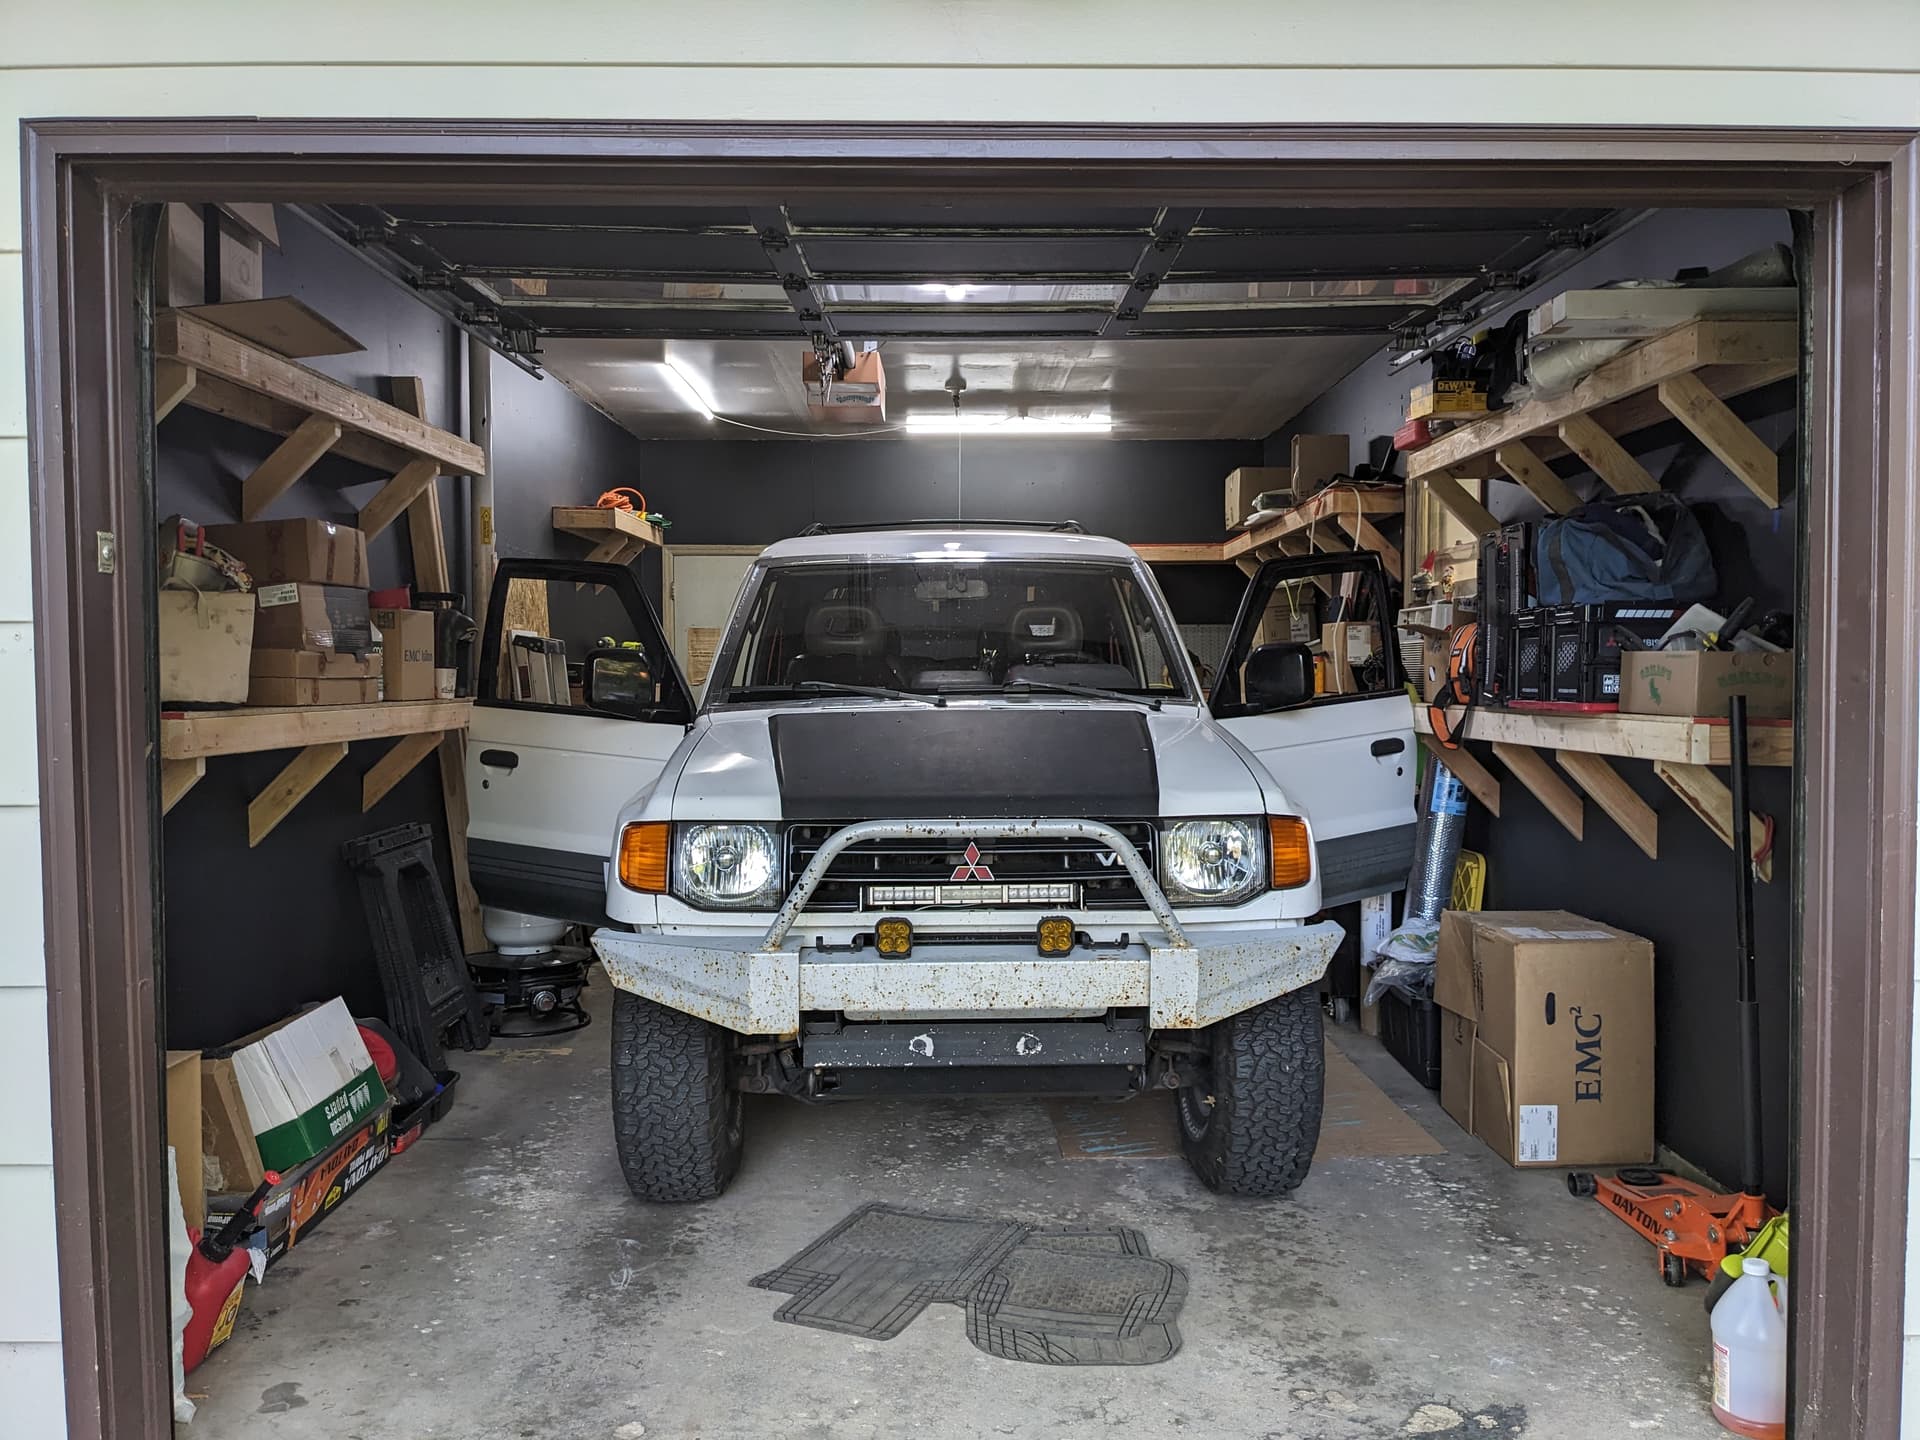
Fezzik is in the building.

(And the wife and daughter have left the state—for an entire week.)

My Quest

  • Monday: begin stripping the interior
  • Tuesday: finish stripping the interior, pressure wash the carpet
  • Wednesday: [ break ]
  • Thursday: begin removing the dashboard
  • Friday: bypass and remove heater core

Rewarding myself: If I accomplish all of the above and have time, I will shift gears to install a set of new JL 6x9s my mother-in-law ordered by mistake and just gave to me instead of returning.

Note: I plan on keeping Fezzik drivable through all of this just in case. I know there will be times when this isn’t possible; when the windshield or brake master cylinder is out, for example, but these should be limited. While I’m planning on Fezzik being down for an entire month, I don’t want him immobile.

The Backlog

  • [ while the heater core is being repaired ]
    – repair brakes: check lines for leaks, replace master cylinder, fluid, bleed
    – clean the headliner
  • install repaired heater core
  • r&r moon roof assembly
  • refurb dashboard: new center vents, clean ducts, install power ports, switch panel
  • install Noico in dash area as needed
  • install new aux circuits: fwd lighting, emergency flashers, house circuit
  • STARLIGHT FAMILY WEEK
    – install starlight fiber optics into headliner
    – install starlight control unit in Fezzik
    – install Noico in headliner
    – install headliner and test
  • reinstall dashboard
  • install Noico everywhere else
  • reinstall carpet
  • reinstall interior
  • install emergency flashers
  • install seats
    – refurb seats?
  • repaint front bumper
  • reinstall Diode Dynamics SS3 fogs
  • reinstall & connect the big Lightforce “oscars”
  • install new ADD flood/ditch lights
  • install new ADD reverse lights
  • replace rear suspension bushings
  • install panhard bar

That’s clearly more than I can get done in a single month, but I know I can make a serious progress.

1 Like

Journey to the Heater Core Ep. 2

While I got Fezzik into the garage and made some serious progress, I am currently behind schedule and looking at closer to end of September before I’m done. Turns out I overdid it the week the girls were out of town and it took me a couple weeks to physically recover.

The following pics were taken a couple days after the last one, above. Since then, I’ve removed the airbags.

That’s it. And Fezzik isn’t currently drivable while the dash is broken down and the steering wheel is pulled.

Interior Removal


Carpet Removal

I pulled the carpet and drug it out back for pressure washing. If it’s not obvious, driver side is top left. I’m seeing a slight green tint to the carpet on the passenger footwell corner. (The ECU sits less than a foot above this soggy mess, by the way.)

I didn’t like the thought of rinsing antifreeze down the street into the storm drains, but as you can see, Arlo and Louise were immediately interested in the carpet, so I drug it back past Fez out to the driveway. Notice how the carpet was so wet it left streaks on the floor when I pulled it back through the garage.

Carpet Cleaning

Once I had everything laid out in the driveway, I grabbed the Simple Green, pressure washer, and a drill-mounted scrub brush, and got to work cleaning the carpet.

First, I used the pressure washer to aggressively rinse the carpet. Next, I attached my foam gun attachment and saturated the carpet. I let it soak for a few minutes, then went over everything with the power brush. After that, I gave it another high pressure rinse, before another Simple Green soak, followed by another high pressure rinse, and then a final, low pressure flush with the regular hose to clean things out.


Carpet Cleaning Results

Once I was done, I hung the carpets over the trash carts to drip dry. They could have come out better, I’m sure, but I am pleased with these results. (I’ve also got four bottles of dark gray Rit dye and a mini deck sprayer to apply the dye once the weather cooperates.

(Did you notice the red streak in the above picture? It was hidden under so much grime. Kinda panicked for a couple minutes when I was pressure washing and the water started running red. Turns out it was probably just a red ink pen that fell between the seats and cooked out in the heat.)

In other news, with the carpets hanging on the ADD bull bar, Fez reminds me of the Mutt Cutts van.

Final Steps to the Heater Core

The airbags, combined with my aches and pains, set me back a bit. I suspect they changed the SRS connectors when they performed the Takata recall. I had to do some research to be sure before I started prying on wires connected to literal explosive devices.

Got them out, though, and have stuffed the HVAC controls back into the dash cavity far enough to be able to access the control cabling. That’s my next challenge. After that, I suspect it’s maybe a dozen bolts to get the dash out and begin the final push to the heater core.

In Other News

  • Replacement heater core arrived from China. Nobody locally works on heater cores, which means I’m going to have to pressure test this sucker myself before it goes in. Or who knows, maybe I ship the original back to Phoenix for professional repair. Not sure yet. We’ll see when the old core is out.
  • (I also got replacement center vents, since mine are borked and you have to remove the HVAC controls to get them out. Another while you’re in there affair.)

Time is already running out for this project, though. I’m out of town this Saturday, think we’re doing something the following weekend, then it’s like two weeks until we fly to SLC for Mabon, and then it’s October.

1 Like

Journey to the Heater Core Ep. 3

Good News. Bad News.

Bad News: The replacement heater core I got from China has the wrong inlet/outlets.
Good News: It looks like my leaks might have just been the rubber hose couplers & I won’t need it.

I’ve already requested the return via Ebay. I triple checked the part number and looked up as many real, actual pictures of the OE unit as I could find (which wasn’t much). I should have known. The listing had the right part number (MB657416), but incorrectly referred to the part as the “rear” heater core. (It’s not that one, either. Doesn’t even look anything like it.)

It might work, but considering how obviously faulty the couplers look, I’m just going to return it and pressure test the original once I get it out. Fingers crossed it’s just those couplers.

Dash Removal

I got the dash out easily enough. Truly, the hardest part about this job is keeping track of all the pieces. If you’re prepared to take everything out—and you’re not in a rush—I think you’ll do alright.


Electrical Lala Land

I should fully remove the weird, never-quite-right alarm system while I’m in there. (There’s two more black boxes velcro’d to the ECU case, too.)

Here’s a couple interesting things I wasn’t expecting. @PajEvo have you ever seen these guys before? Any ideas what they are?

  • colored cards stacked below the relays
  • that blue fuse all by itself on the left
  • it looks like the upper/middle relay location is terminated (should I install a relay?)

Here’s some more interesting stuff. Audio Express had my truck an entire weekend to install a deck and rear speakers many, many years ago. This is how they wired things up. Those appear to be plain old 2-wire speaker cables crimped to the harness instead of using the factory harness. (Maybe they couldn’t connect to the weird, round, multi-pin connectors back there I presume were for the Infinity system?

Either way, I’ll be re-wiring these because damn. Ugly.

Running Out of Room!

I’ve long said that, once you start taking apart a car, you can fill a 2-car garage. Well, I only have a 1-car garage nowadays. My shelves are filling up, and so is the back of Fezzik! Woof!

Gonna keep after it! Once the core is replaced, it’s all fun and games.

  • new speakers w/ better wiring & sound insulation
  • new red/white LED reading lights in the back w/ USB power ports
  • a freshly recovered dashboard w/ new vents & LED lighting
  • freshly dyed carpet w/ sound insulation
  • fully functional aux lights up front
  • clean HVAC ducting

I miss driving my truck!

1 Like

Journey to the Heater Core Ep. 4

The old heater core is out!

Doesn’t look bad, either. There’s a little spot of corrosion toward the bottom on one side, but I think the leak was truly the hose couplers. Still need to pressure test this one to be sure. And I’m still more than likely going to install the new one from Luso when it arrives. (I’ll pressure test it, too.)


Here’s a couple more pictures of the HVAC assemblies under the dash for future reference. Heater core is in the big black box. AC evap core is in the middle white box. Blower motor (and cheap foam “filter”) on the right. It’s gonna be interesting getting all these ducts sealed back up again, but I have a plan.


I started pressure washing interior trim.

I also pressure washed the dashboard and most of the center console bits. Felt really good until the factory foam bits started melting off like they were made out of dirt, themselves. After this batch, I still have an entire pile of smaller bits to do. (It’s all gonna get a fresh coat of dye so it matches.)


Headliner is out too!

I got the headliner out and into the basement, where it’s awaiting steam cleaning and a fiber optic install. Looks like it’s gonna clean up nicely, too. I’m excited. I’m going to ask Neighbor Steve to help me drop the sunroof this week so I can fully clean it up and get it working like new again. (It currently works, but could use a good cleaning after 25 years.)

I started cleaning the shell.

Would you believe the carpet under the pad in the passenger footwell is STILL soaked with coolant from the leak? I had to wedge the aftermarket alarm box under it for airflow. Wow. So nasty.

Otherwise, I removed the OE amp and CD changer cables since neither was still in the vehicle—and check out the secret cubby under the second row that I didn’t know about. Maybe that’s where the amp used to be. Maybe it’s where I build out my house electrical box. :thinking:

In any case, I figured out where the Audio Express guy ran those speaker wires. I’m definitely going to clean those up before the carpet goes back in.


Speaking of cleanup…

I spent some quality time polishing the gauge cluster lens. Did such a good job, now I have to open it up and do the inside, too. Just as well. I’ve got all the LEDs to install too, so it’s worth a good cleaning.


I’m starting to get pretty excited. Yes, there’s going to be some challenges putting everything back together again, and timing is going to be key to getting everything done this month, but the interior is going to be almost completely new, save seats and door cards. Fortunately, those are easy to remove anytime, so maybe I’ll try my hand at upholstery this winter.

(Then again, I need to get the seat heaters installed before winter. Maybe I’ll just slip them under the seat covers. Planning on doing quite a bit of pre-wiring work to set the stage for future projects.)

1 Like

Journey to the Heater Core Ep. 5

The new heater core is IN!

[ Edit: @MrGalantguy I think you might find some of these details interesting. ]

It wasn’t an exact fit, but it was close enough I was able to make it work. I wish it didn’t have the munched fins it does, but that’s my fault for trying to use a small prybar to clearance the HVAC control arm without removing the core. (Tool slipped into the heater box, wouldn’t just slip right back out.)


Captain Halfass: Under Pressure

That last picture, above, with all the things connected and the foam tape in place, reminds me I should reconnect the heater hoses in the engine bay, throw the ECU and cluster back in, and pressure test things.

As much work has gone into this project, It would be a HUGE MISTAKE not to make sure things are fully sealed up before I put it all back together. I didn’t go through with plans to purchase a bunch of pipe fittings so I could pressurize the core and maybe submerge it in a bucket of water or watch a gauge or something. I mean, the hose couplers on the original core were obviously the cause of the leaks, given how much fluid I was losing.

I’ve casually pressure tested both cores using the Captain Halfass Method:

  1. Cover the short pipe with your thumb.
  2. Put the other pipe in your mouth.
  3. Try blowing up the core like a balloon.

Both units behaved the same. I huffed, and I puffed, and I looked like an idiot. Considering the leak was big enough that I could hear it spitting out when the coolant level was lower—meaning the system didn’t have to be full and fully pressurized to leak—I’m telling myself we’re good here.

Bold Strategy Cotton GIF by MOODMAN

Luso Overland vs. OEM

Side-by-side, you can see how close the replacement core from Luso Overland matches the OE unit that came out. (Which was clearly only leaking from the 25-year-old rubber hoses connecting things.) The end tanks might be a little smaller, and the pipe on the right is crush-bent just a bit too close to the tank to be a drop-in solution.


I ended up using the corner of my new workbench and a paint brush handle as a mandrel to bend the pipe outwards enough to clear the heater box door control. Absent the opposing force of the bench, the pipe wanted to bend at the base where it’s welded to the tank. Considering I’d already mashed fins and am installing with a sketchy tube, I was trying to be careful.

Washing Dirt Away, Make New

This just in: SEM Color Coat is the shit. I also have a couple cans of Duplicolor for plastic and vinyl (for the carpet), but this stuff was said to be the best for matching interior colors. I got lucky. Turns out the “15303 Graphite” color is almost indistinguishable from the original gray on my dashboard and interior trim. :+1:

It’s not a silver bullet, though. You can still see blemishes on the passenger airbag, but I believe these can be fixed by sanding things smooth and touching the wet paint with a texturized pad. Acouple light coats in the sun and things are looking brand new!


Other Mentionables

When Luso reached out to me to let me know they had the cores (but they weren’t as drop-in as they would like and he wanted to make sure I was aware), I decided to grab a couple other long-overdue bits he carries—the hood prop retainer clip and driver’s door check (so I can lose my wood block).


Beyond that, I started installing Noico behind the dashboard. I’m itching to install it everywhere, but still need to drop the sunroof so I can access the roof panel, and I’m concerned about either damaging any installed Noico while I’m working, if not making a bigger mess to clean up before I’m done.


And the beat goes on…

1 Like

Amazing work, dude!