Awww man, that just sucks. There is no eloquent way to say anything about it.
1 Like
07.31.23 — Heater Core & Interior Refurb Begins
As much as I’m not looking forward to replacing the heater core, it’s just what I needed. Parts have been piling up for years while I waited for sufficient impetus to remodel the garage and strip the interior.
Fiber optic, starlight headliner, LED reading lights, 60lbs of sound insulation, and new 6x9s are all worth doing, but the sheer amount of shit that has to come out of the truck to do them, ya know? I considered it a Wyld Stallyns Dilemma. Just as Bill and Ted could not make a triumphant video without Eddie Van Halen on guitar—but could not get Eddie Van Halen on guitar without a triumphant video, I couldn’t spend a month taking Fezzik apart without remodeling the garage—but I couldn’t remodel the garage until I needed to spend a month in the garage taking Fezzik apart.
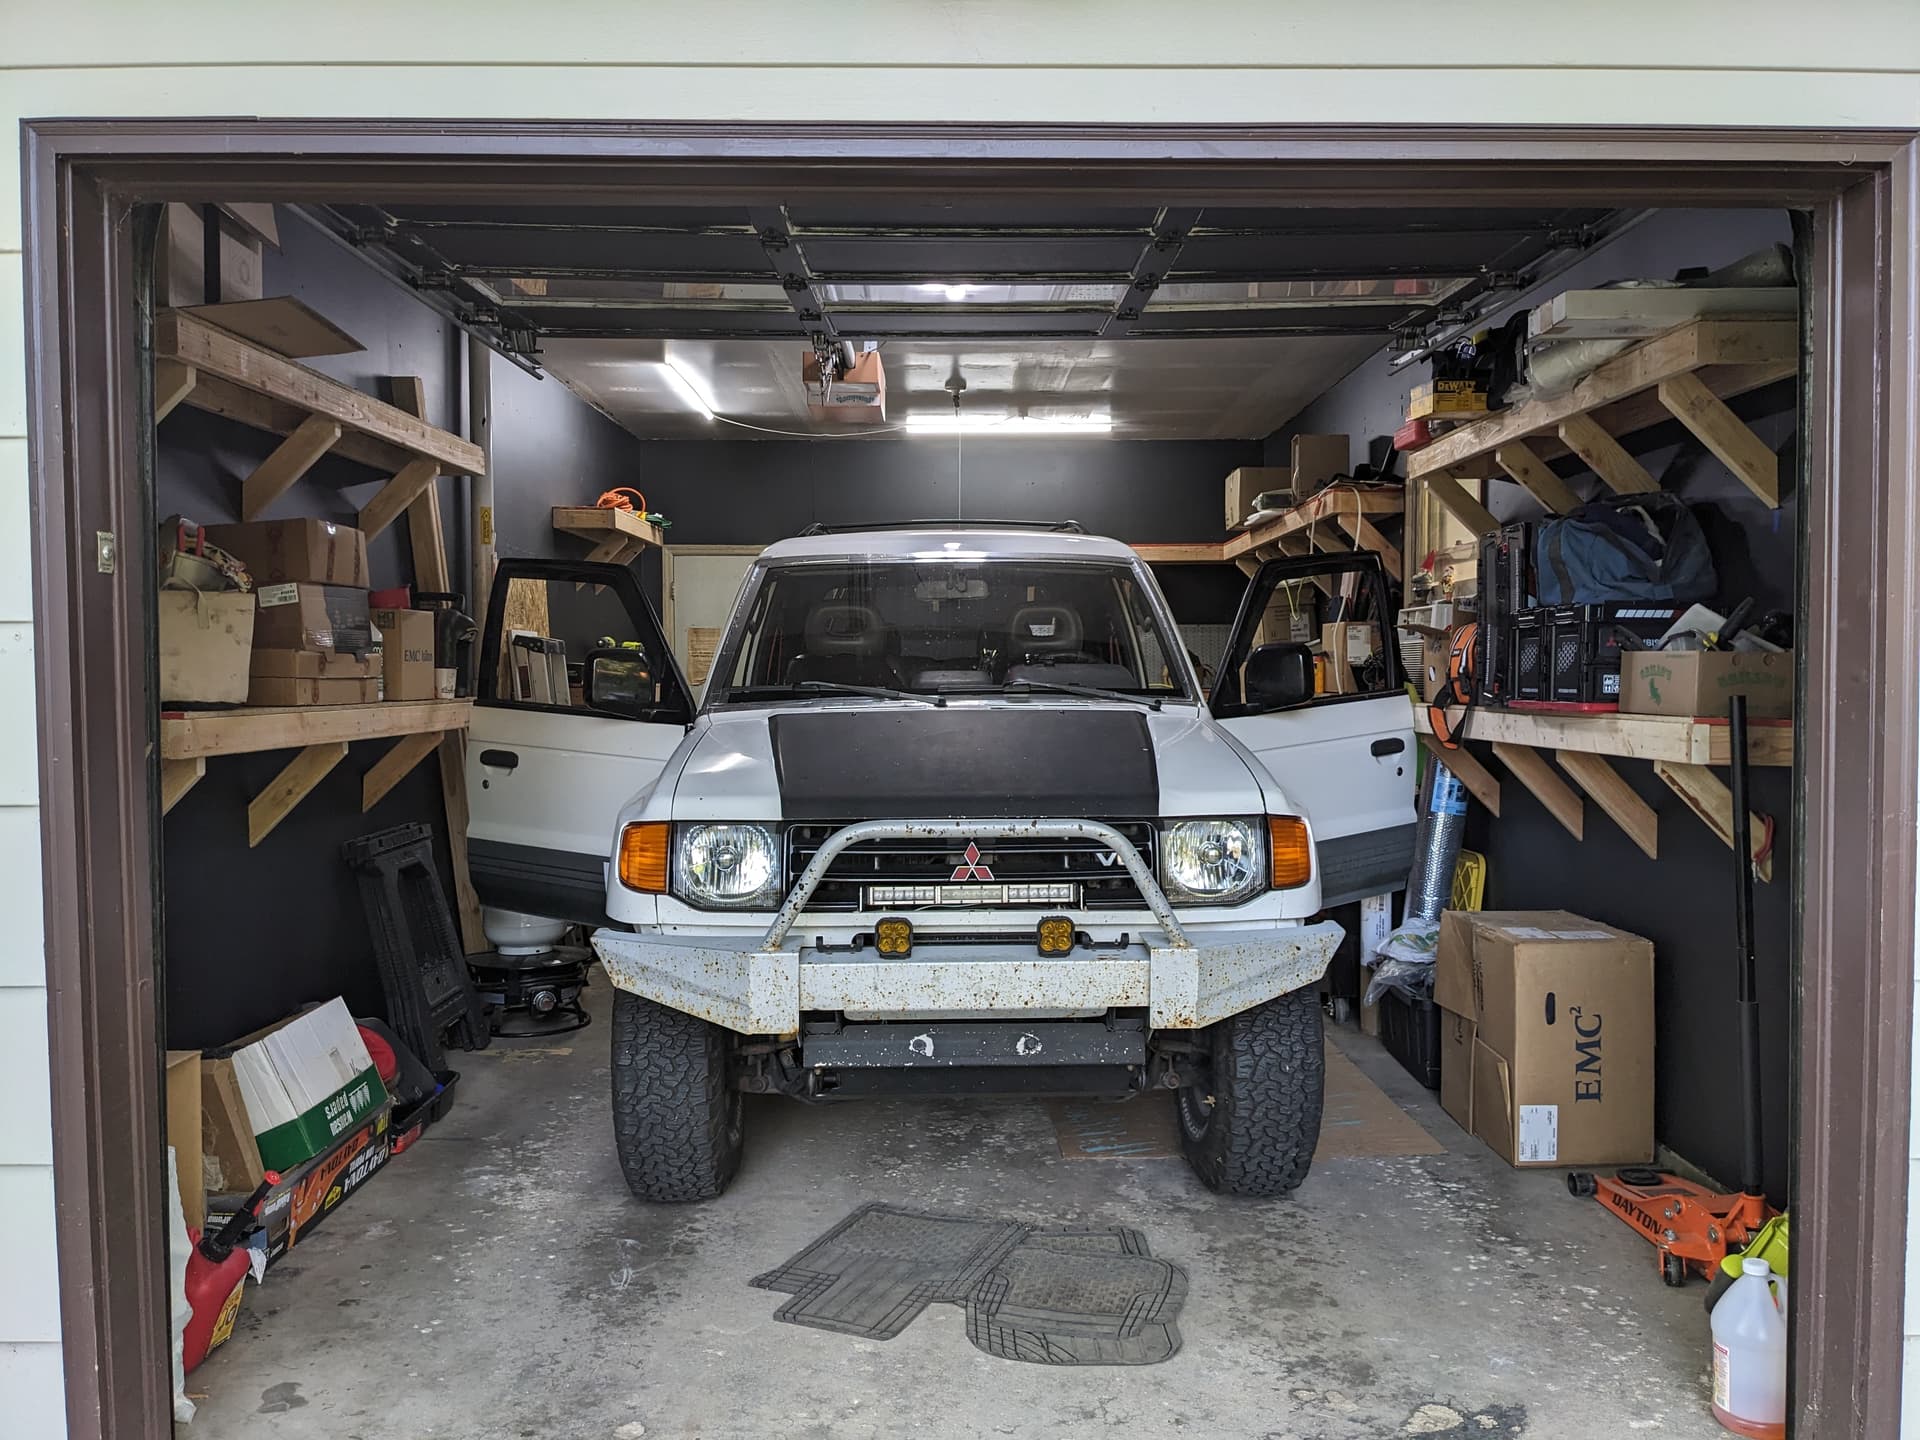
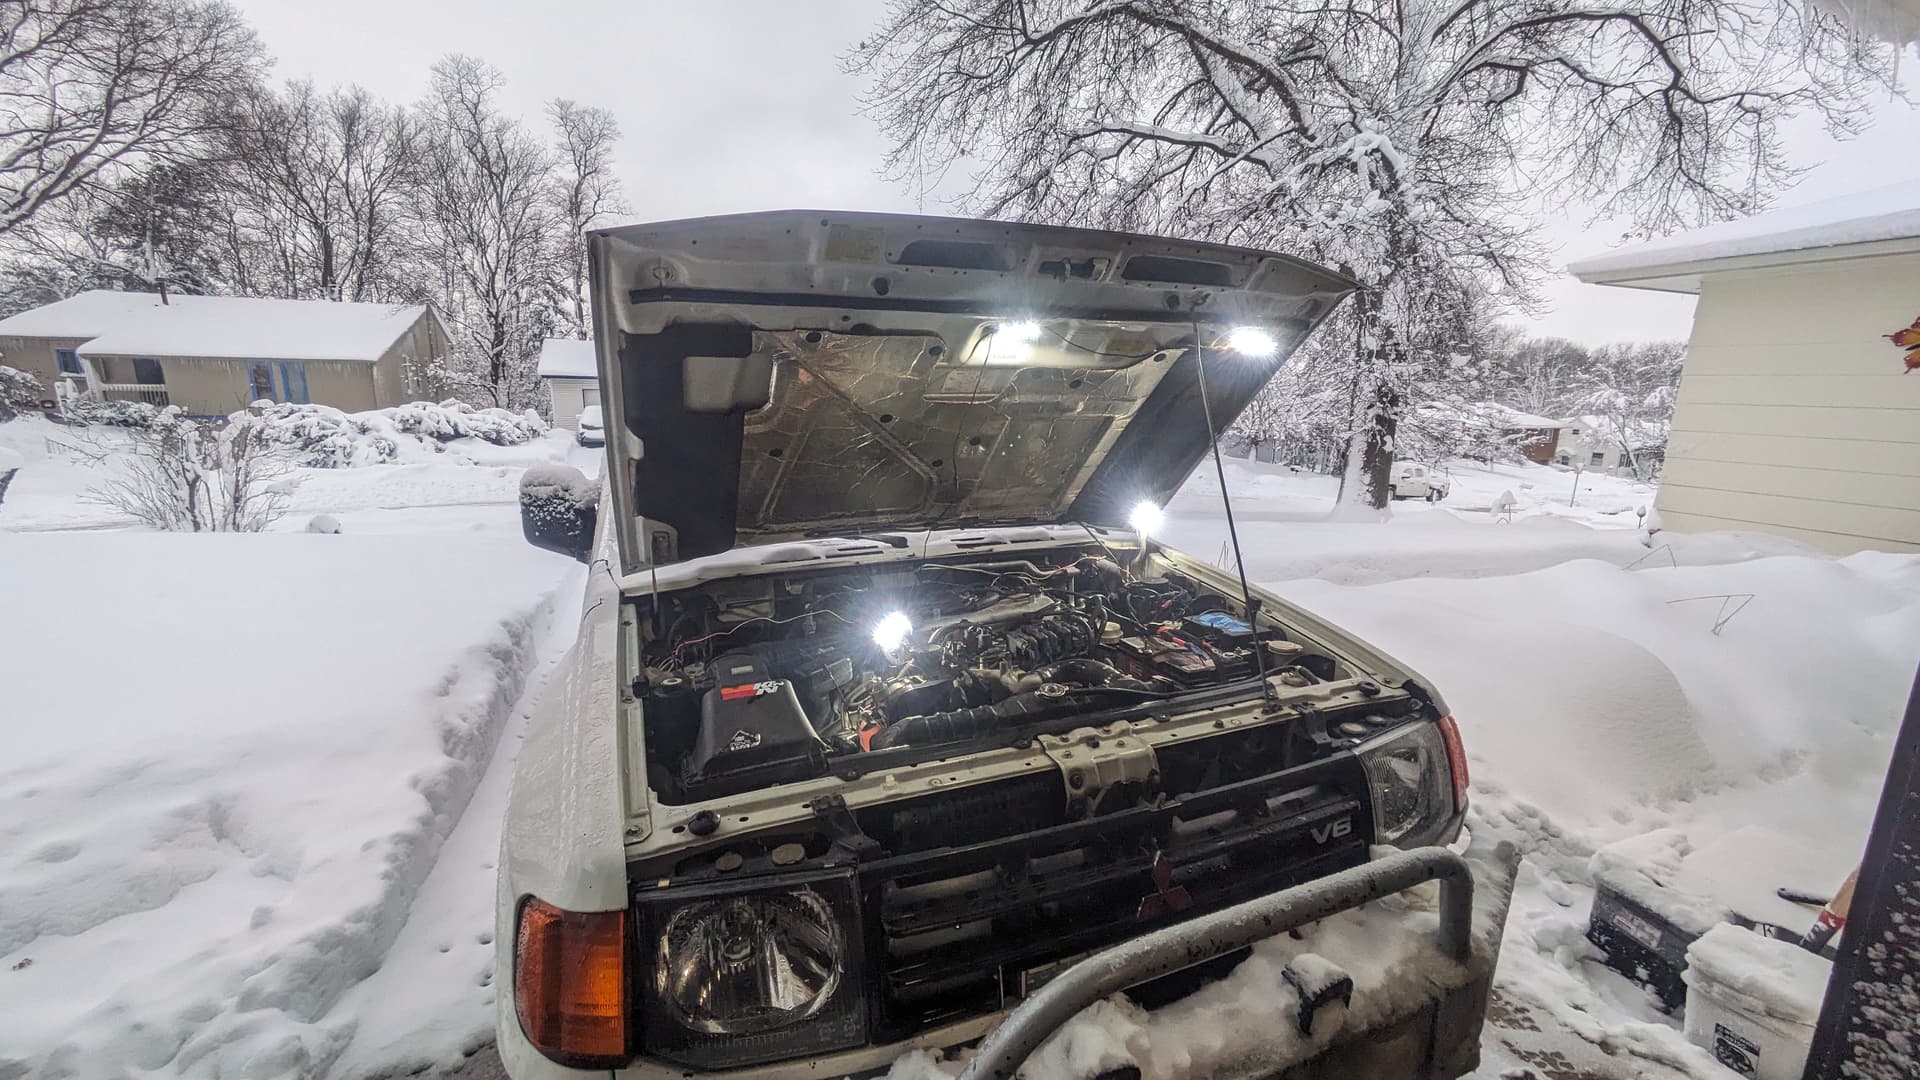
Fezzik is in the building.
(And the wife and daughter have left the state—for an entire week.)
My Quest
- Monday: begin stripping the interior
- Tuesday: finish stripping the interior, pressure wash the carpet
- Wednesday: [ break ]
- Thursday: begin removing the dashboard
- Friday: bypass and remove heater core
Rewarding myself: If I accomplish all of the above and have time, I will shift gears to install a set of new JL 6x9s my mother-in-law ordered by mistake and just gave to me instead of returning.
Note: I plan on keeping Fezzik drivable through all of this just in case. I know there will be times when this isn’t possible; when the windshield or brake master cylinder is out, for example, but these should be limited. While I’m planning on Fezzik being down for an entire month, I don’t want him immobile.
The Backlog
- [ while the heater core is being repaired ]
– repair brakes: check lines for leaks, replace master cylinder, fluid, bleed
– clean the headliner - install repaired heater core
- r&r moon roof assembly
- refurb dashboard: new center vents, clean ducts, install power ports, switch panel
- install Noico in dash area as needed
- install new aux circuits: fwd lighting, emergency flashers, house circuit
- STARLIGHT FAMILY WEEK
– install starlight fiber optics into headliner
– install starlight control unit in Fezzik
– install Noico in headliner
– install headliner and test - reinstall dashboard
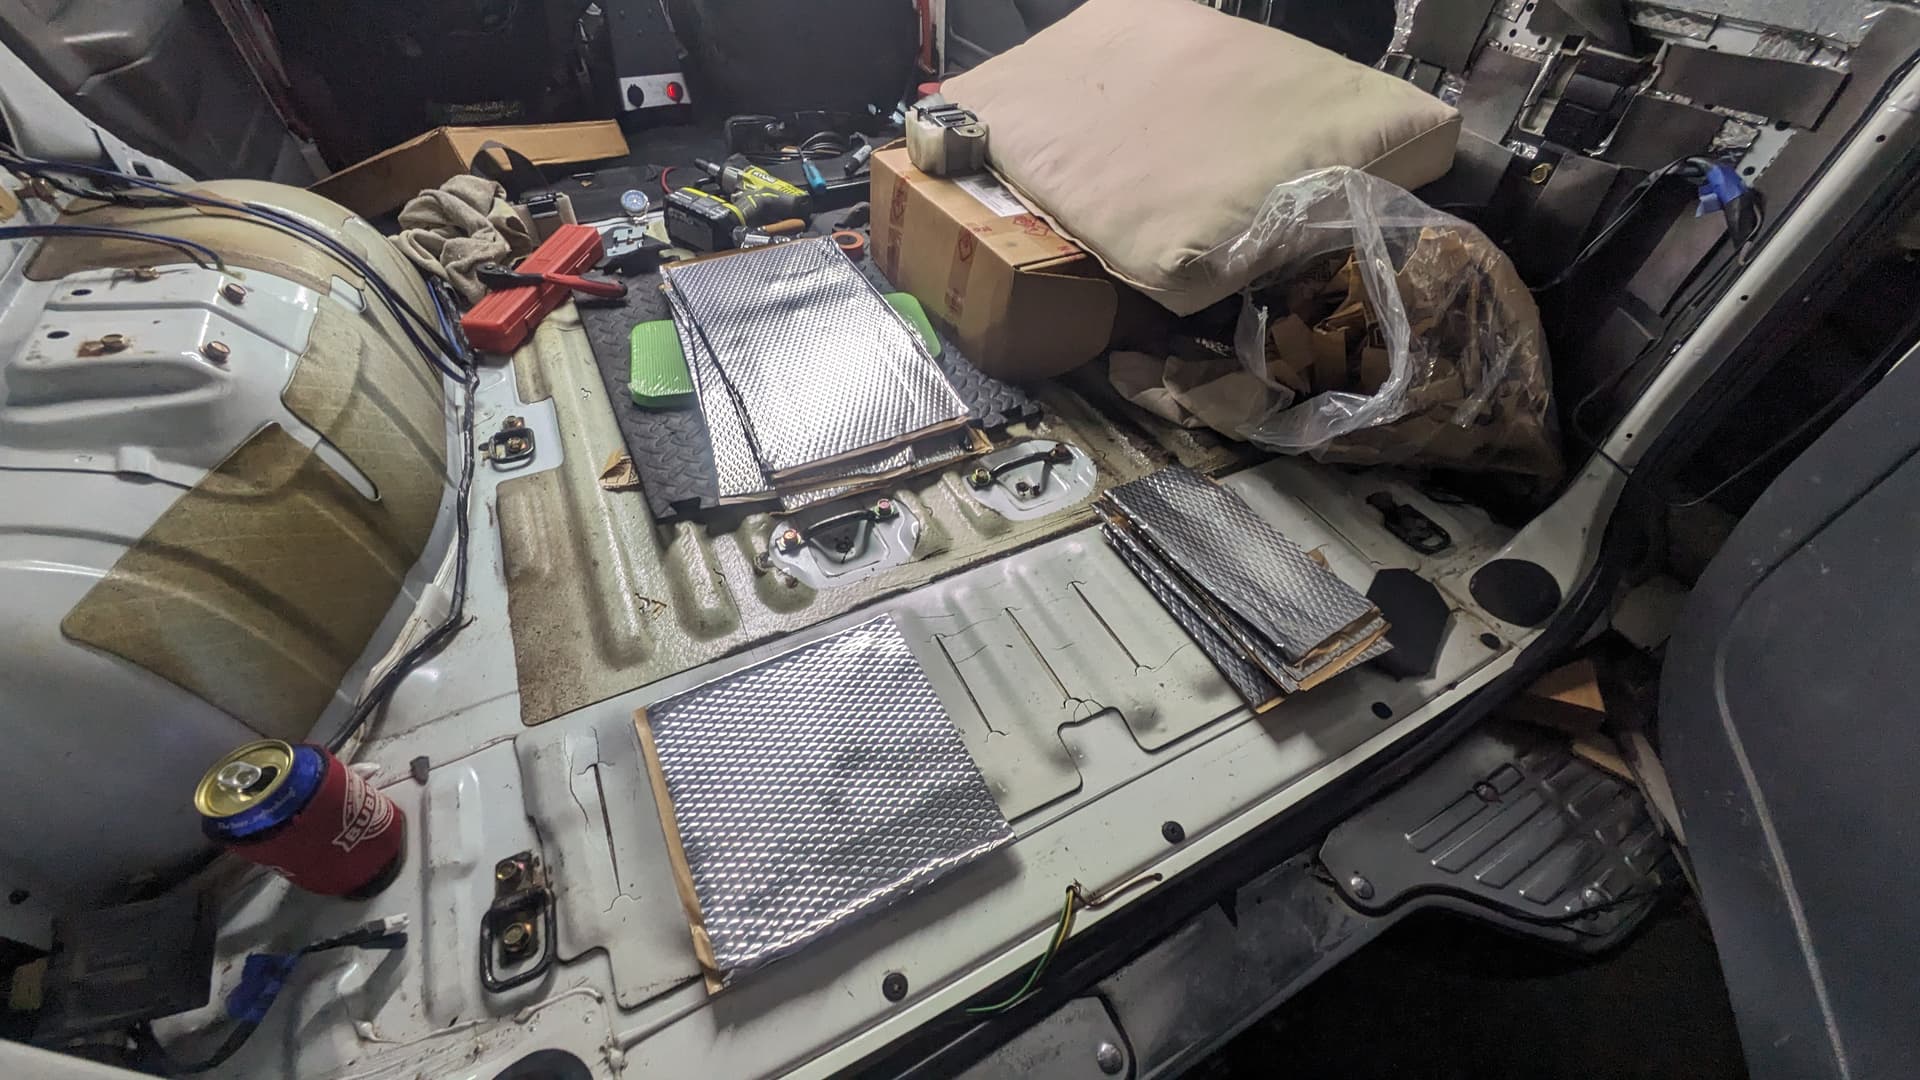
- install Noico everywhere else
- reinstall carpet
- reinstall interior
- install emergency flashers
- install seats
– refurb seats? - repaint front bumper
- reinstall Diode Dynamics SS3 fogs
- reinstall & connect the big Lightforce “oscars”
- install new ADD flood/ditch lights
- install new ADD reverse lights
- replace rear suspension bushings
- install panhard bar
That’s clearly more than I can get done in a single month, but I know I can make a serious progress.
1 Like
Journey to the Heater Core Ep. 2
While I got Fezzik into the garage and made some serious progress, I am currently behind schedule and looking at closer to end of September before I’m done. Turns out I overdid it the week the girls were out of town and it took me a couple weeks to physically recover.
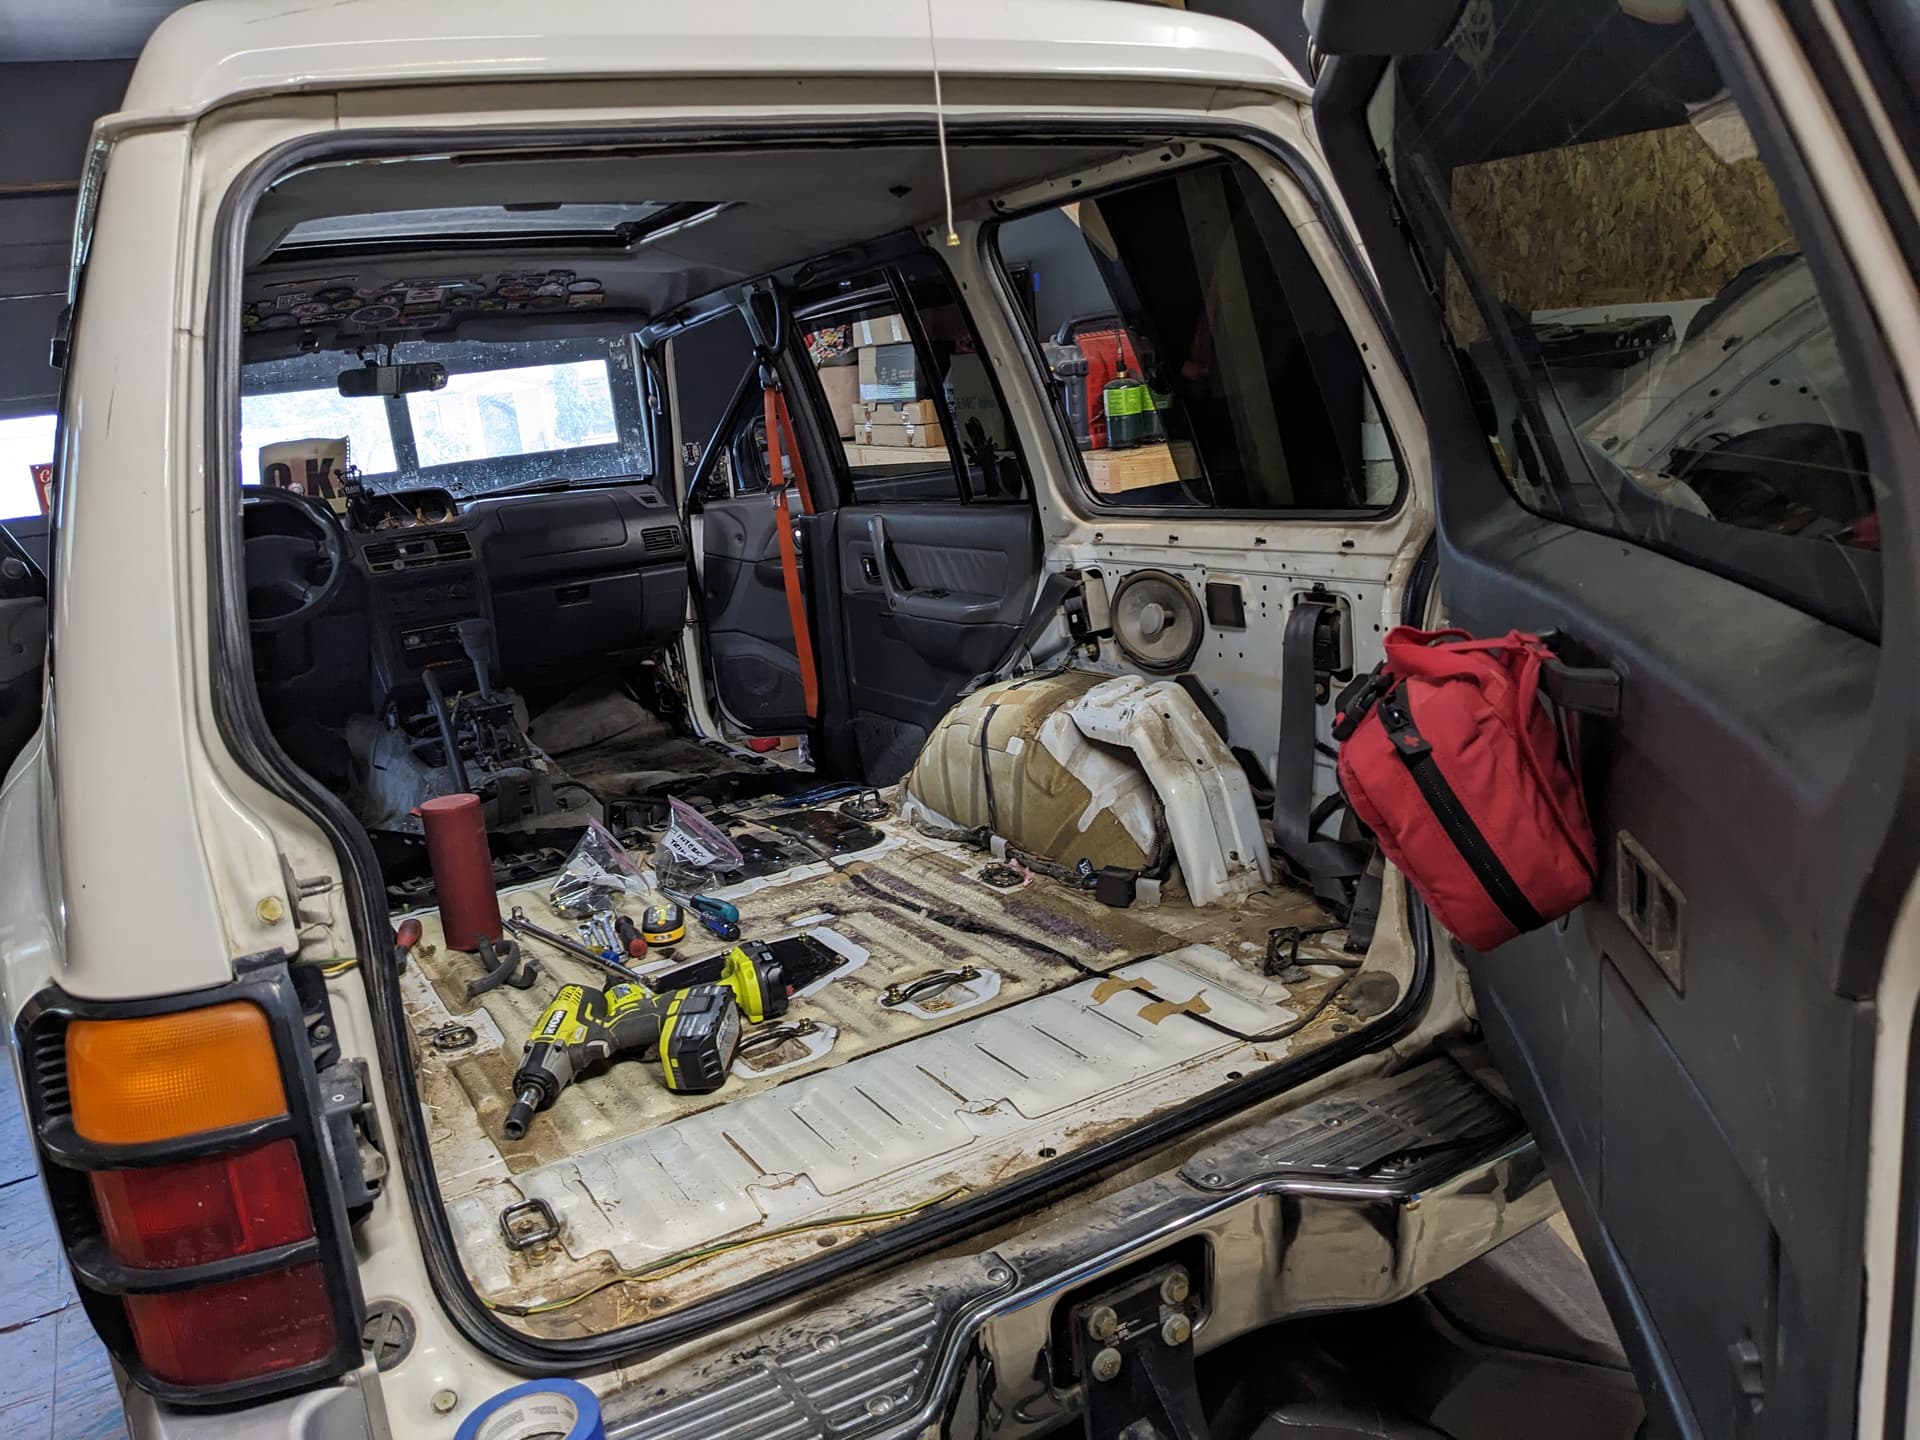
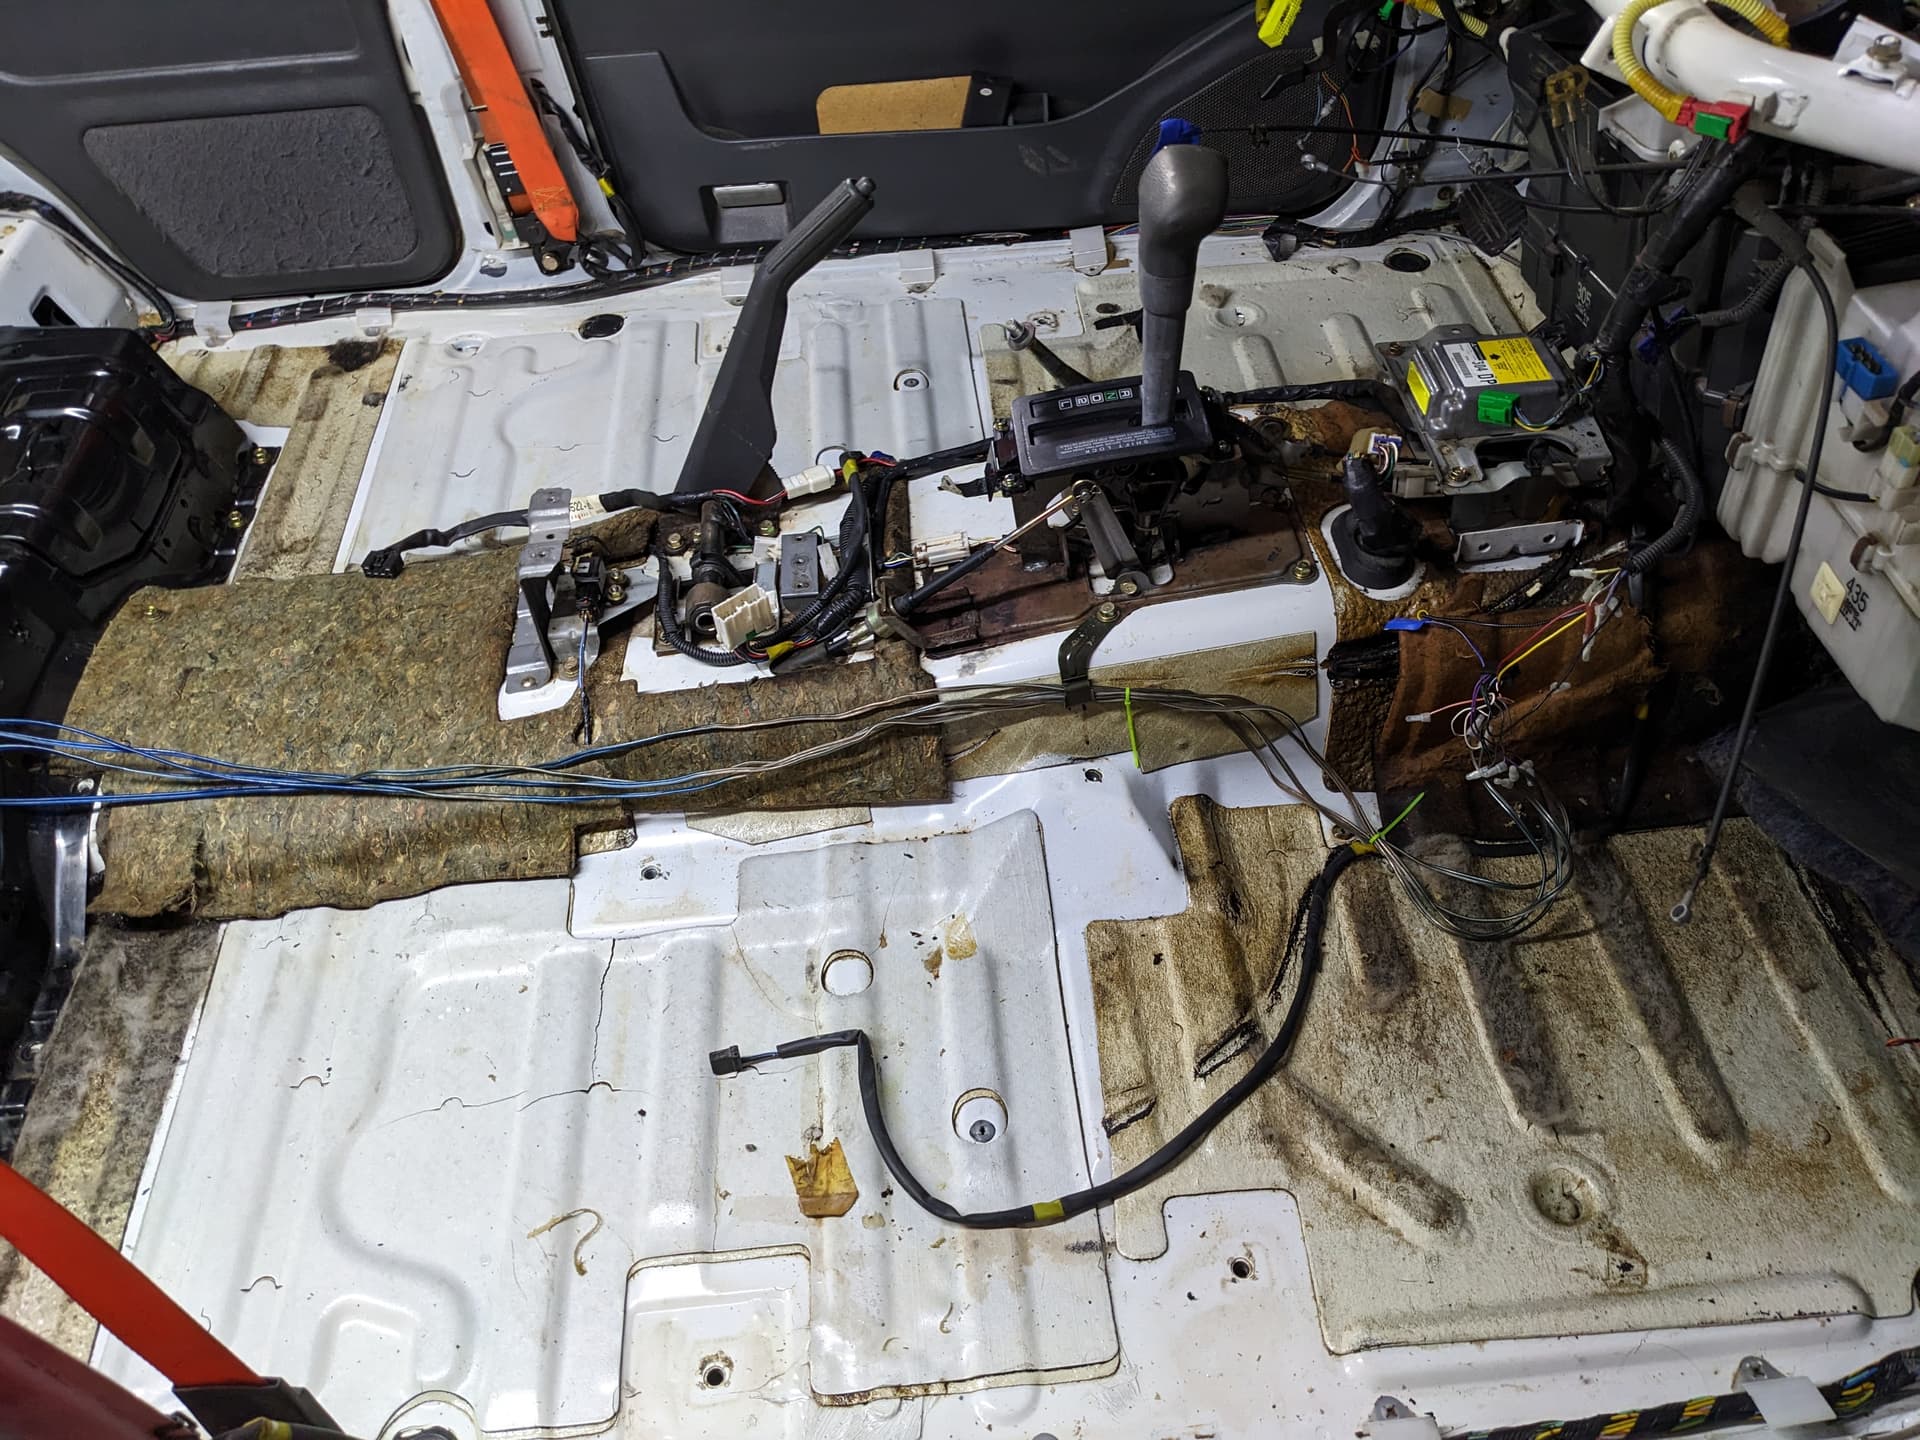
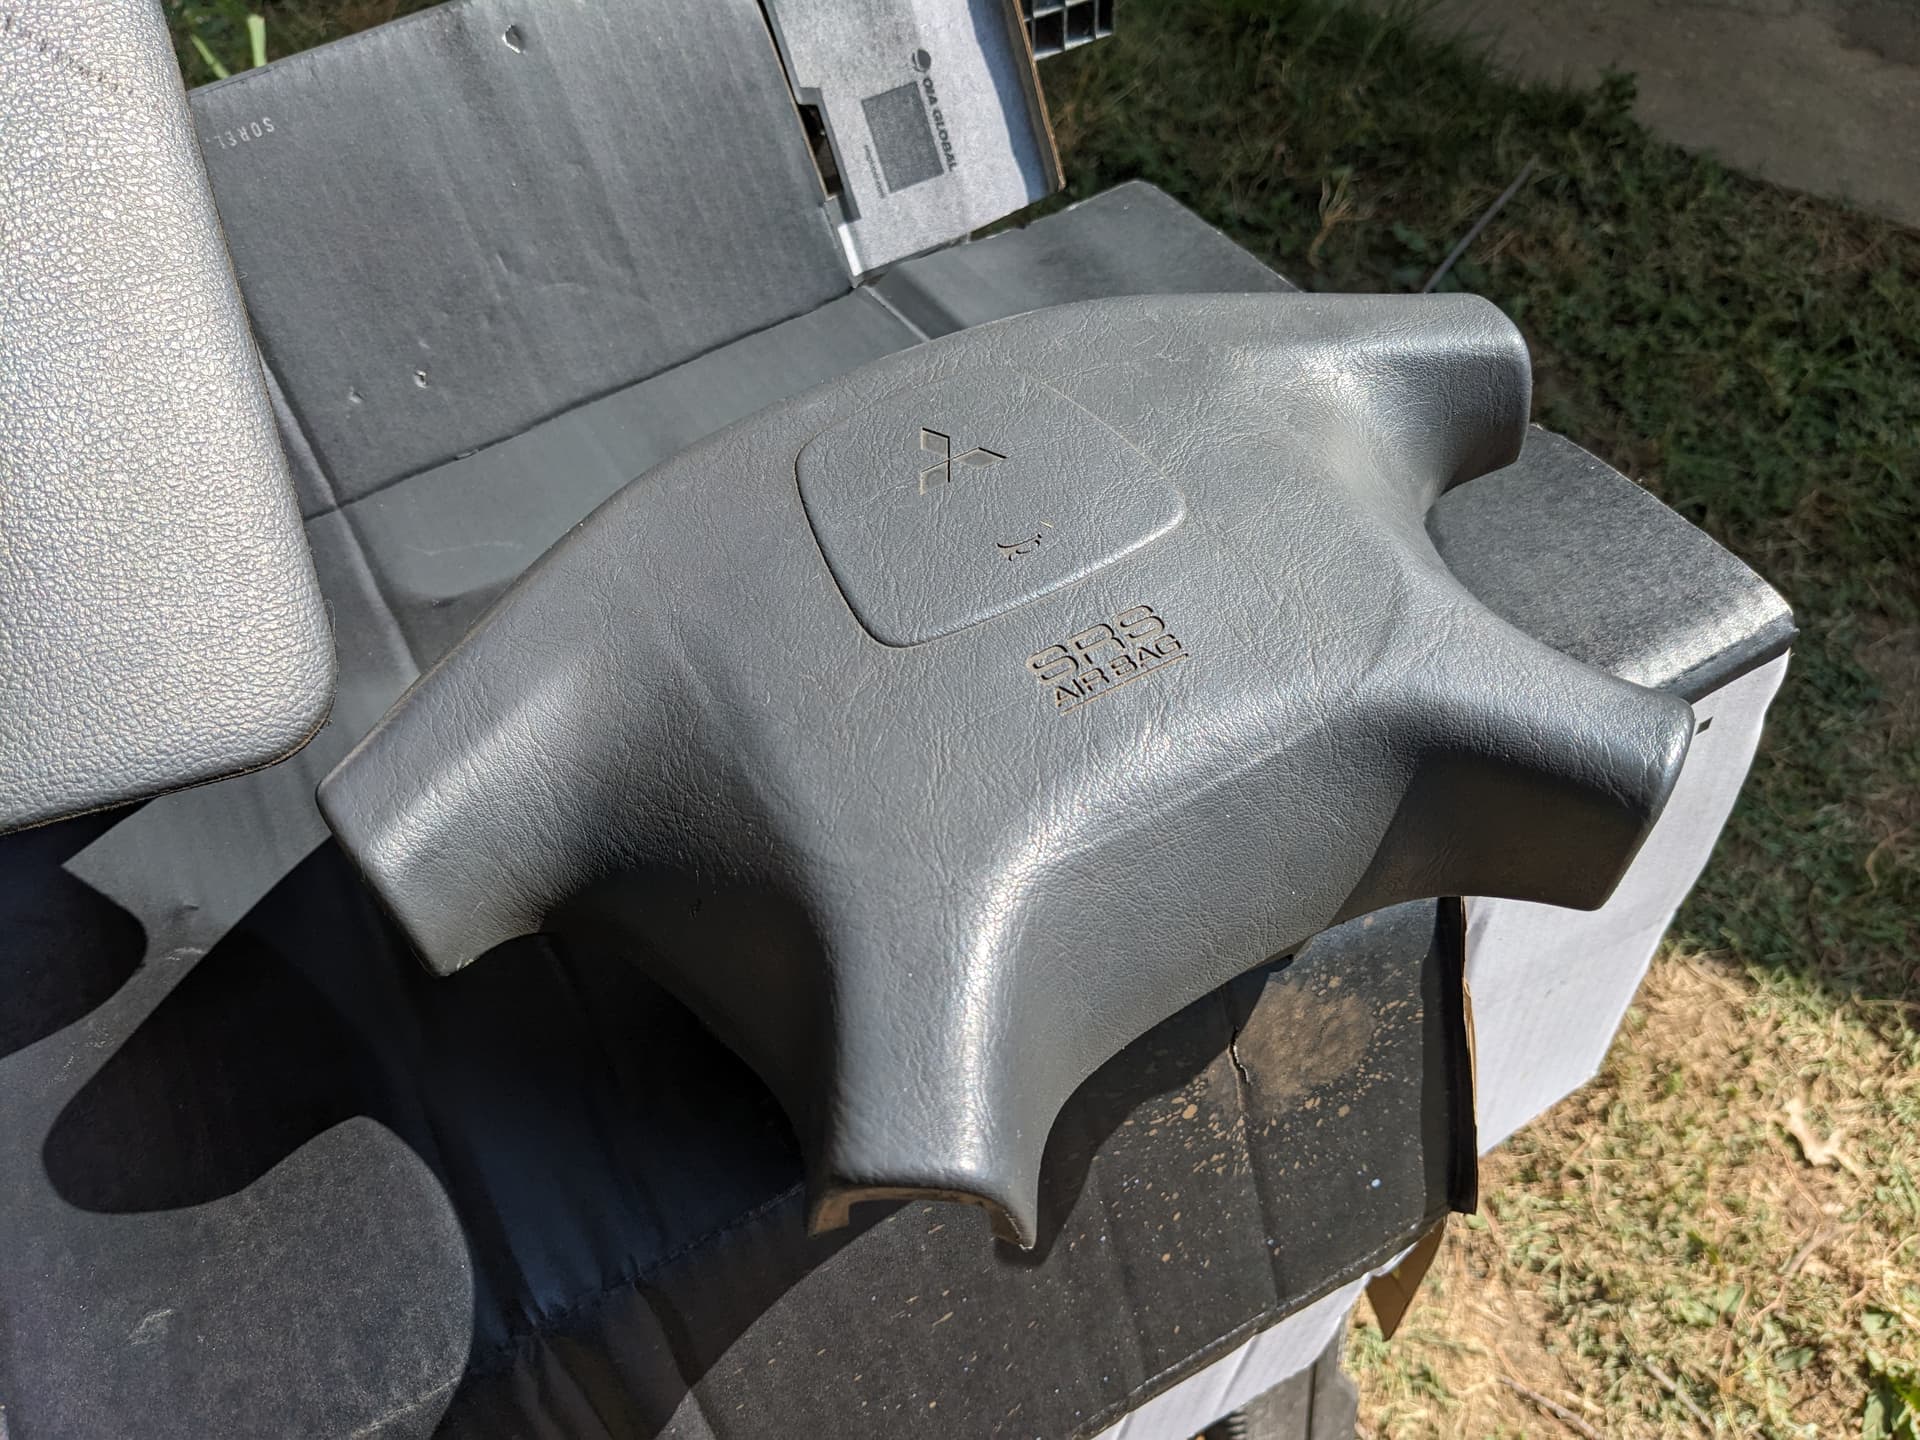
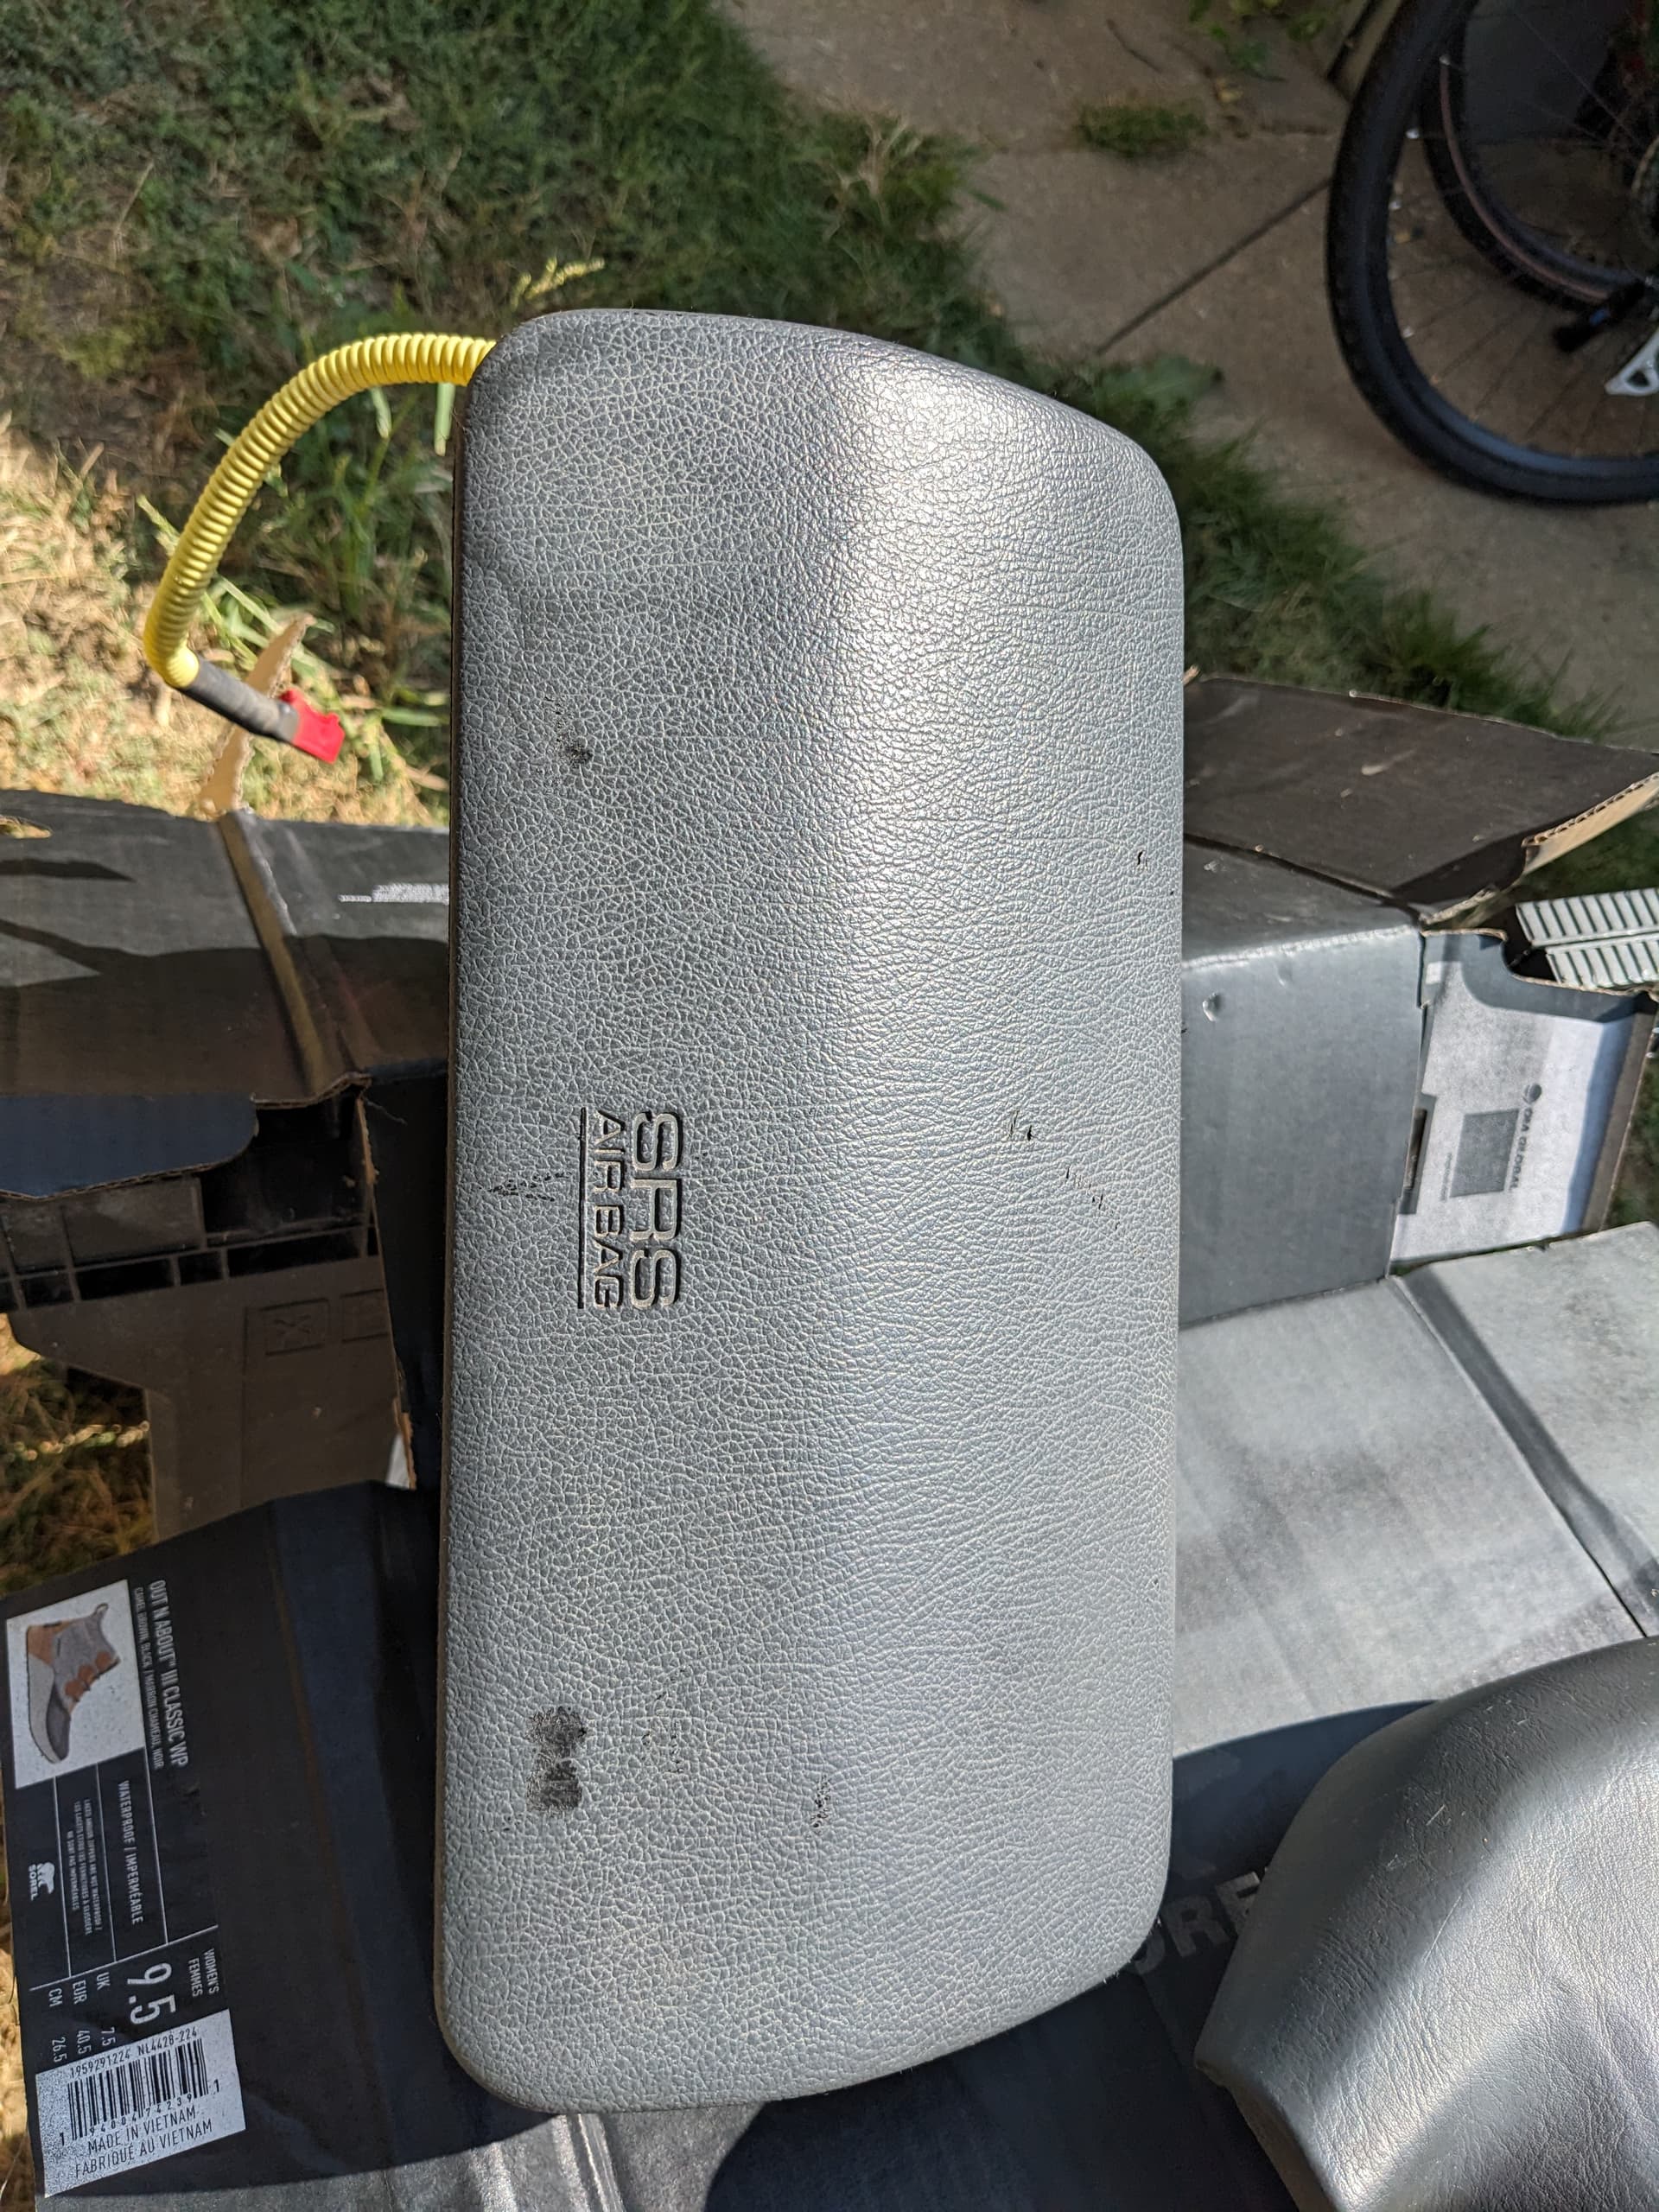
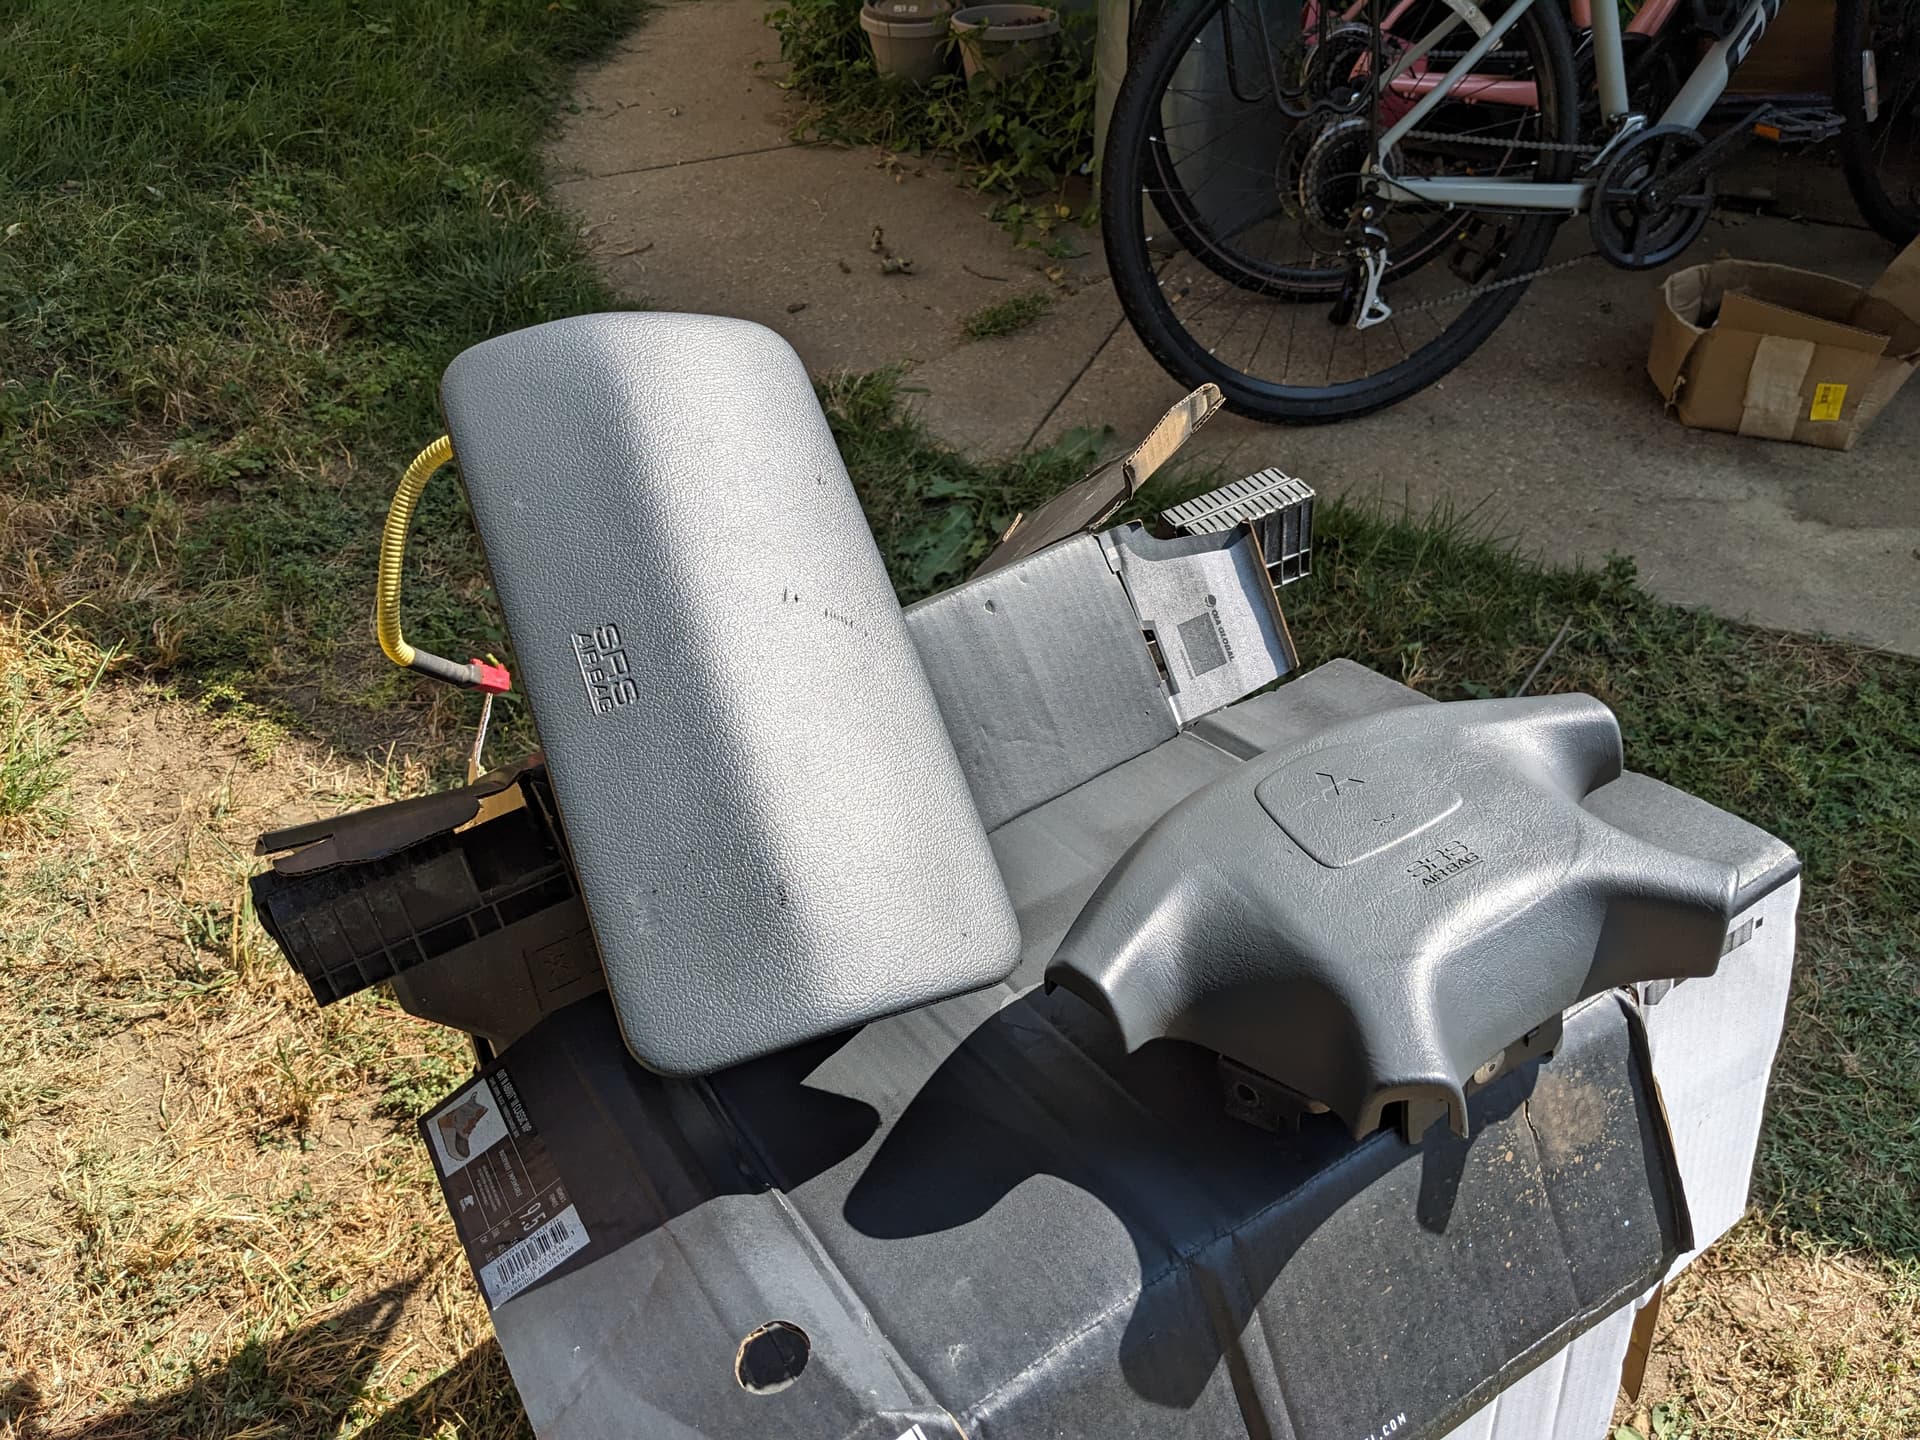
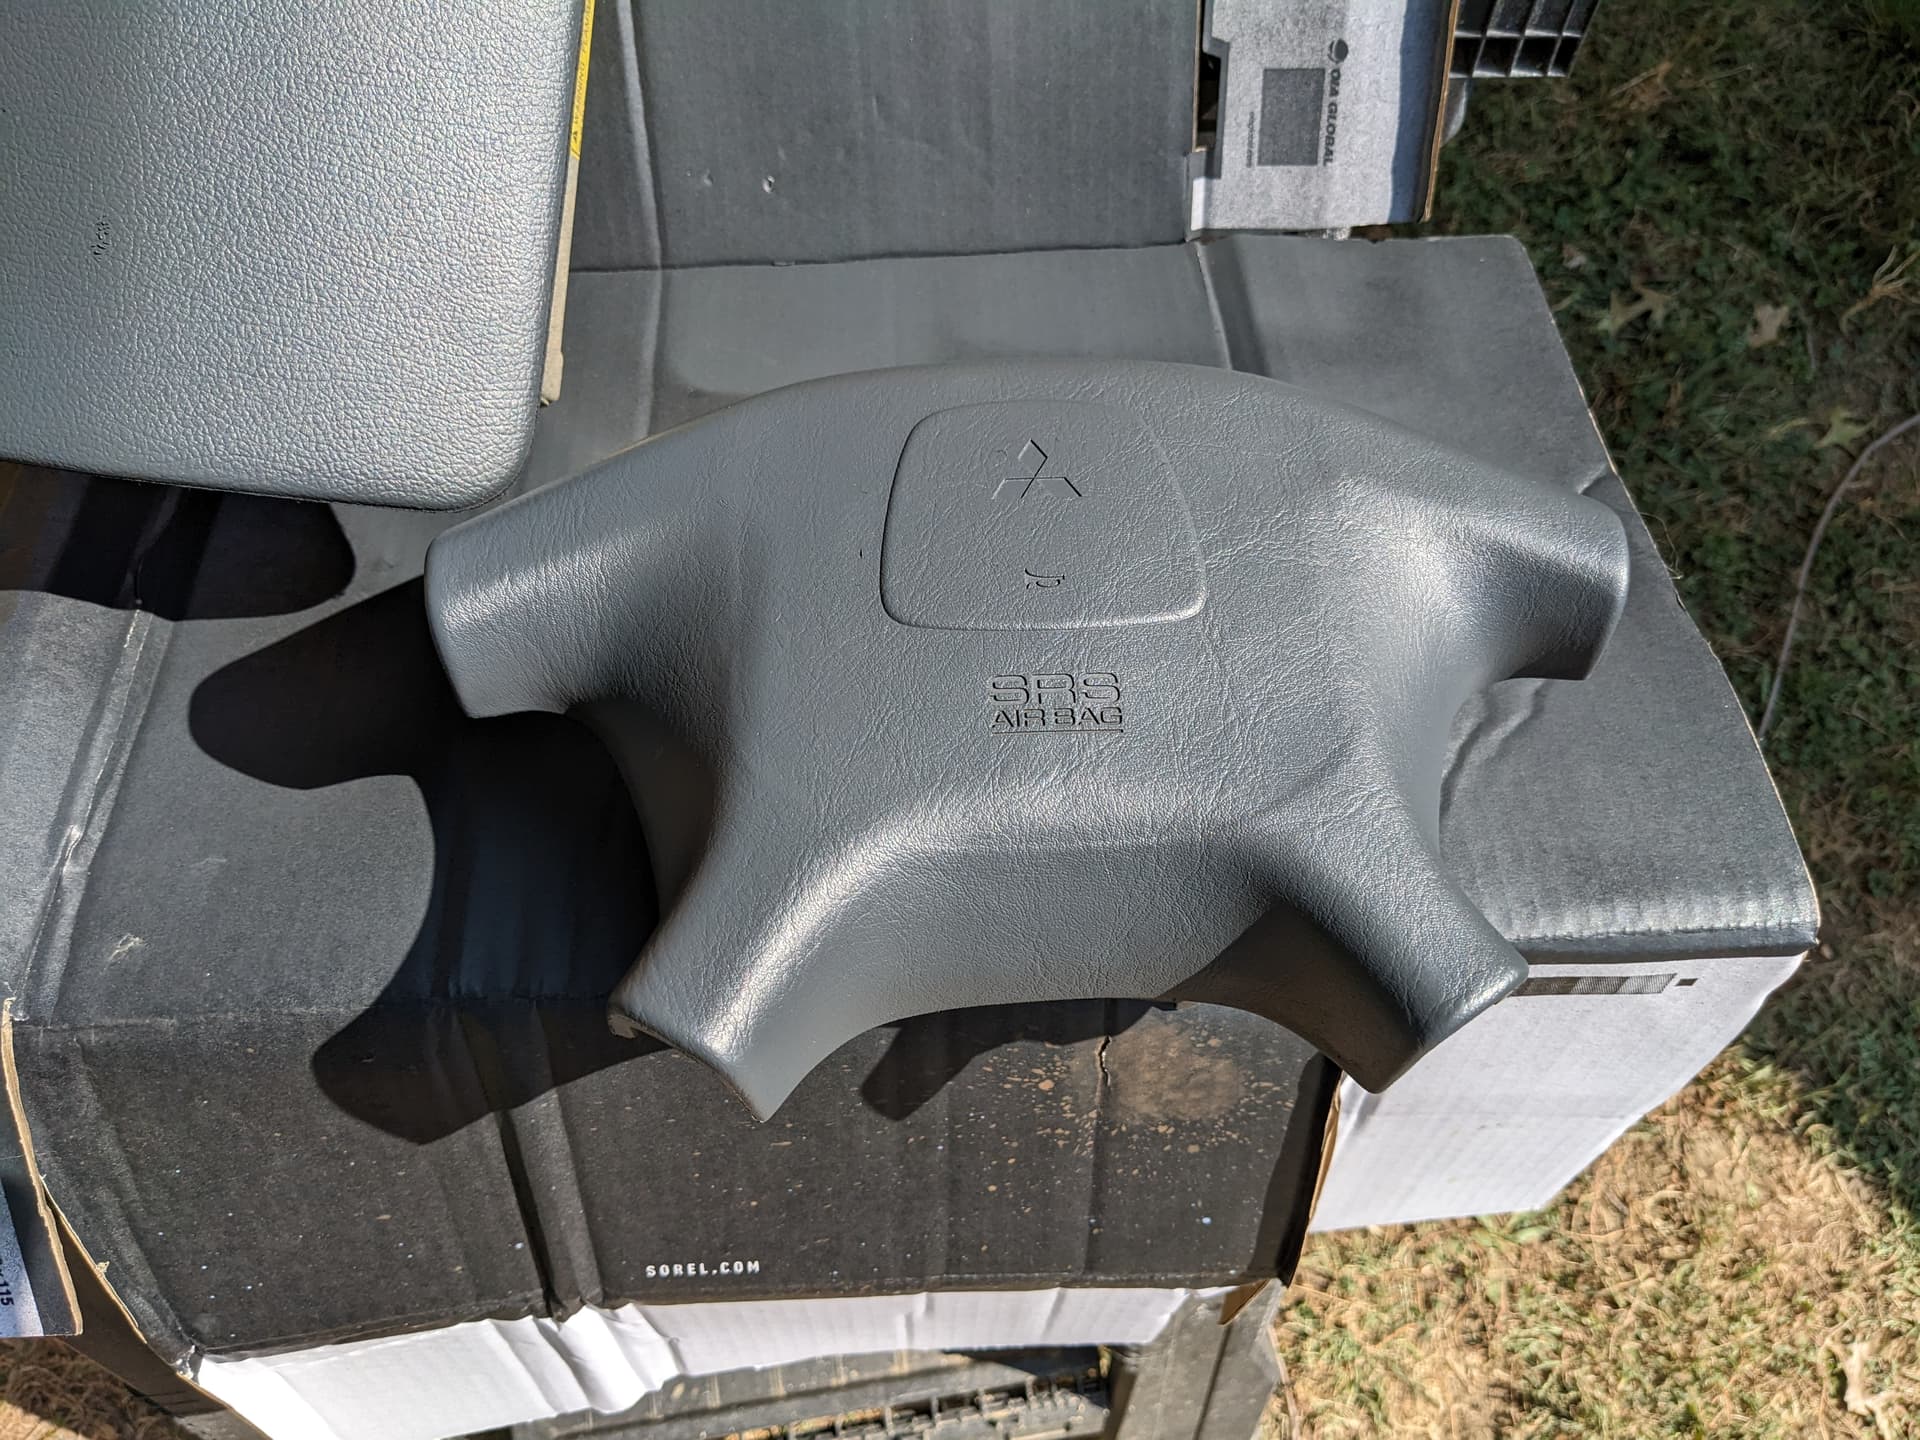
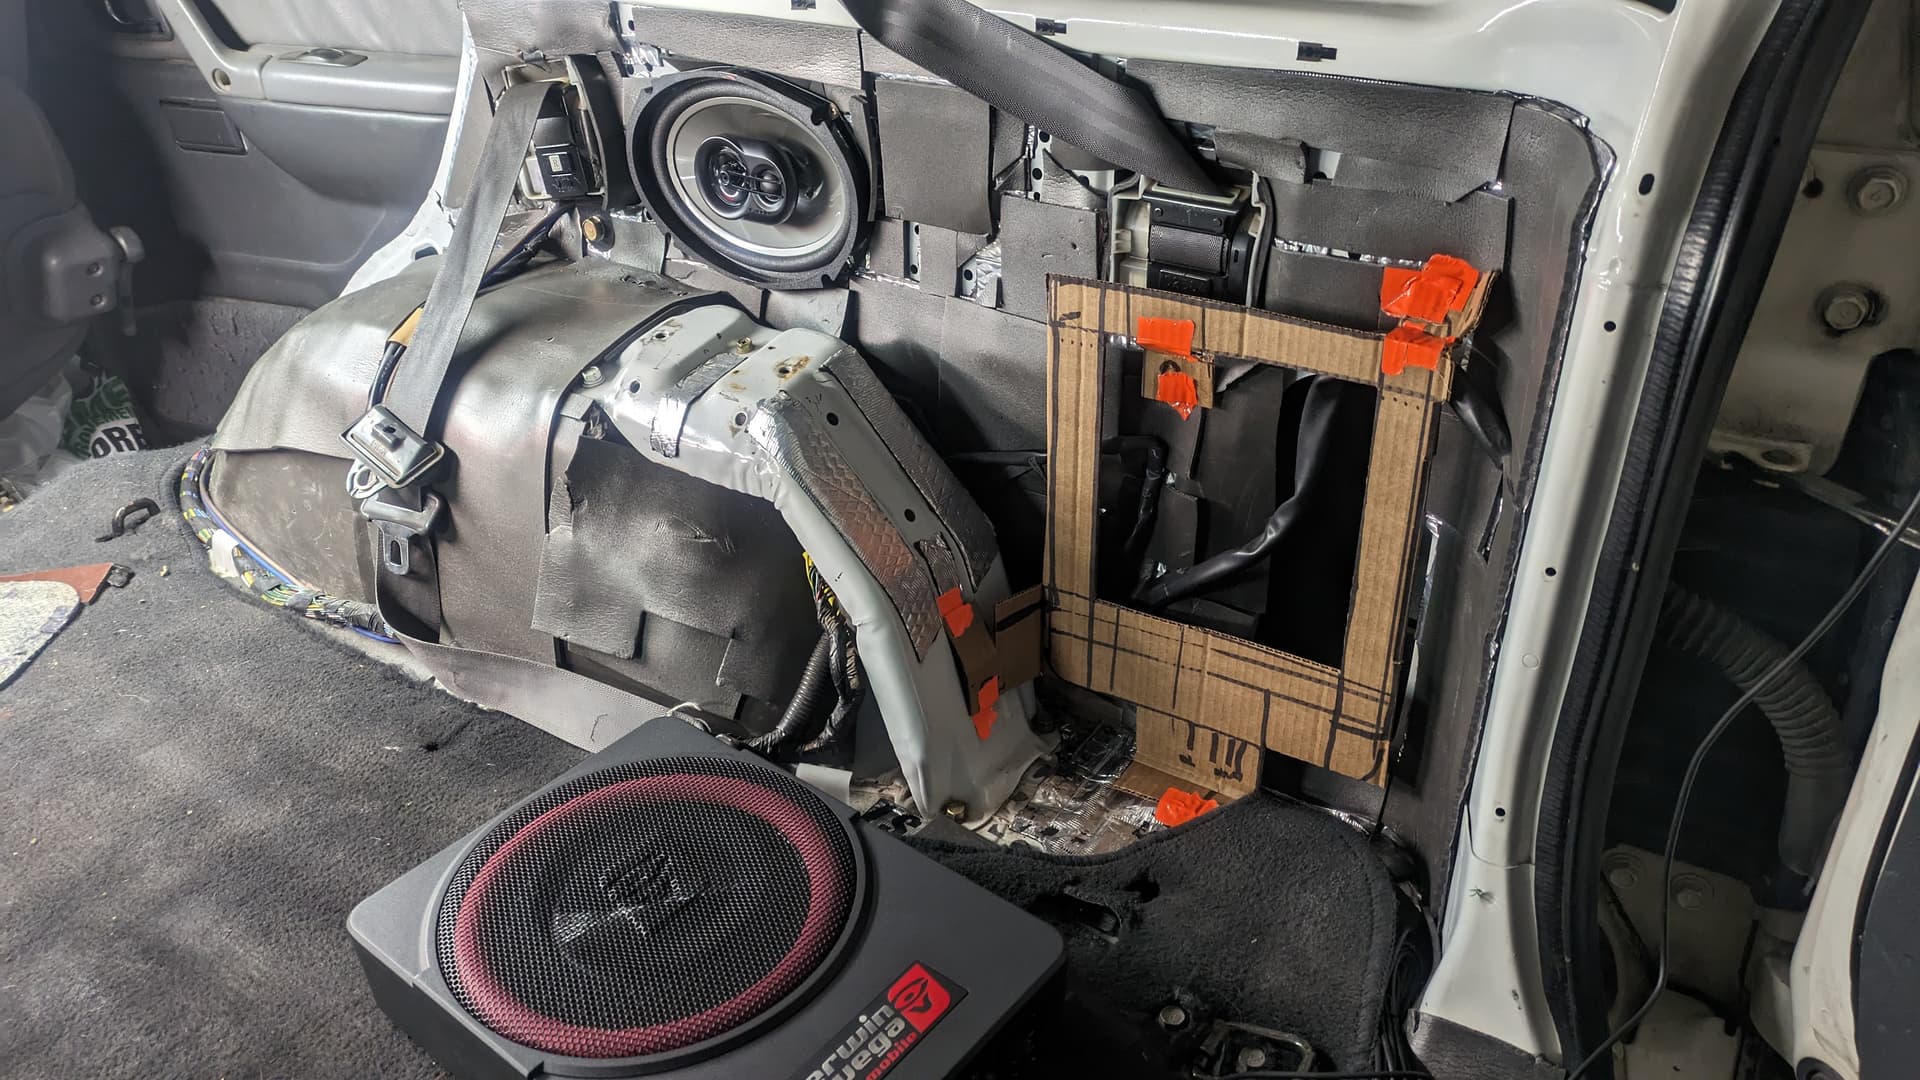
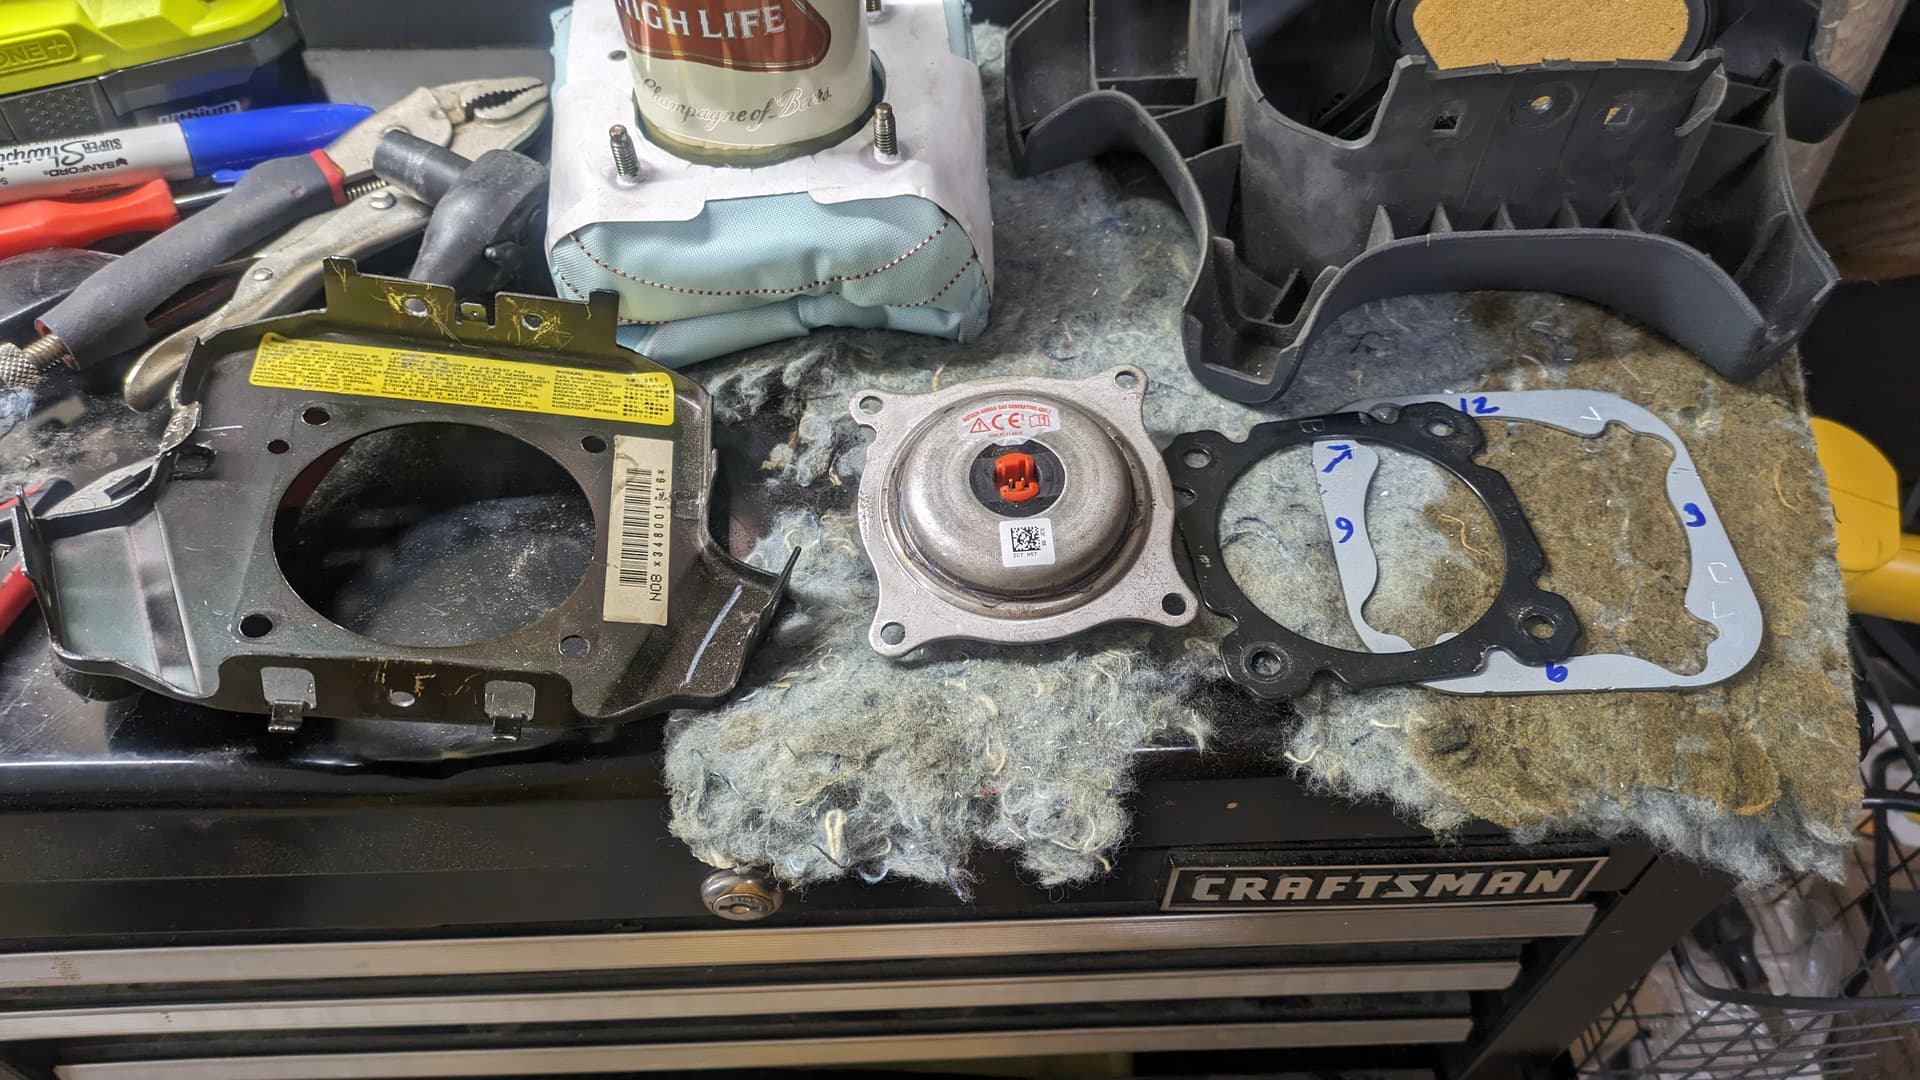
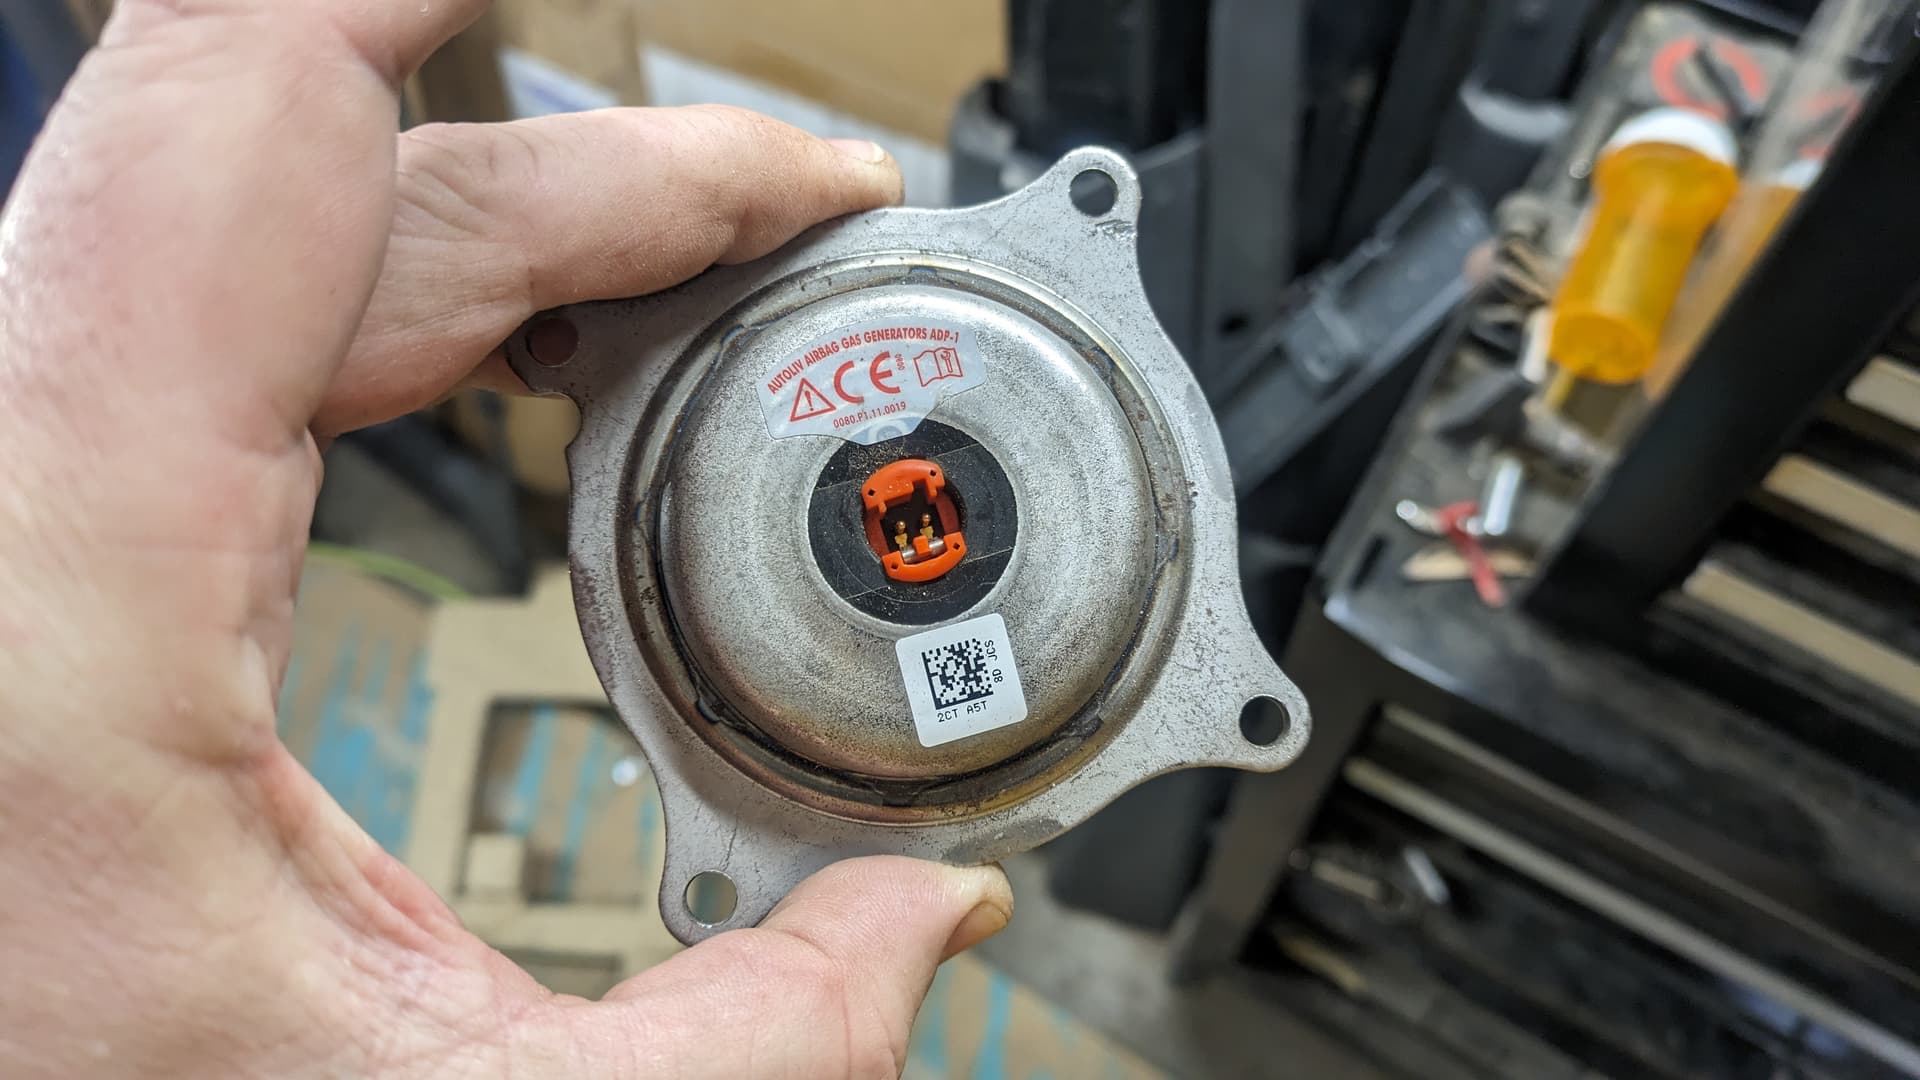
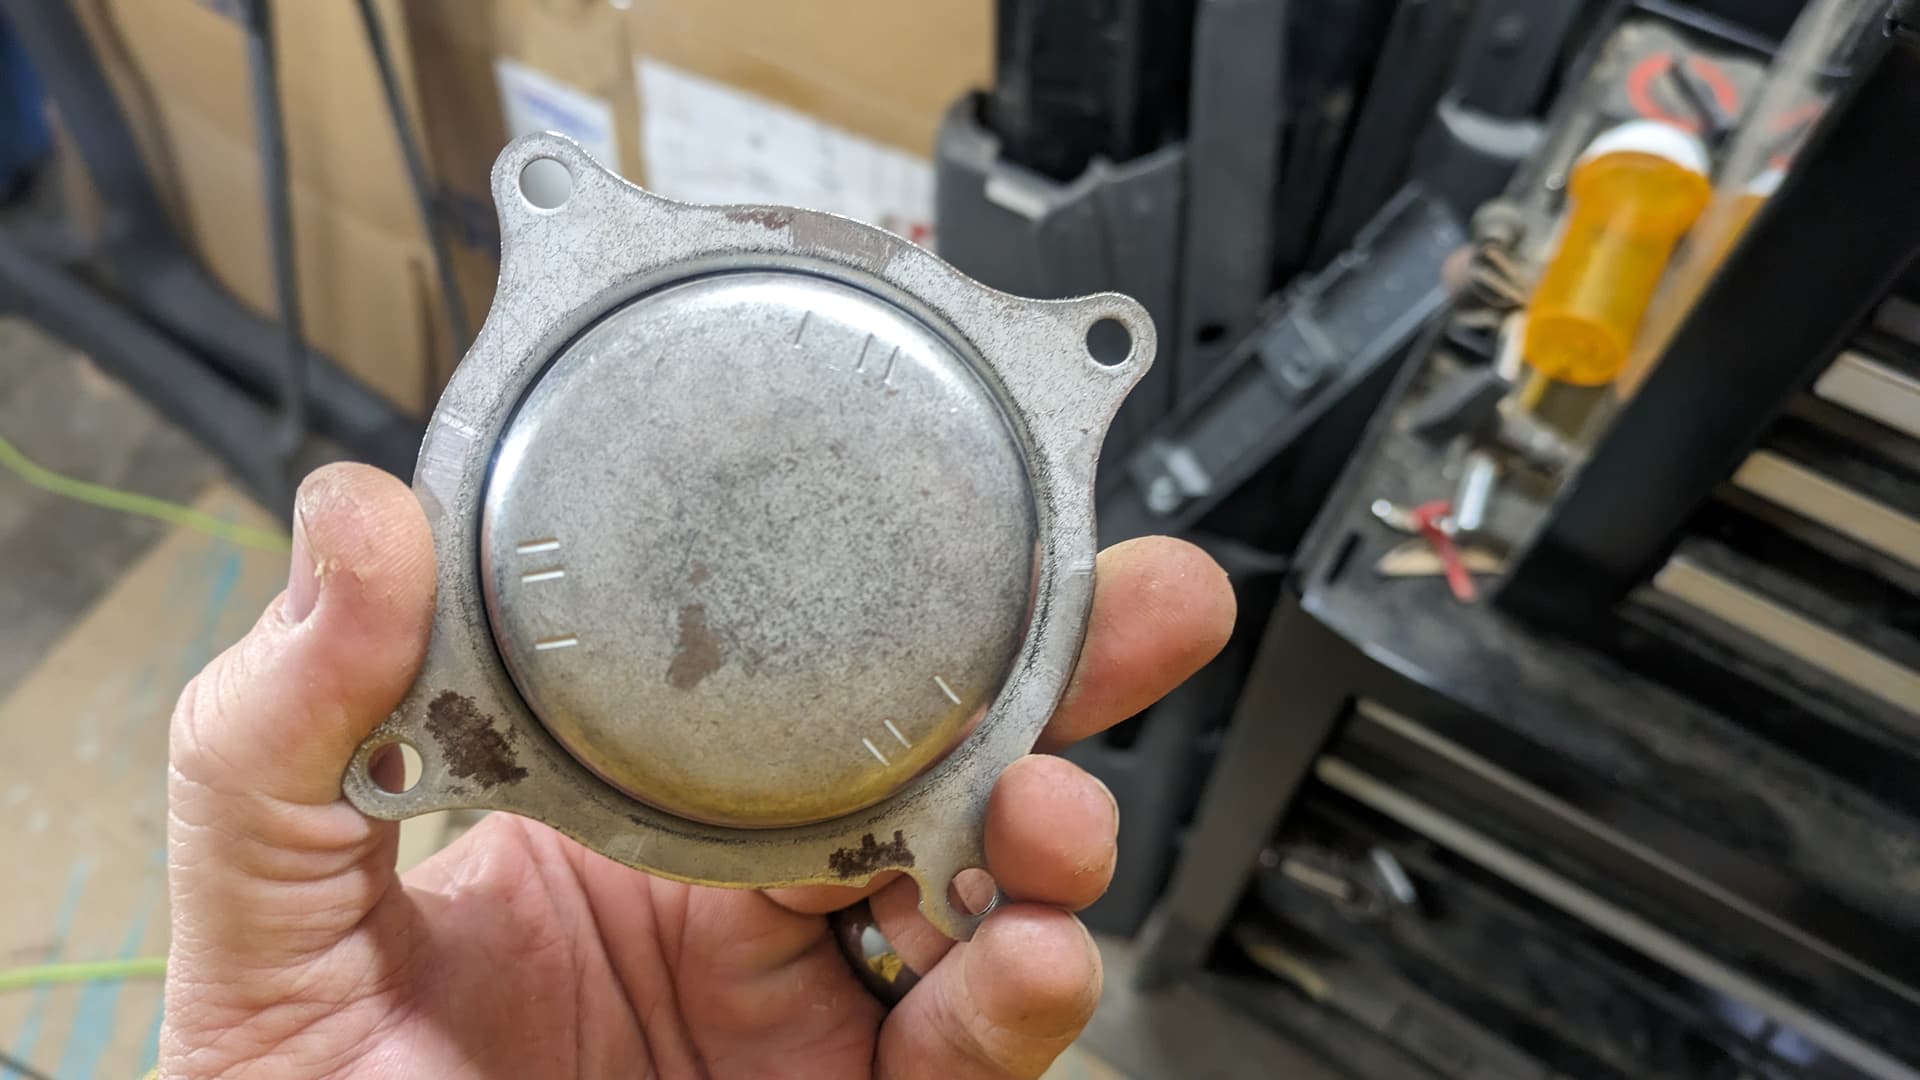
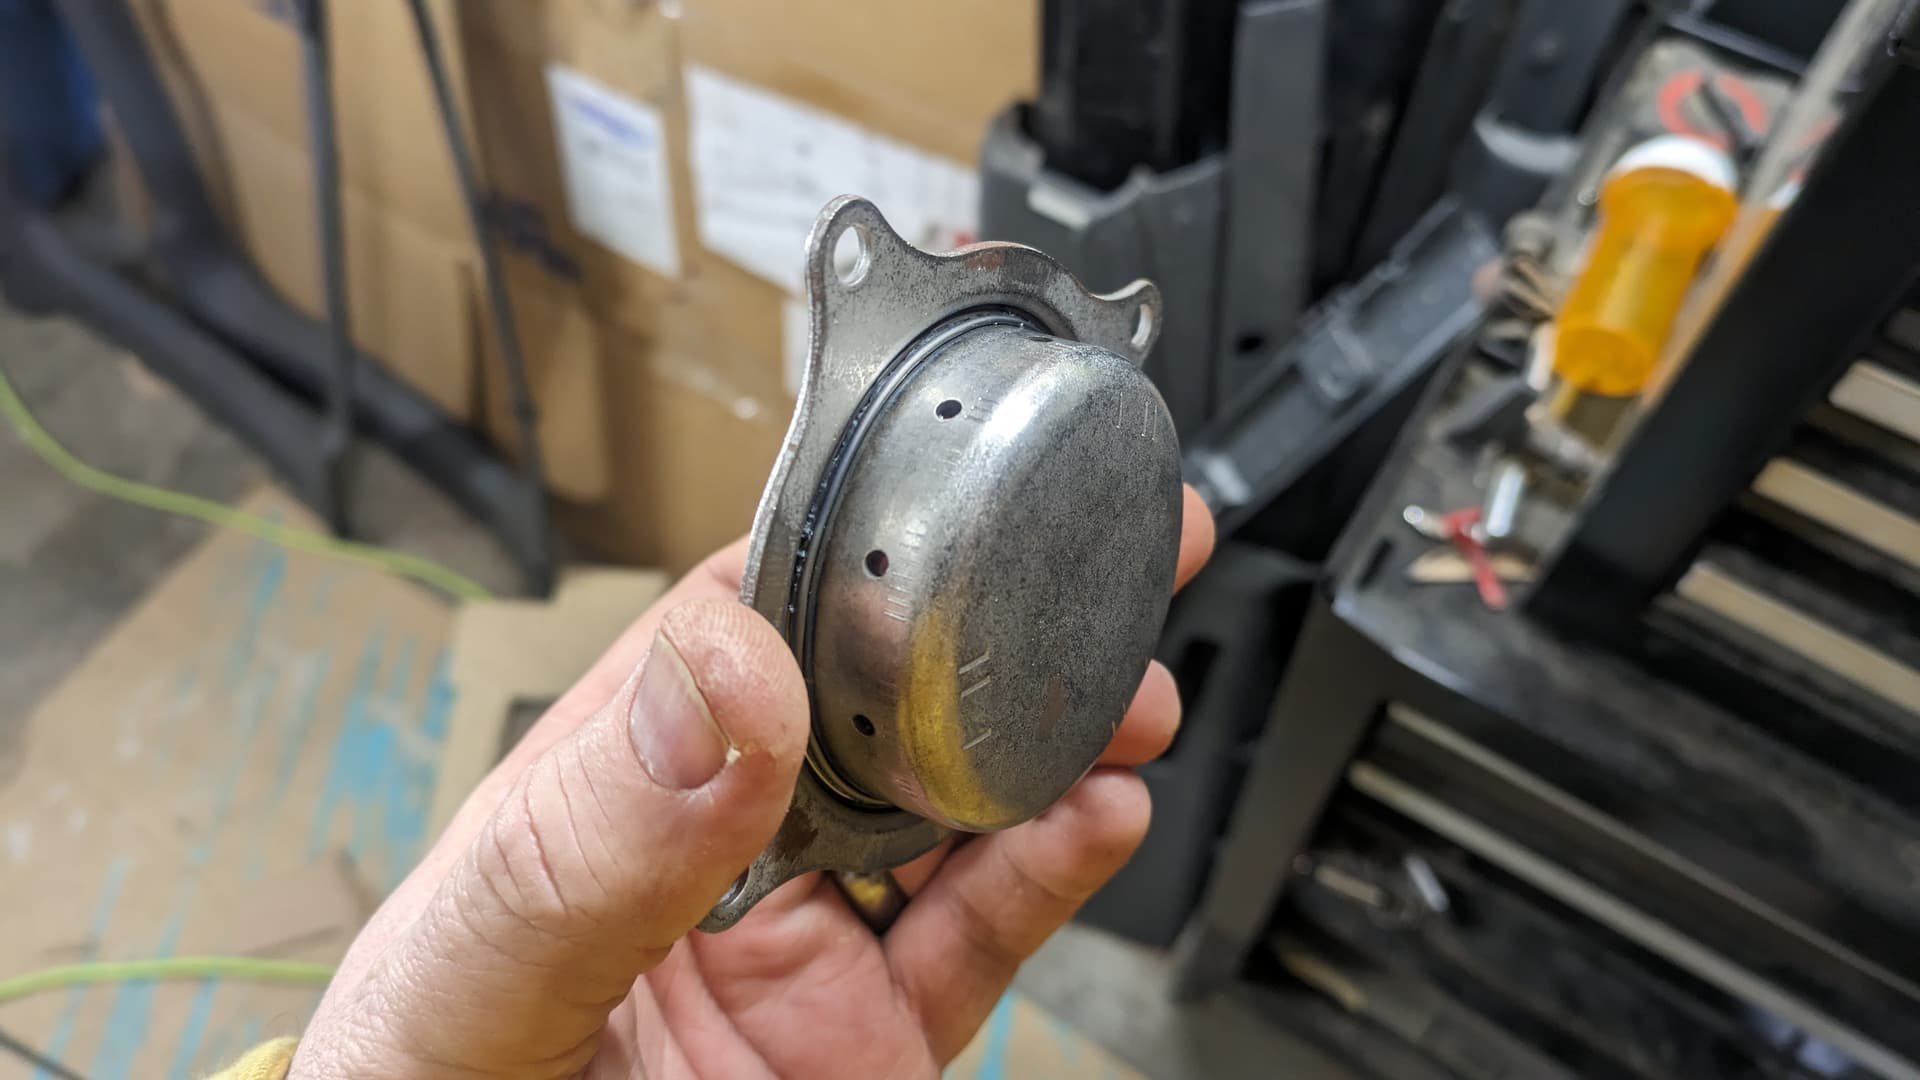
The following pics were taken a couple days after the last one, above. Since then, I’ve removed the airbags.
That’s it. And Fezzik isn’t currently drivable while the dash is broken down and the steering wheel is pulled.
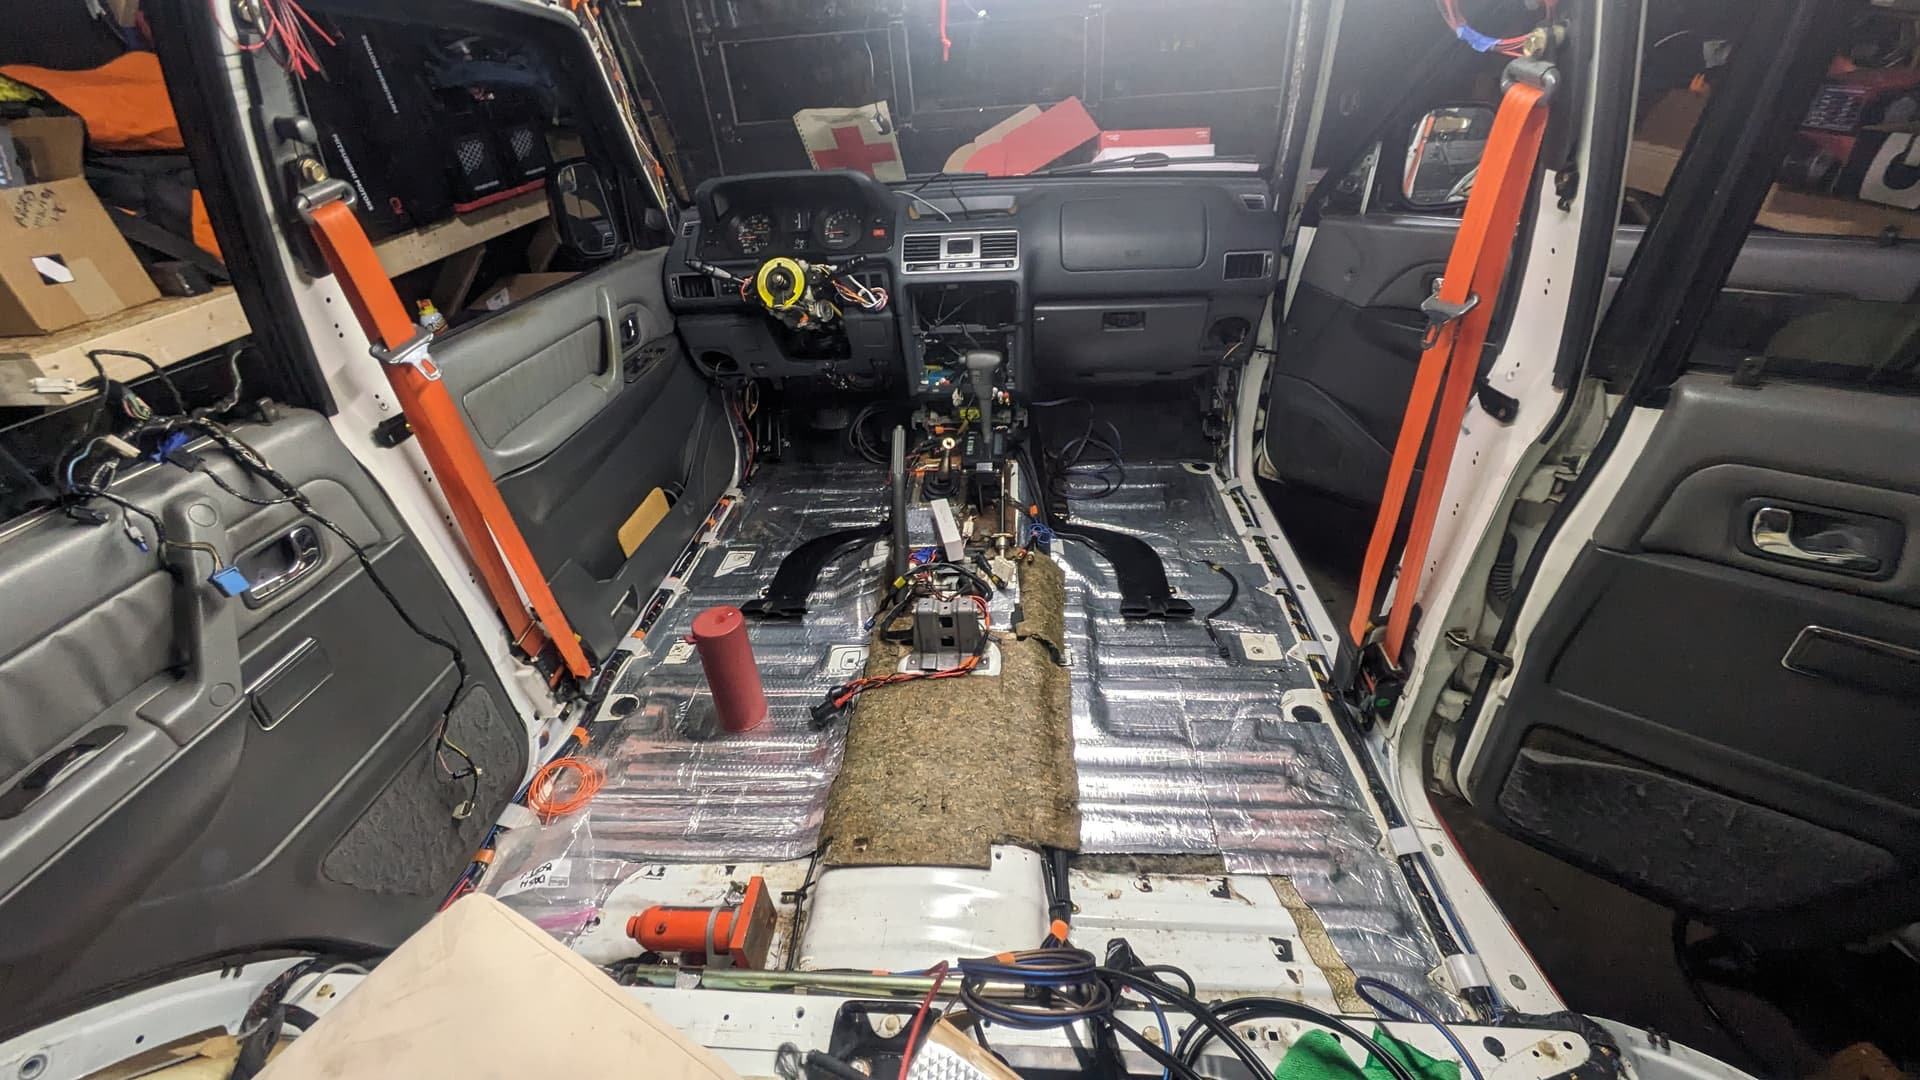
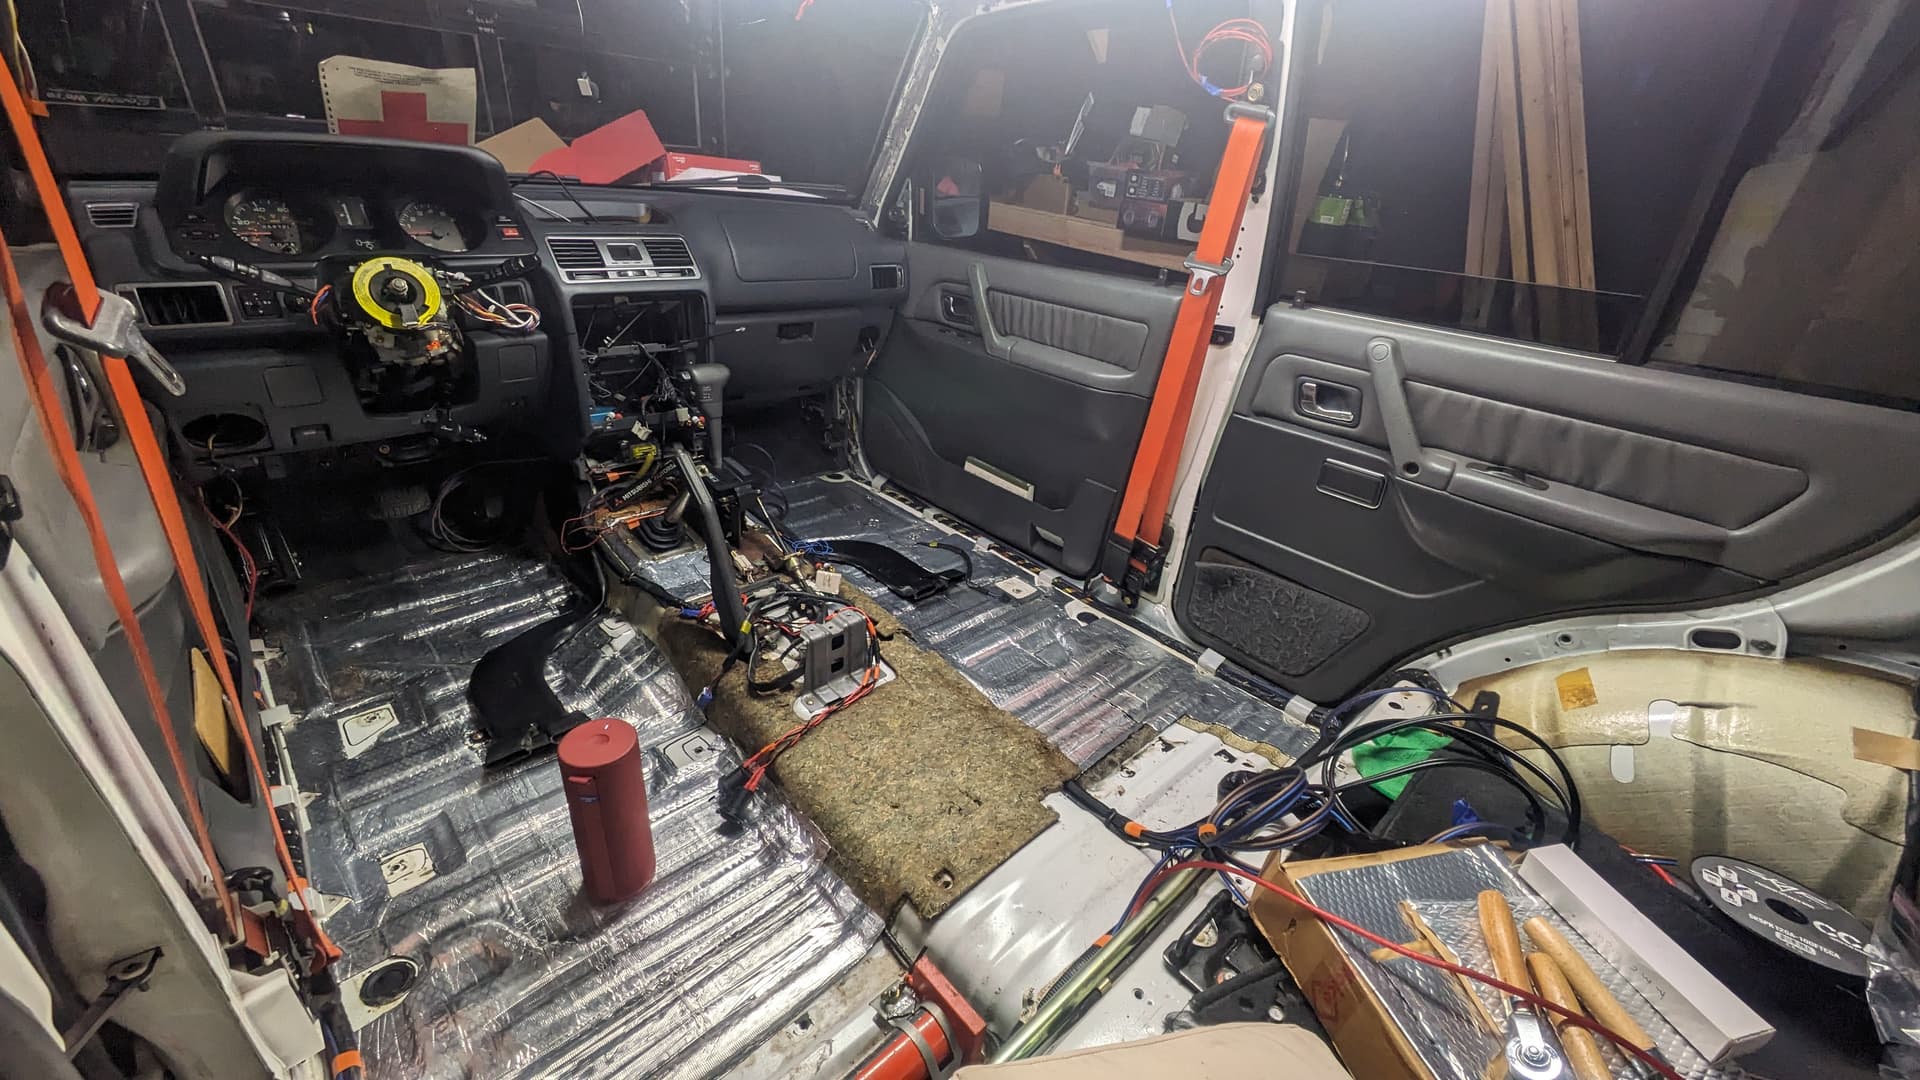
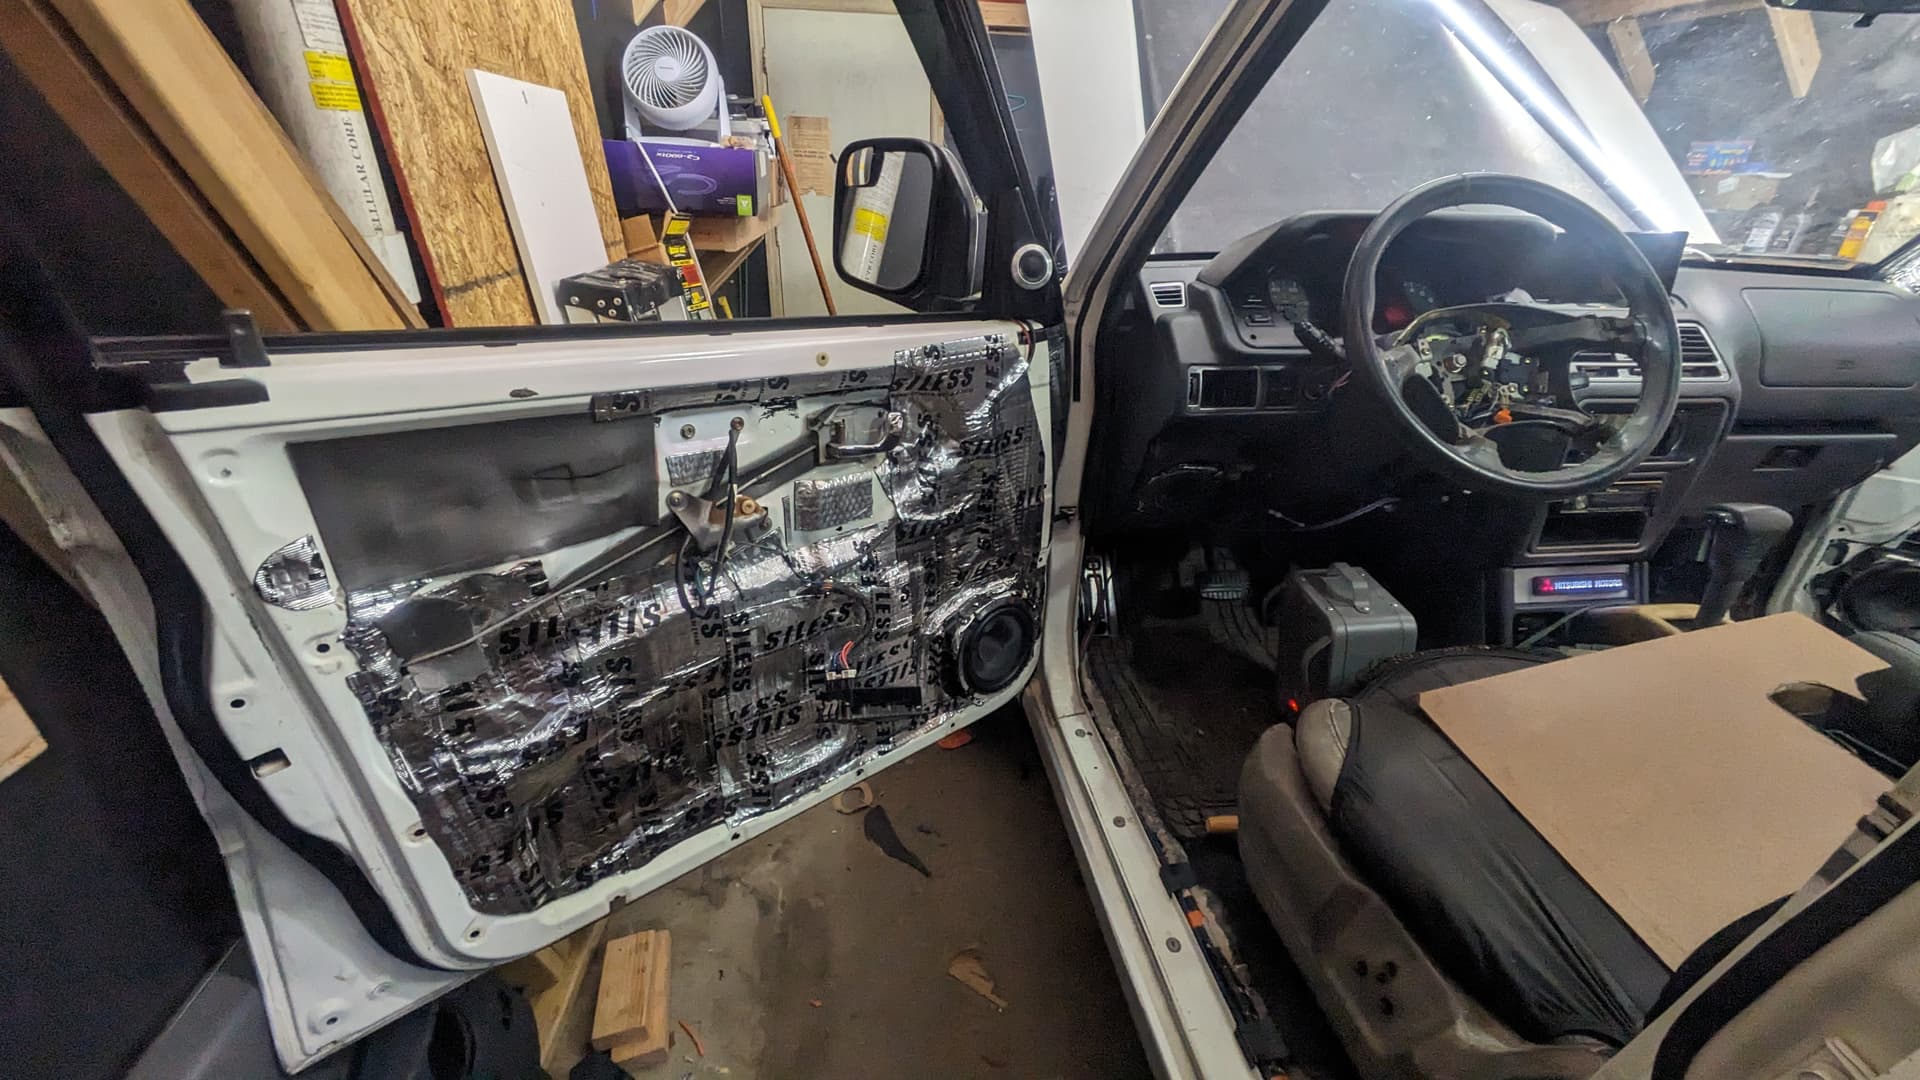
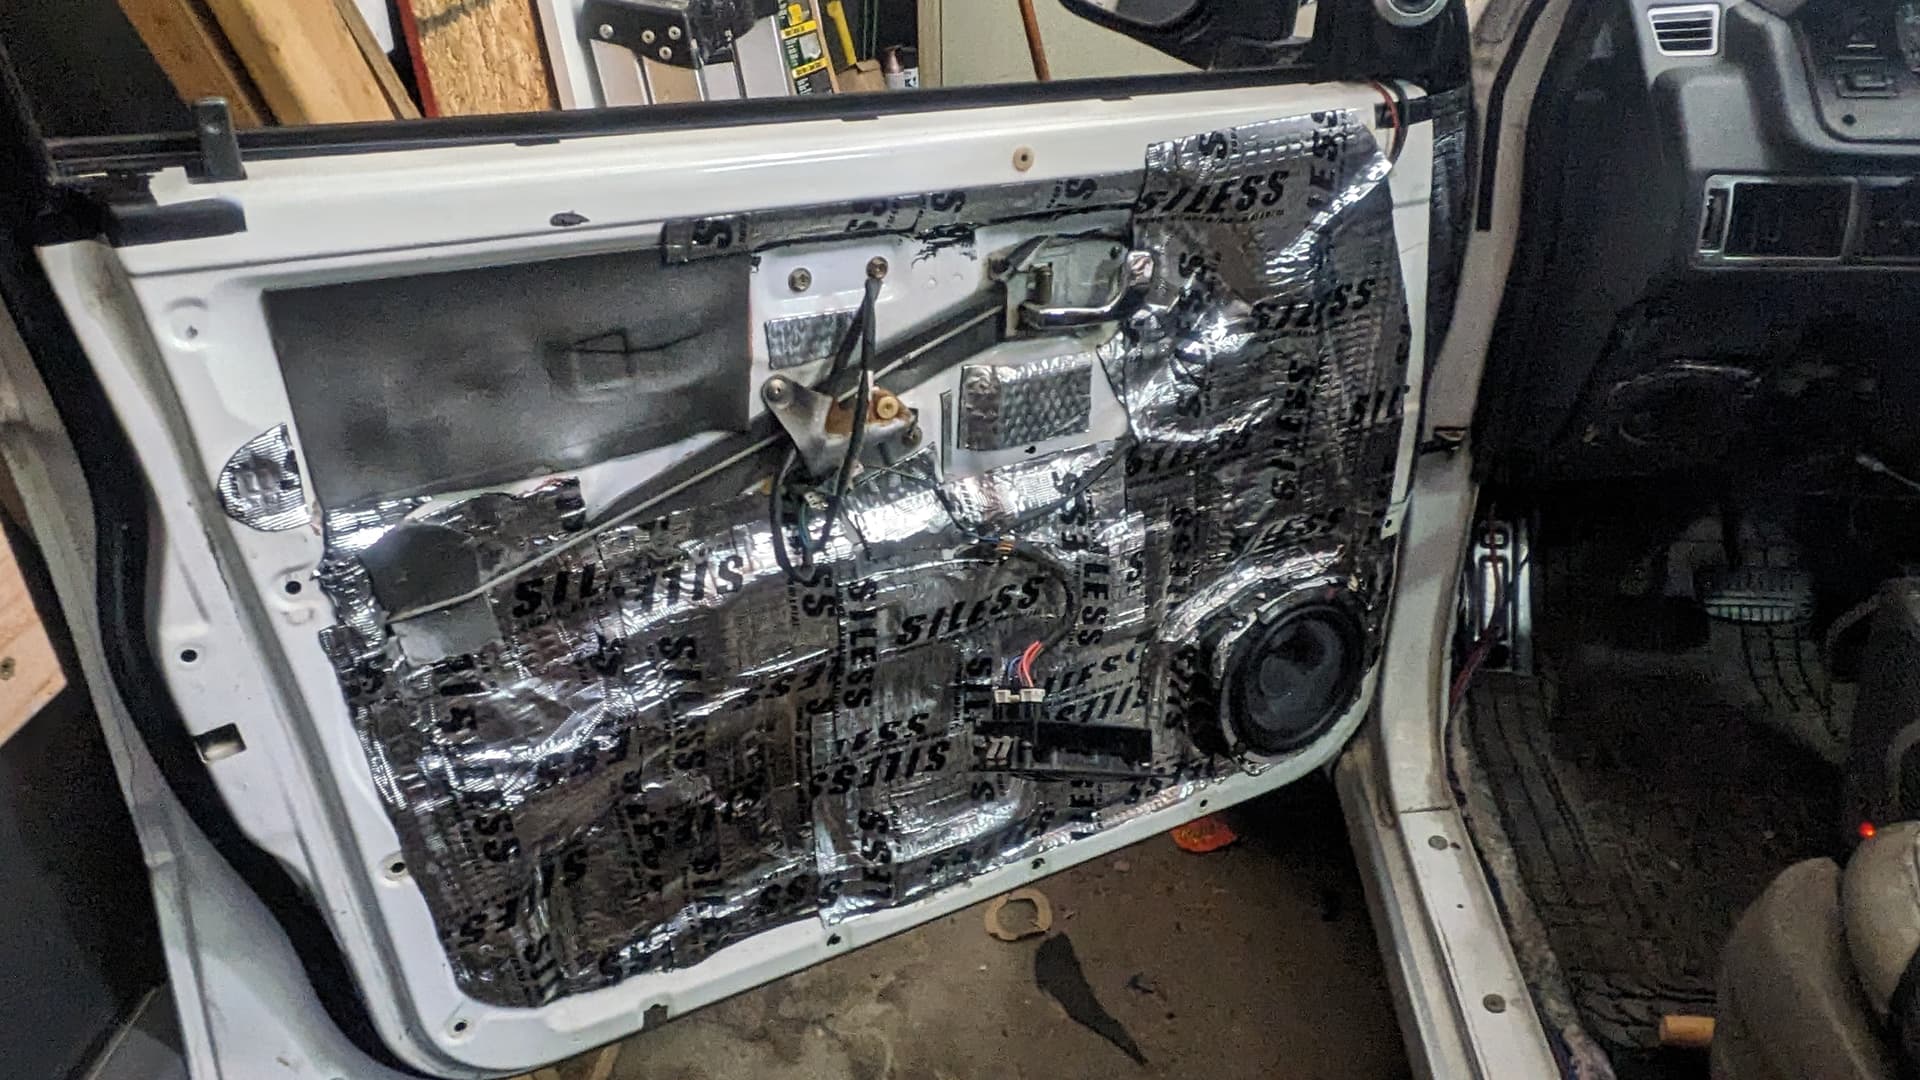
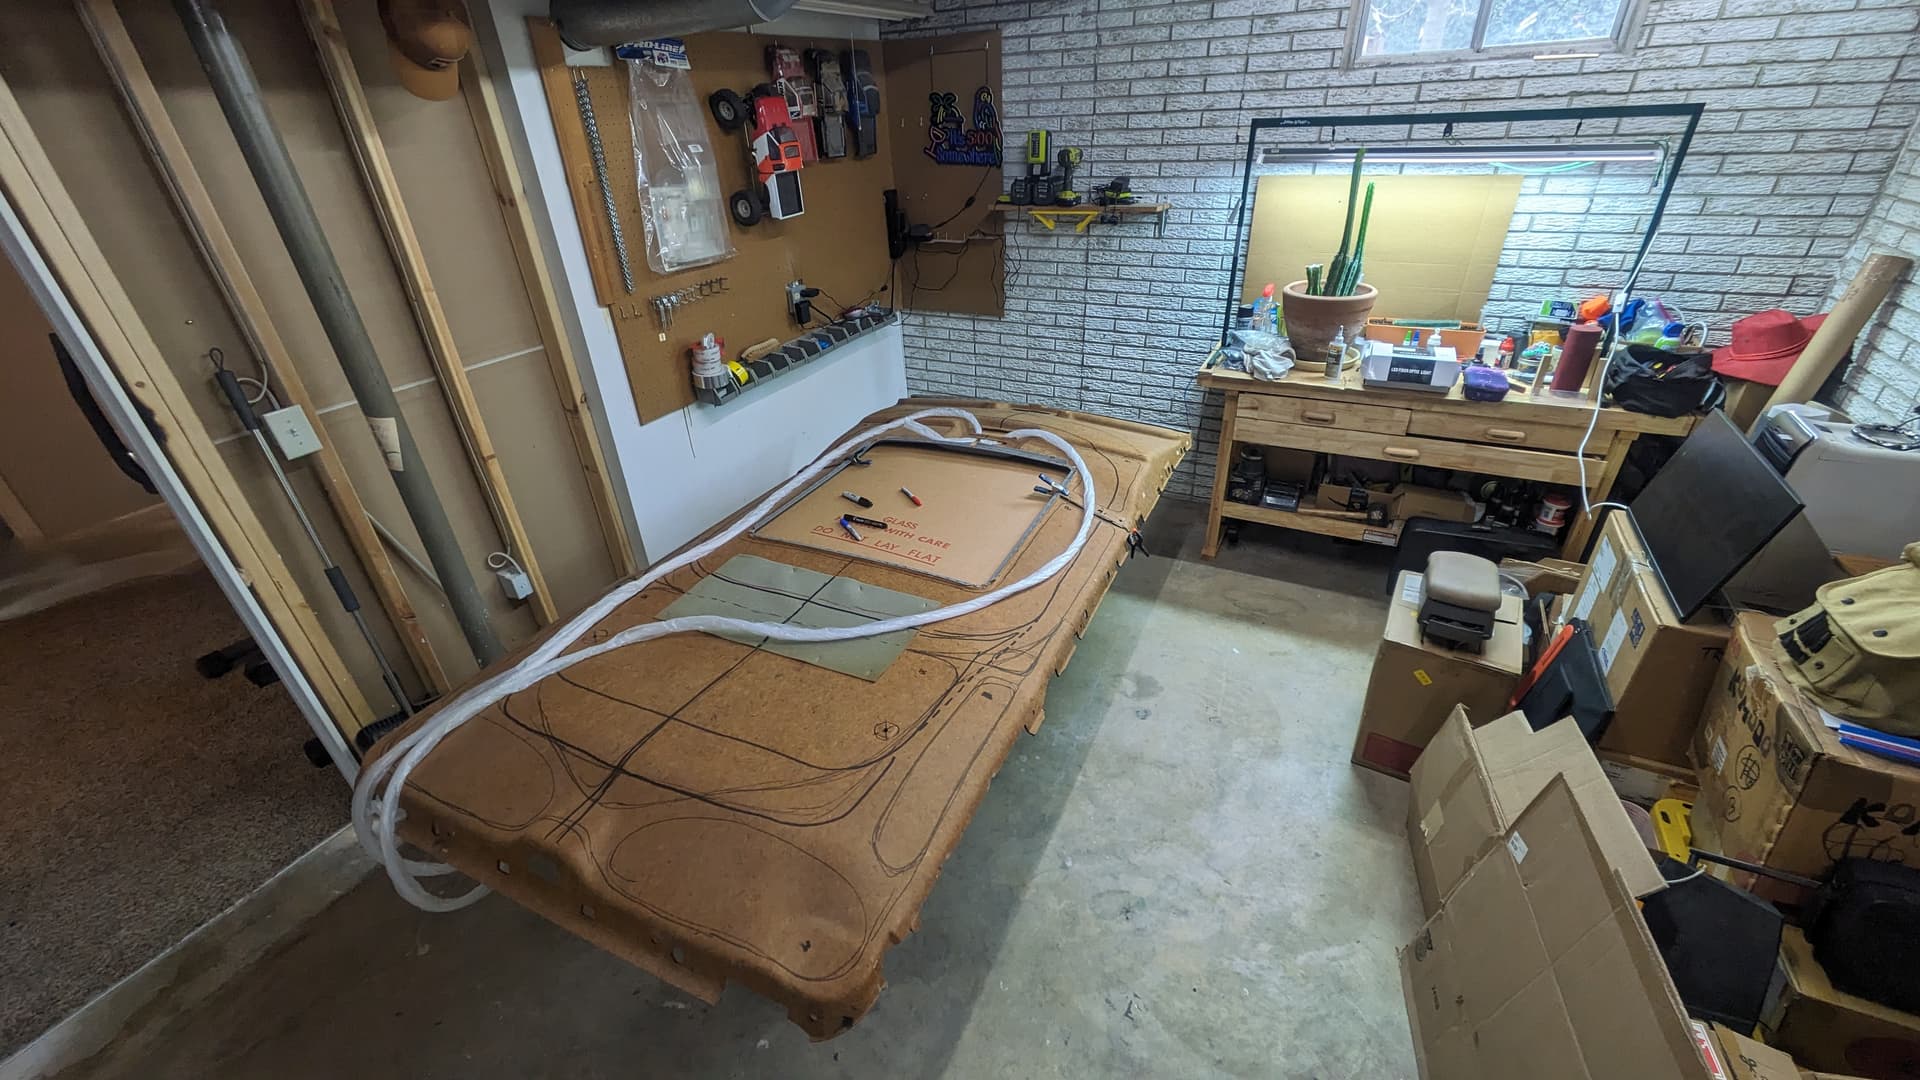
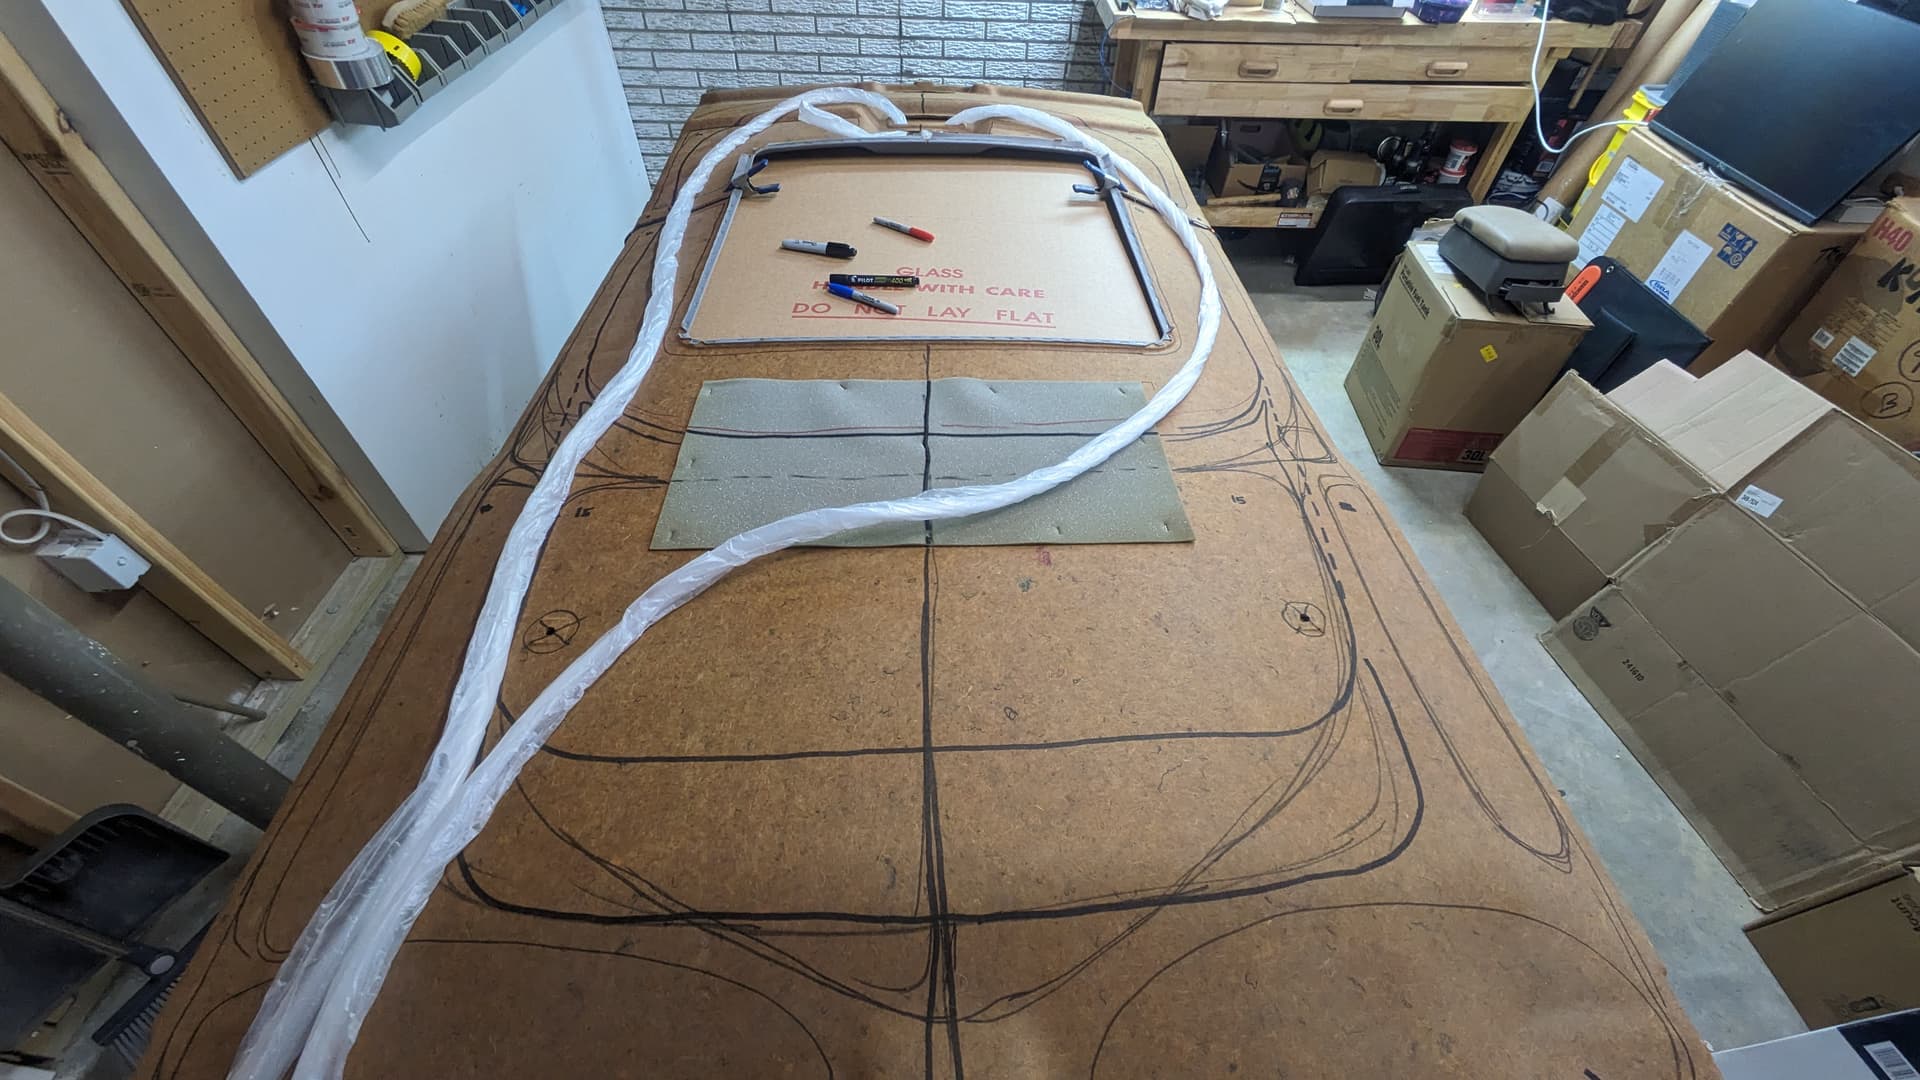
Interior Removal
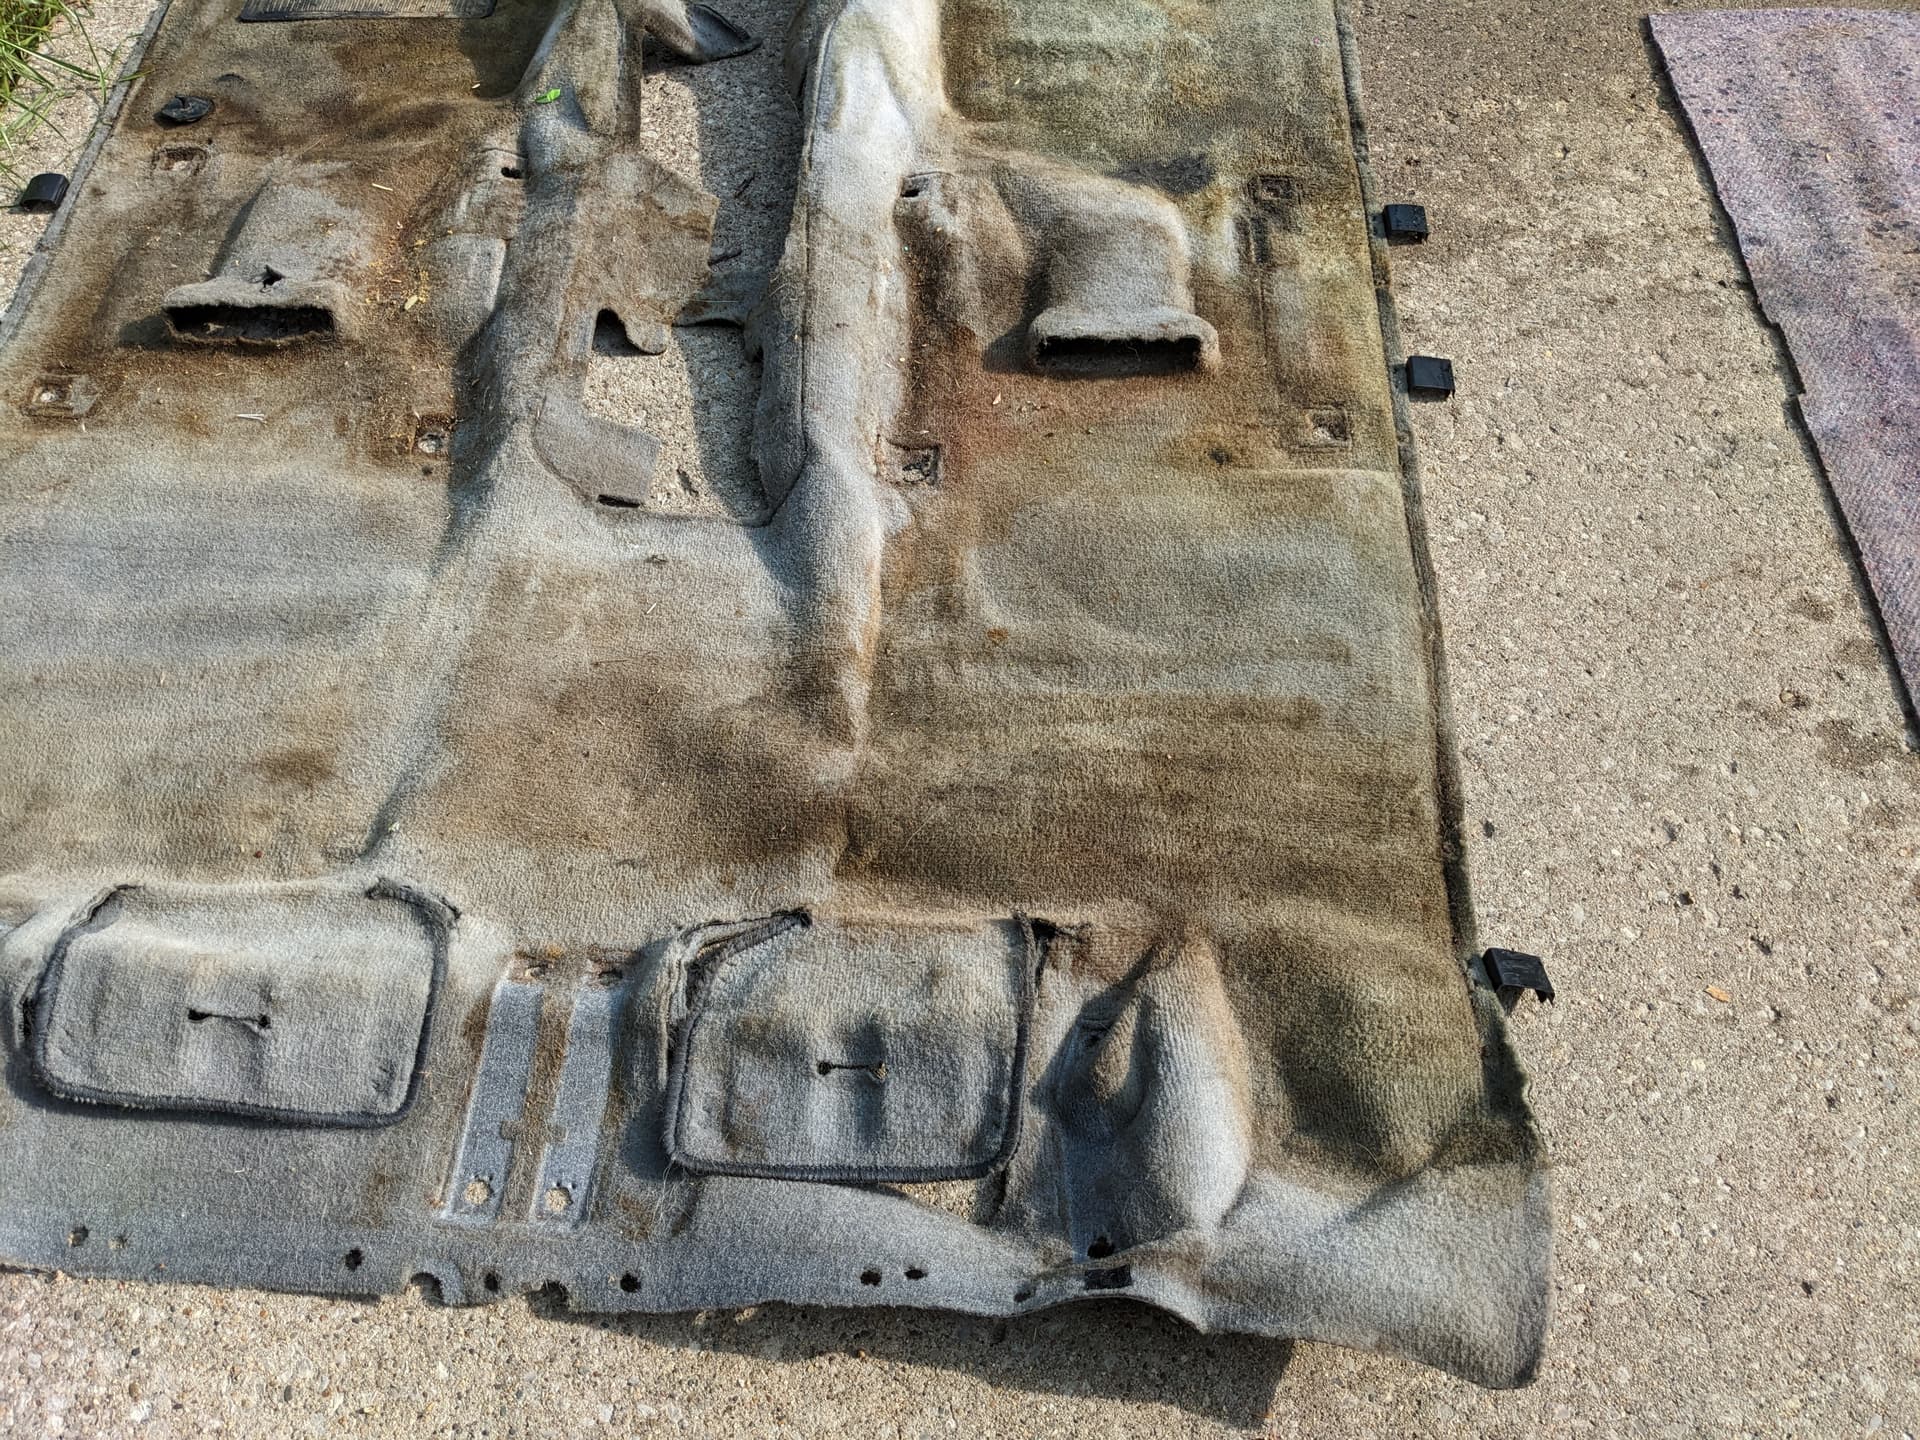
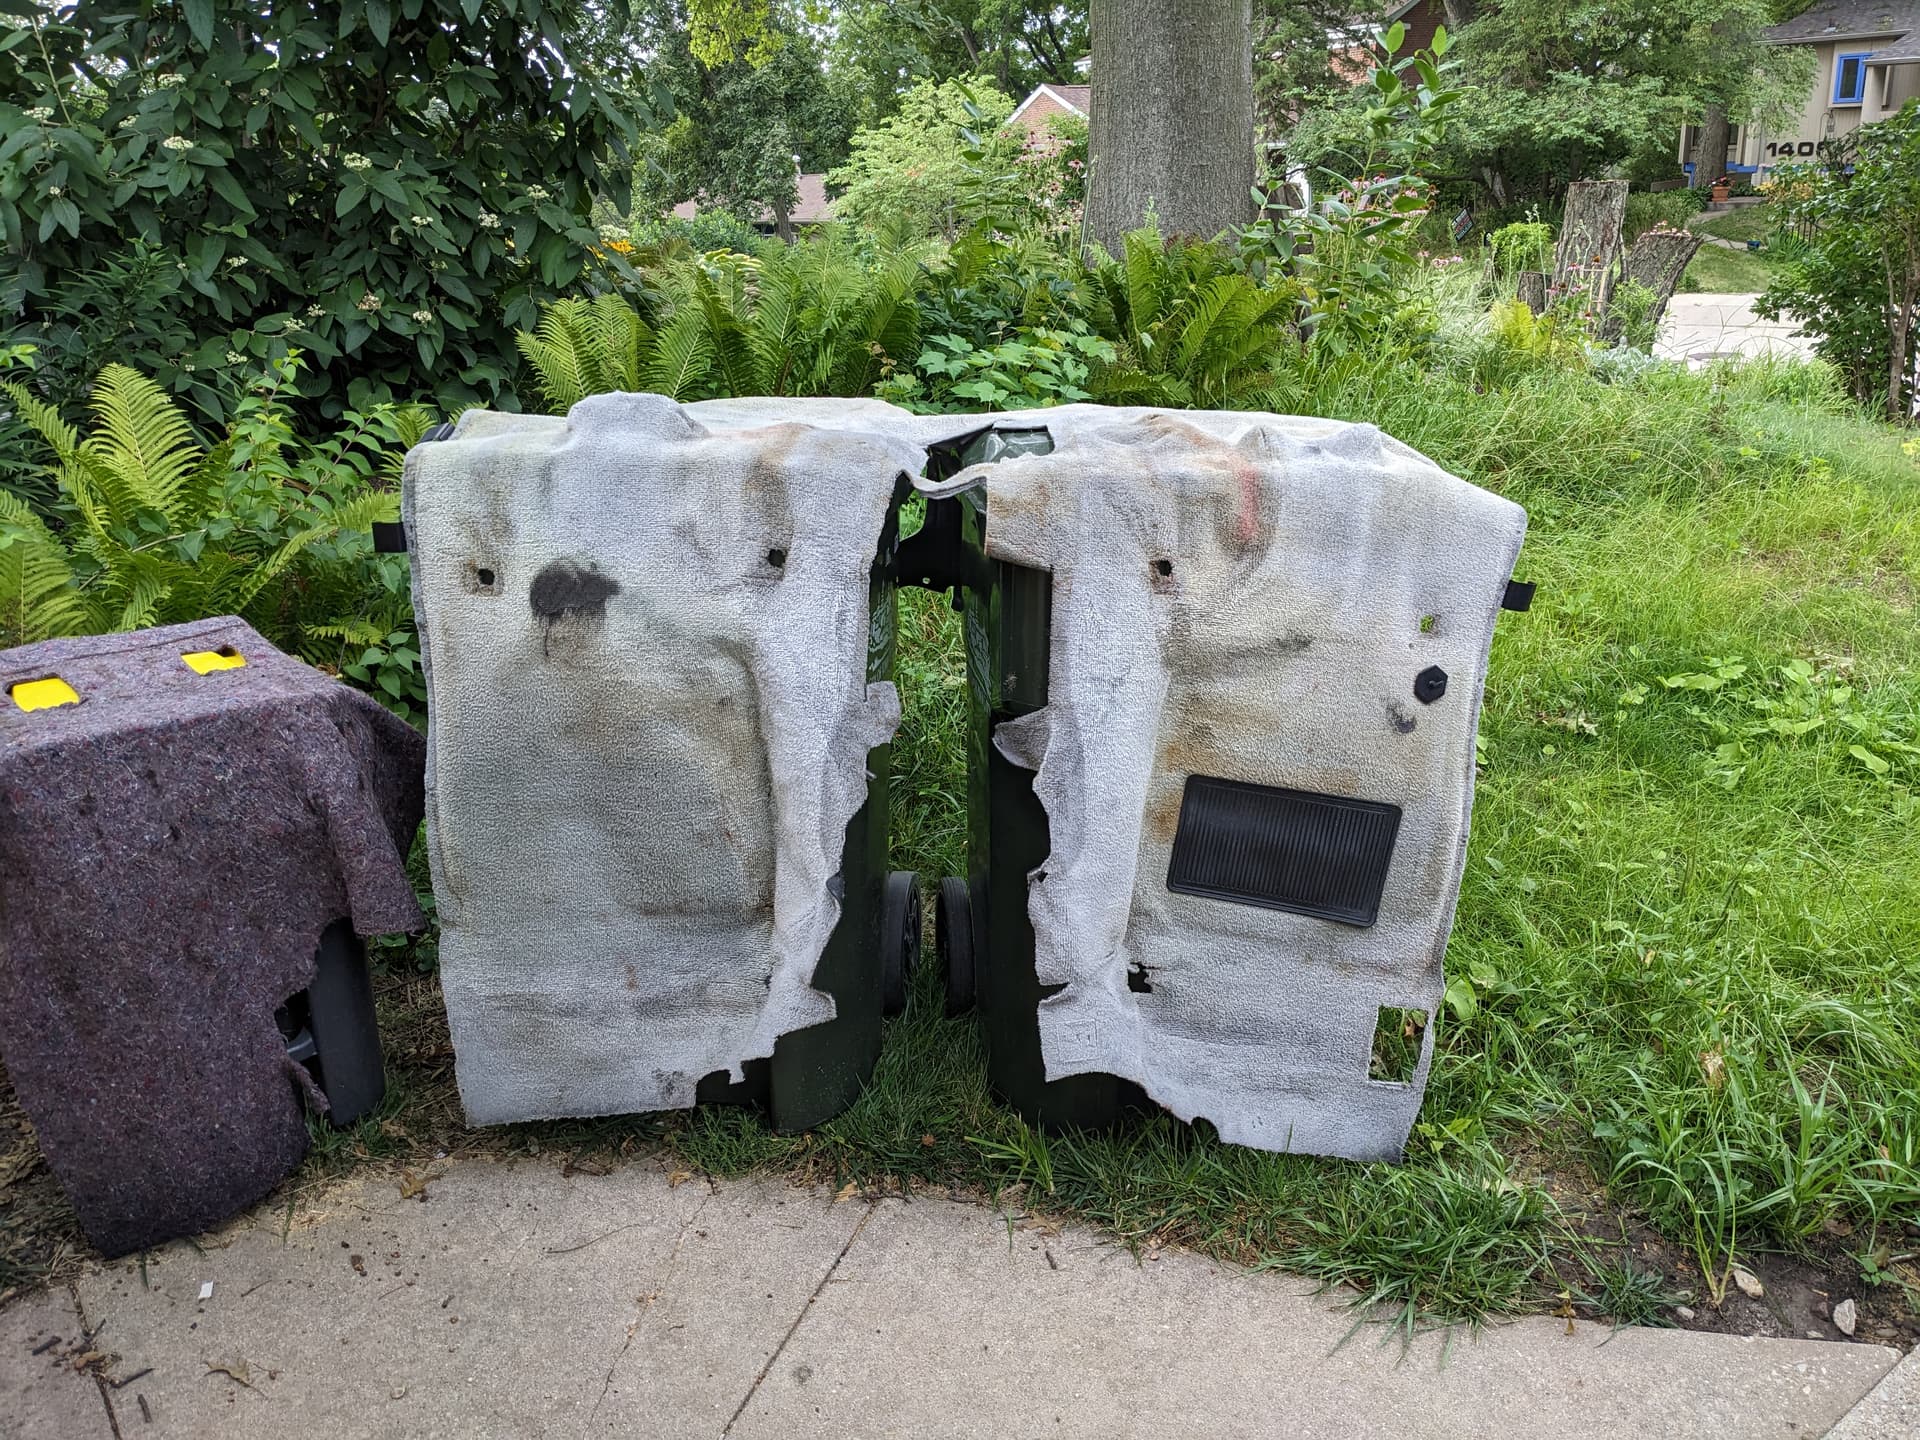
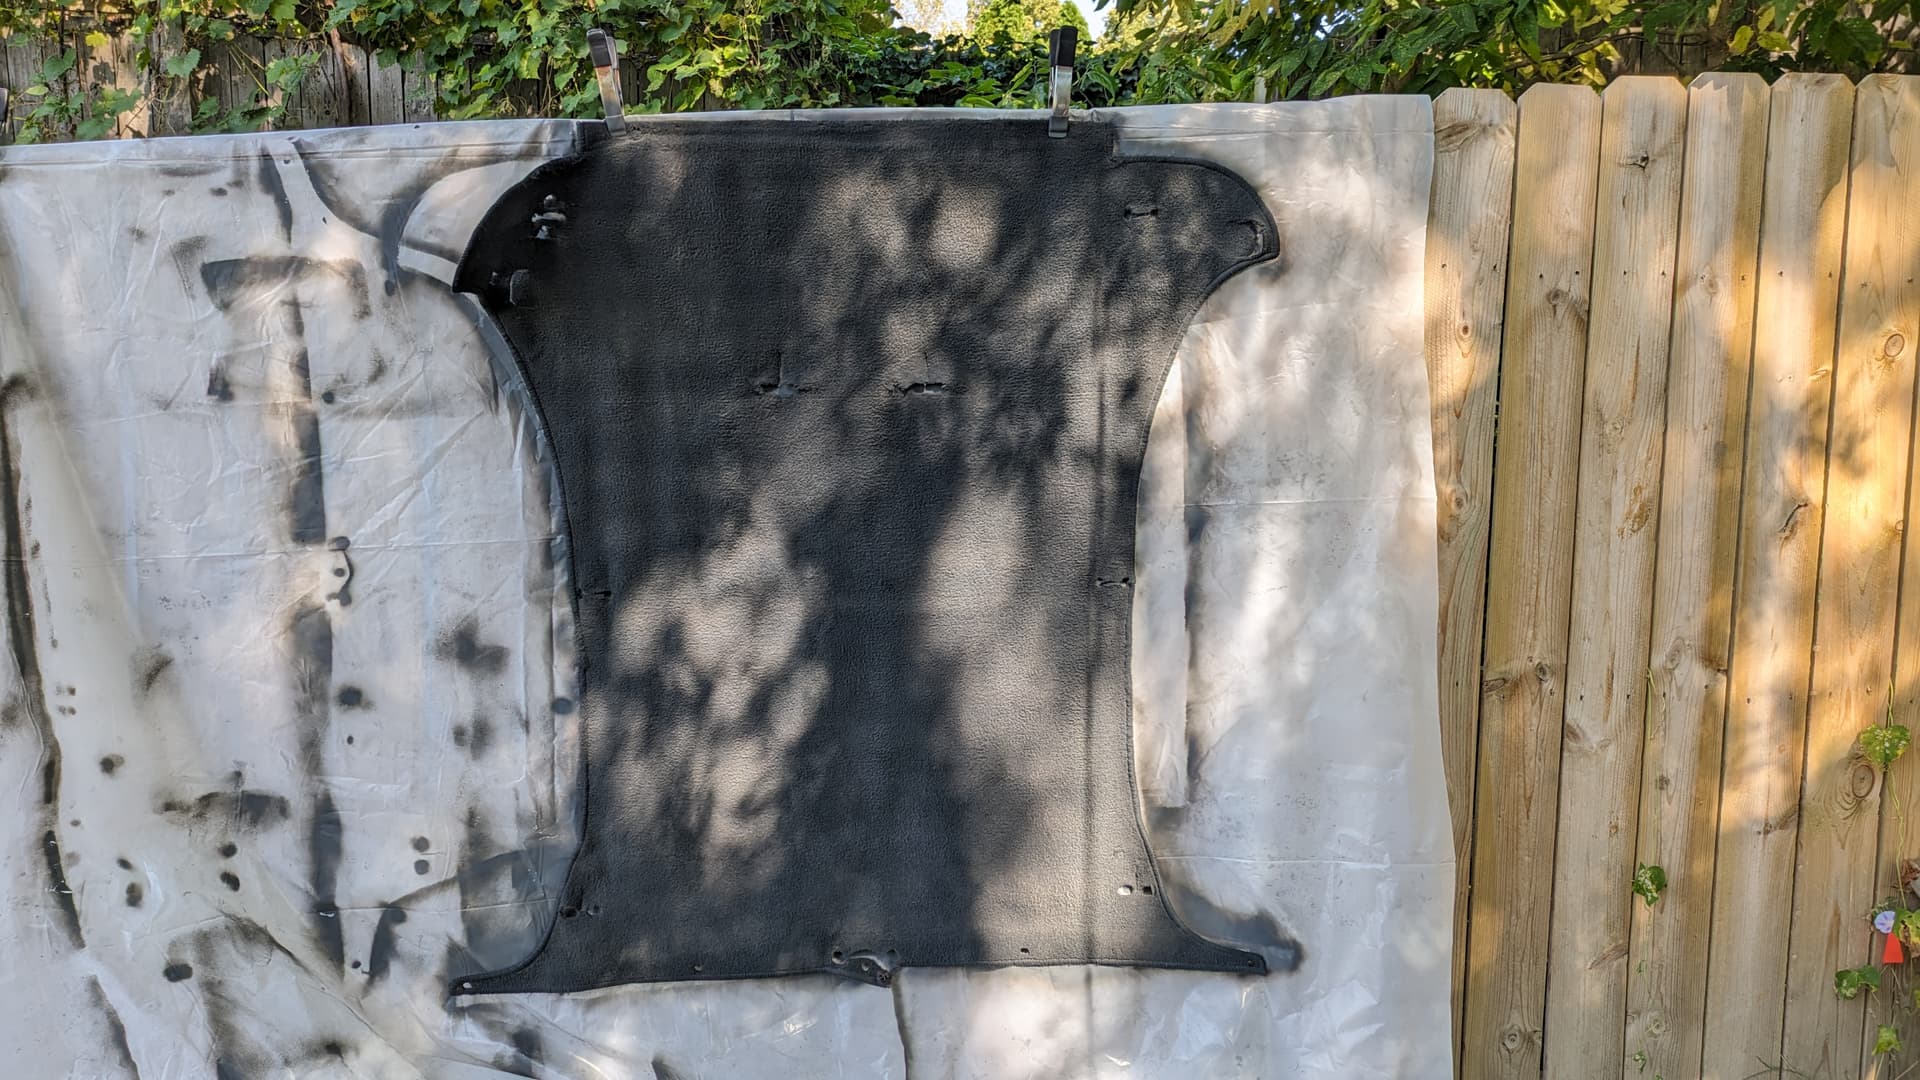
Carpet Removal
I pulled the carpet and drug it out back for pressure washing. If it’s not obvious, driver side is top left. I’m seeing a slight green tint to the carpet on the passenger footwell corner. (The ECU sits less than a foot above this soggy mess, by the way.)

I didn’t like the thought of rinsing antifreeze down the street into the storm drains, but as you can see, Arlo and Louise were immediately interested in the carpet, so I drug it back past Fez out to the driveway. Notice how the carpet was so wet it left streaks on the floor when I pulled it back through the garage.
Carpet Cleaning
Once I had everything laid out in the driveway, I grabbed the Simple Green, pressure washer, and a drill-mounted scrub brush, and got to work cleaning the carpet.
First, I used the pressure washer to aggressively rinse the carpet. Next, I attached my foam gun attachment and saturated the carpet. I let it soak for a few minutes, then went over everything with the power brush. After that, I gave it another high pressure rinse, before another Simple Green soak, followed by another high pressure rinse, and then a final, low pressure flush with the regular hose to clean things out.

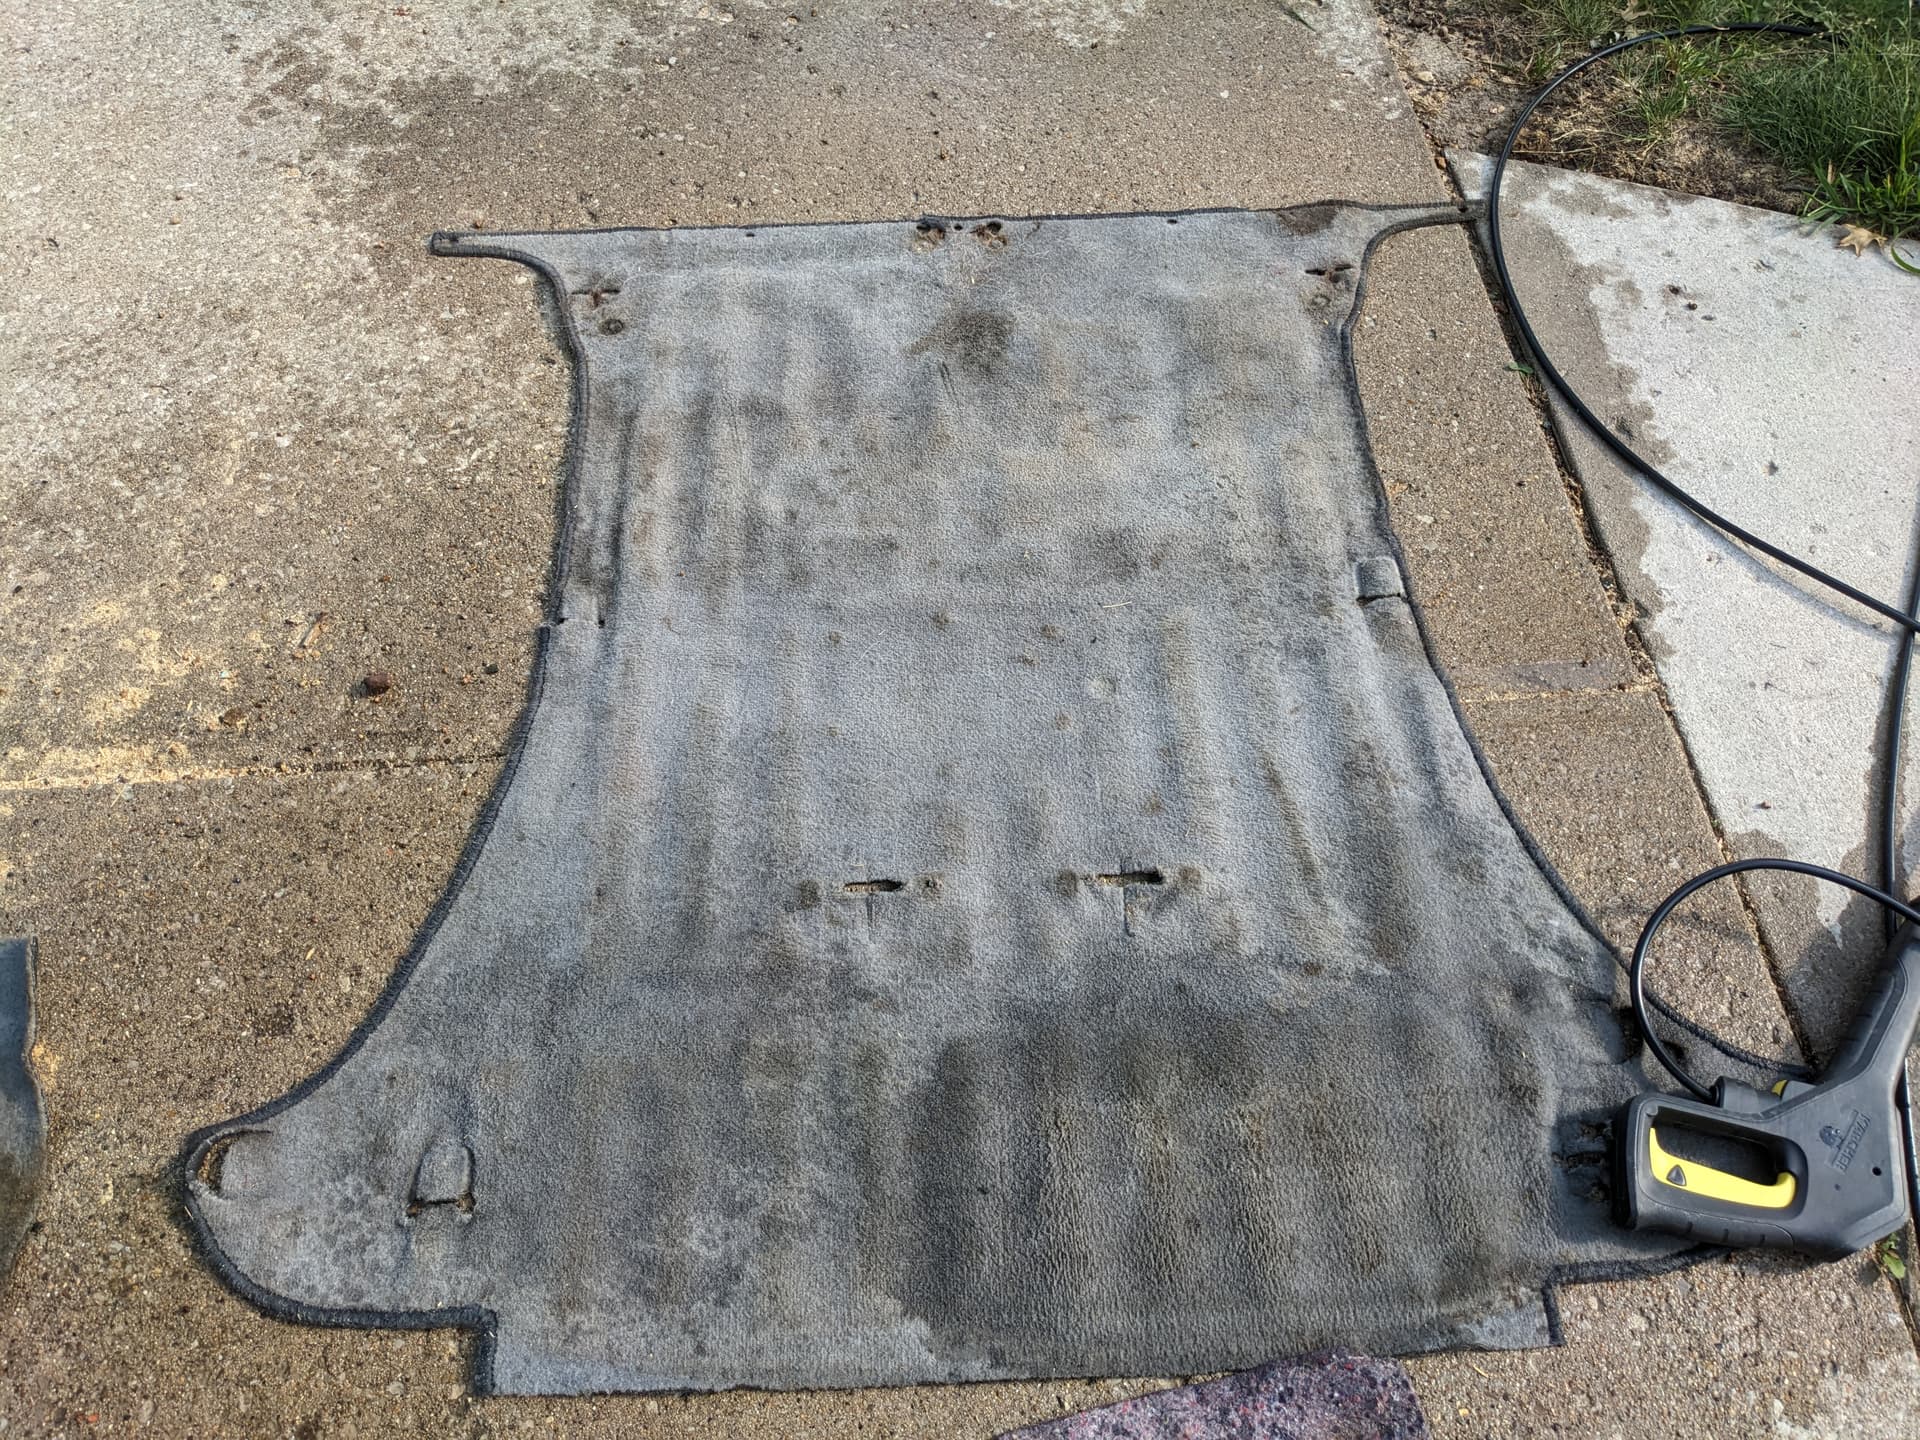
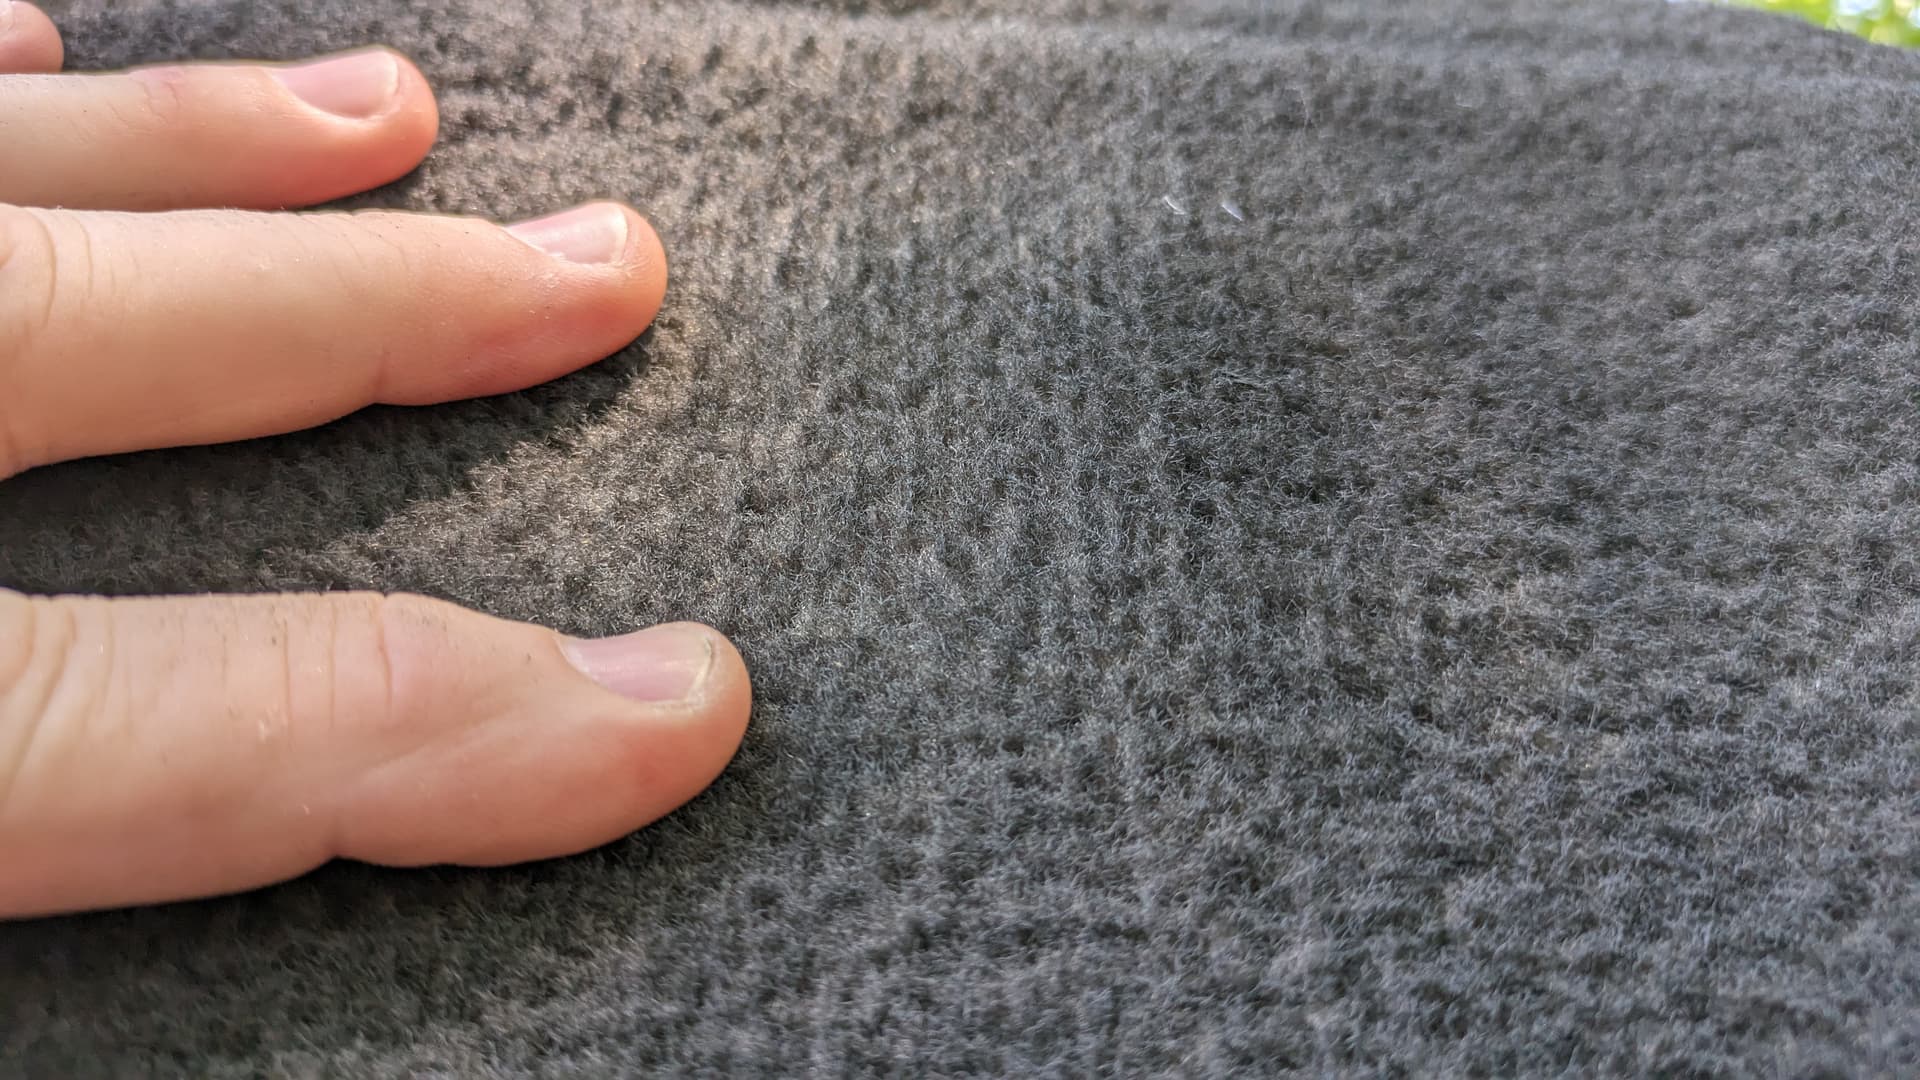
Carpet Cleaning Results
Once I was done, I hung the carpets over the trash carts to drip dry. They could have come out better, I’m sure, but I am pleased with these results. (I’ve also got four bottles of dark gray Rit dye and a mini deck sprayer to apply the dye once the weather cooperates.
(Did you notice the red streak in the above picture? It was hidden under so much grime. Kinda panicked for a couple minutes when I was pressure washing and the water started running red. Turns out it was probably just a red ink pen that fell between the seats and cooked out in the heat.)
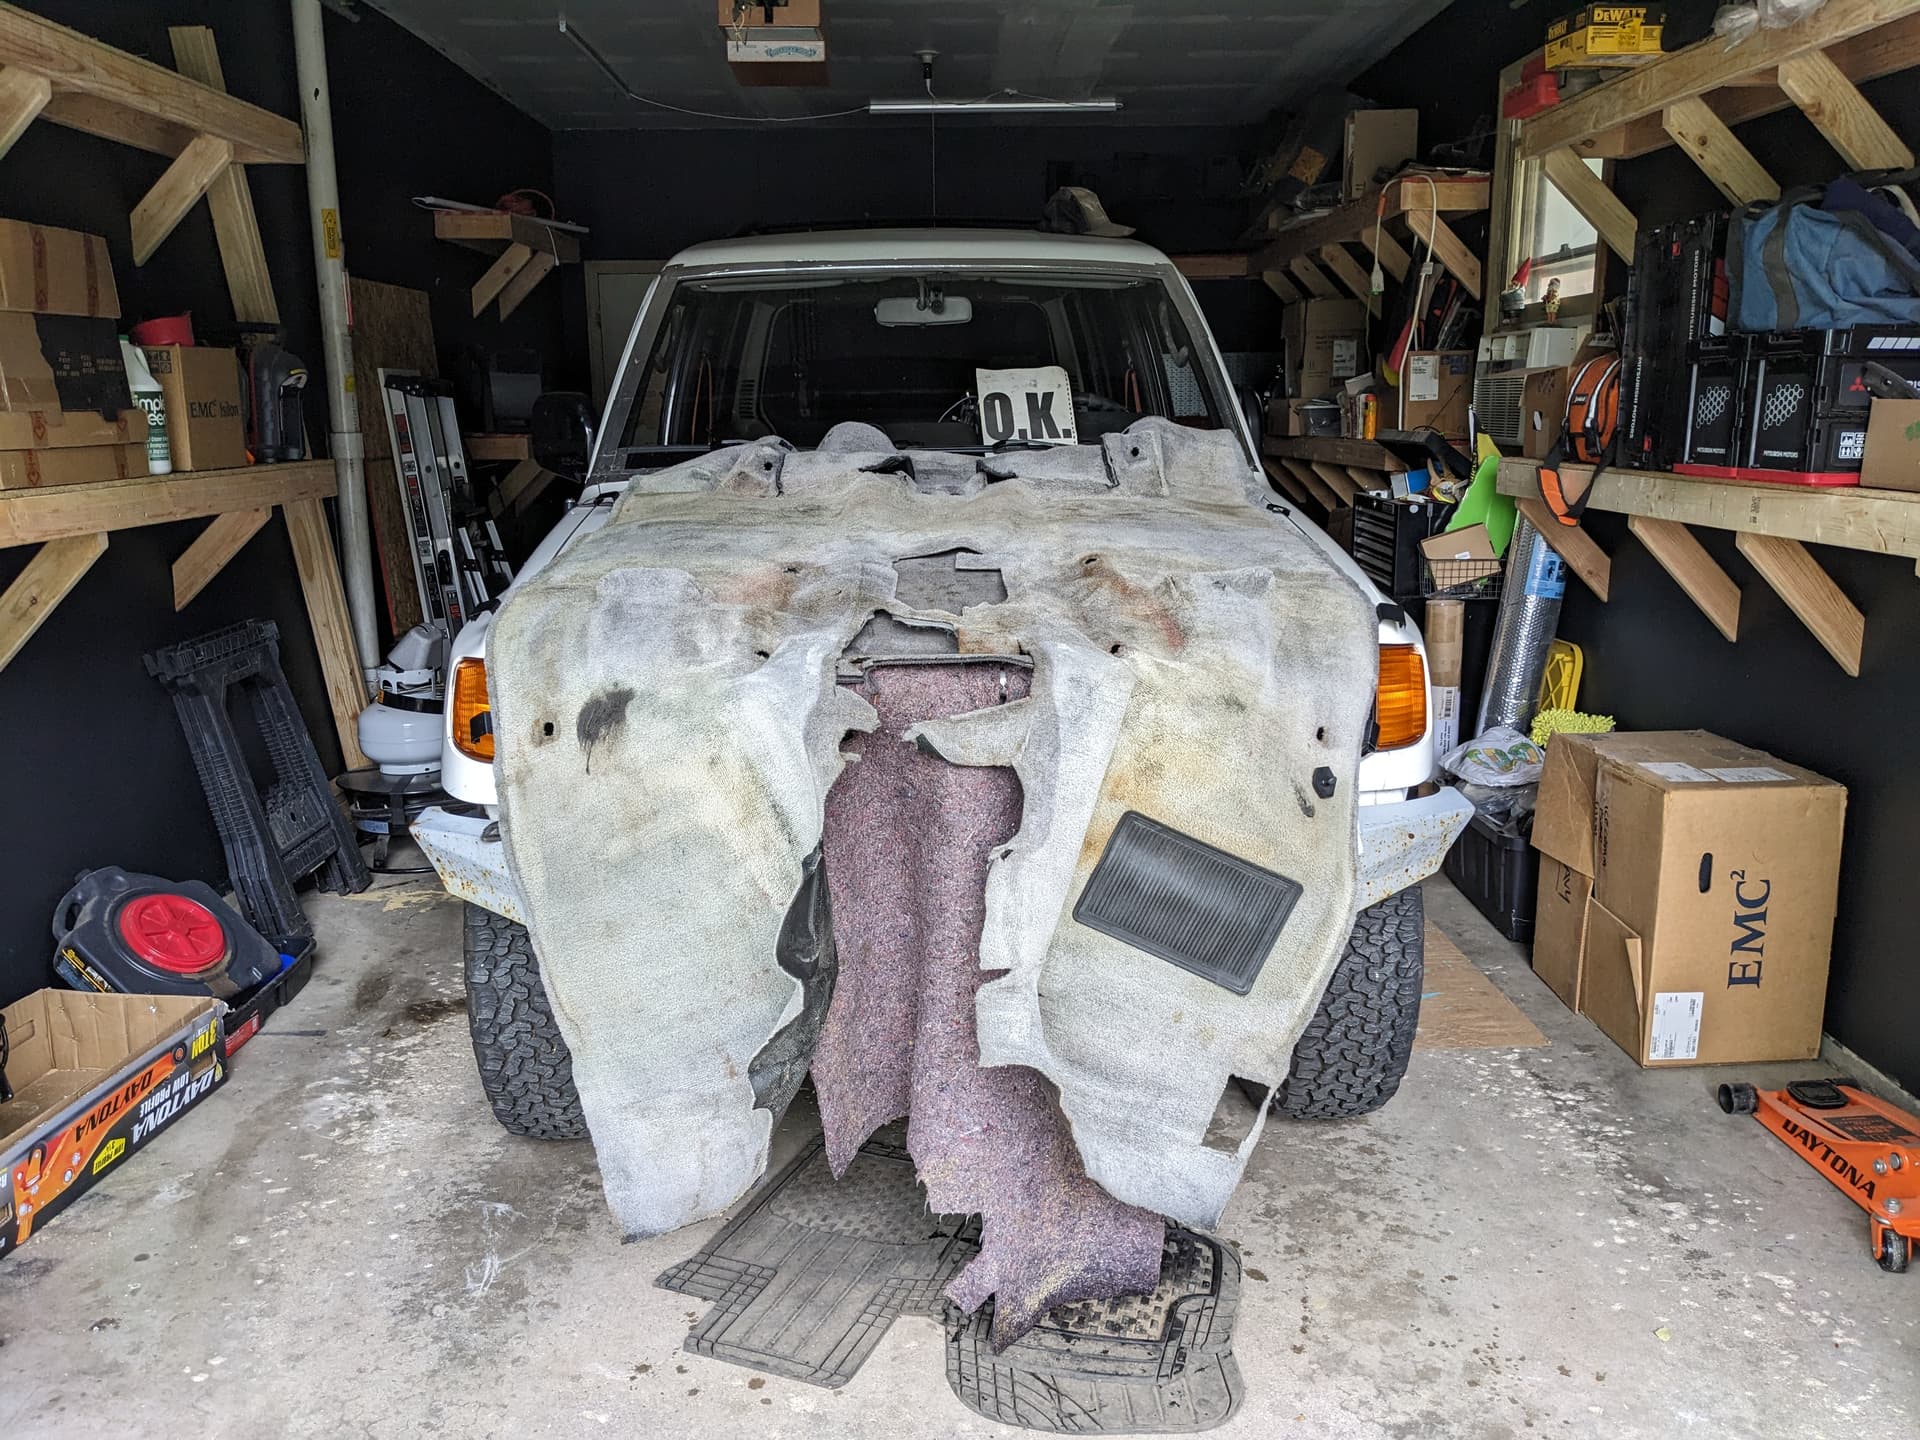
In other news, with the carpets hanging on the ADD bull bar, Fez reminds me of the Mutt Cutts van.
Final Steps to the Heater Core
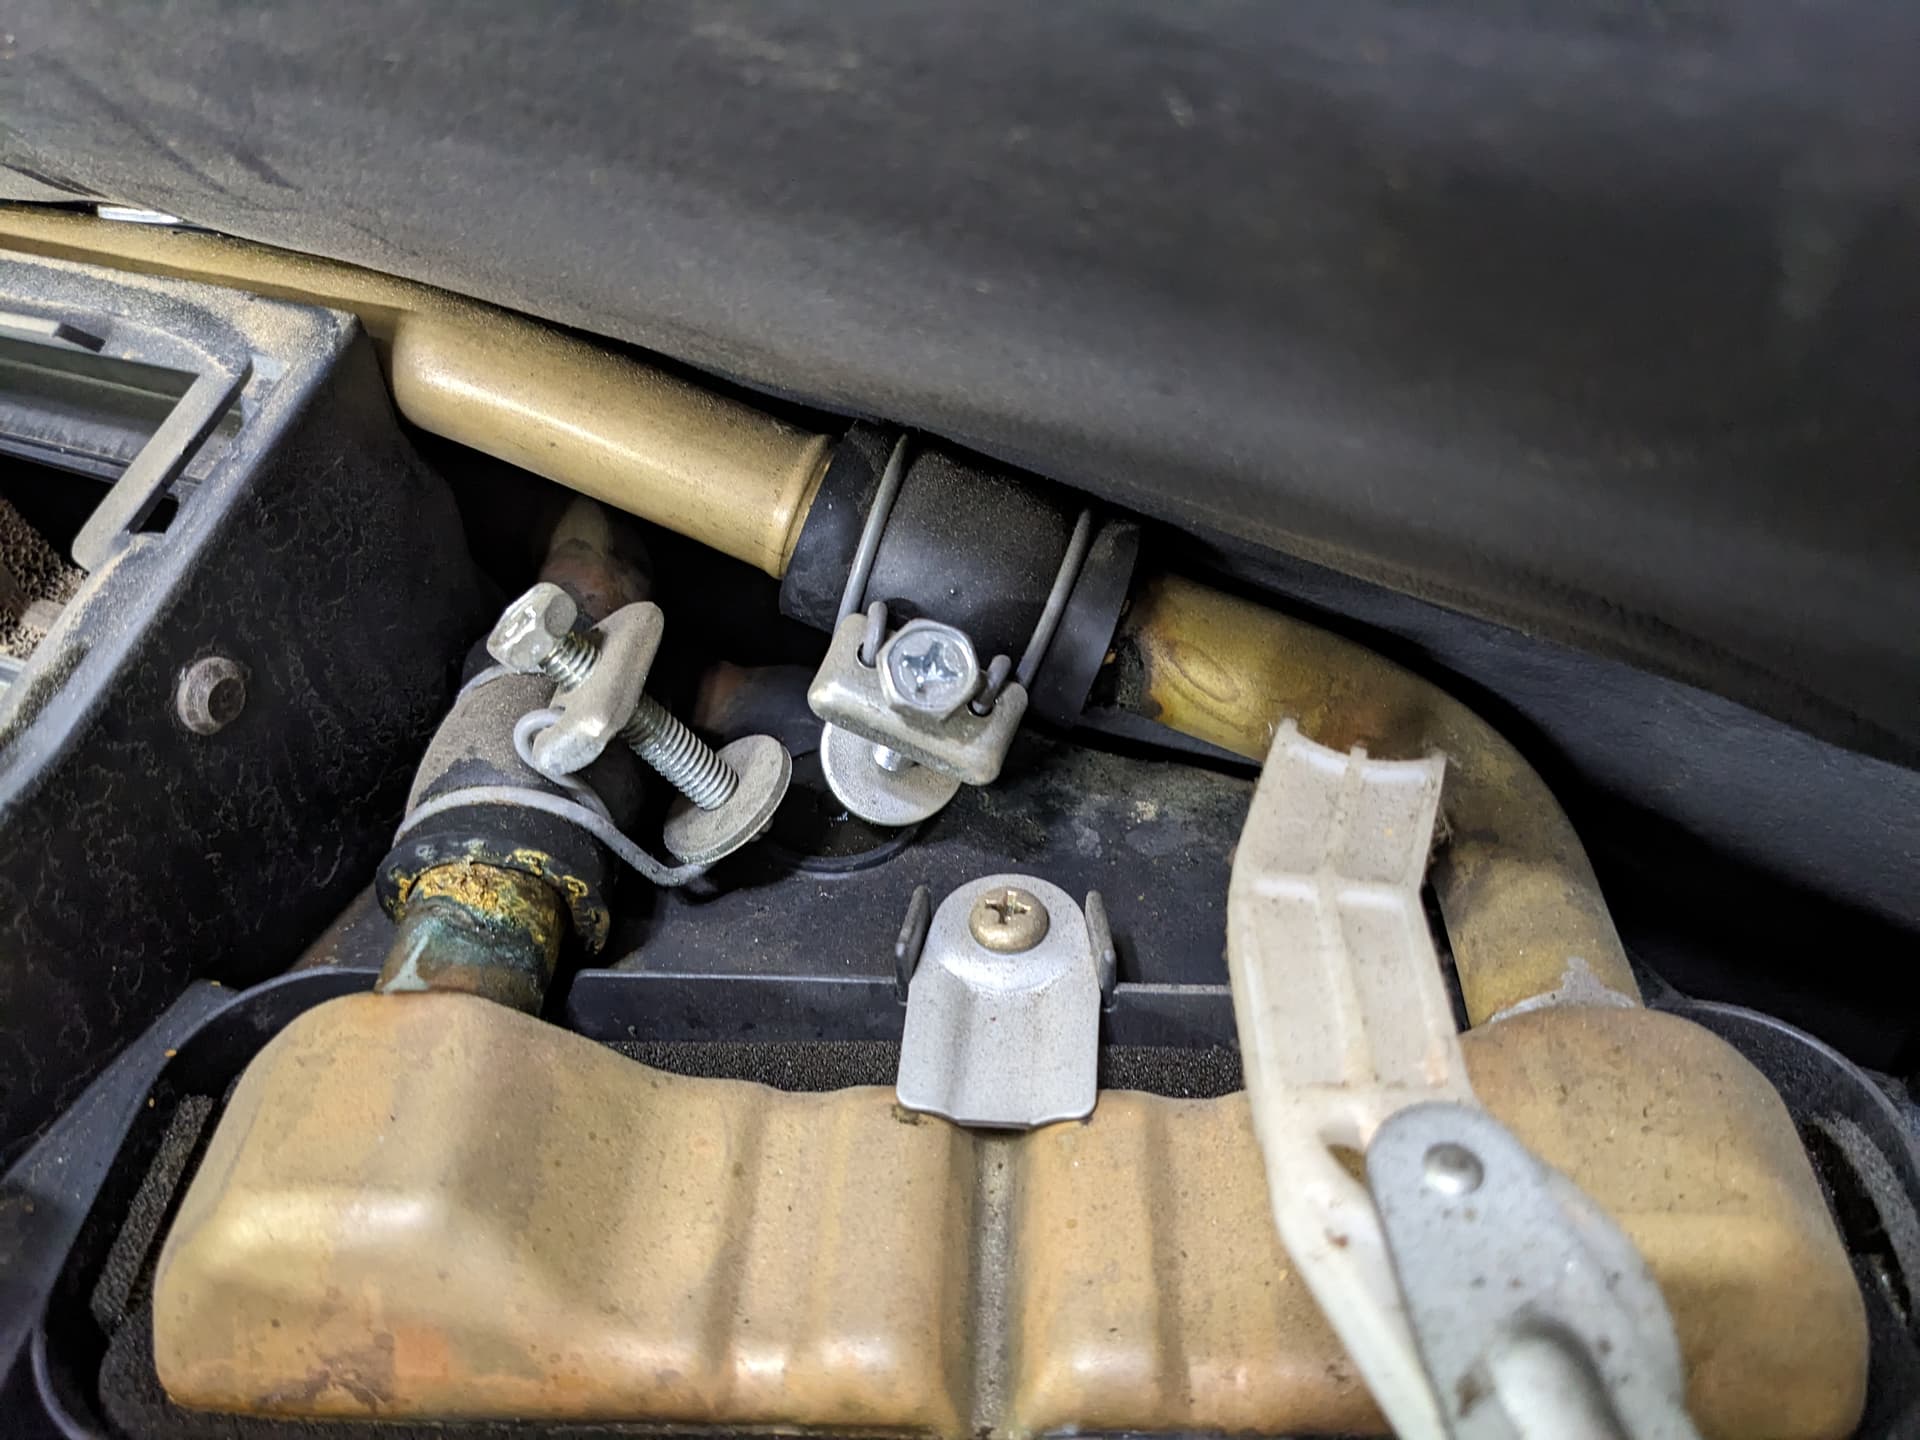
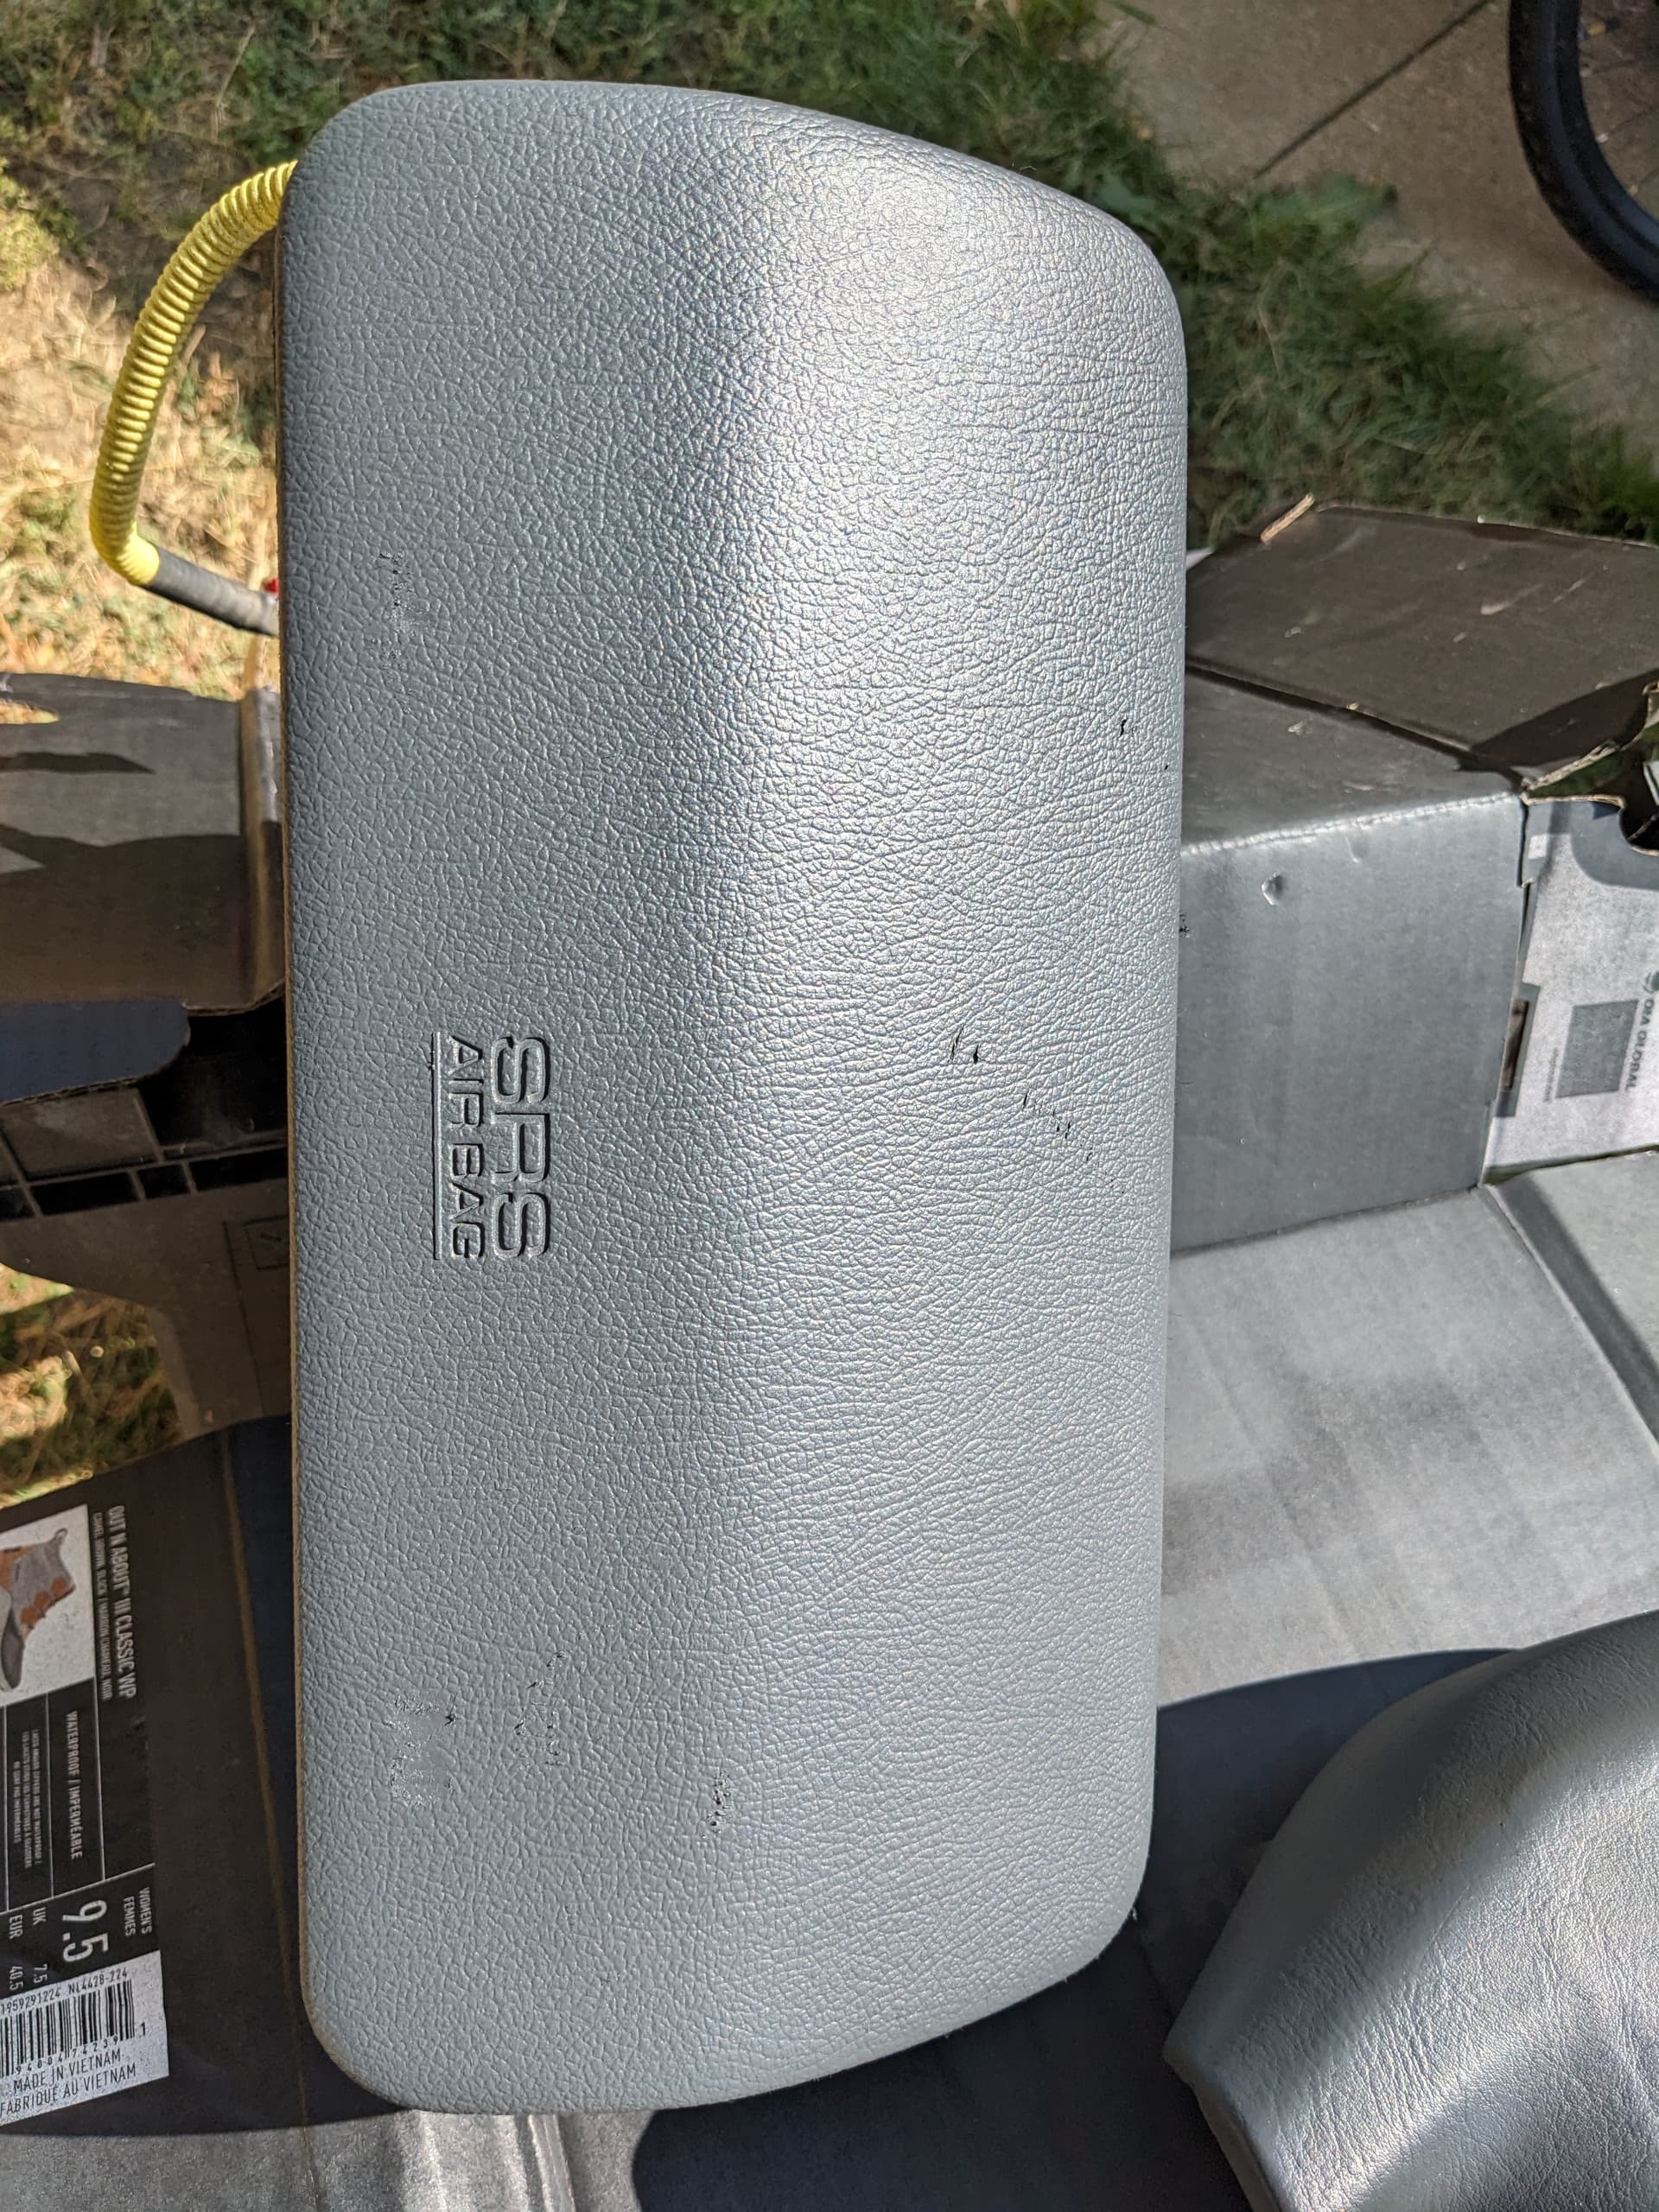
The airbags, combined with my aches and pains, set me back a bit. I suspect they changed the SRS connectors when they performed the Takata recall. I had to do some research to be sure before I started prying on wires connected to literal explosive devices.
Got them out, though, and have stuffed the HVAC controls back into the dash cavity far enough to be able to access the control cabling. That’s my next challenge. After that, I suspect it’s maybe a dozen bolts to get the dash out and begin the final push to the heater core.
In Other News
- Replacement heater core arrived from China. Nobody locally works on heater cores, which means I’m going to have to pressure test this sucker myself before it goes in. Or who knows, maybe I ship the original back to Phoenix for professional repair. Not sure yet. We’ll see when the old core is out.
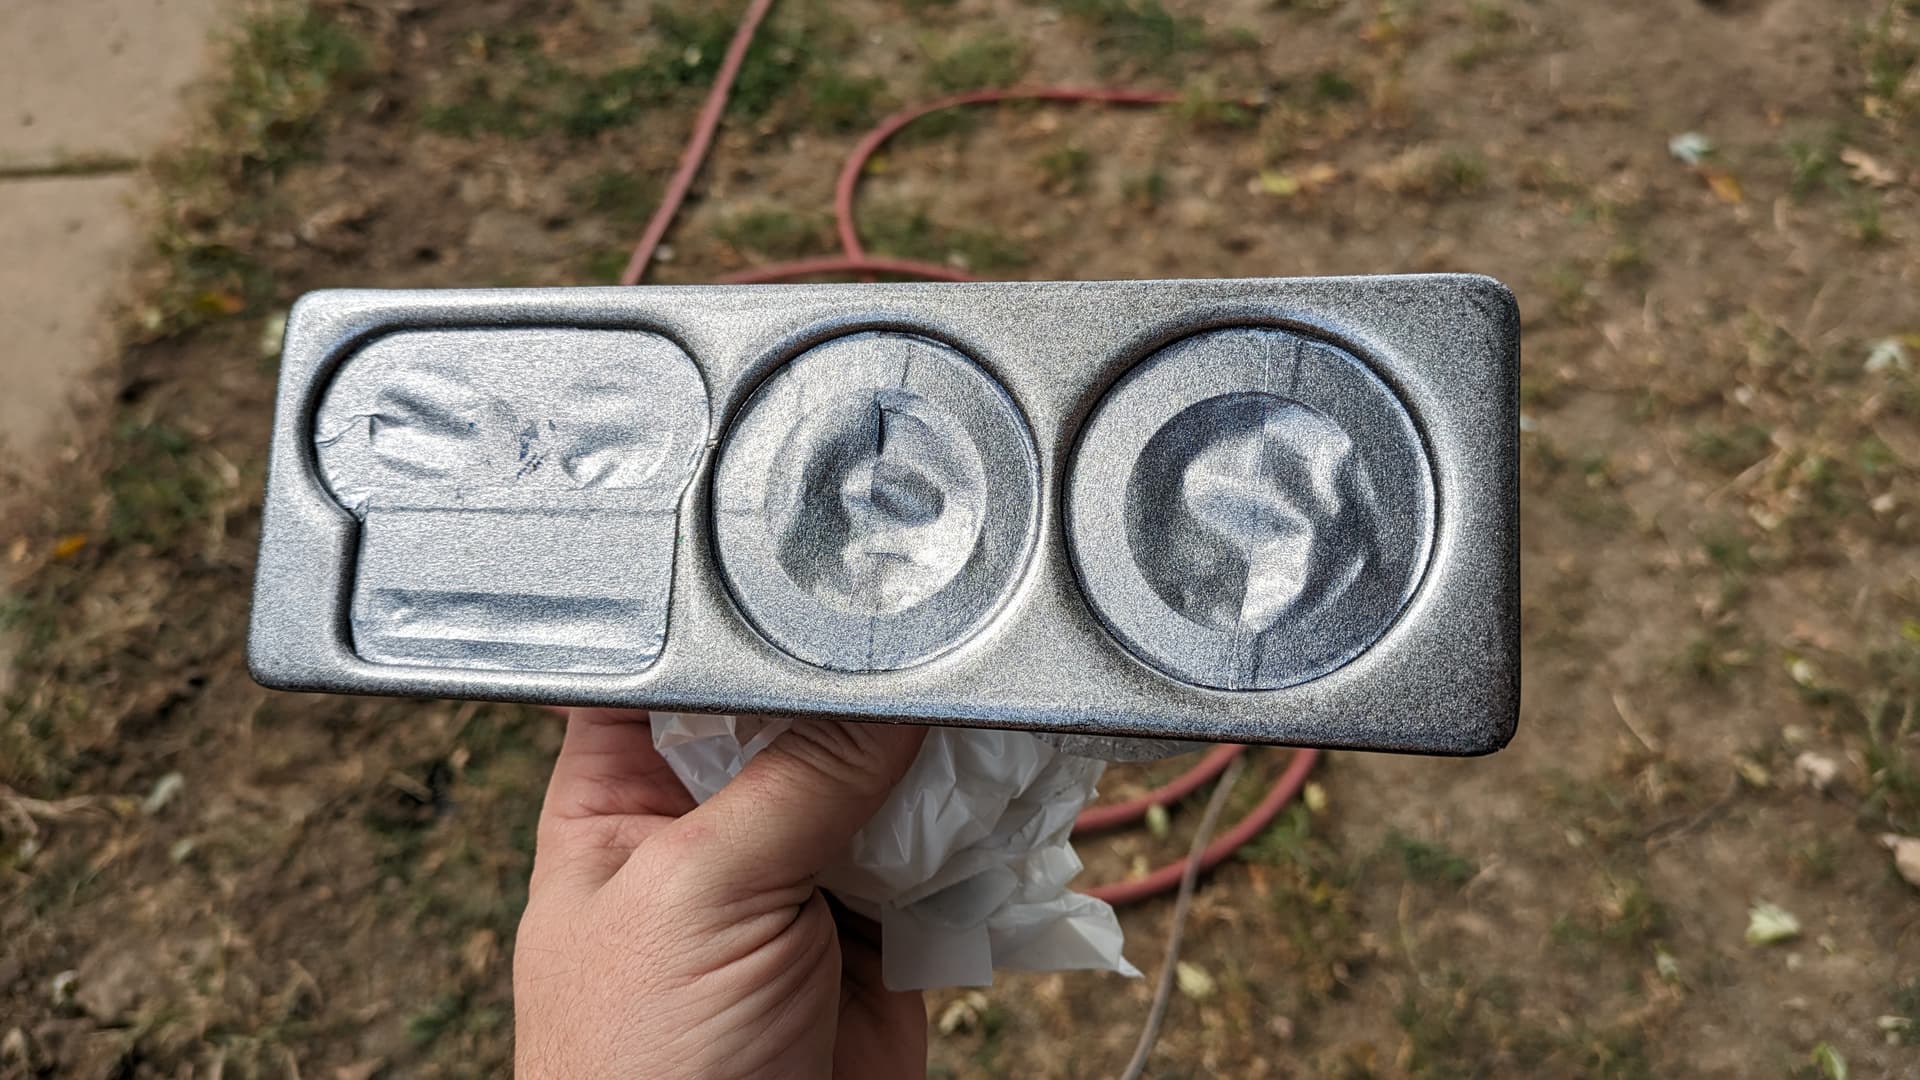
- (I also got replacement center vents, since mine are borked and you have to remove the HVAC controls to get them out. Another while you’re in there affair.)
Time is already running out for this project, though. I’m out of town this Saturday, think we’re doing something the following weekend, then it’s like two weeks until we fly to SLC for Mabon, and then it’s October.
1 Like
Journey to the Heater Core Ep. 3
Good News. Bad News.
Bad News: The replacement heater core I got from China has the wrong inlet/outlets.
Good News: It looks like my leaks might have just been the rubber hose couplers & I won’t need it.
I’ve already requested the return via Ebay. I triple checked the part number and looked up as many real, actual pictures of the OE unit as I could find (which wasn’t much). I should have known. The listing had the right part number (MB657416), but incorrectly referred to the part as the “rear” heater core. (It’s not that one, either. Doesn’t even look anything like it.)
It might work, but considering how obviously faulty the couplers look, I’m just going to return it and pressure test the original once I get it out. Fingers crossed it’s just those couplers.
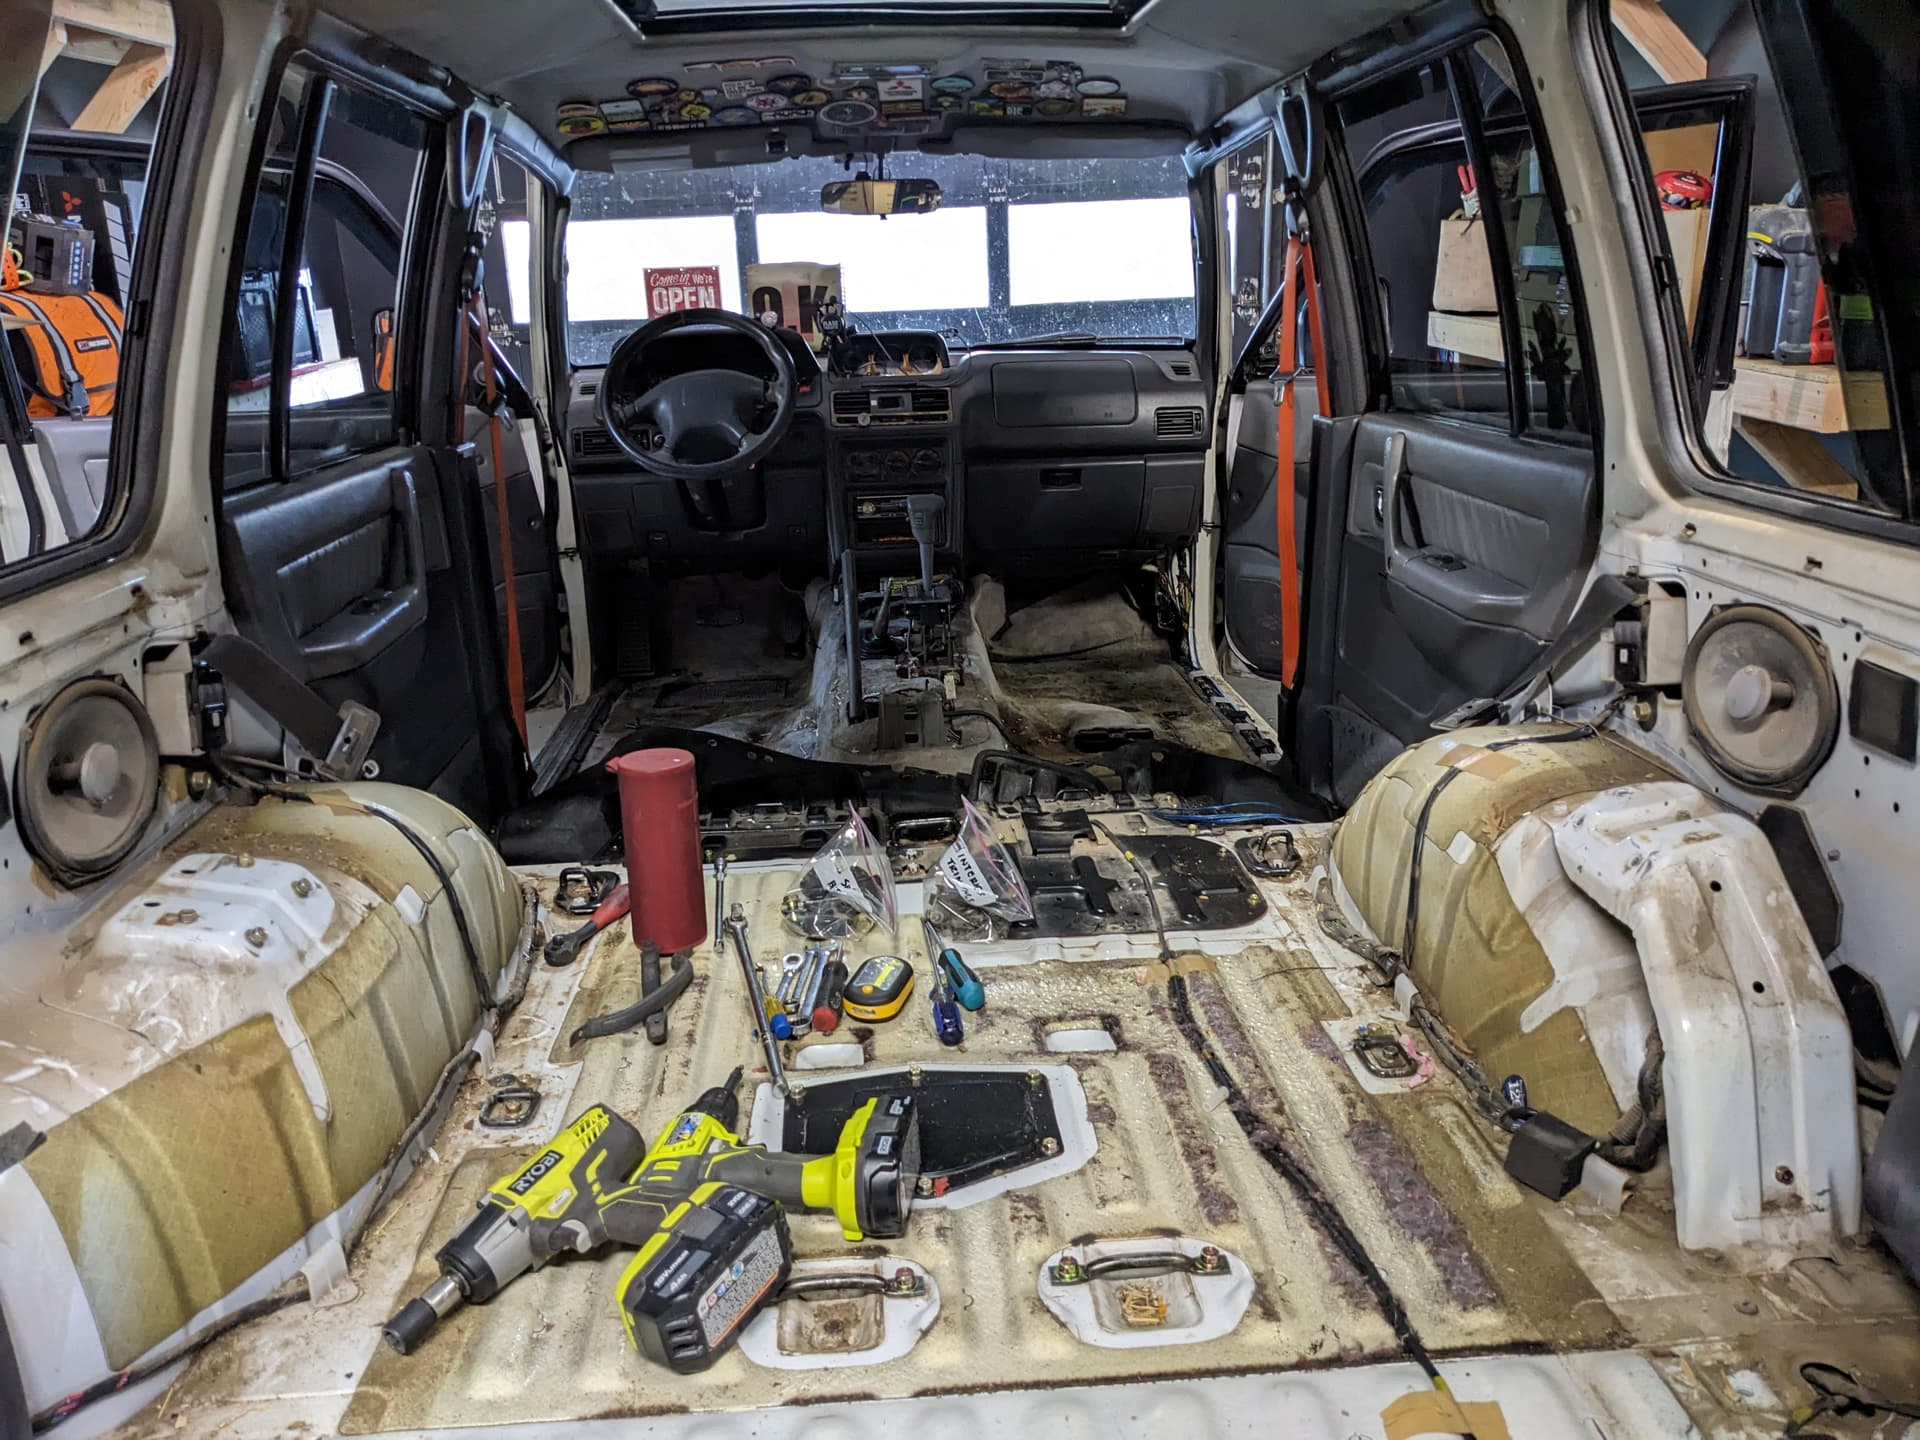
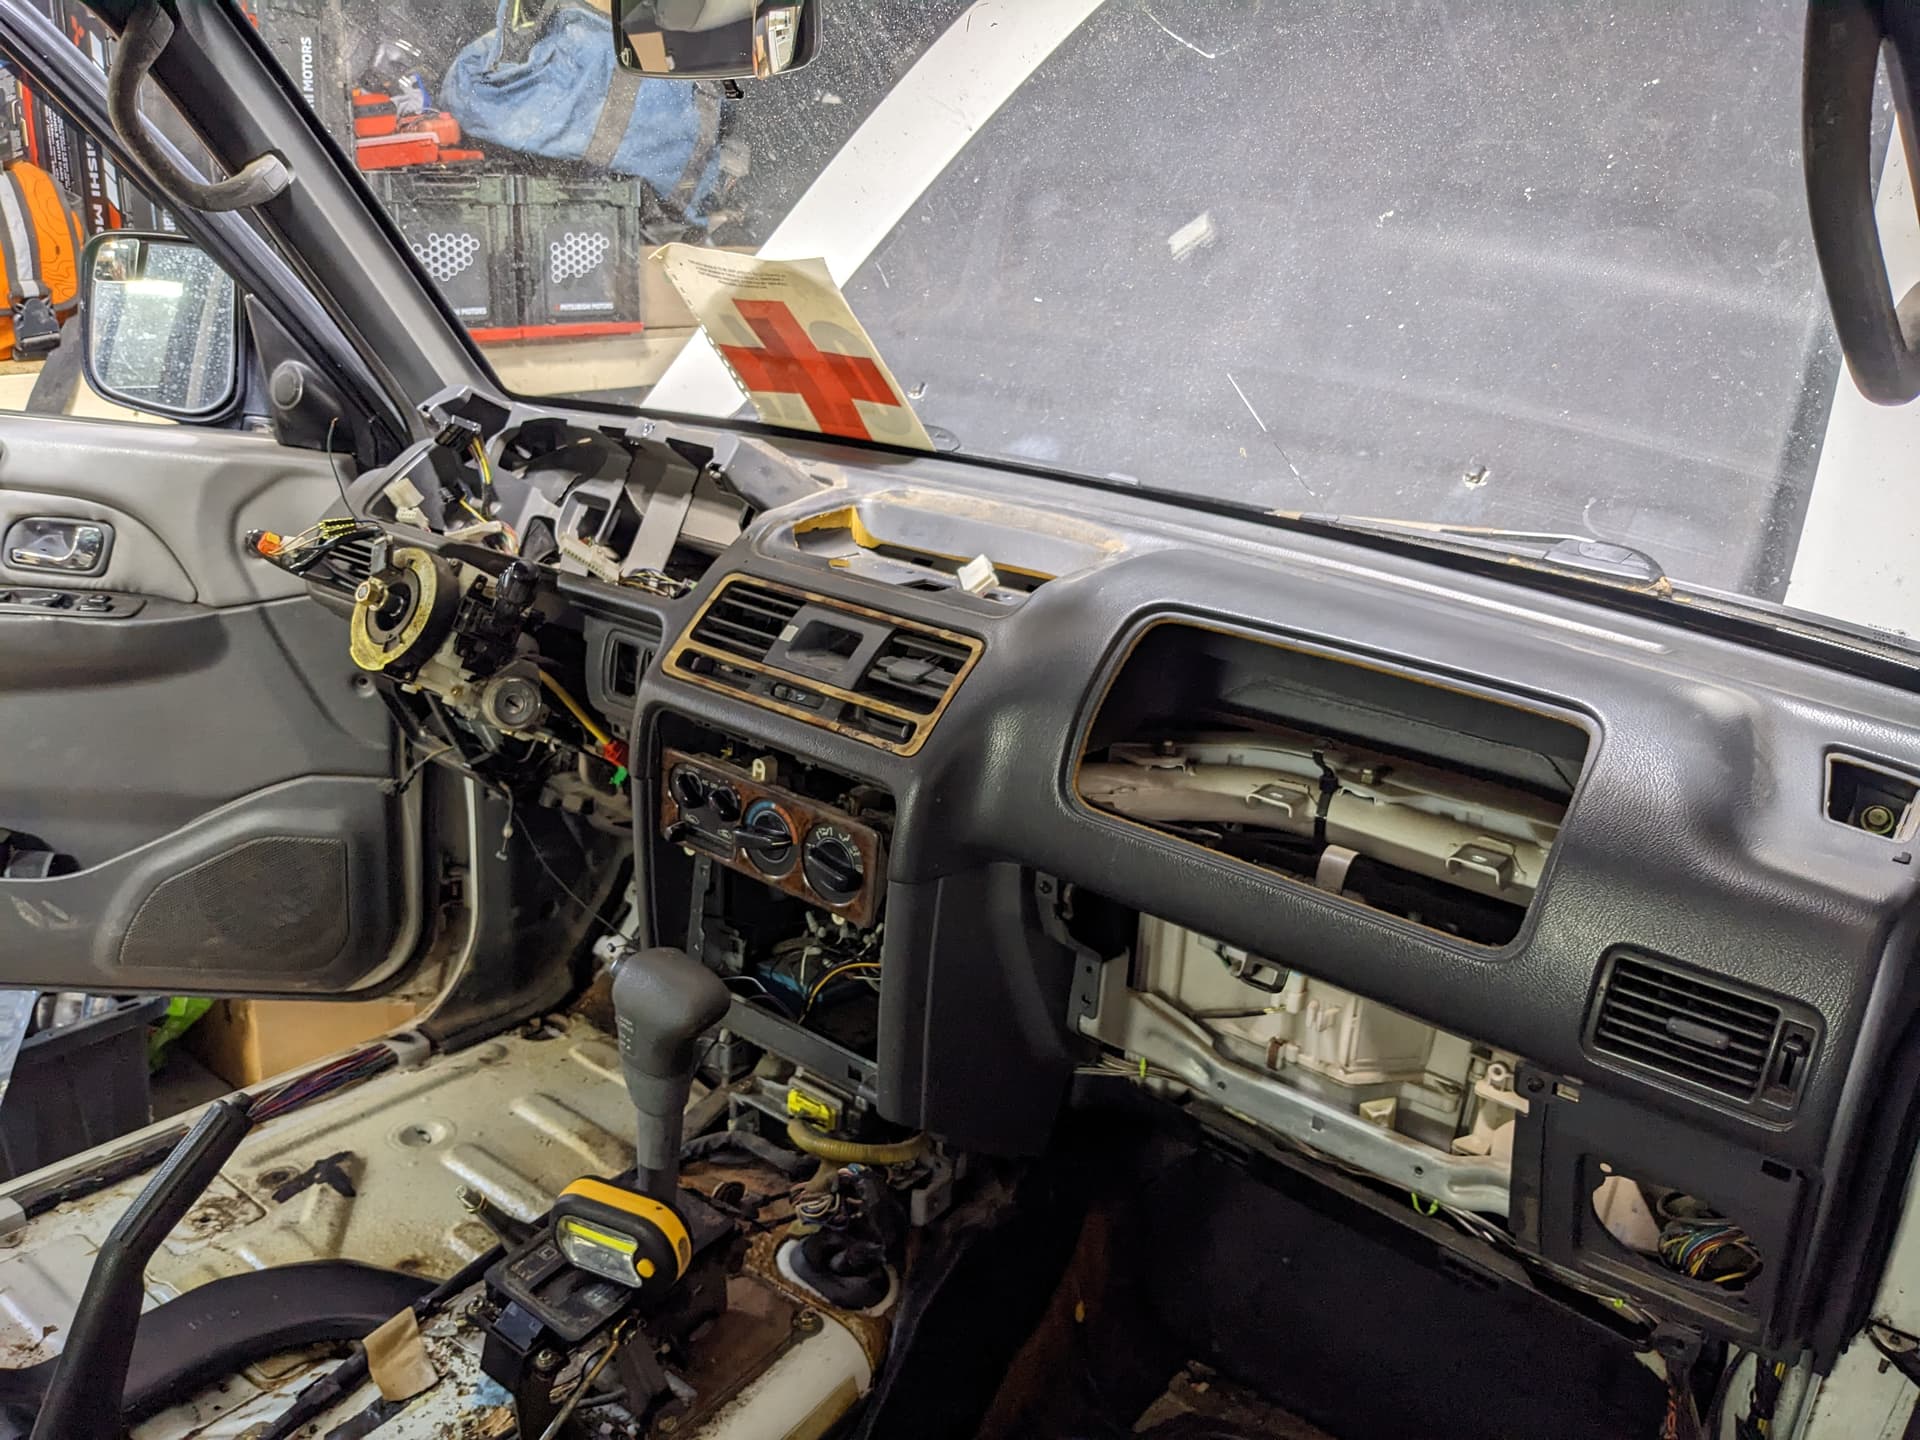
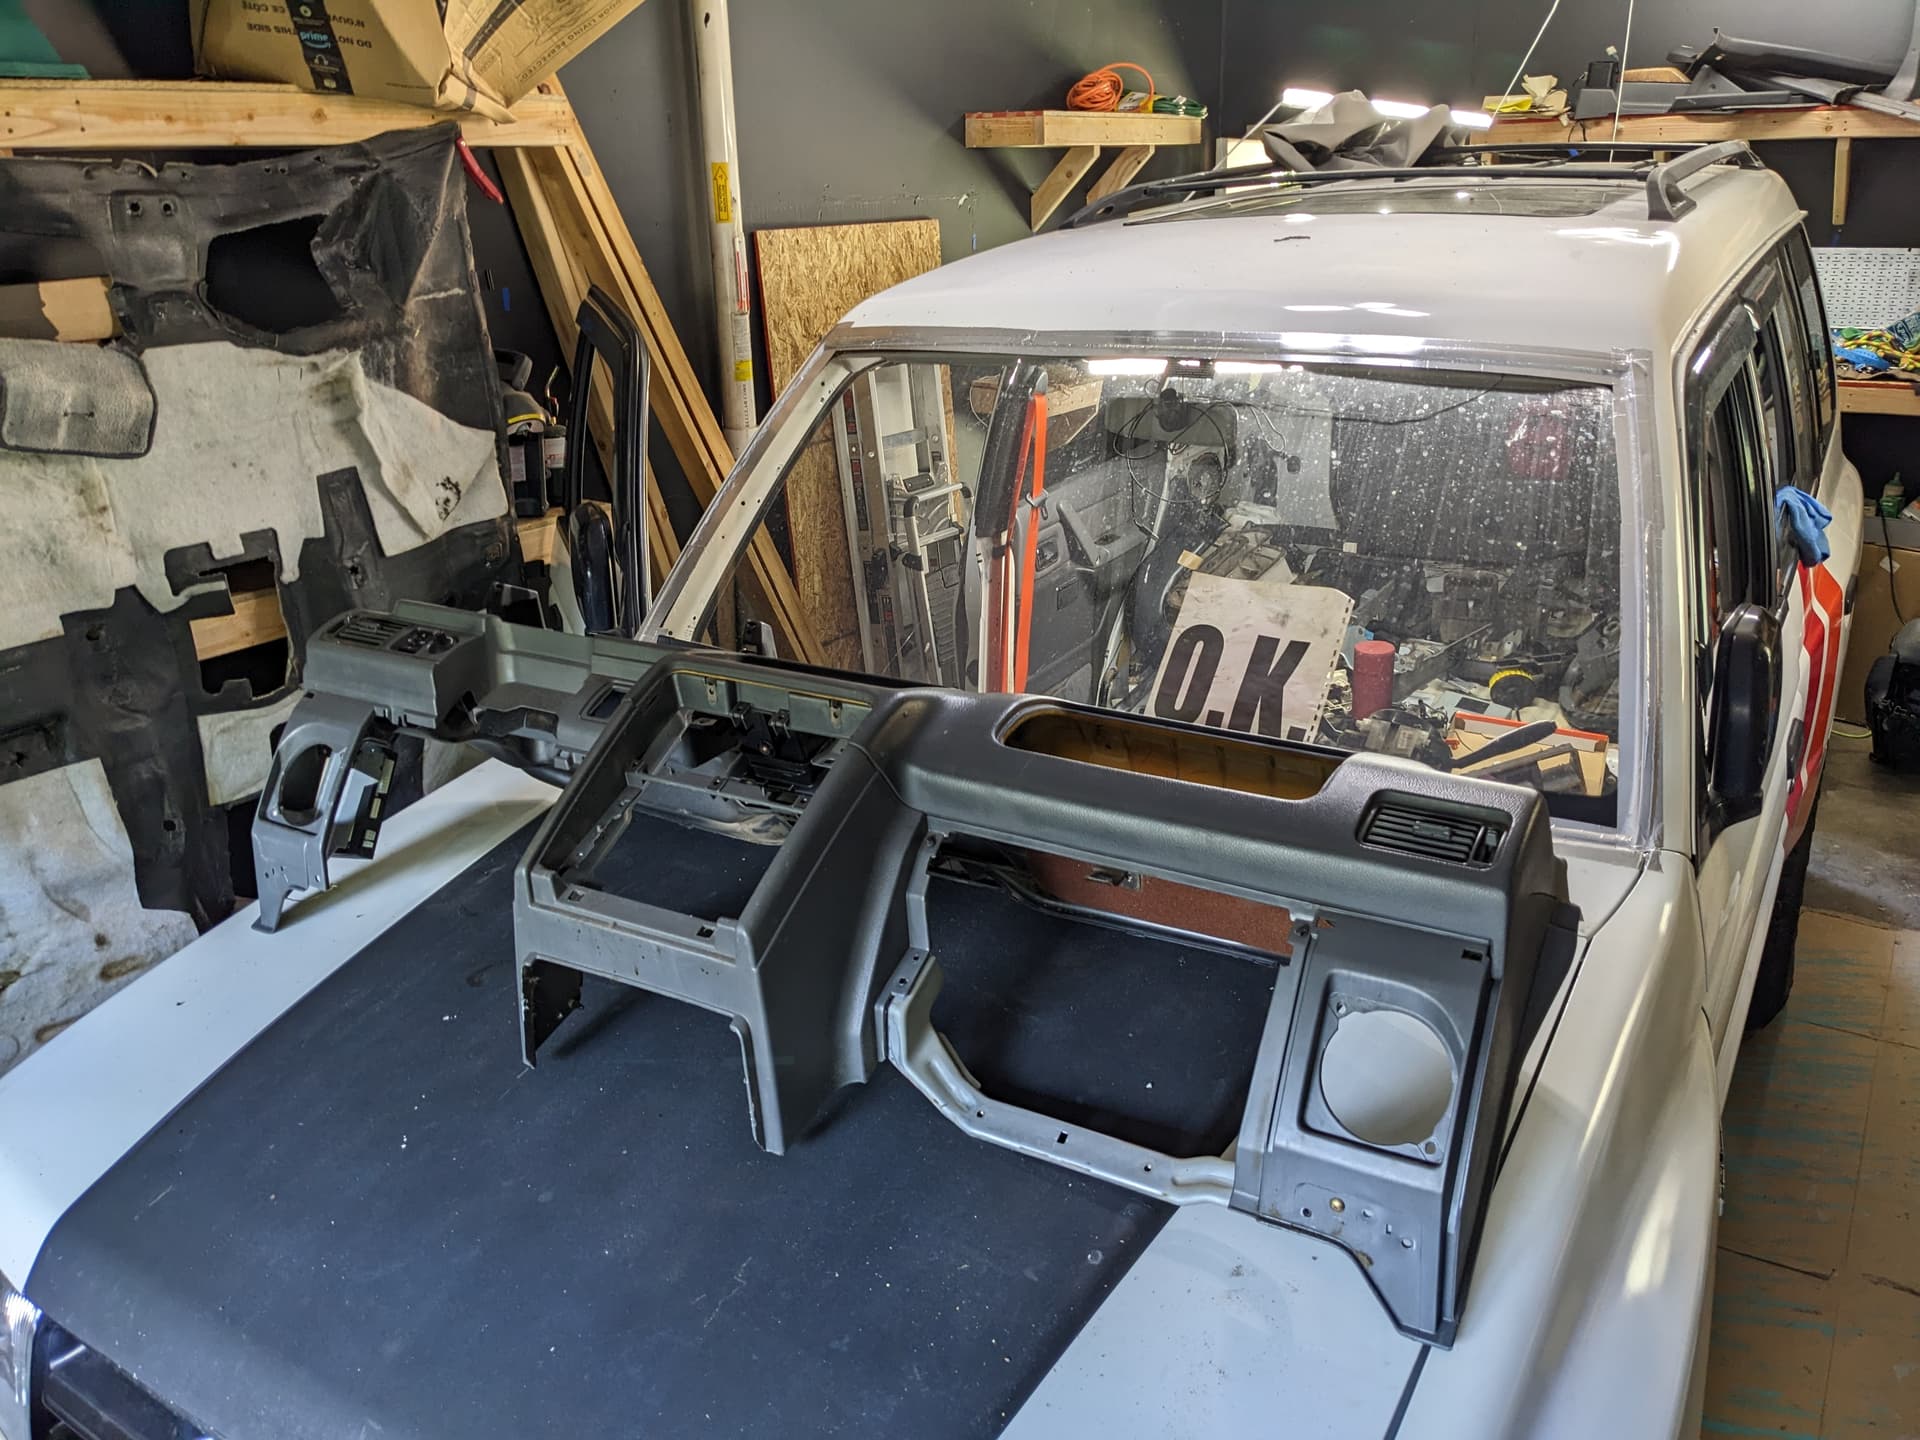
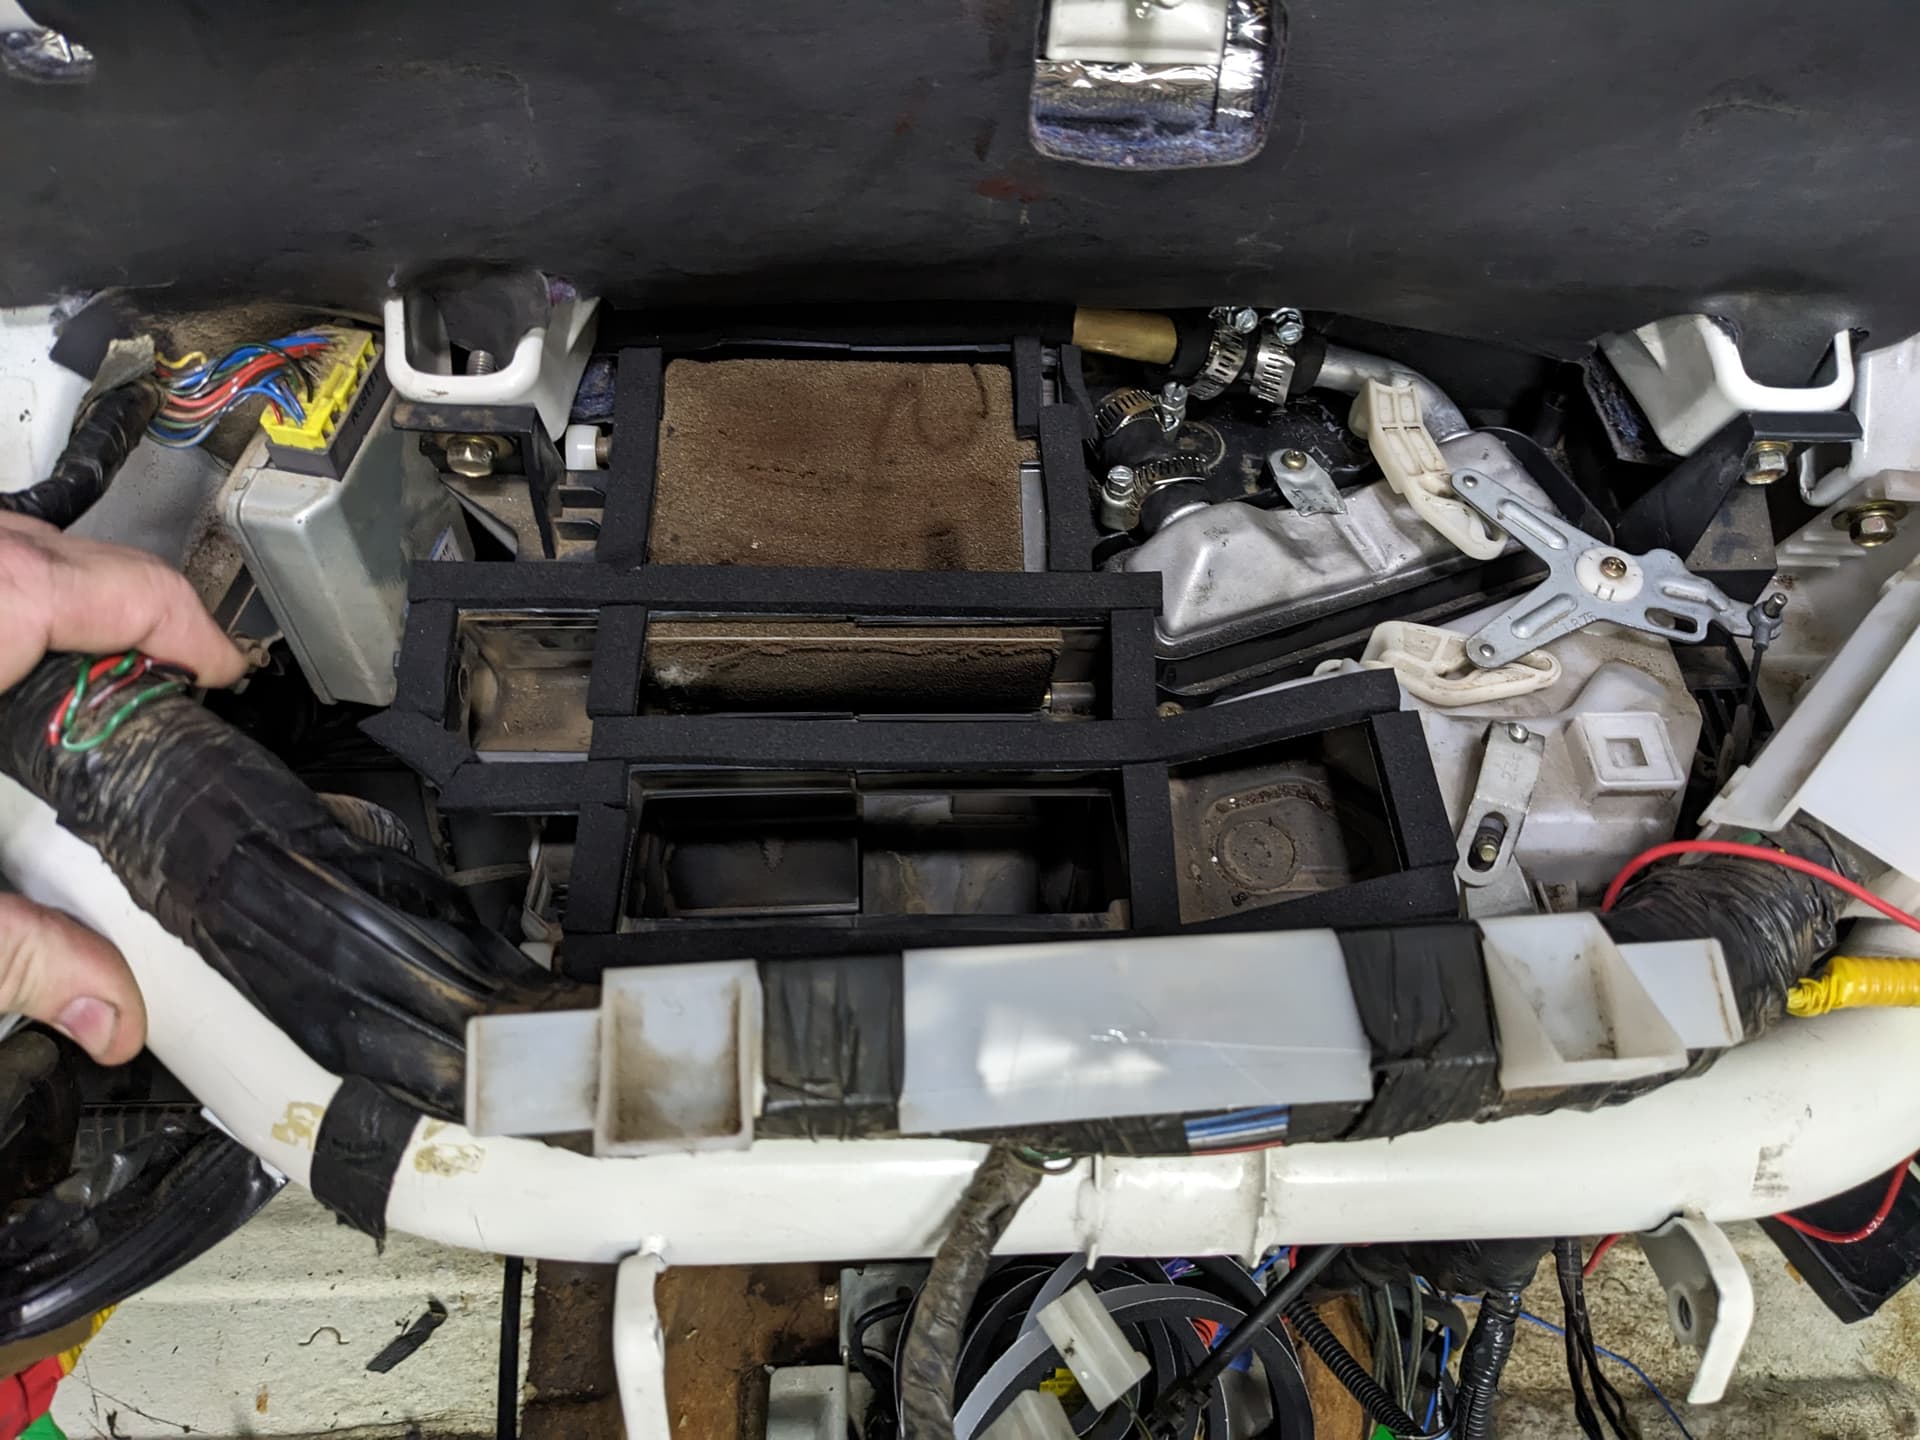
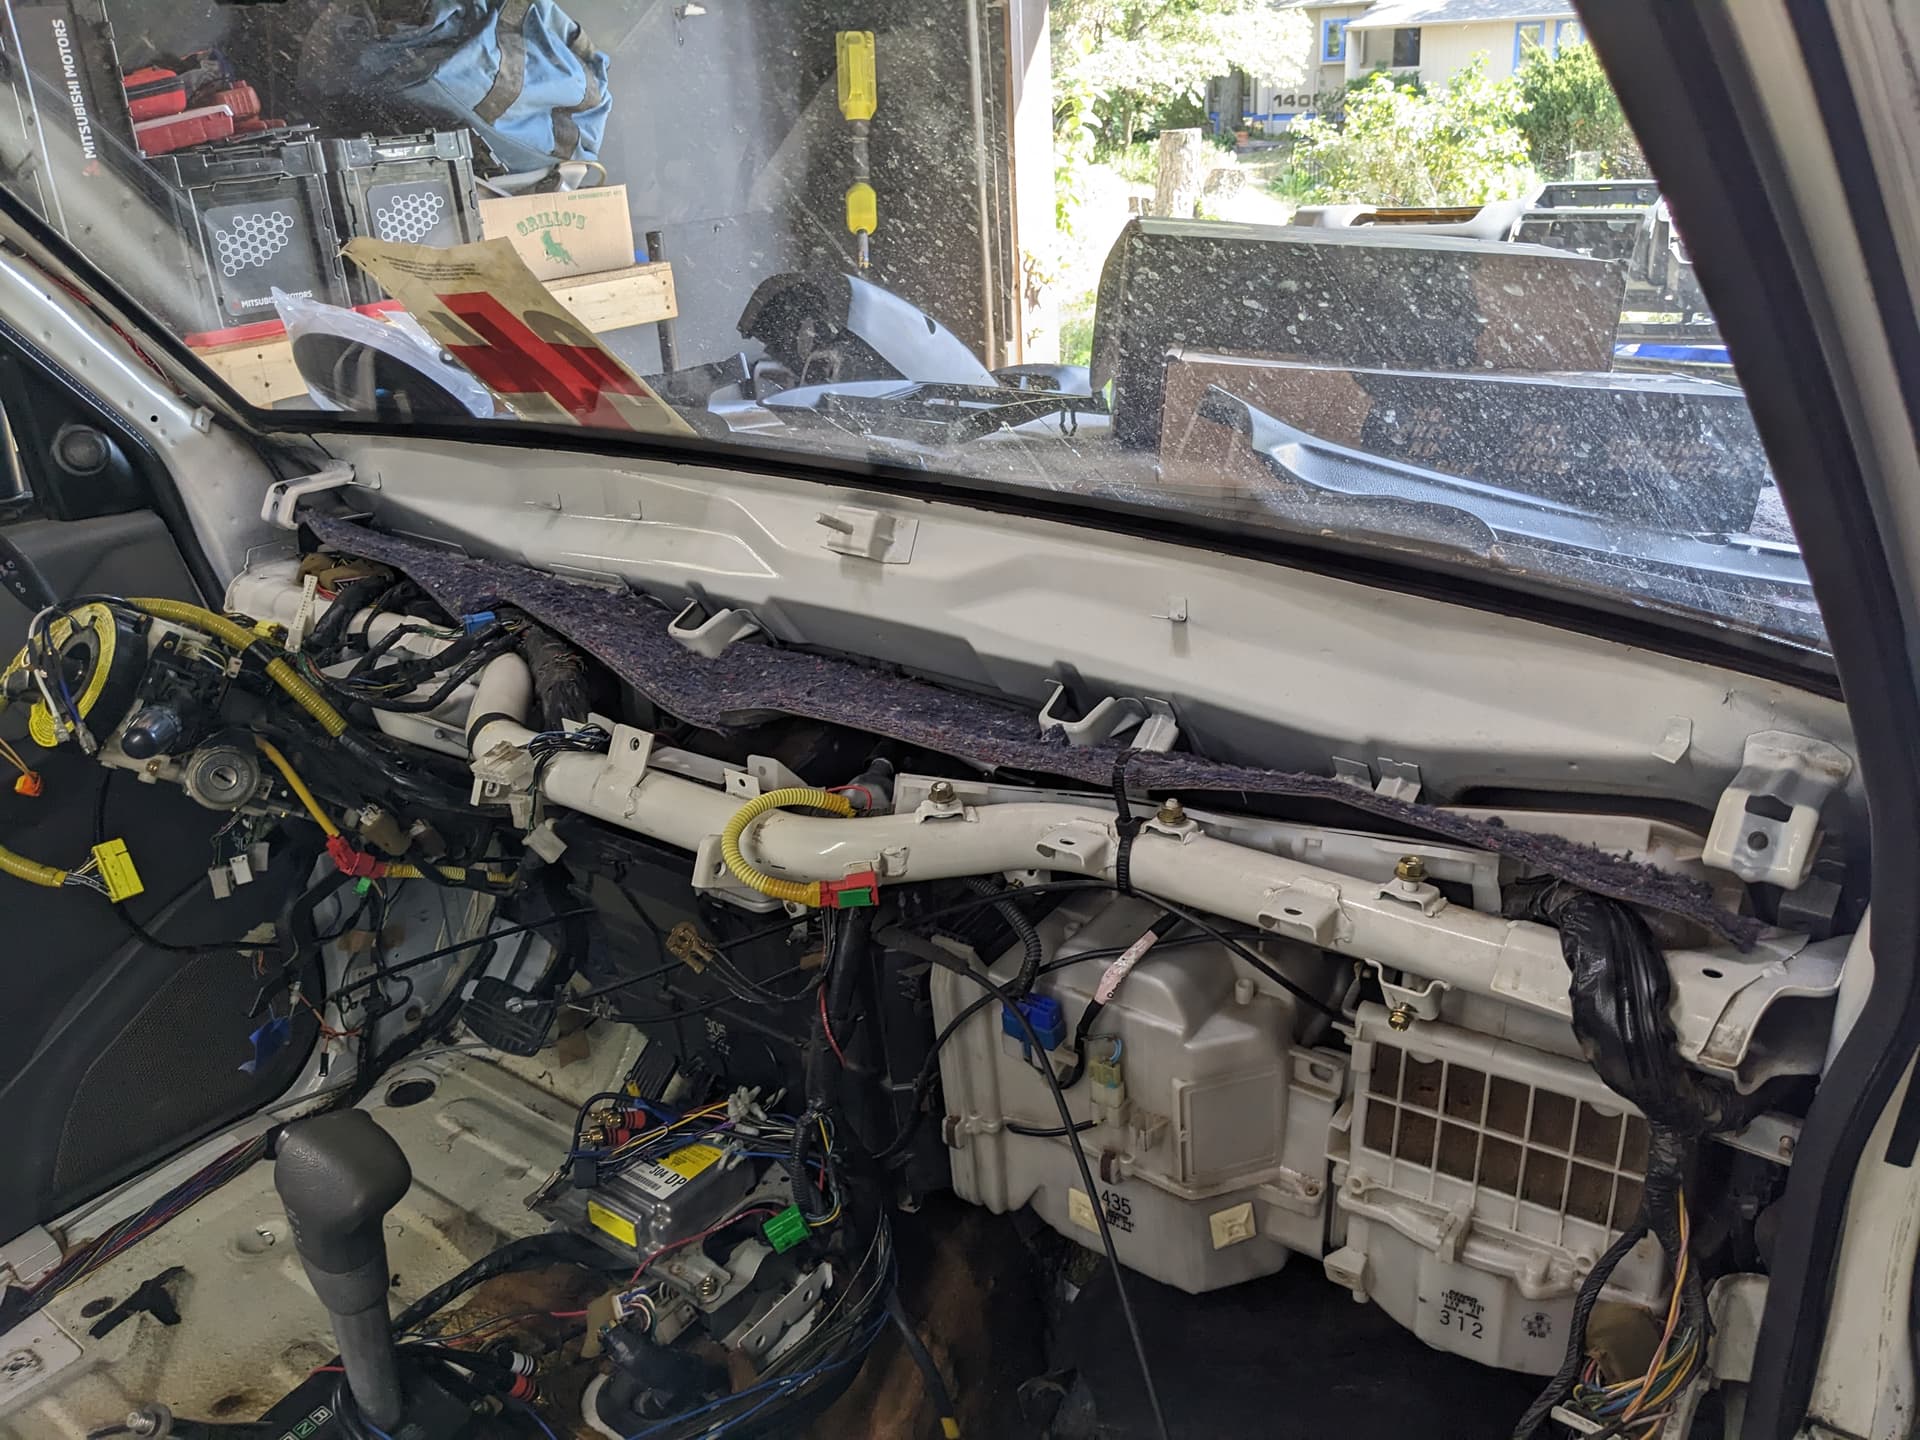
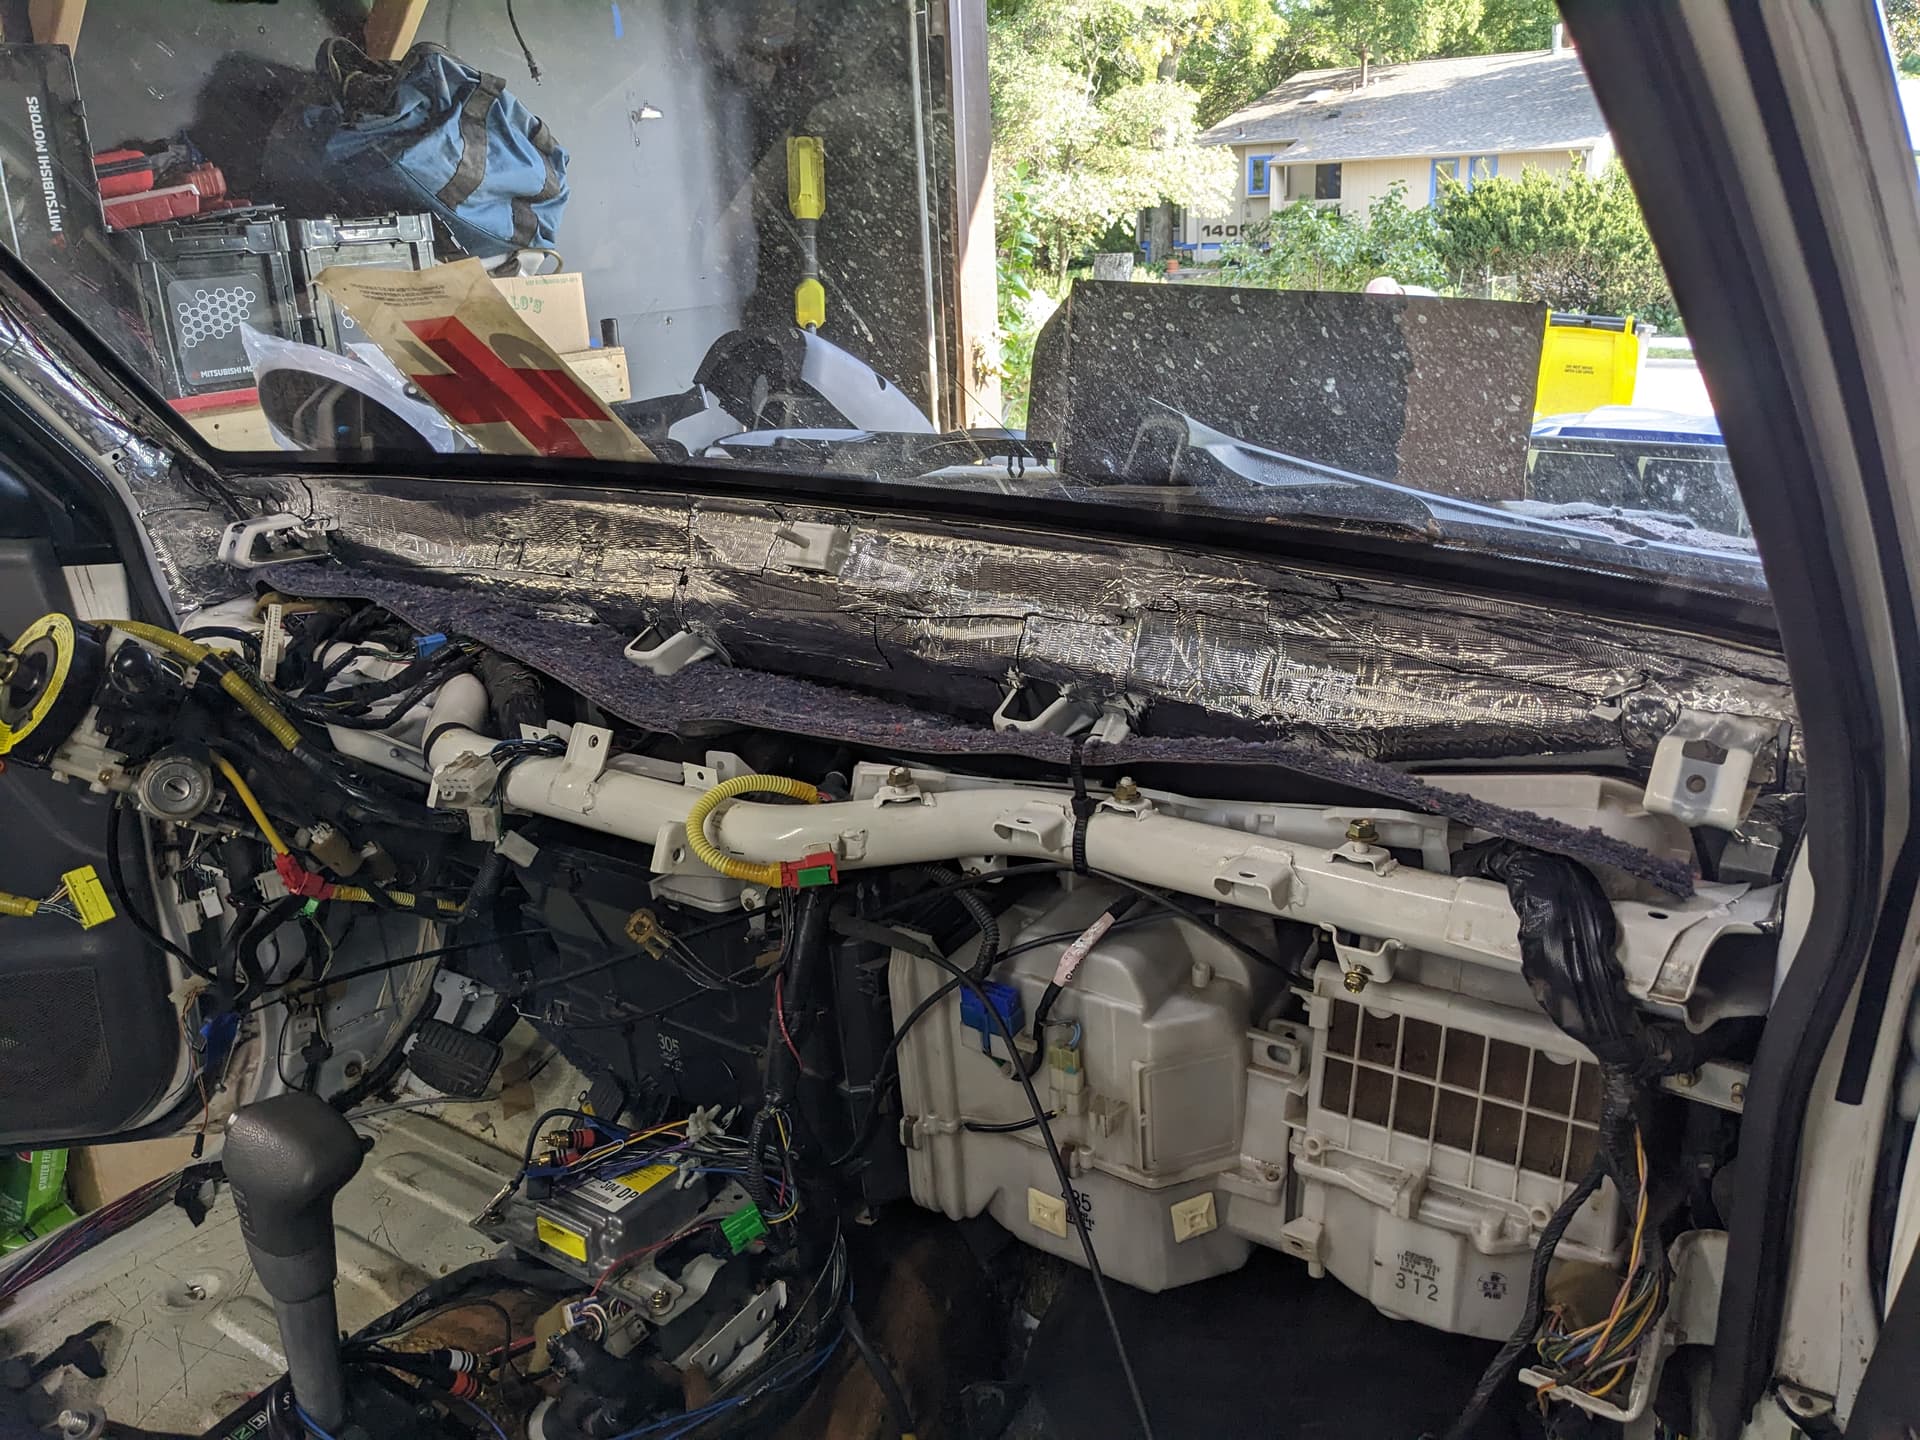
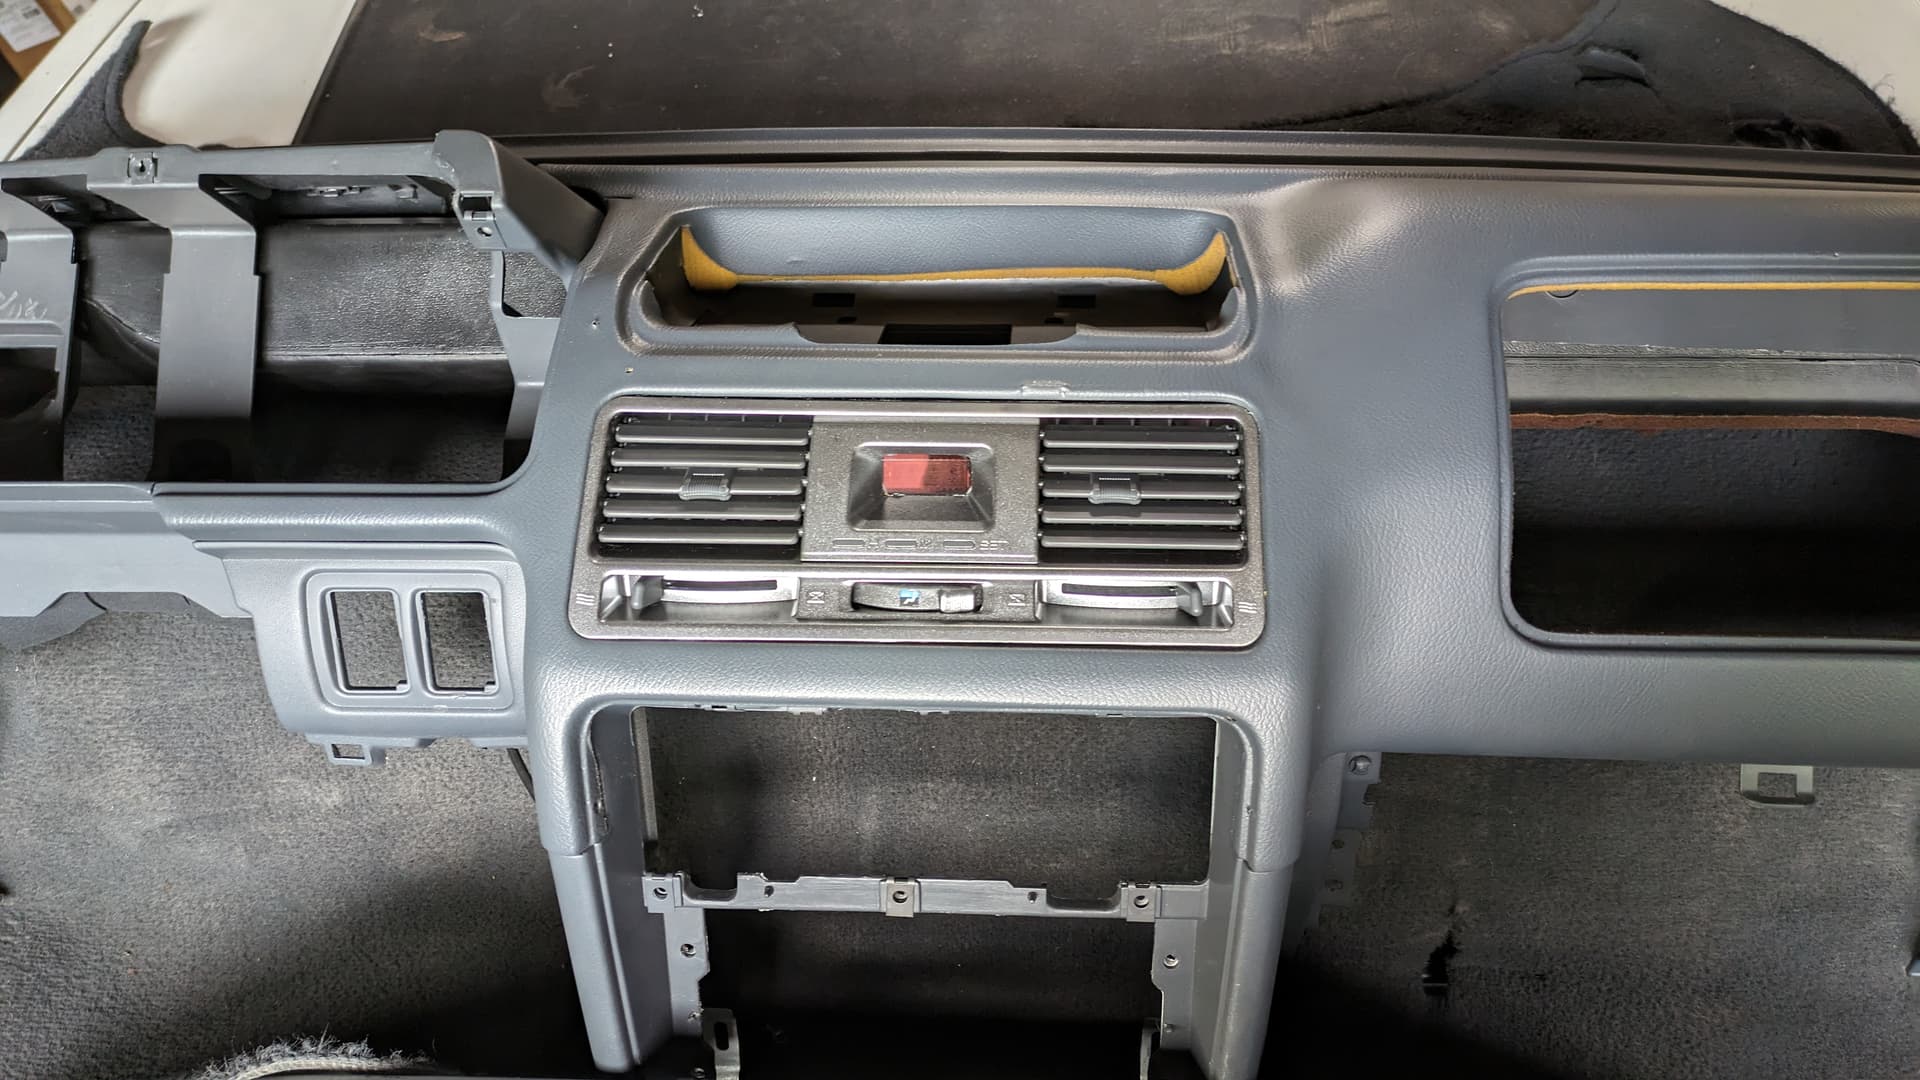
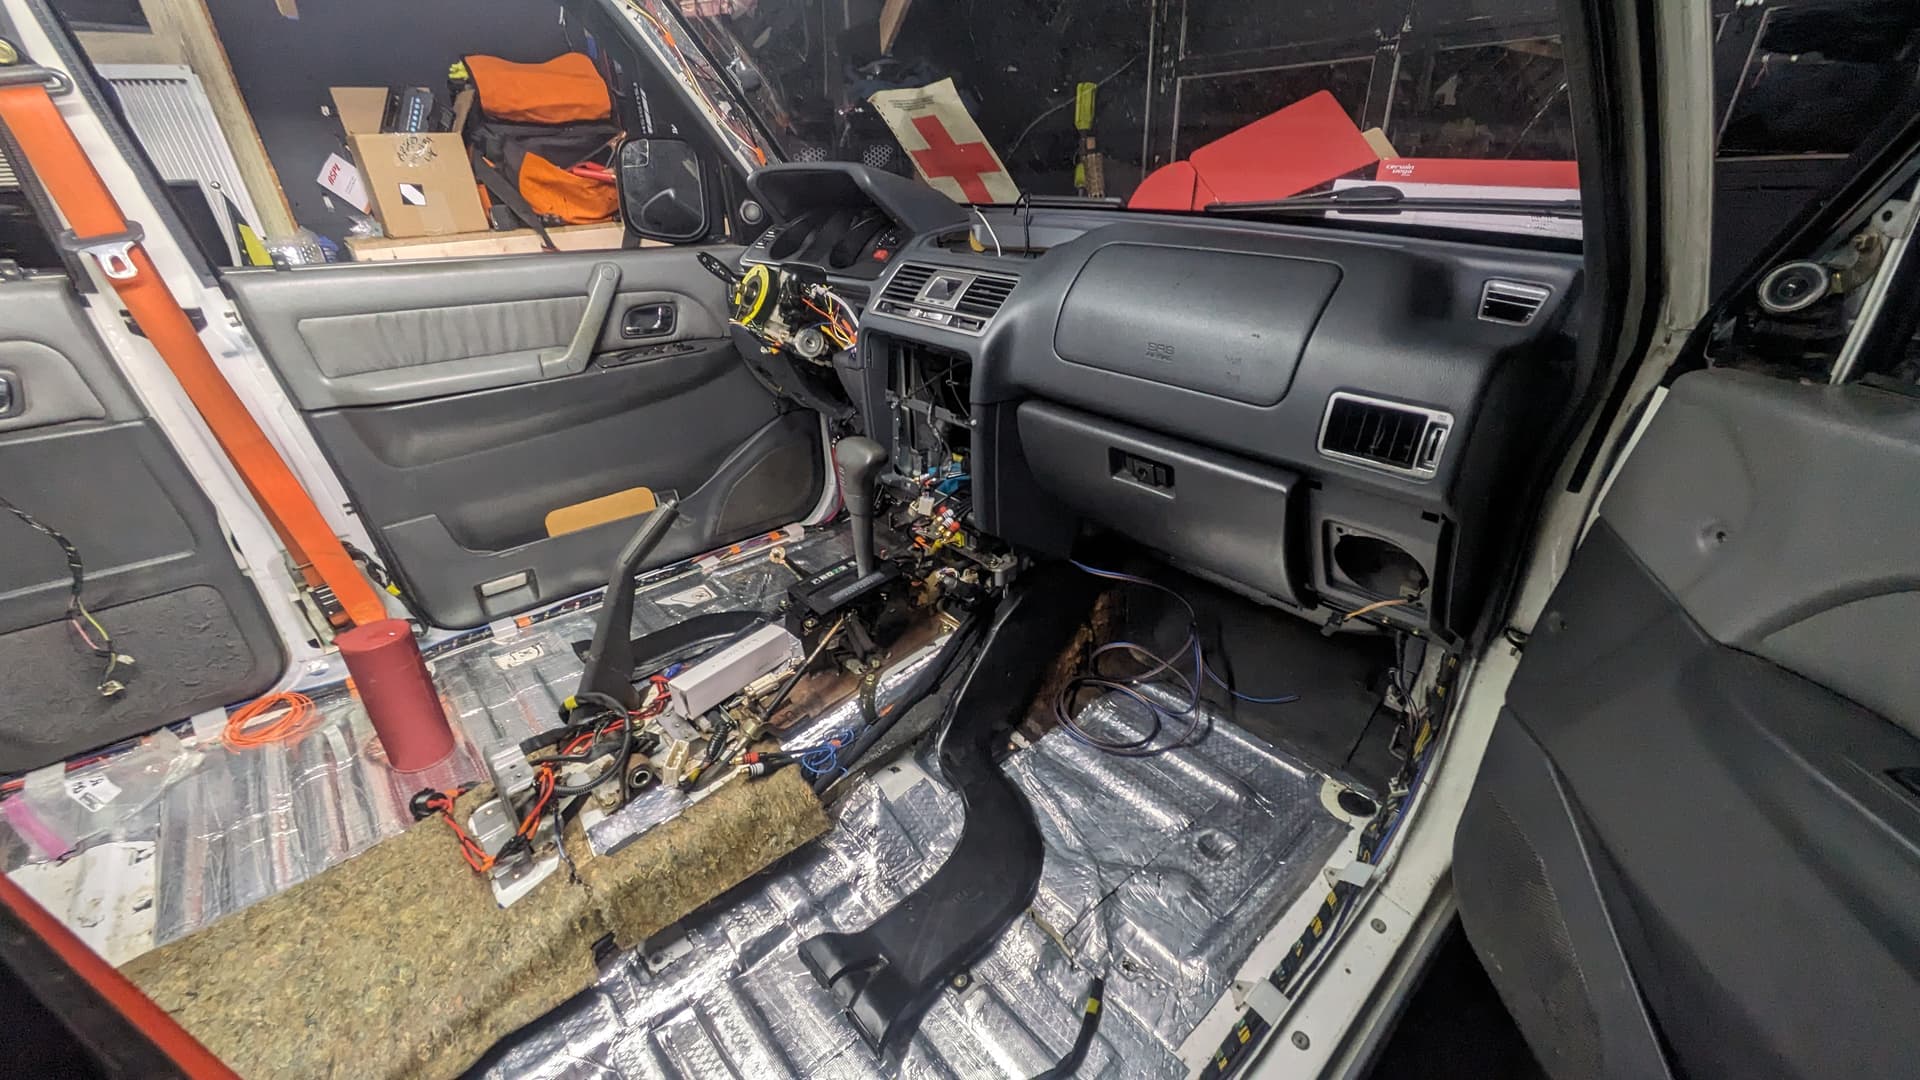
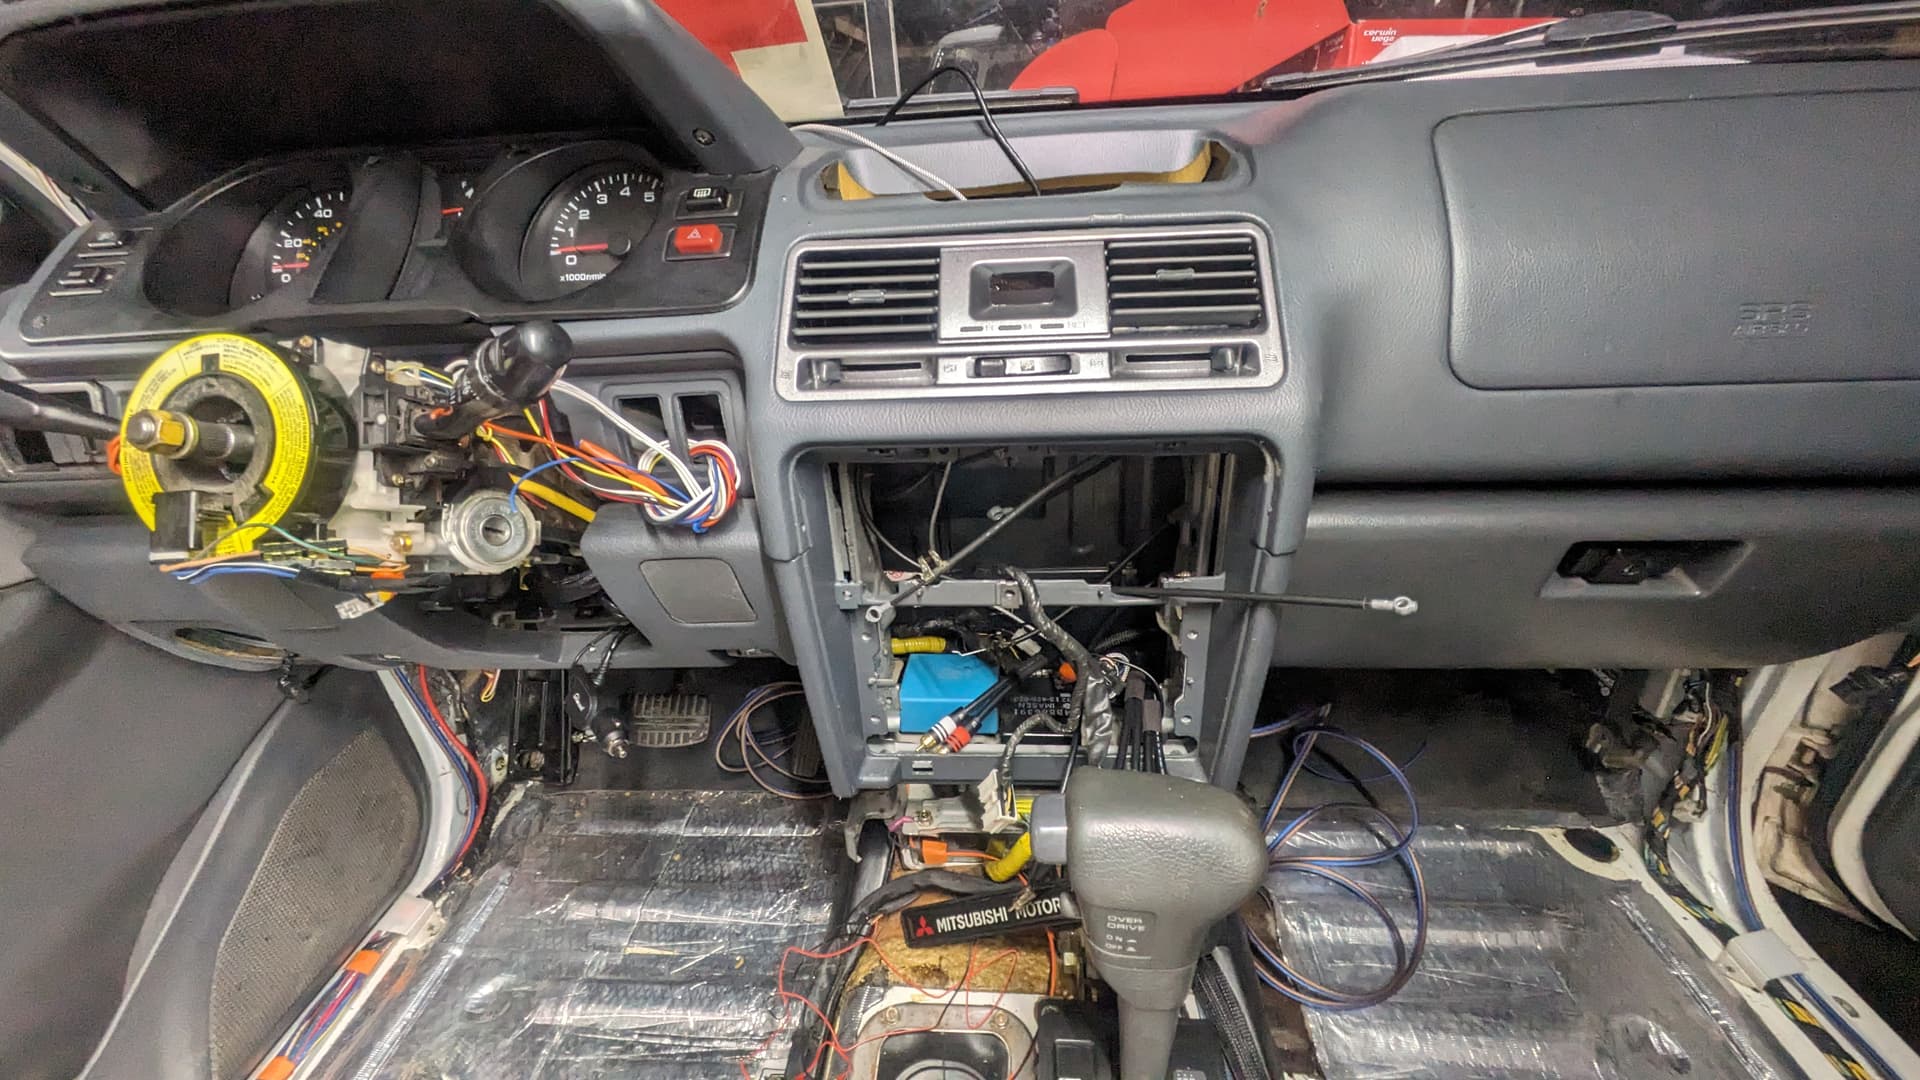
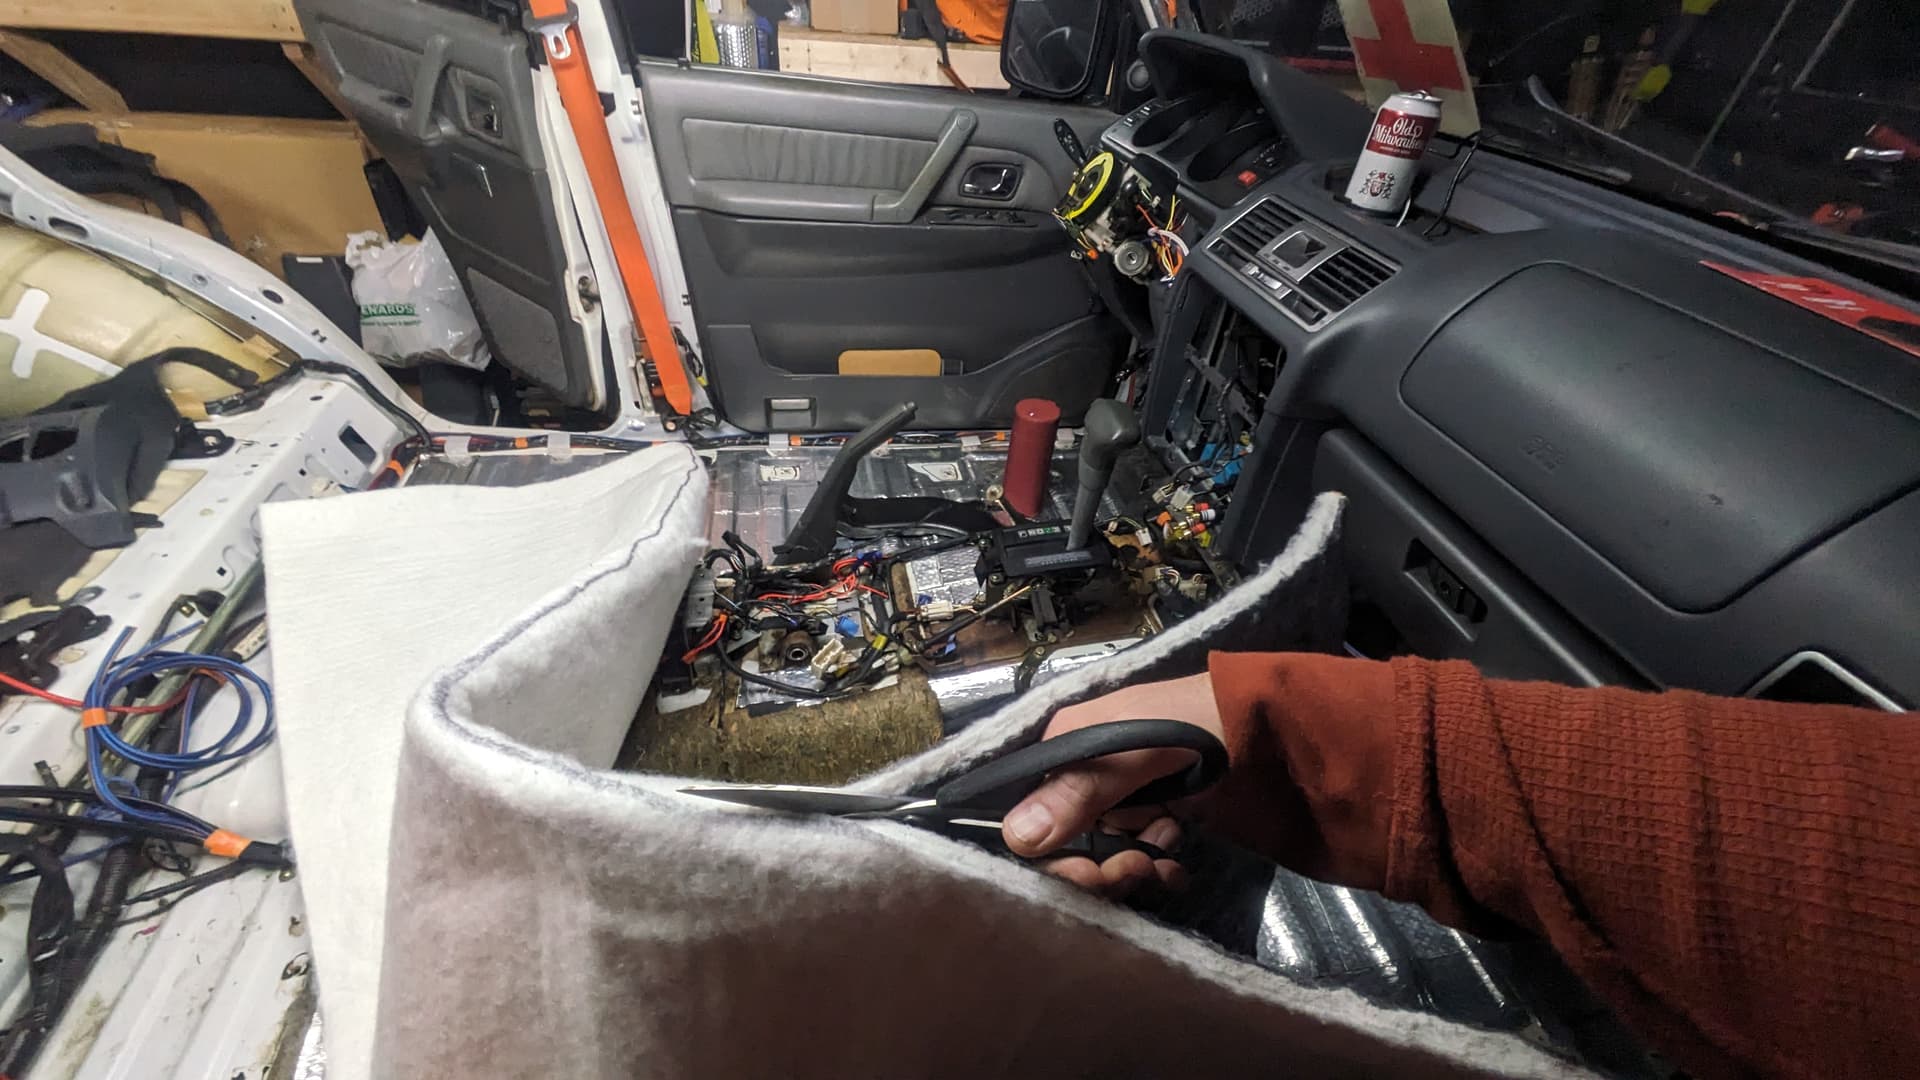
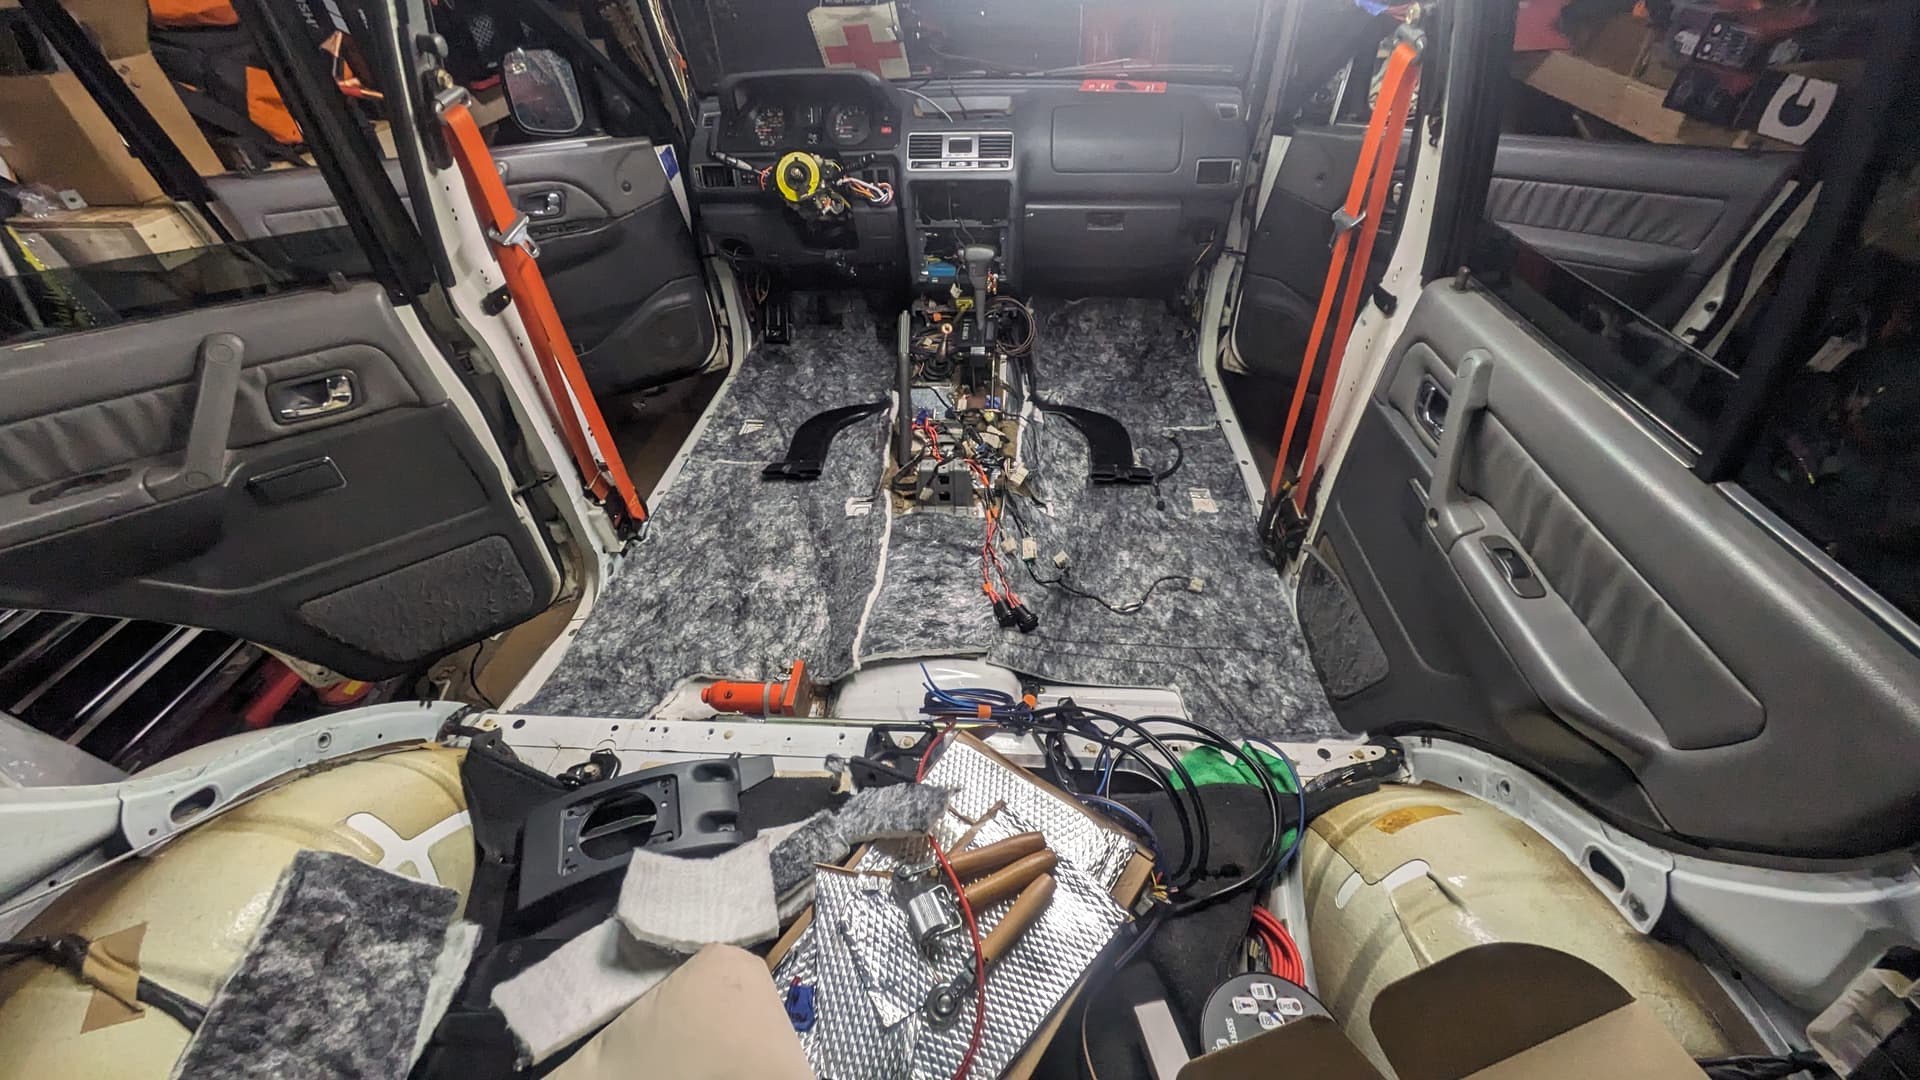
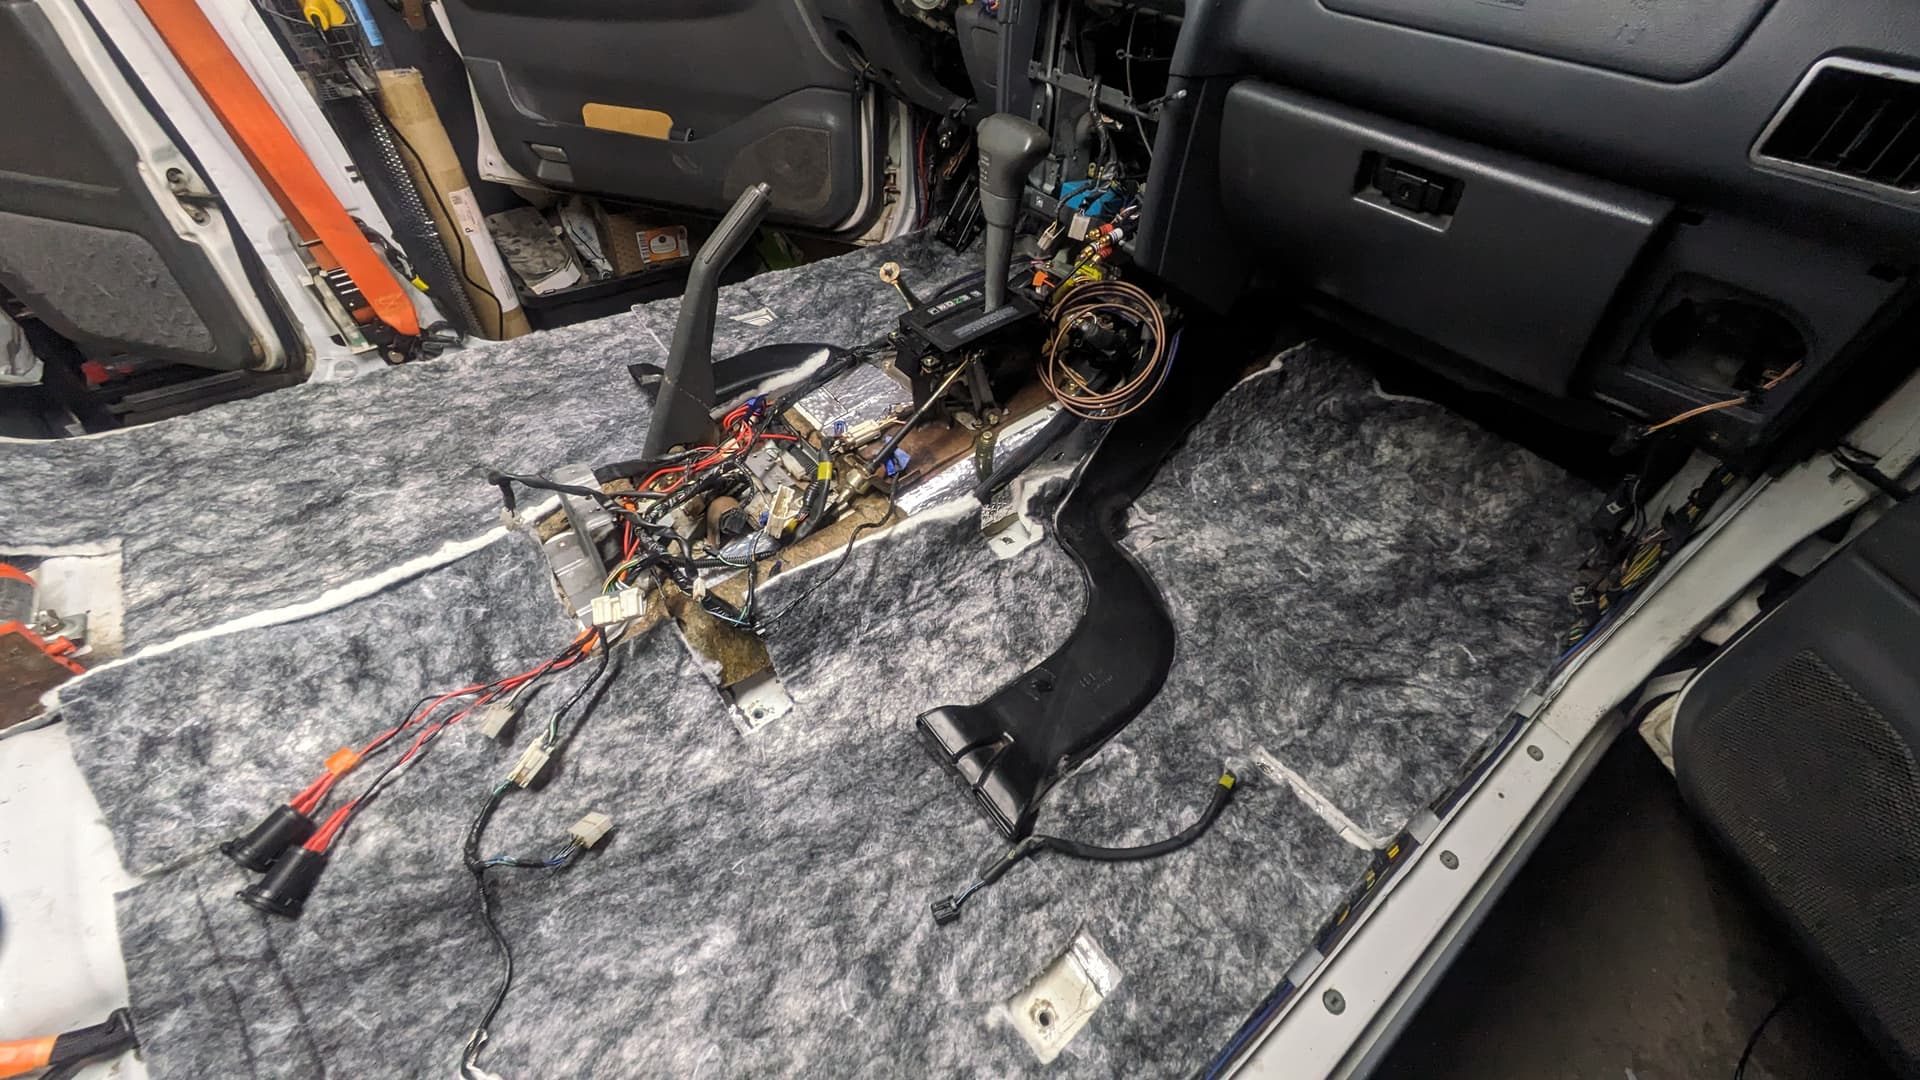
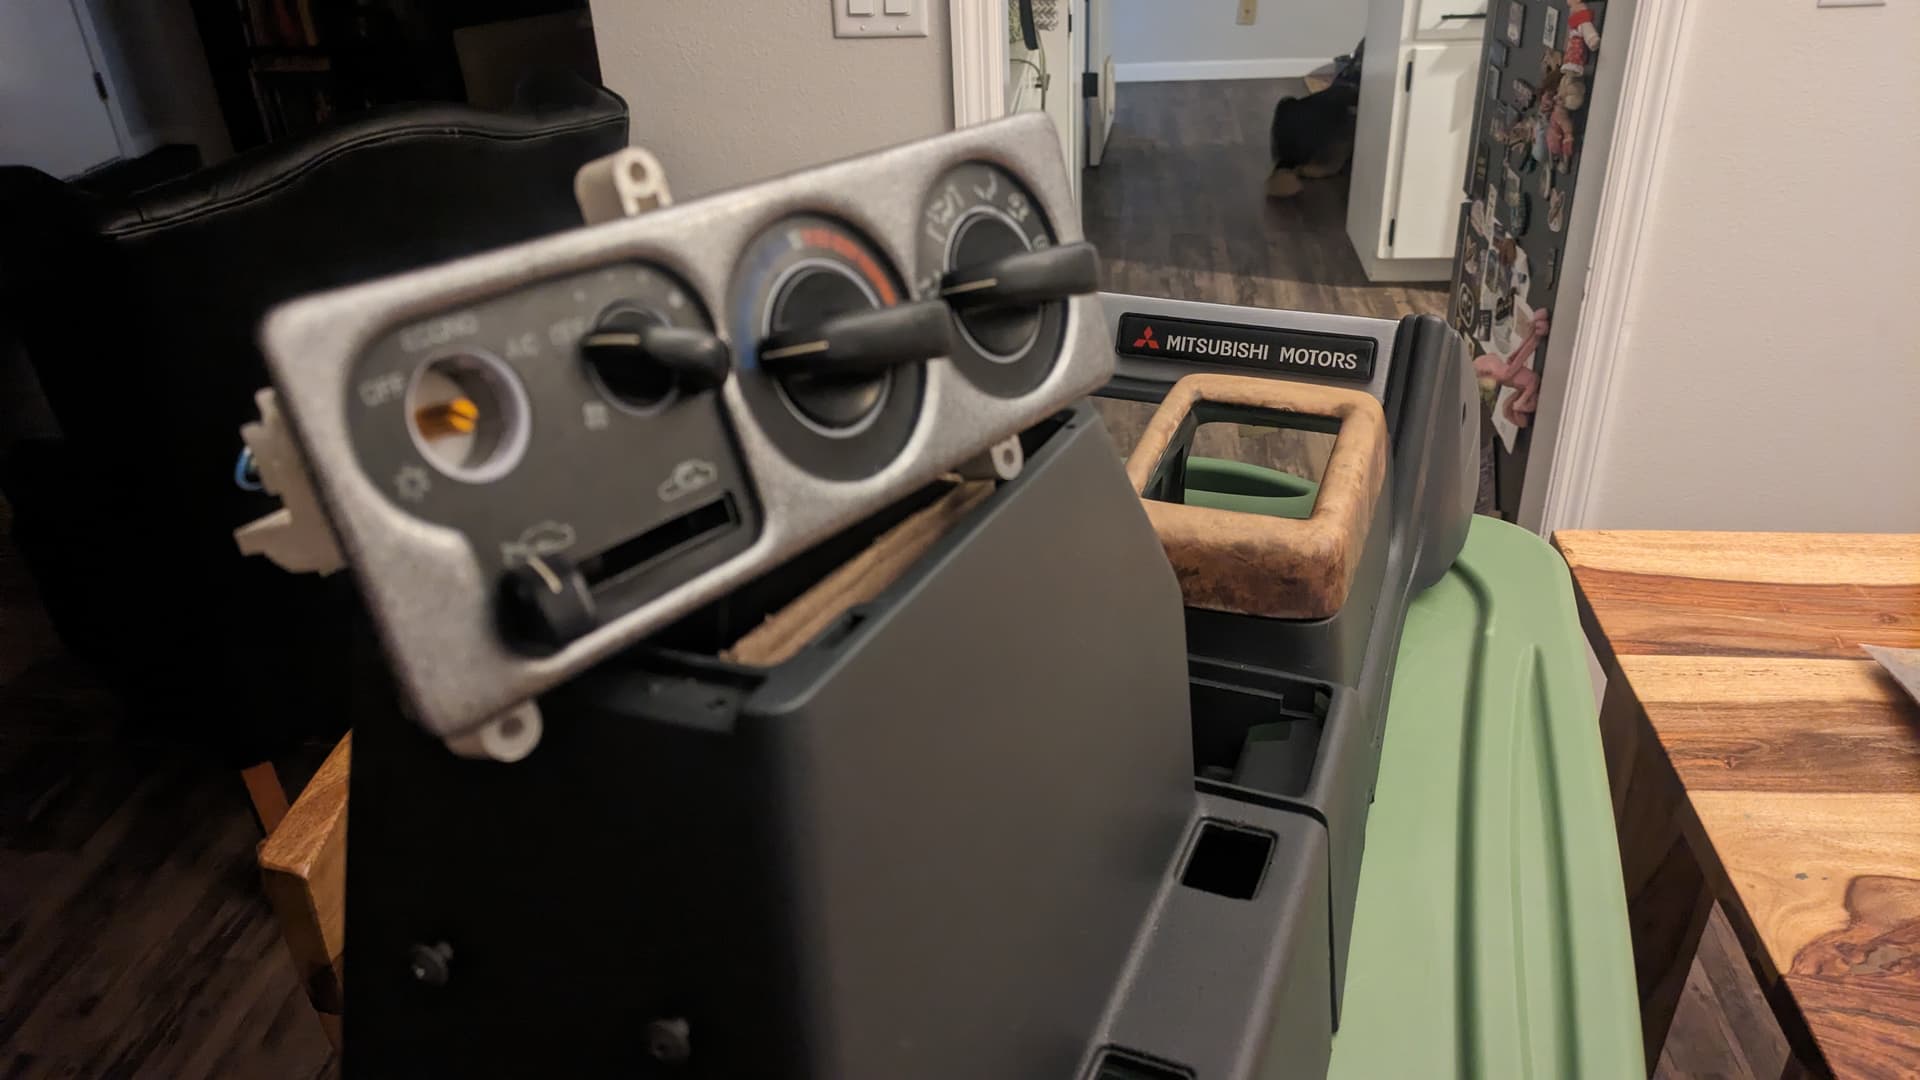
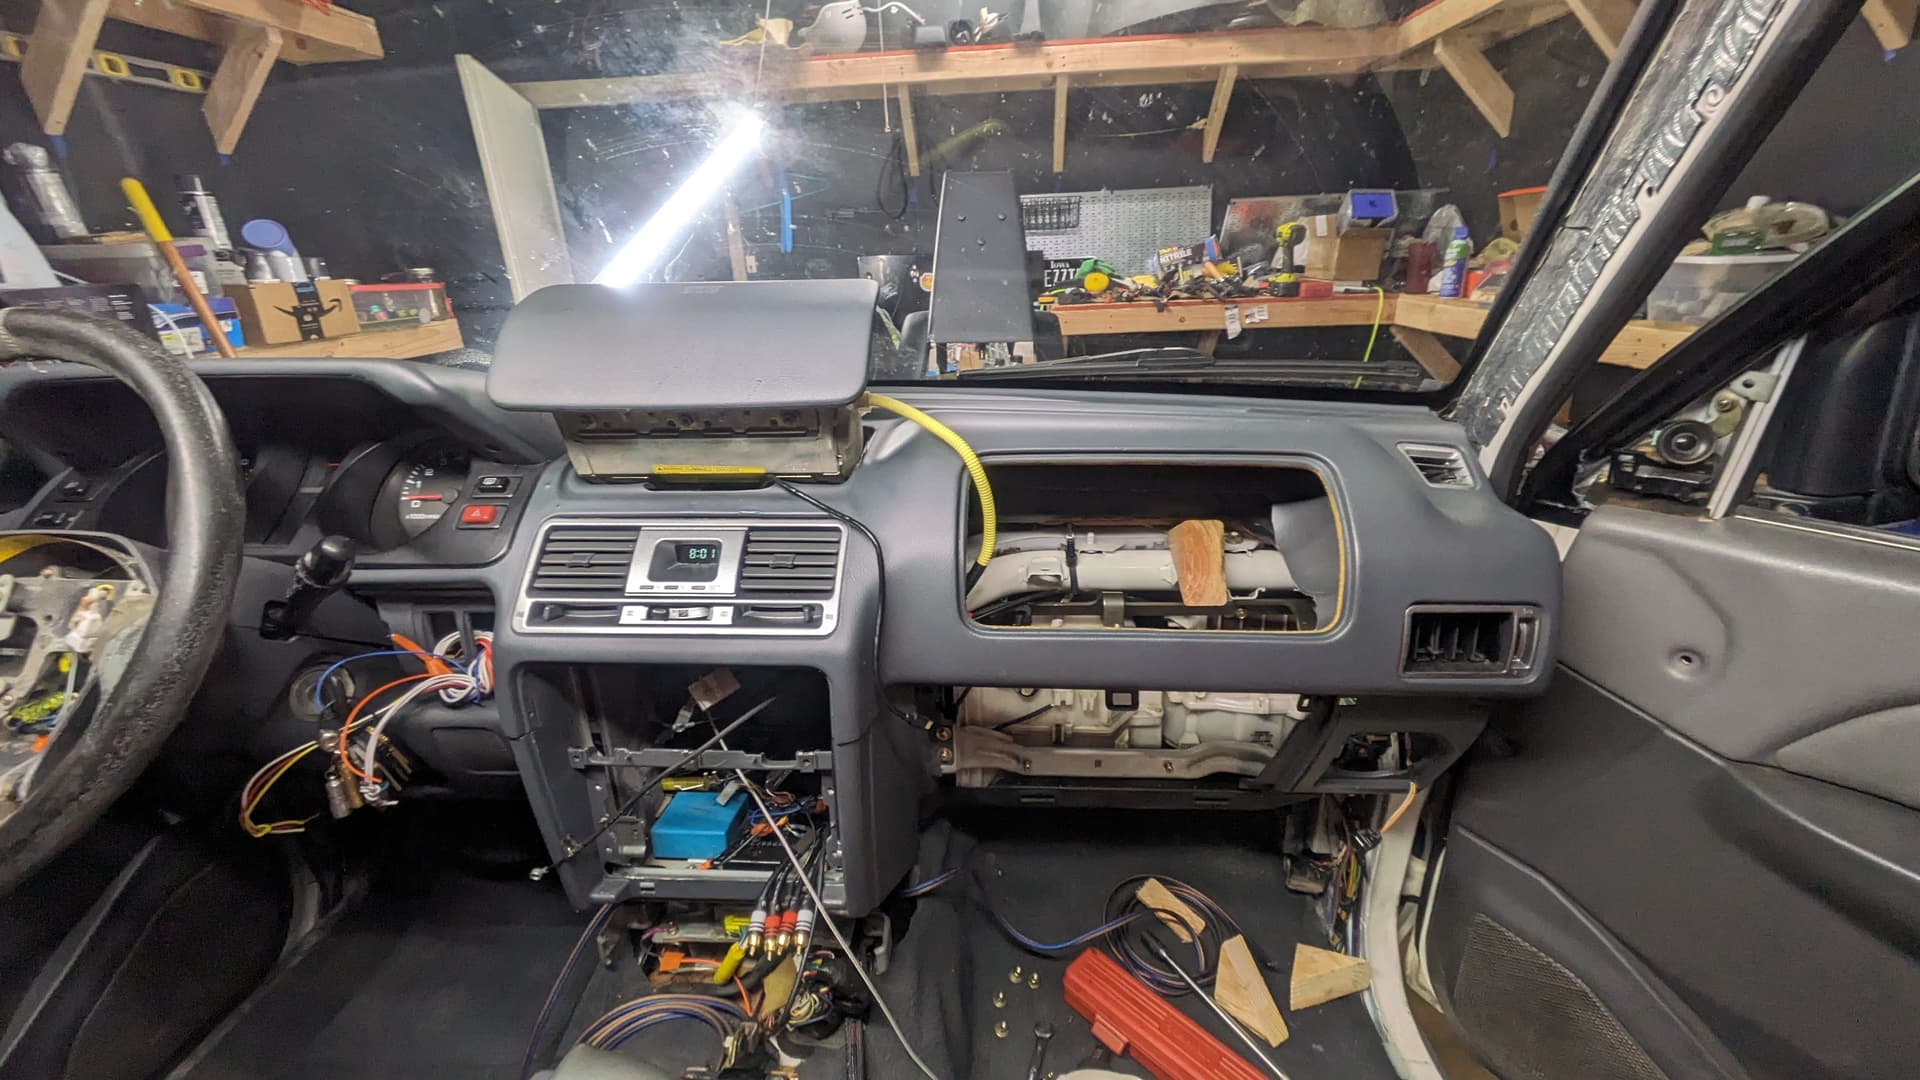
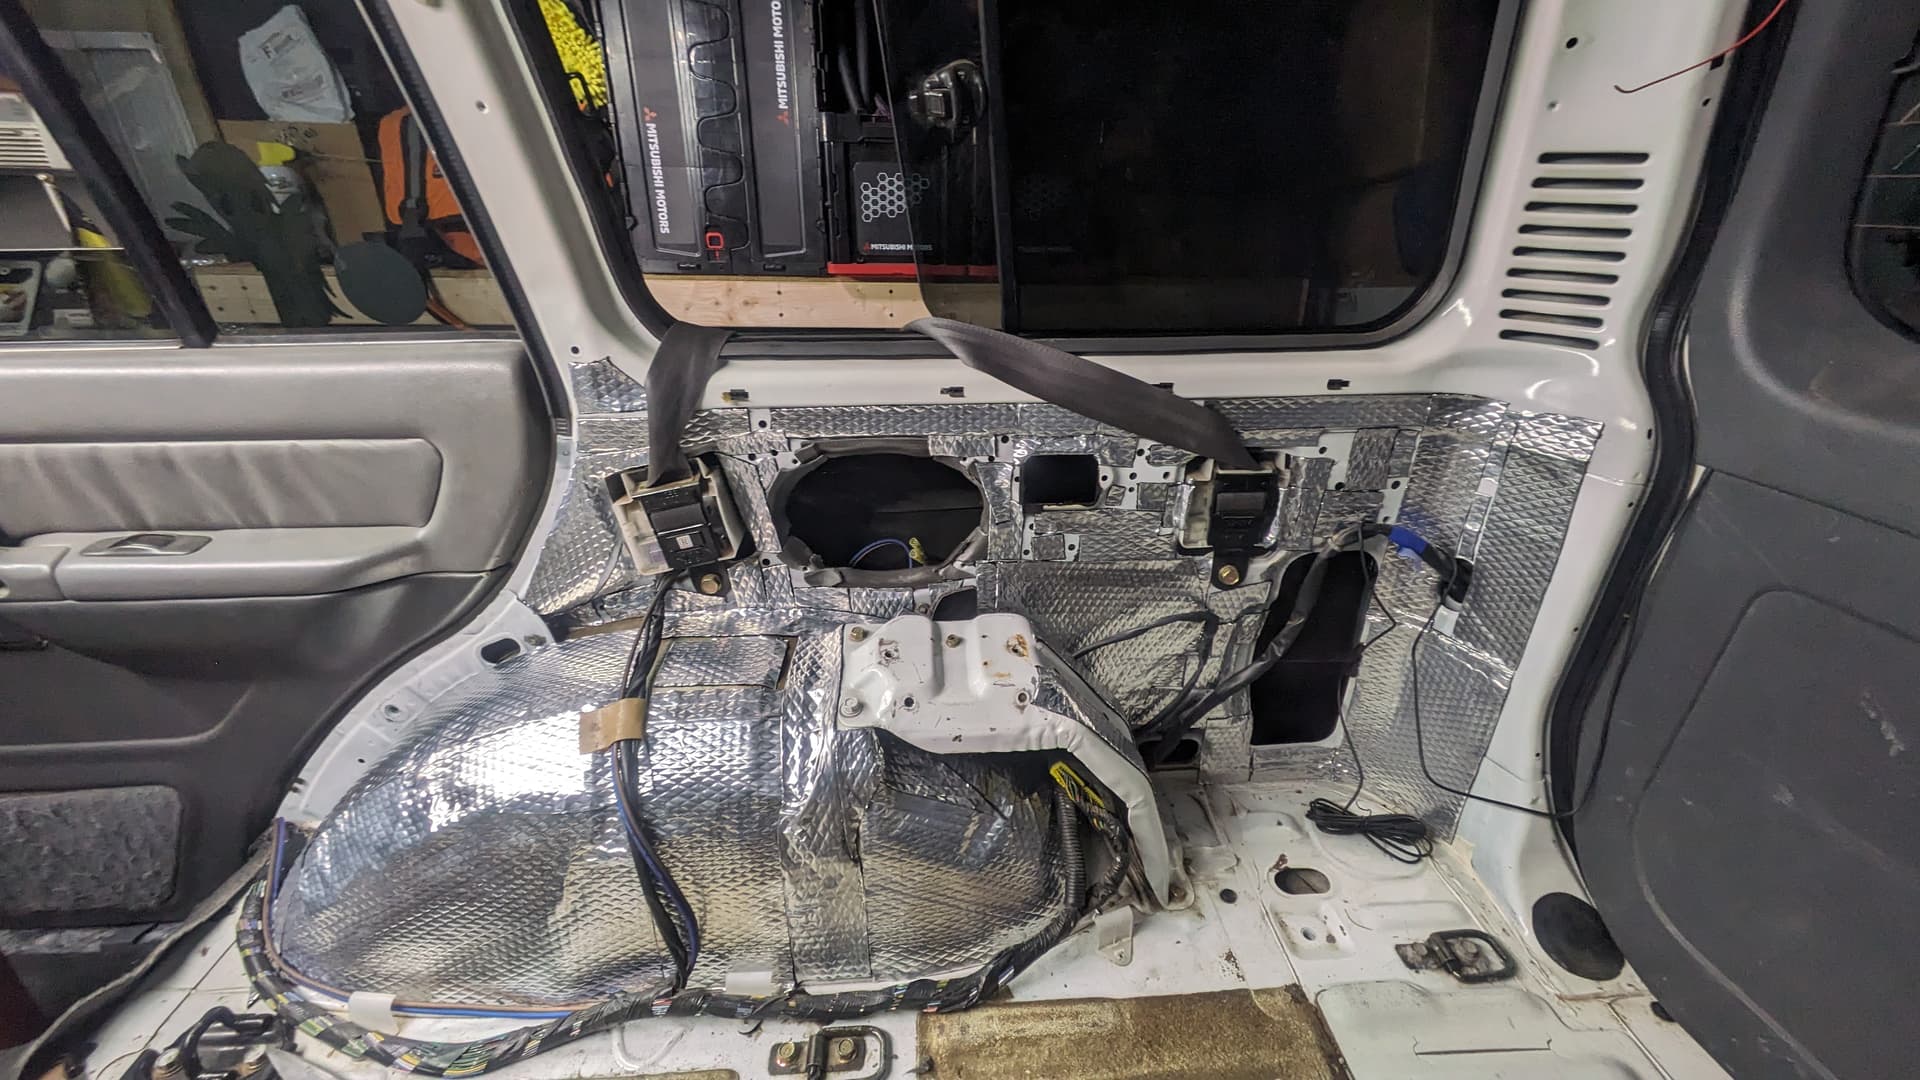
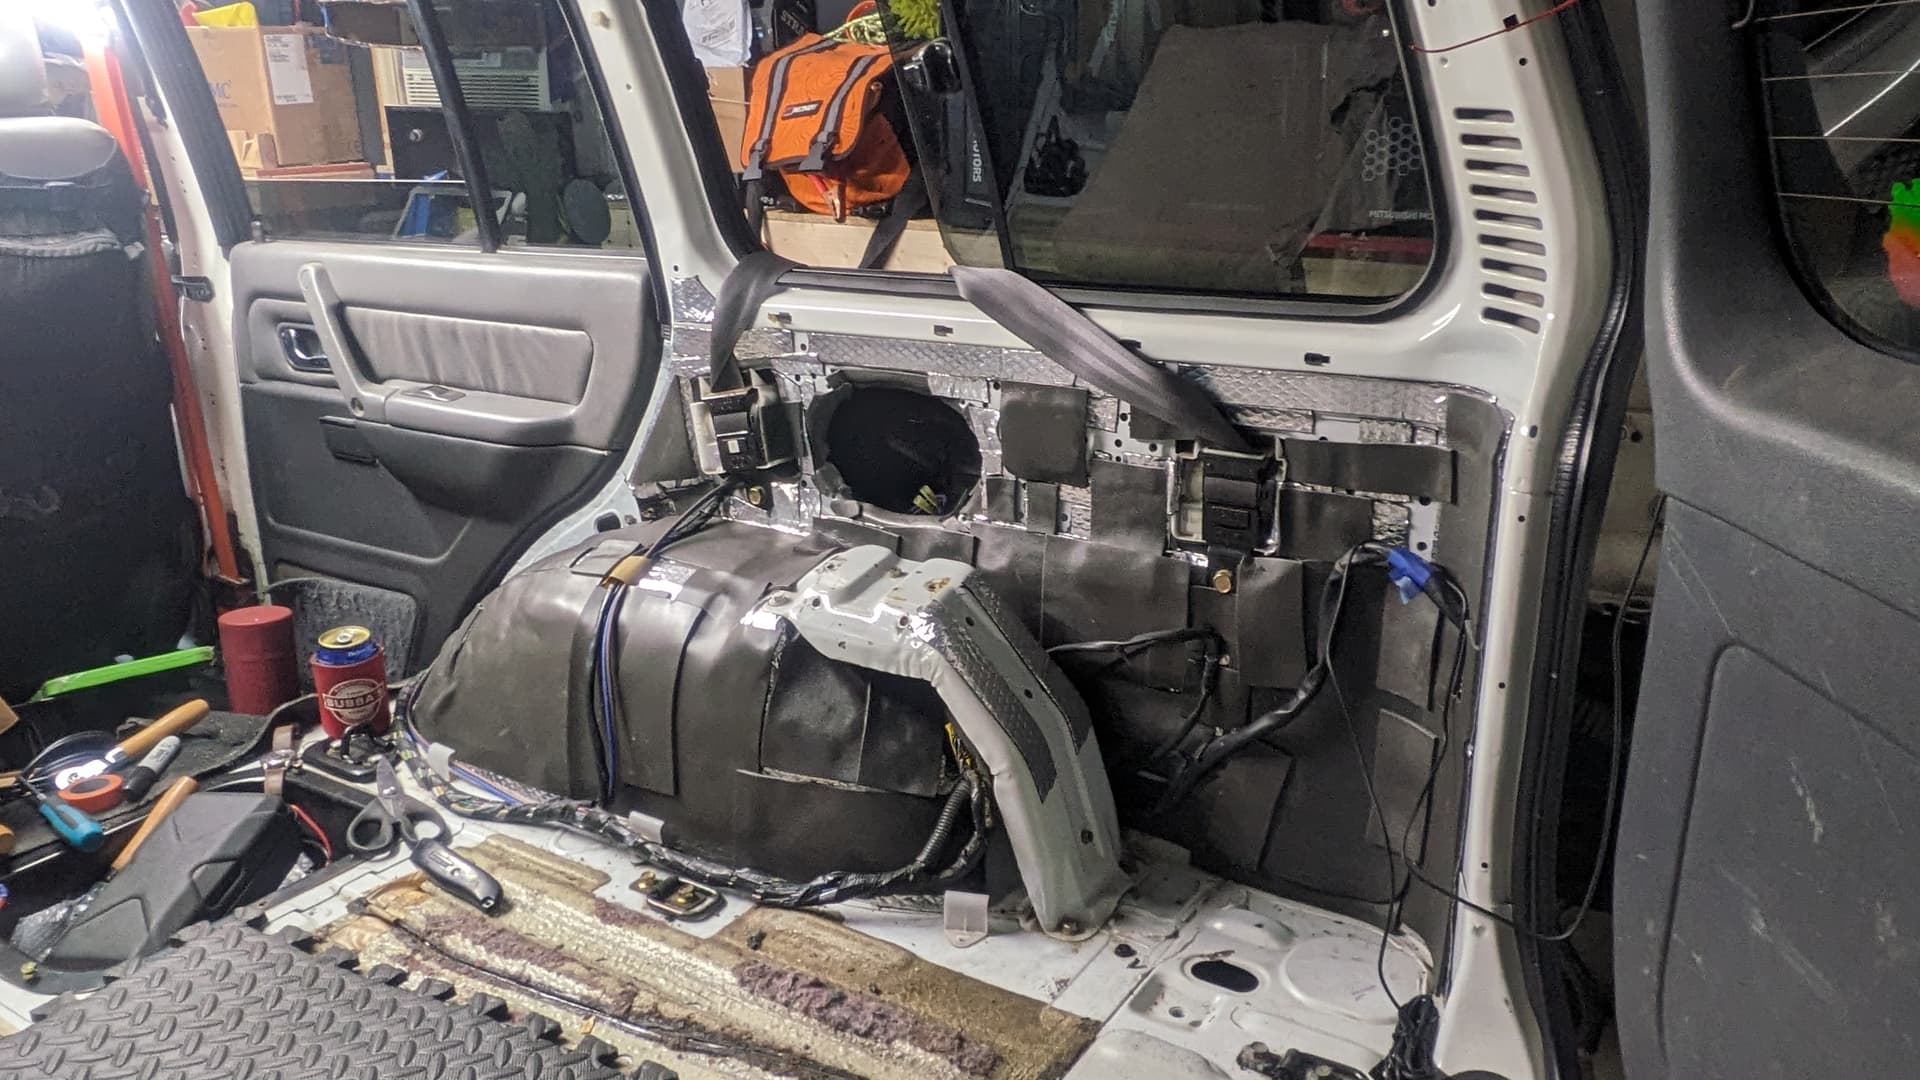
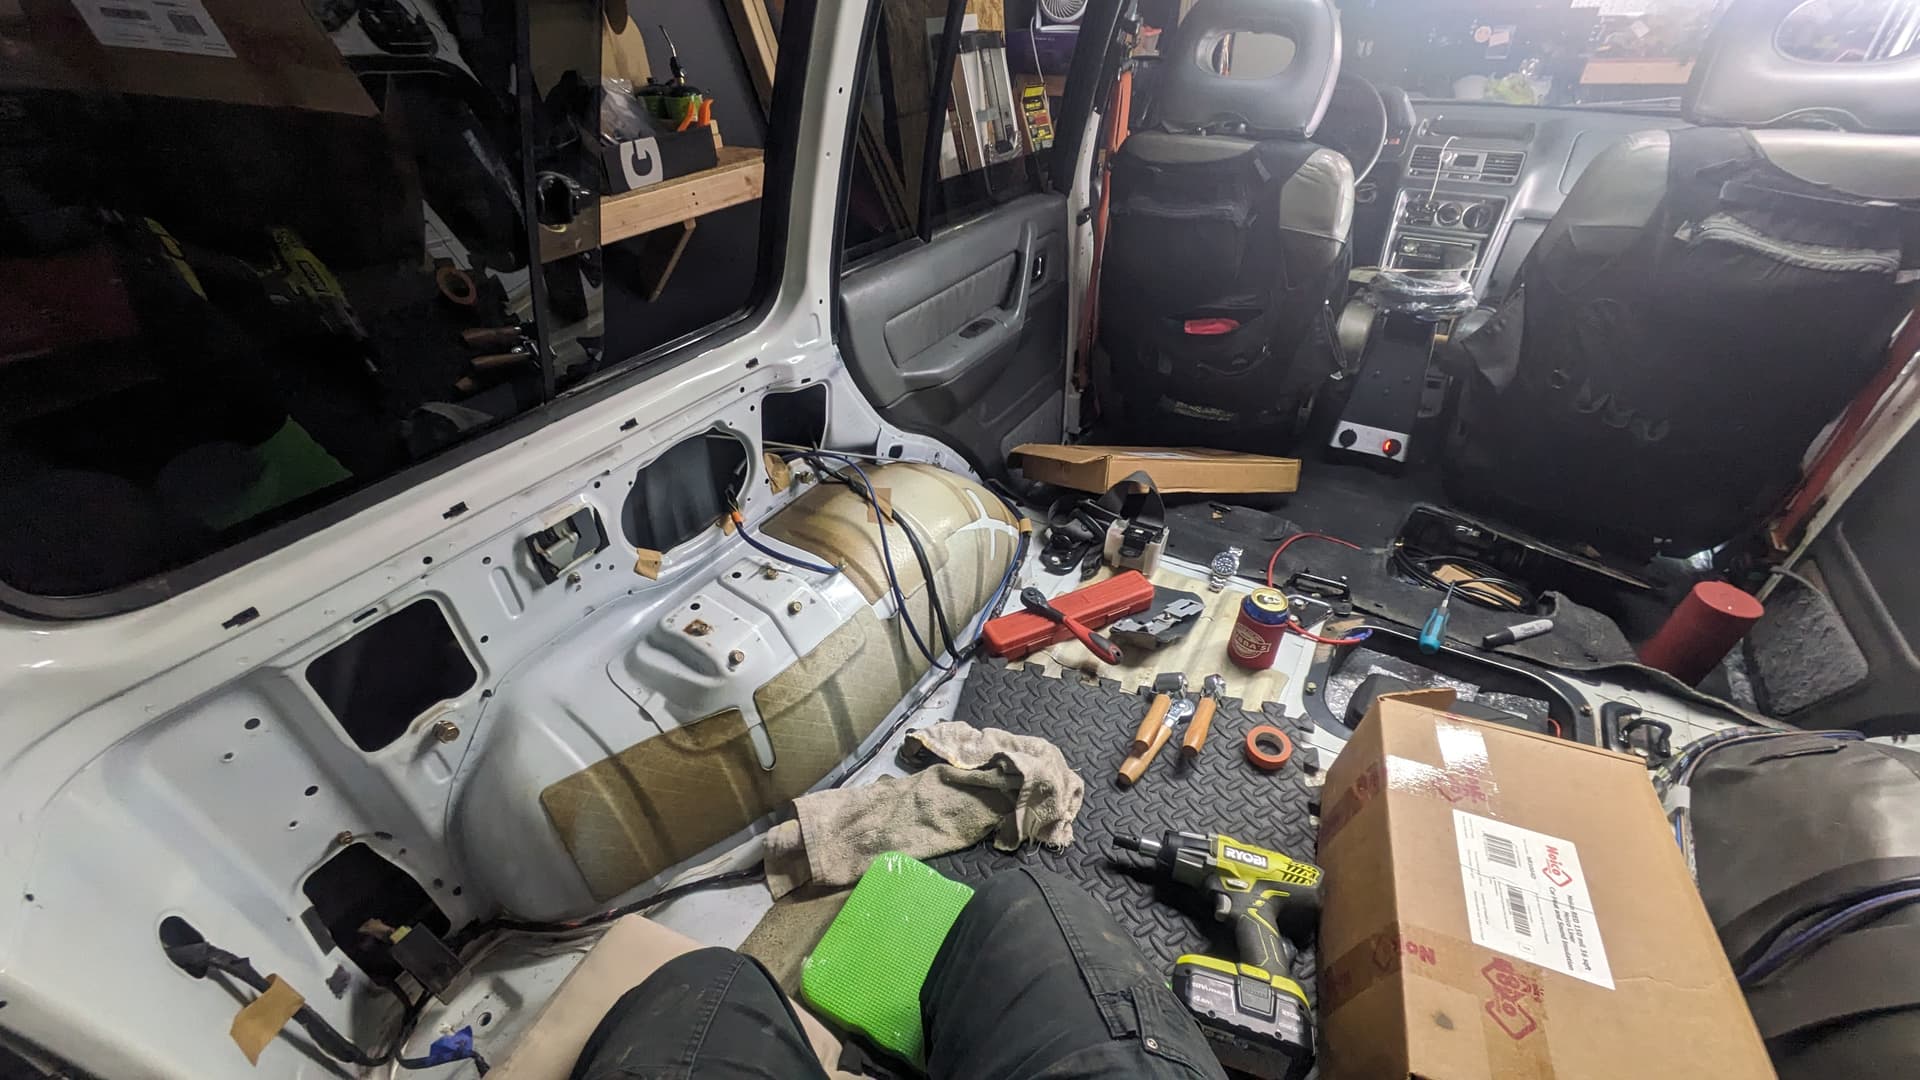
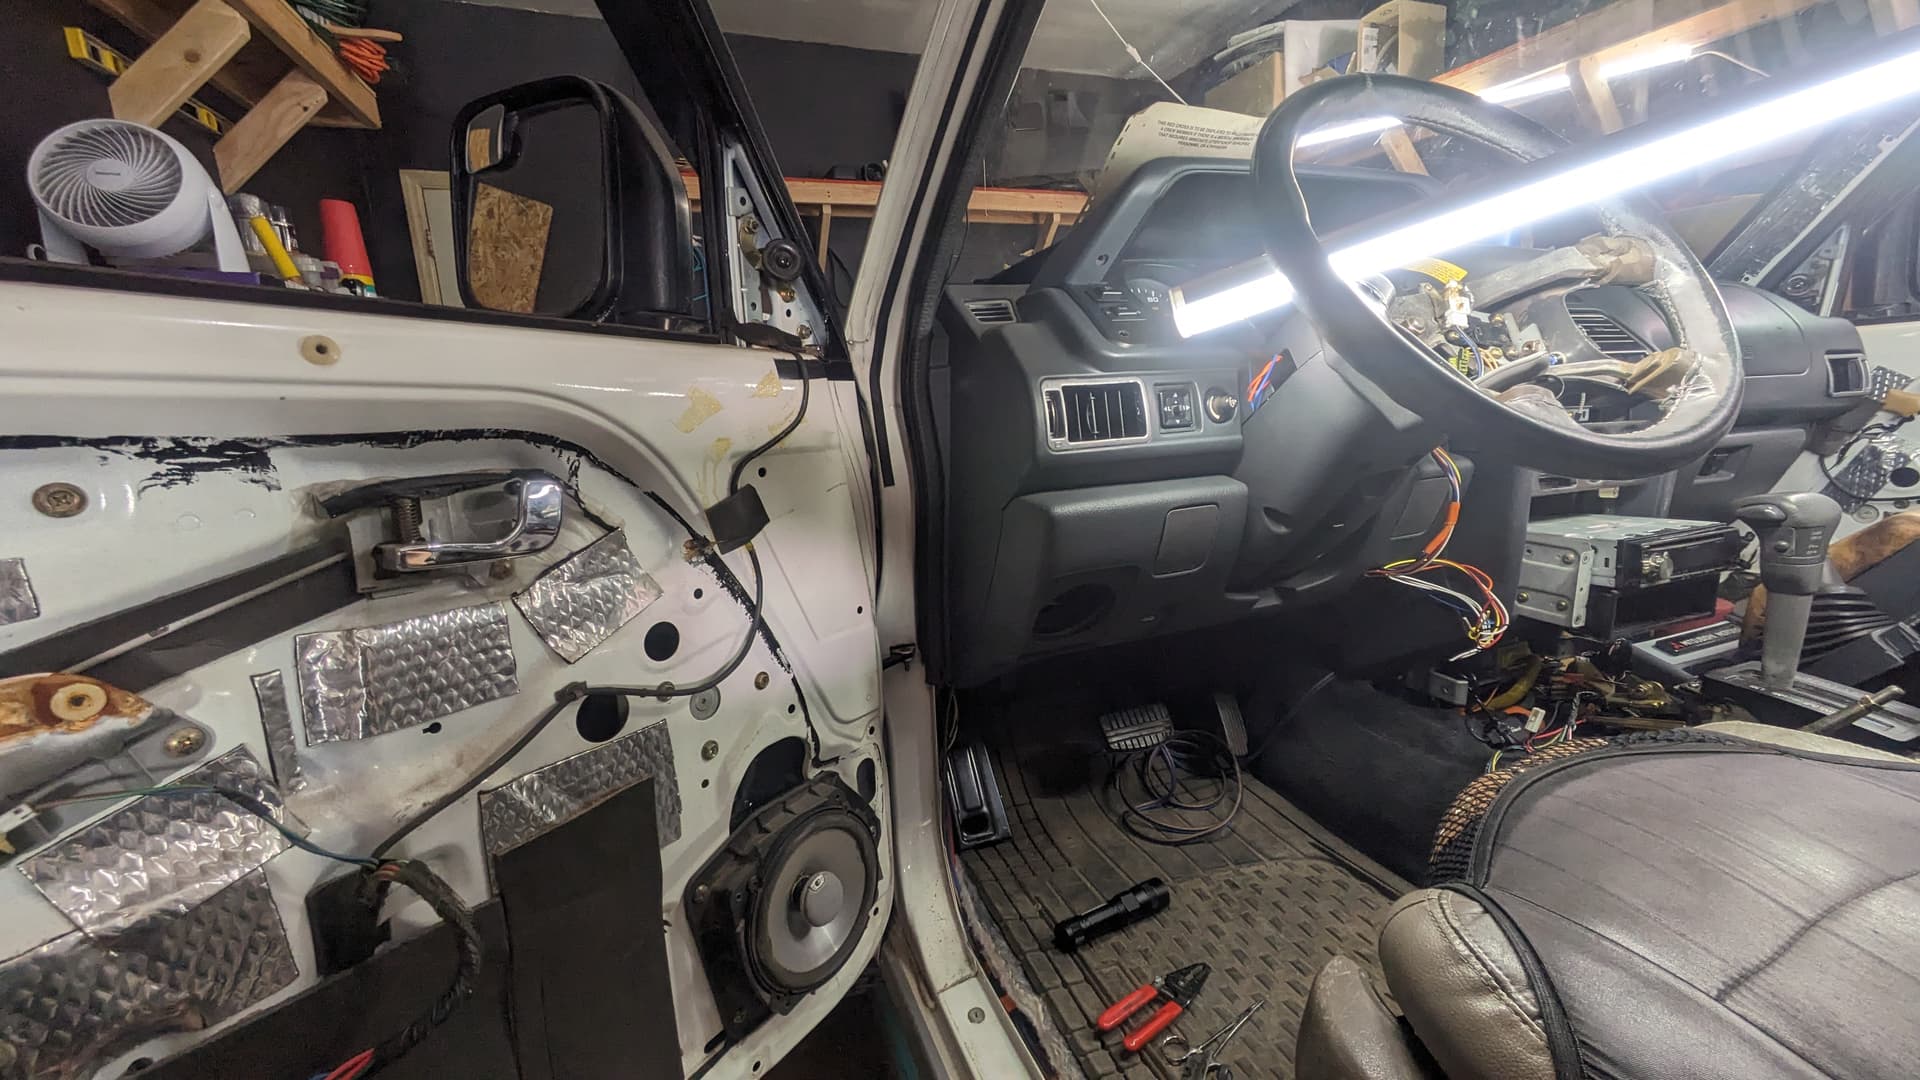
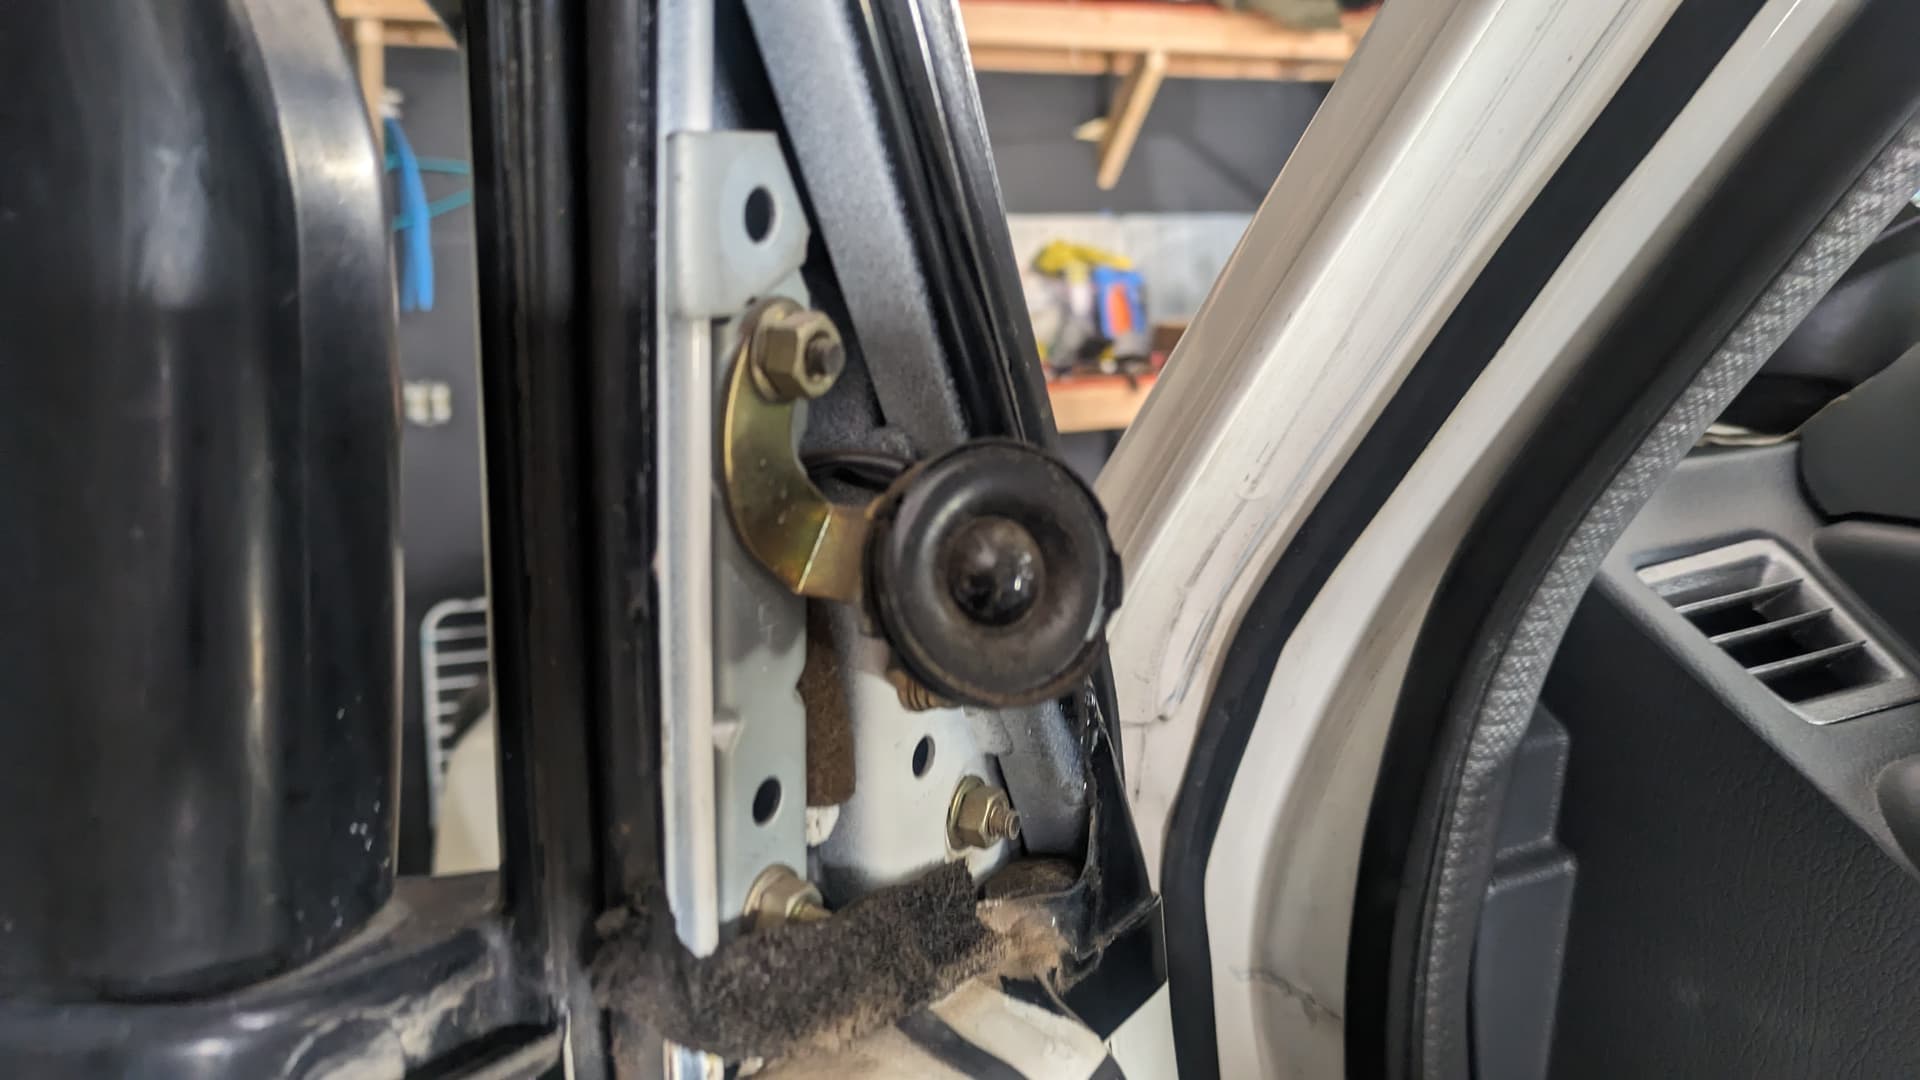
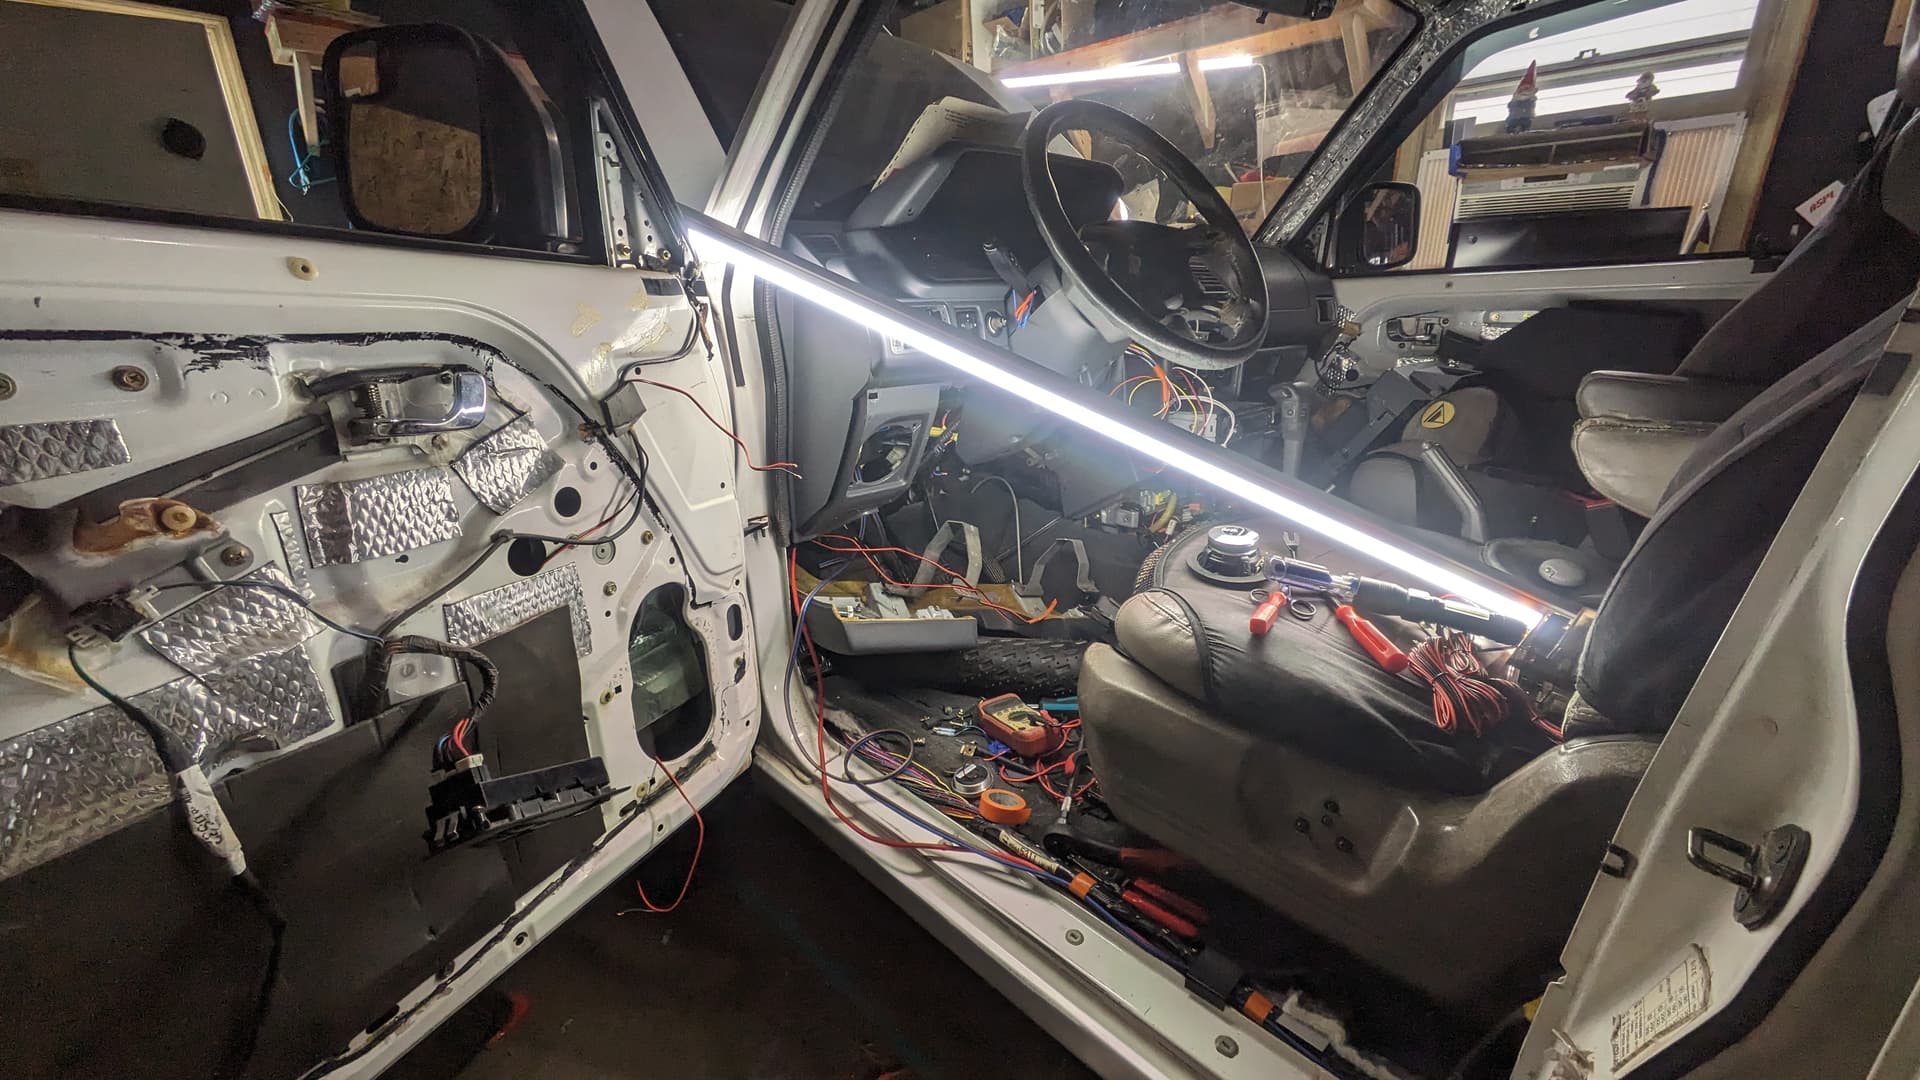
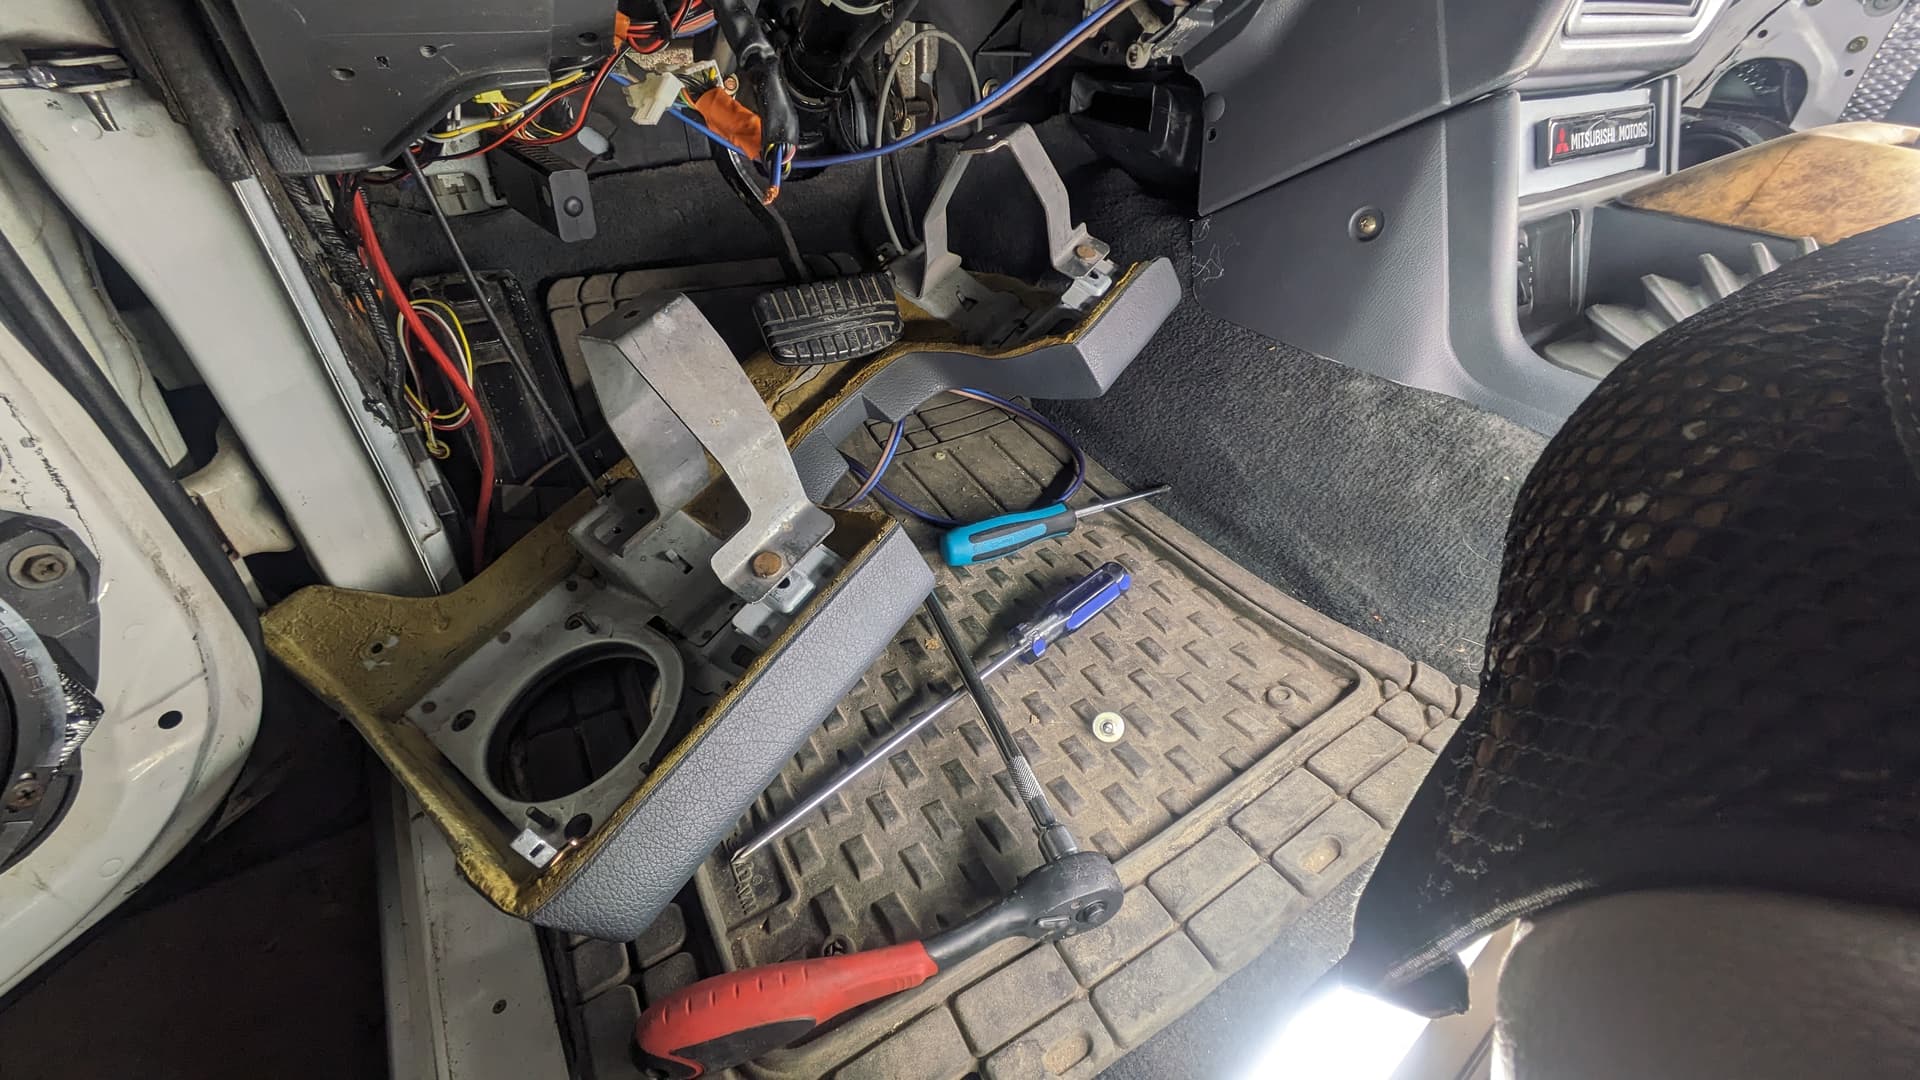
Dash Removal
I got the dash out easily enough. Truly, the hardest part about this job is keeping track of all the pieces. If you’re prepared to take everything out—and you’re not in a rush—I think you’ll do alright.
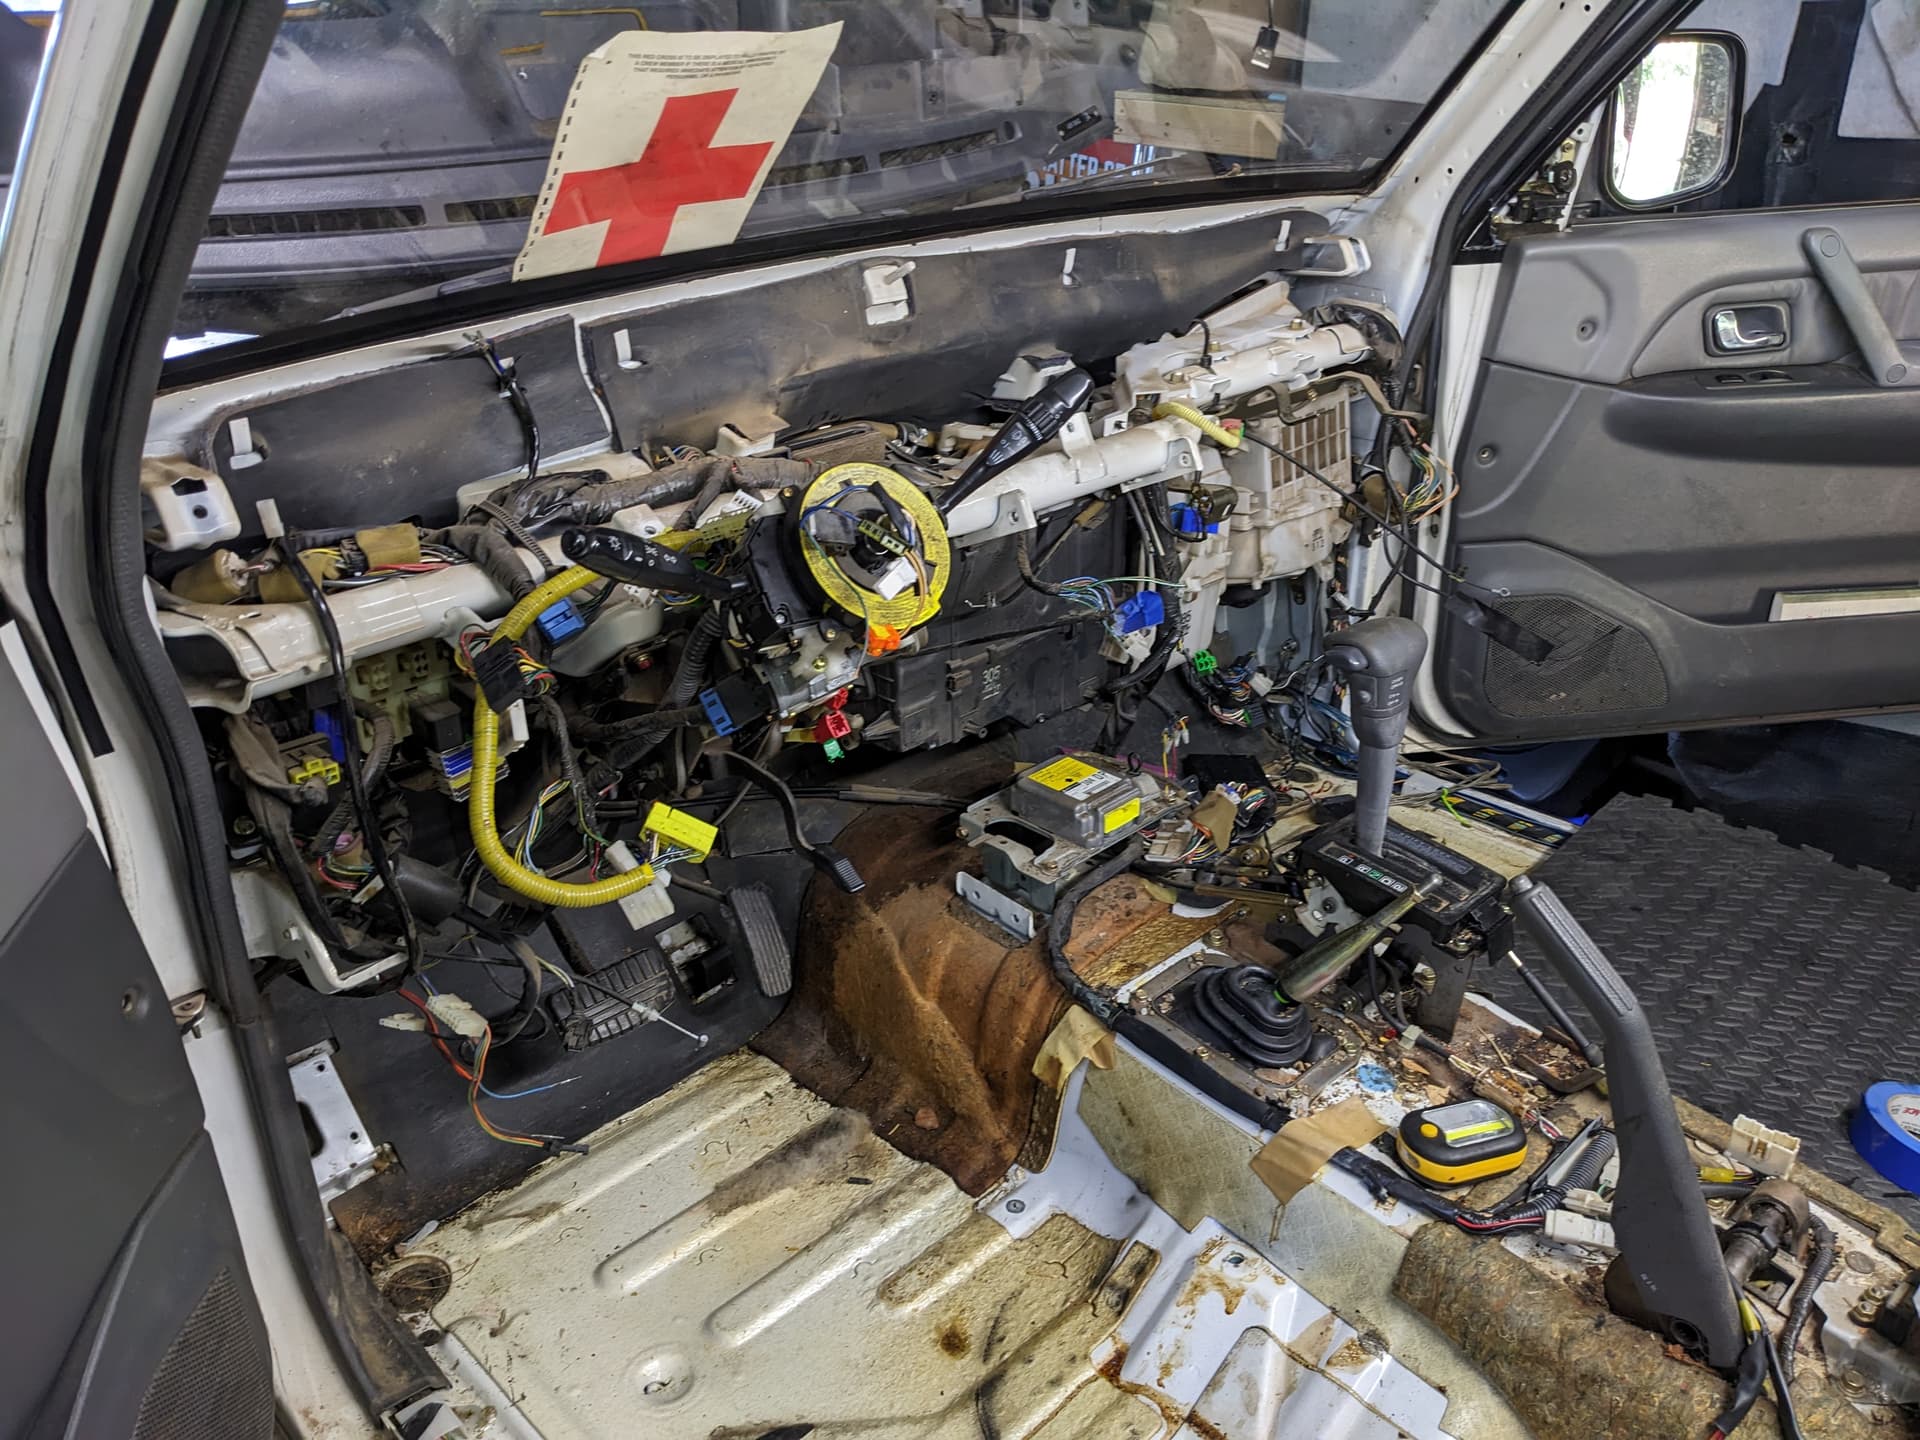

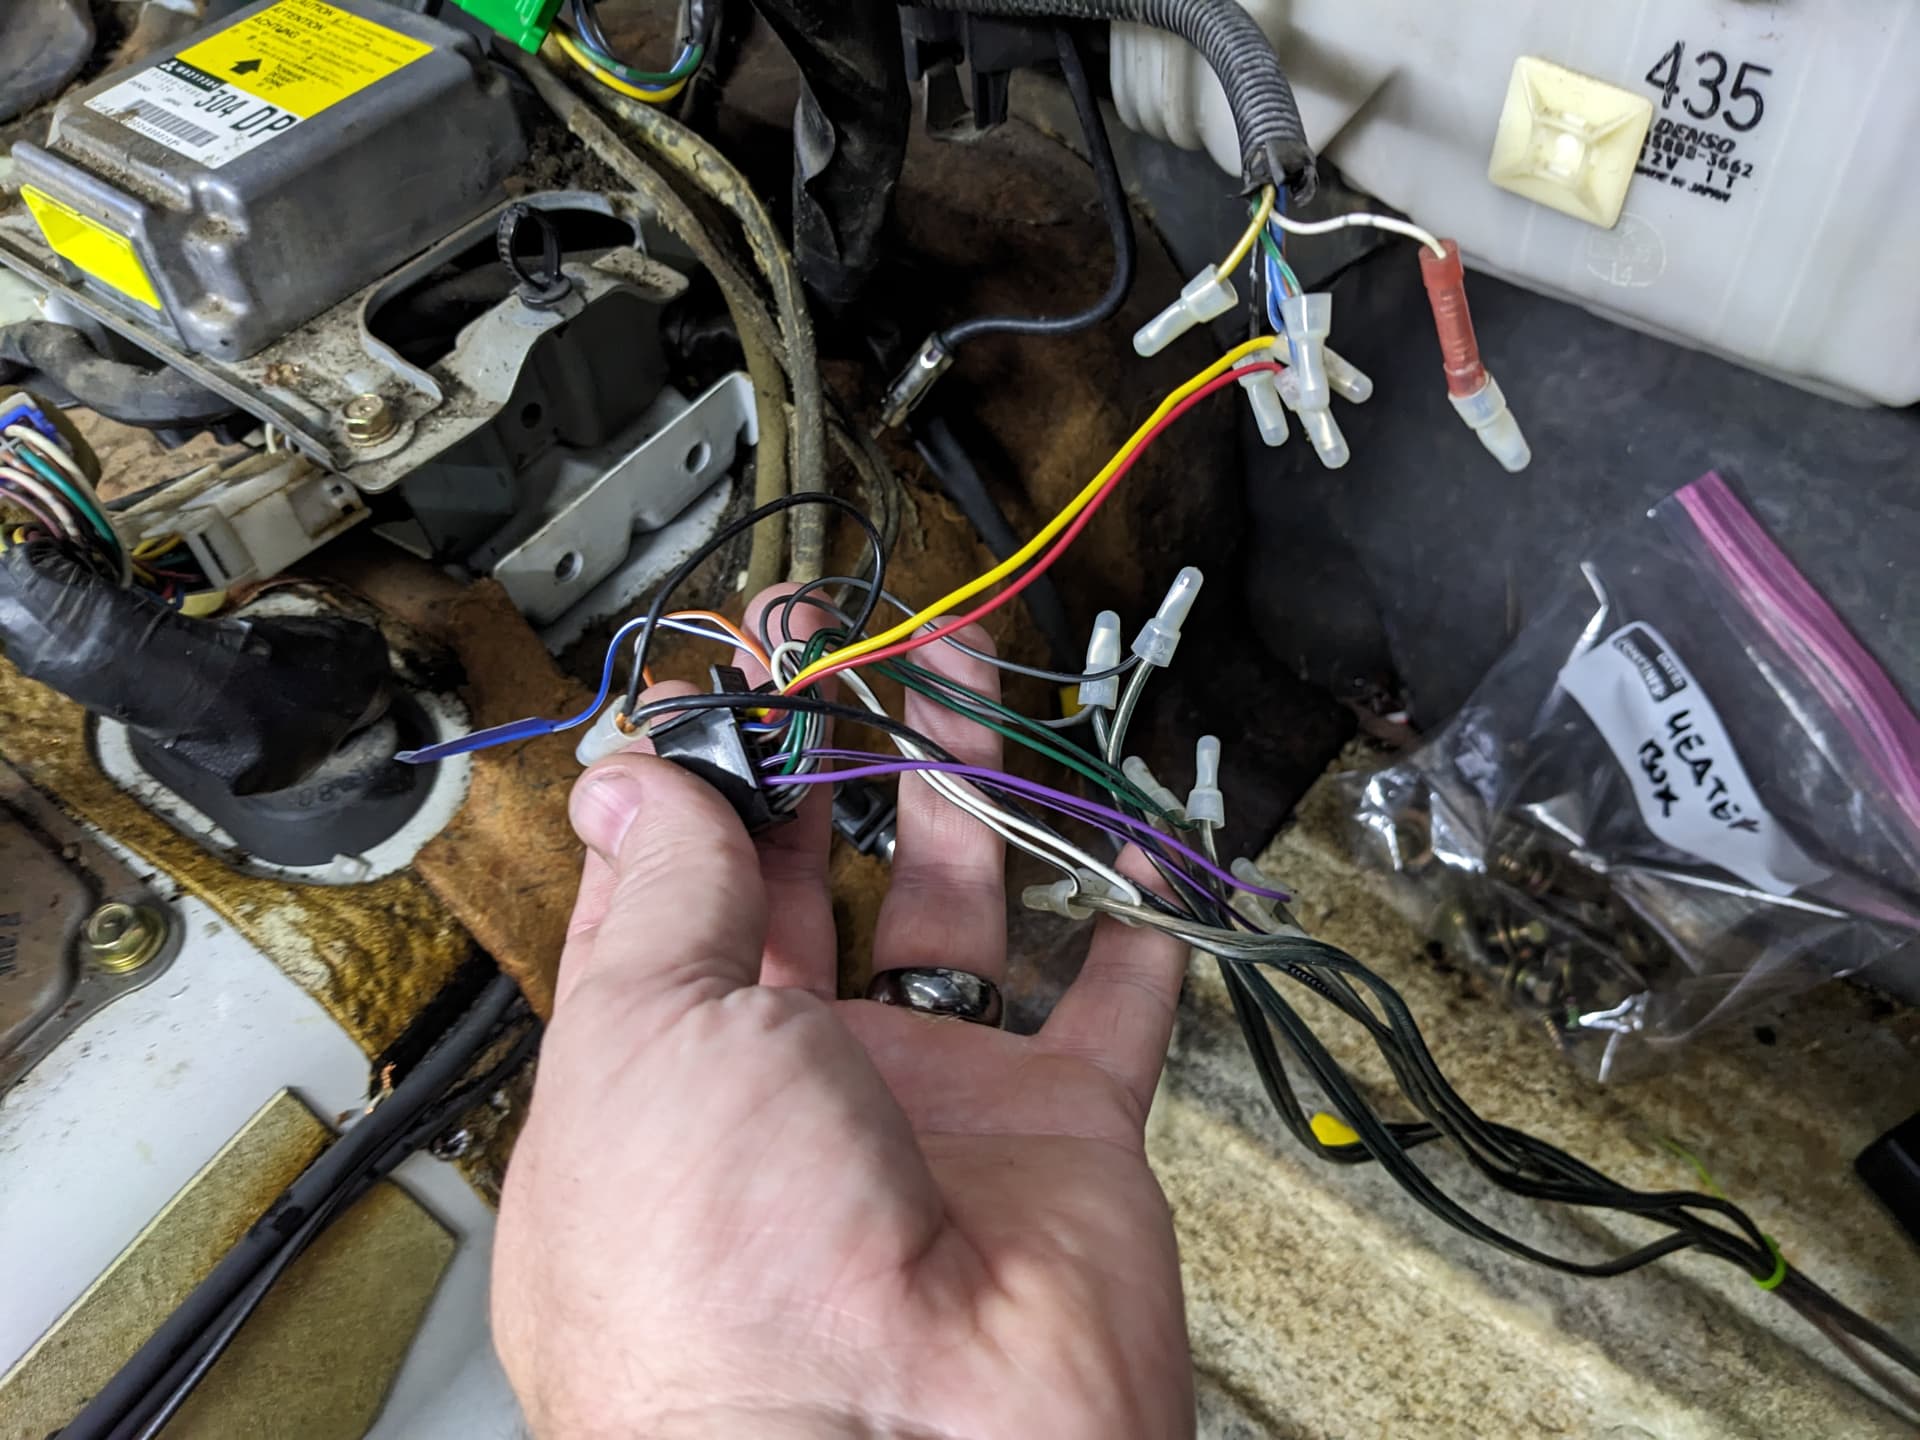
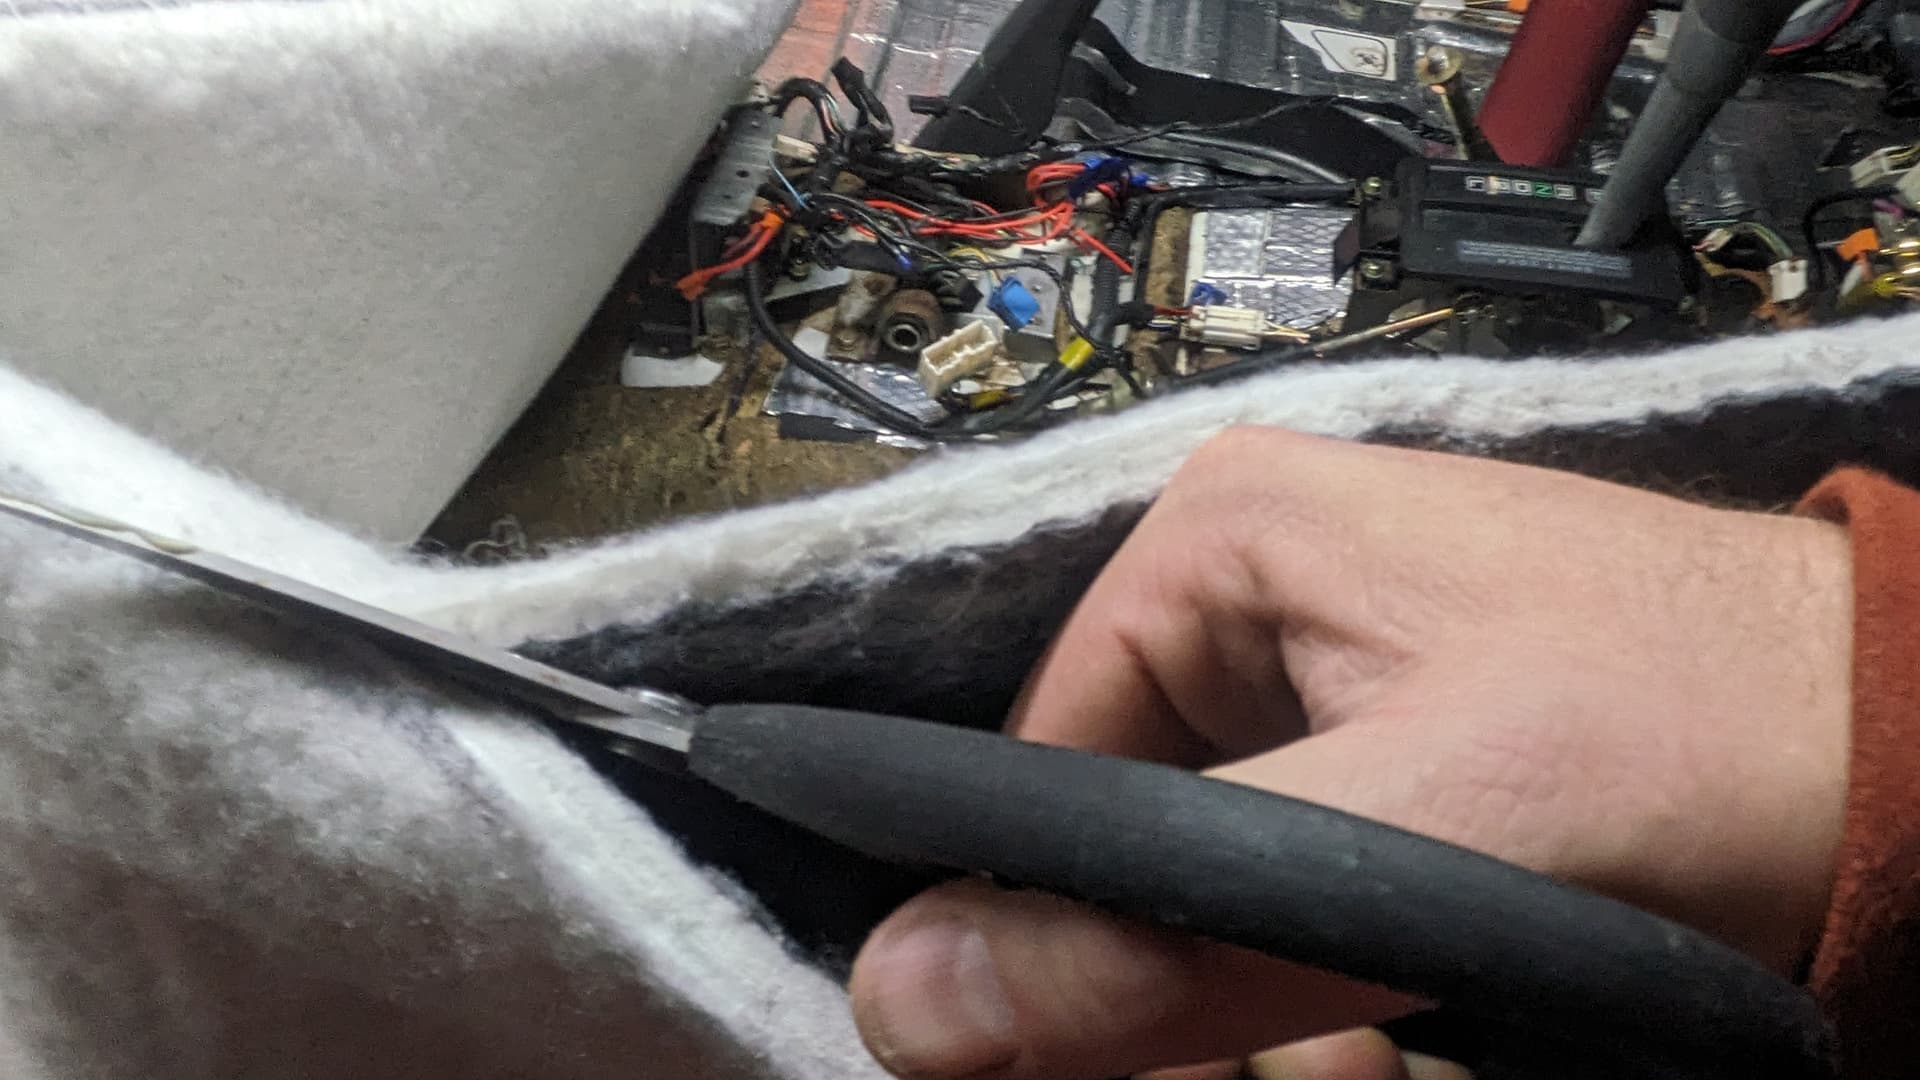
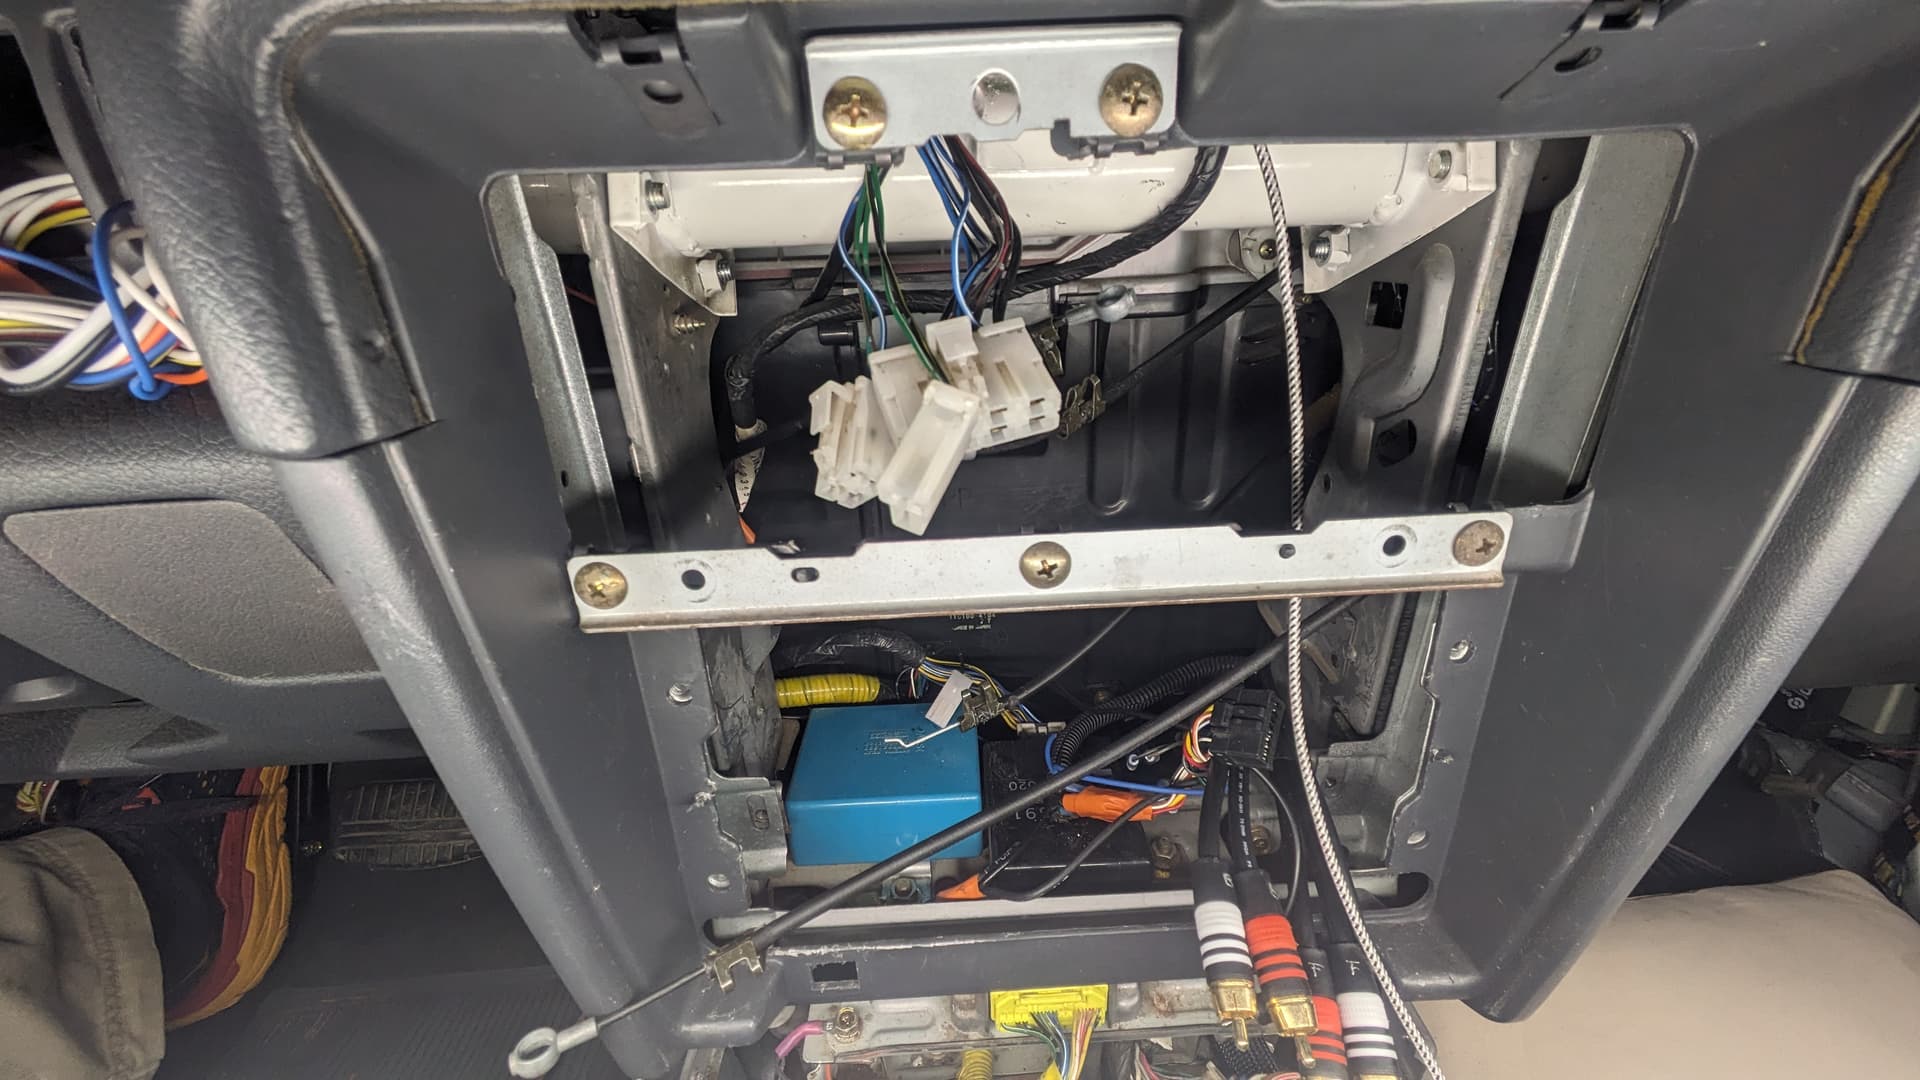
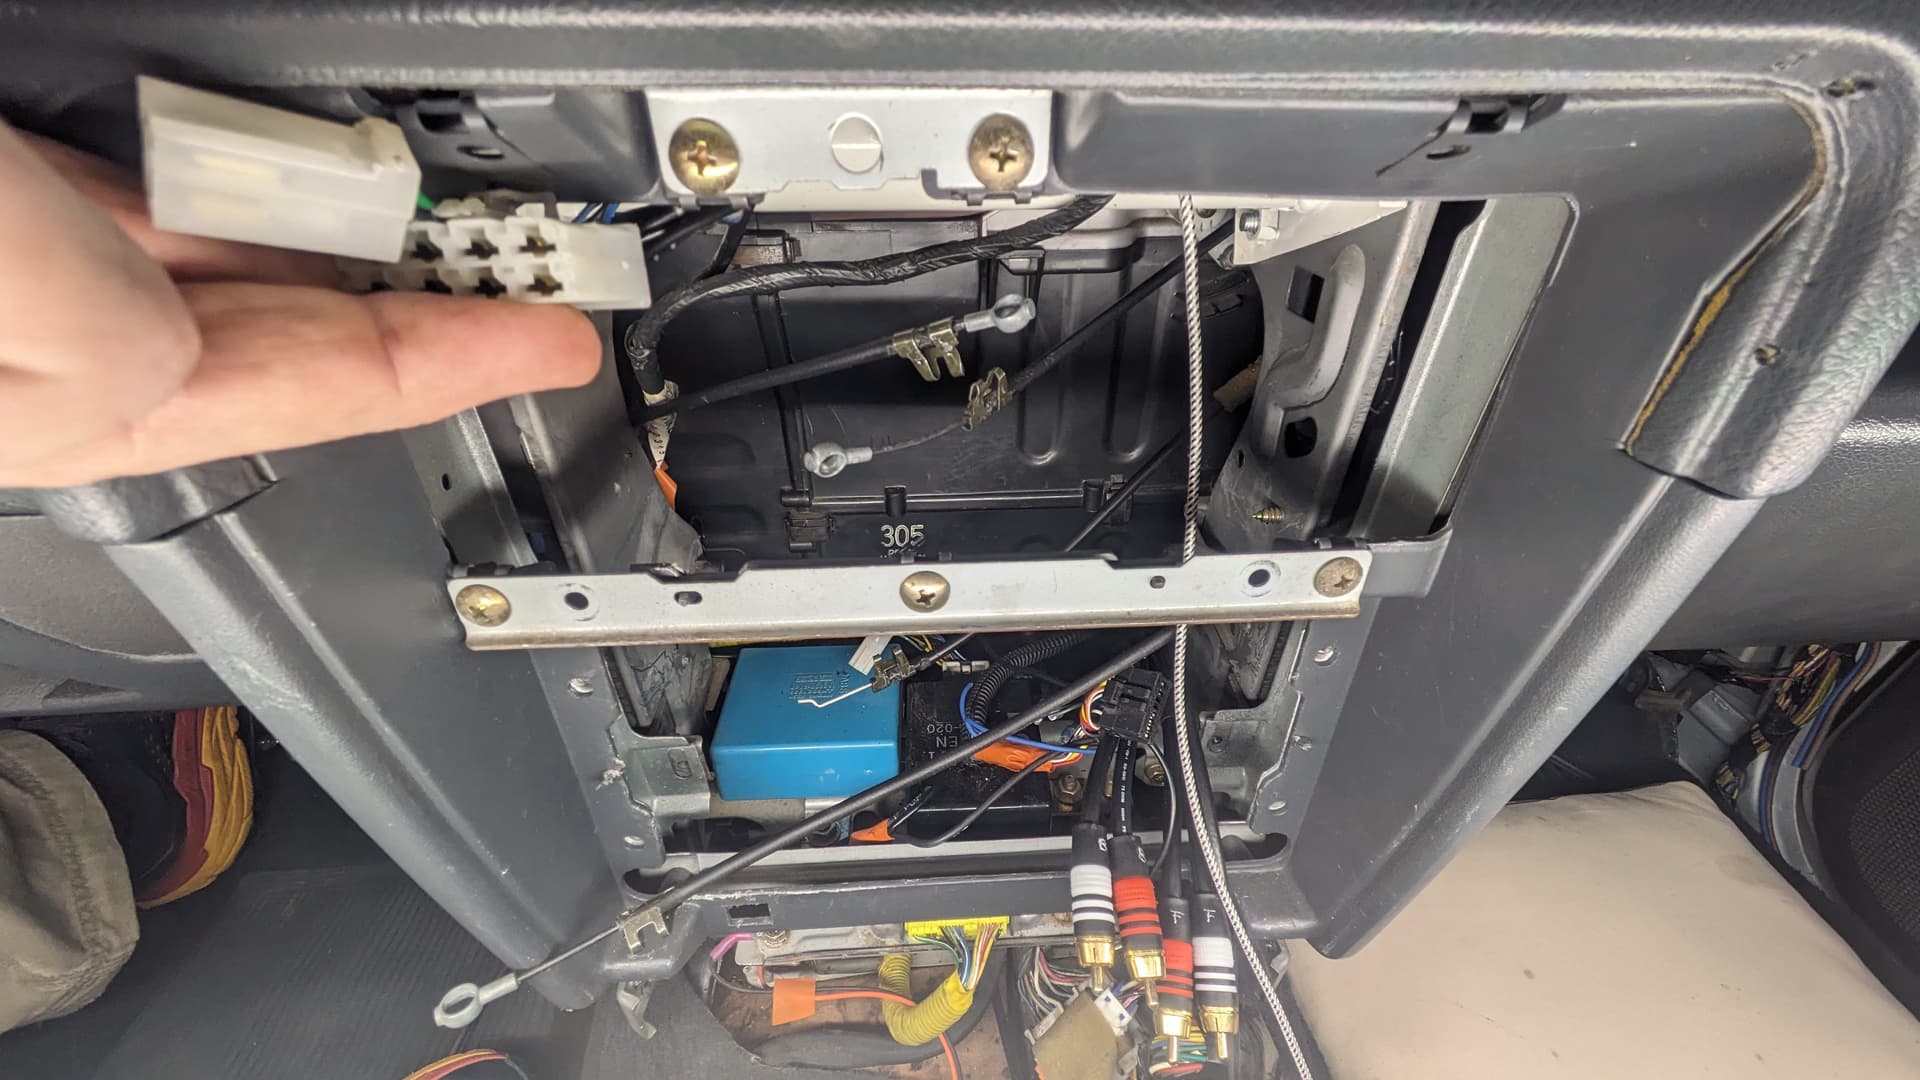
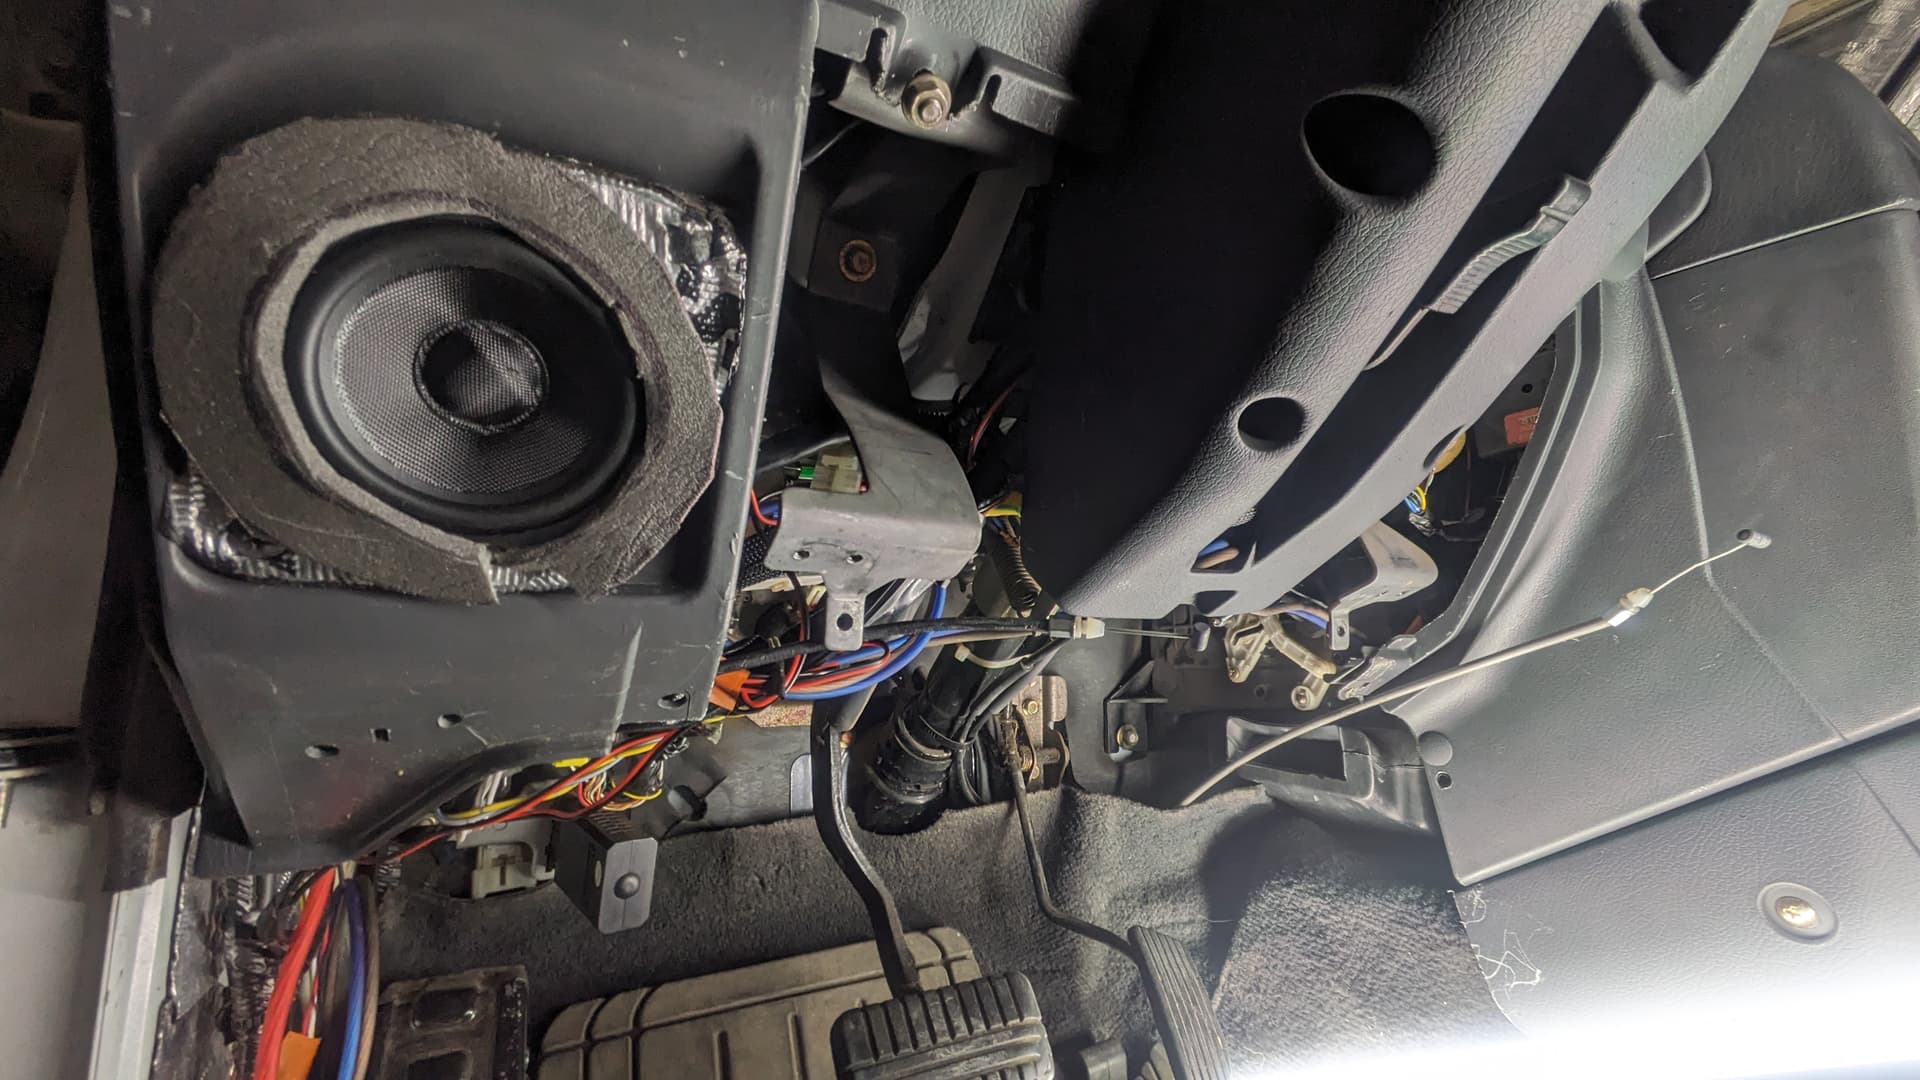
Electrical Lala Land
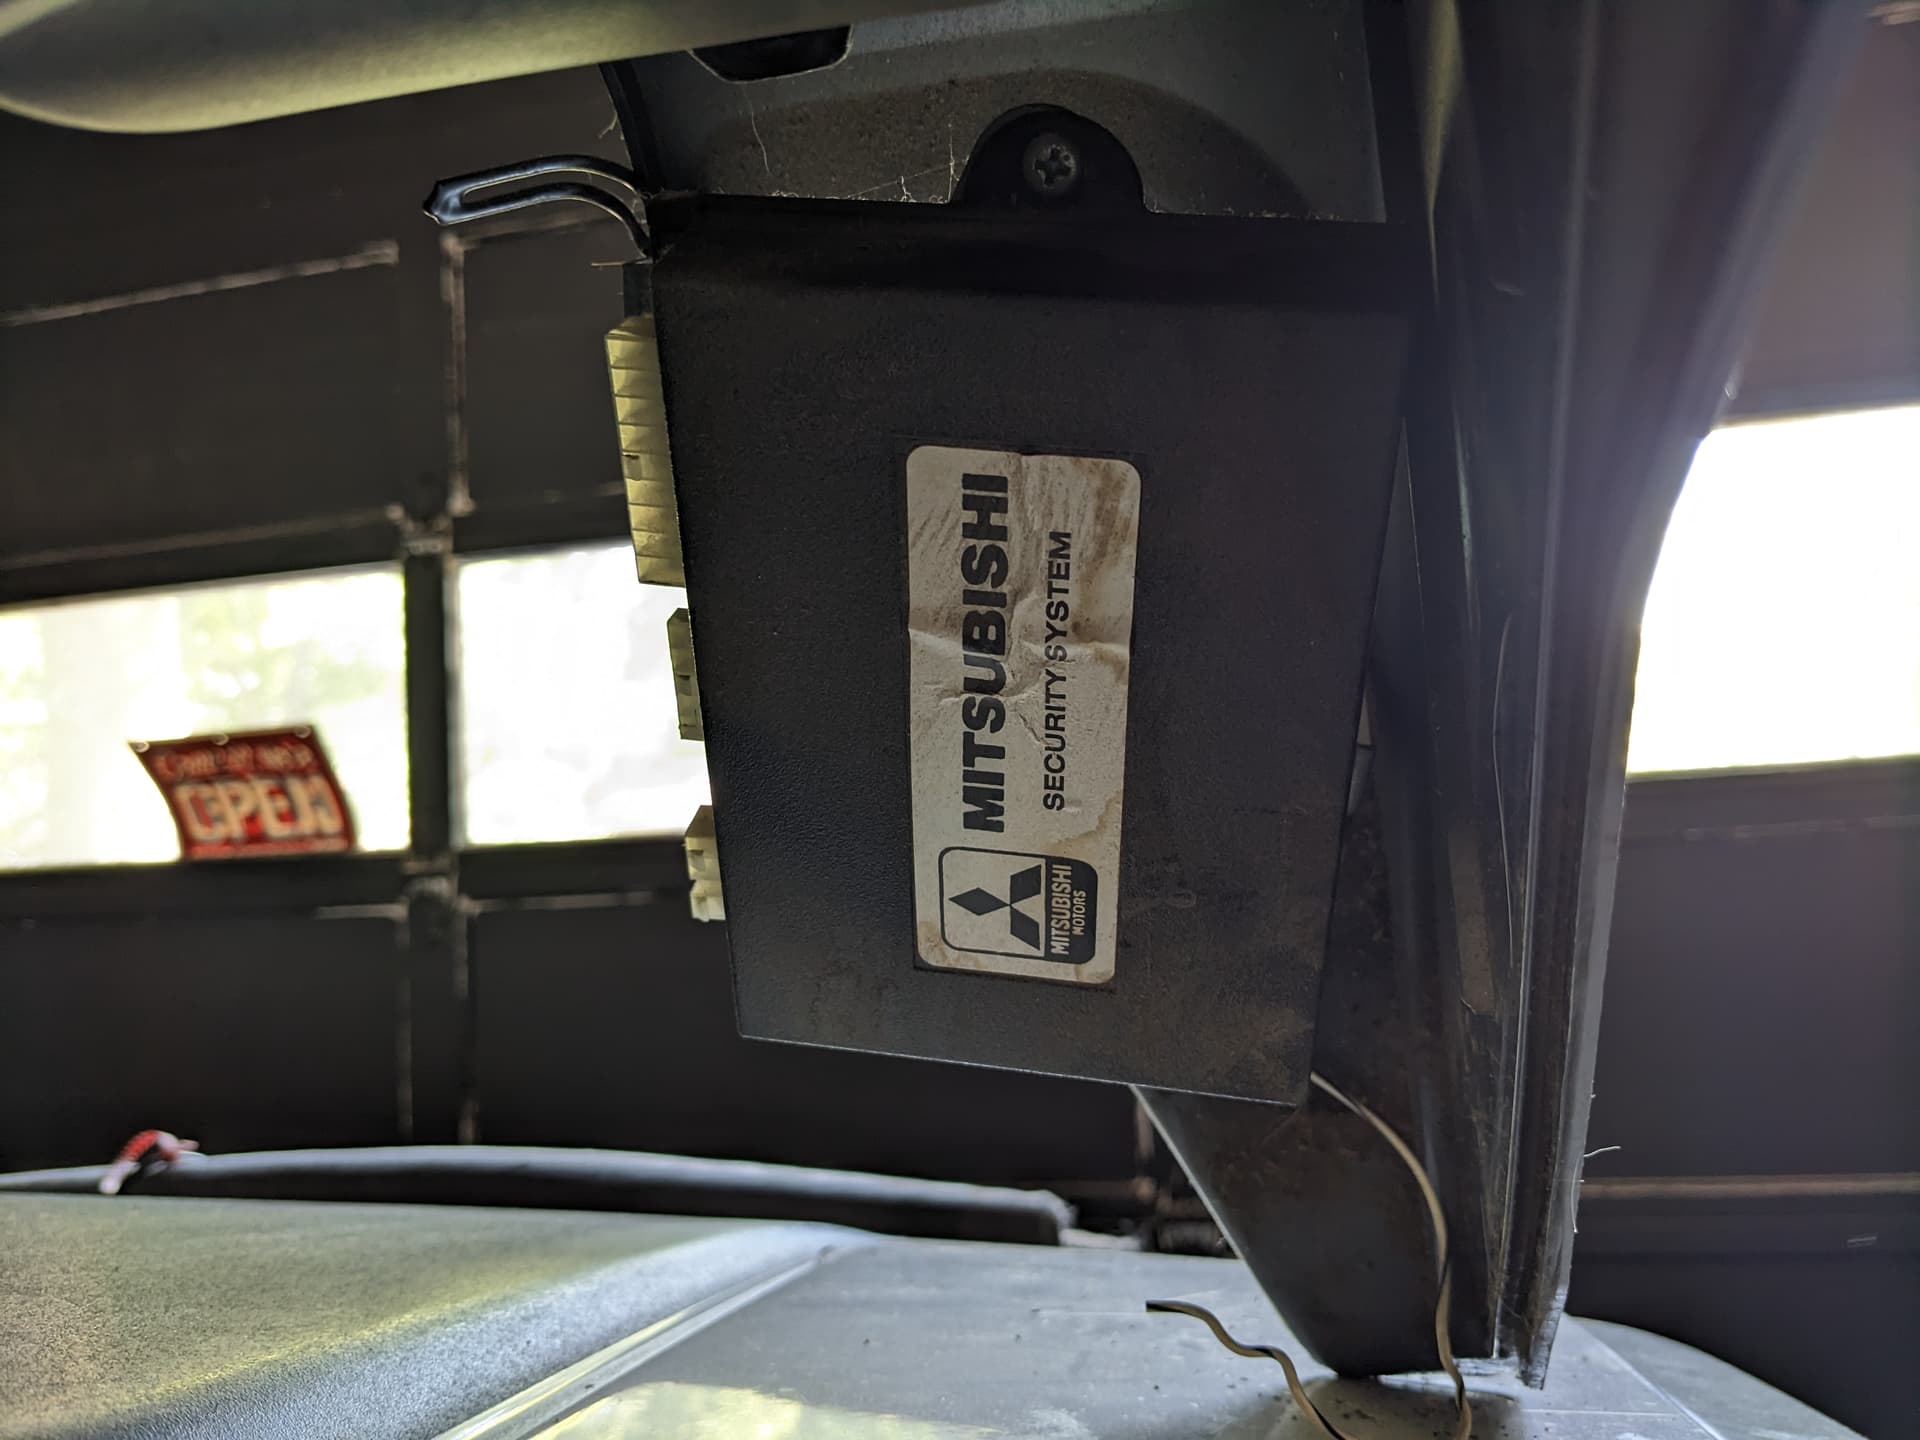
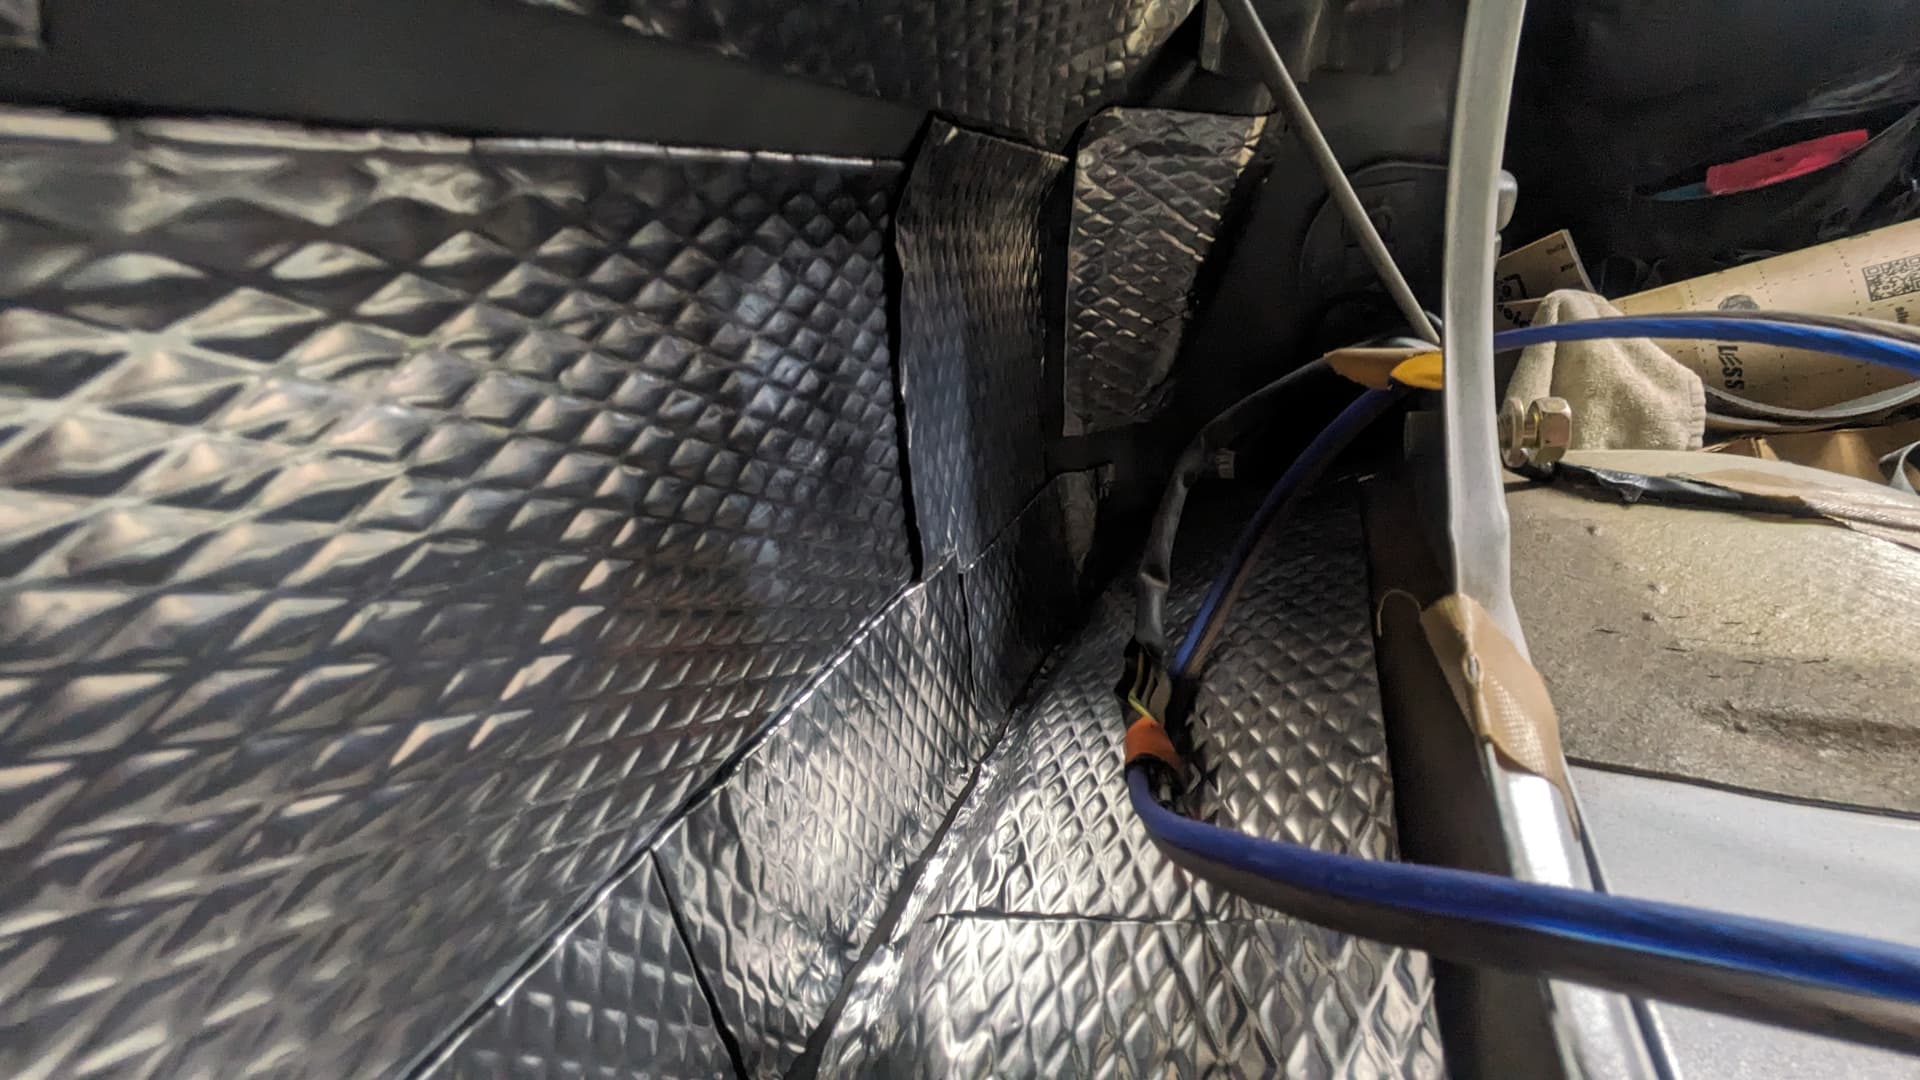
I should fully remove the weird, never-quite-right alarm system while I’m in there. (There’s two more black boxes velcro’d to the ECU case, too.)
Here’s a couple interesting things I wasn’t expecting. @PajEvo have you ever seen these guys before? Any ideas what they are?
- colored cards stacked below the relays
- that blue fuse all by itself on the left
- it looks like the upper/middle relay location is terminated (should I install a relay?)
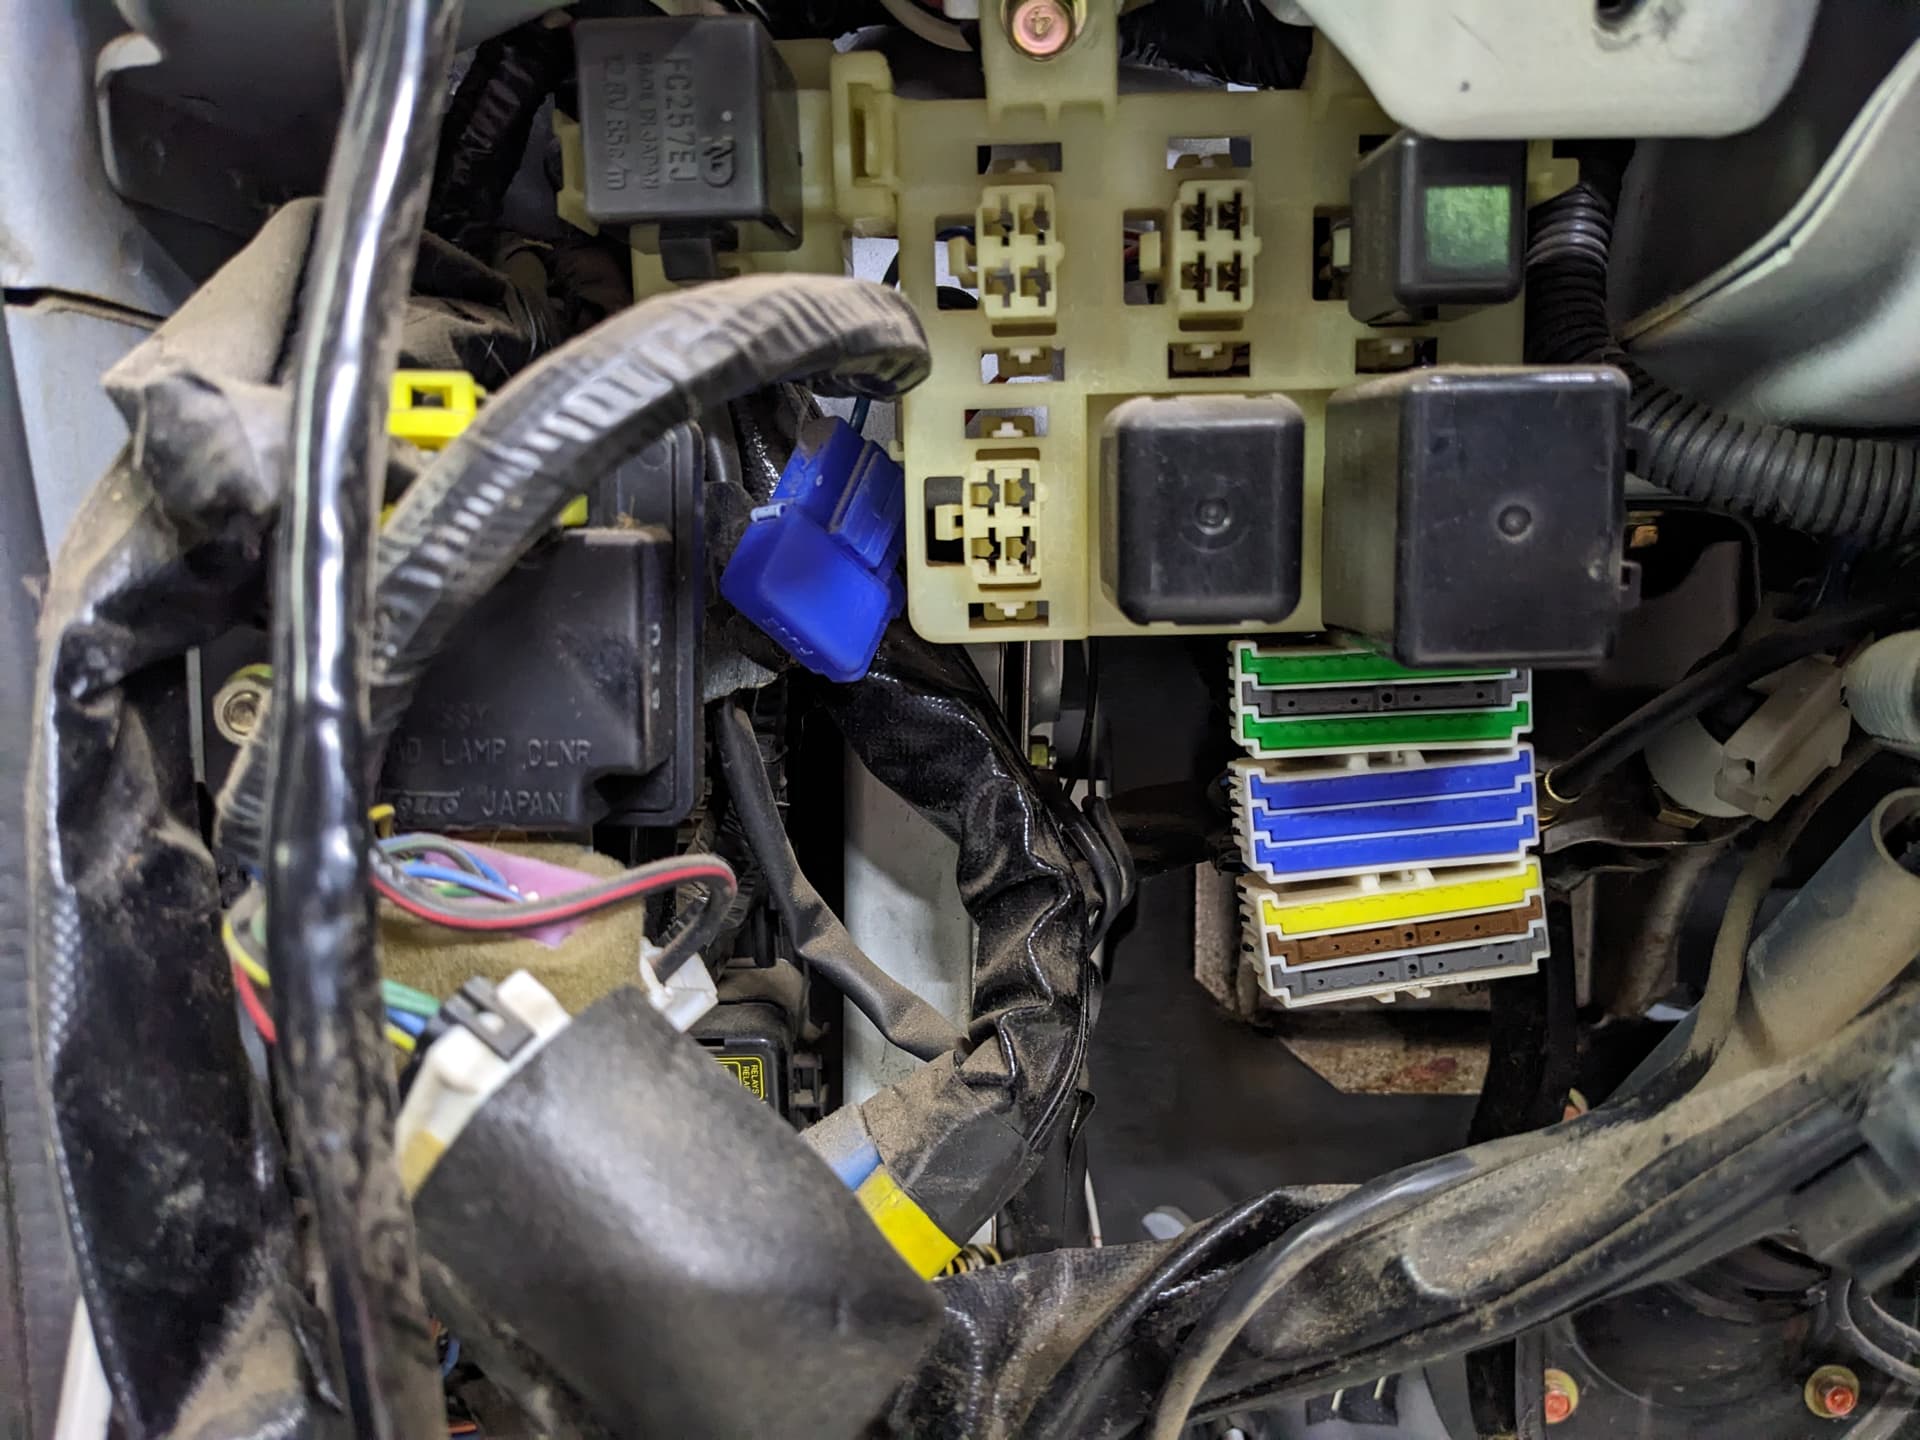
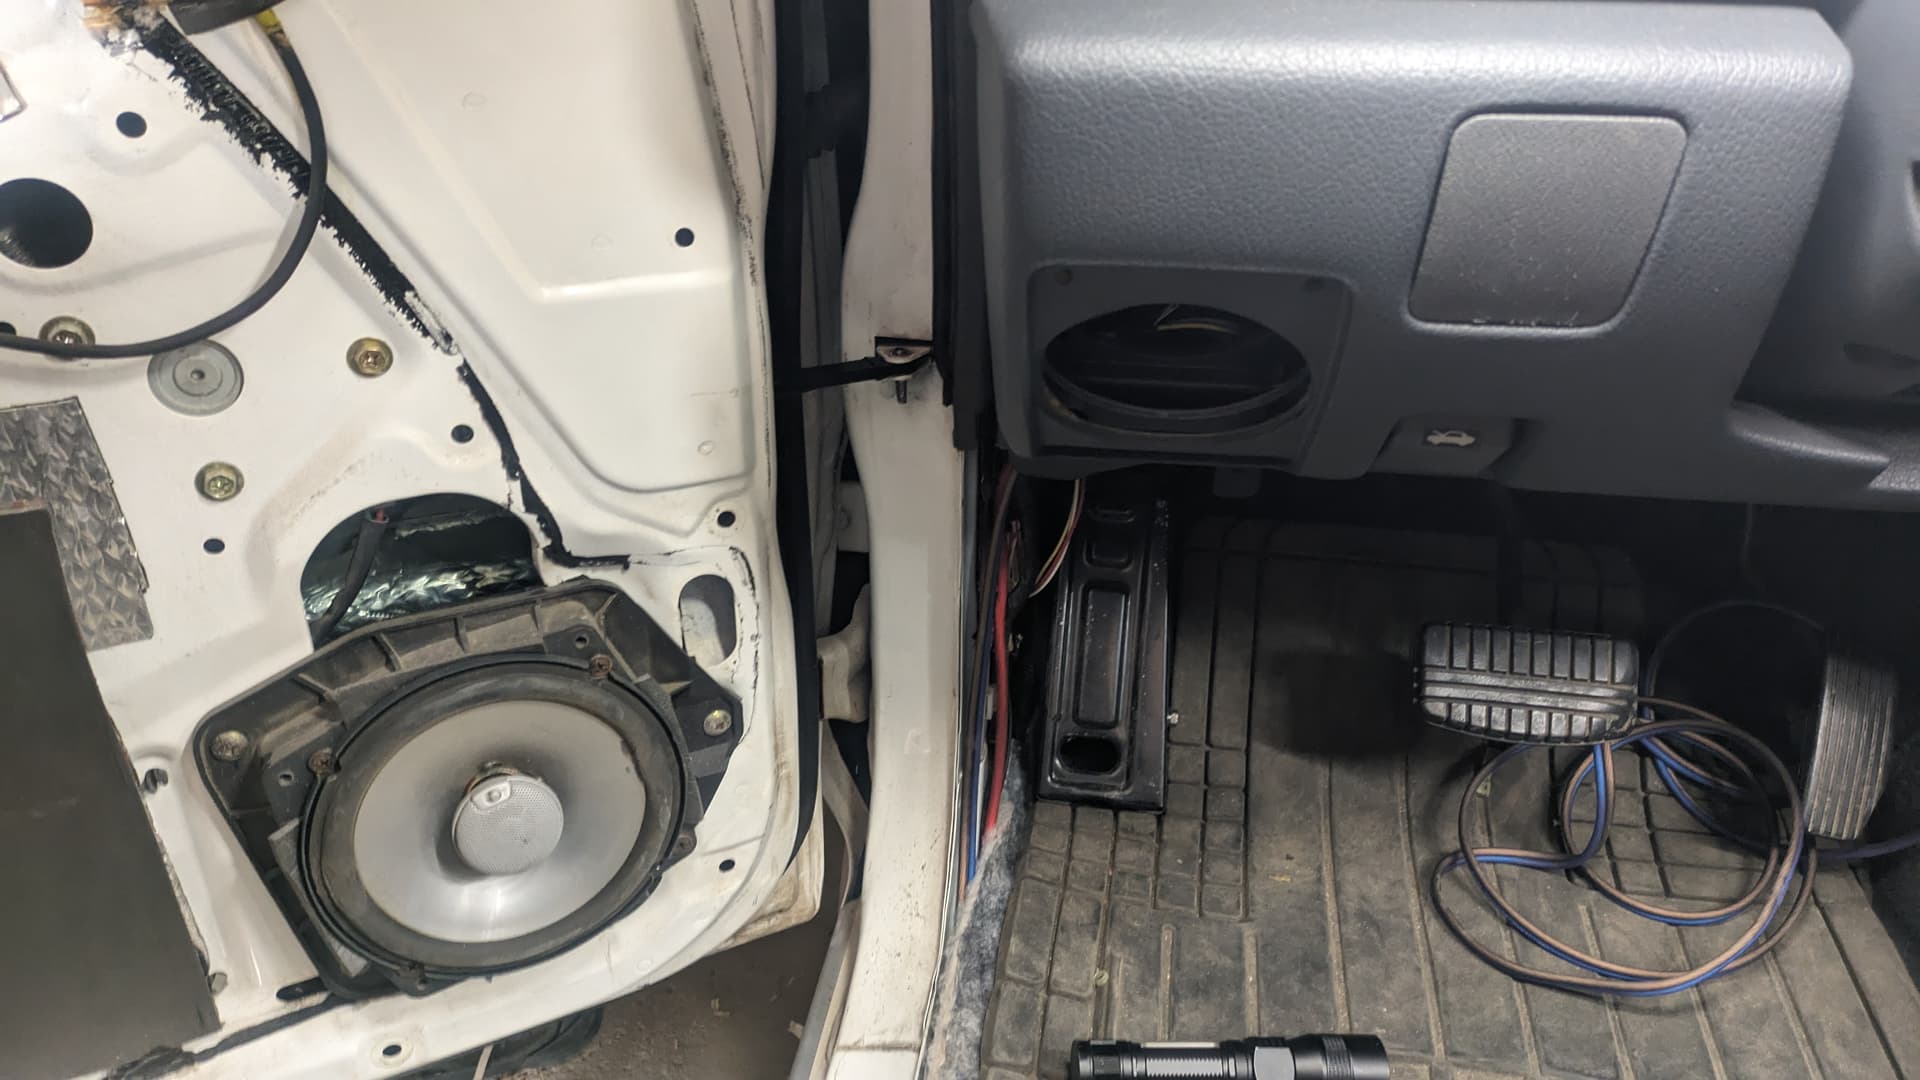
Here’s some more interesting stuff. Audio Express had my truck an entire weekend to install a deck and rear speakers many, many years ago. This is how they wired things up. Those appear to be plain old 2-wire speaker cables crimped to the harness instead of using the factory harness. (Maybe they couldn’t connect to the weird, round, multi-pin connectors back there I presume were for the Infinity system?
Either way, I’ll be re-wiring these because damn. Ugly.
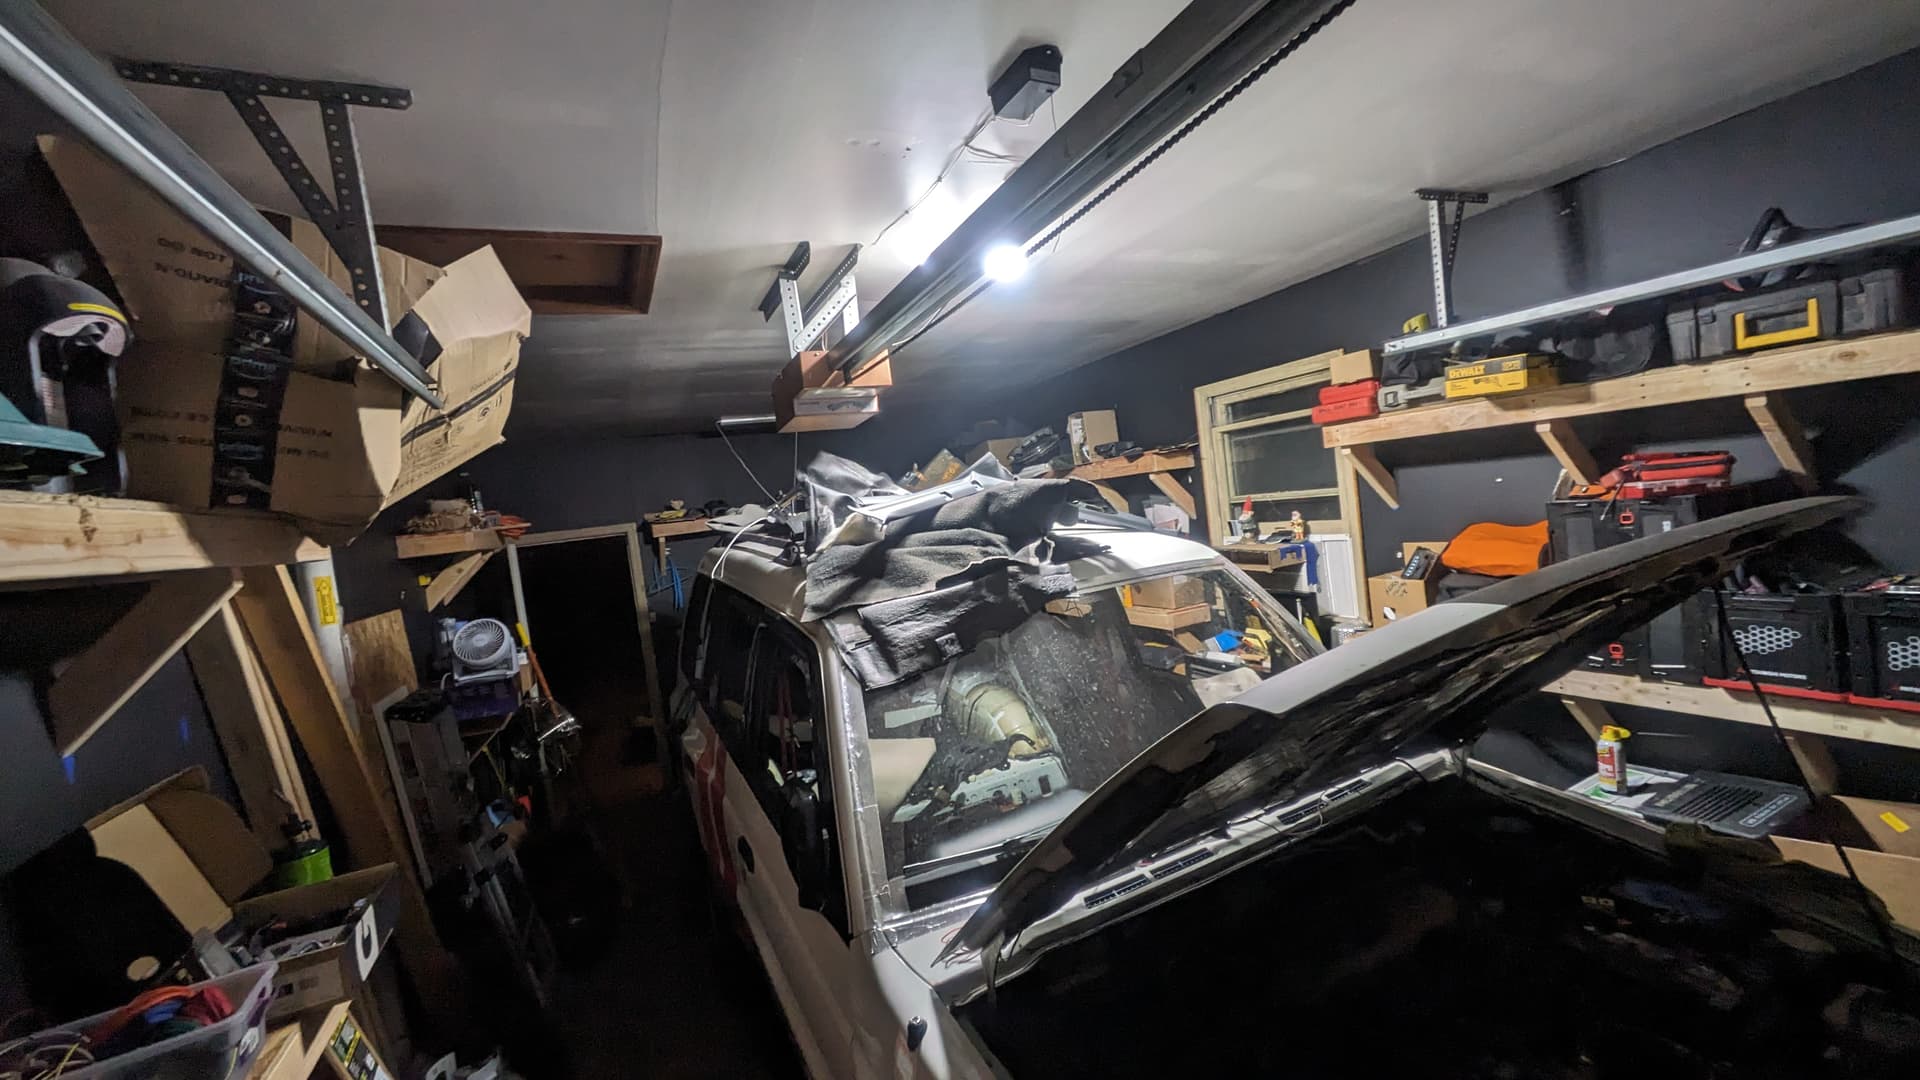
Running Out of Room!
I’ve long said that, once you start taking apart a car, you can fill a 2-car garage. Well, I only have a 1-car garage nowadays. My shelves are filling up, and so is the back of Fezzik! Woof!
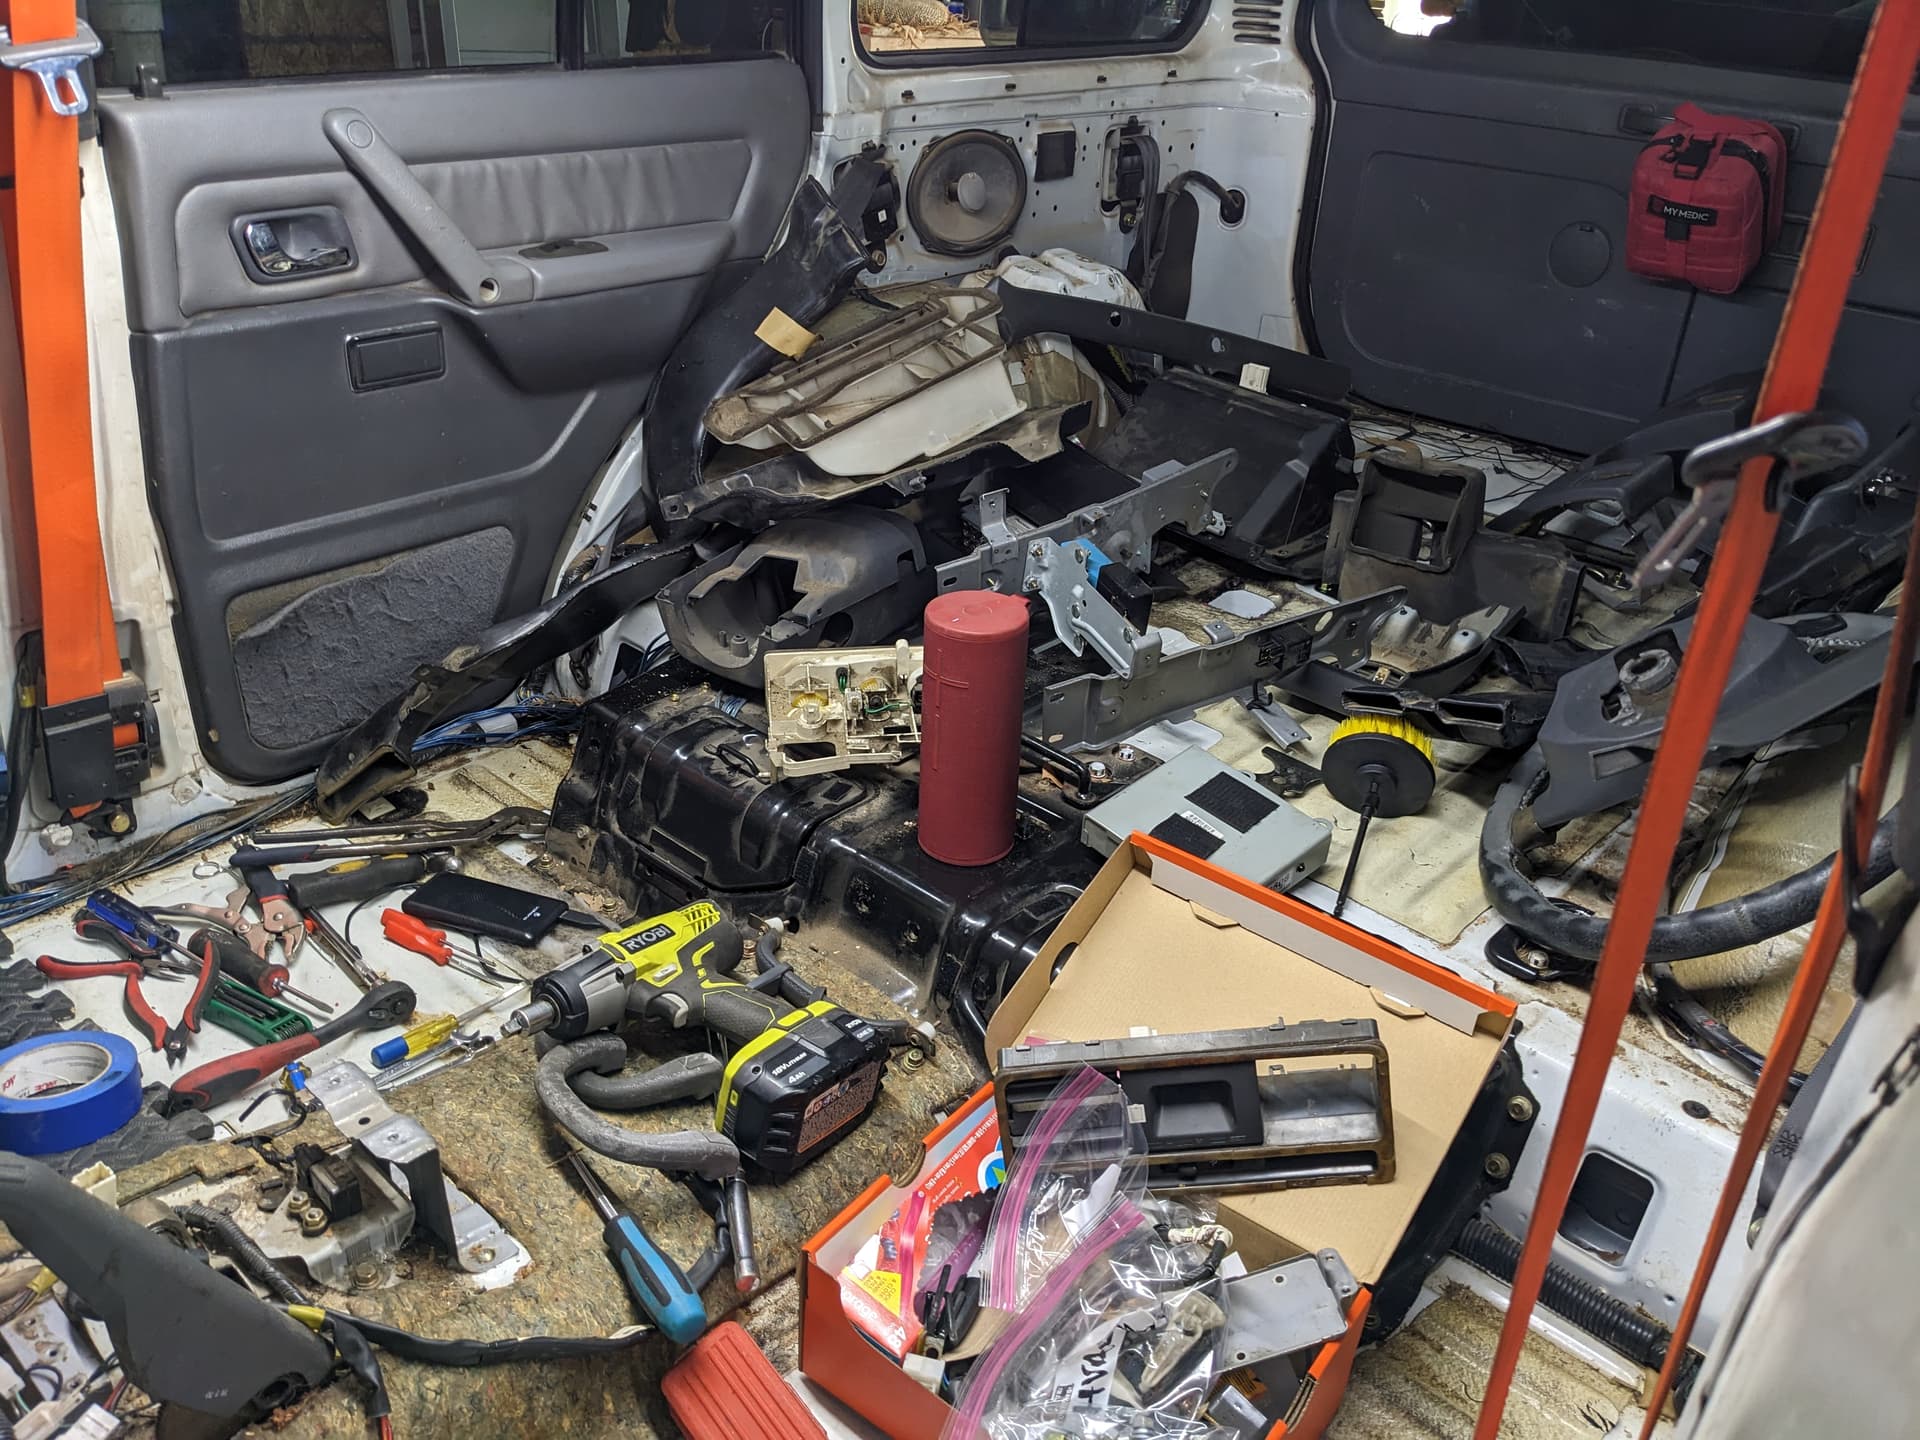
Gonna keep after it! Once the core is replaced, it’s all fun and games.
- new speakers w/ better wiring & sound insulation
- new red/white LED reading lights in the back w/ USB power ports
- a freshly recovered dashboard w/ new vents & LED lighting
- freshly dyed carpet w/ sound insulation
- fully functional aux lights up front
- clean HVAC ducting
I miss driving my truck!
1 Like
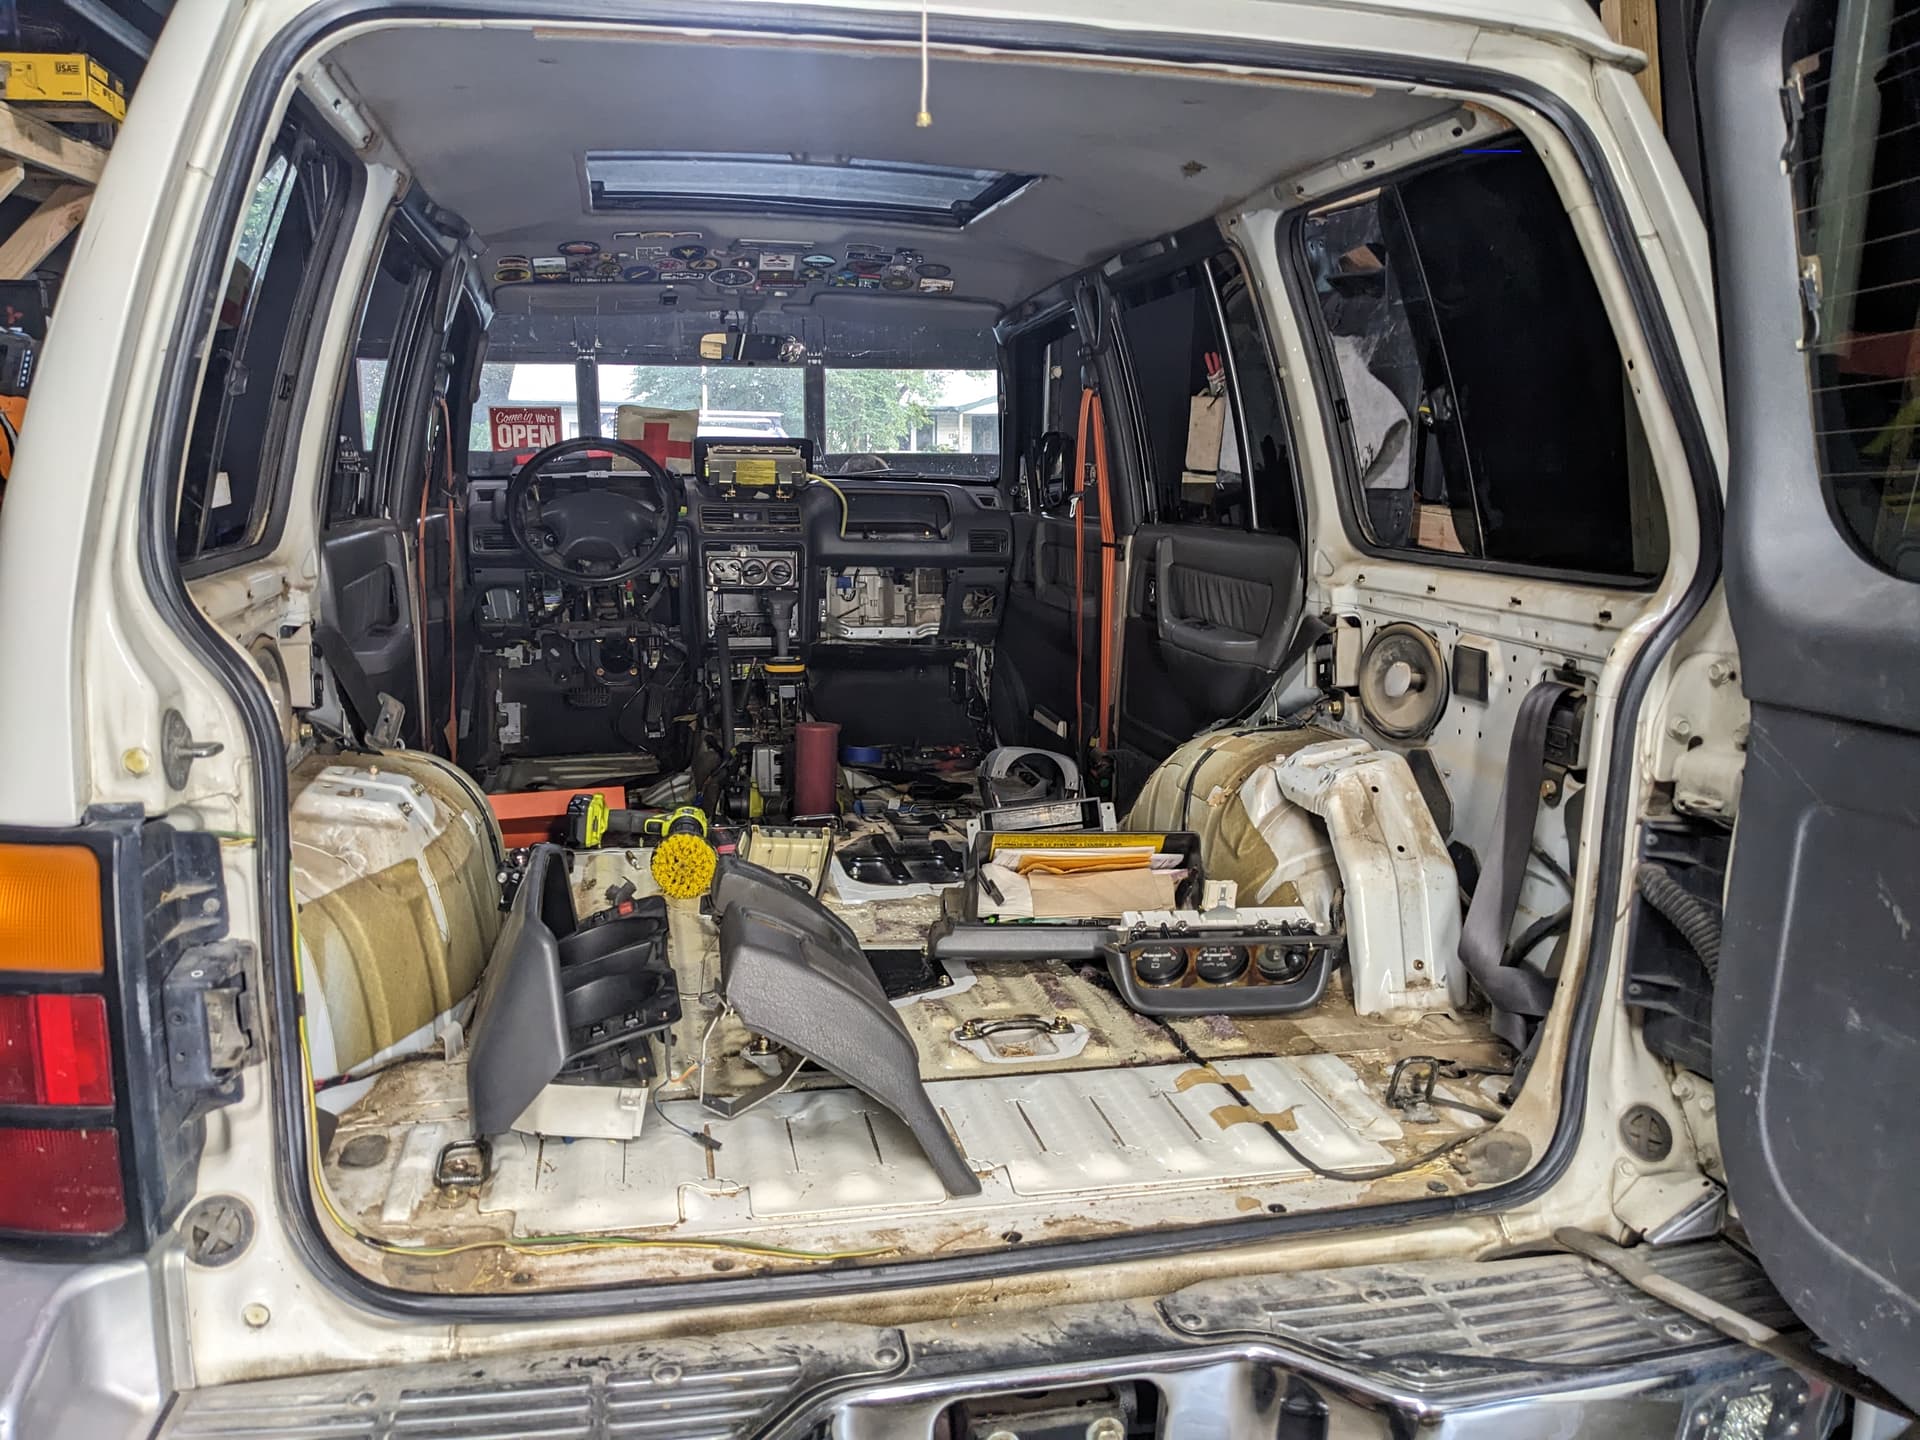
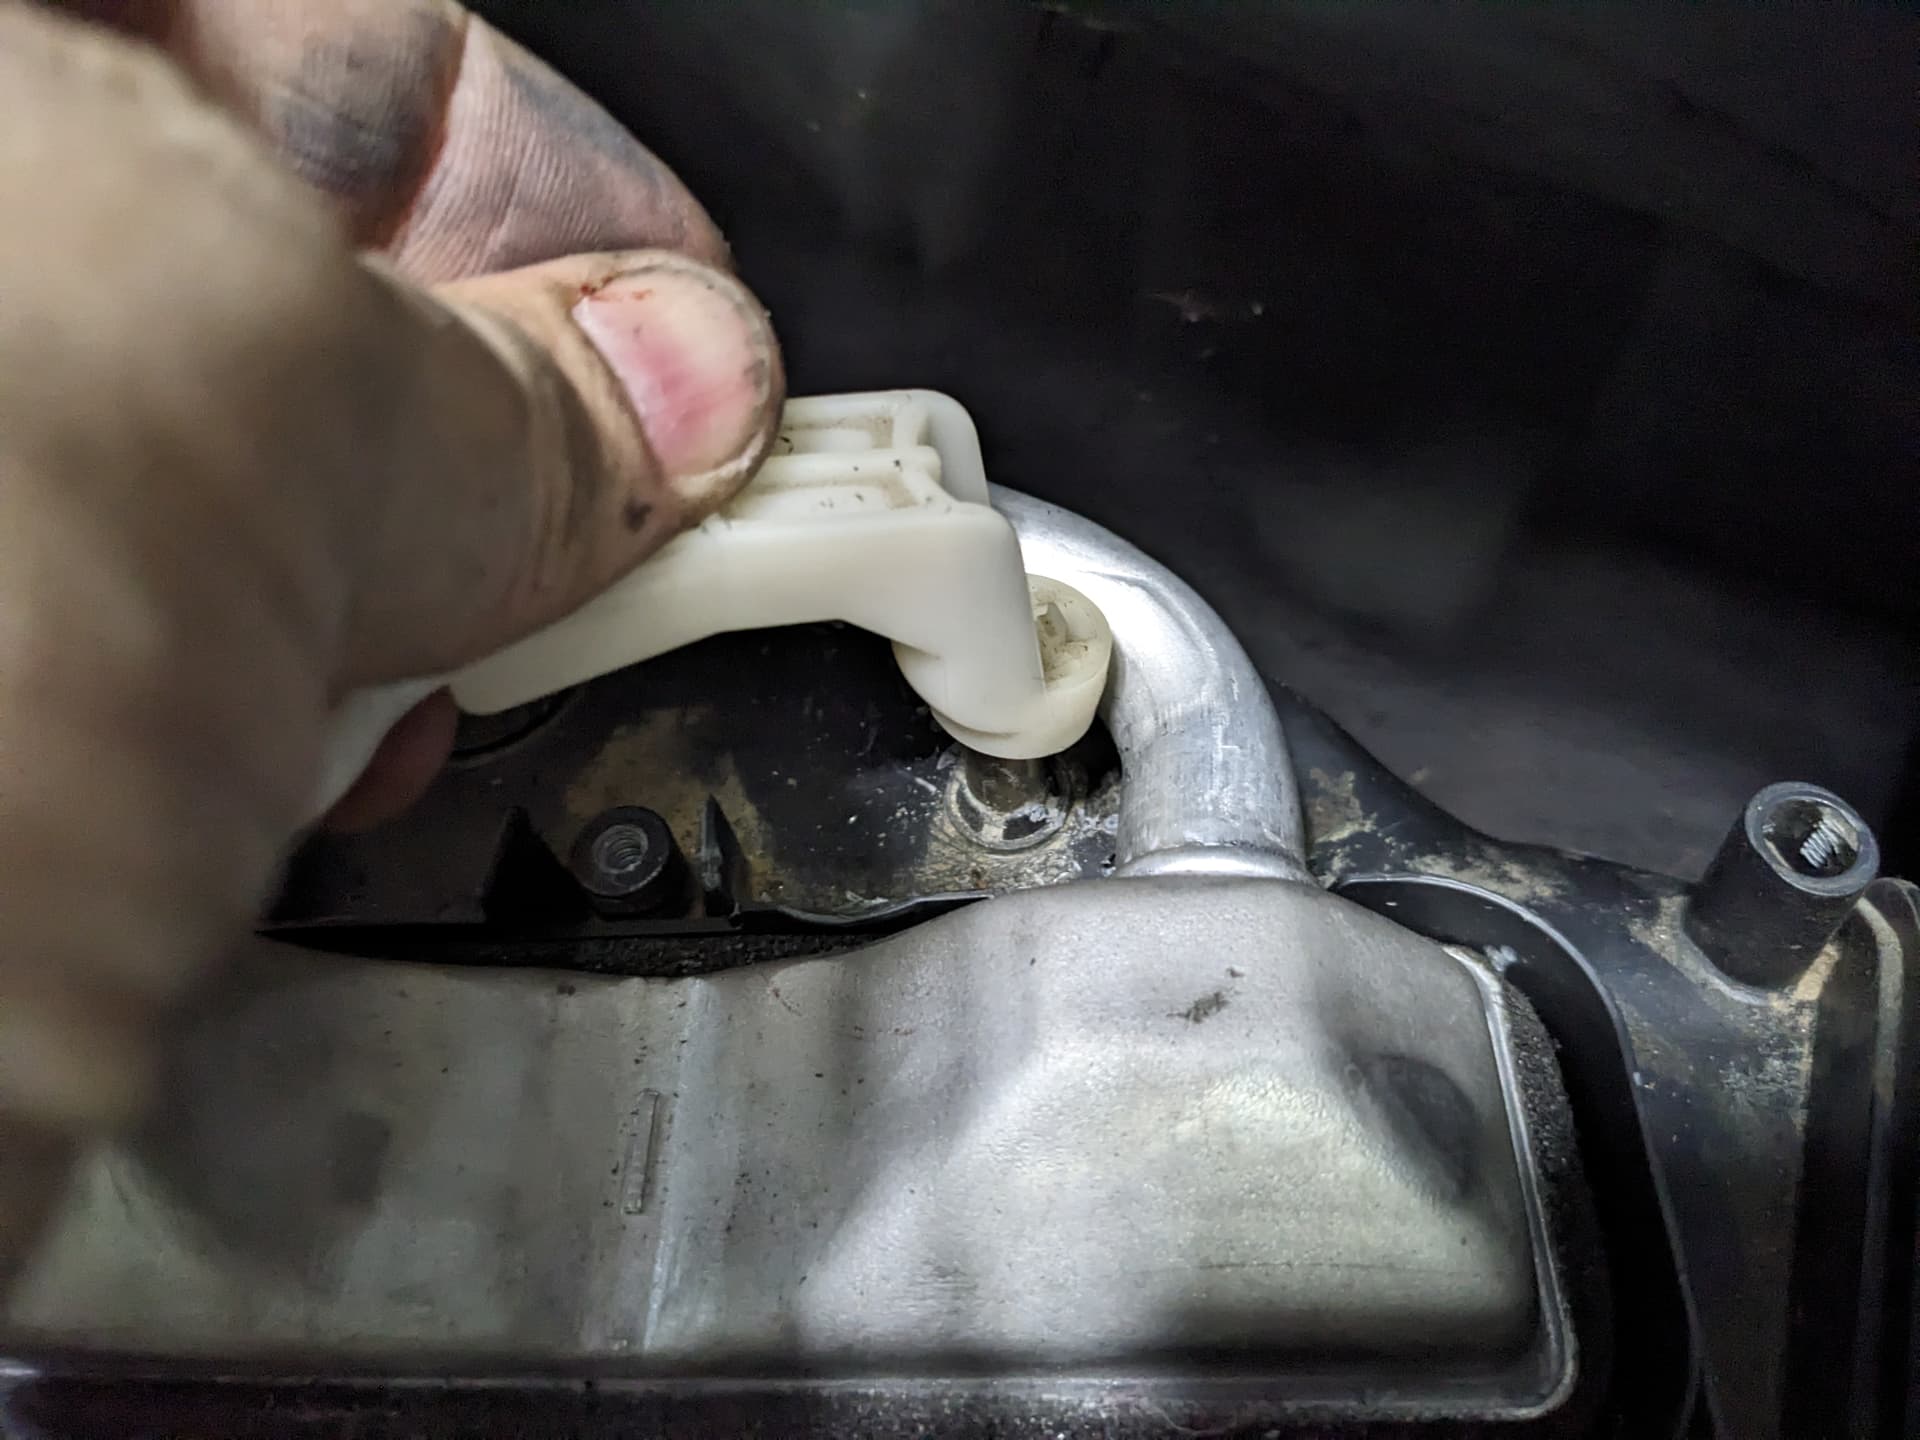
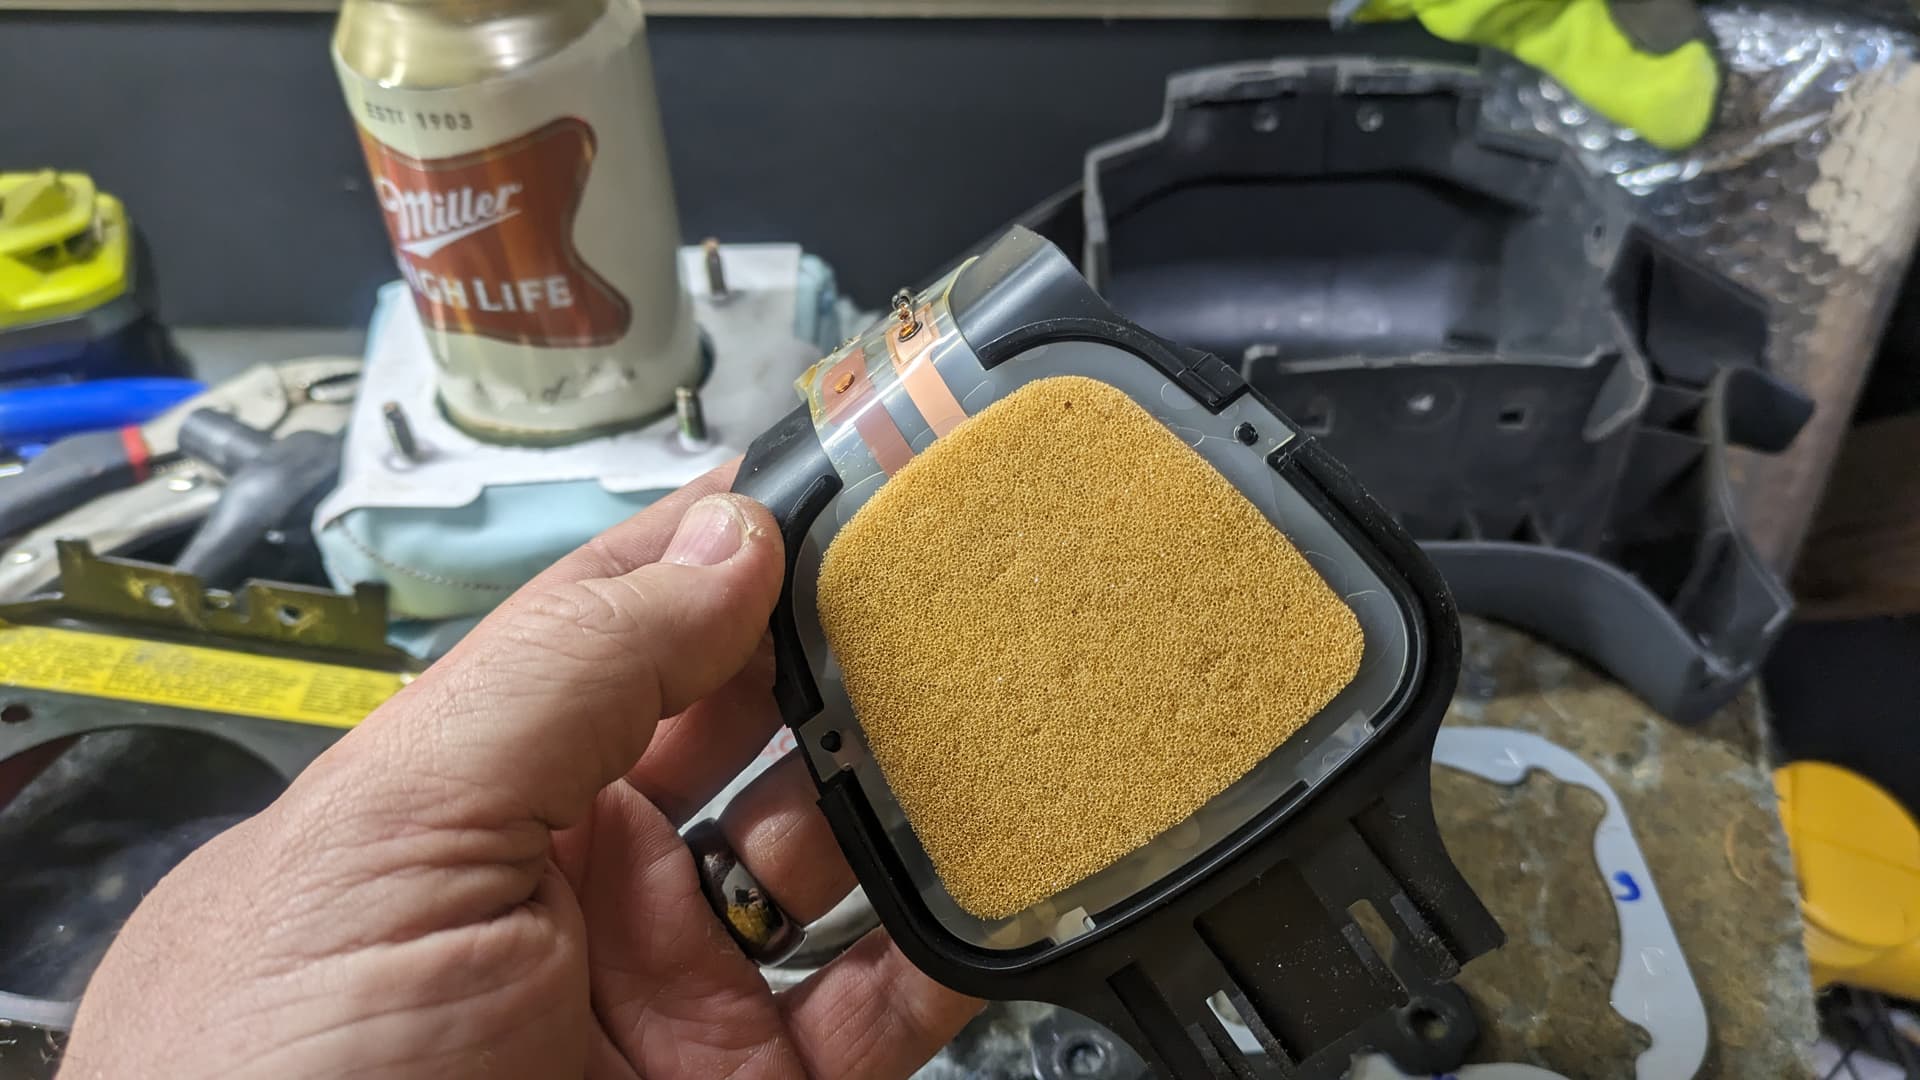
Journey to the Heater Core Ep. 4
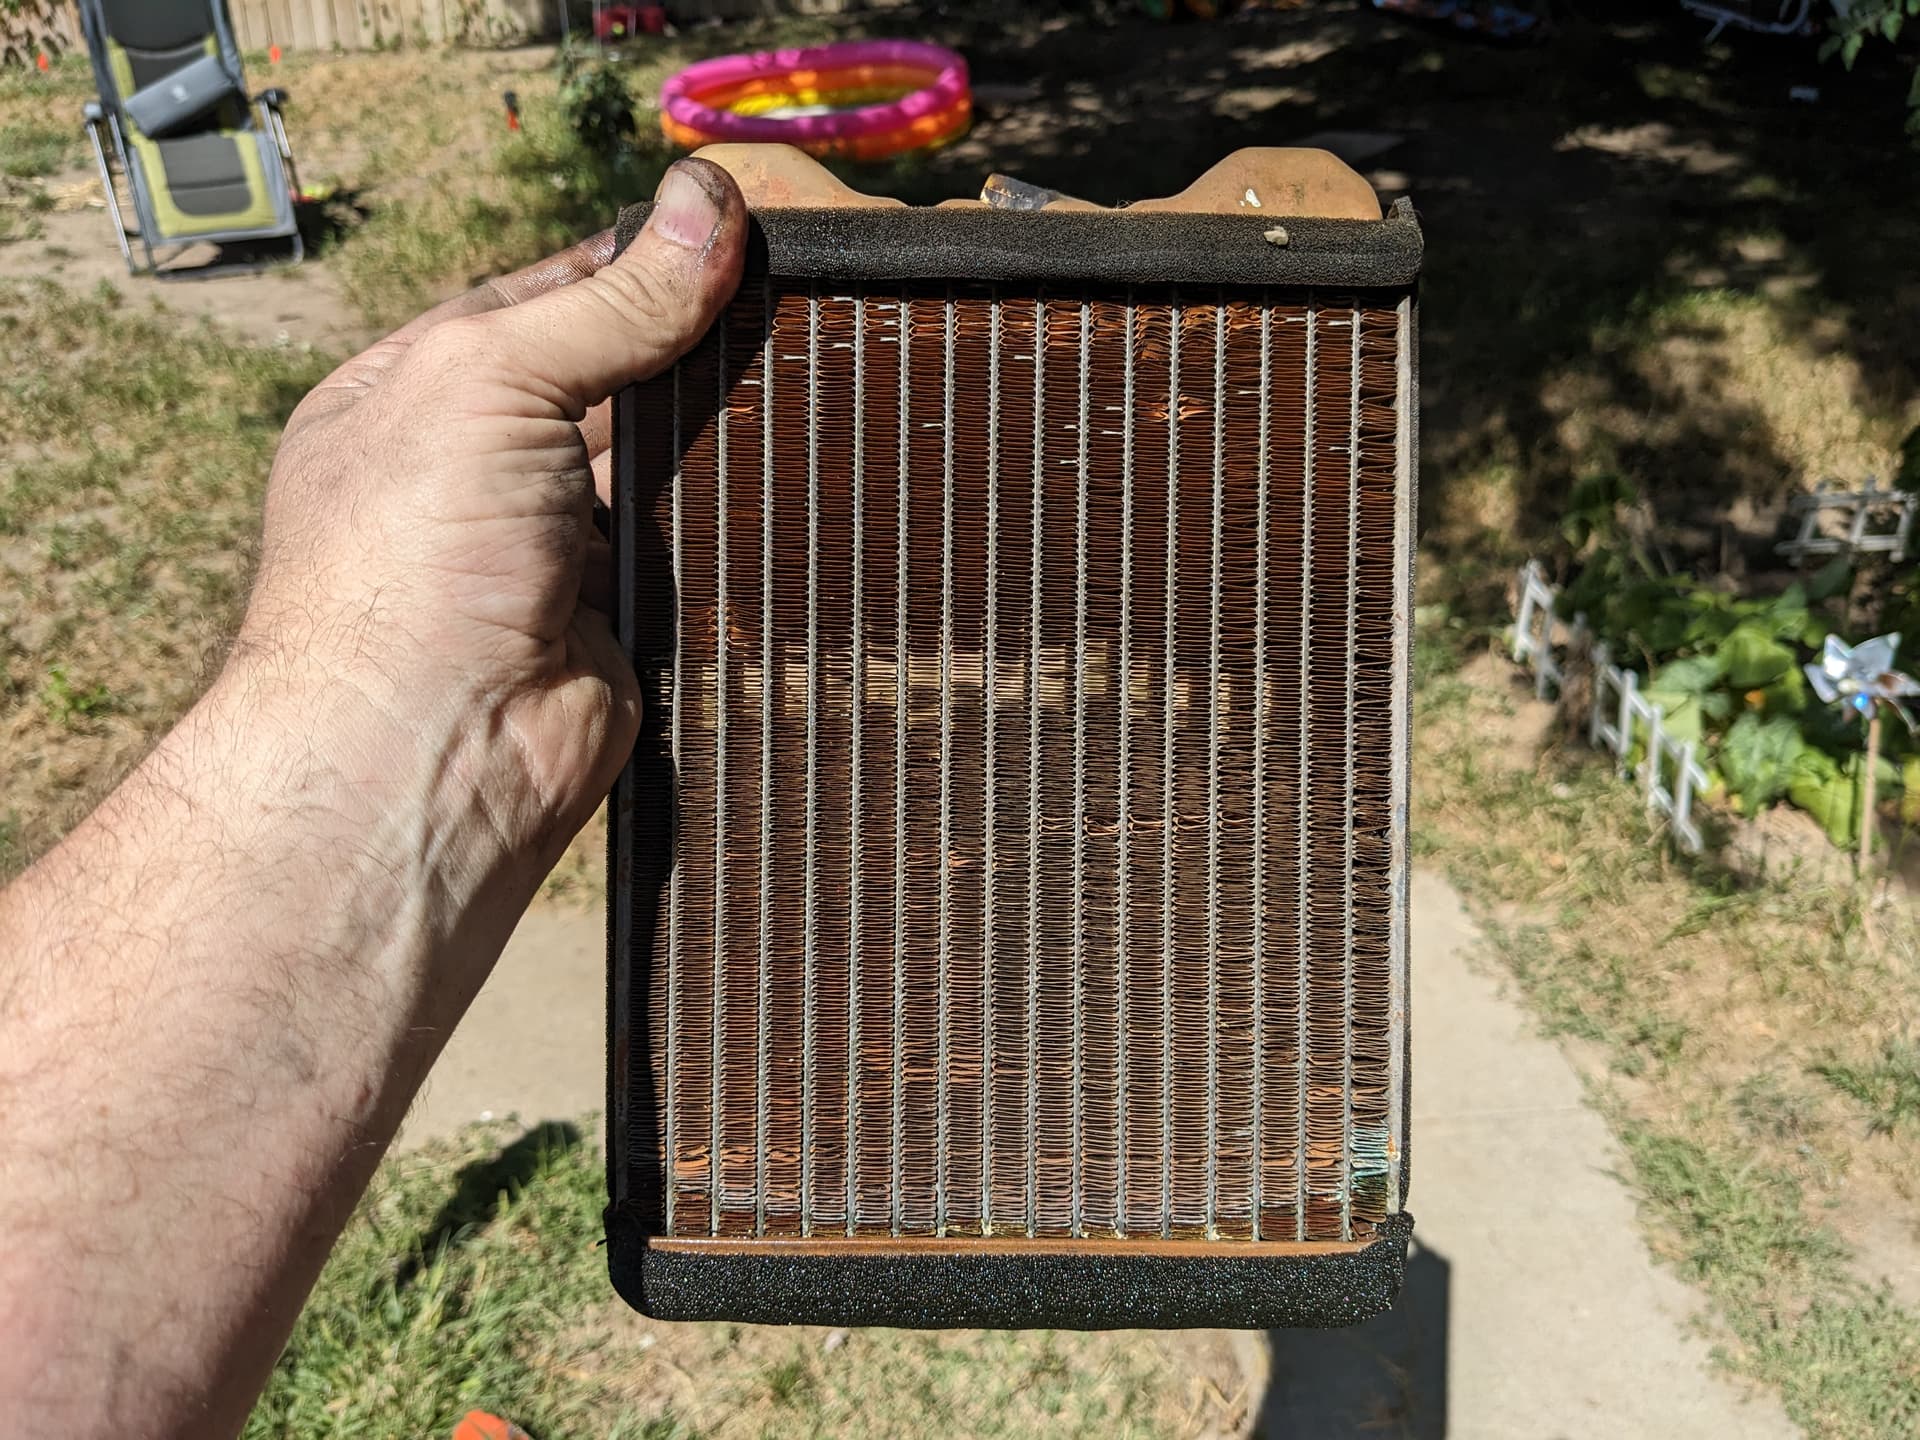
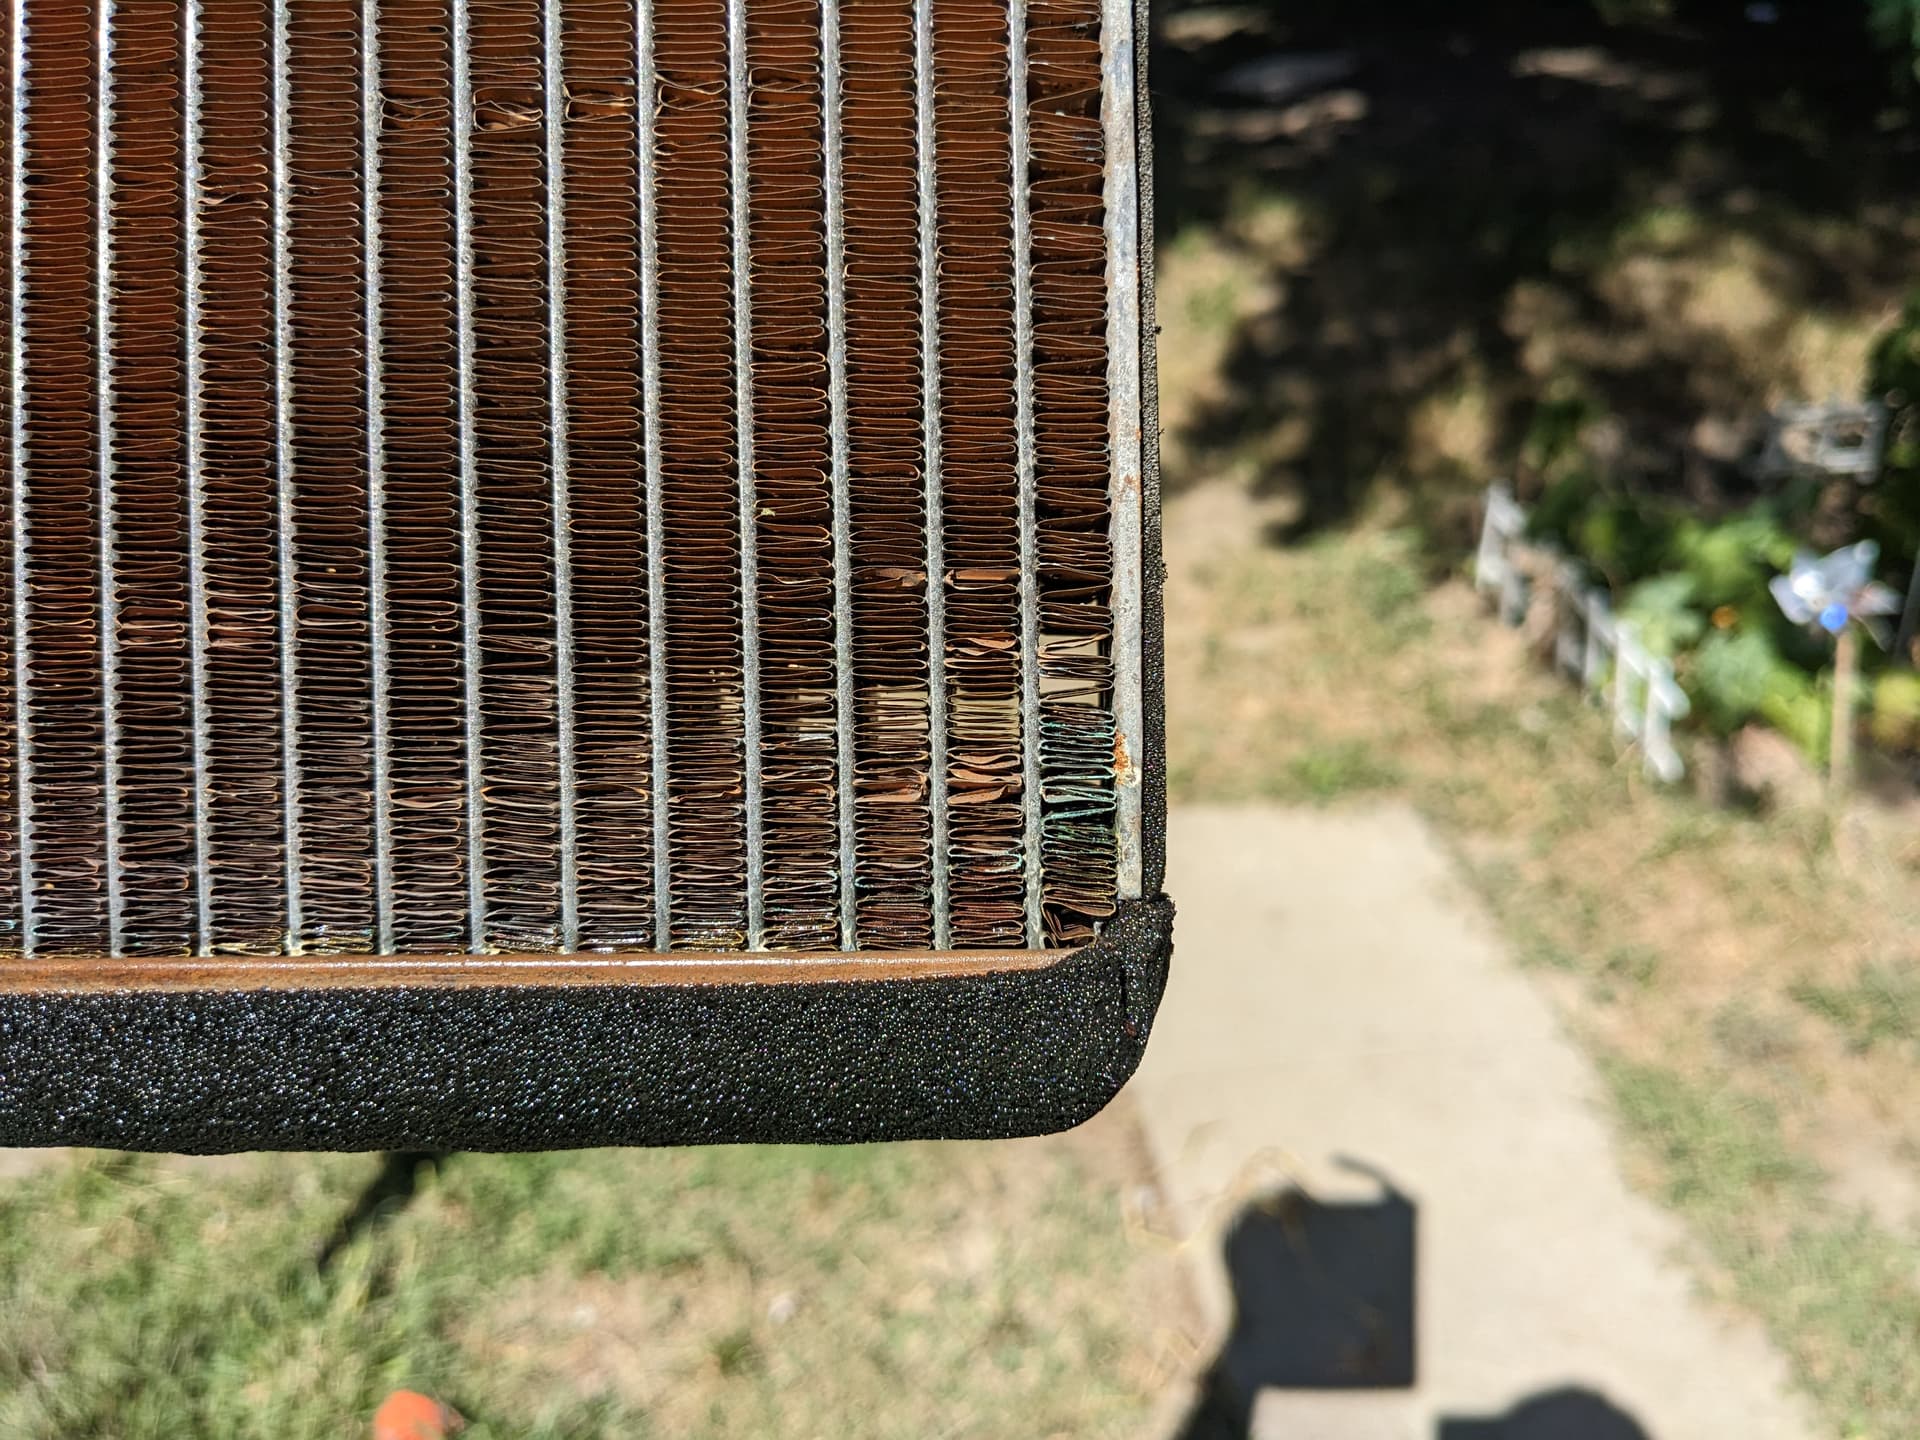
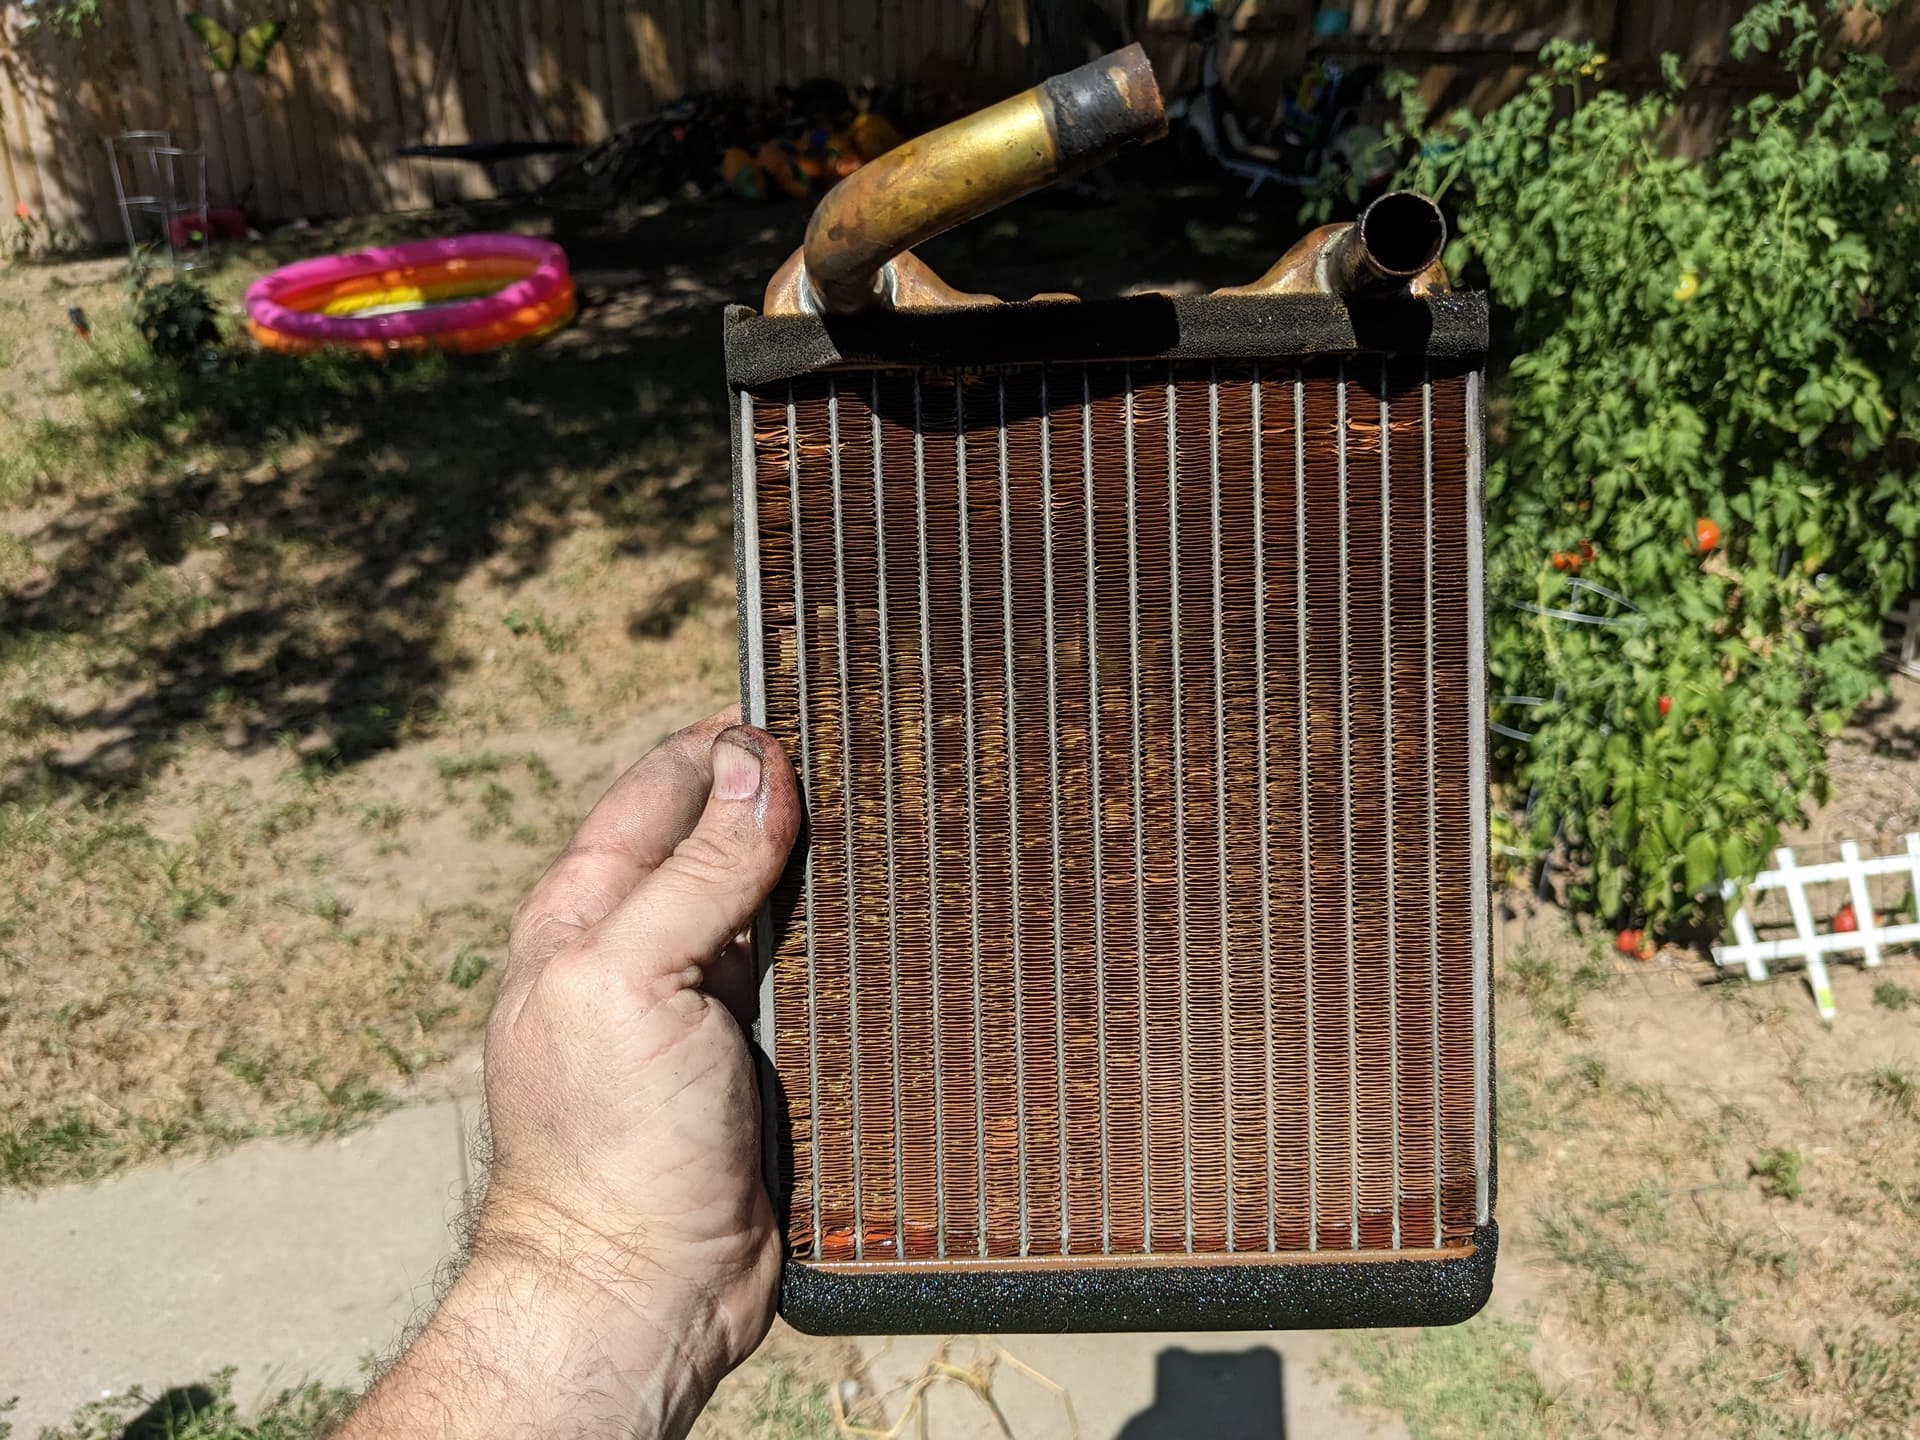
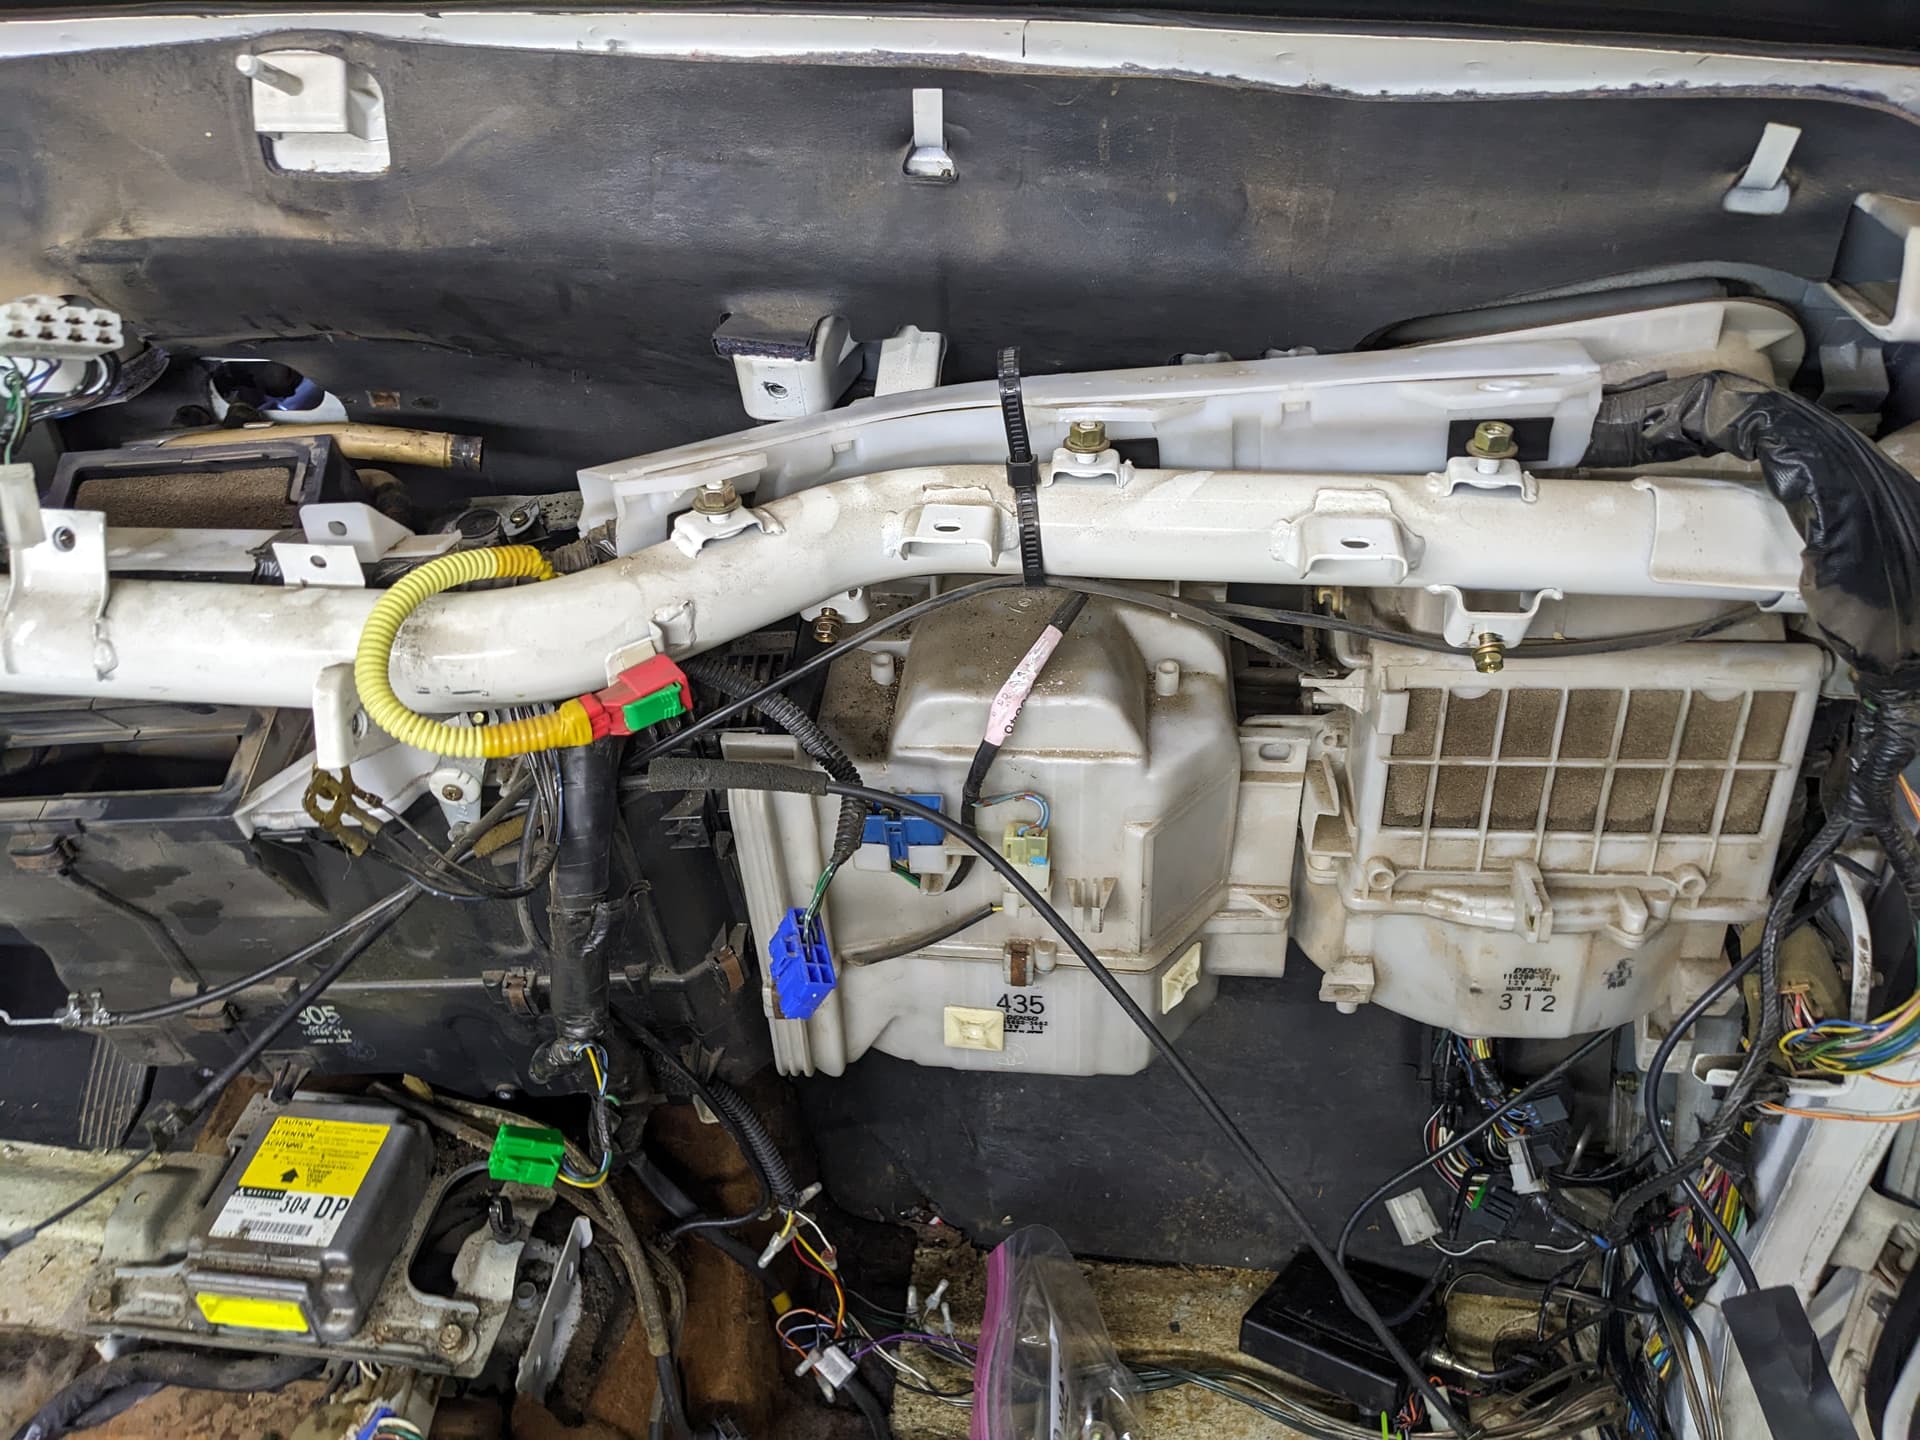
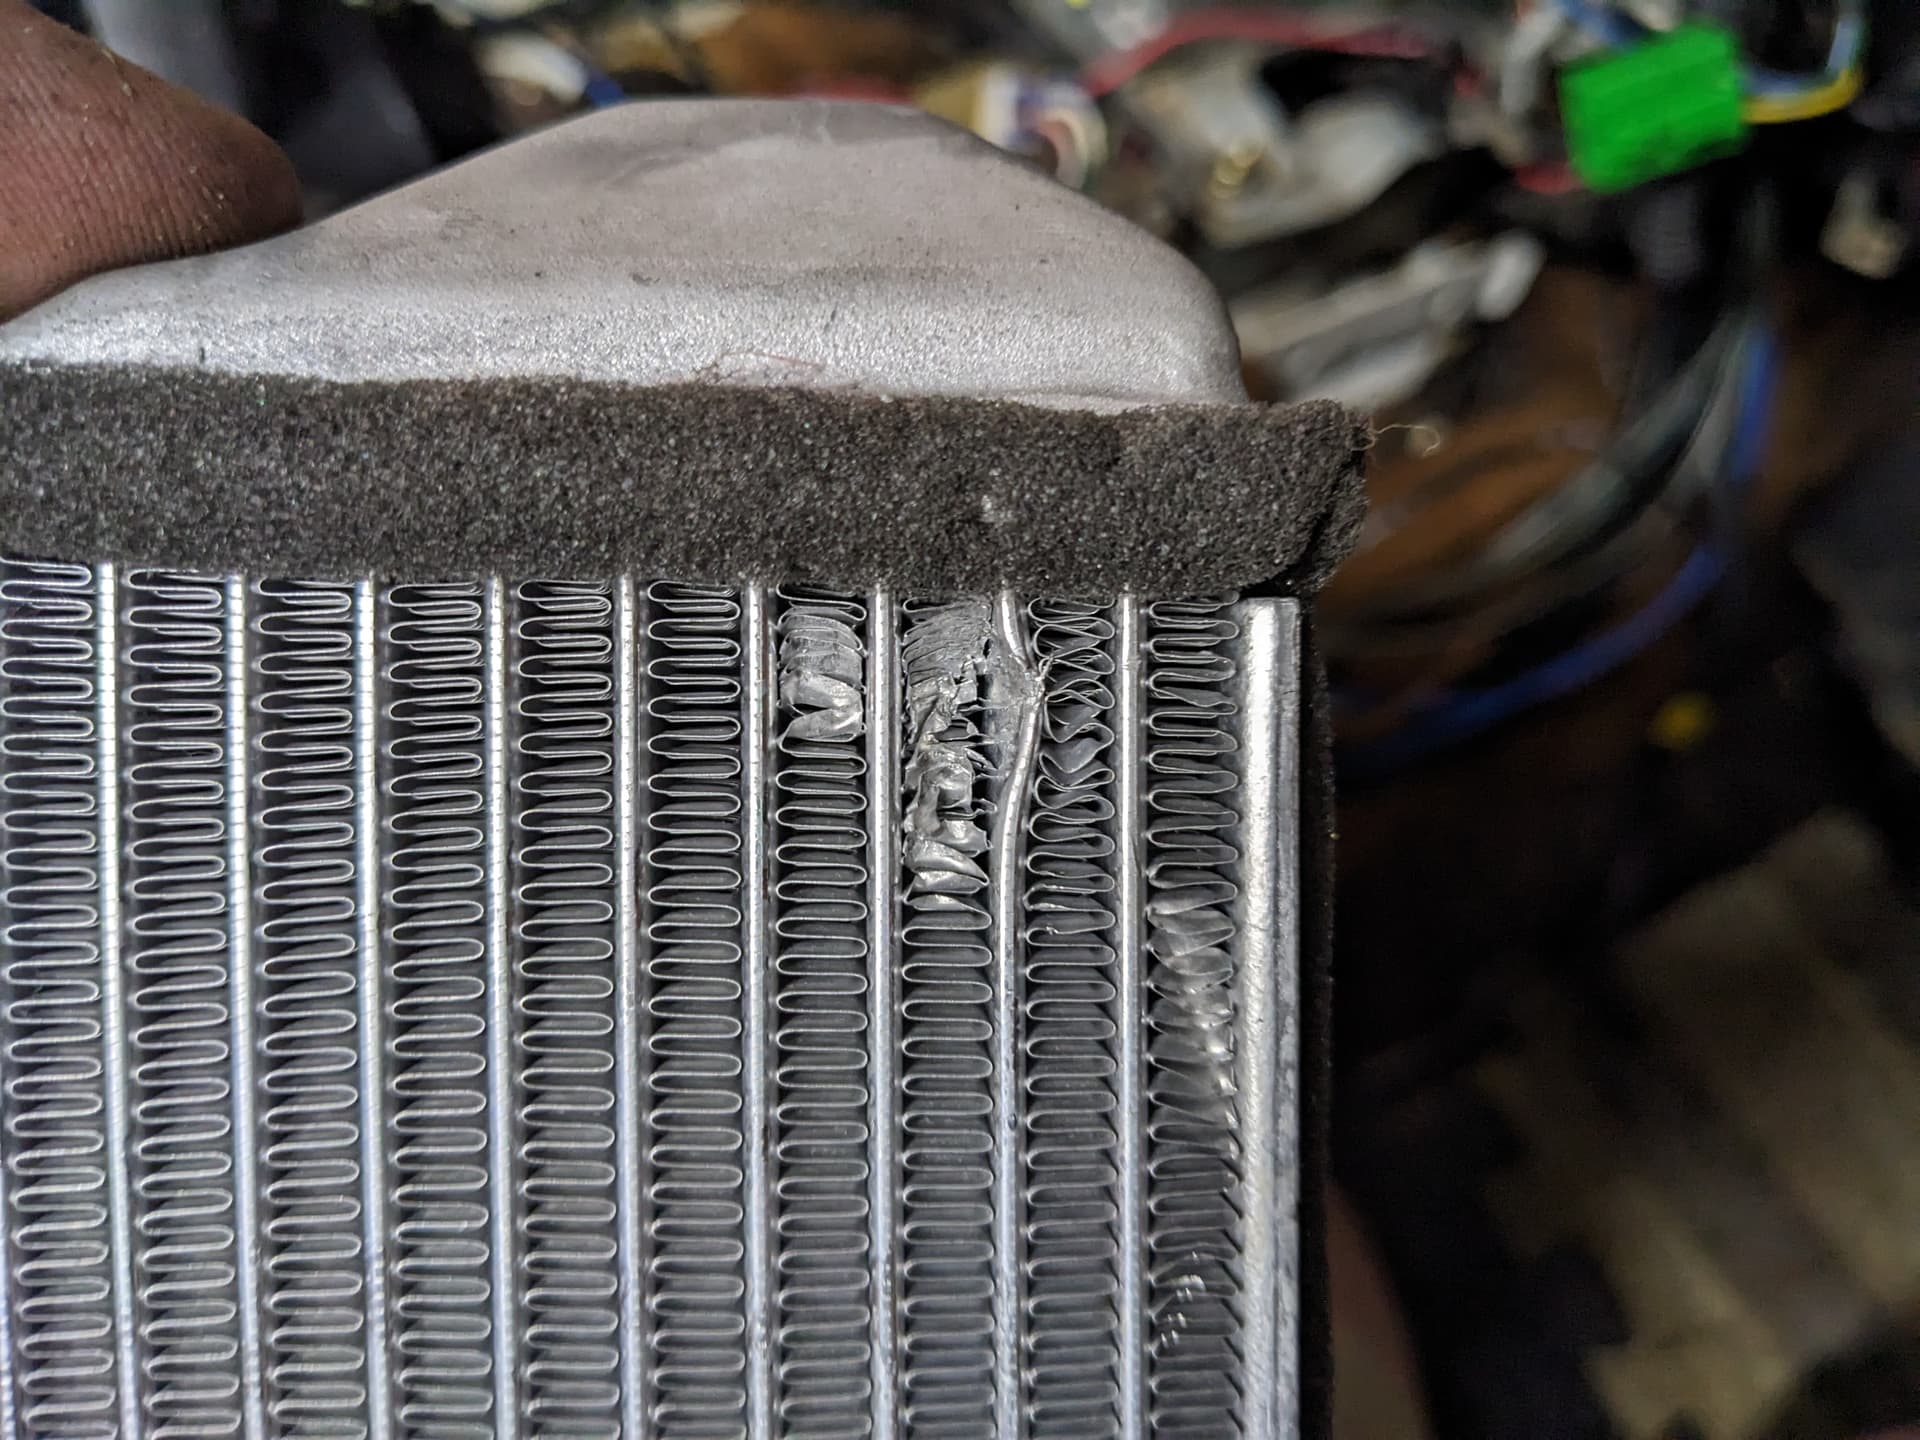
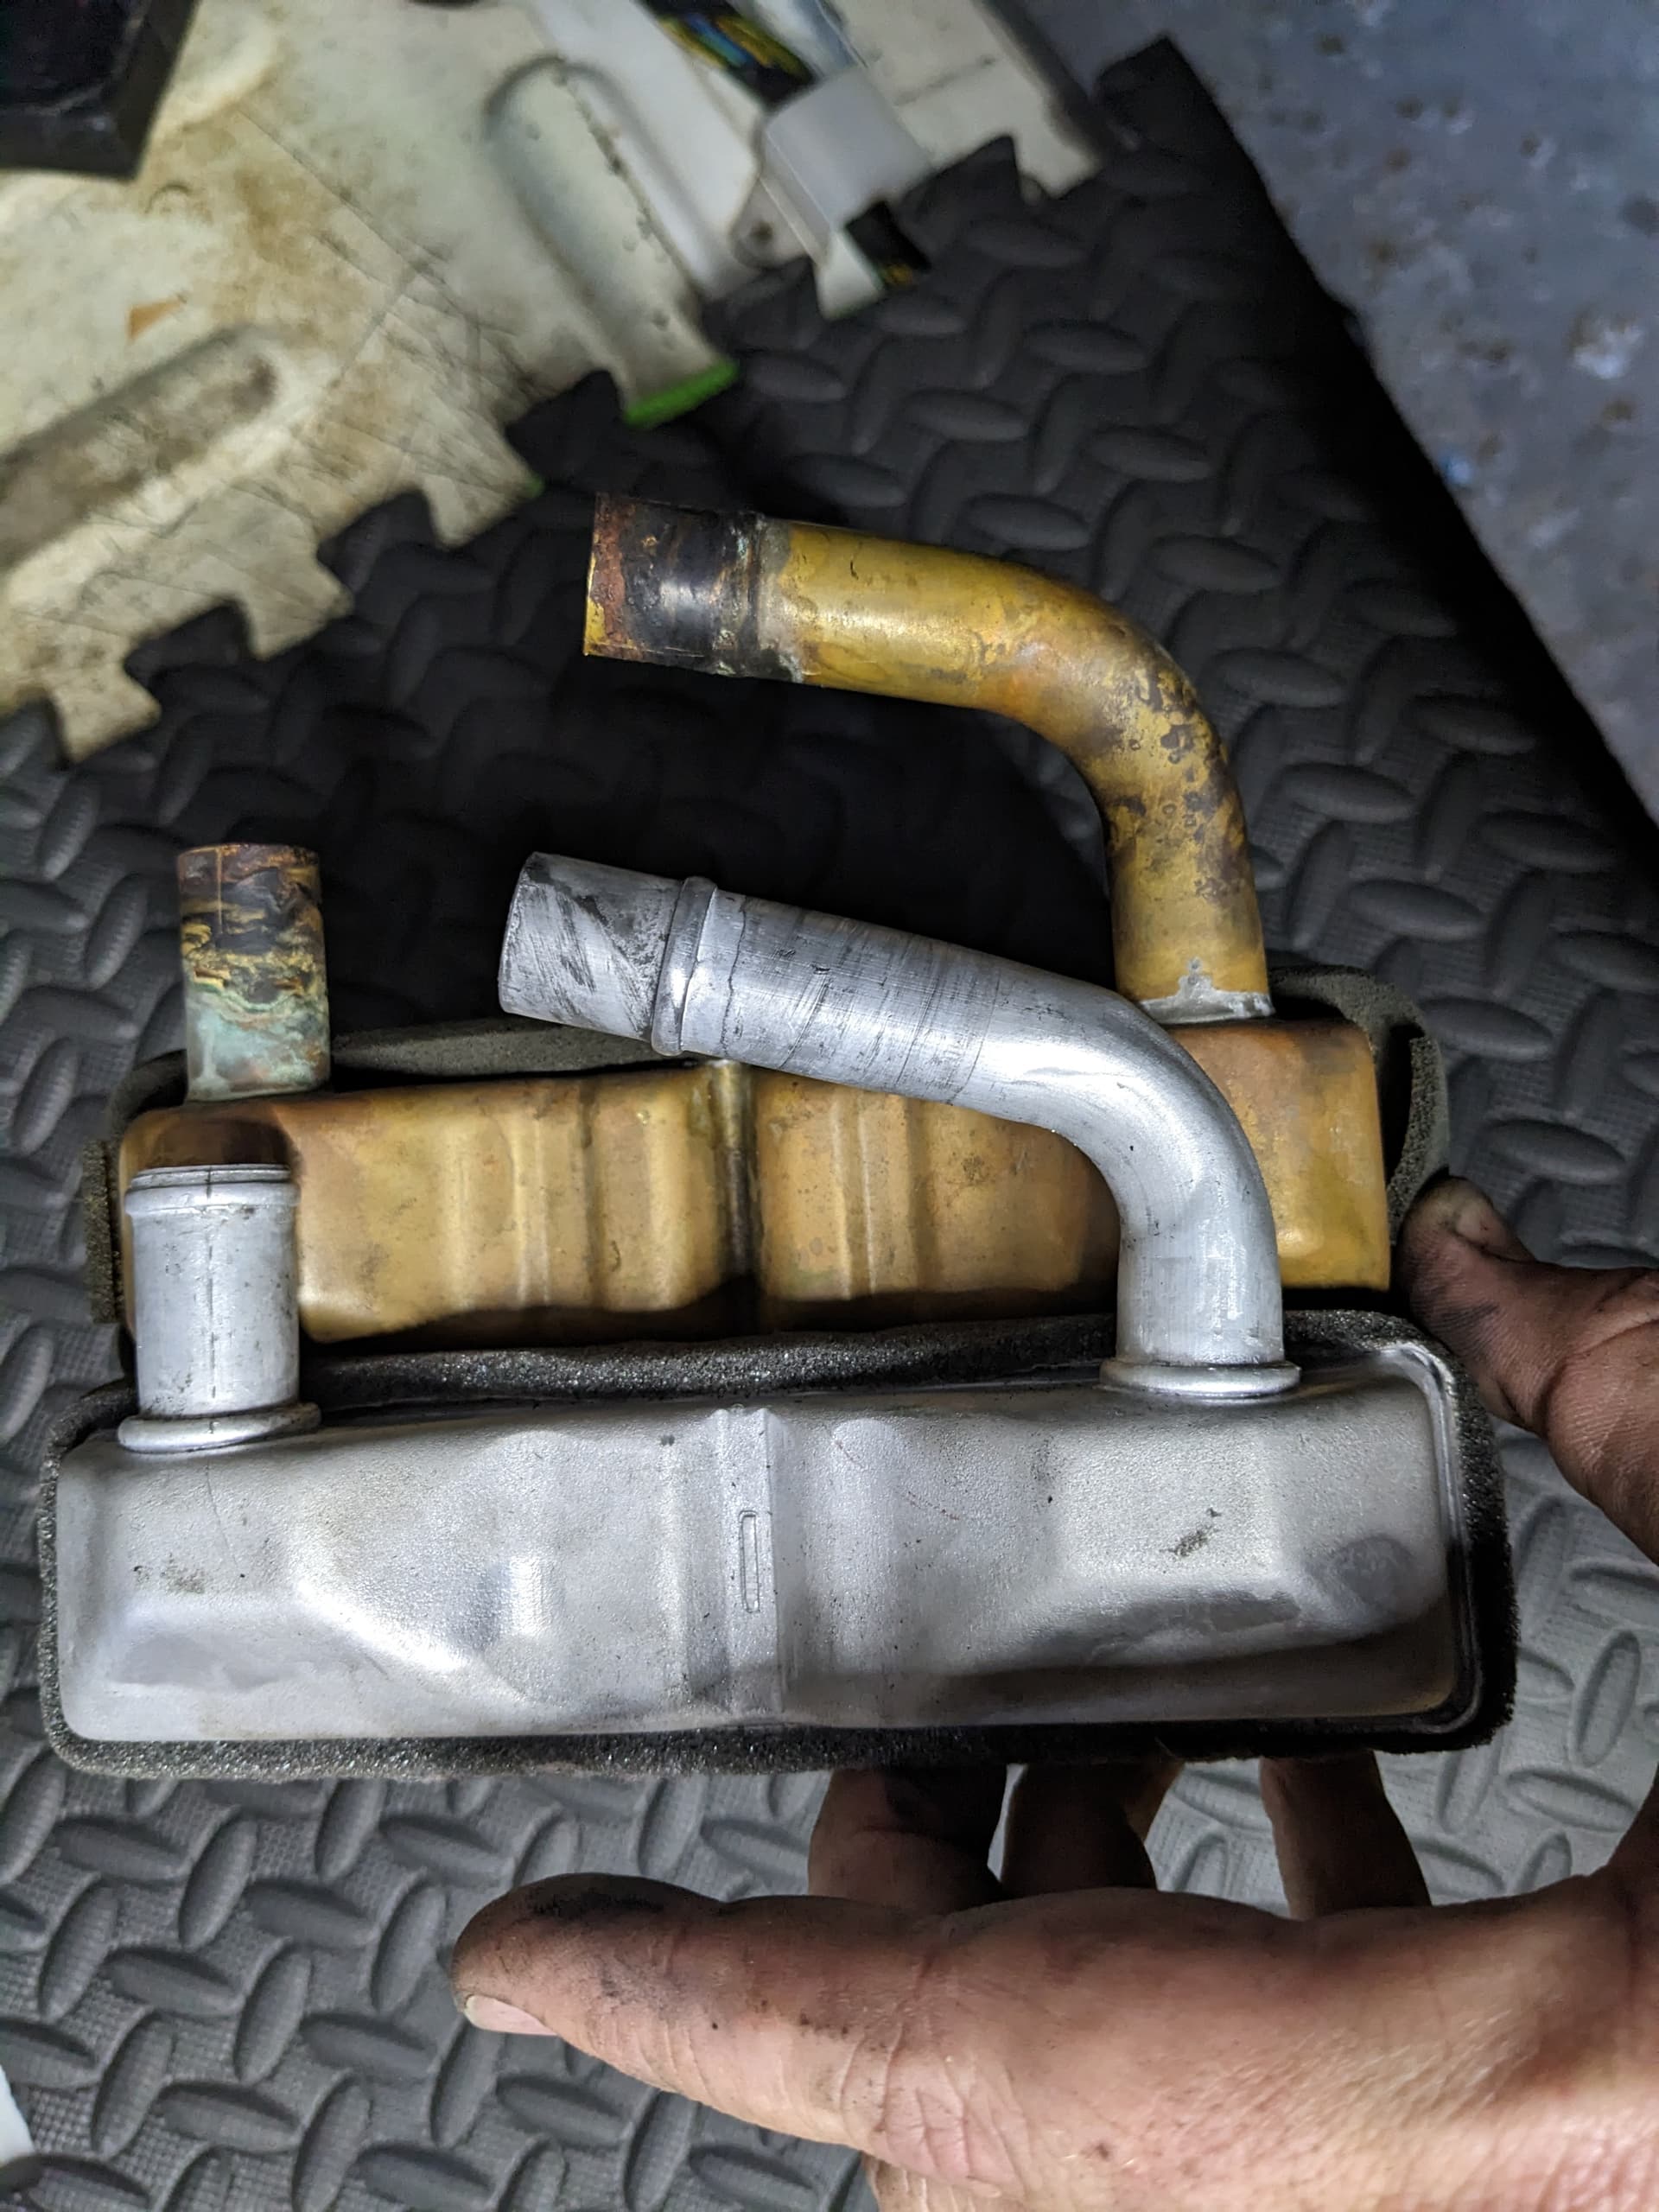
The old heater core is out!
Doesn’t look bad, either. There’s a little spot of corrosion toward the bottom on one side, but I think the leak was truly the hose couplers. Still need to pressure test this one to be sure. And I’m still more than likely going to install the new one from Luso when it arrives. (I’ll pressure test it, too.)
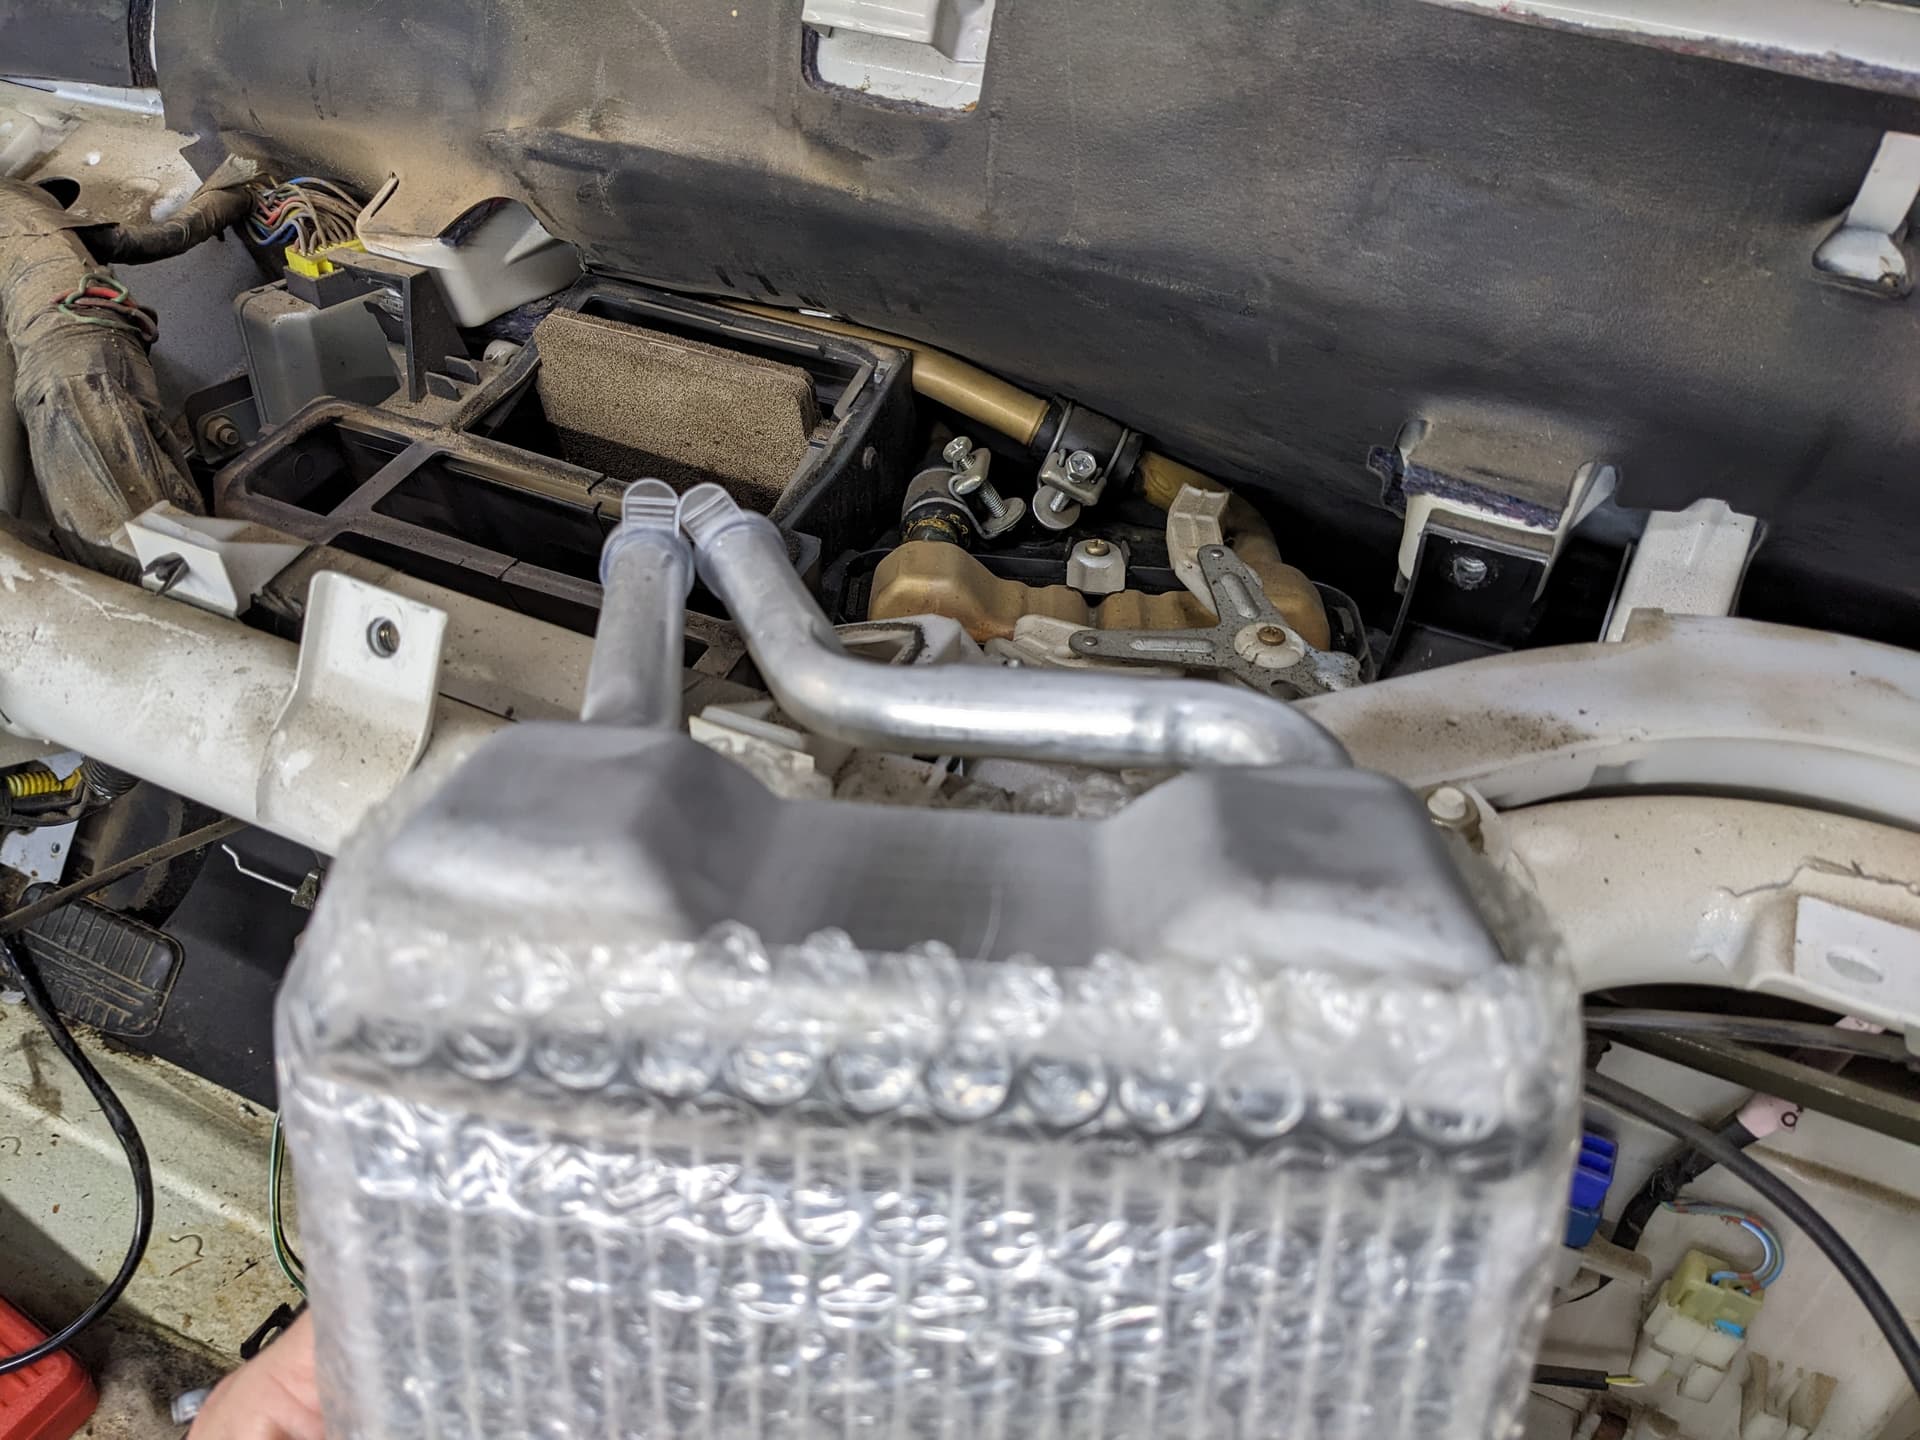
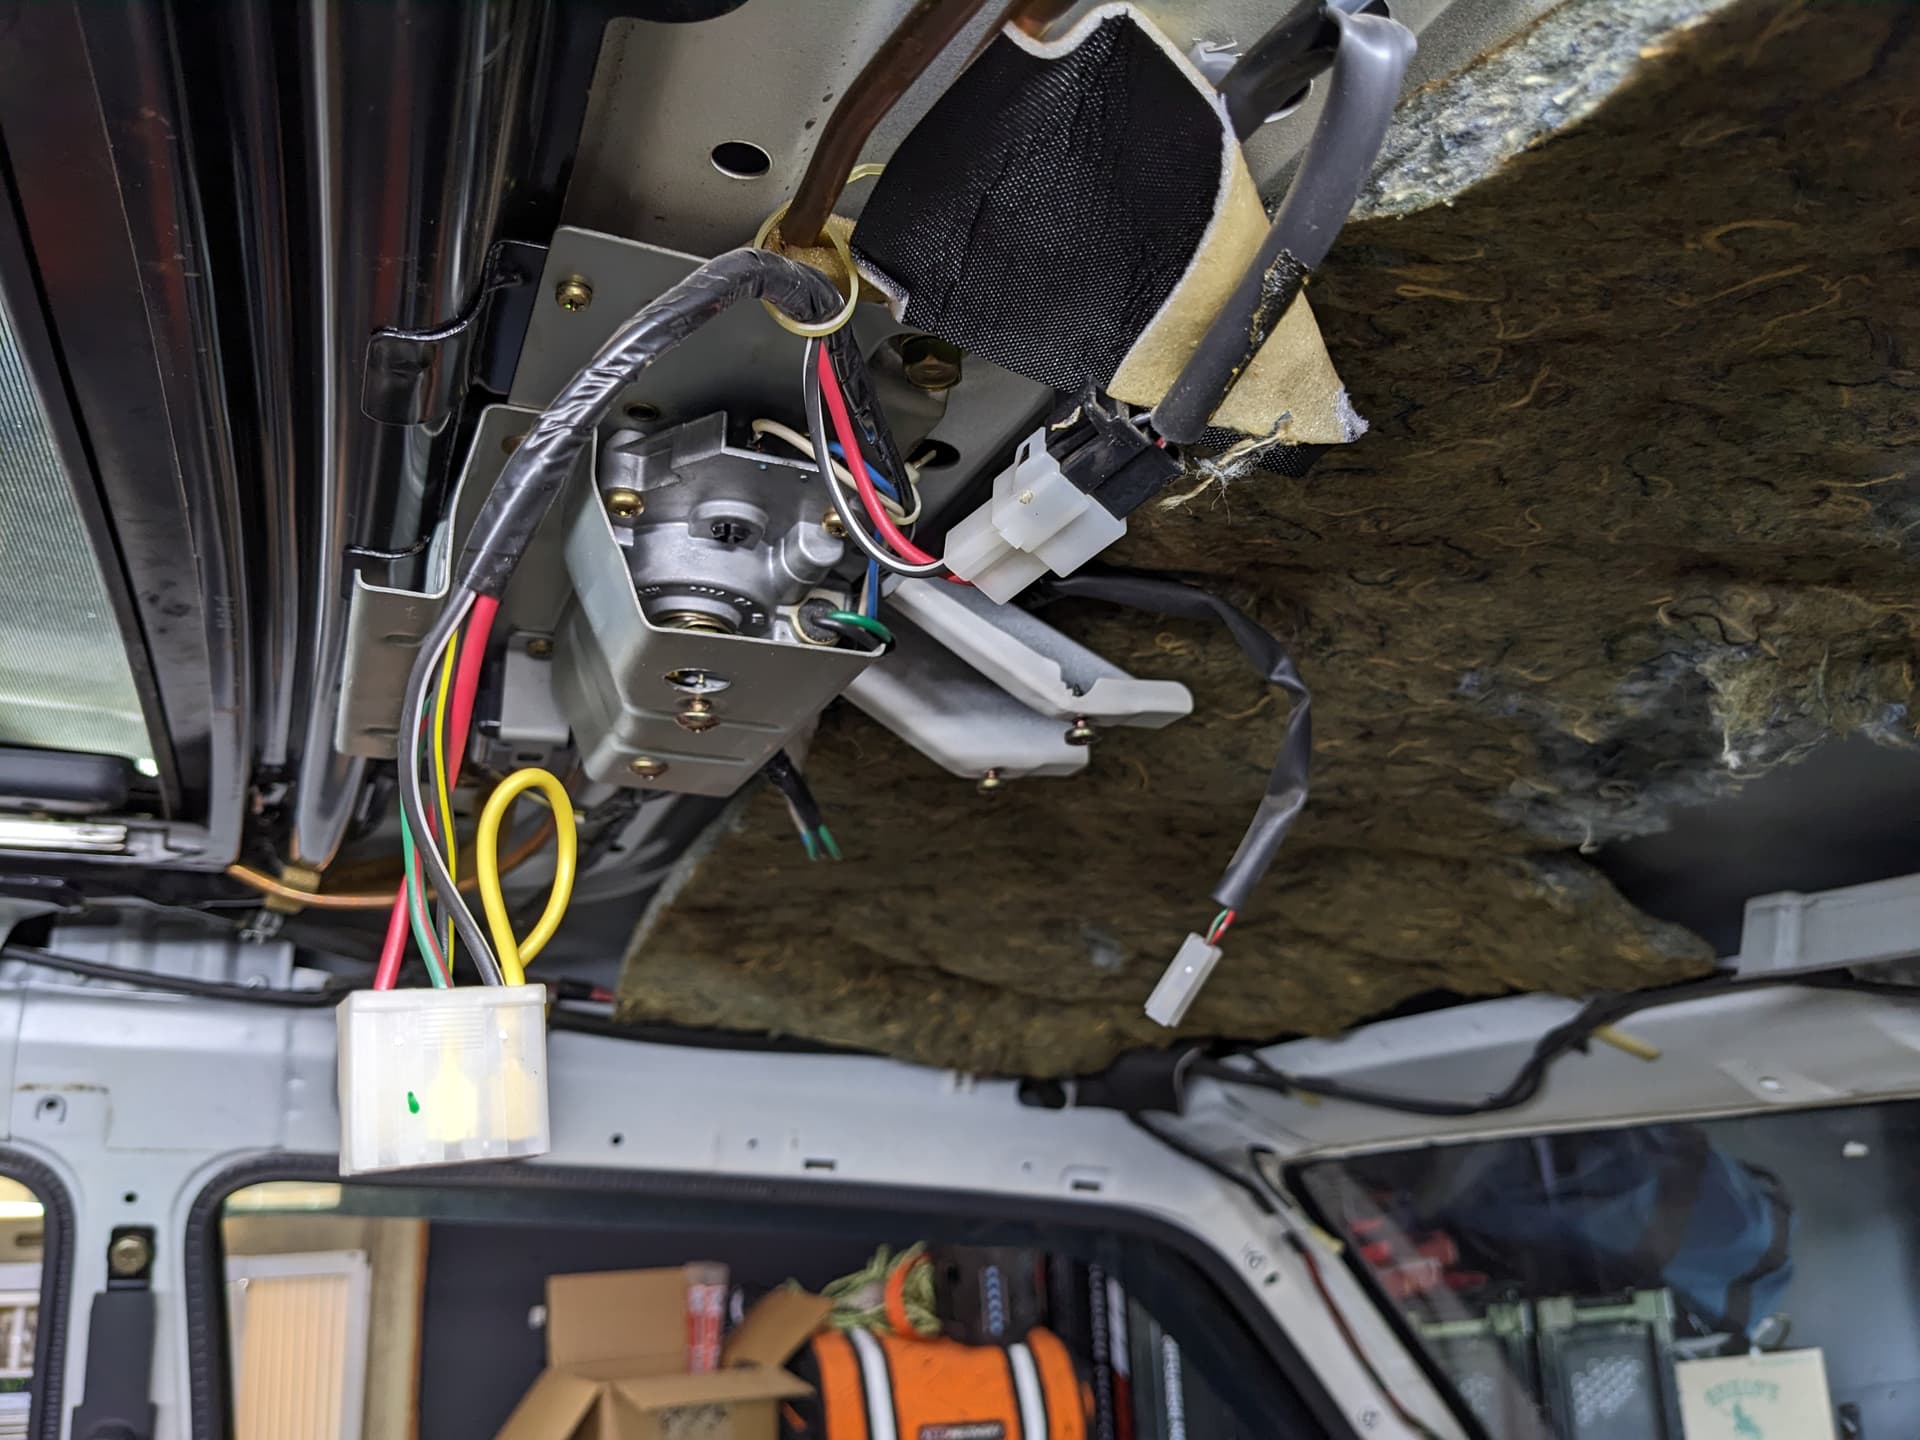
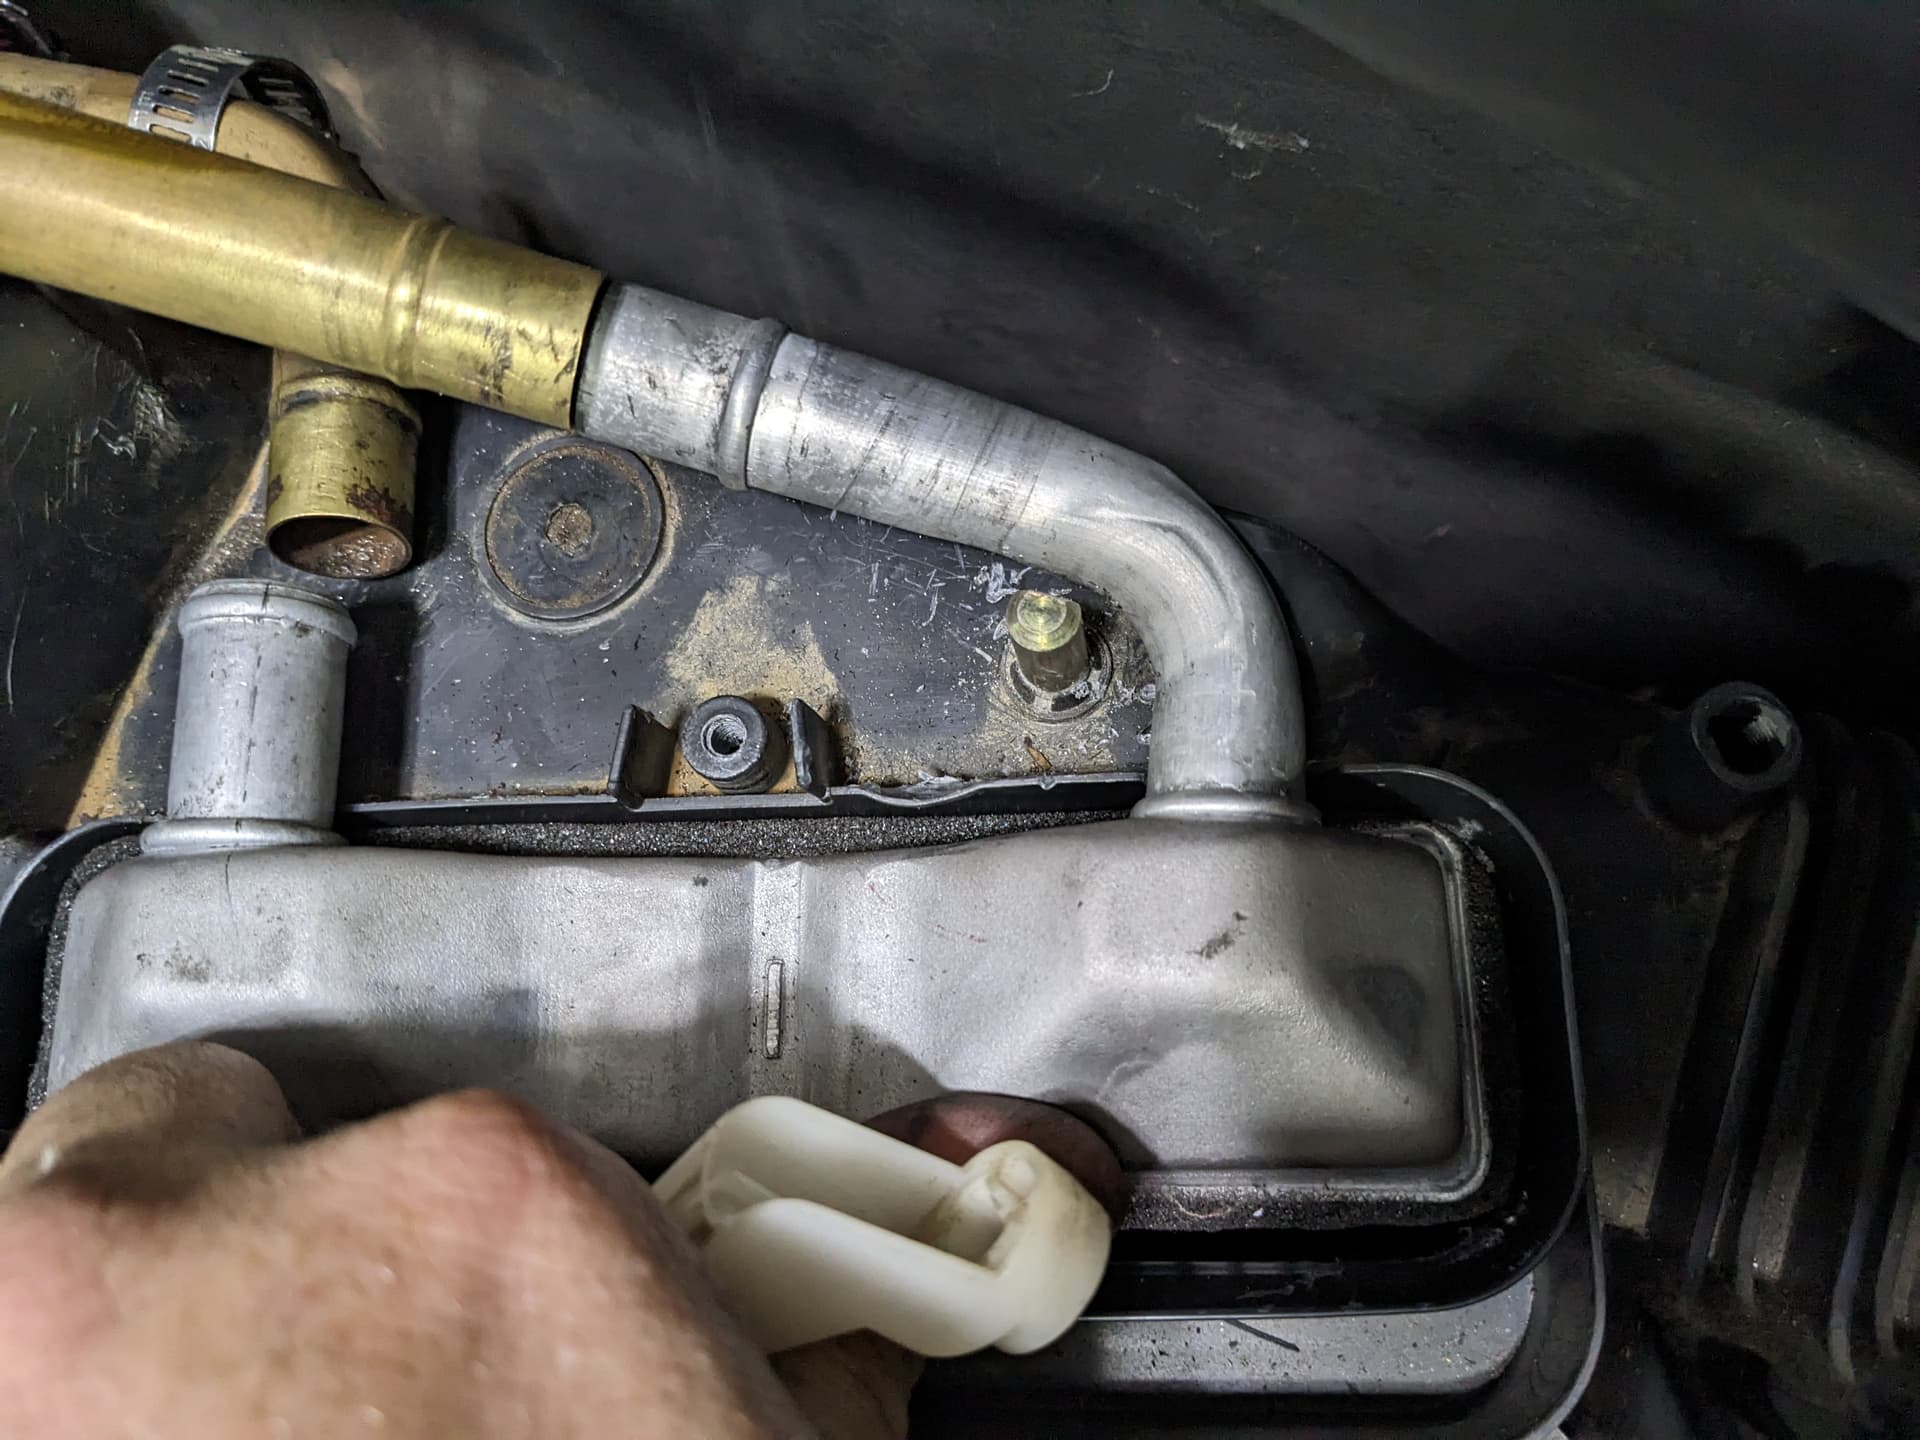
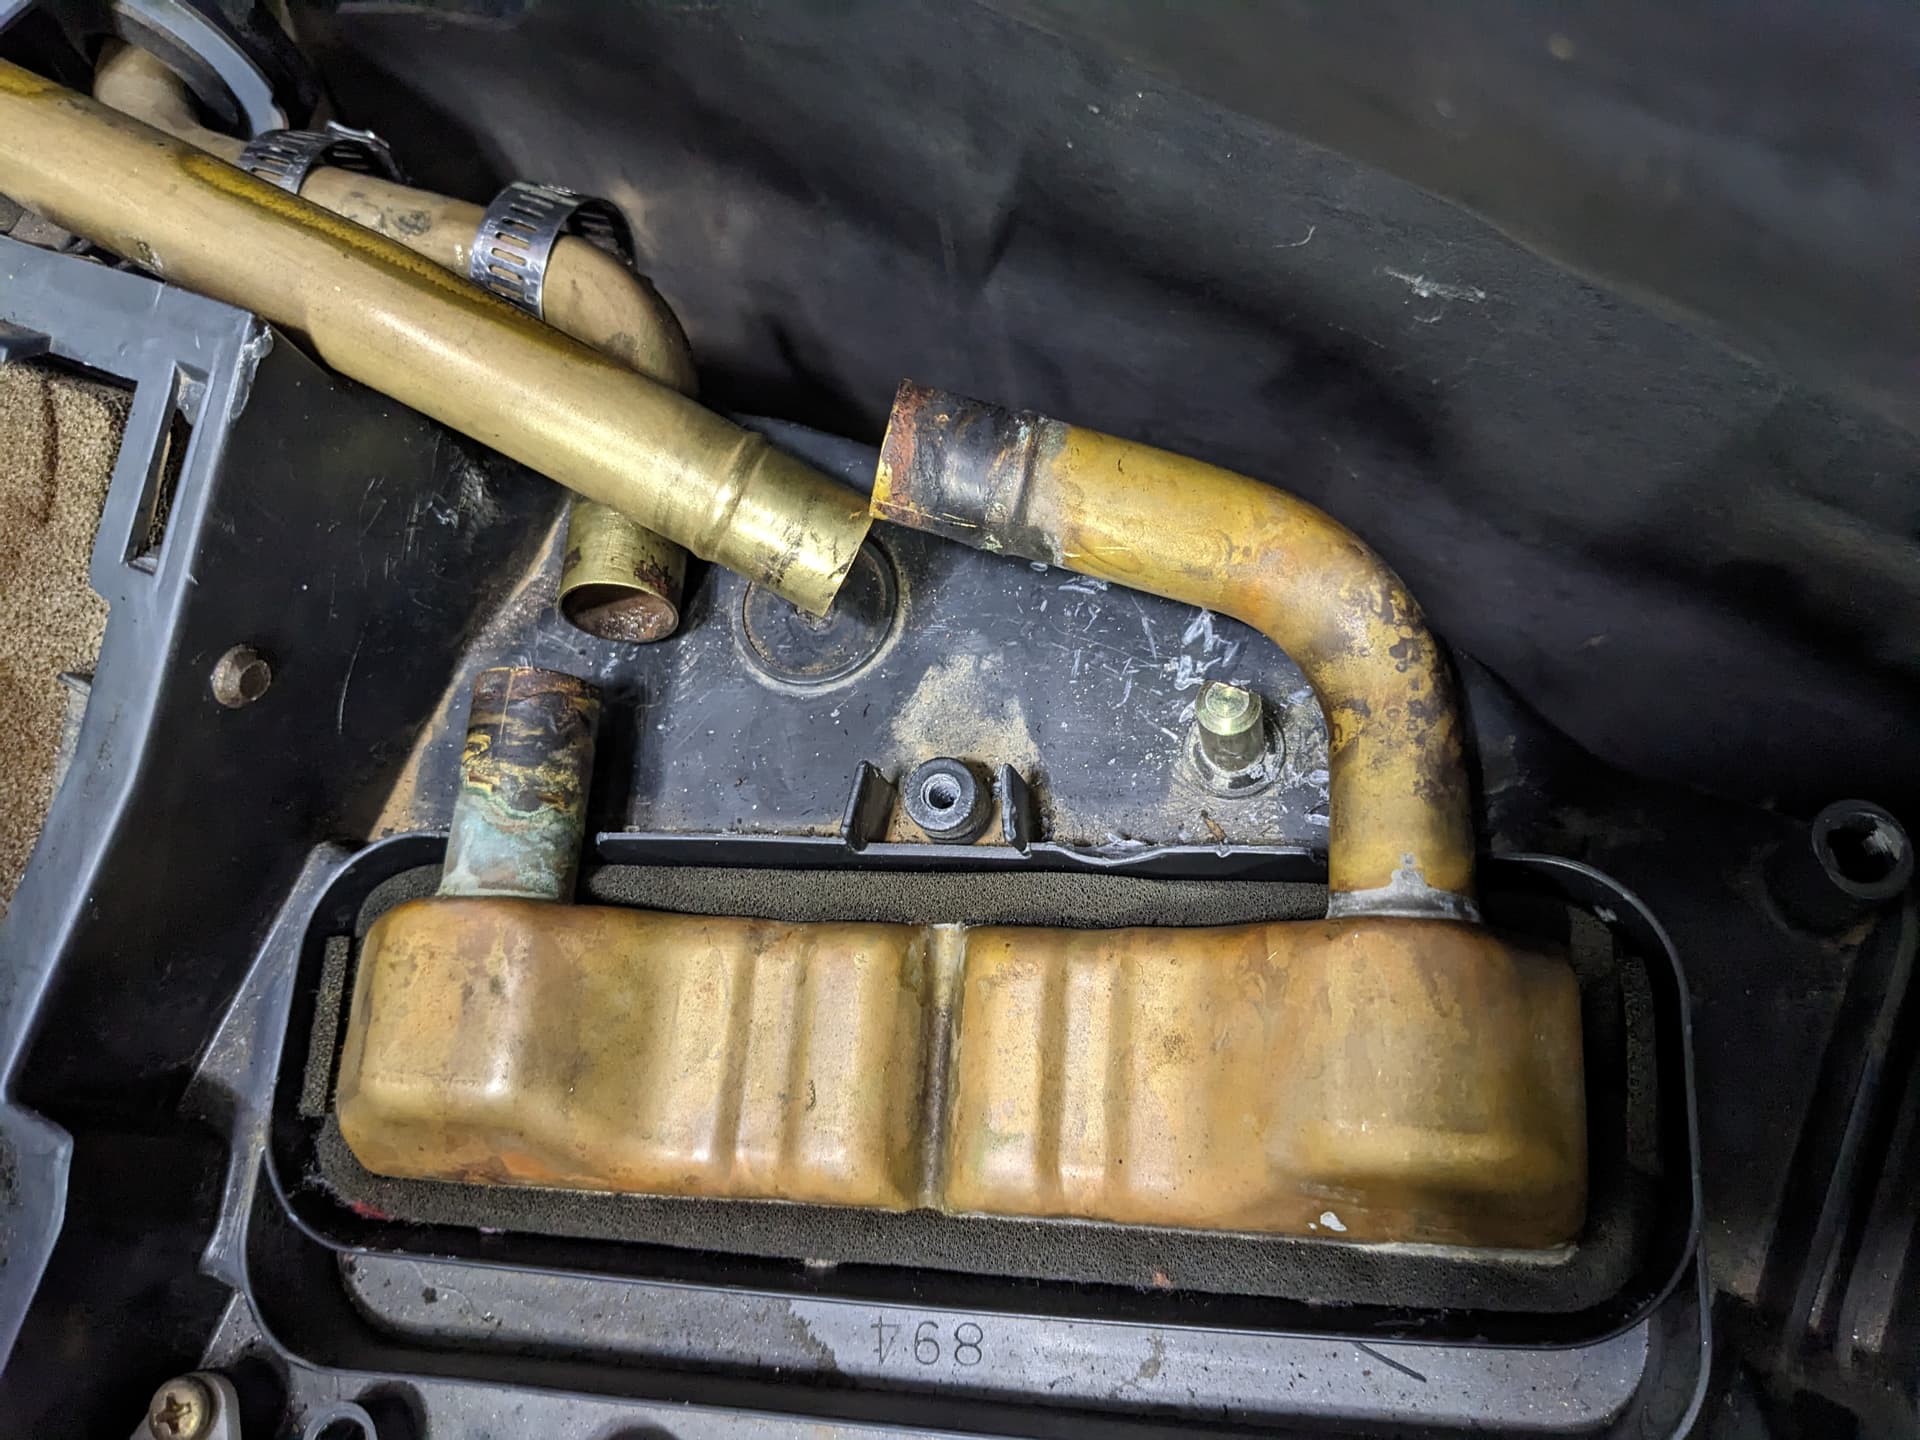
Here’s a couple more pictures of the HVAC assemblies under the dash for future reference. Heater core is in the big black box. AC evap core is in the middle white box. Blower motor (and cheap foam “filter”) on the right. It’s gonna be interesting getting all these ducts sealed back up again, but I have a plan.
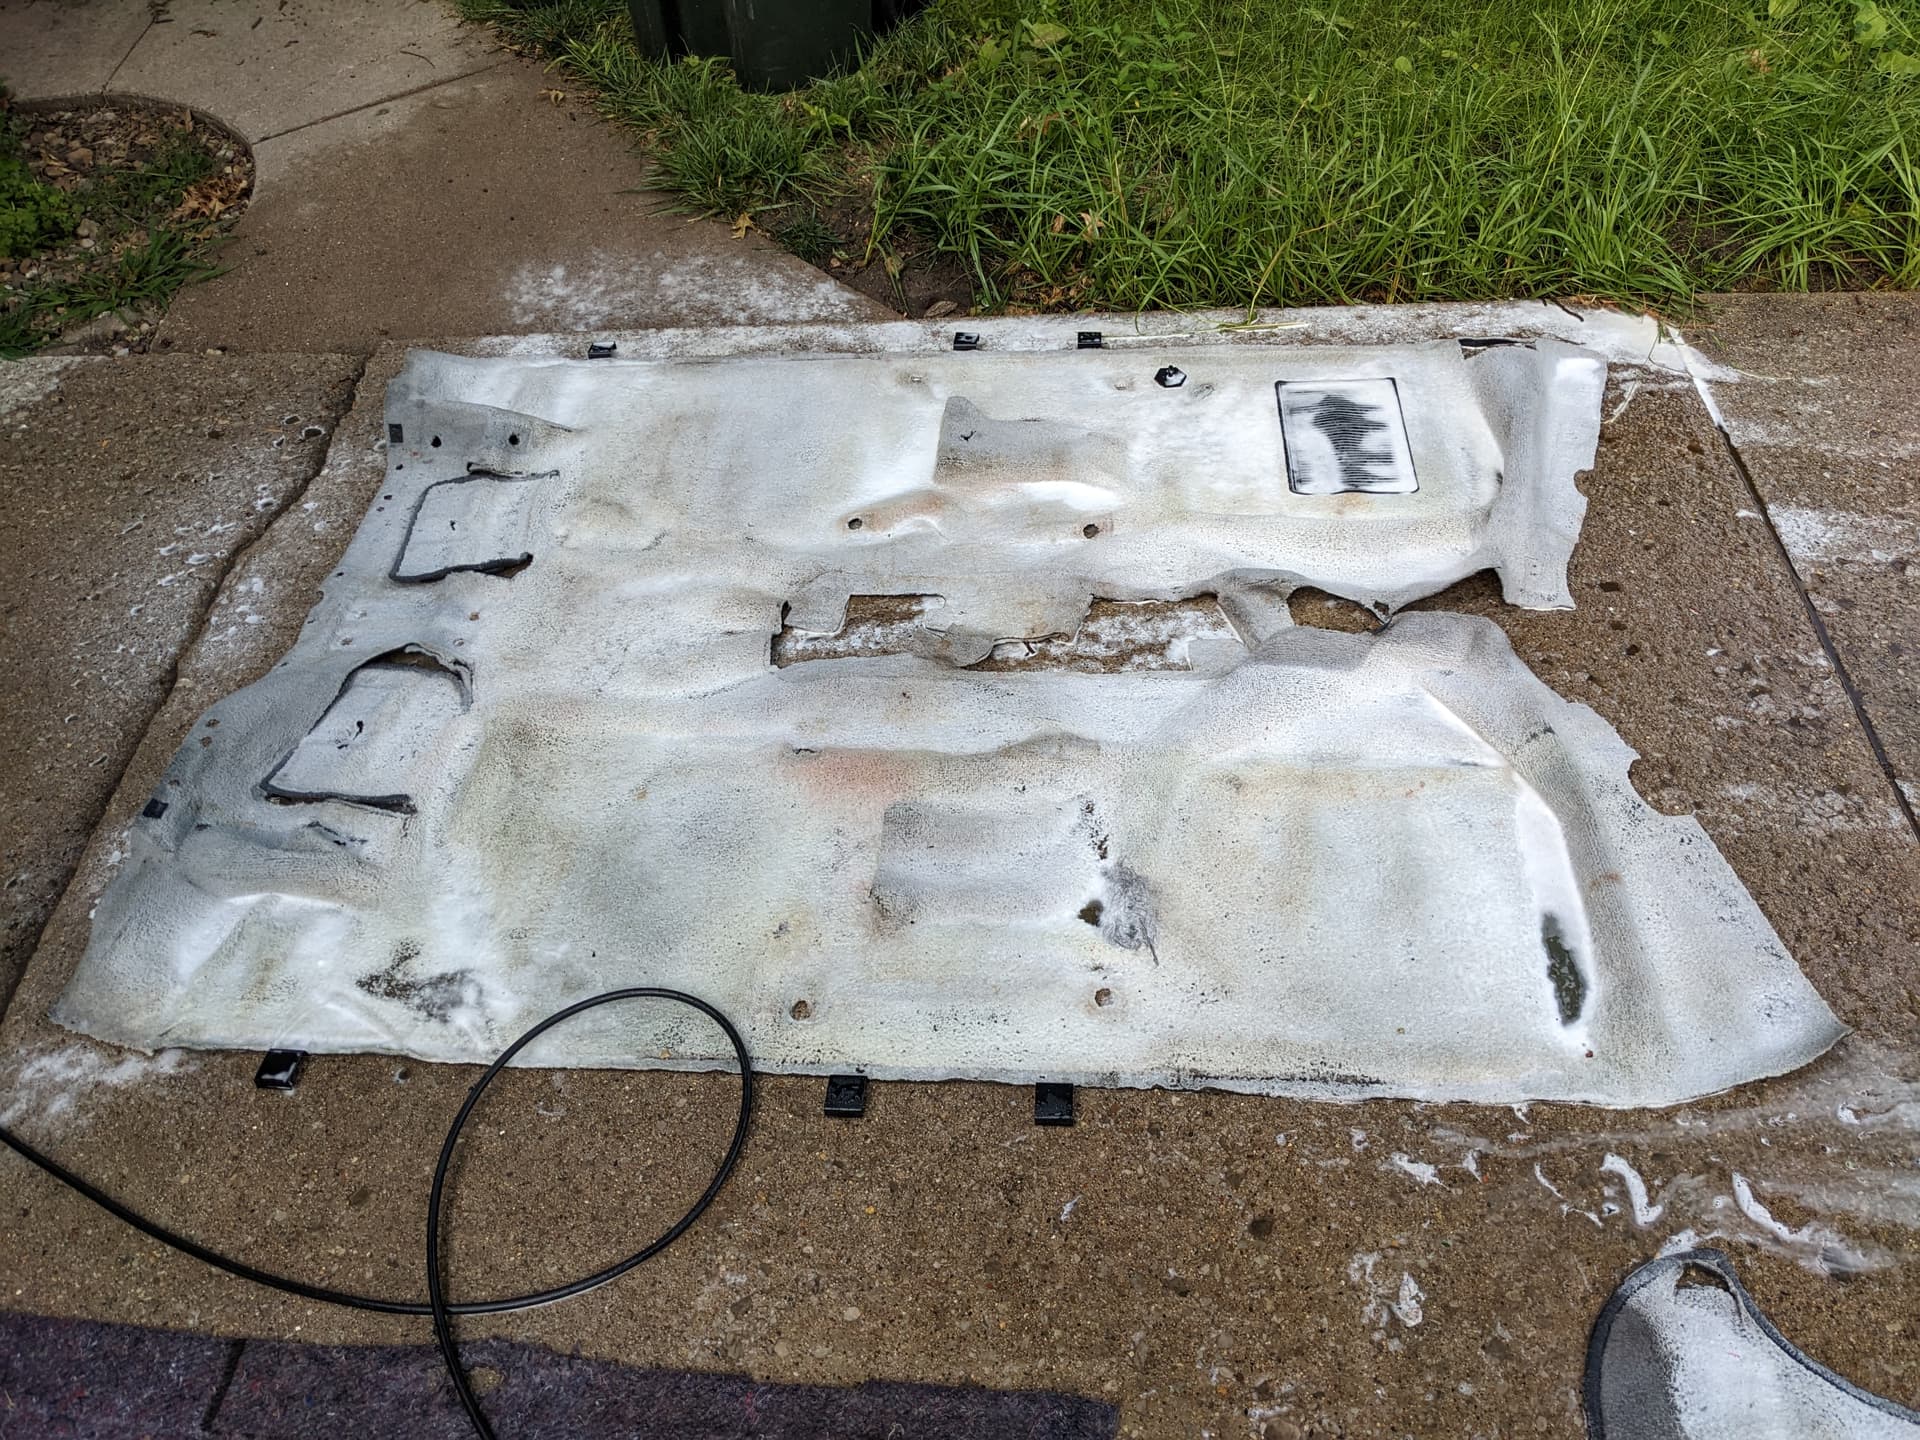
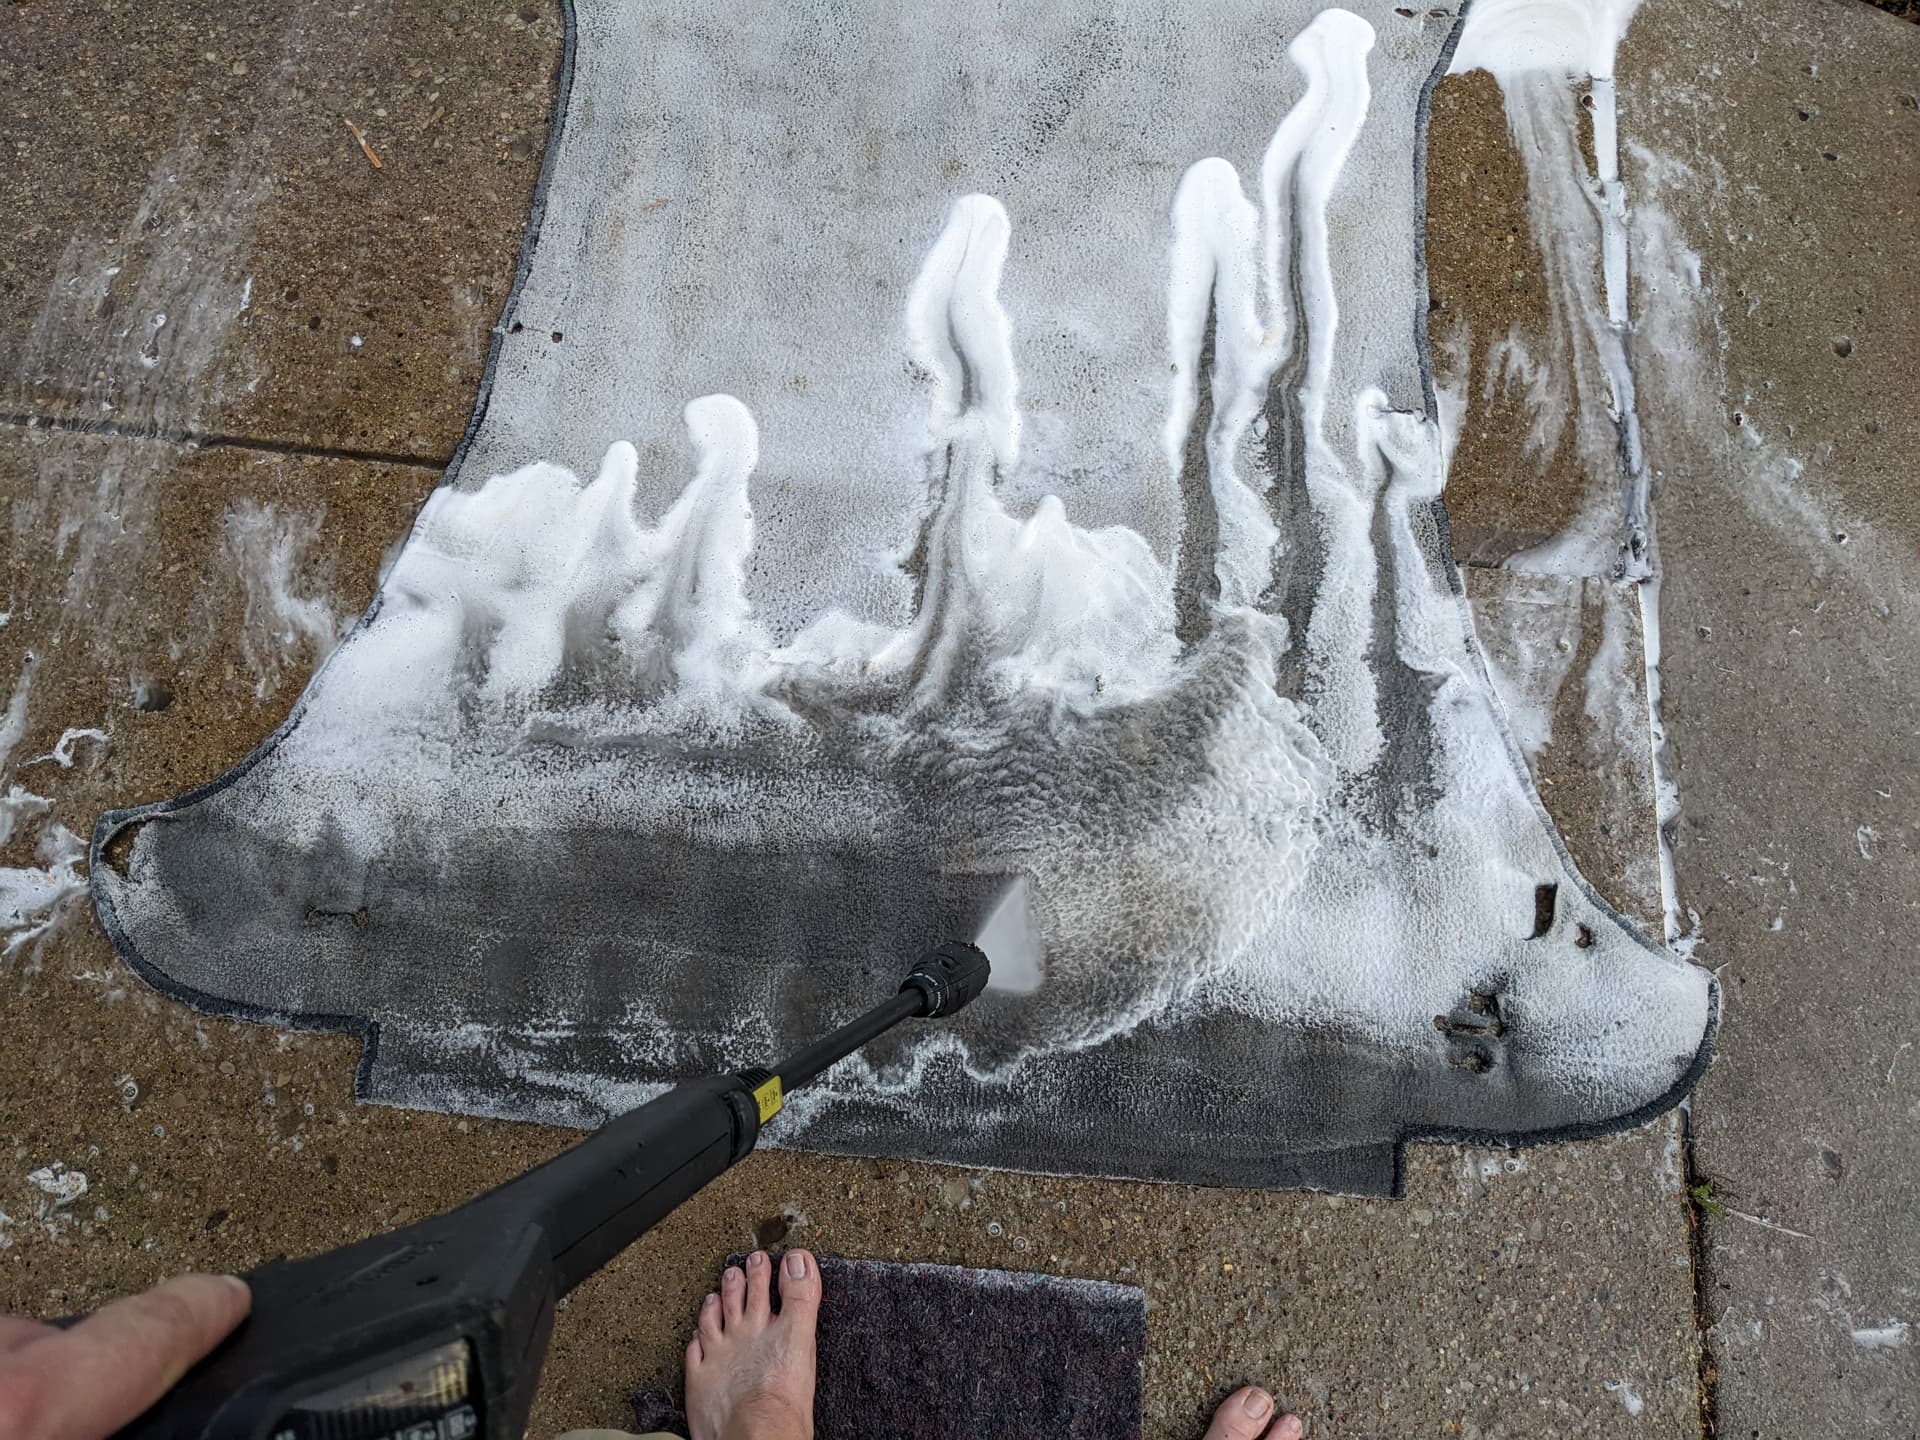
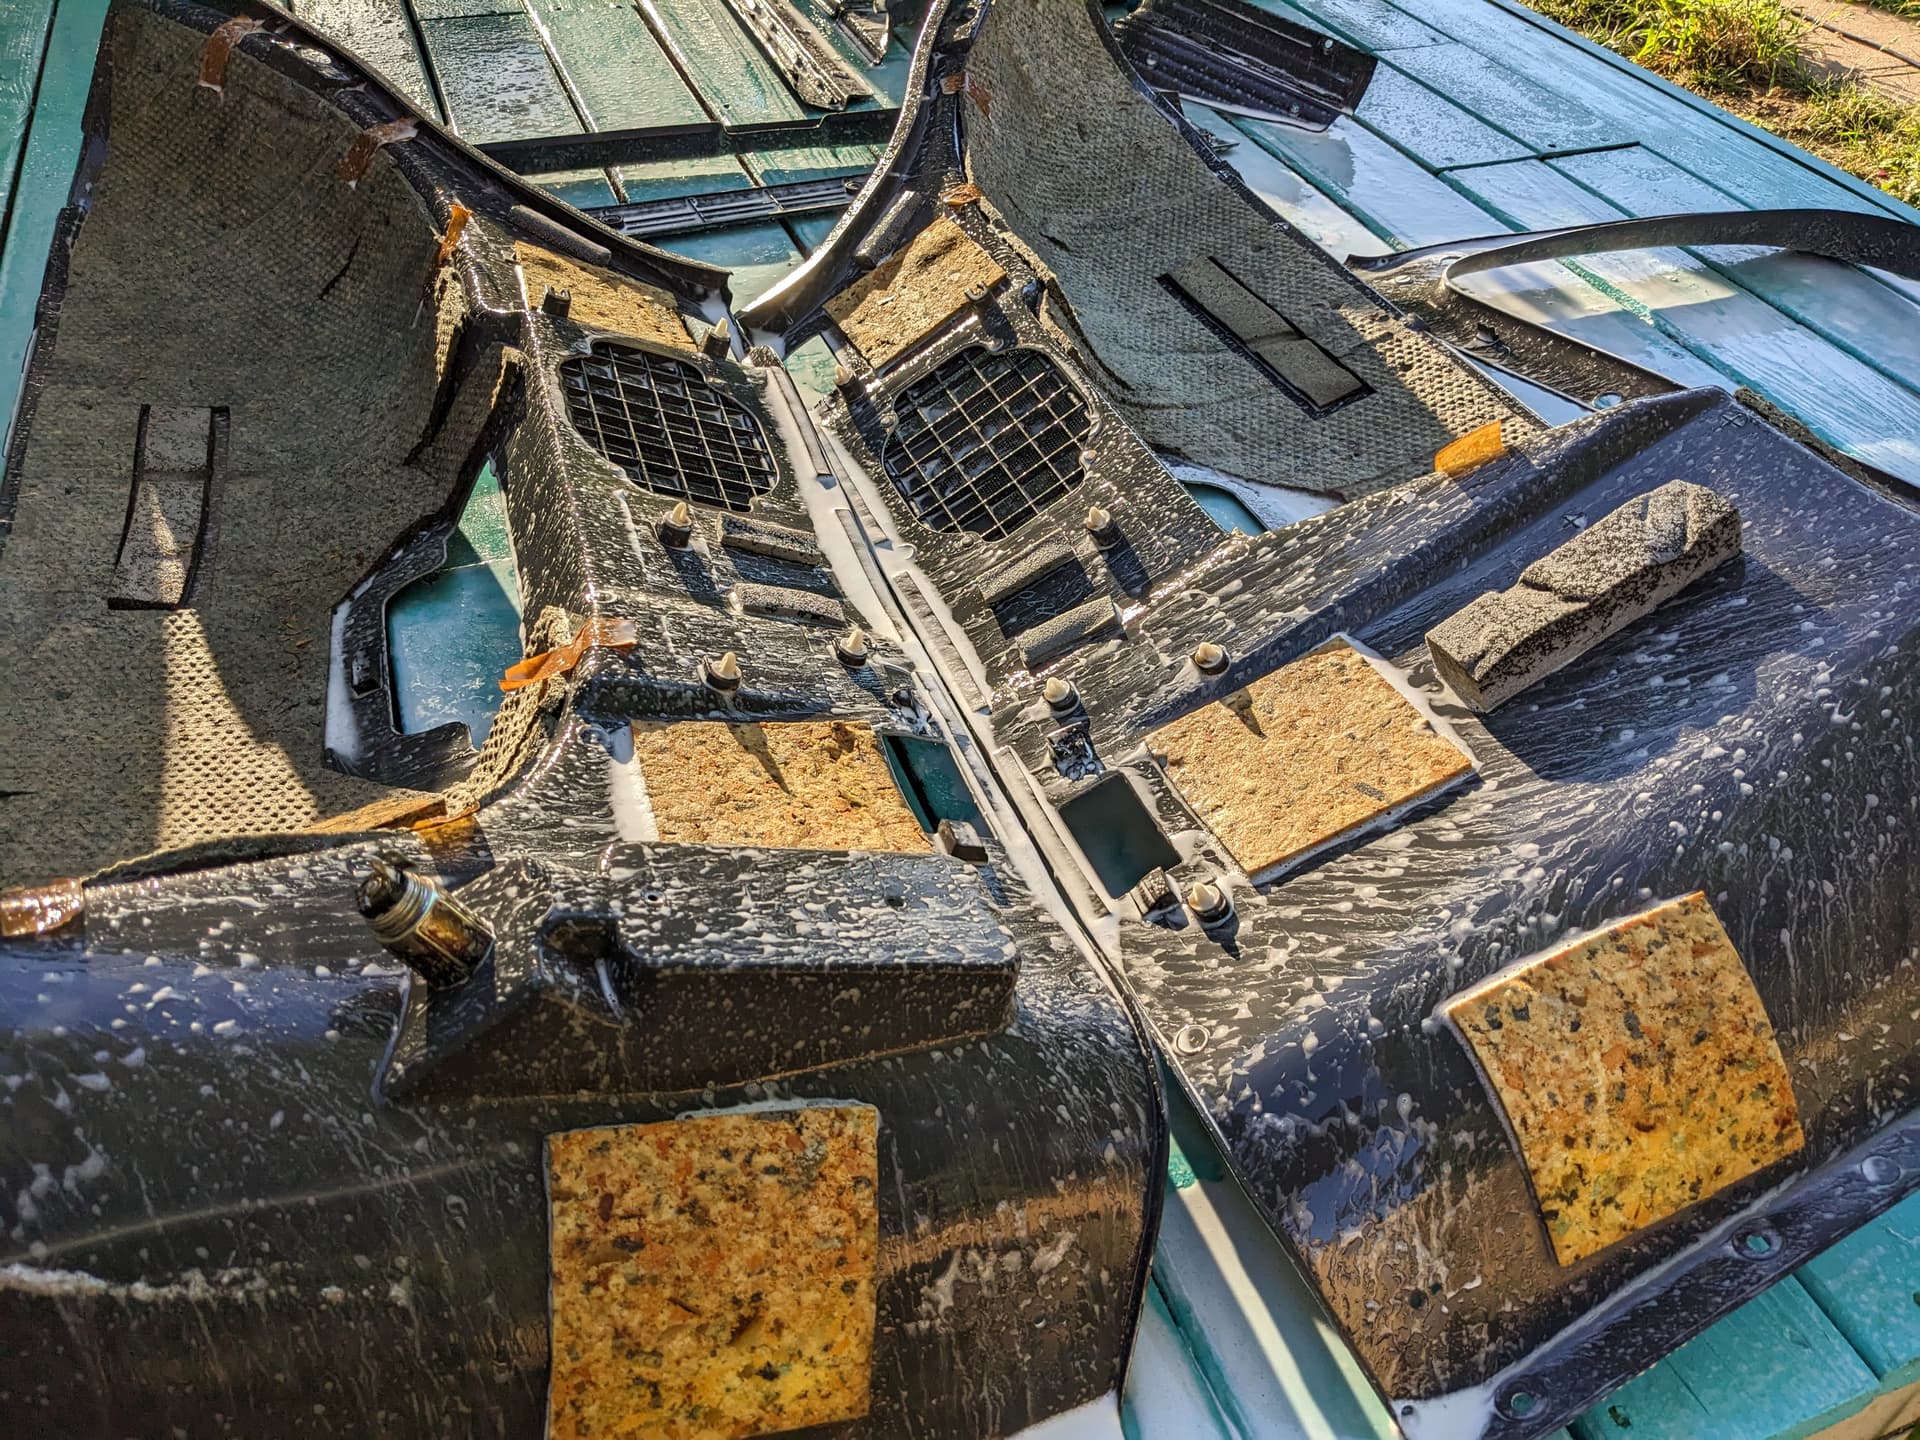
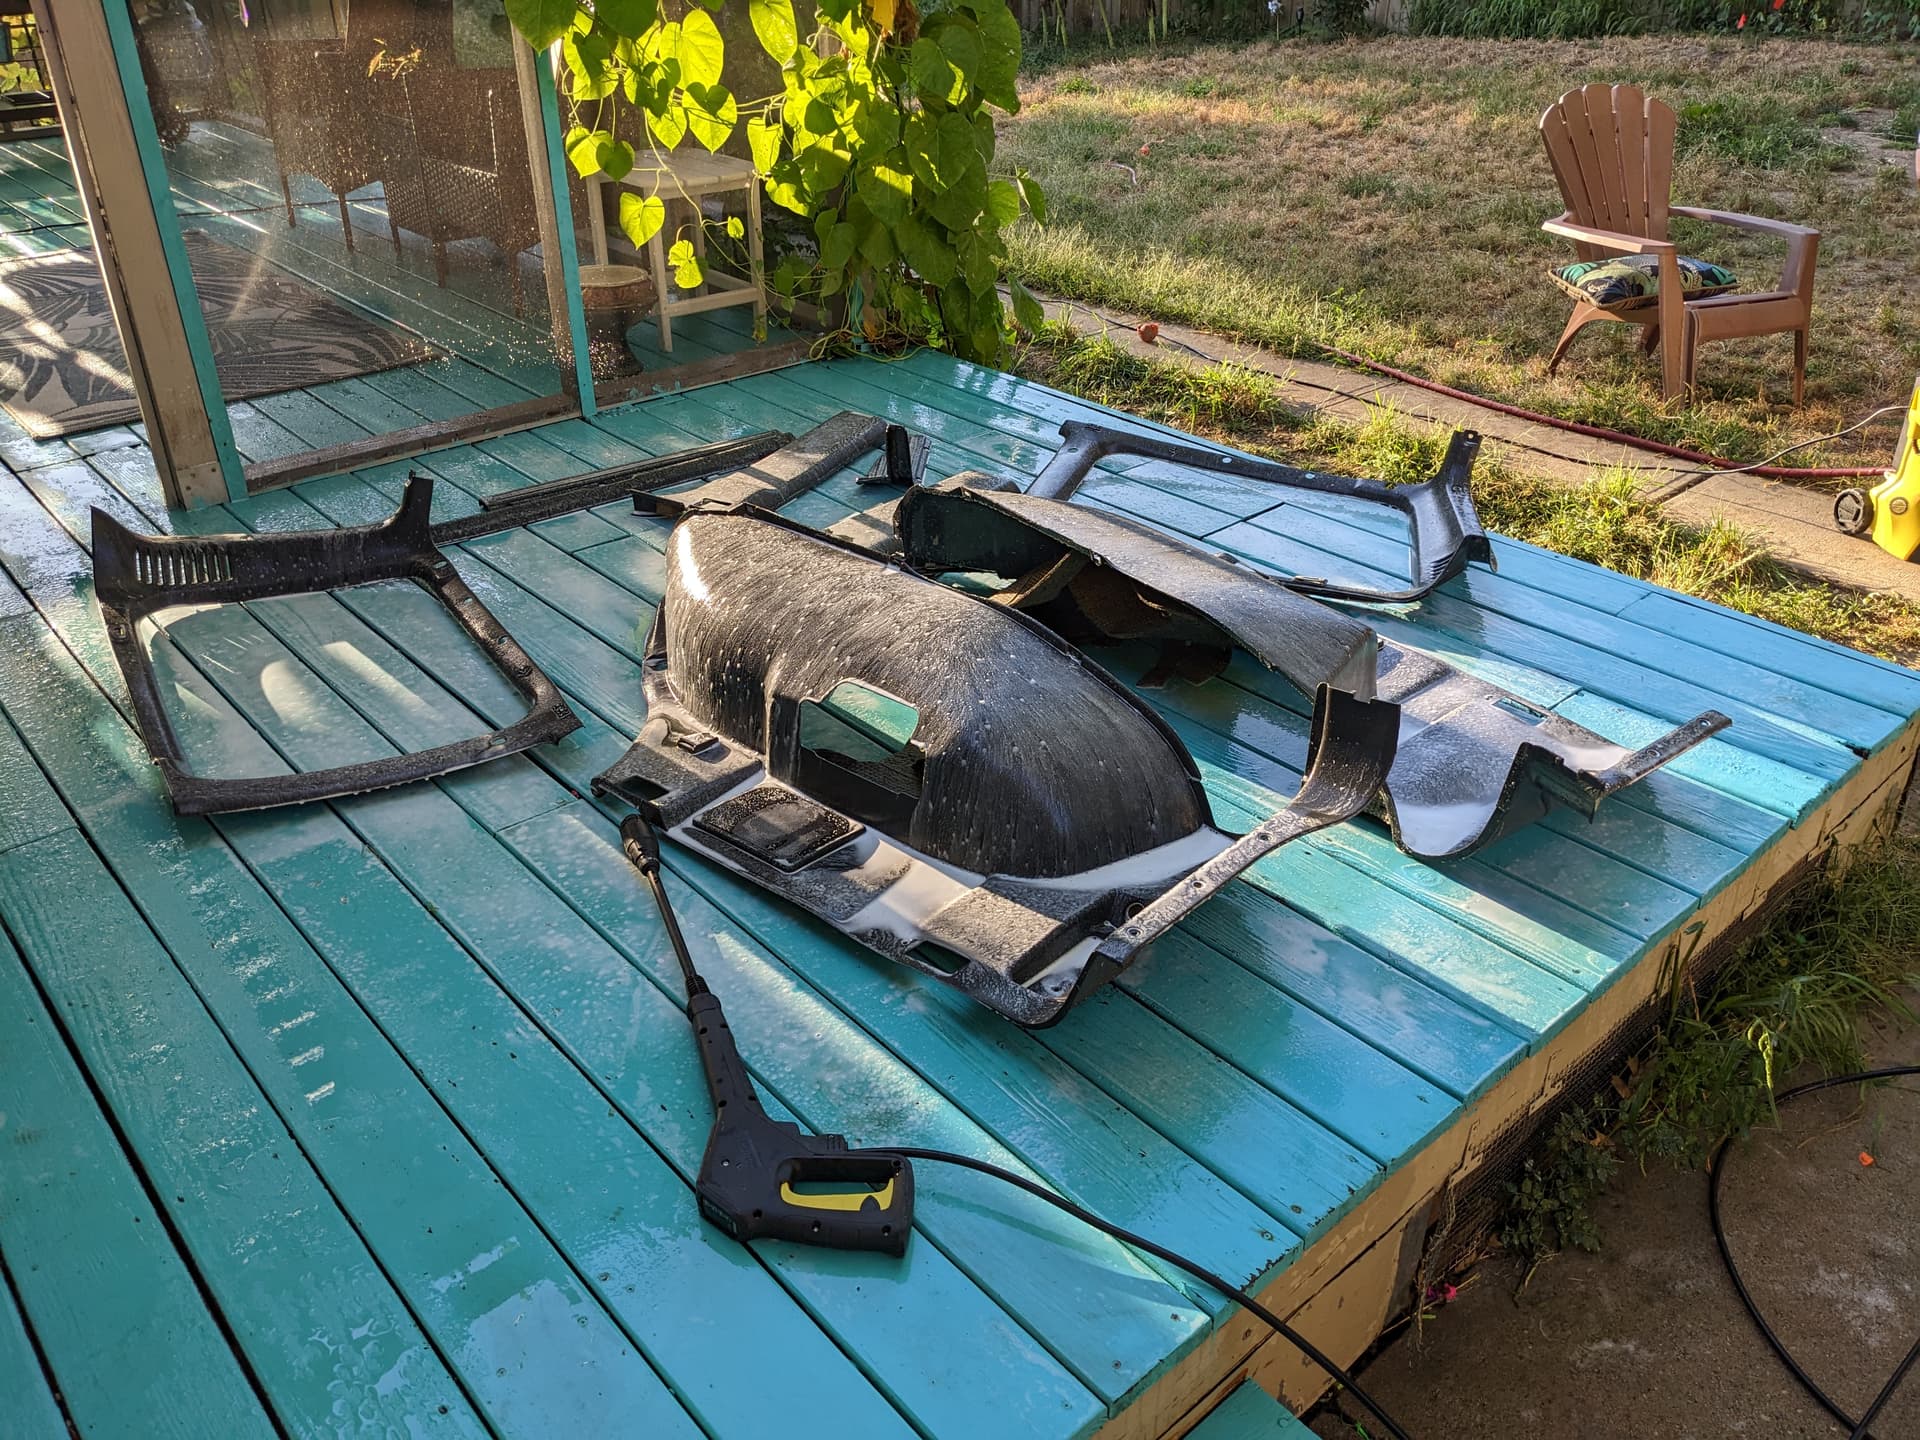
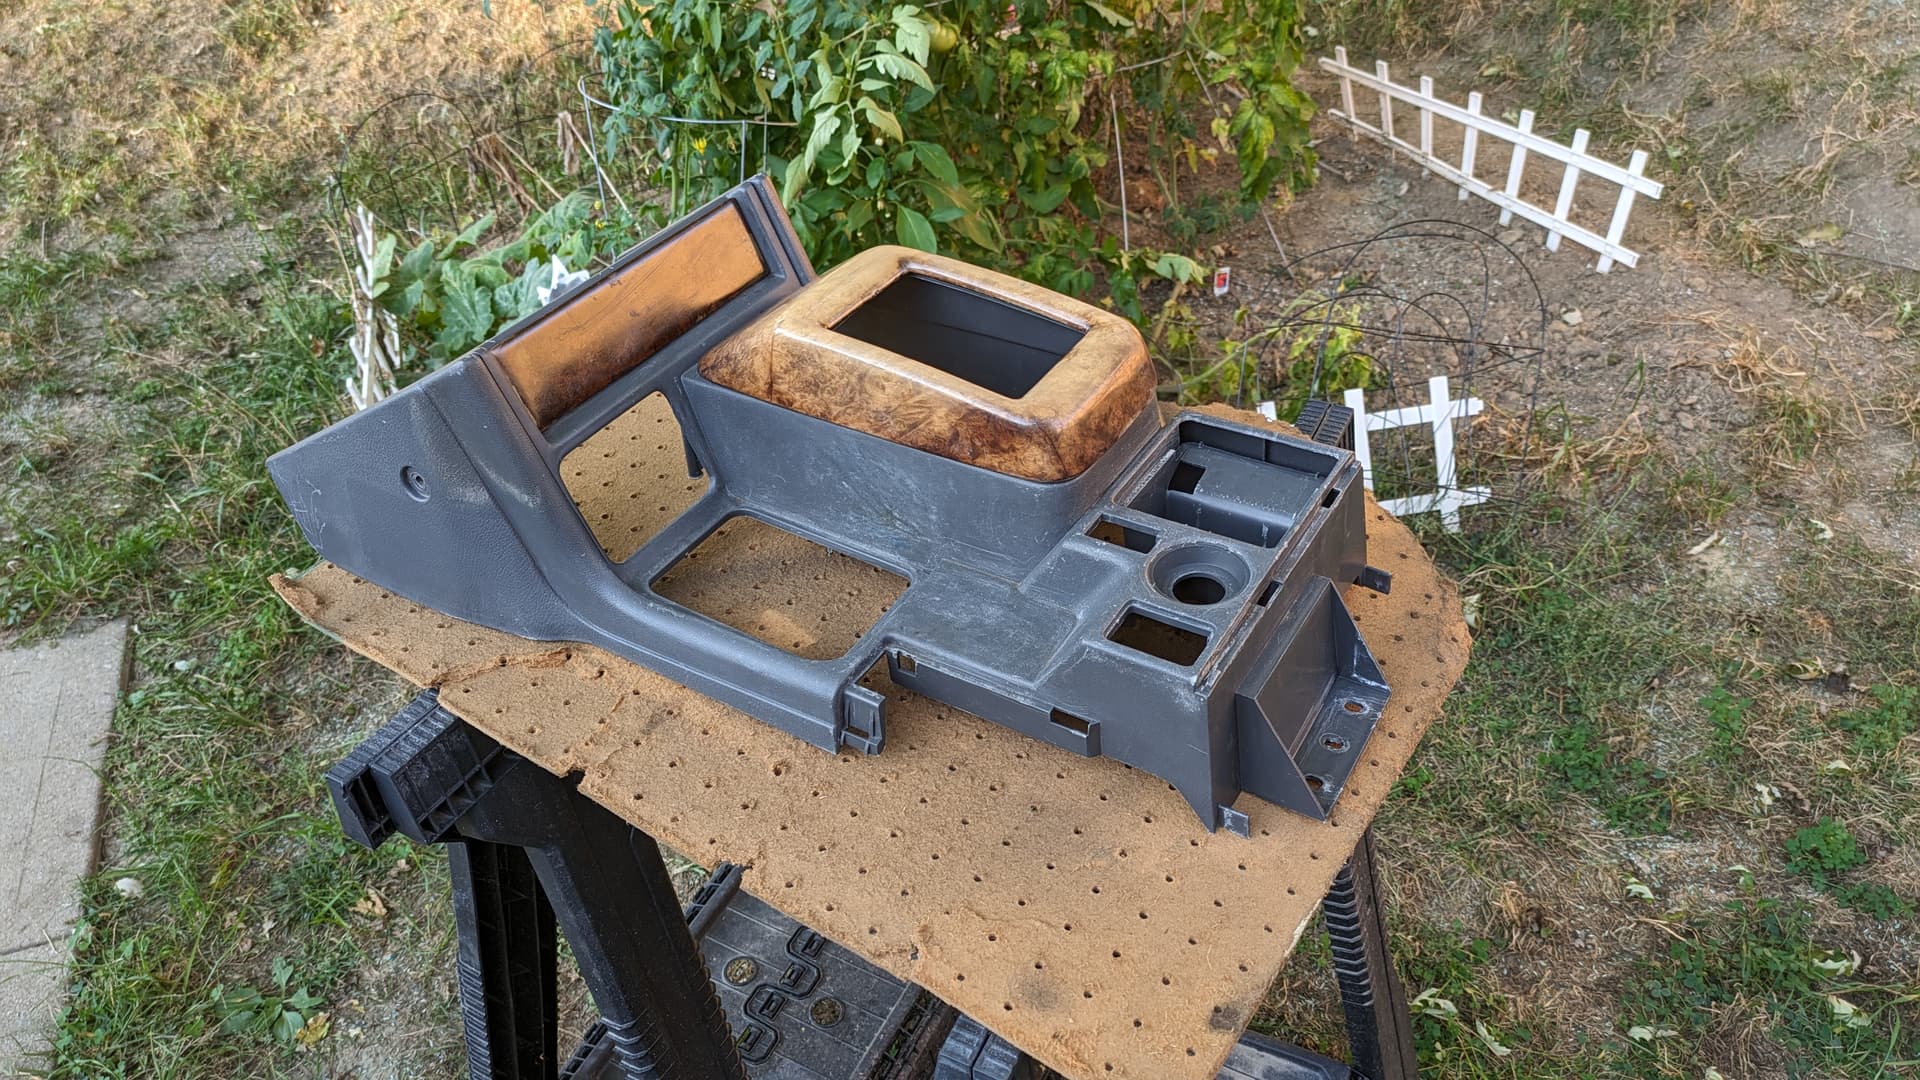
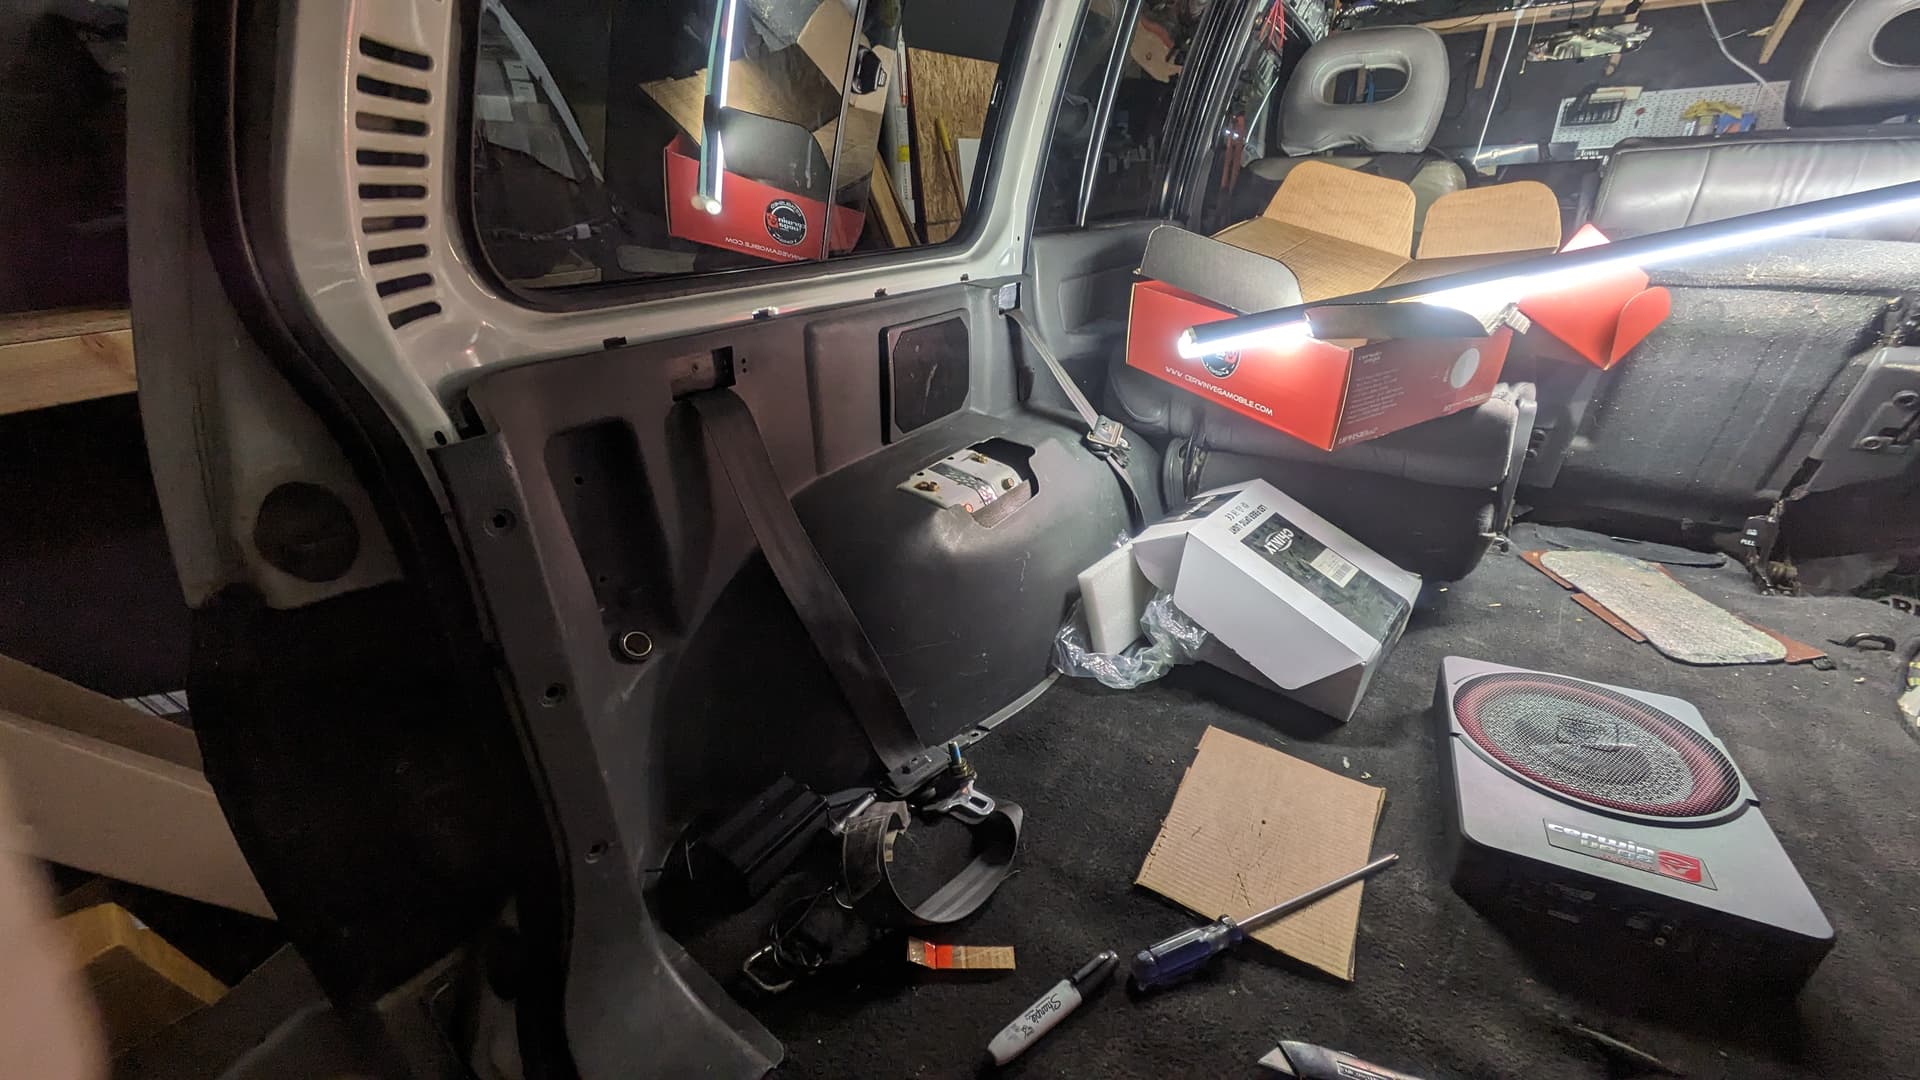
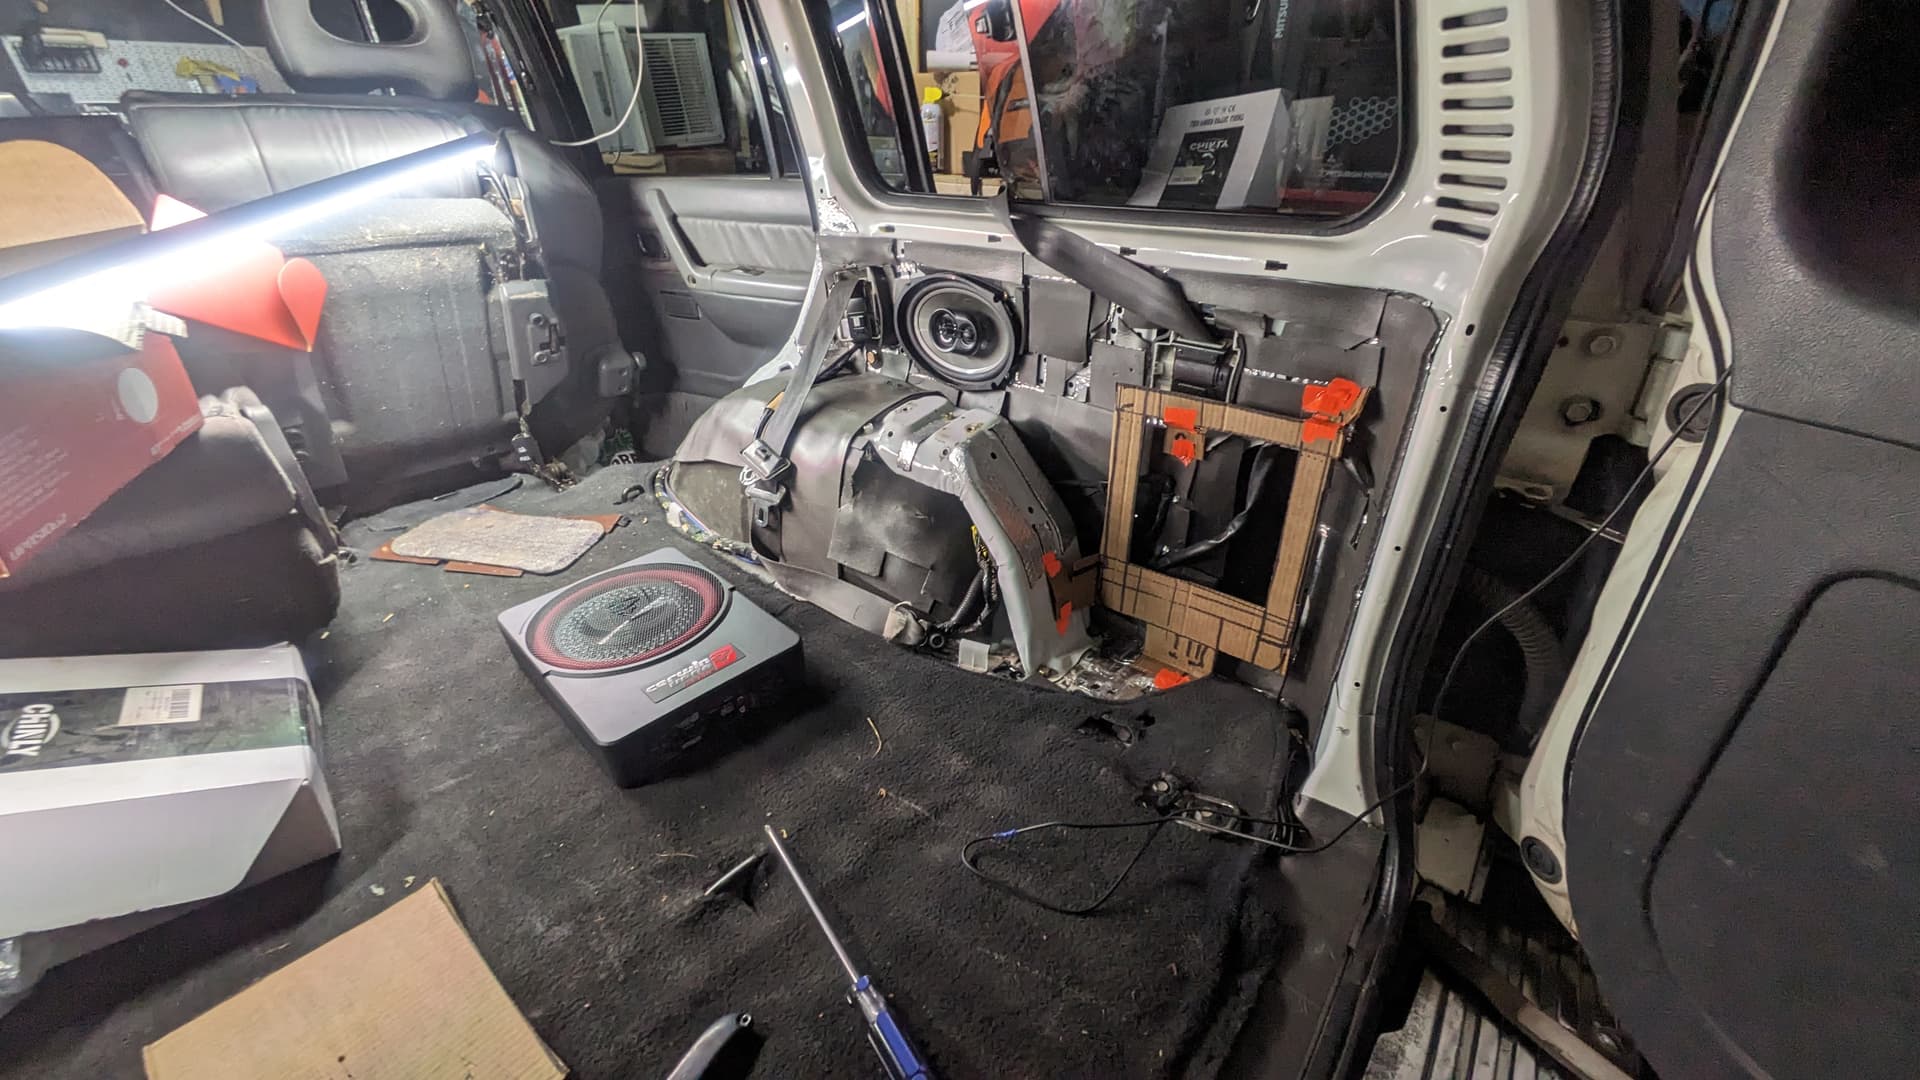
I started pressure washing interior trim.
I also pressure washed the dashboard and most of the center console bits. Felt really good until the factory foam bits started melting off like they were made out of dirt, themselves. After this batch, I still have an entire pile of smaller bits to do. (It’s all gonna get a fresh coat of dye so it matches.)

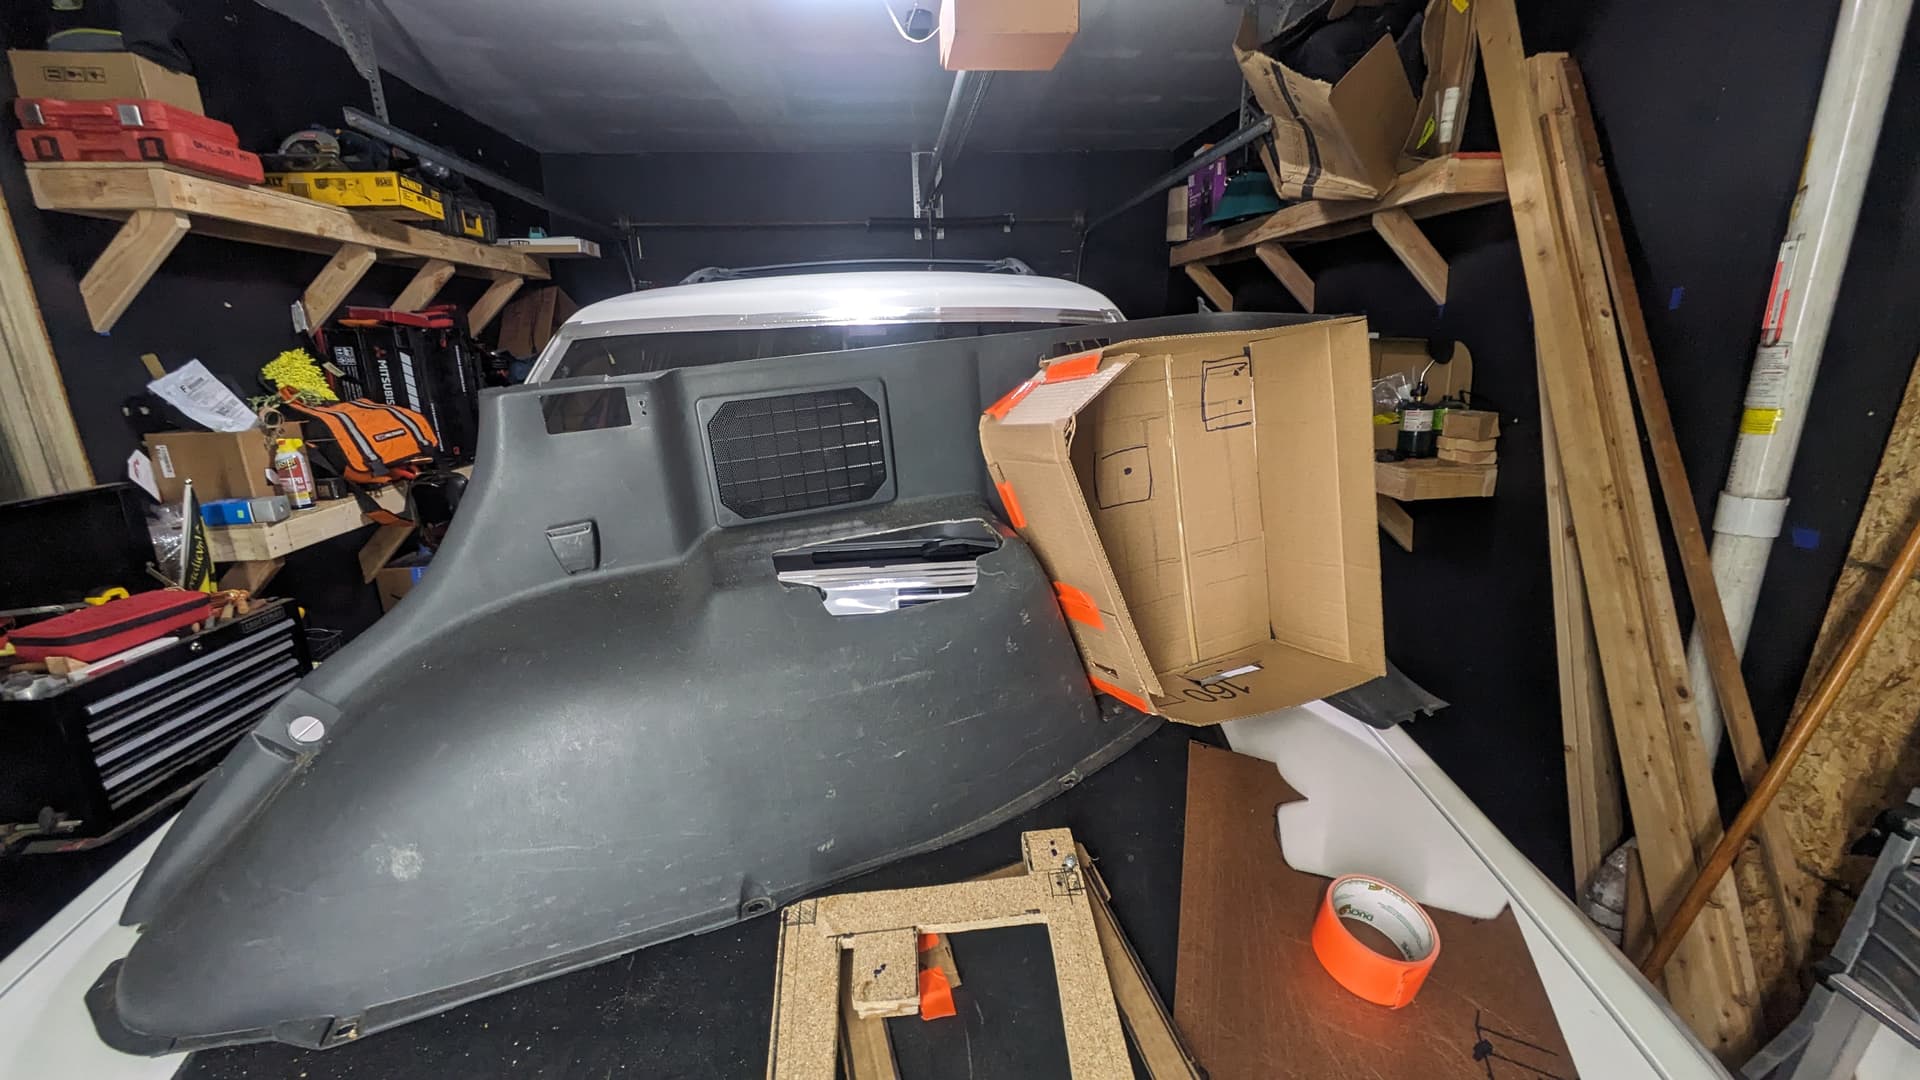
Headliner is out too!
I got the headliner out and into the basement, where it’s awaiting steam cleaning and a fiber optic install. Looks like it’s gonna clean up nicely, too. I’m excited. I’m going to ask Neighbor Steve to help me drop the sunroof this week so I can fully clean it up and get it working like new again. (It currently works, but could use a good cleaning after 25 years.)
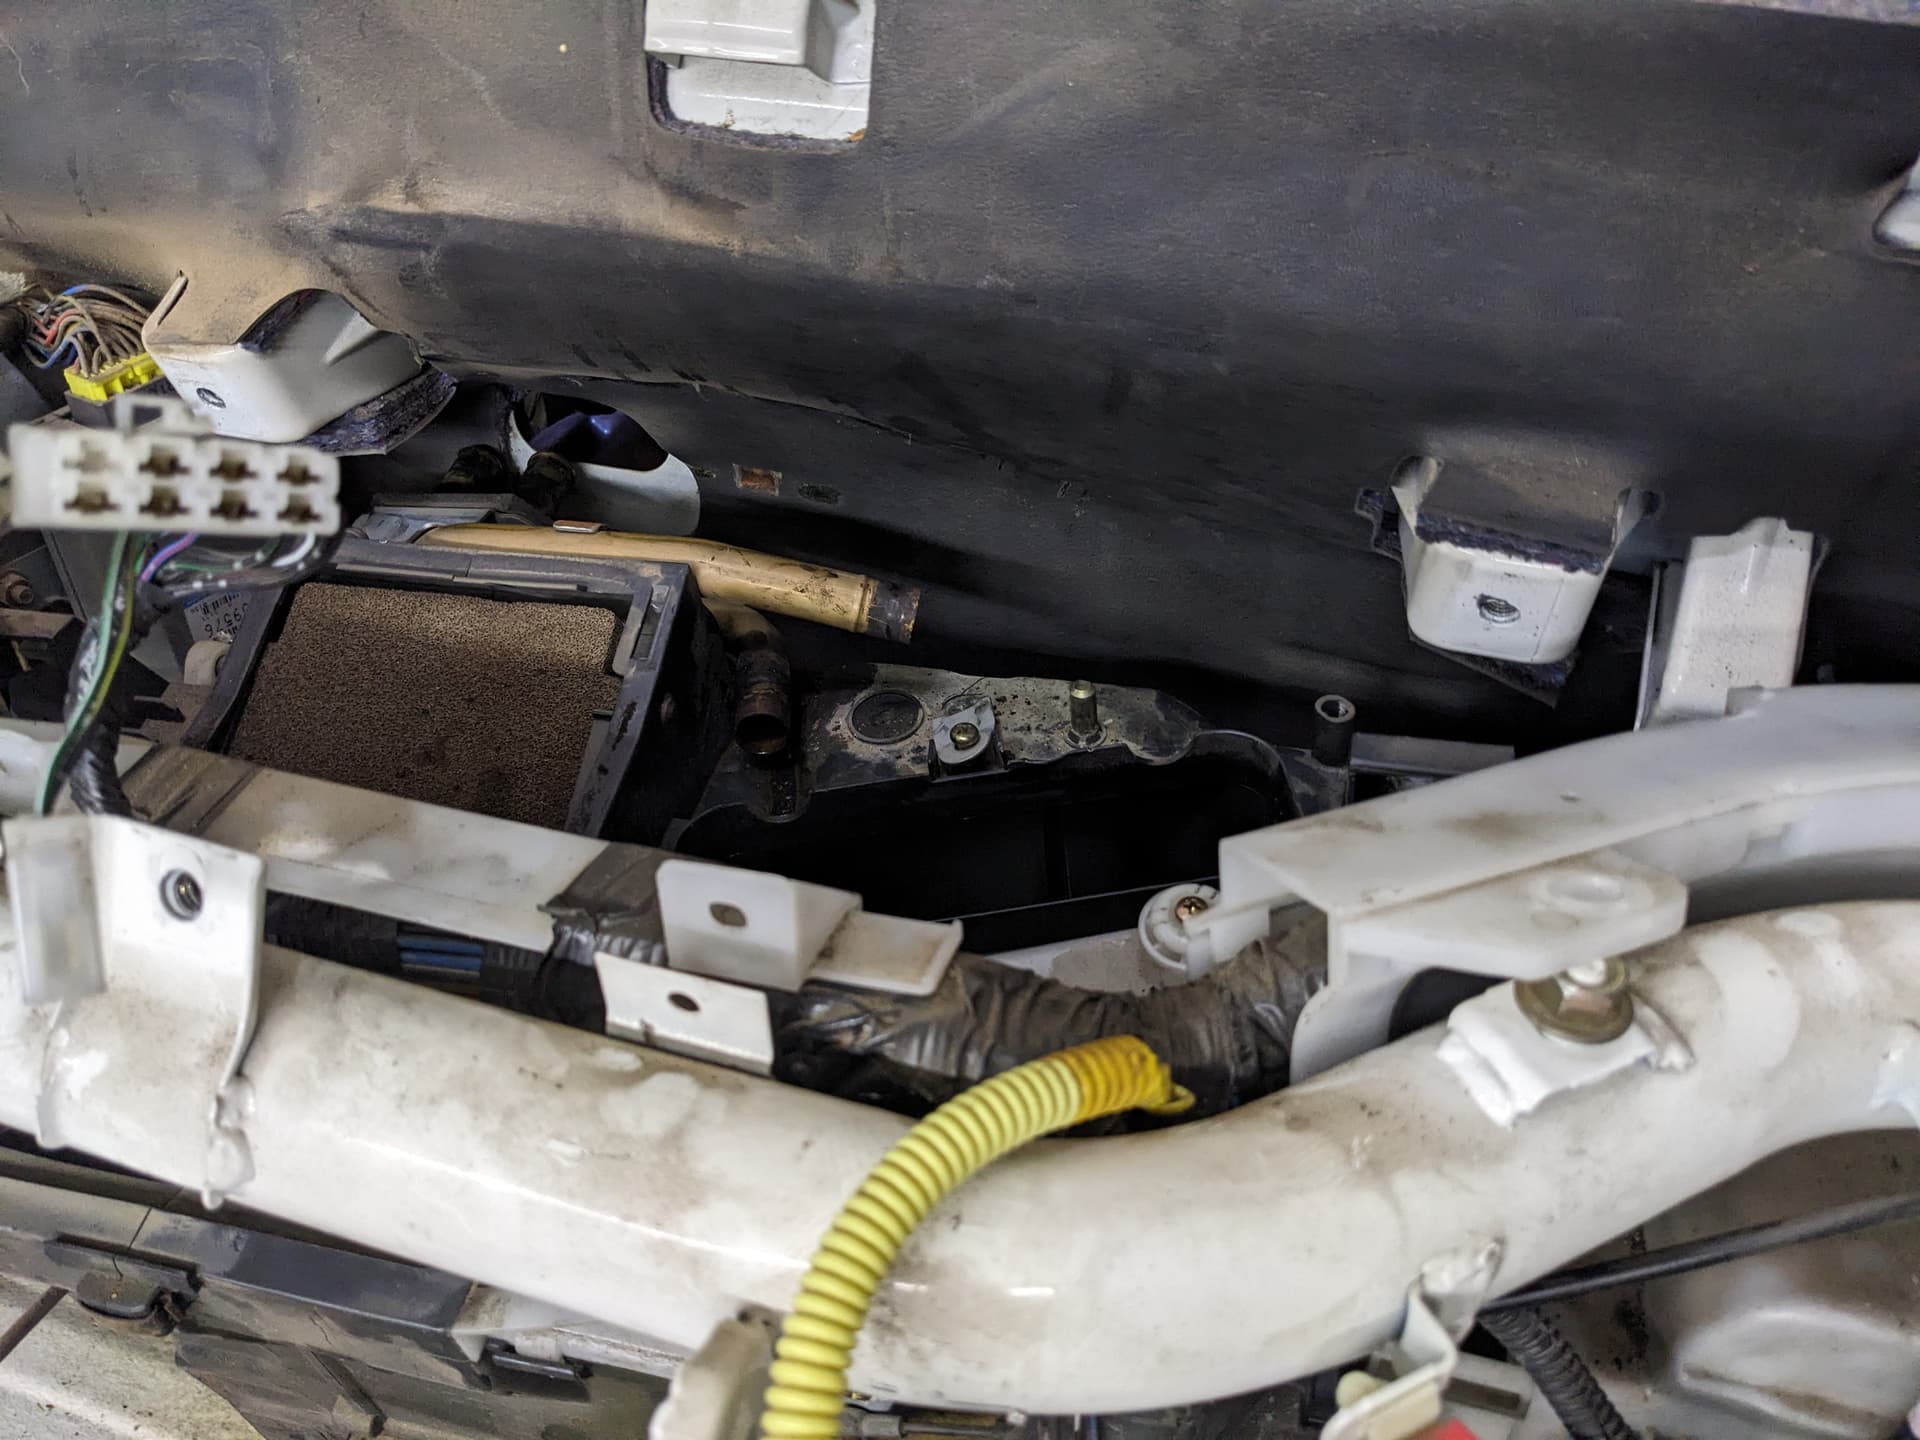
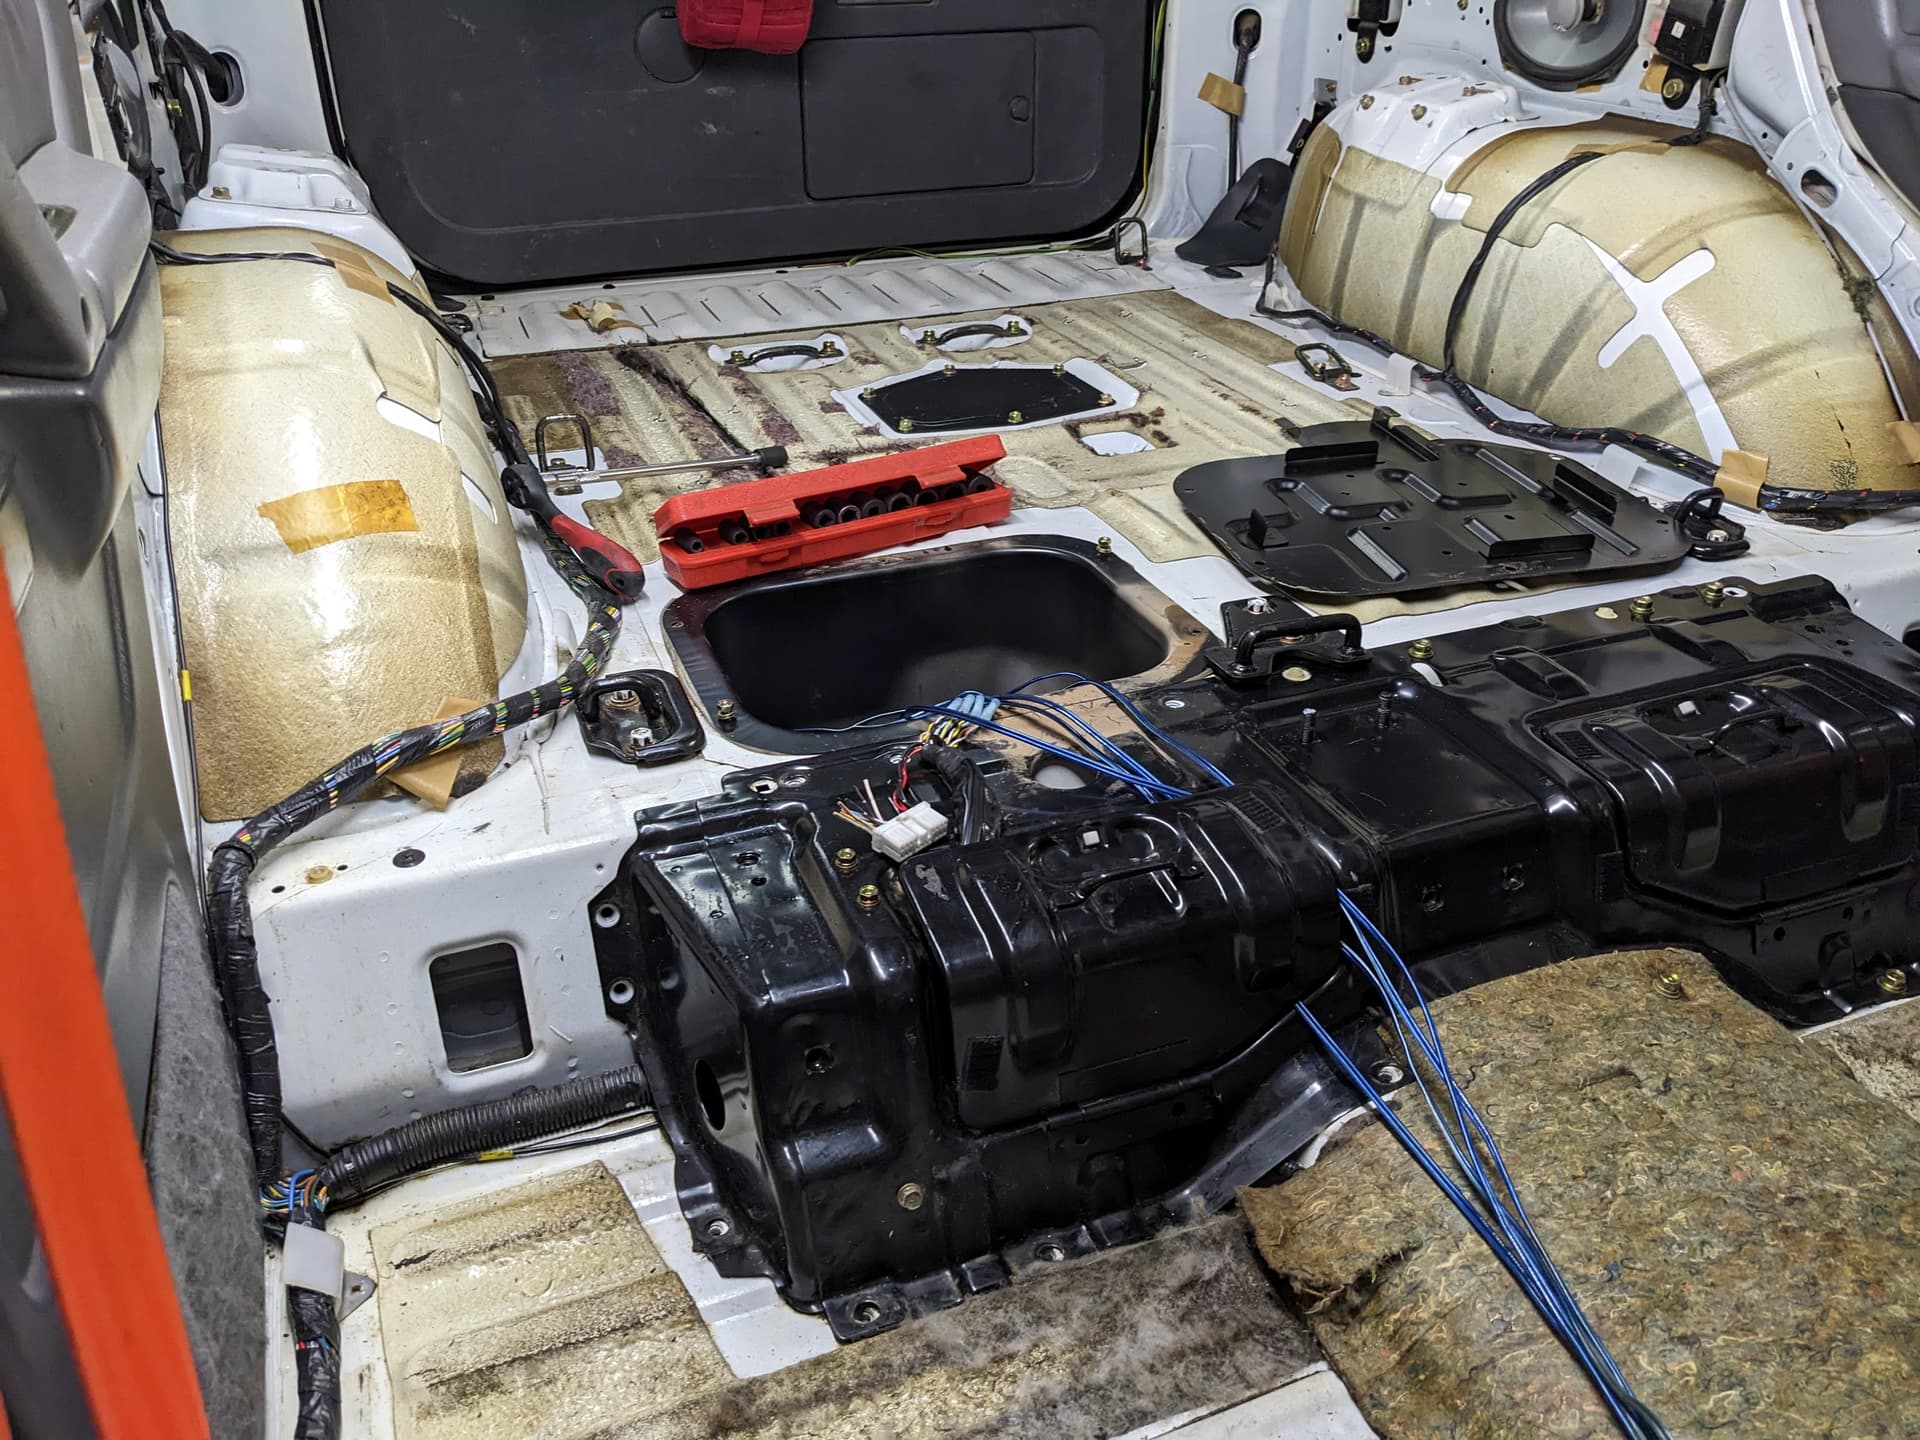
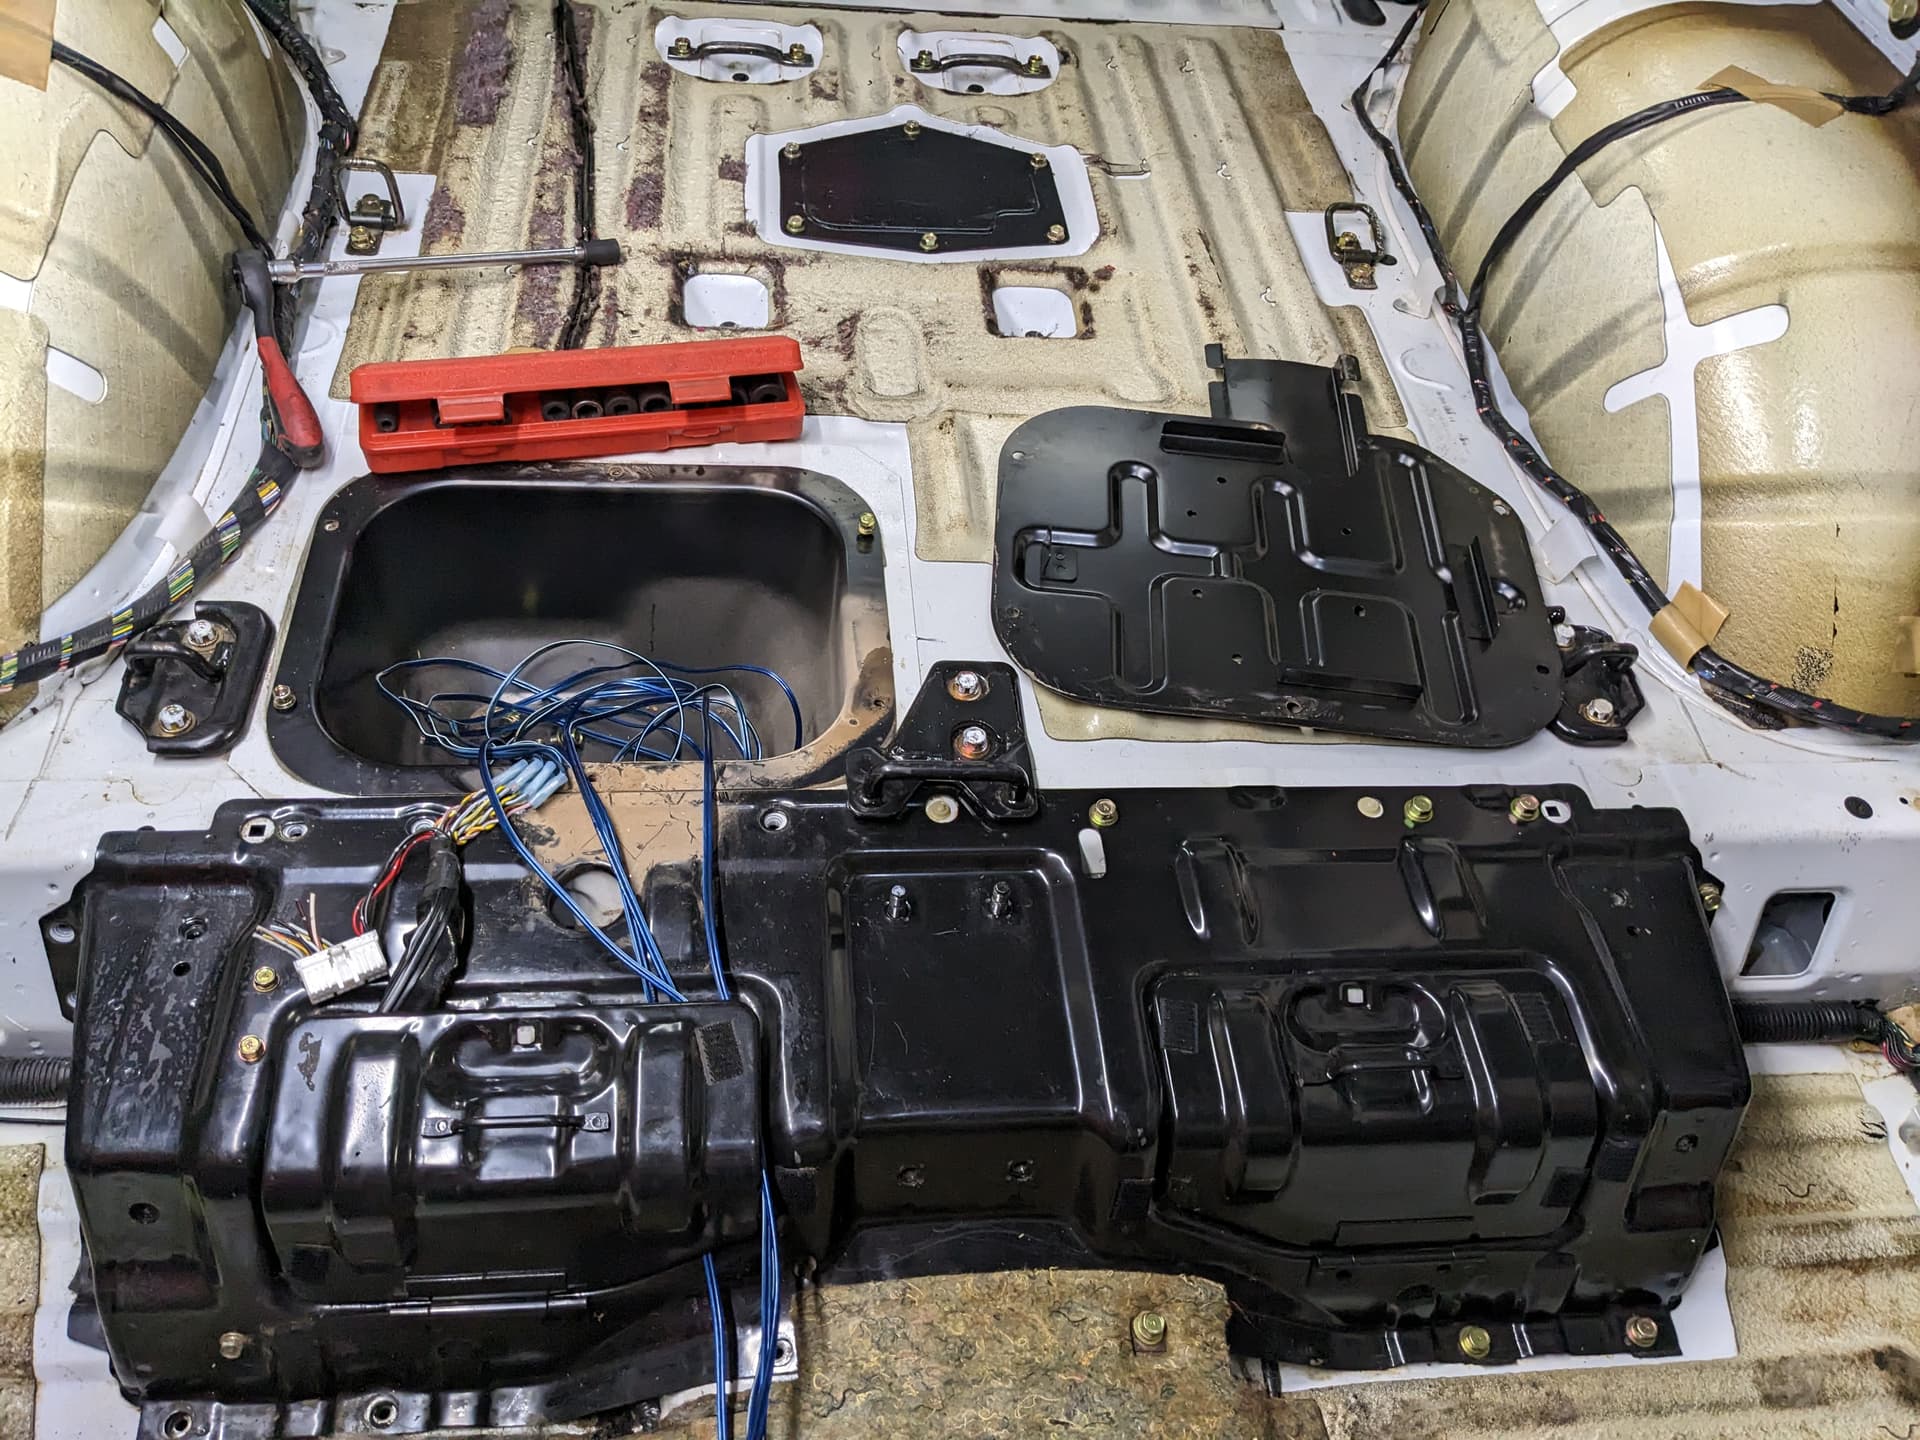
I started cleaning the shell.
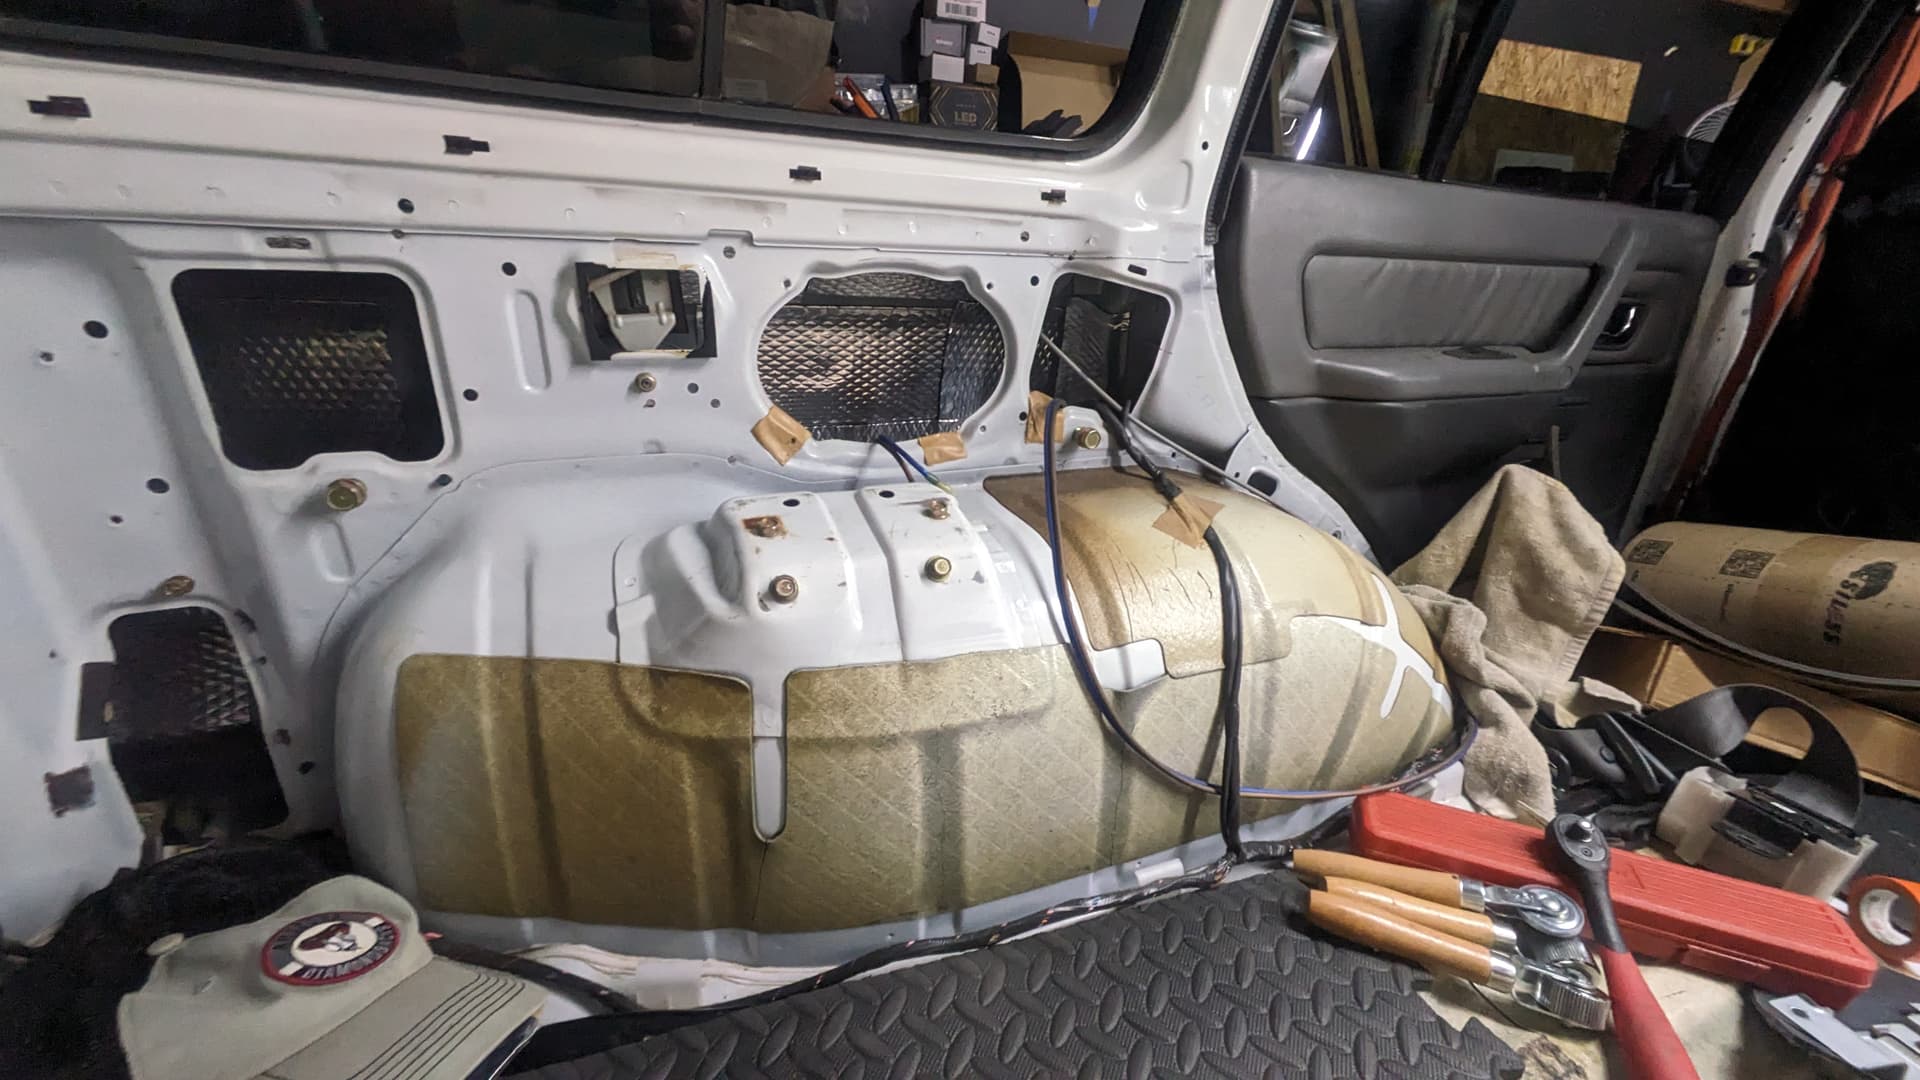
Would you believe the carpet under the pad in the passenger footwell is STILL soaked with coolant from the leak? I had to wedge the aftermarket alarm box under it for airflow. Wow. So nasty.
Otherwise, I removed the OE amp and CD changer cables since neither was still in the vehicle—and check out the secret cubby under the second row that I didn’t know about. Maybe that’s where the amp used to be. Maybe it’s where I build out my house electrical box. ![]()
In any case, I figured out where the Audio Express guy ran those speaker wires. I’m definitely going to clean those up before the carpet goes back in.
Speaking of cleanup…
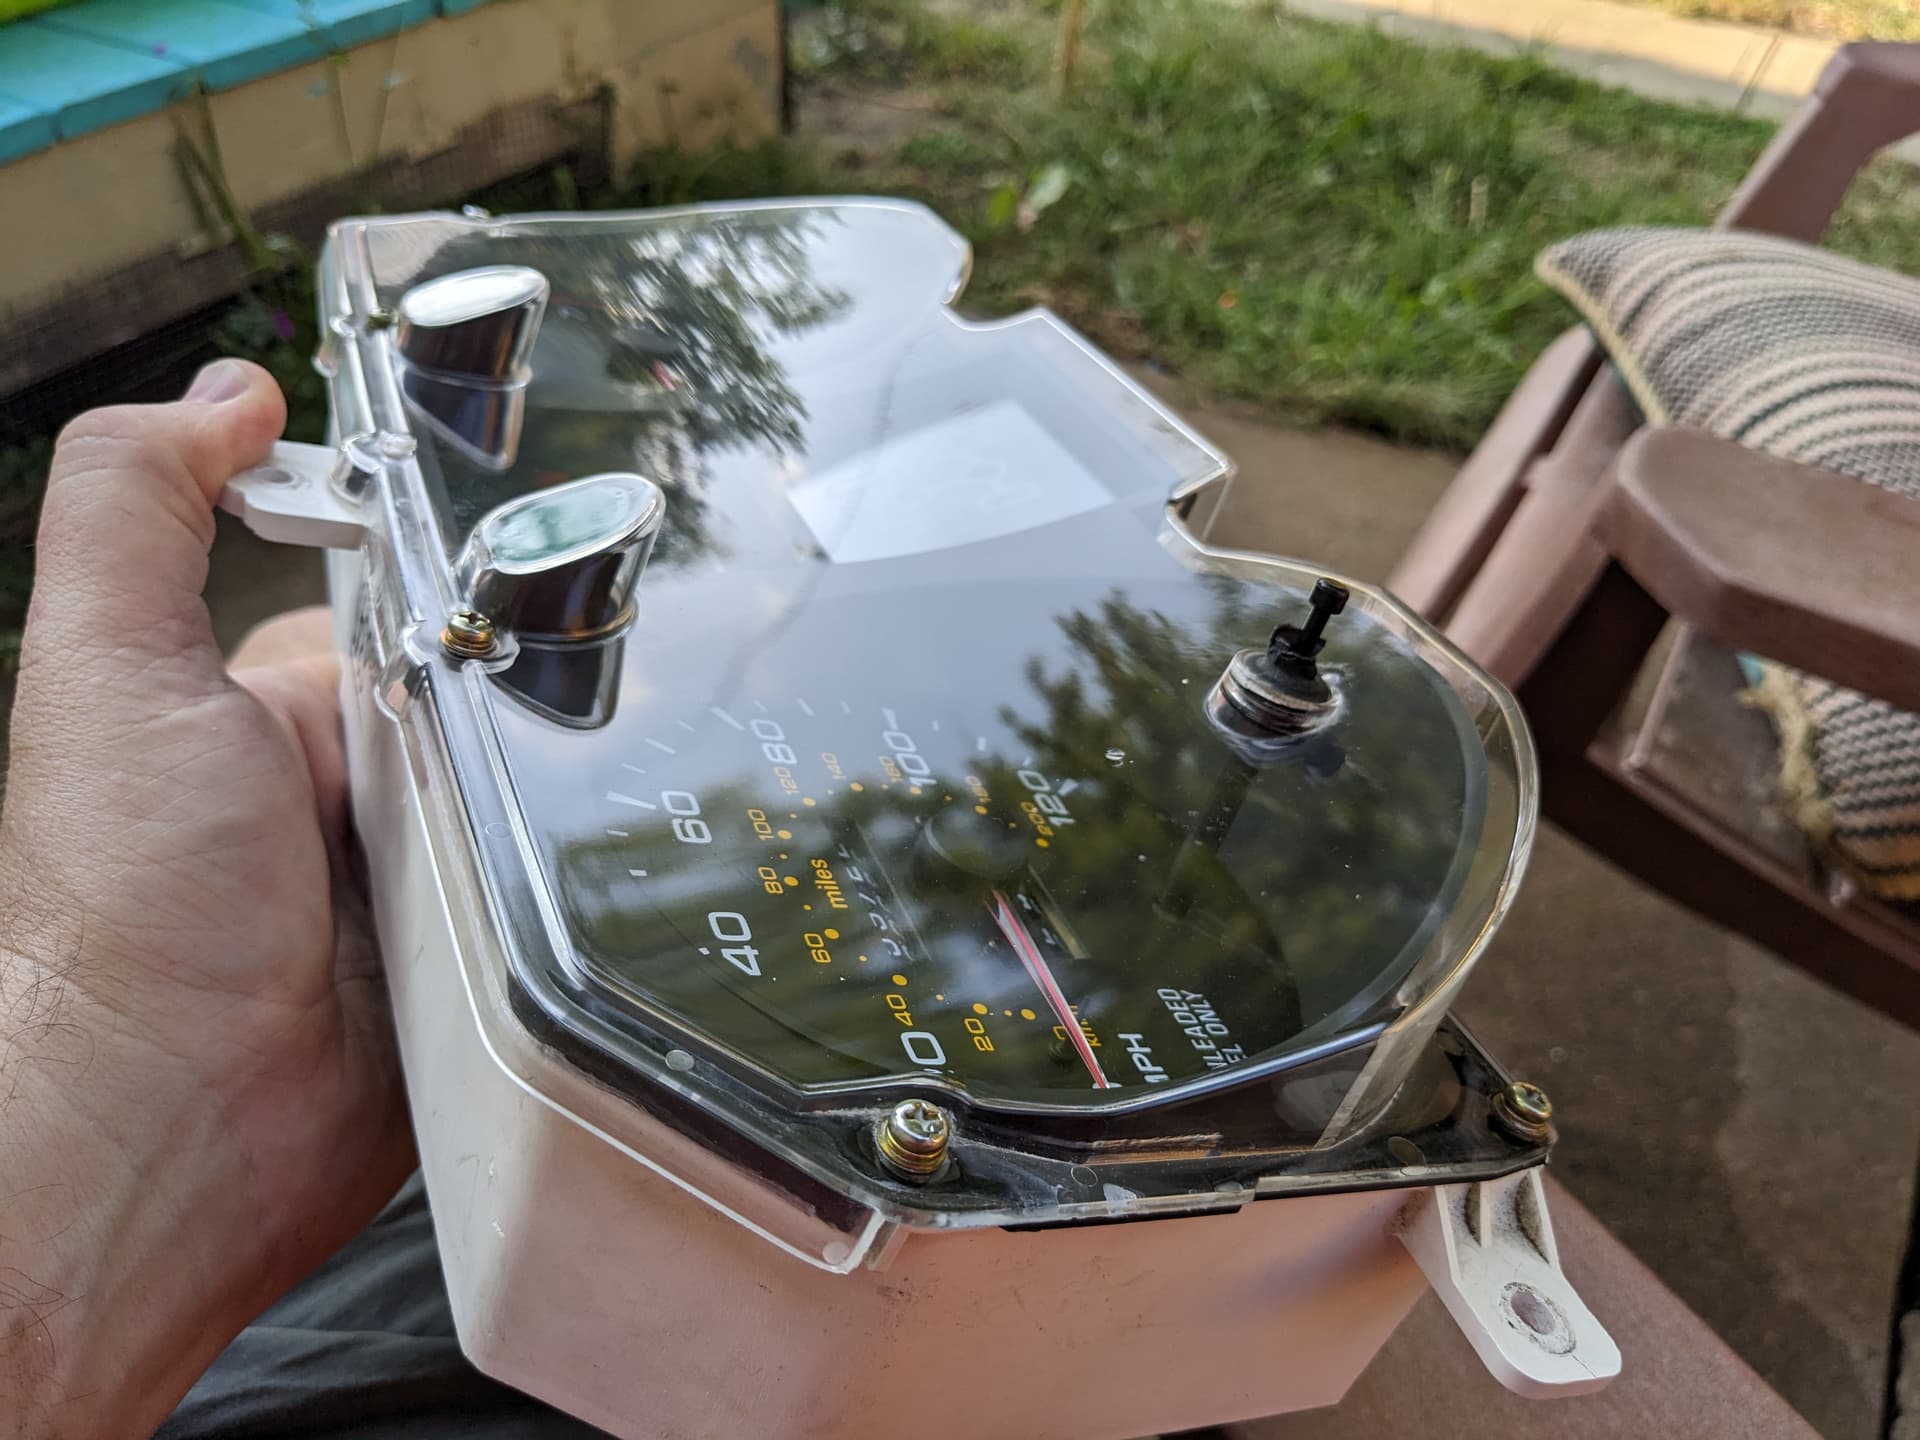
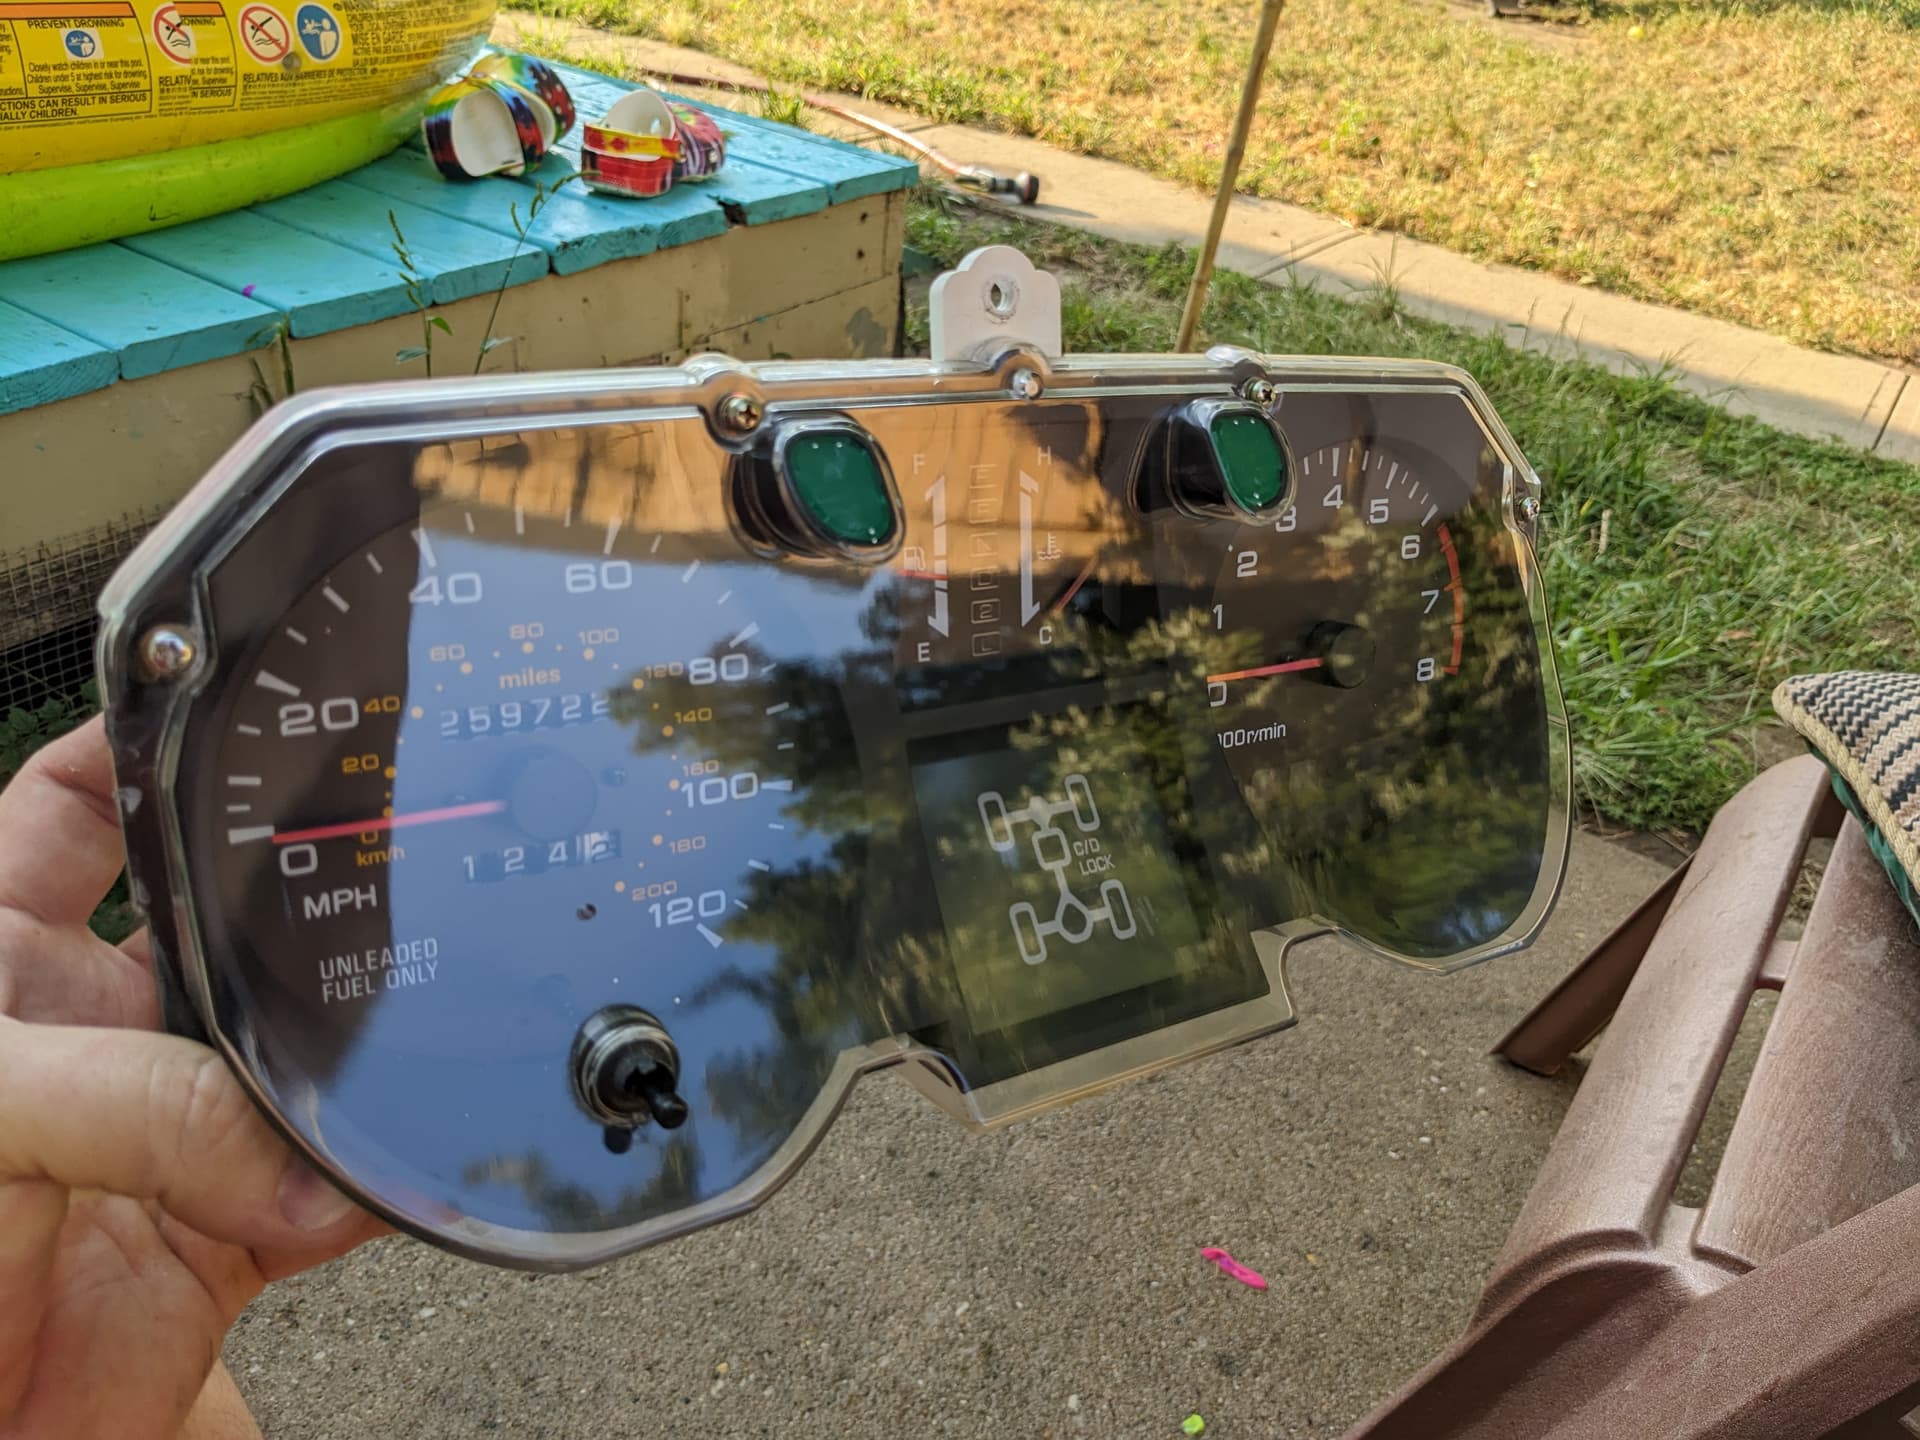
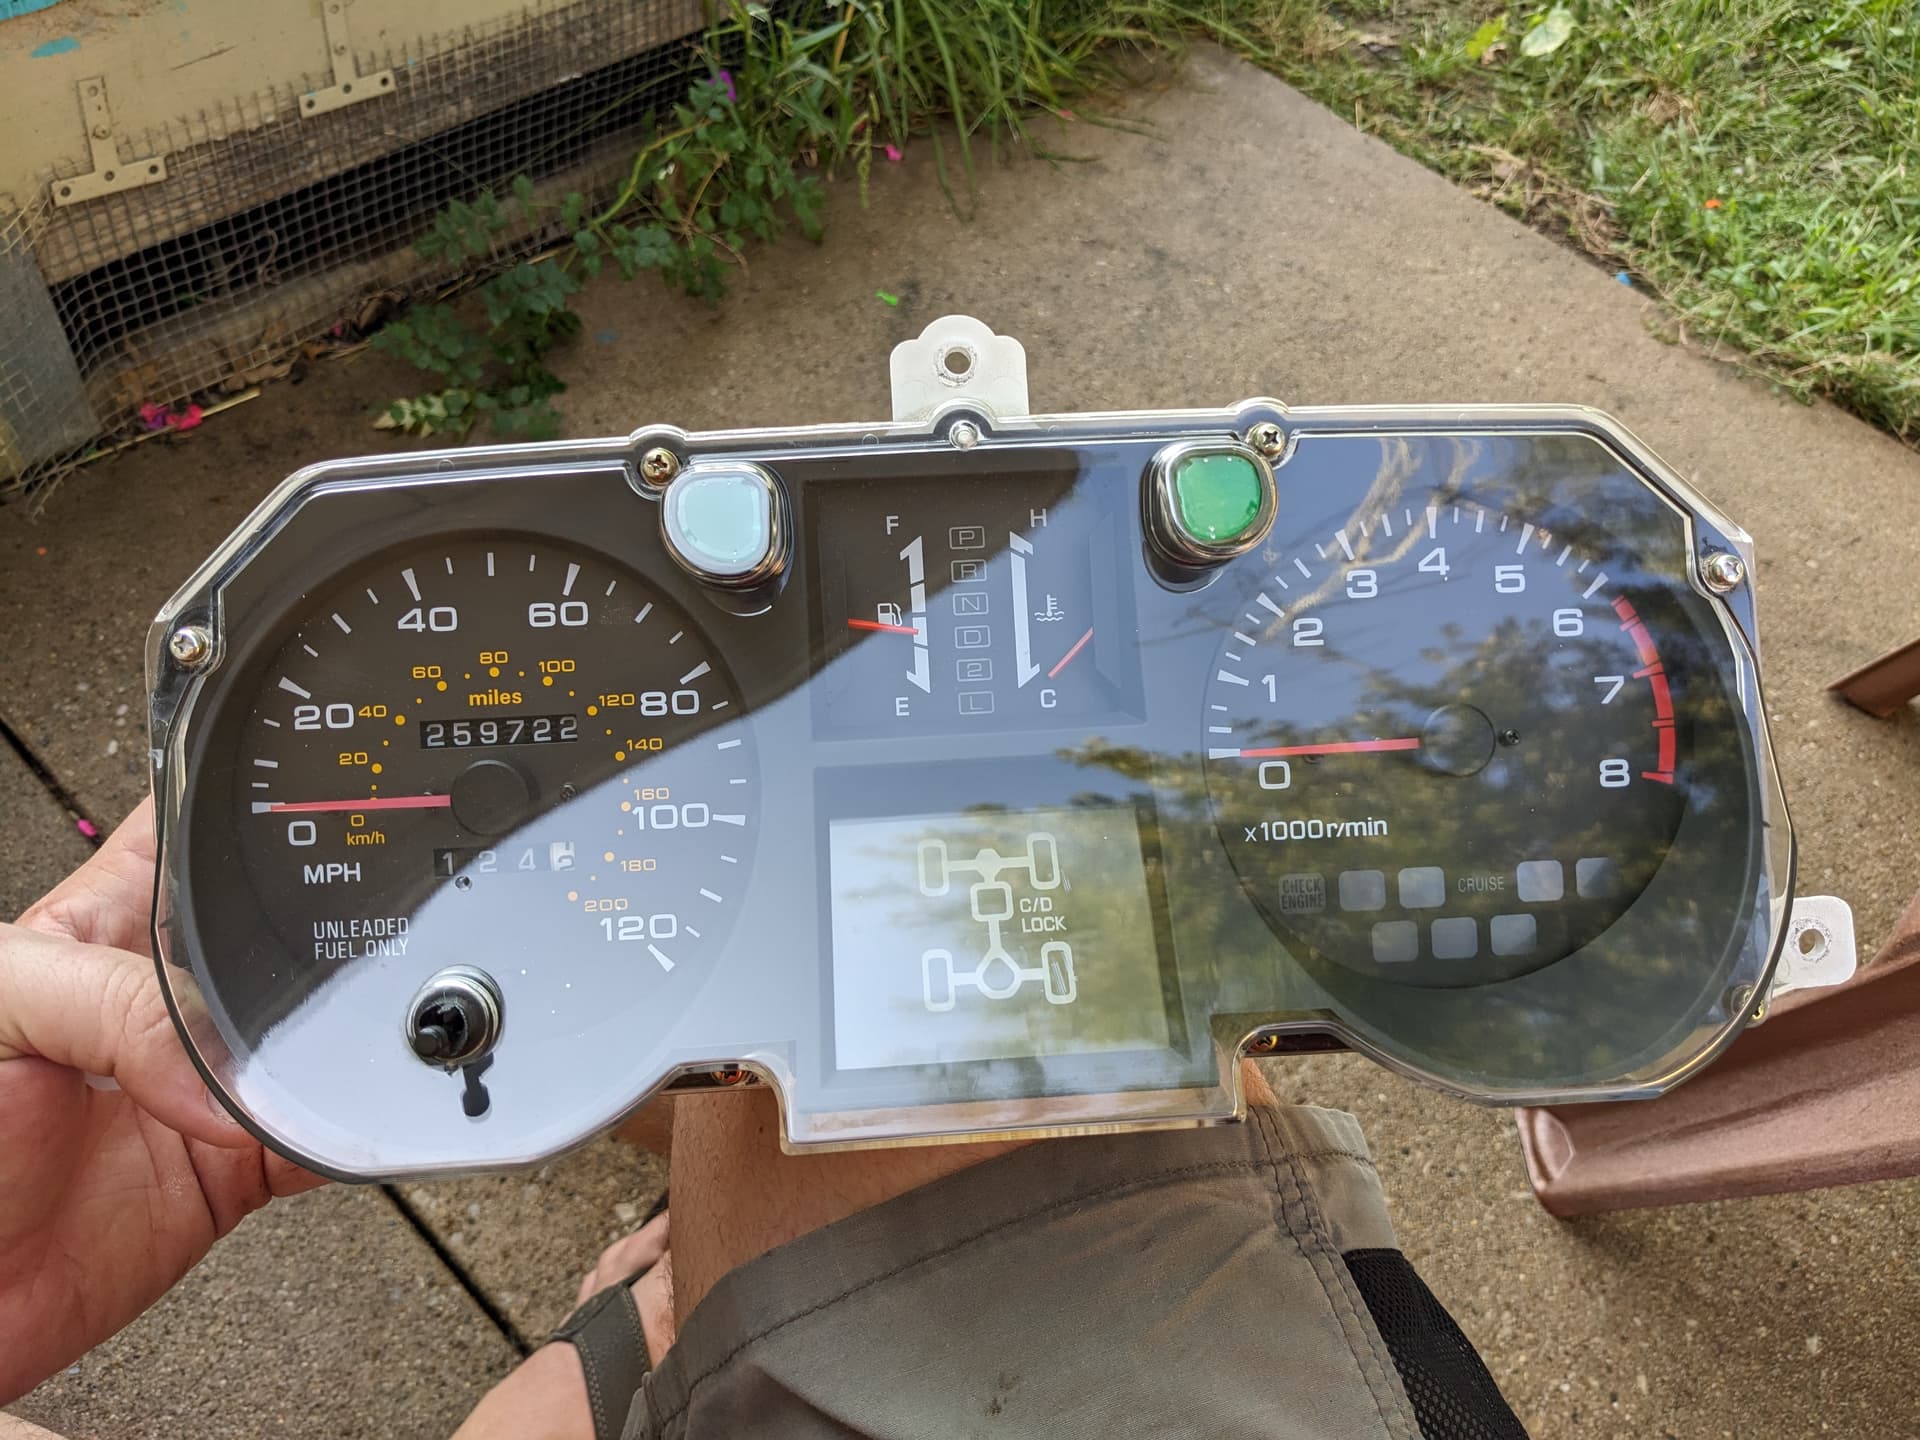
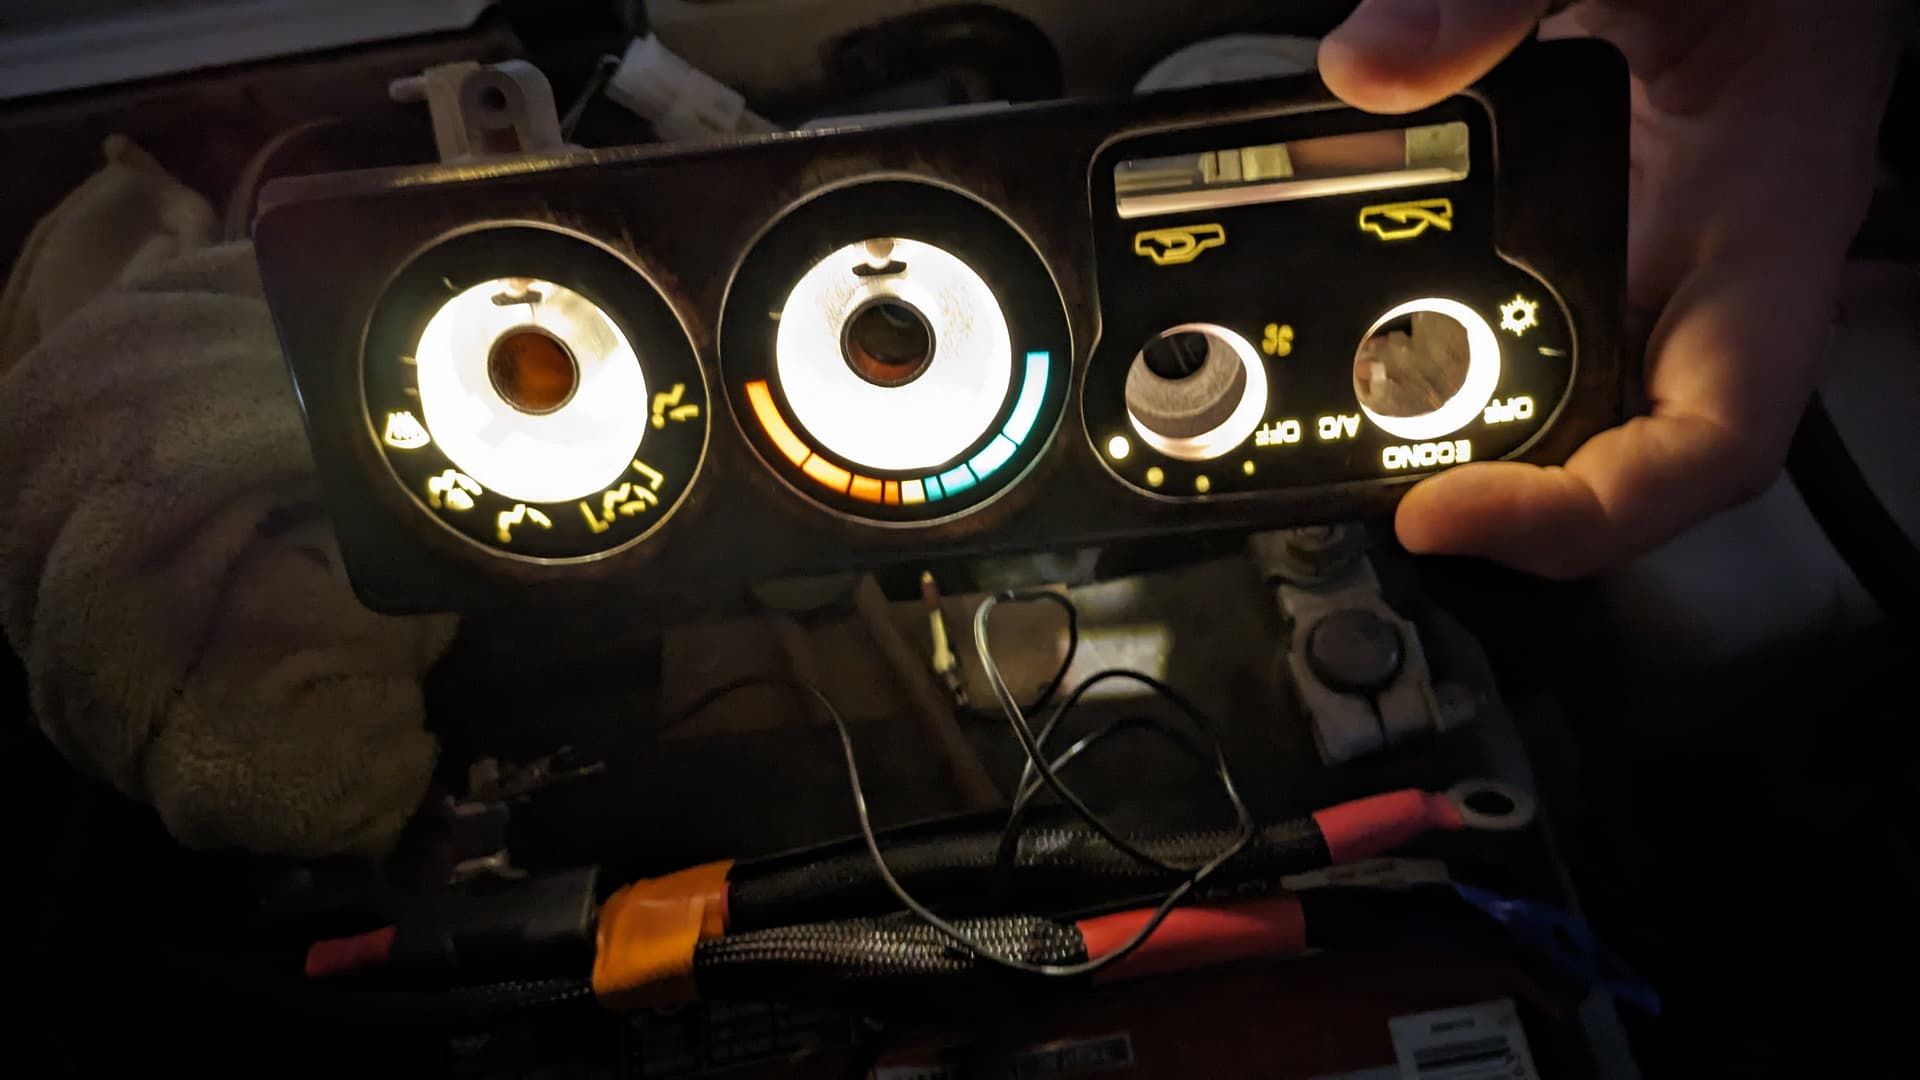
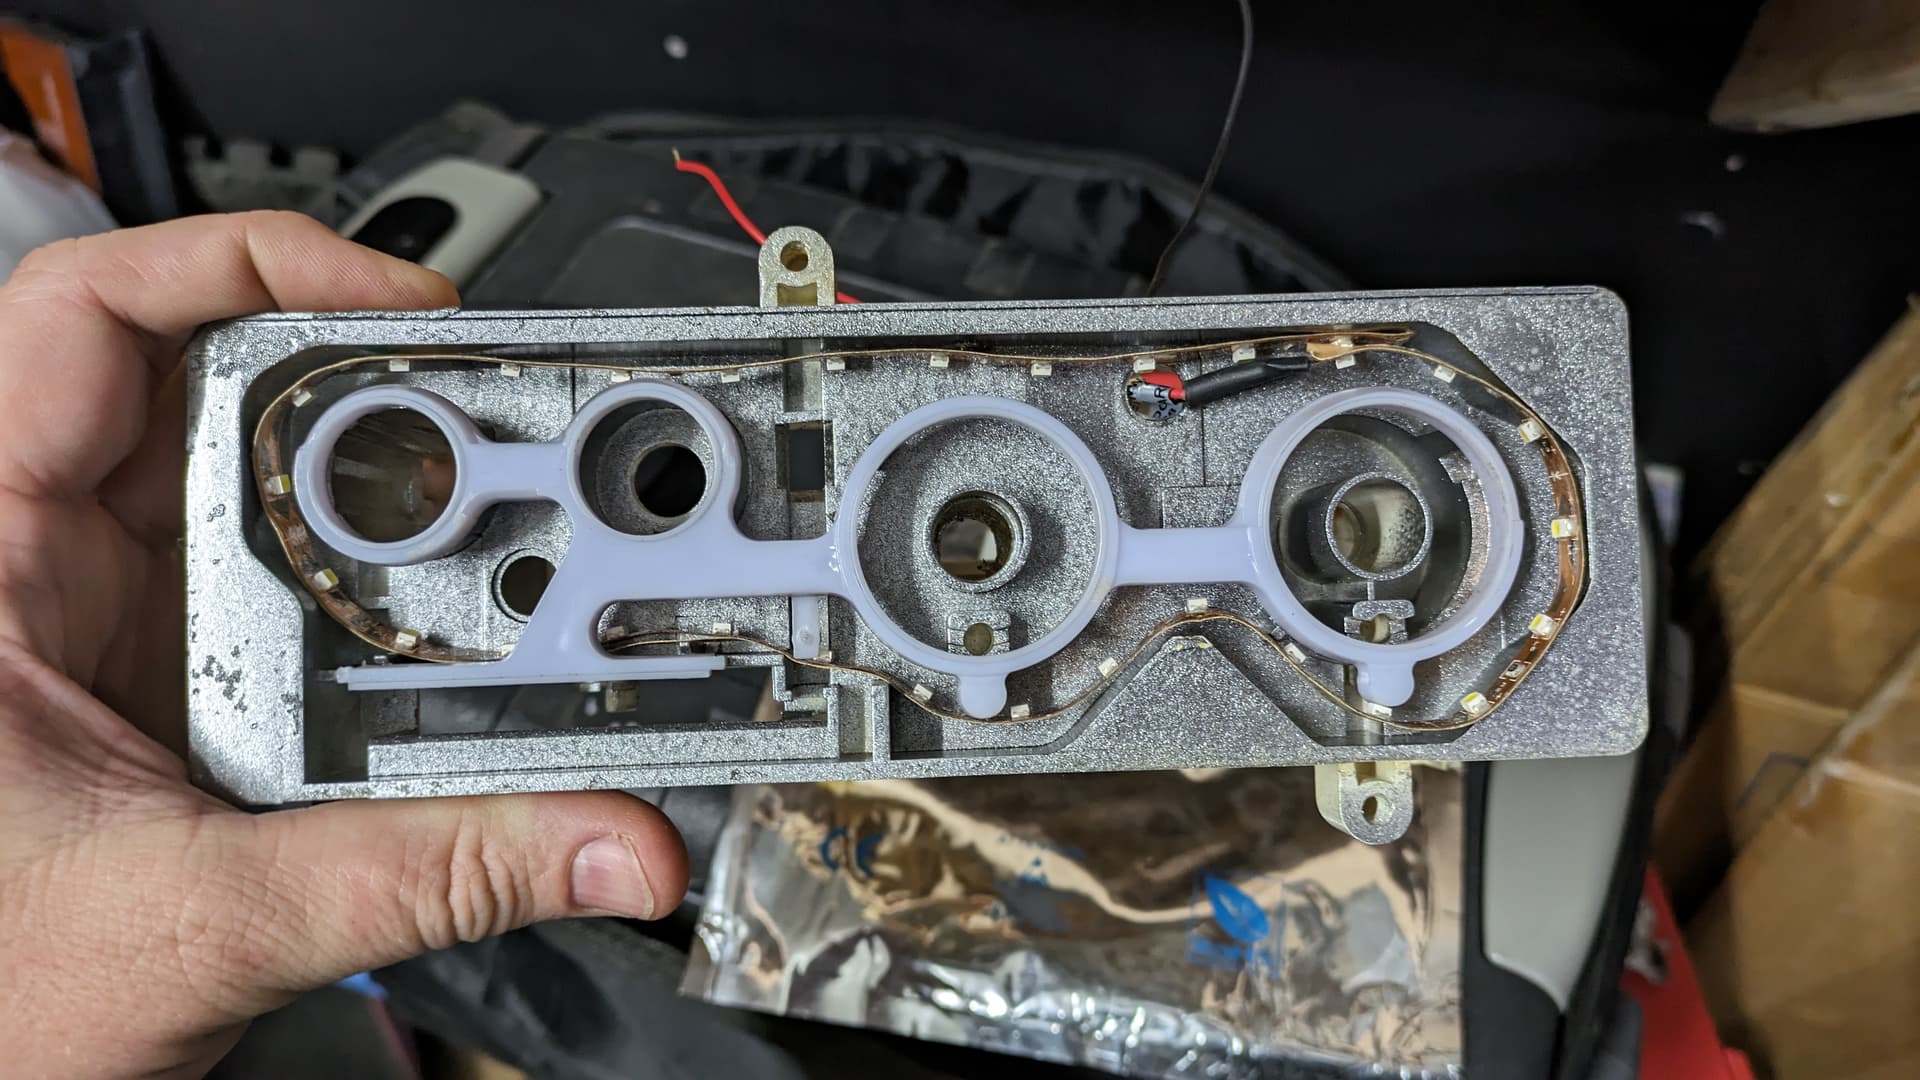
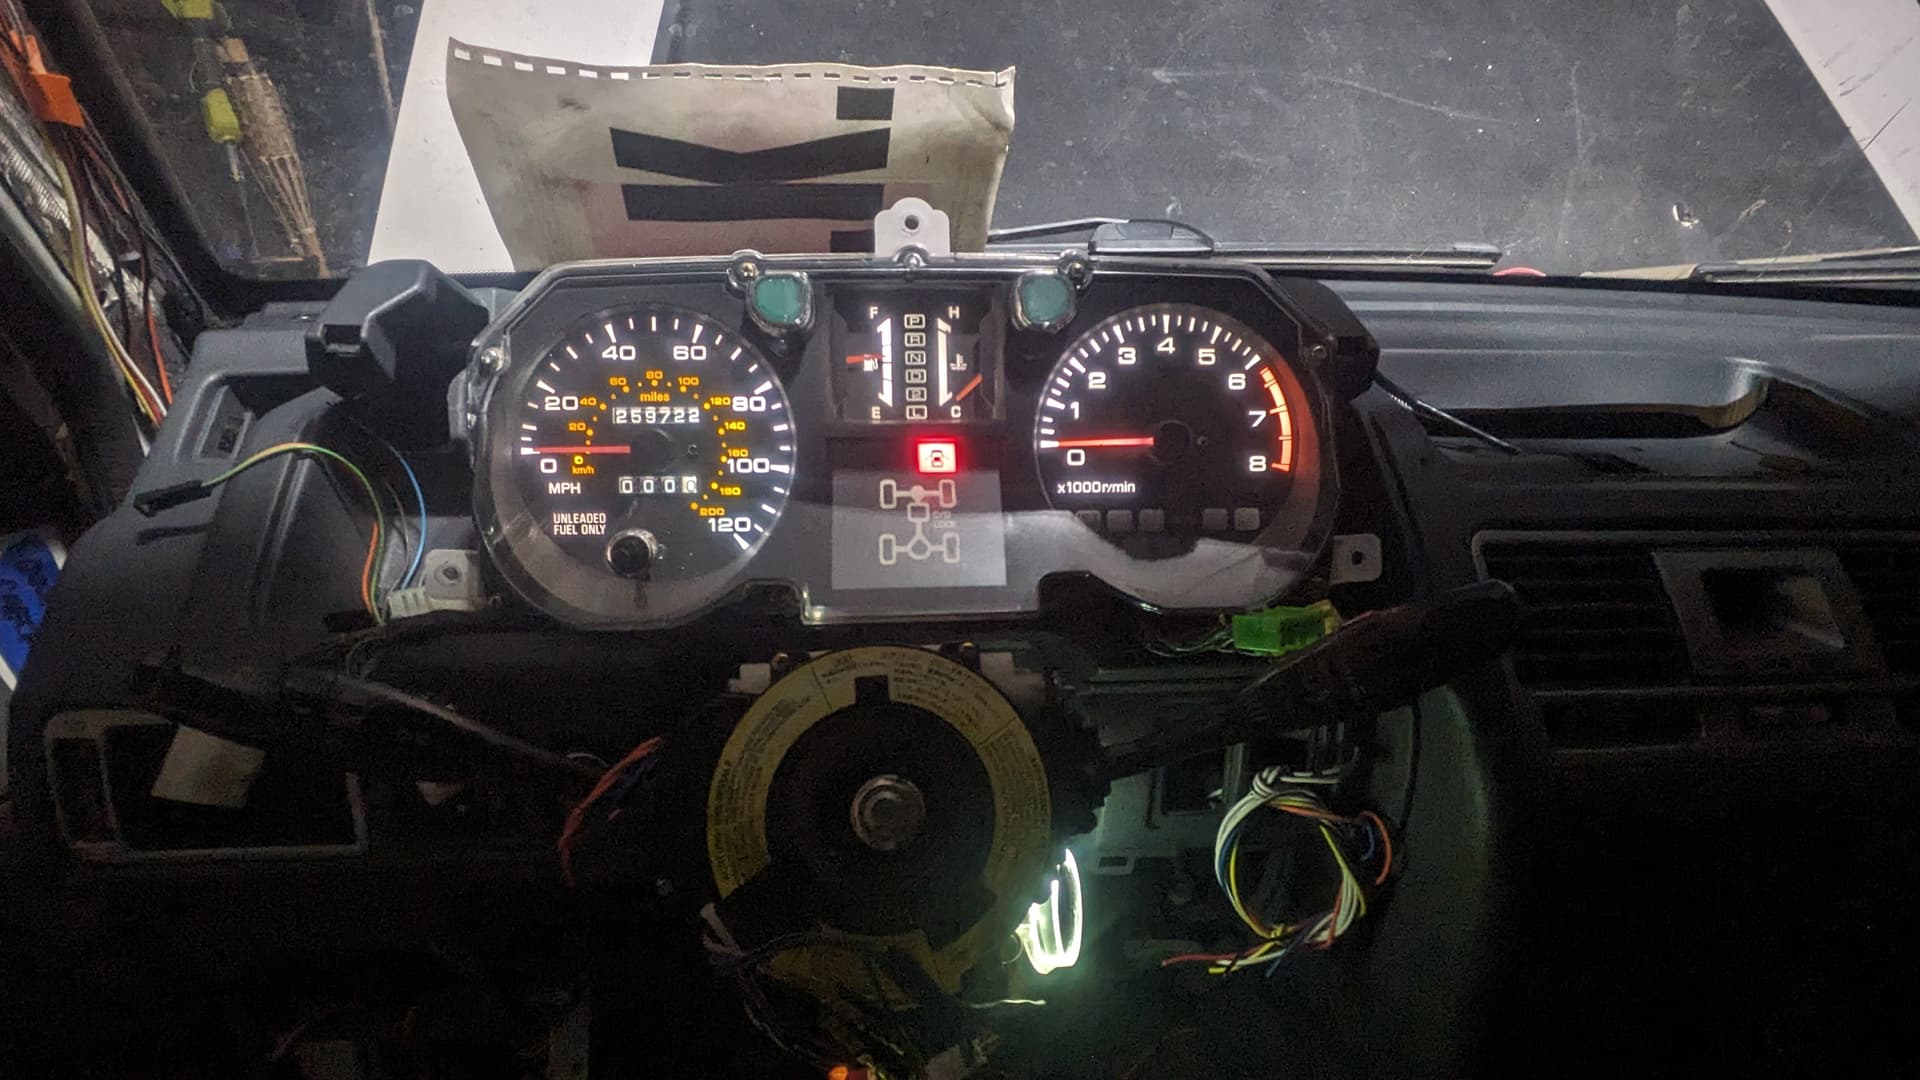
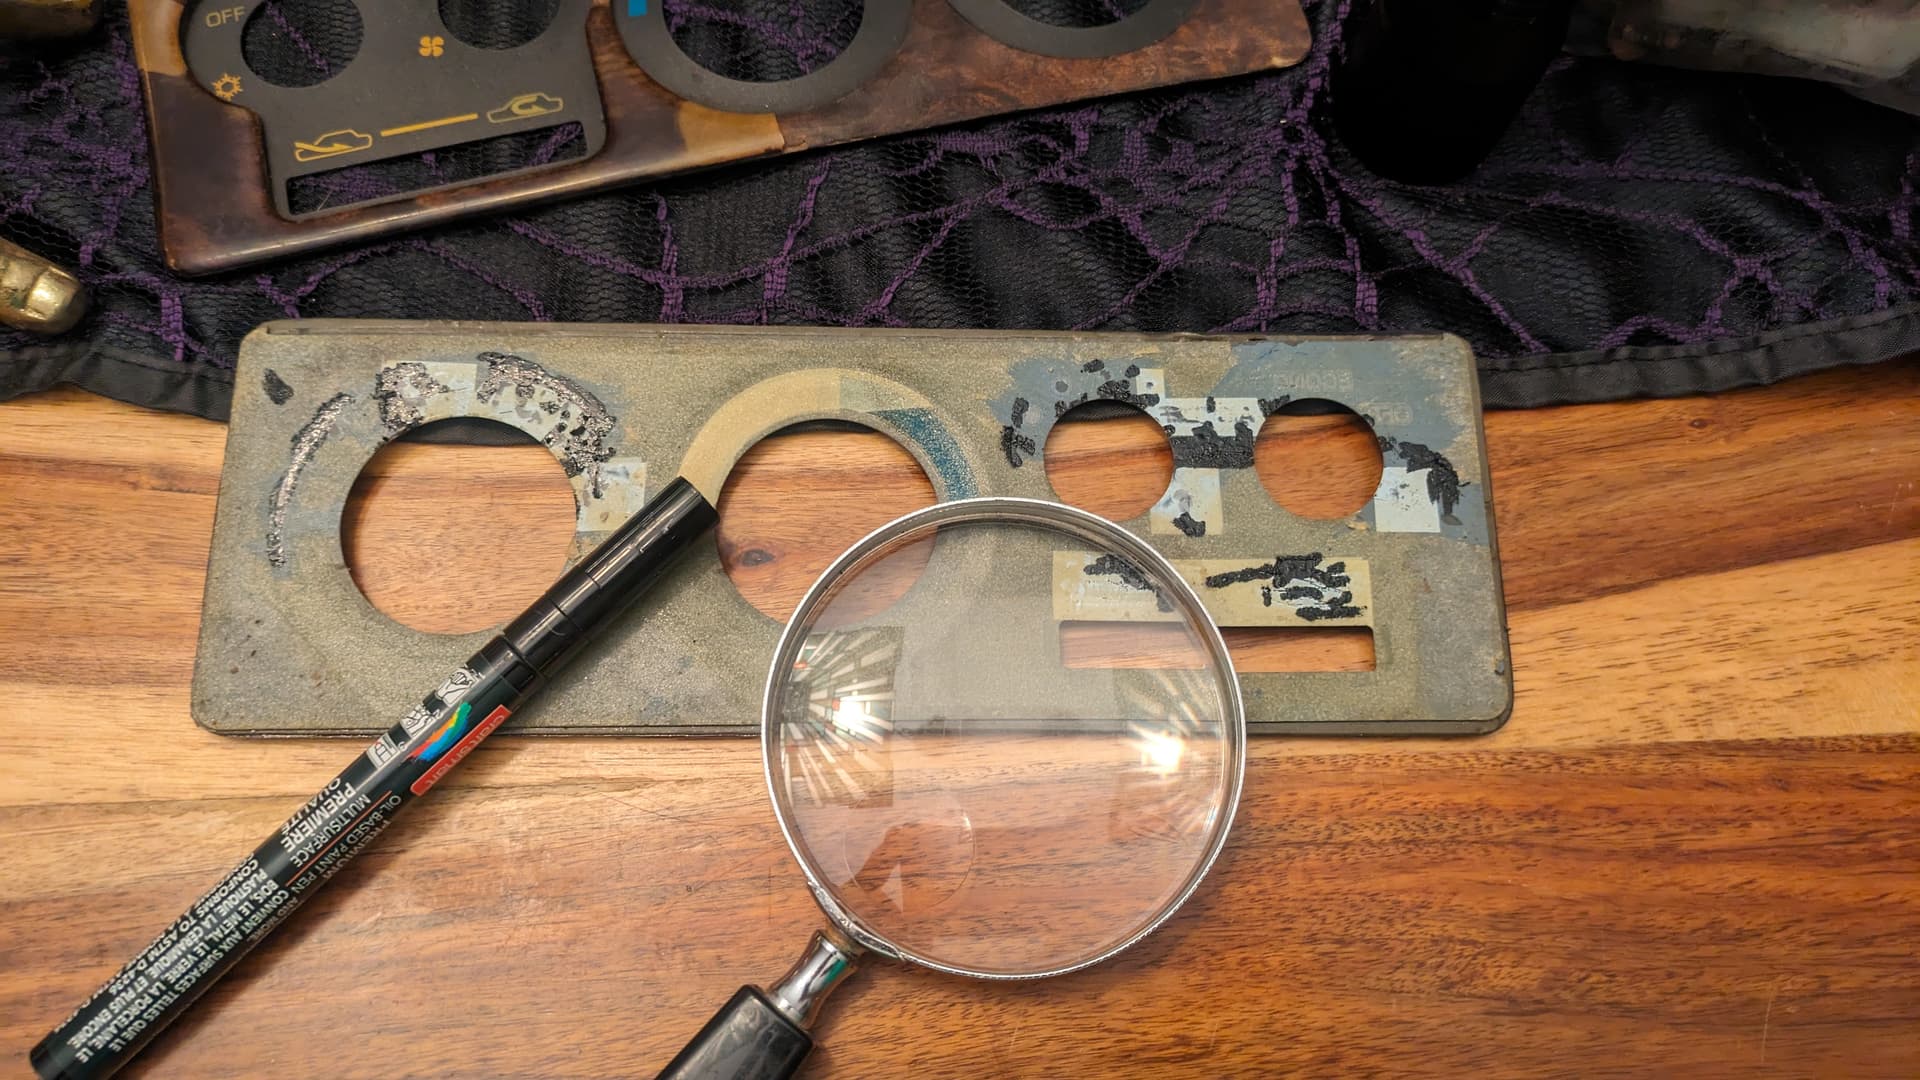
I spent some quality time polishing the gauge cluster lens. Did such a good job, now I have to open it up and do the inside, too. Just as well. I’ve got all the LEDs to install too, so it’s worth a good cleaning.
I’m starting to get pretty excited. Yes, there’s going to be some challenges putting everything back together again, and timing is going to be key to getting everything done this month, but the interior is going to be almost completely new, save seats and door cards. Fortunately, those are easy to remove anytime, so maybe I’ll try my hand at upholstery this winter.
(Then again, I need to get the seat heaters installed before winter. Maybe I’ll just slip them under the seat covers. Planning on doing quite a bit of pre-wiring work to set the stage for future projects.)
1 Like
Journey to the Heater Core Ep. 5
The new heater core is IN!
[ Edit: @MrGalantguy I think you might find some of these details interesting. ]
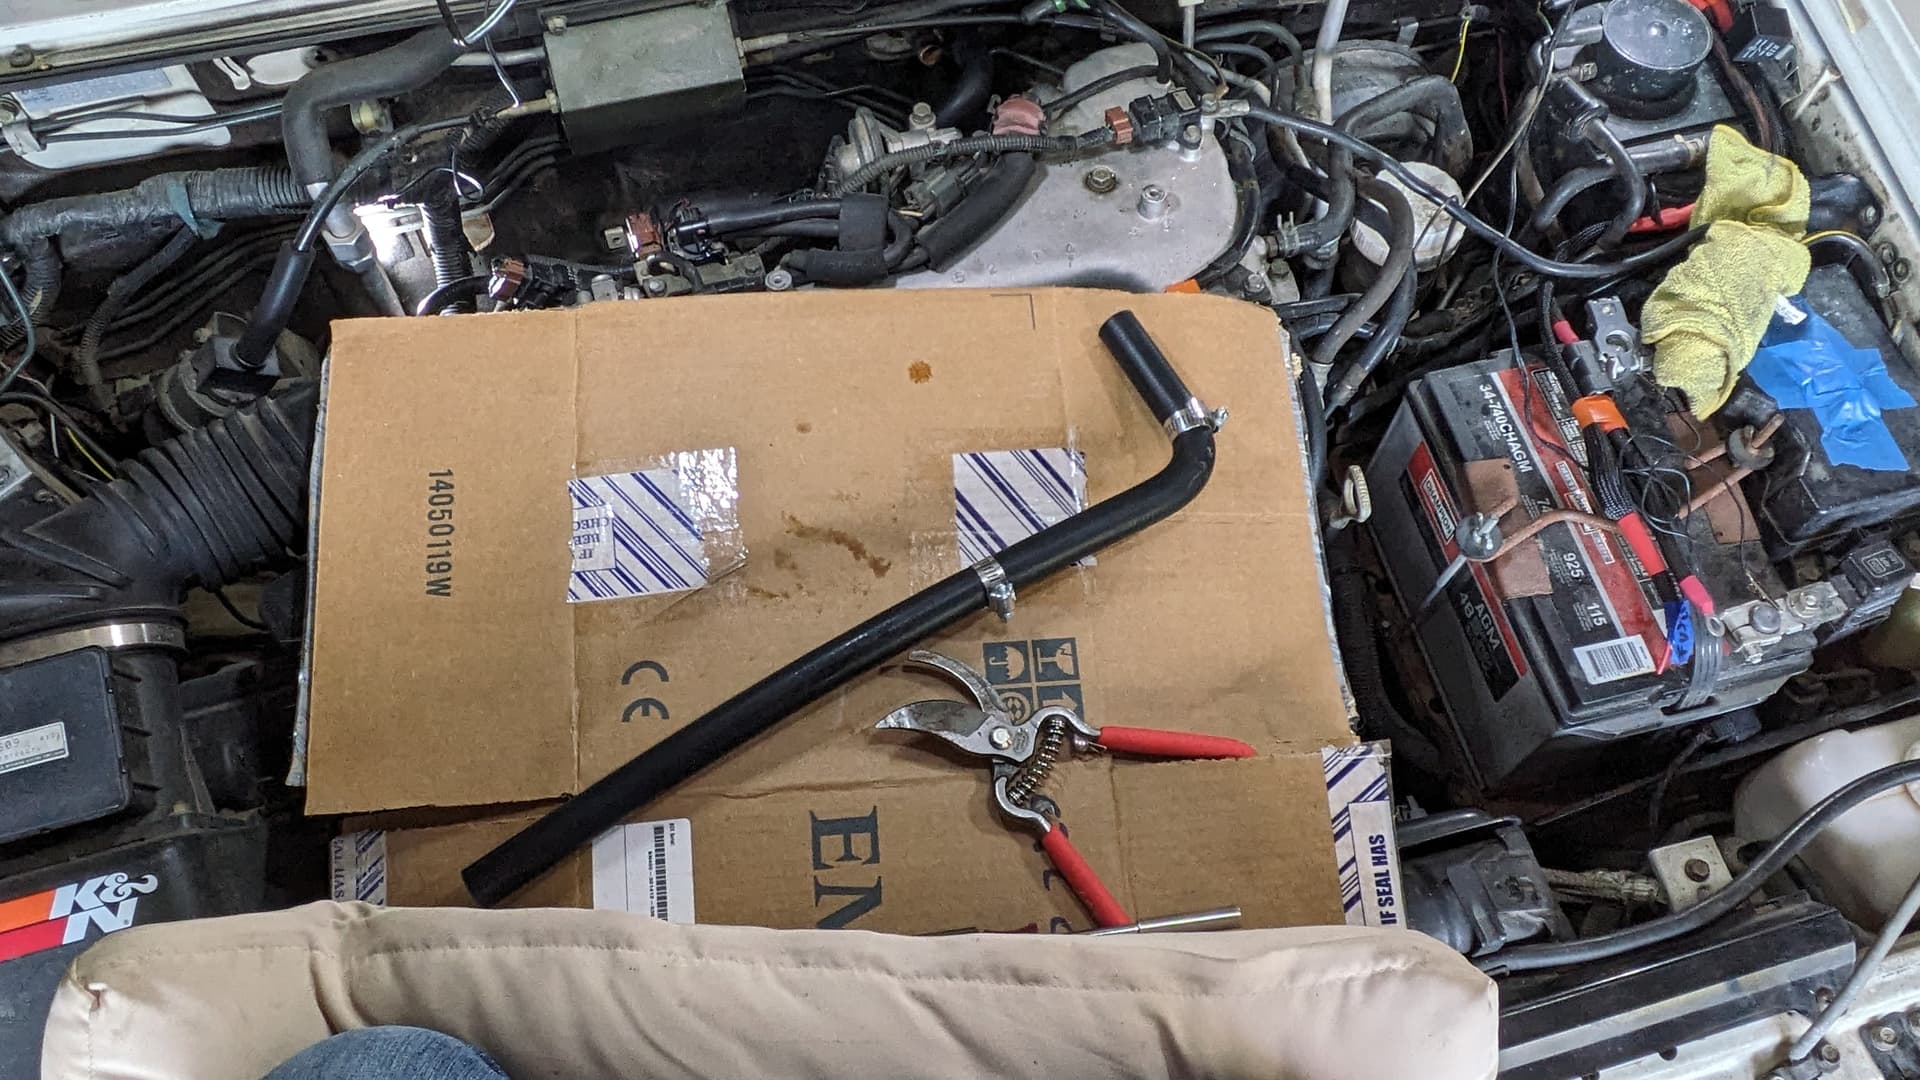
It wasn’t an exact fit, but it was close enough I was able to make it work. I wish it didn’t have the munched fins it does, but that’s my fault for trying to use a small prybar to clearance the HVAC control arm without removing the core. (Tool slipped into the heater box, wouldn’t just slip right back out.)
Captain Halfass: Under Pressure
That last picture, above, with all the things connected and the foam tape in place, reminds me I should reconnect the heater hoses in the engine bay, throw the ECU and cluster back in, and pressure test things.
As much work has gone into this project, It would be a HUGE MISTAKE not to make sure things are fully sealed up before I put it all back together. I didn’t go through with plans to purchase a bunch of pipe fittings so I could pressurize the core and maybe submerge it in a bucket of water or watch a gauge or something. I mean, the hose couplers on the original core were obviously the cause of the leaks, given how much fluid I was losing.
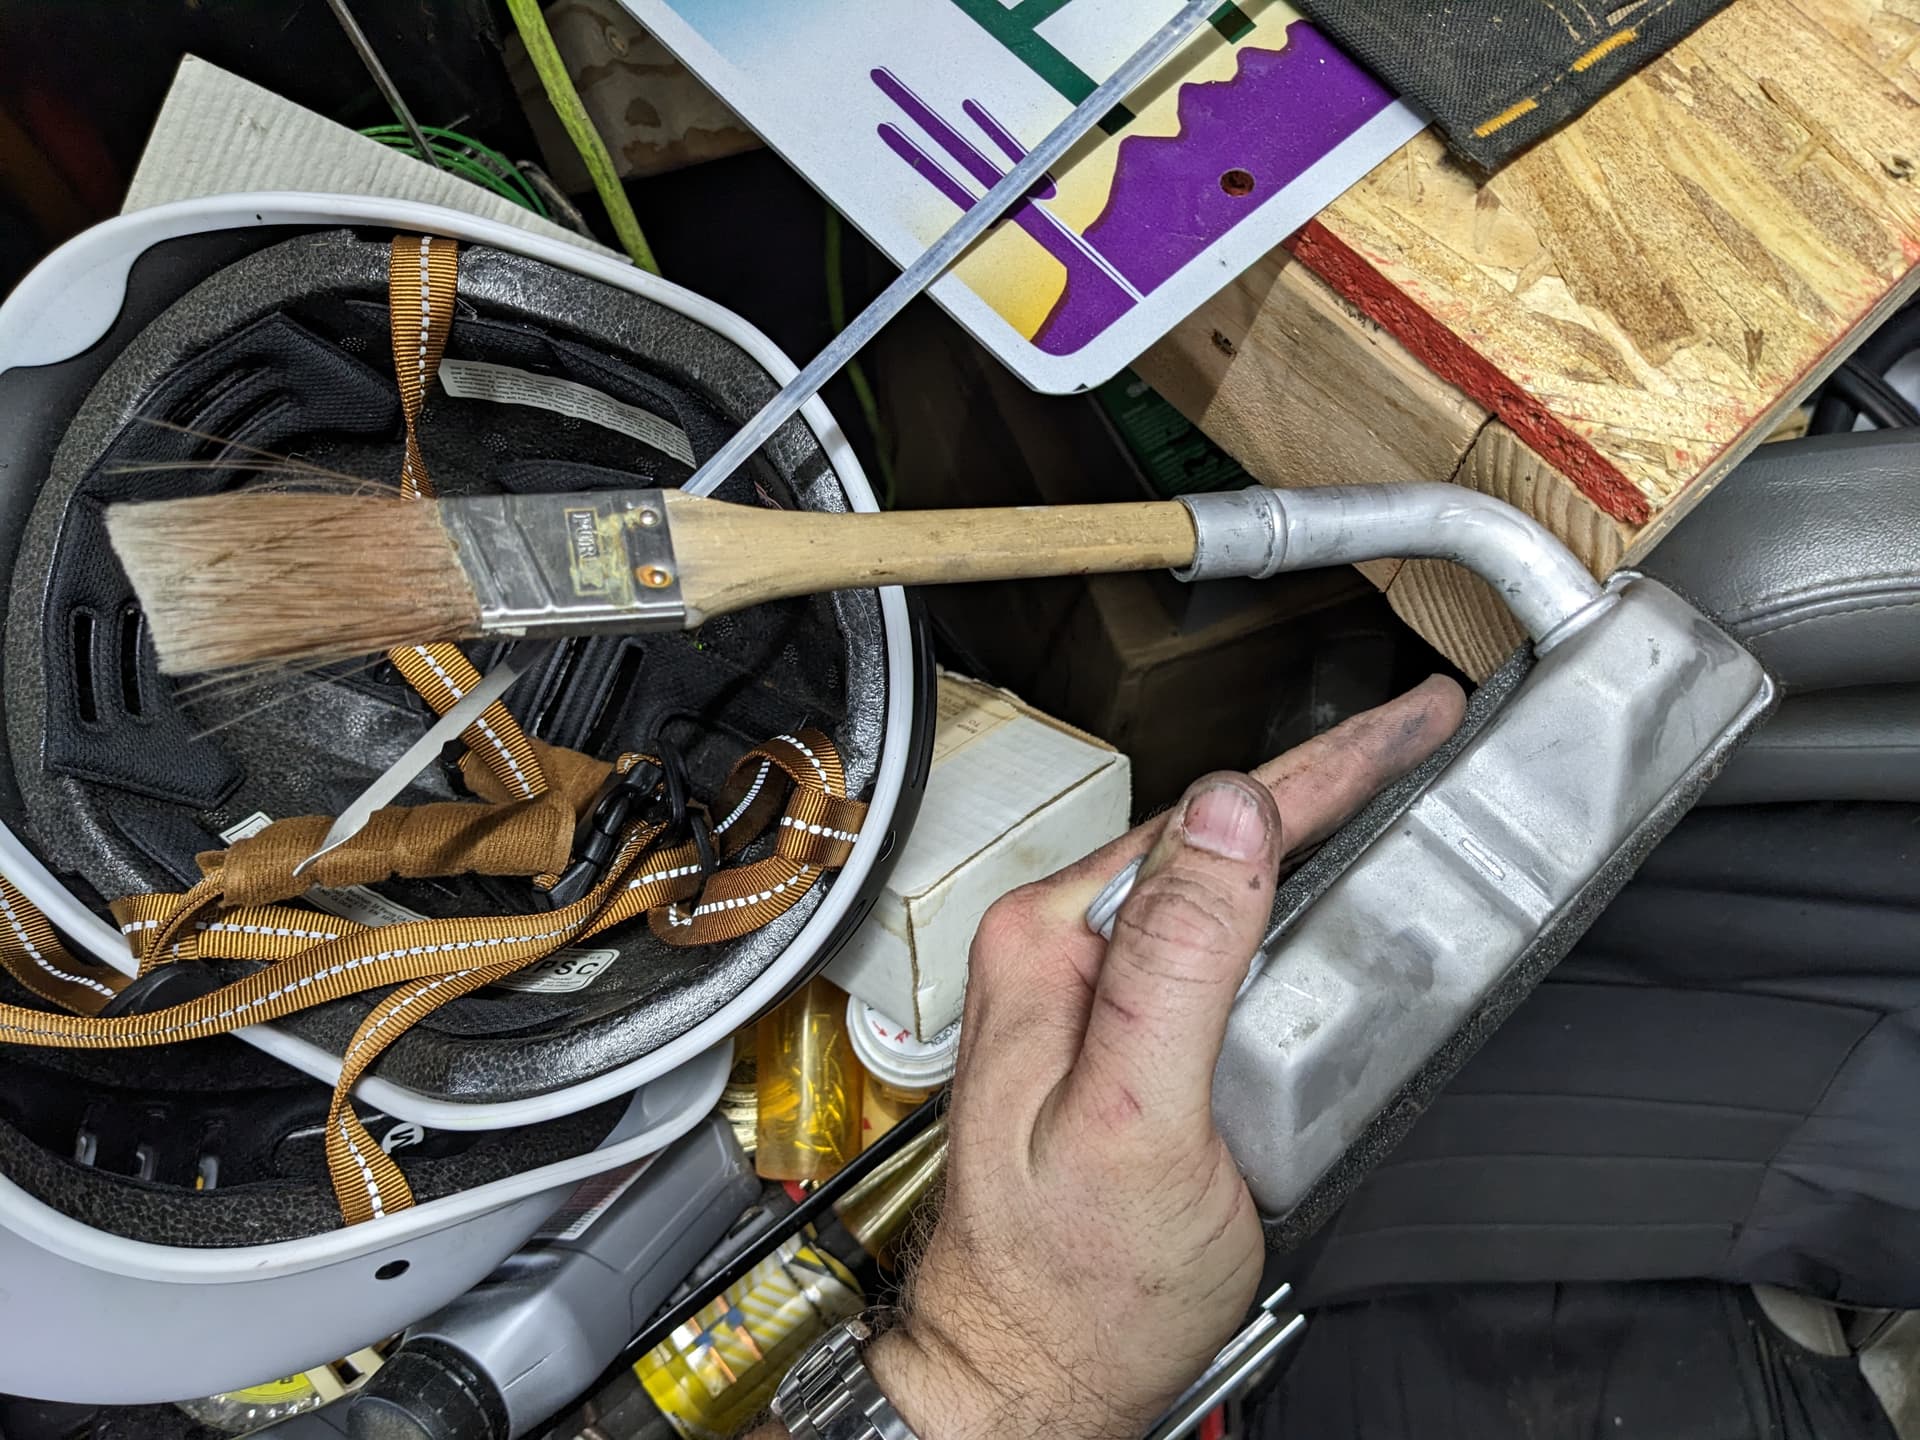
I’ve casually pressure tested both cores using the Captain Halfass Method:
- Cover the short pipe with your thumb.
- Put the other pipe in your mouth.
- Try blowing up the core like a balloon.
Both units behaved the same. I huffed, and I puffed, and I looked like an idiot. Considering the leak was big enough that I could hear it spitting out when the coolant level was lower—meaning the system didn’t have to be full and fully pressurized to leak—I’m telling myself we’re good here.

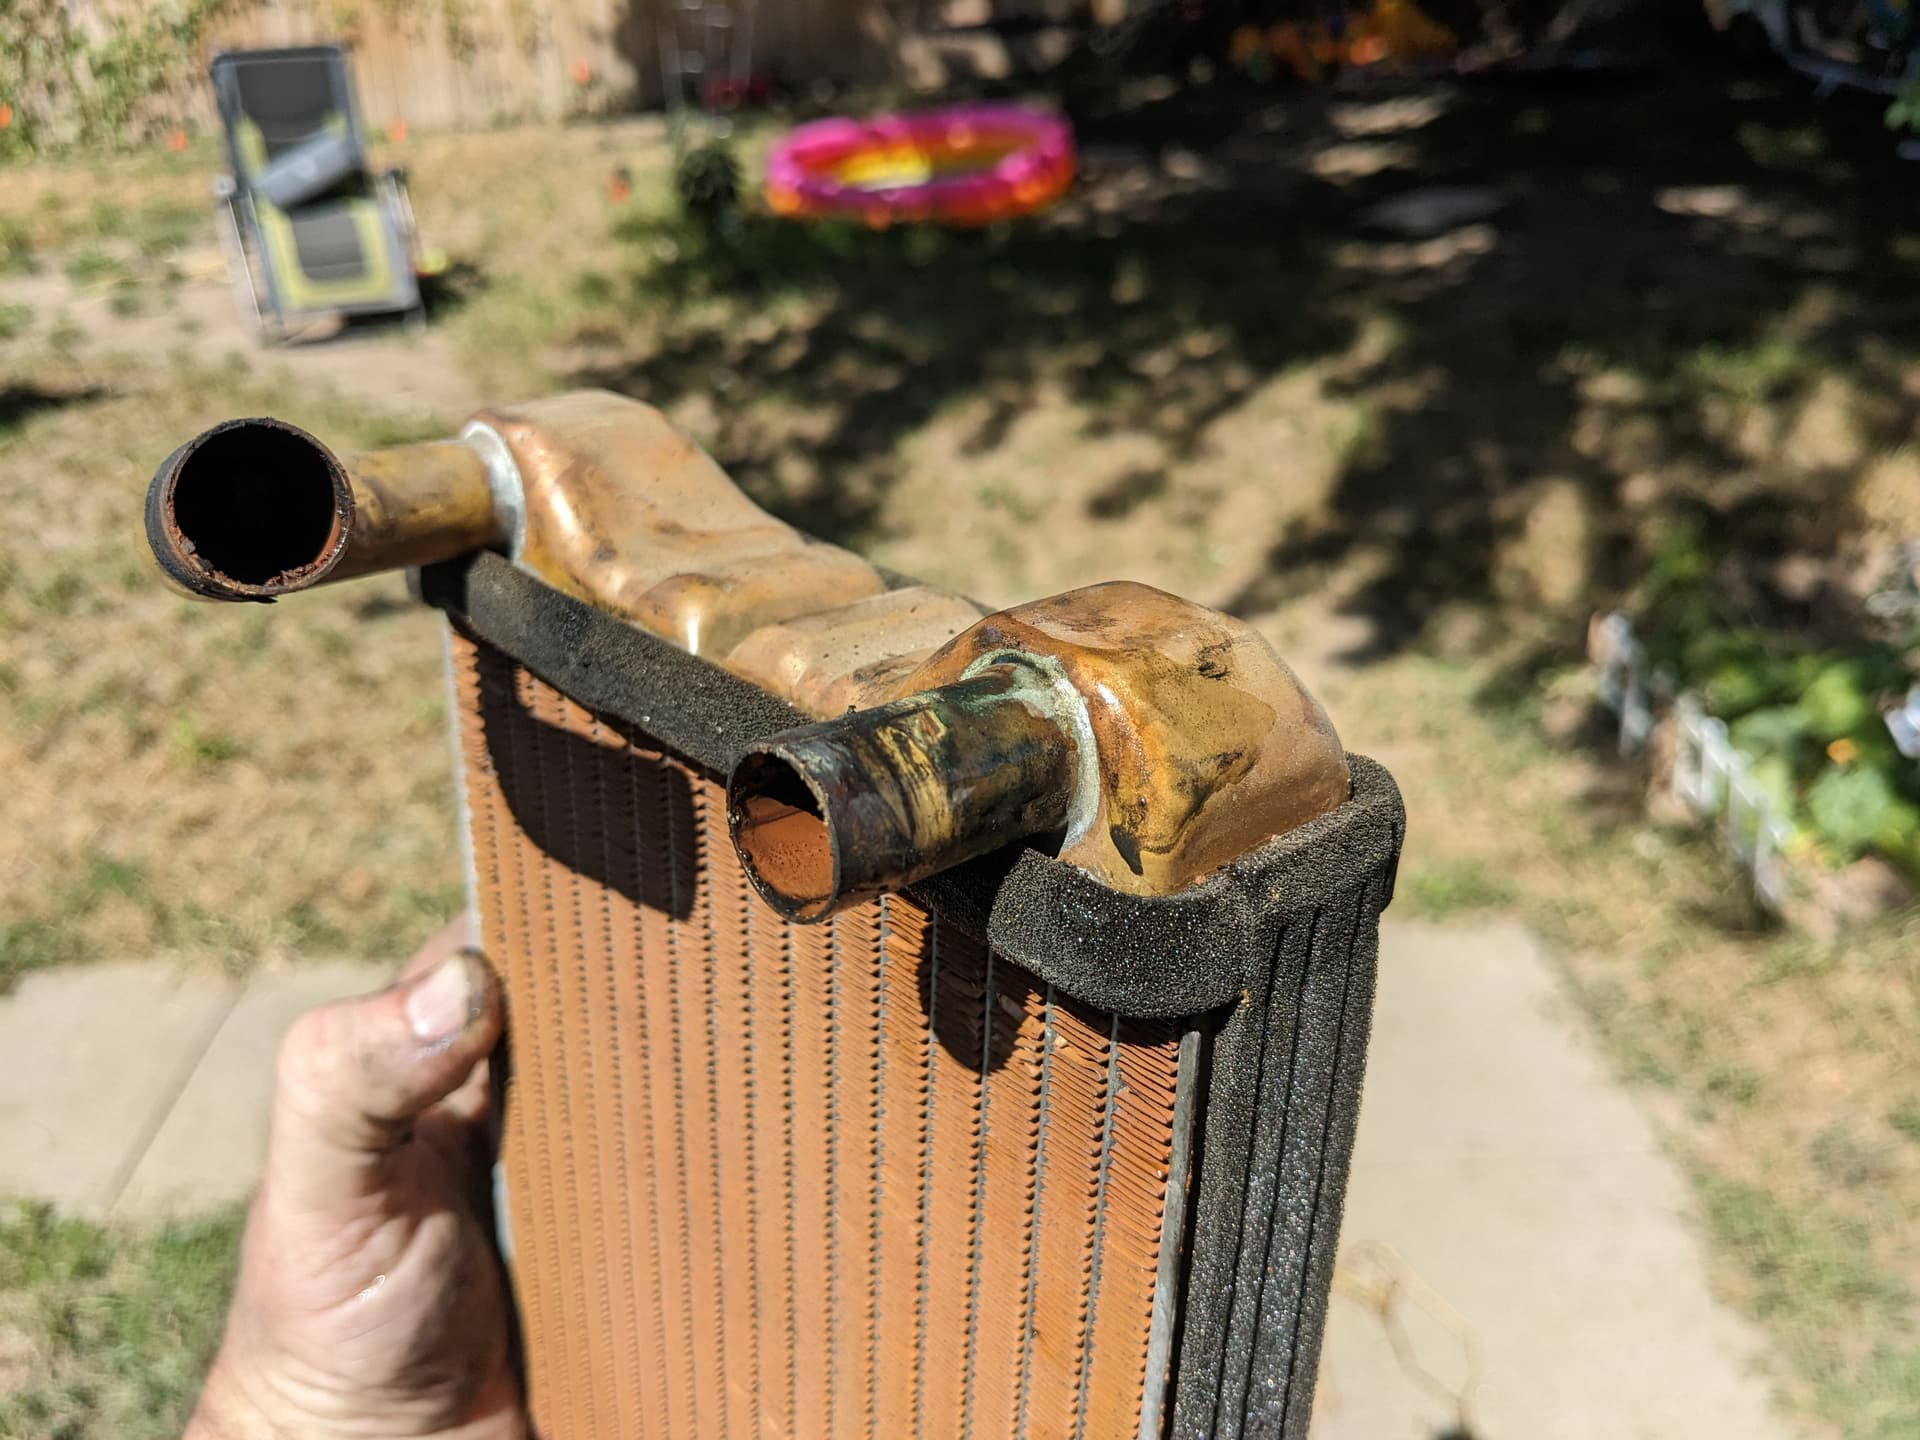
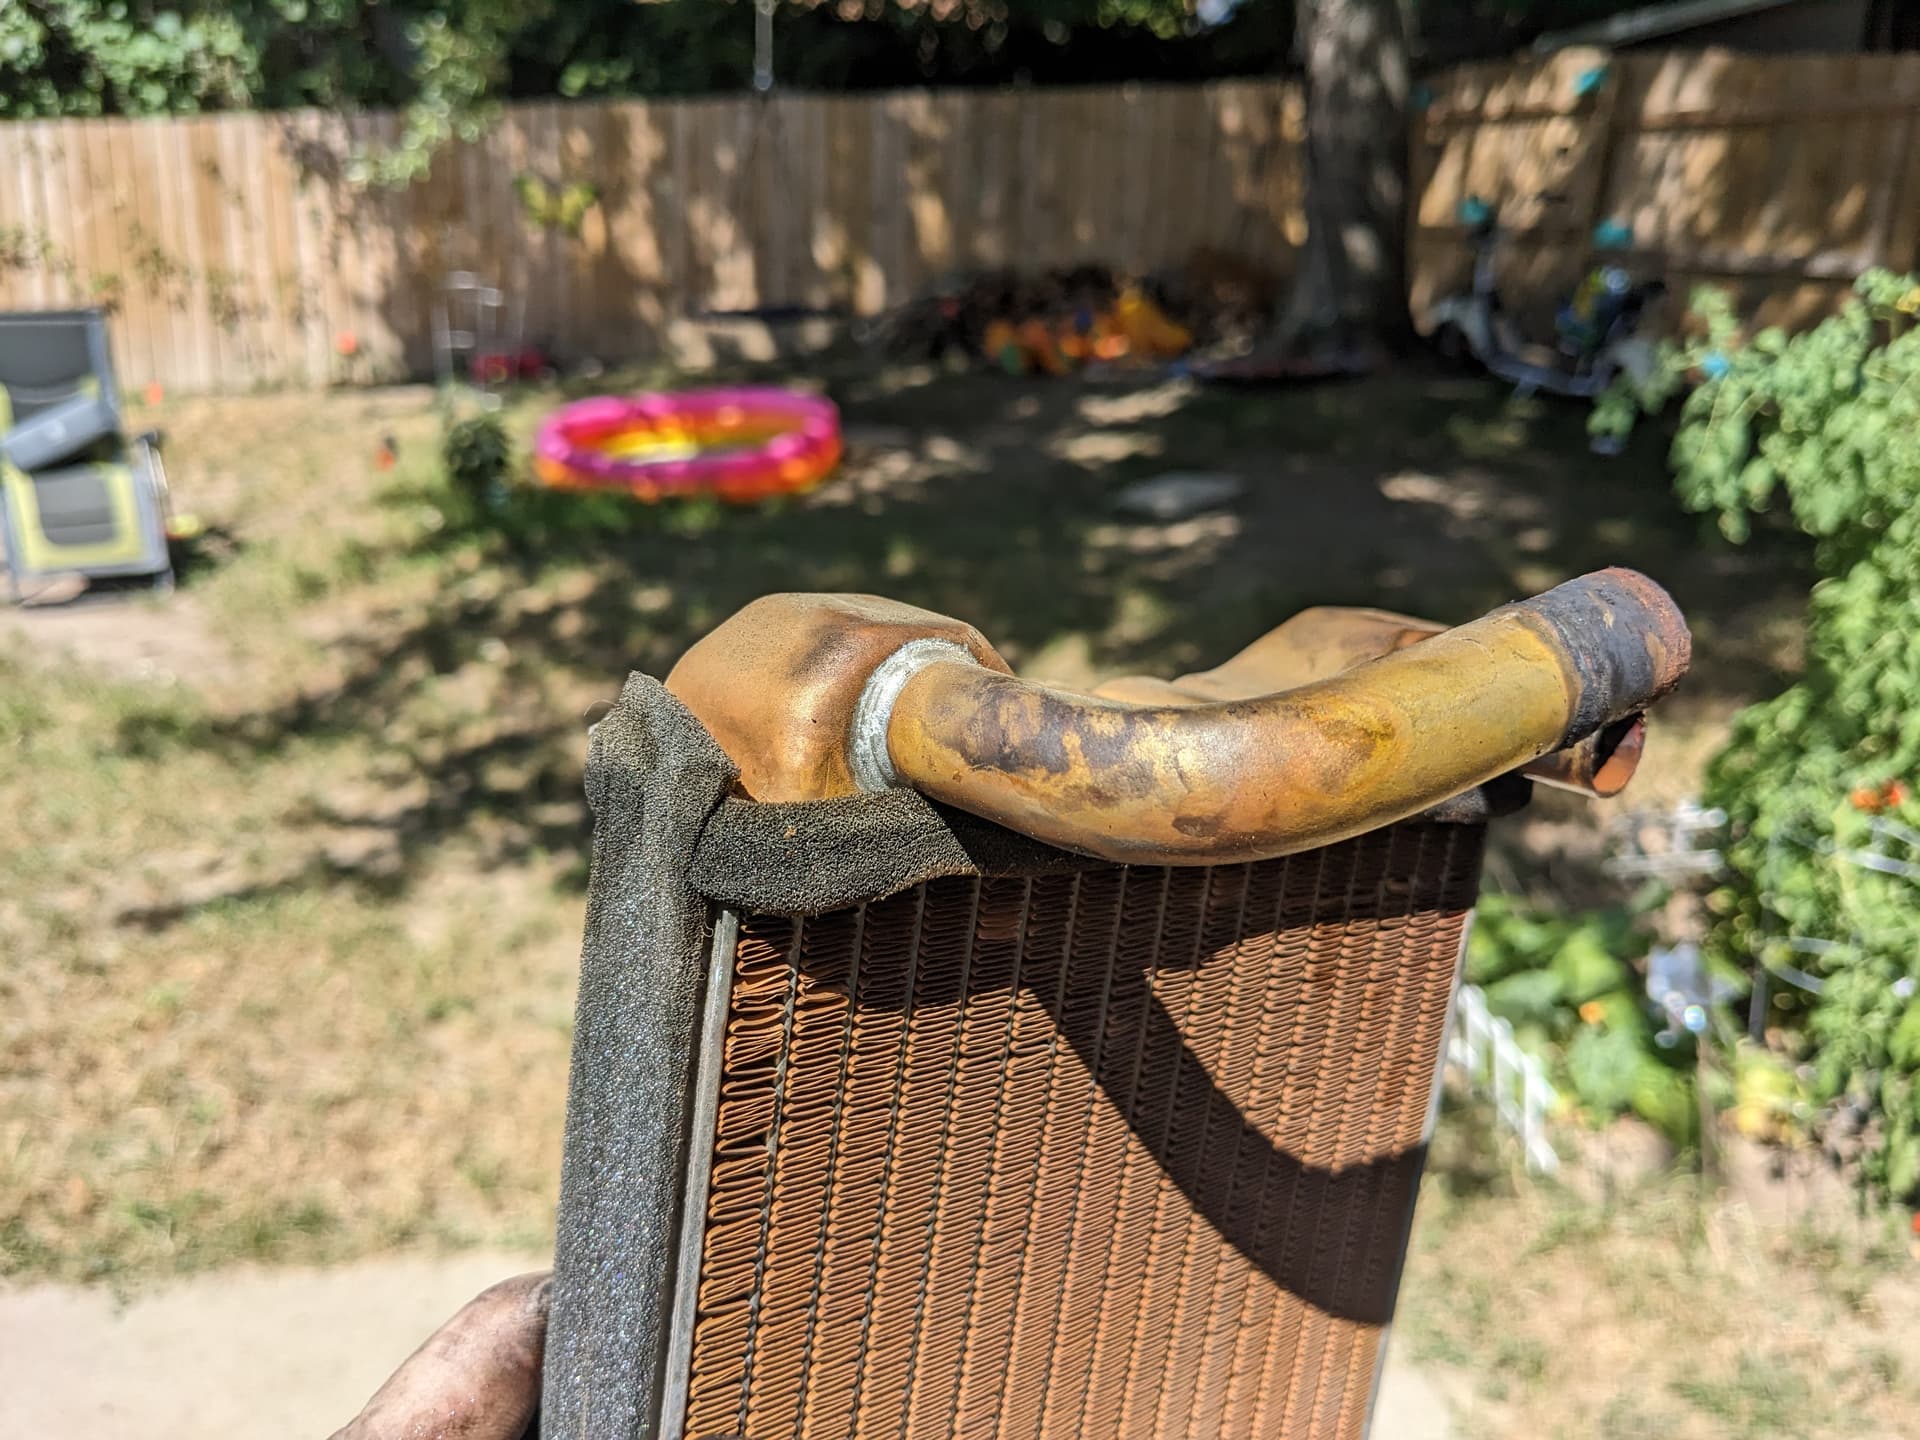
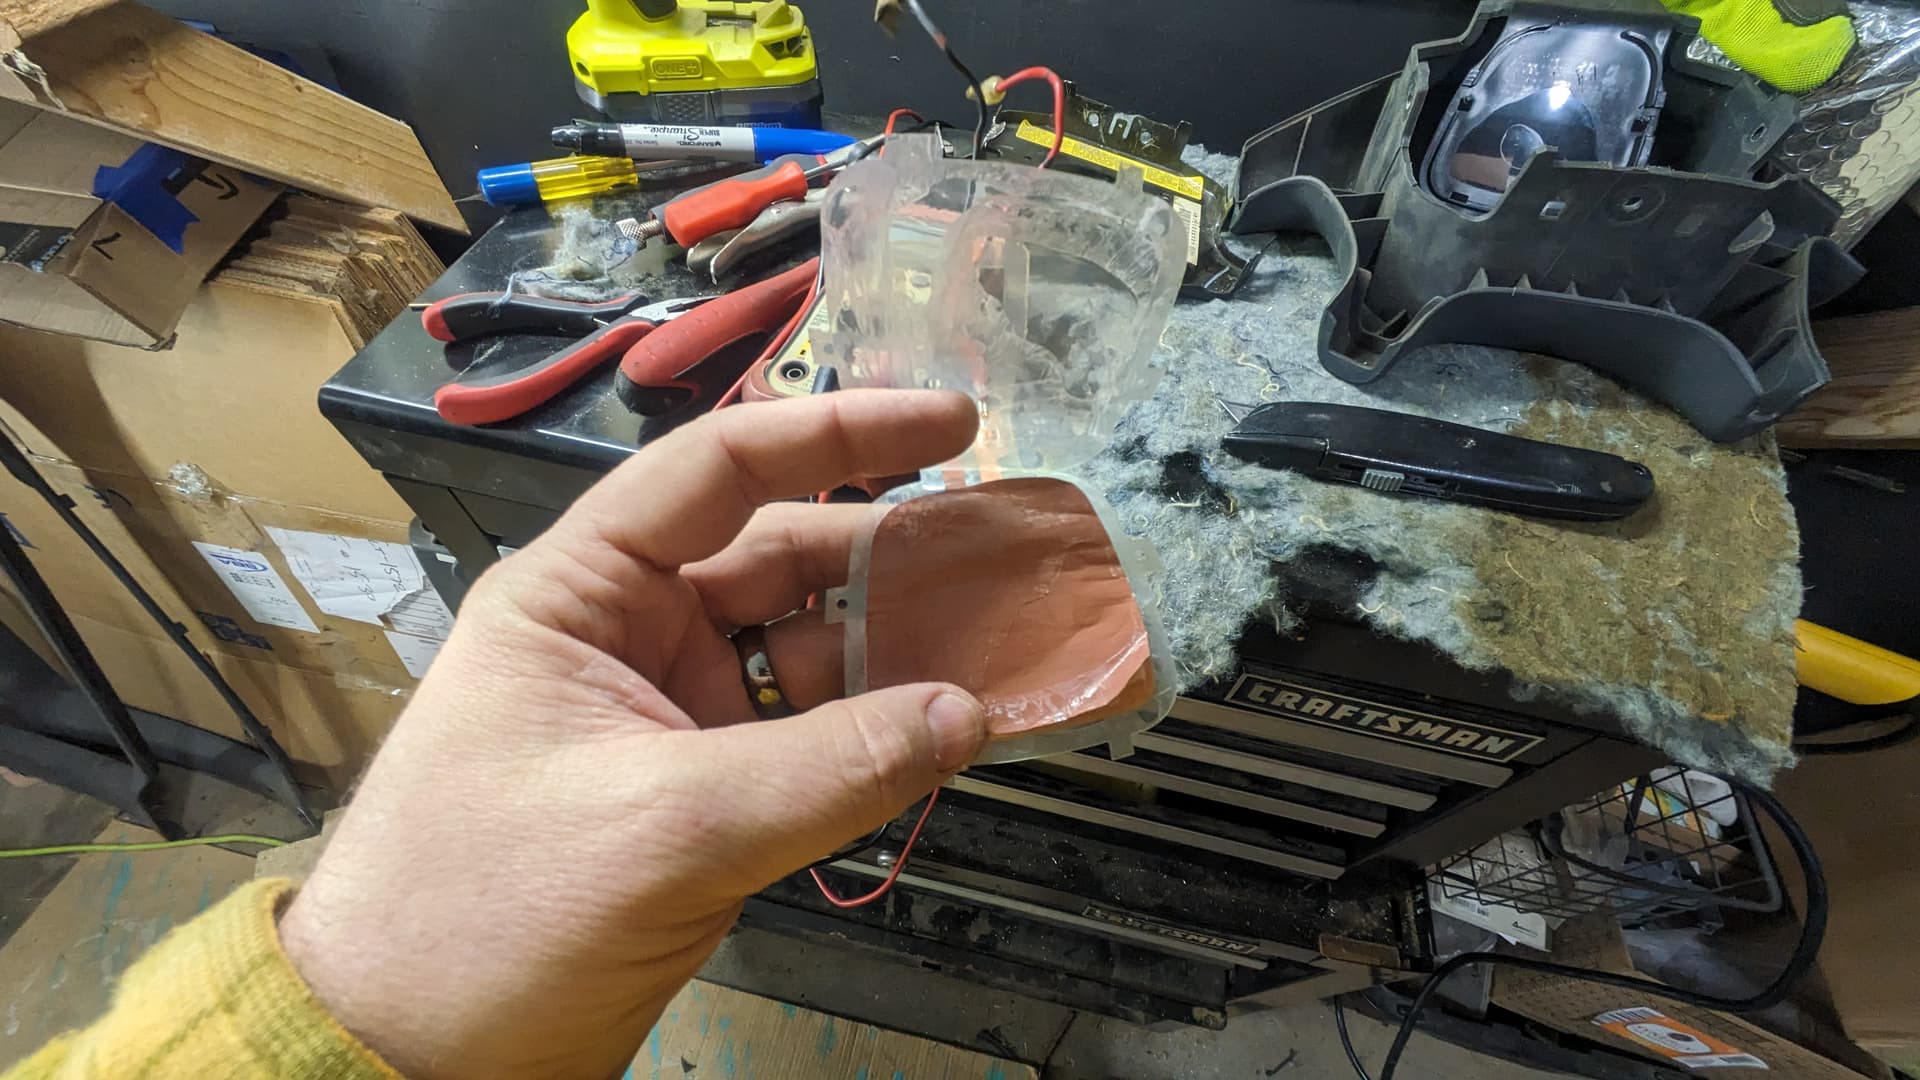
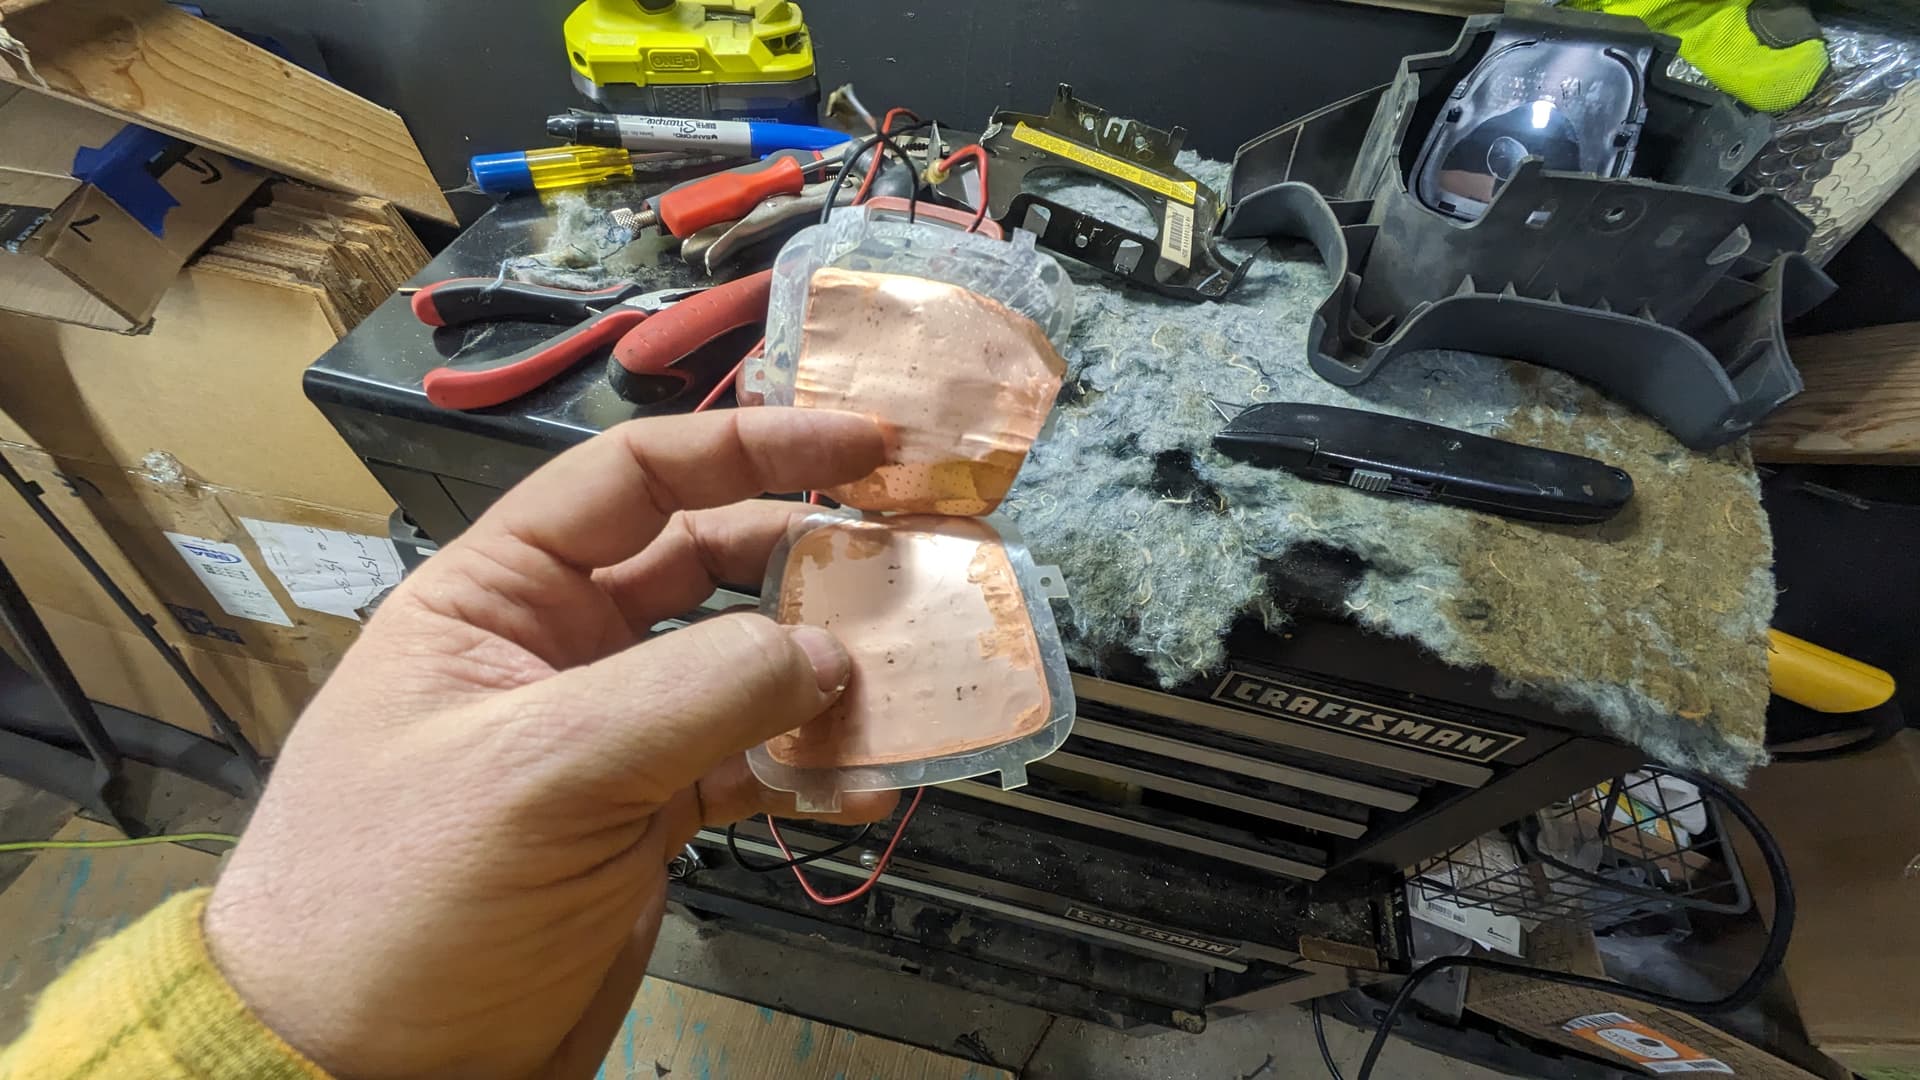
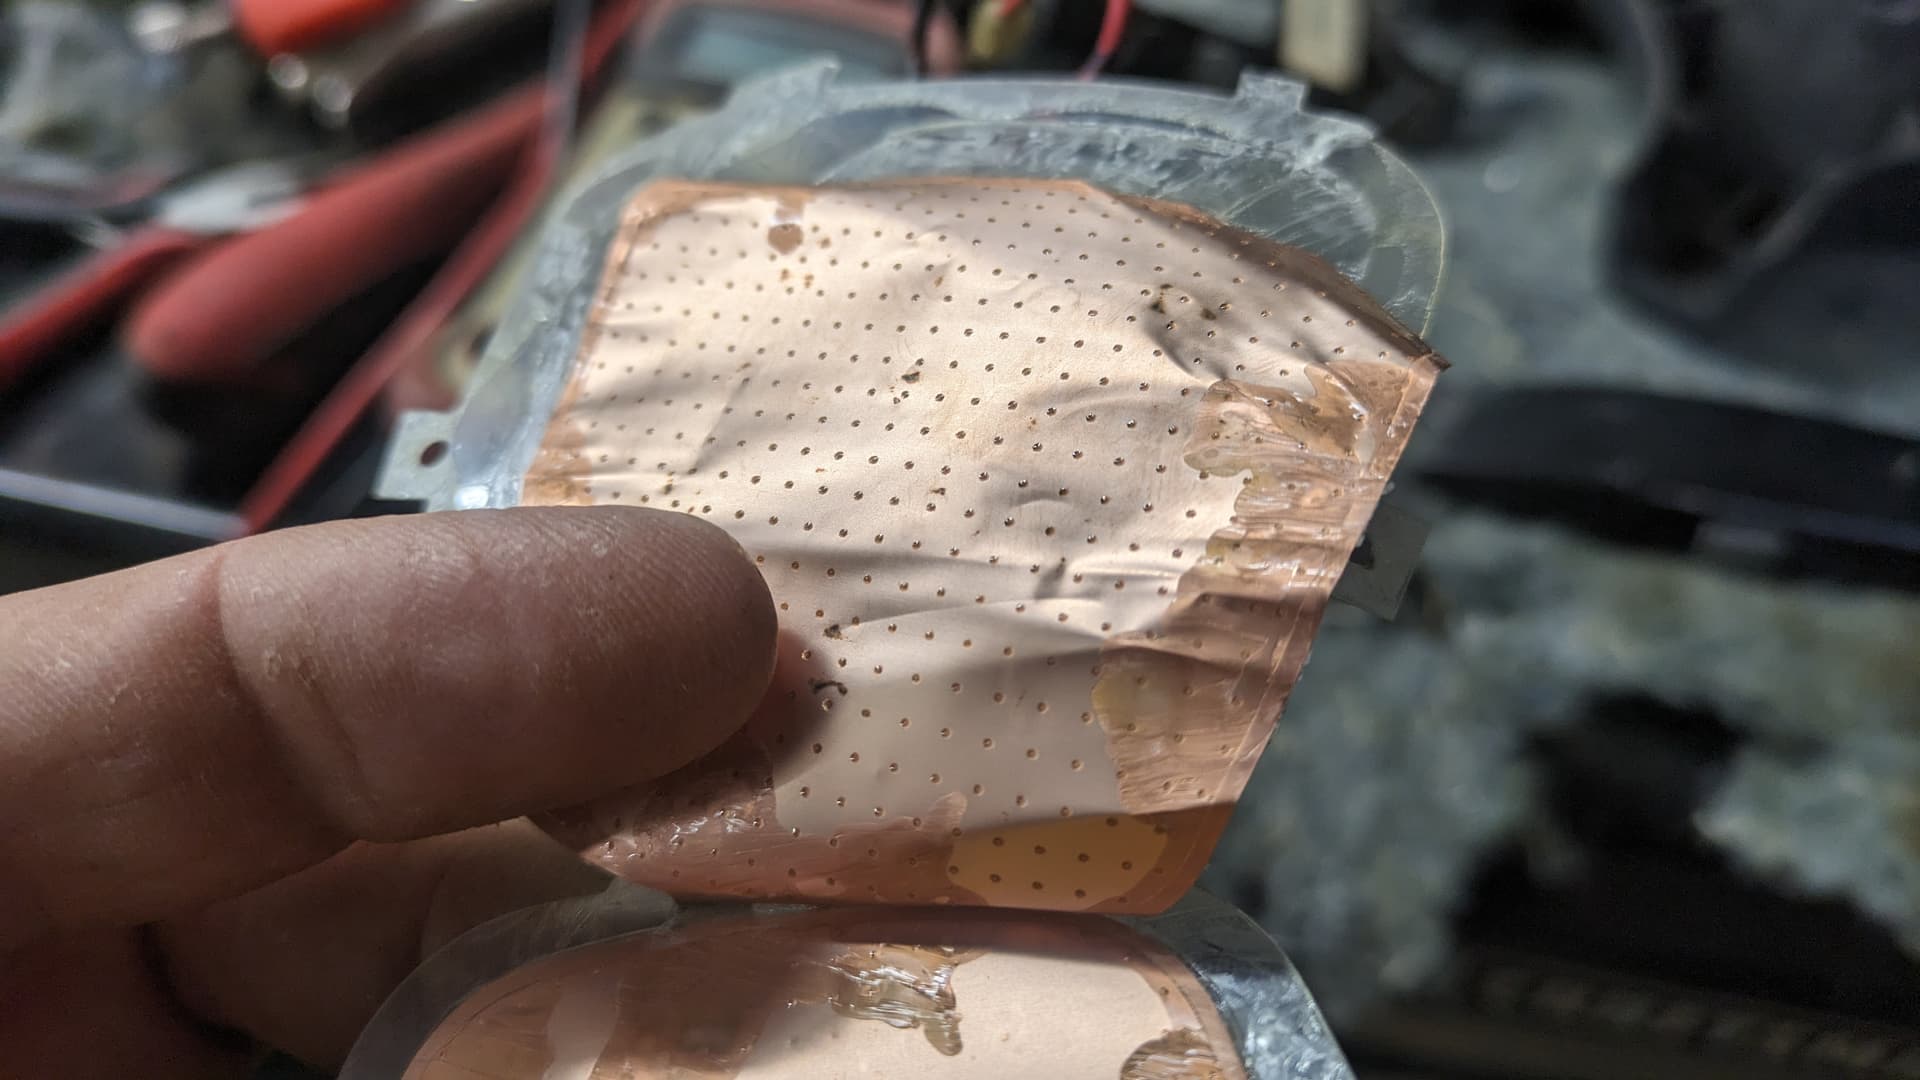
Luso Overland vs. OEM
Side-by-side, you can see how close the replacement core from Luso Overland matches the OE unit that came out. (Which was clearly only leaking from the 25-year-old rubber hoses connecting things.) The end tanks might be a little smaller, and the pipe on the right is crush-bent just a bit too close to the tank to be a drop-in solution.
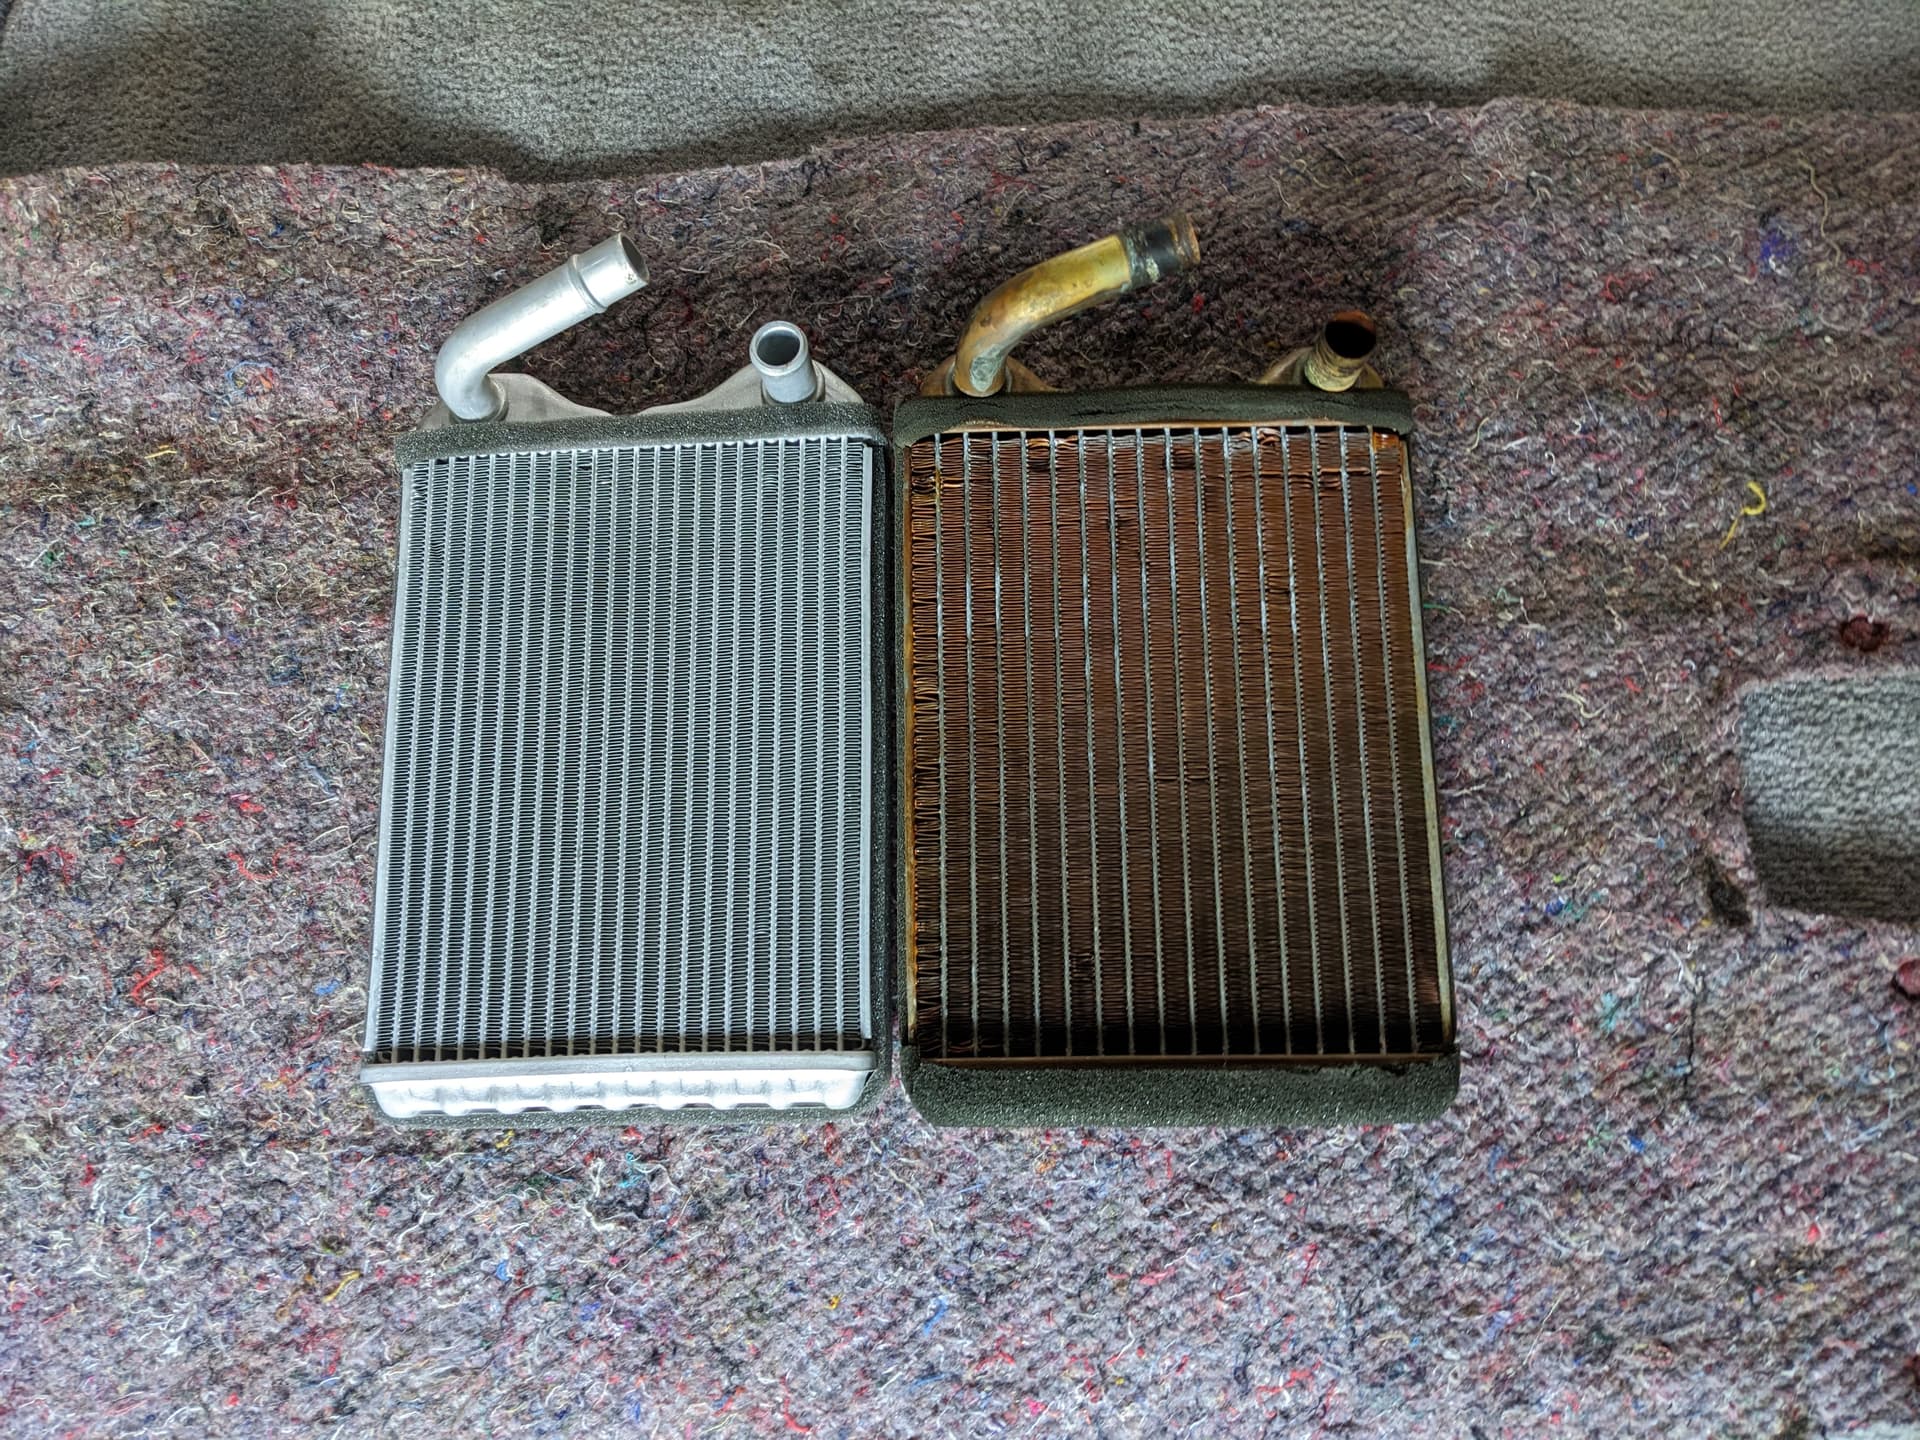
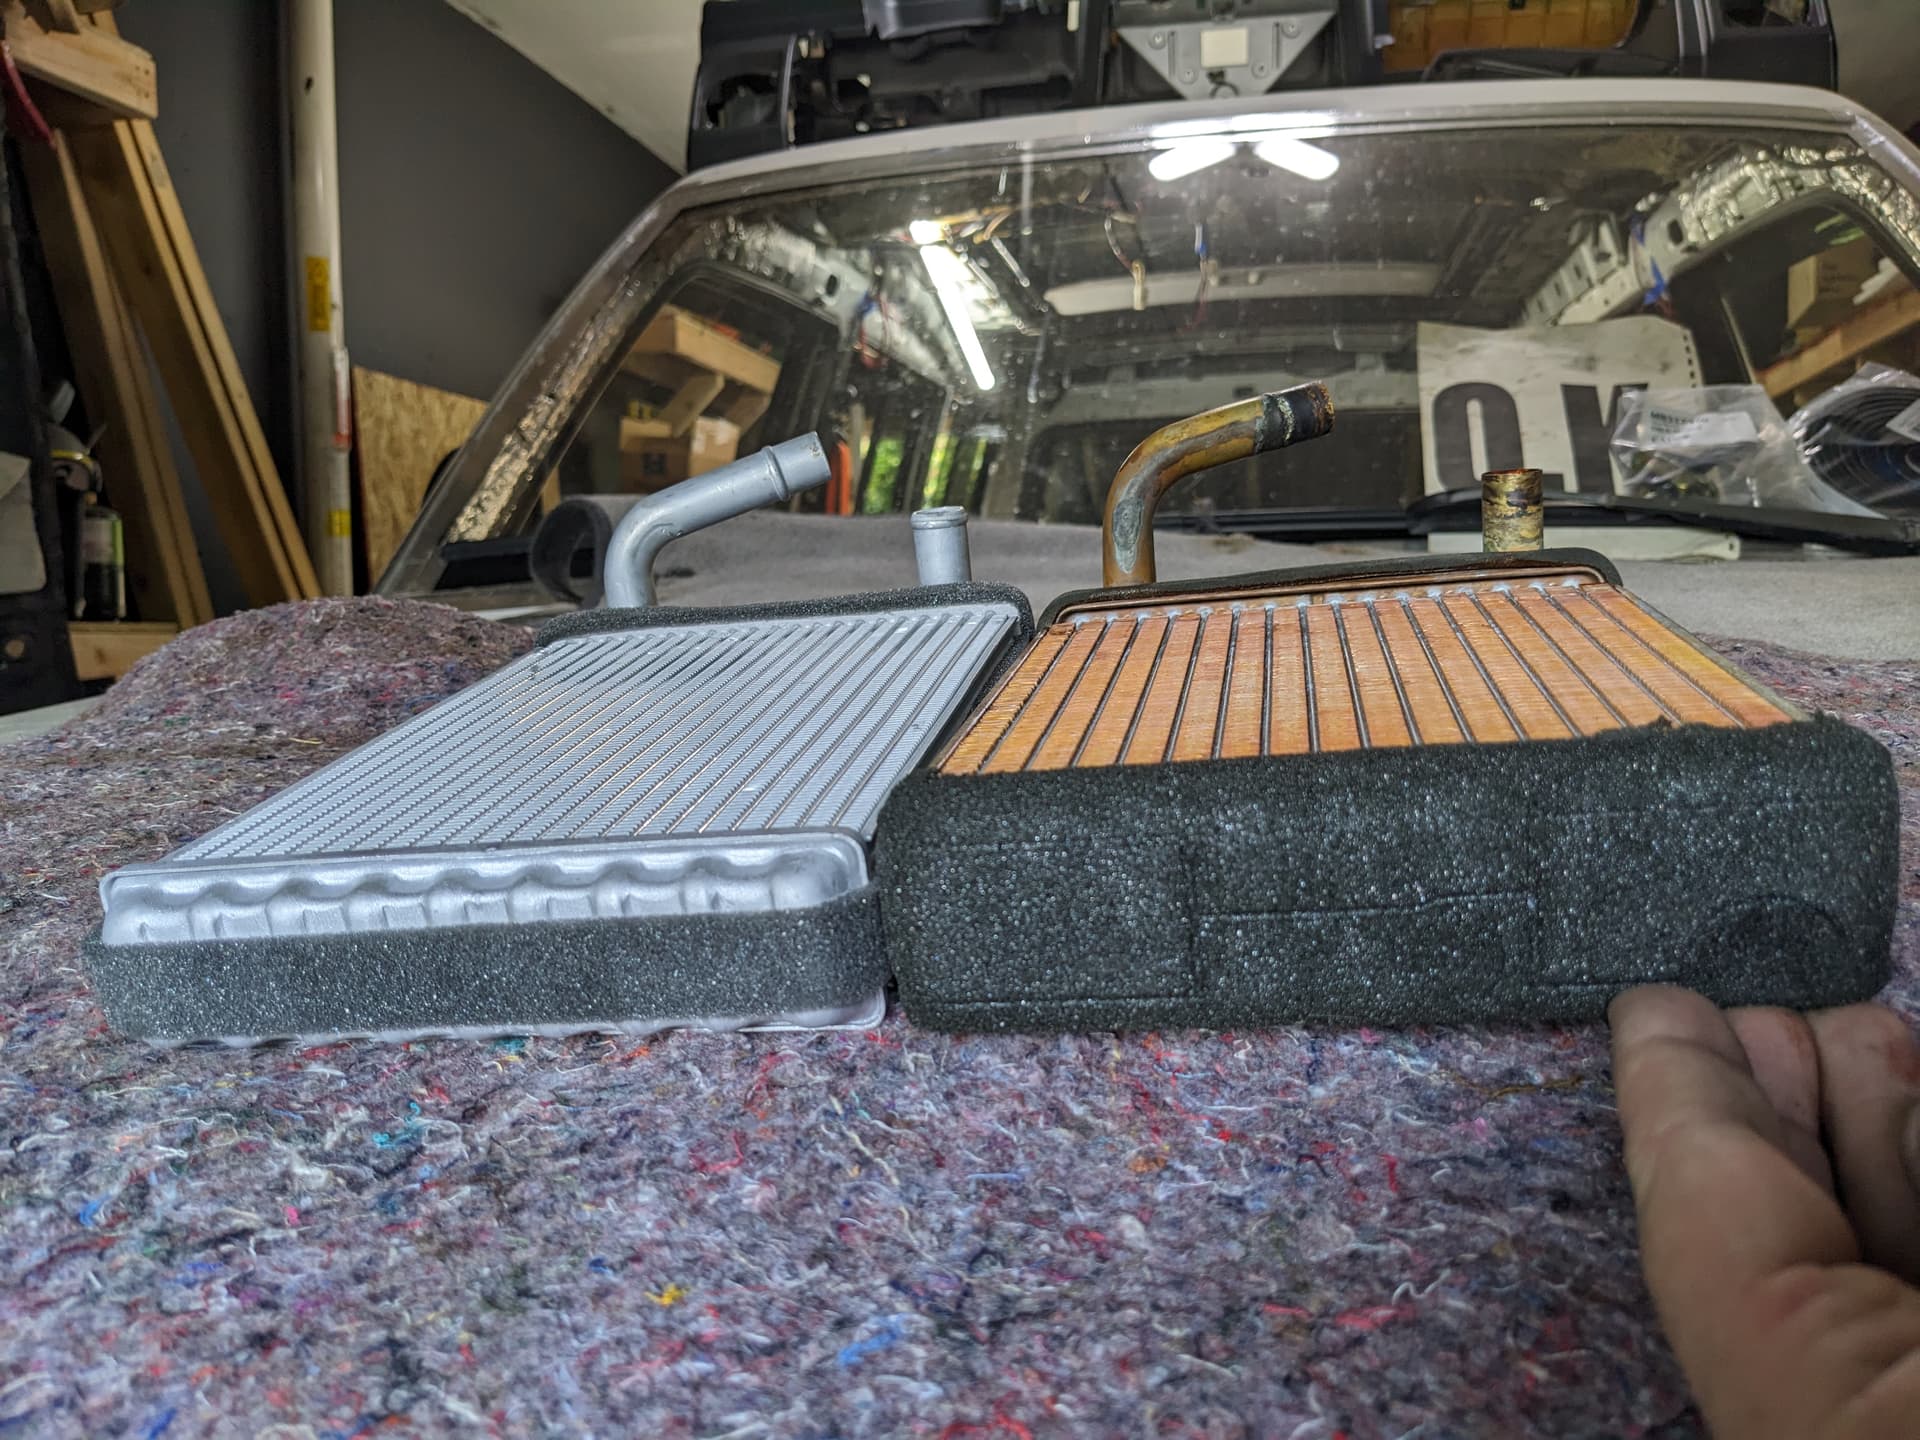
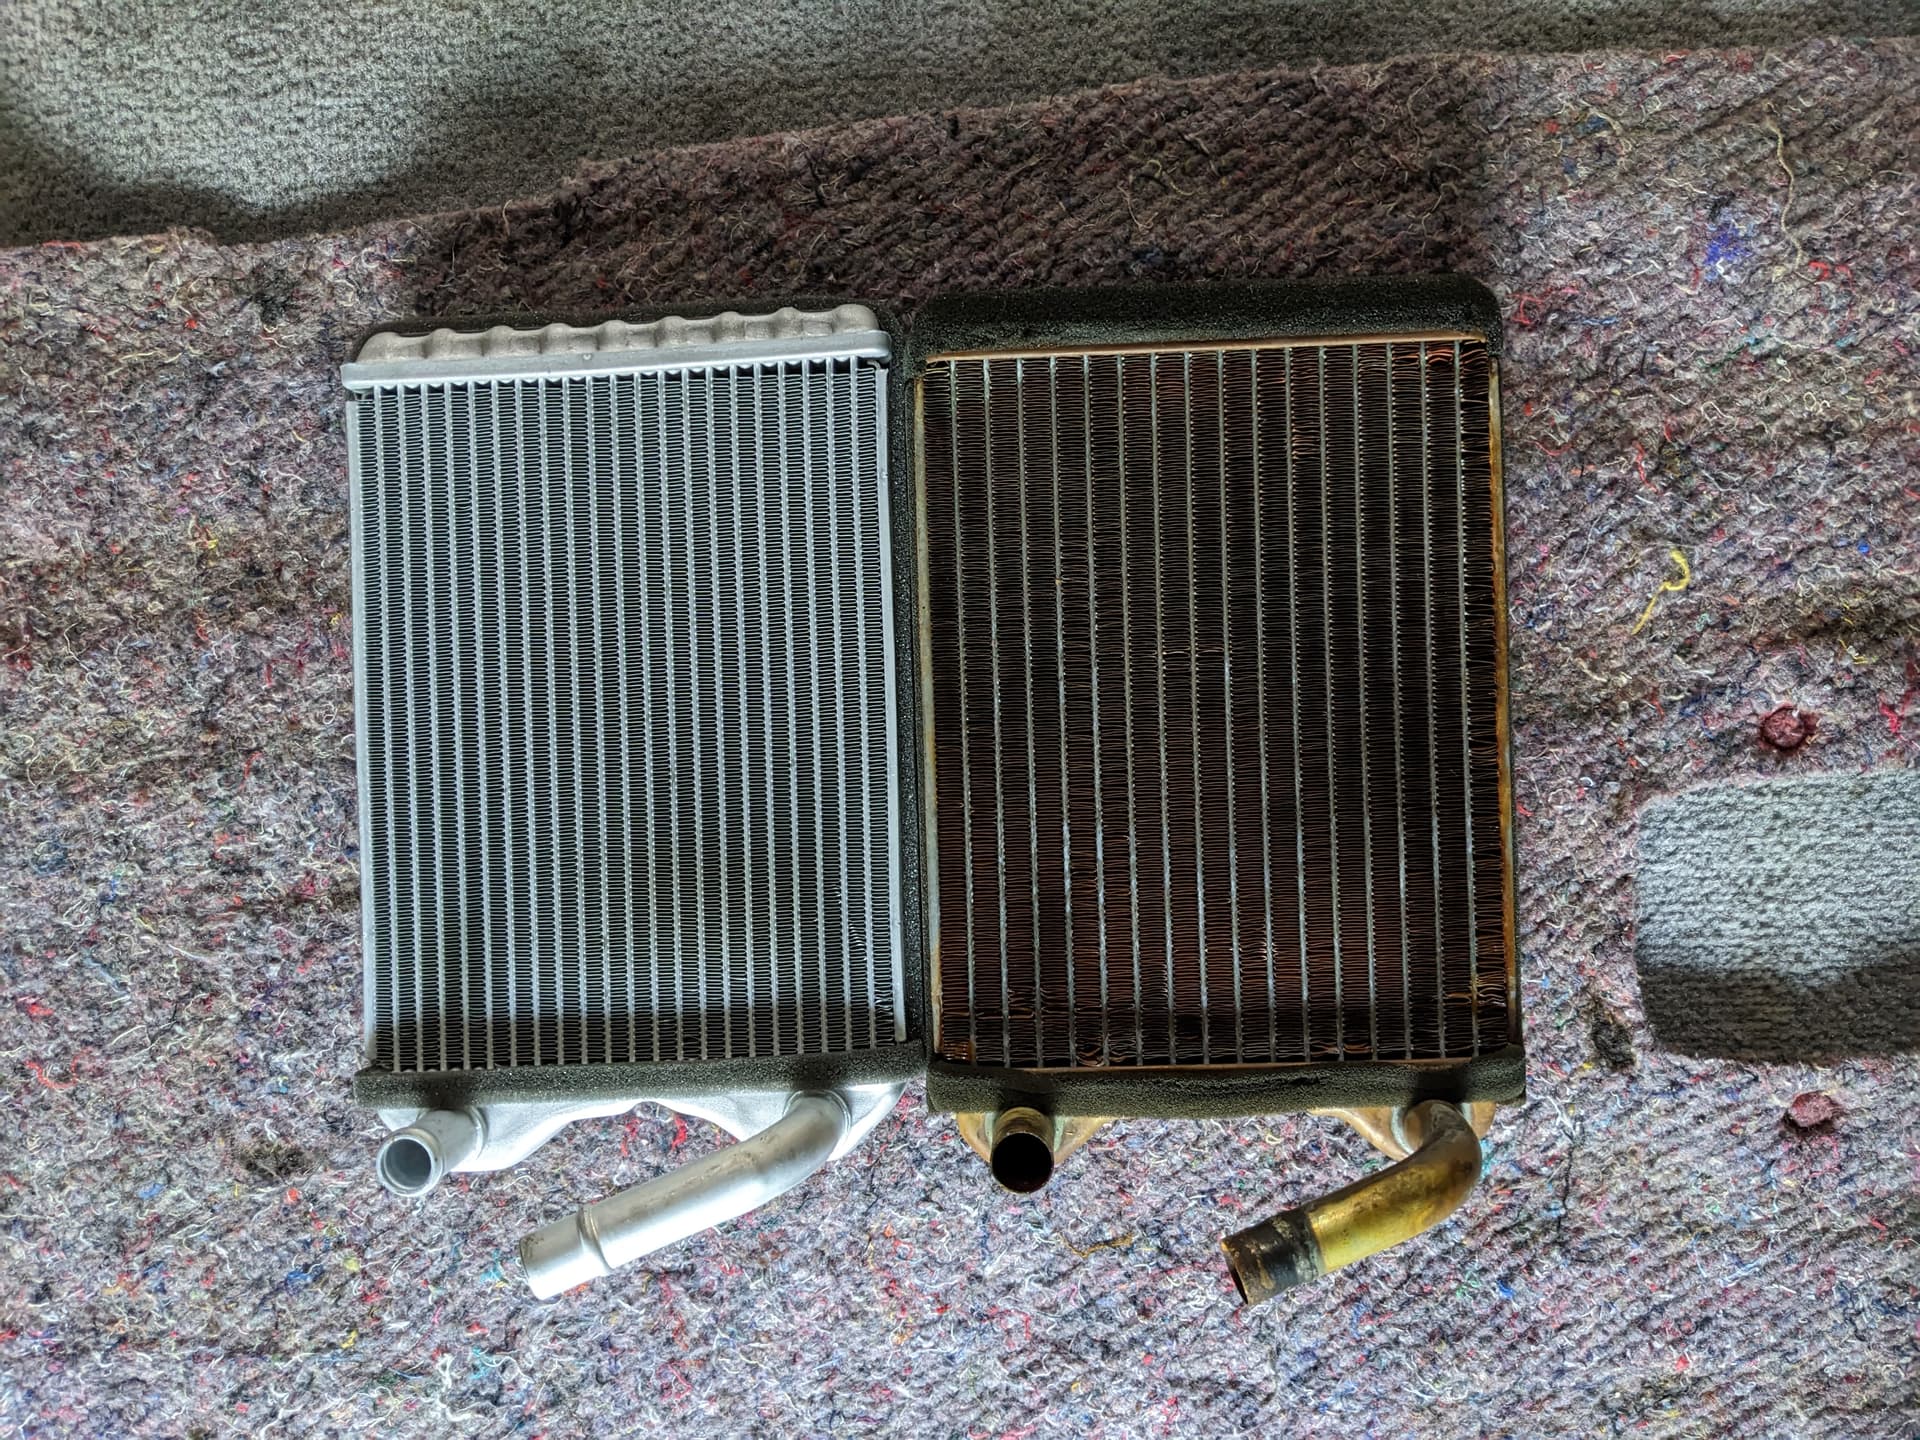
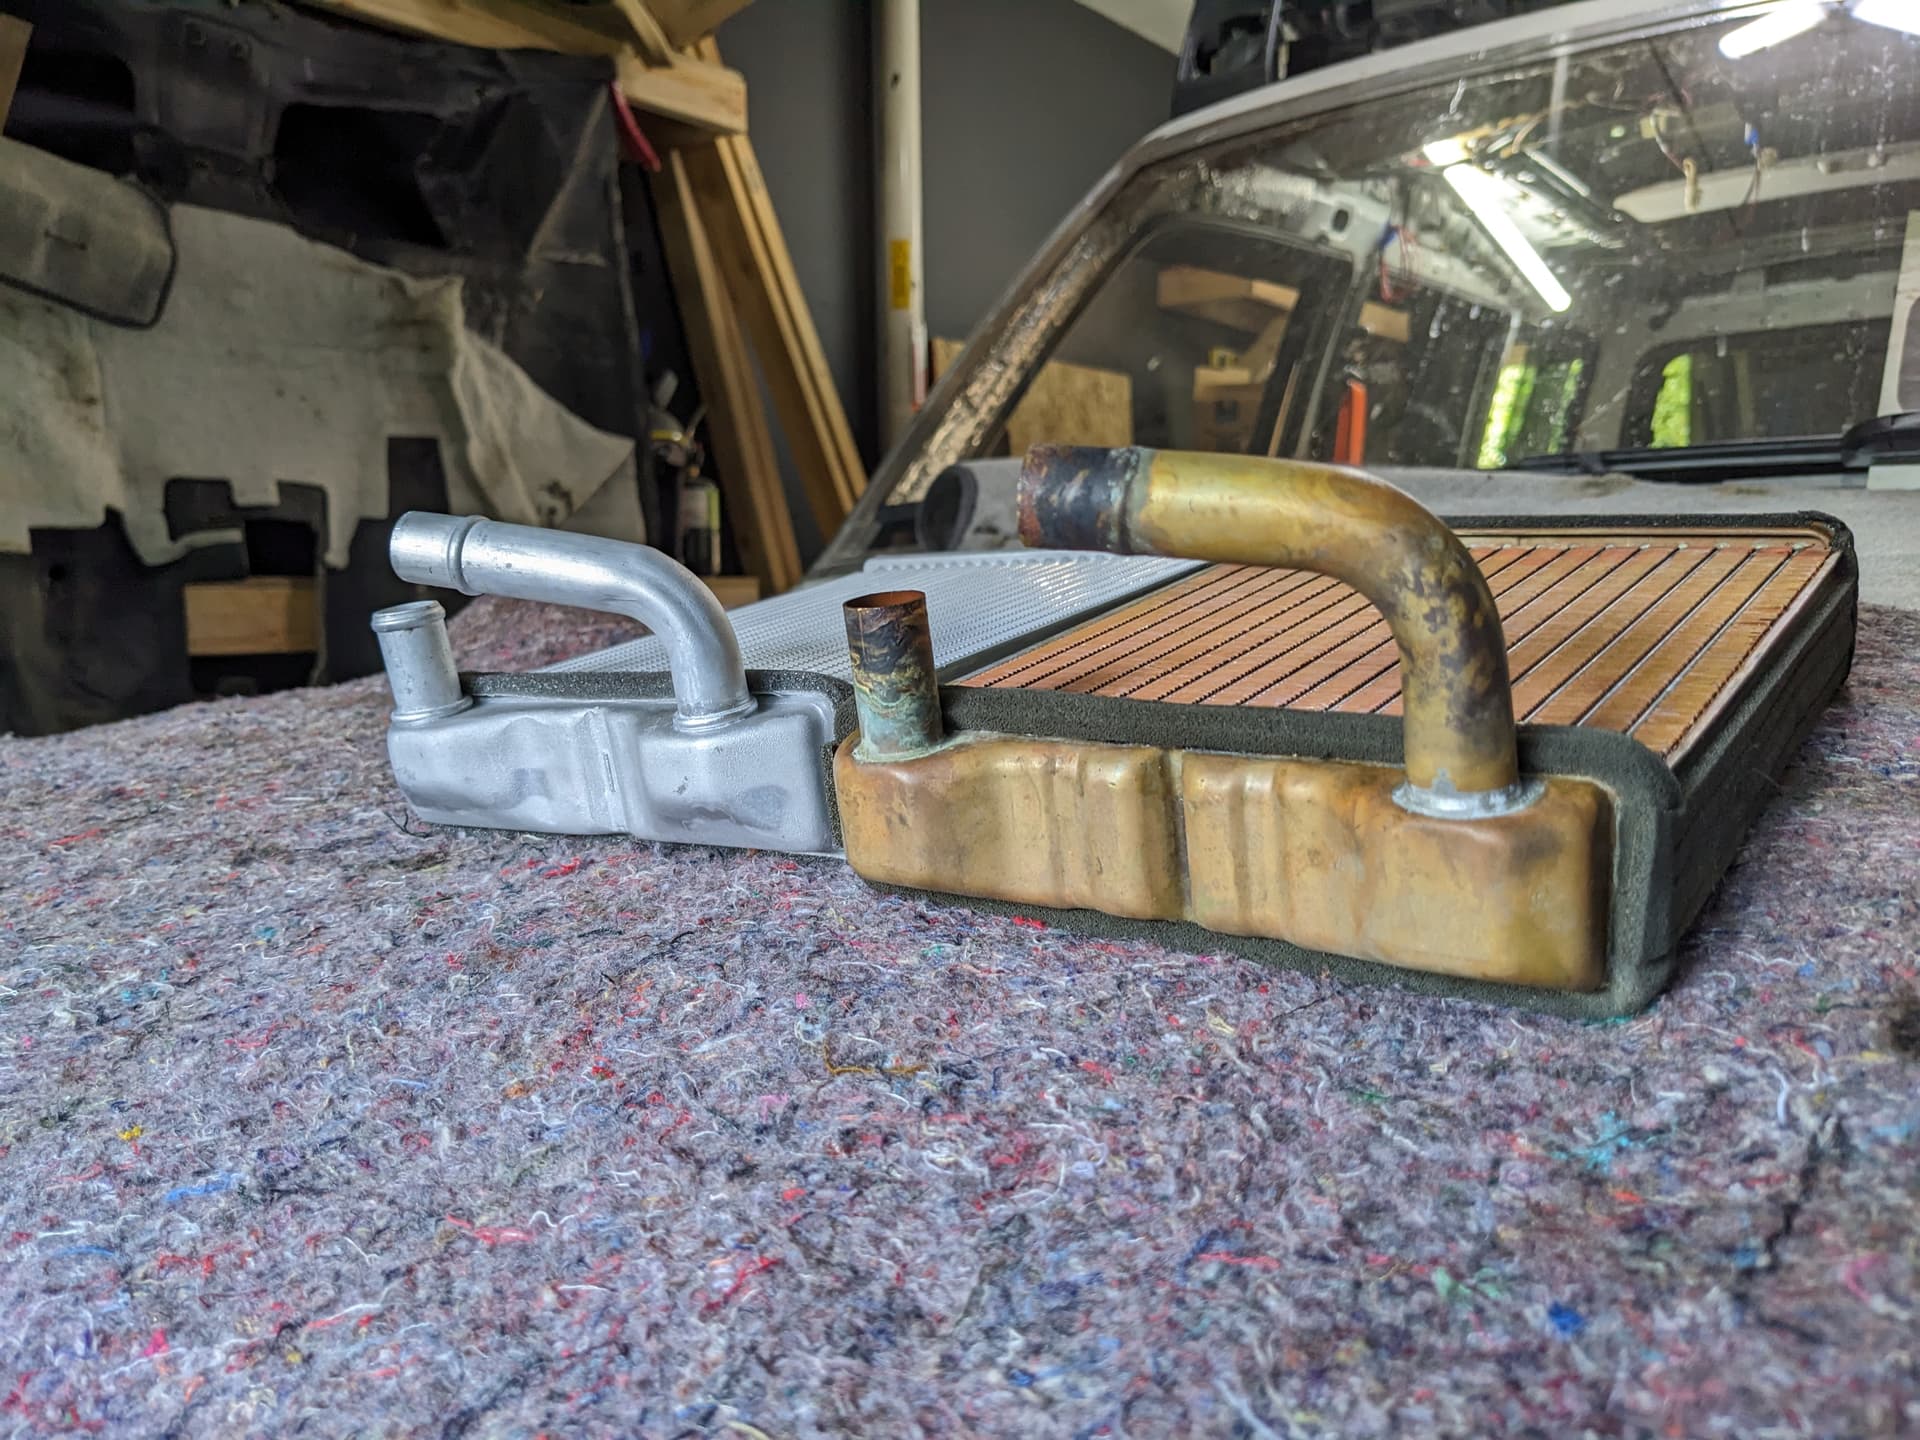
I ended up using the corner of my new workbench and a paint brush handle as a mandrel to bend the pipe outwards enough to clear the heater box door control. Absent the opposing force of the bench, the pipe wanted to bend at the base where it’s welded to the tank. Considering I’d already mashed fins and am installing with a sketchy tube, I was trying to be careful.
Washing Dirt Away, Make New
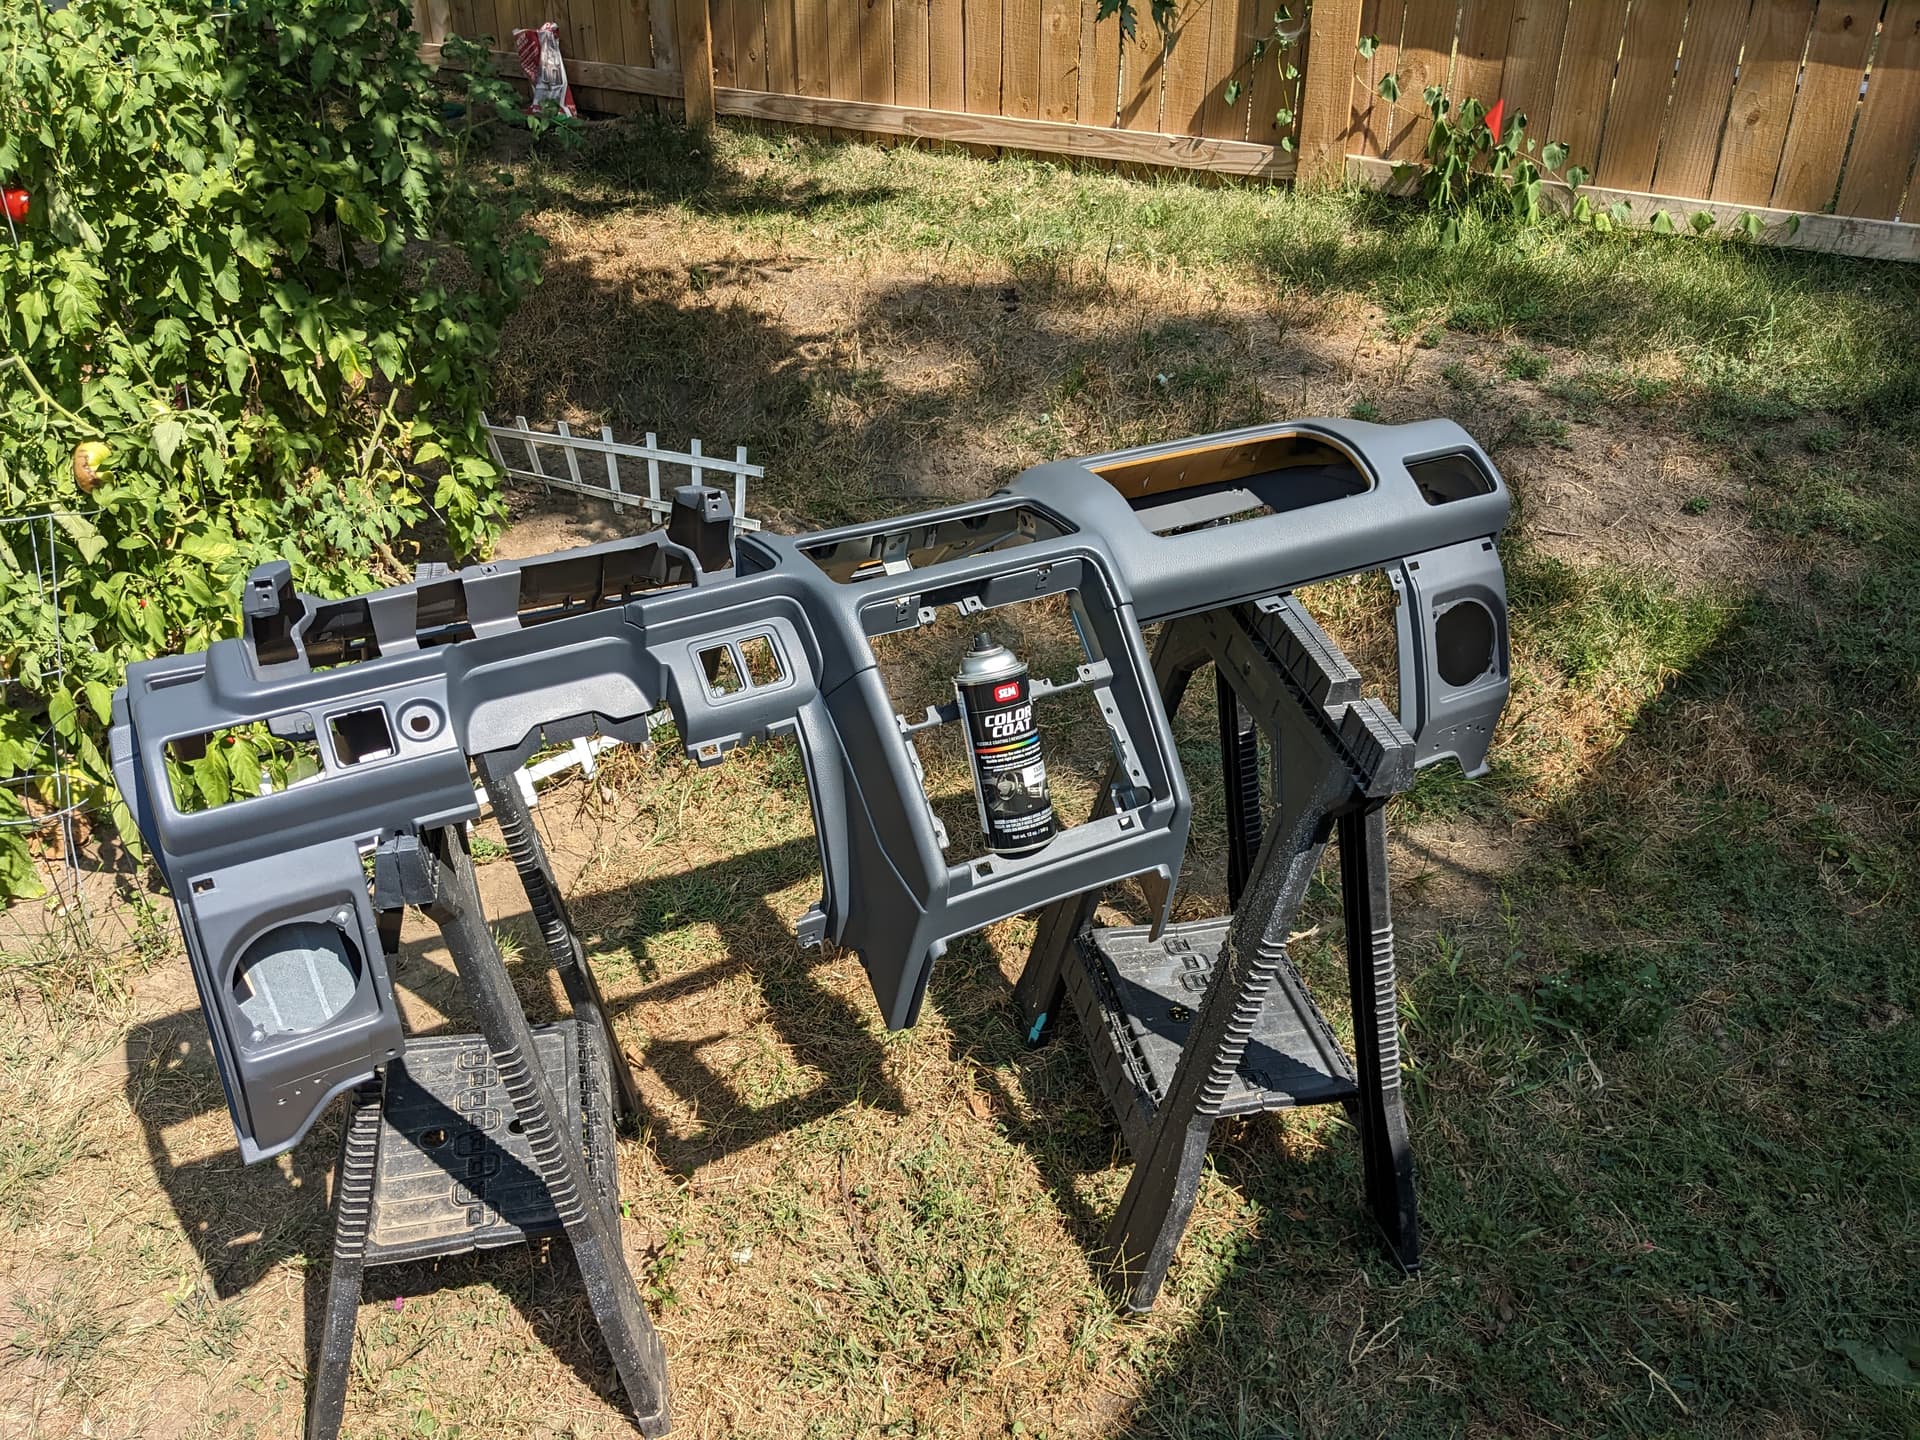
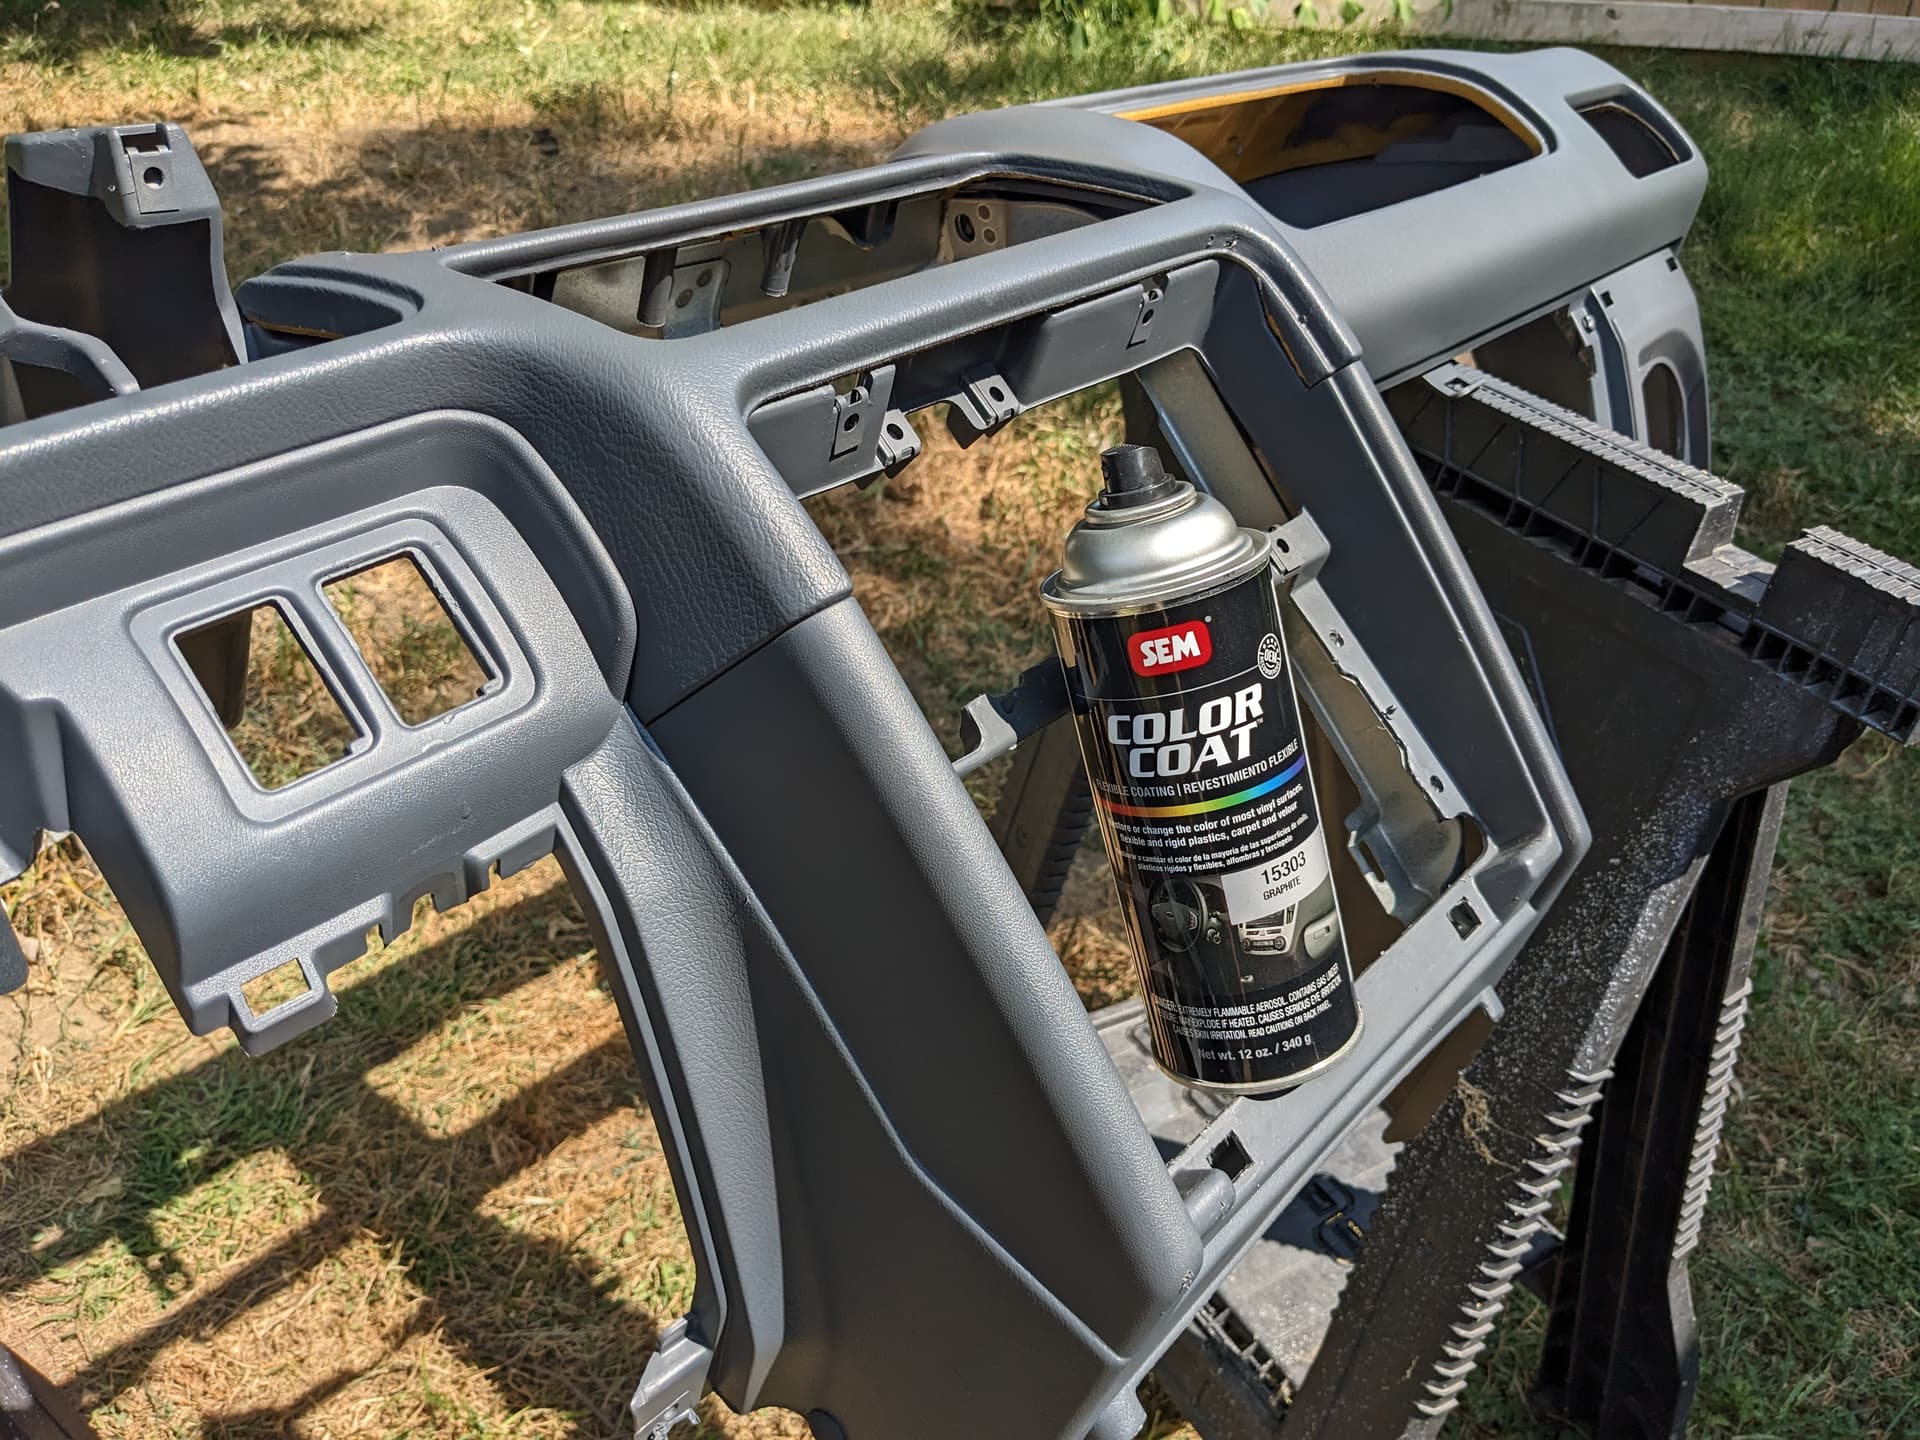
This just in: SEM Color Coat is the shit. I also have a couple cans of Duplicolor for plastic and vinyl (for the carpet), but this stuff was said to be the best for matching interior colors. I got lucky. Turns out the “15303 Graphite” color is almost indistinguishable from the original gray on my dashboard and interior trim. ![]()
It’s not a silver bullet, though. You can still see blemishes on the passenger airbag, but I believe these can be fixed by sanding things smooth and touching the wet paint with a texturized pad. Acouple light coats in the sun and things are looking brand new!

Other Mentionables
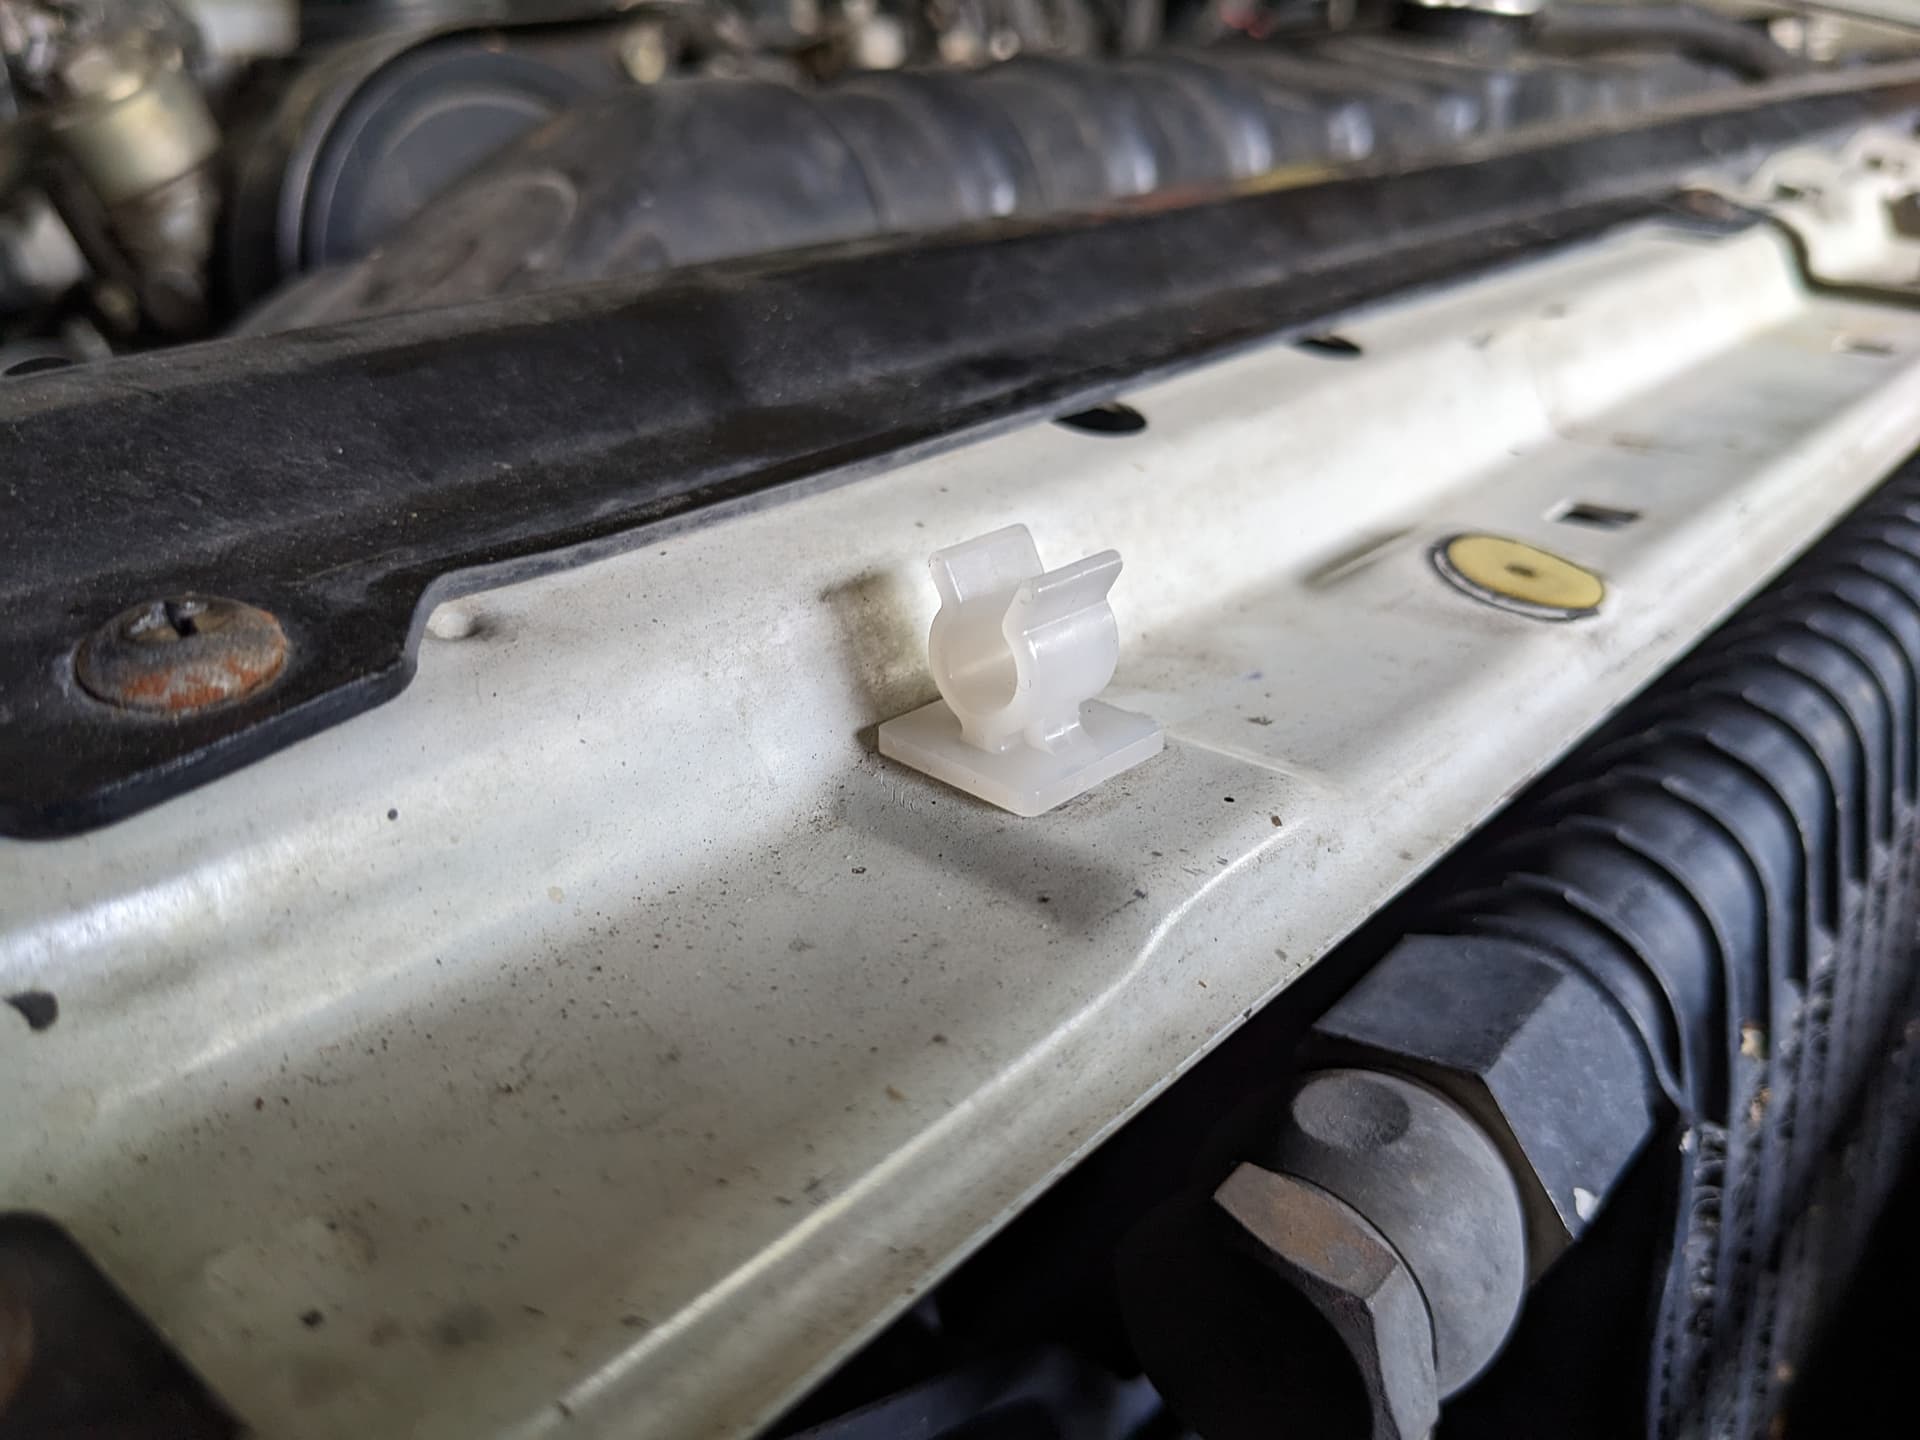
When Luso reached out to me to let me know they had the cores (but they weren’t as drop-in as they would like and he wanted to make sure I was aware), I decided to grab a couple other long-overdue bits he carries—the hood prop retainer clip and driver’s door check (so I can lose my wood block).
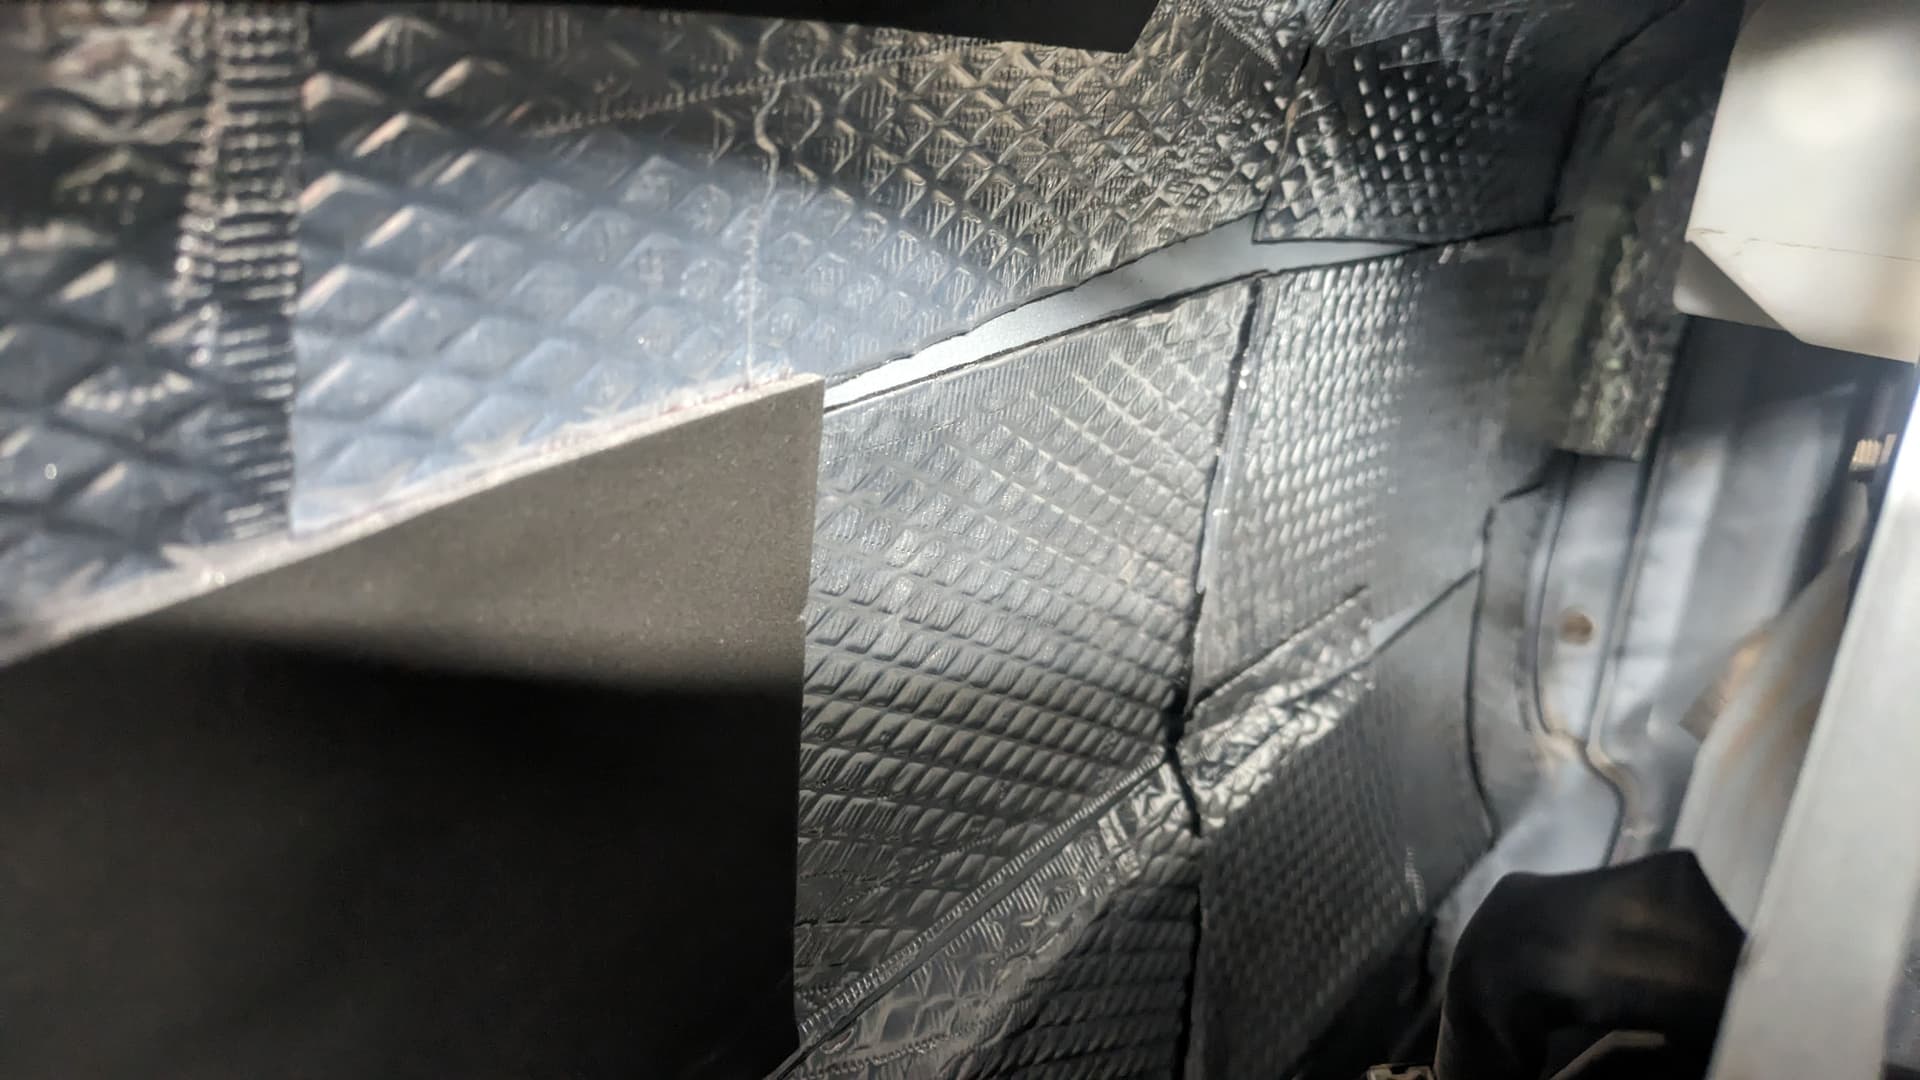
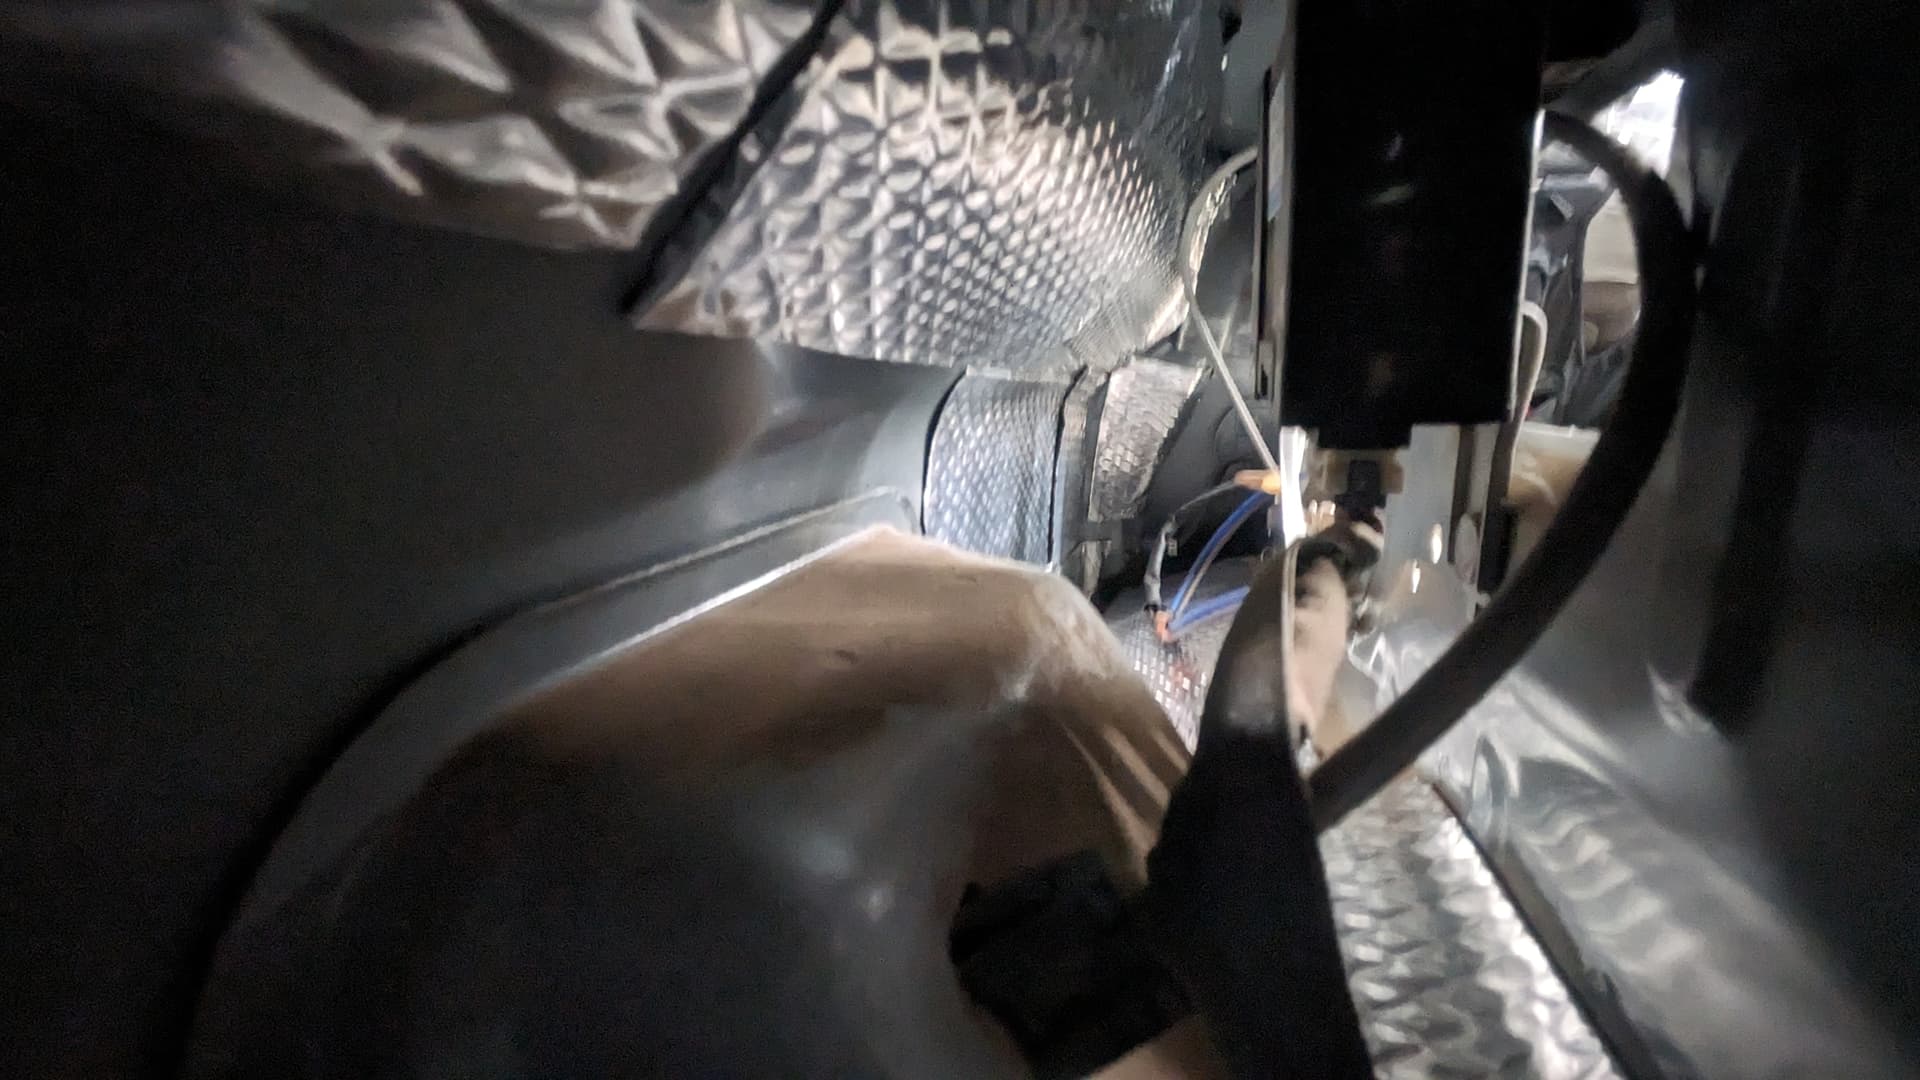
Beyond that, I started installing Noico behind the dashboard. I’m itching to install it everywhere, but still need to drop the sunroof so I can access the roof panel, and I’m concerned about either damaging any installed Noico while I’m working, if not making a bigger mess to clean up before I’m done.
And the beat goes on…
1 Like
Amazing work, dude!
1 Like
Journey to the Heater Core Ep. 6
Putting things back together better.
The heater core is in. I still need to test it before I reinstall the dashboard, but I’ve got another couple weeks before the second set of dash vents arrives. More on that in a minute. For now, the project is all about making all the stuff I’ve taken out better before it goes back in. #whatwould @boostedinaz do?
Last chance for pressure washing & outdoor painting
90-degree weather returned to Iowa City this weekend. A week from now, the highs will only be in the upper-50s. This was my last chance to do outdoor things that need warm and dry conditions—like dying the rear carpet and painting some more interior pieces.


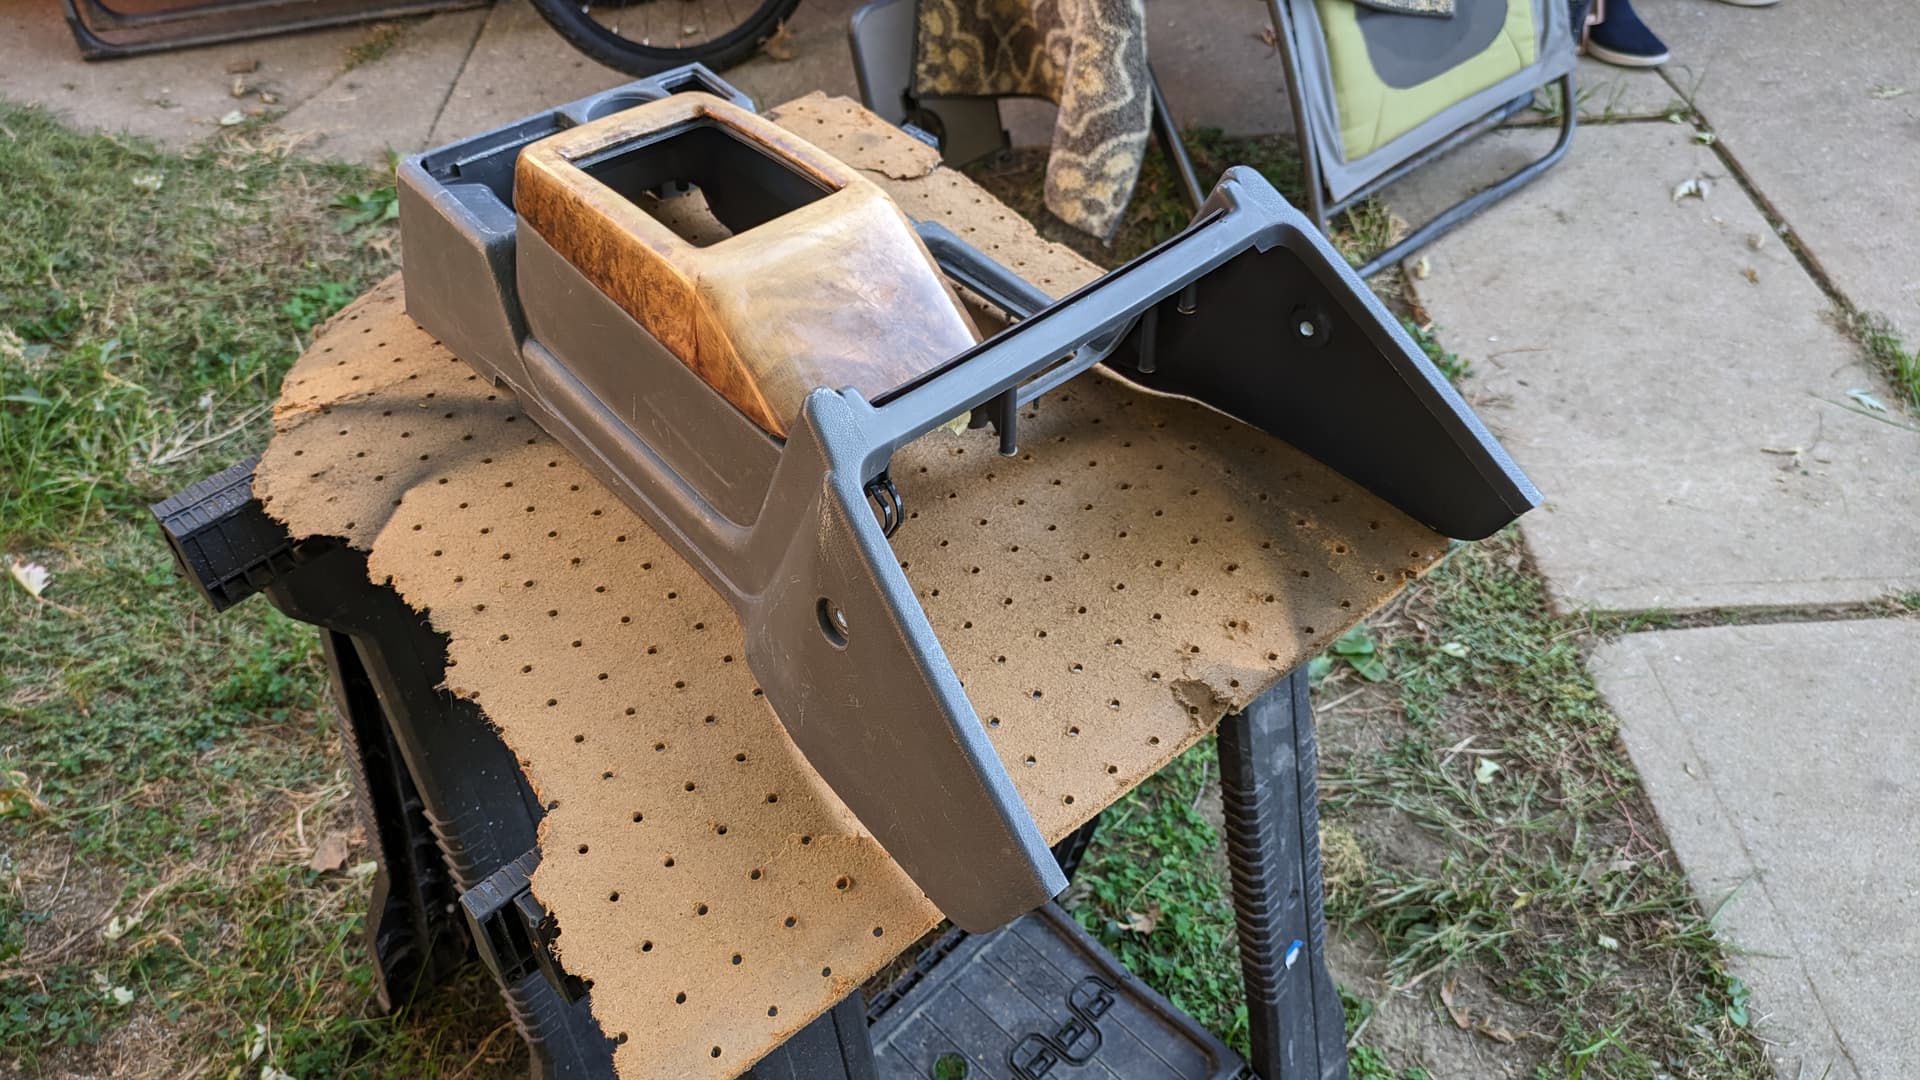

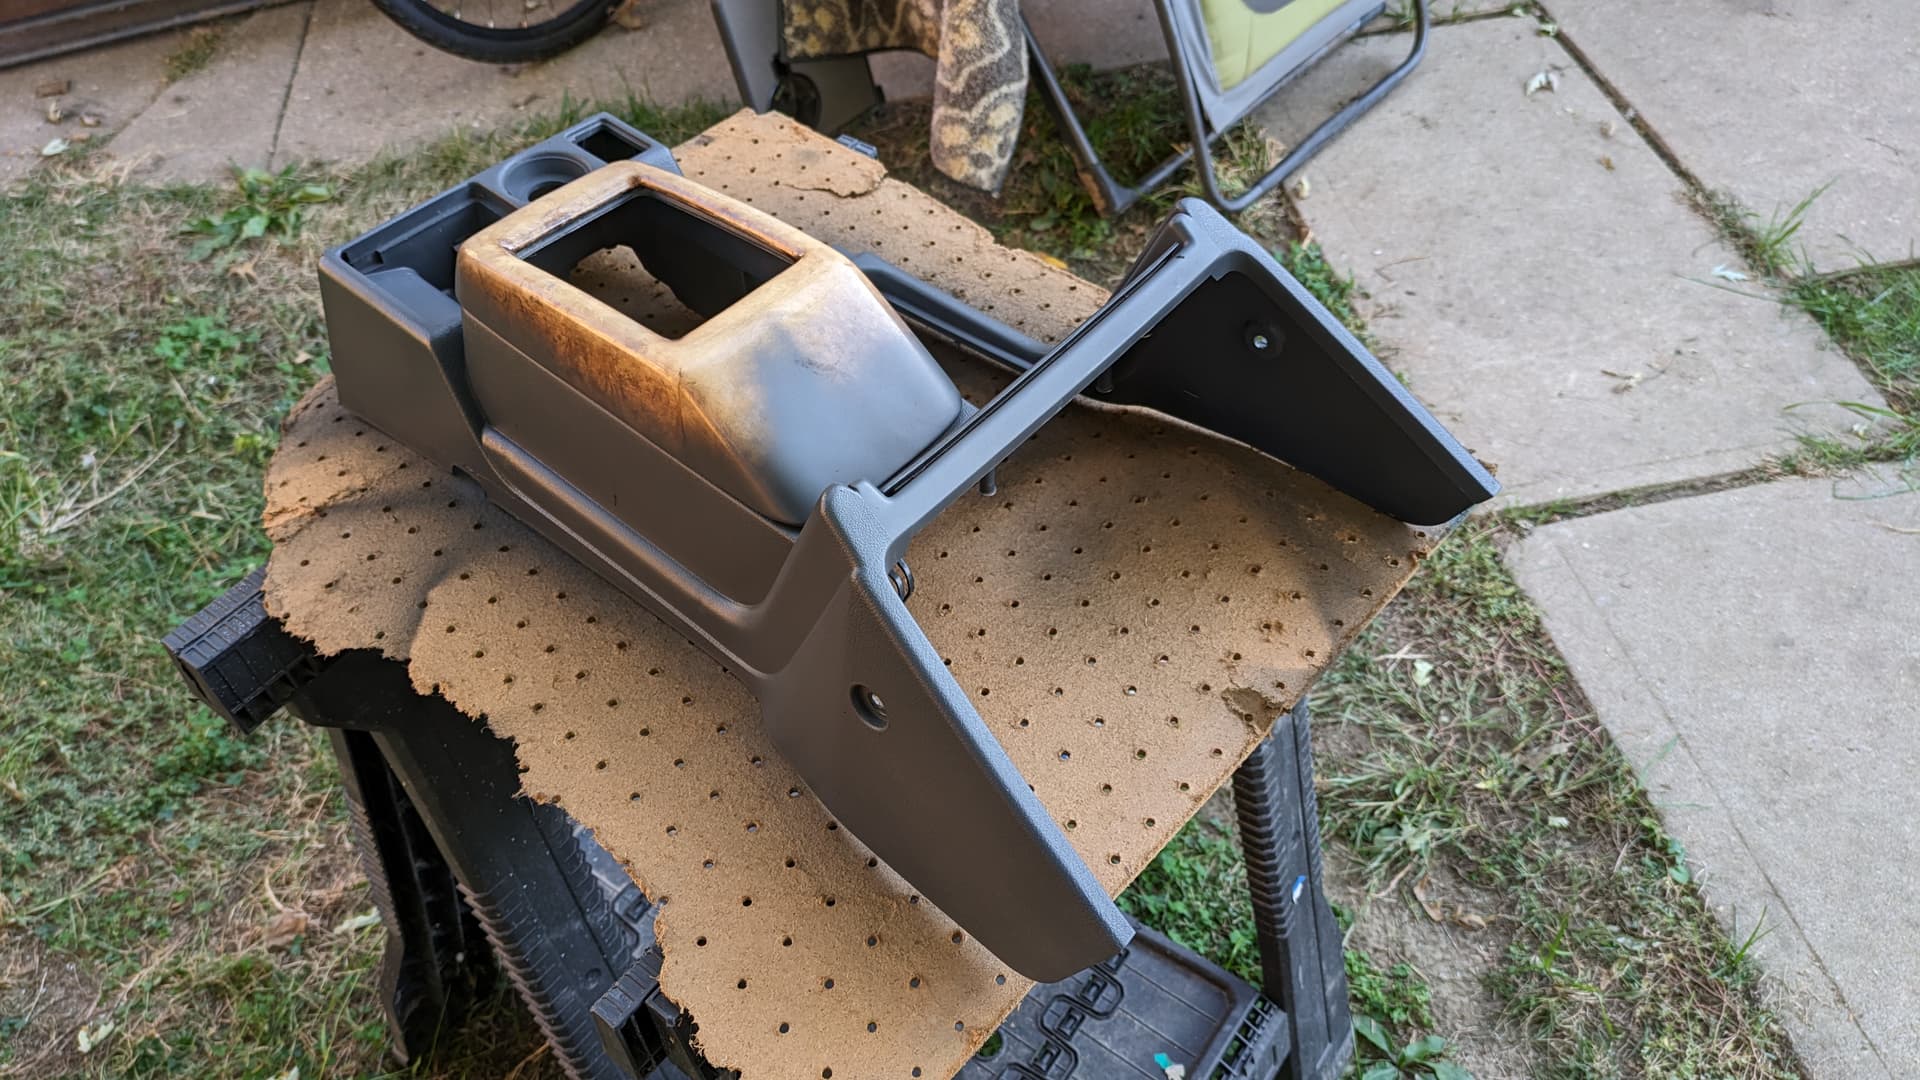
I pressure washed the rest of the interior trim panels and used the last of my first can of SEM paint/dye to make sure the center console and stack have plenty of time to dry before installation. I tried using a heat gun to fix scratches before painting (apparently this is a common thing), but didn’t have much luck and didn’t want to risk irreversibly damaging critical pieces and just painted.
PS: I’m covering all the fake wood trim with silver or brushed aluminum.
I might be overdoing it with the LEDS
In addition to replacing the heater hoses in the engine bay, I think I might also need the HVAC controls hooked up to make sure everything is back together and works right. My controls were all kinds of broken behind the scenes, but I had a spare from my last junkyard run back in Phoenix.
I’ve got LED bulbs for the factory sockets, but I’ve also got a 16-foot reel of warm white, adhesive-backed, SMD LEDS that could work. I don’t remember if they’re dimmable or not, so I’m gonna chicken out on this approach, but it’s sure neat to look at.
Speaker & wiring upgrades
Earlier this summer, I lucked into a brand new set of JL Audio 6x9s. My mother-in-law ordered them by accident, missed the return window, and gave them to me. As much I’ve loved the Infinitys I had installed right after buying the truck, the JLs are beefier and I’m excited.
At the same time, I’ve never been thrilled with the Kenwoods in the doors up front. They’ve never been able to keep up with the Infinitys, which means my soundstage has been biased to the rear. Fezzik originally came with the 8-speaker Infinity system, but the amp and disc changer were removed long before I got the truck.
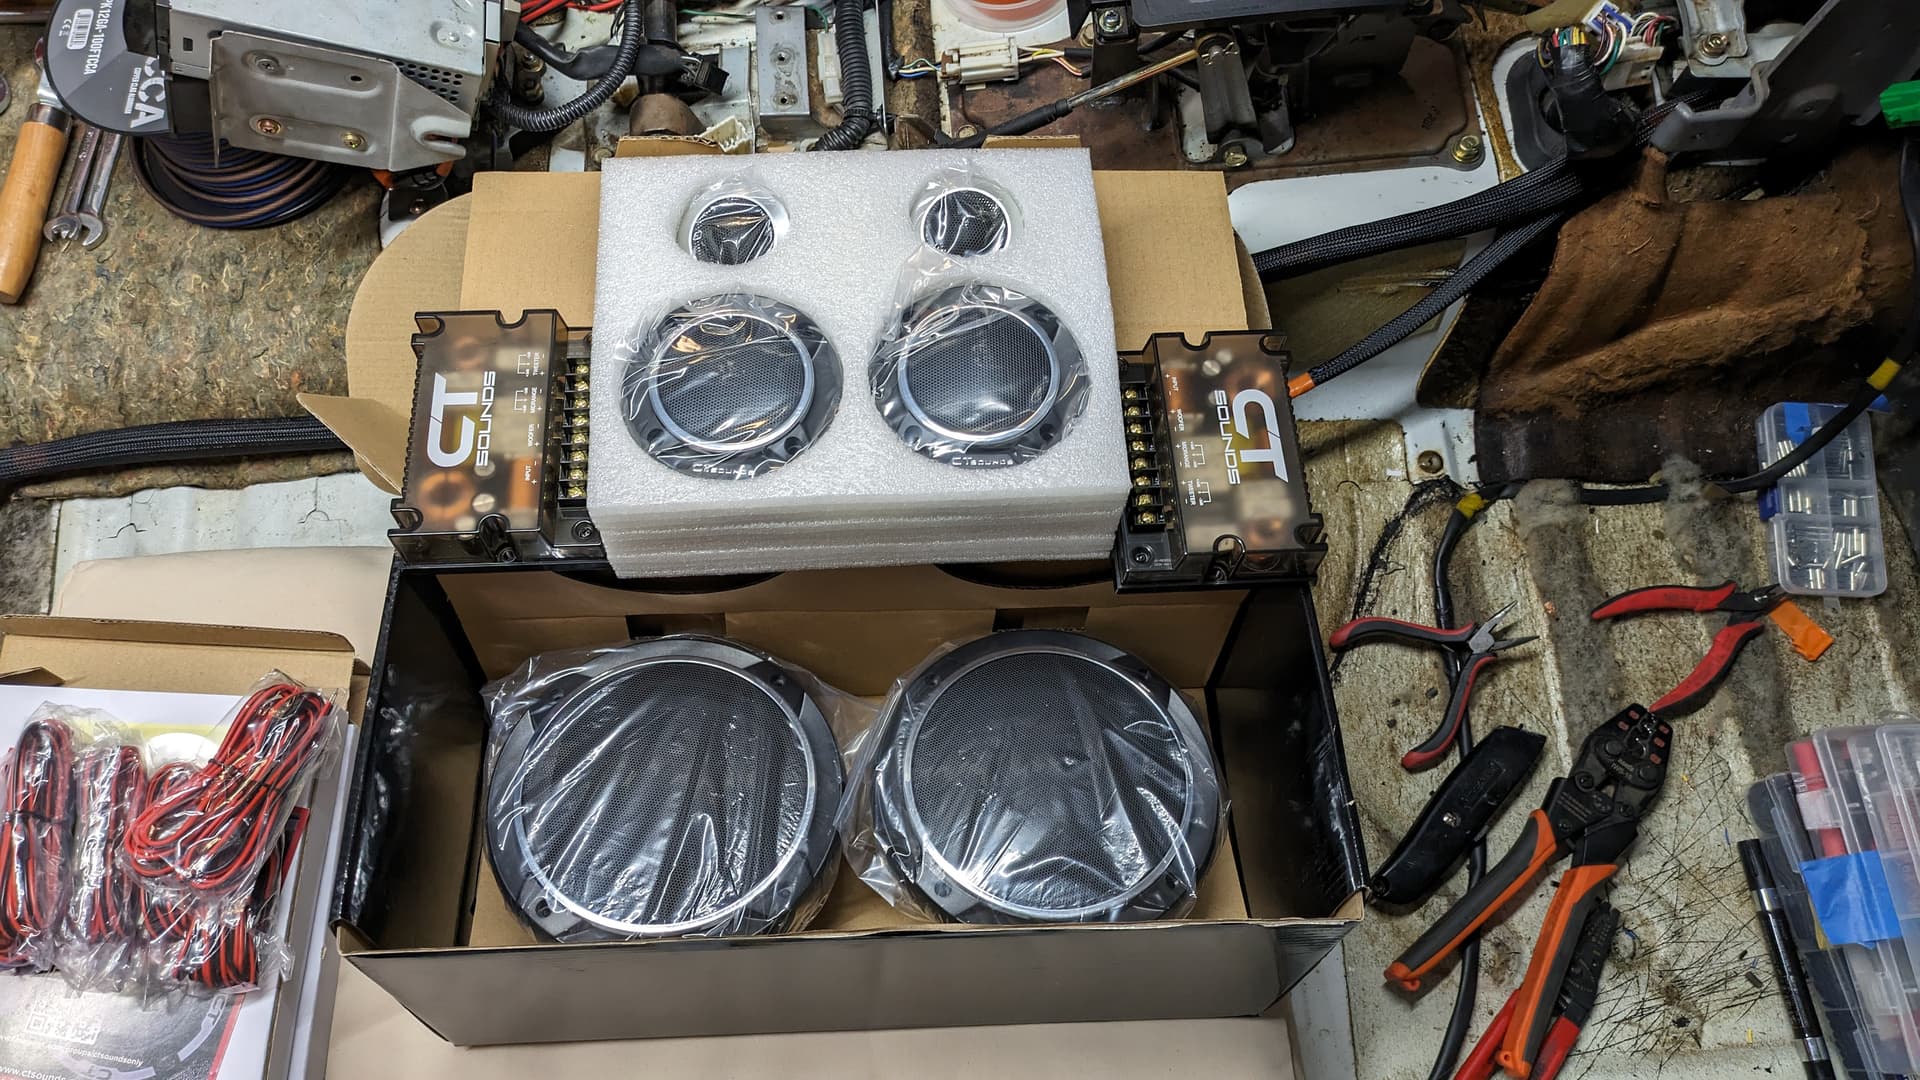
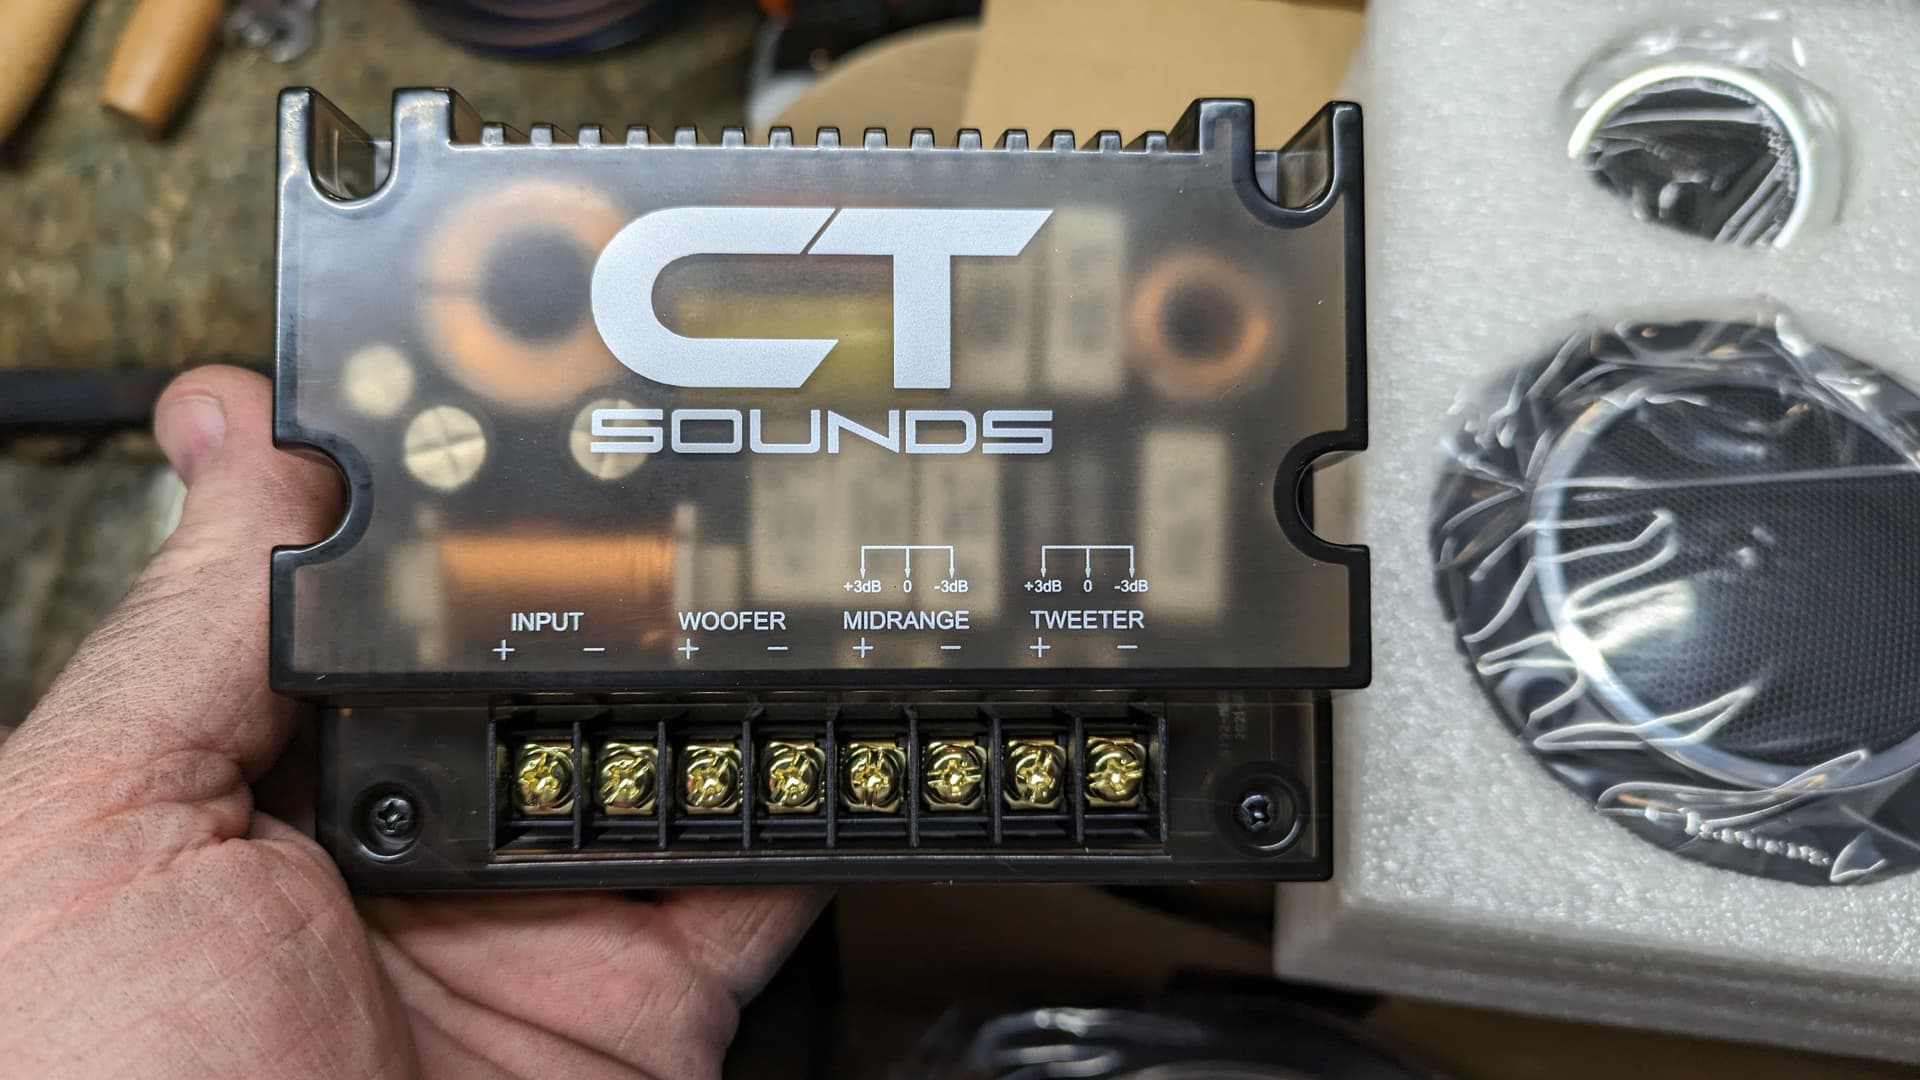
Considering how much time and effort (and money) I’m investing into re/prewiring the truck, I figured it was worth looking into component speakers. As expected, these were generally a lot more than I want to pay for speakers, but I found these CT Sounds 3-ways on Amazon for under $250. The reviews look good. The hardware feels good. I’m cautiously optimistic.
The factory tweeters have never worked for me, and I didn’t even know there were blown speakers in the lower dash. Between these 3-ways and a powered Cerwin-Vega sub (that I hope fits) under the passenger seat, I’m hoping to get closer to the 12-speaker BOSE system in the Mazda. ![]()
Not sure where I’m going to put the crossovers, though. Any ideas?
Other mentionables…
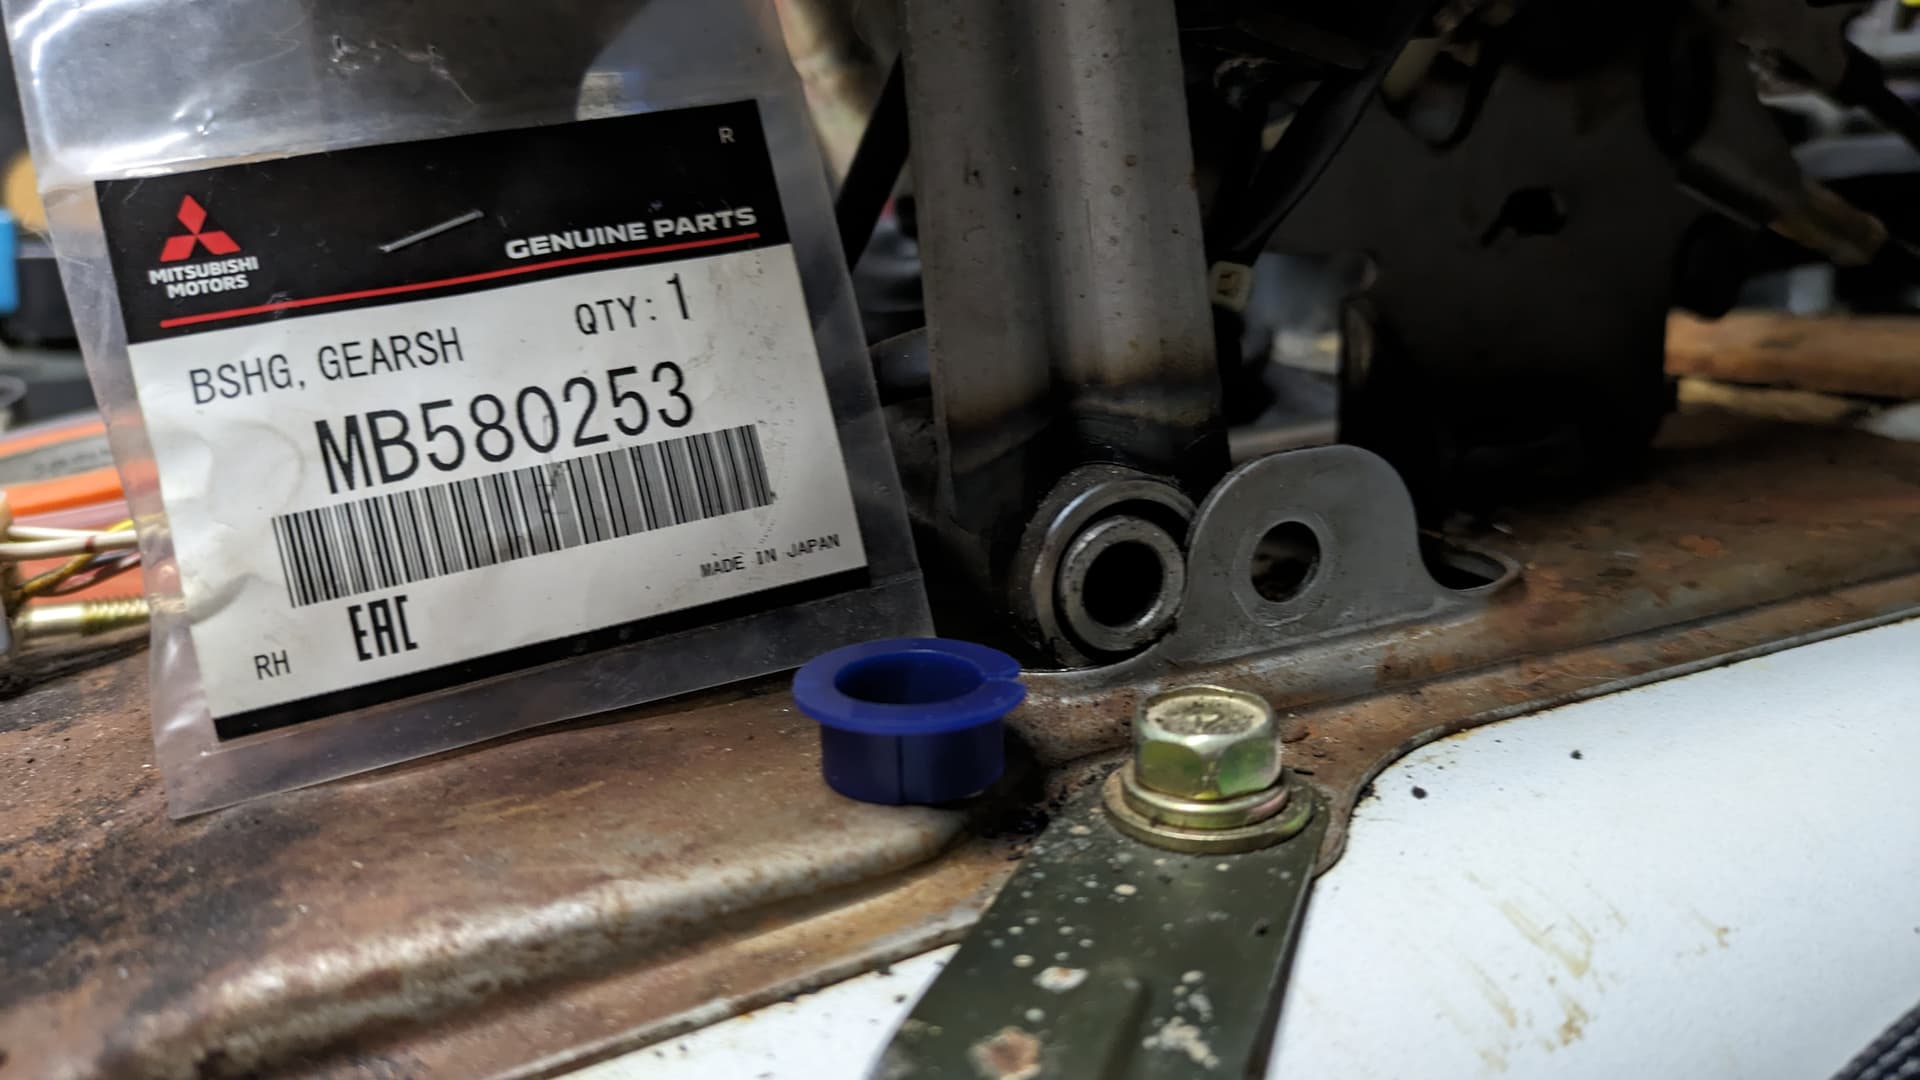
I also finally got around to installing the shifter hinge bushings I bought two years ago. If your Montero shifter wiggles side to side, you need these. You don’t have to remove too much to get to them, either. Mine were completely gone. As in, there was literally no sign of any bushings. It took a little more effort to get them in than I expected (they’re a tight fit), but head-scratching and all, it took me all of 15 minutes with a 12mm wrench and a small hammer. The shifter is nice and tight now and doesn’t feel like a cheap, plastic happy meal toy anymore.
Remind me to replace the PRNDL bulb with an LED!
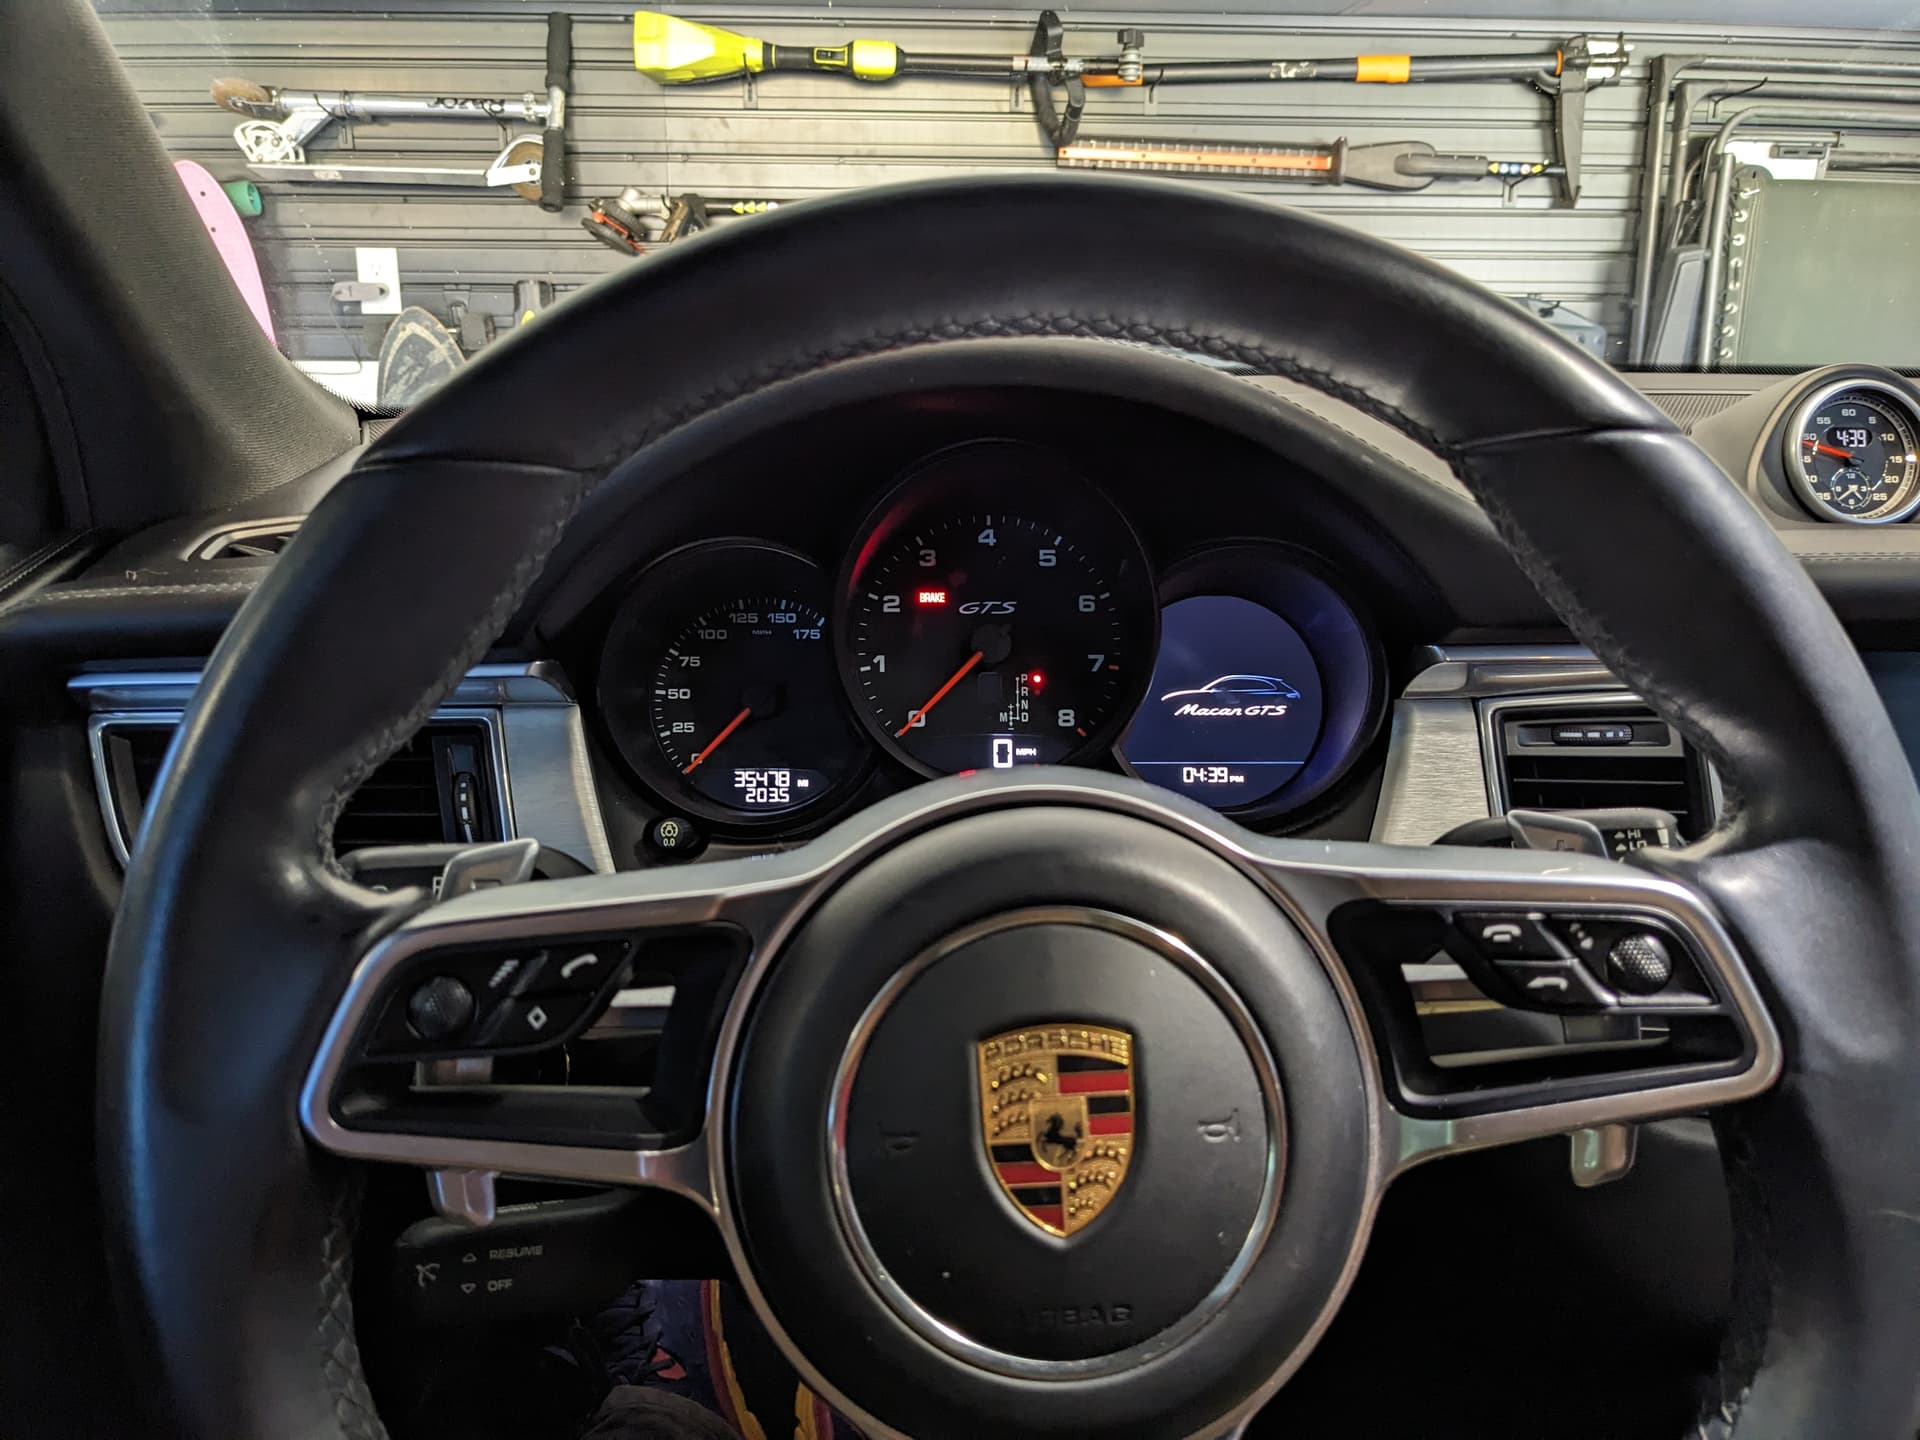
Finally, VP&I flew out to SLC to spend the Mabon weekend with @konverge and his family. I finally got a chance to drive their 2017 Porsche Macan GTS. It was glorious. Like everything we love about the CX-50, only tighter, tauter, and faster. It’s a technological marvel if you ask me, and I’ve made a point of reiterating my request for first right of refusal when/if they should decide to replace it.
Still left to do
- r&r the sunroof, fix the roof rack mount, & noico the roof skin
- test fit the subwoofer, noico the floor, install the carpet pad & carpets
- refurb the HVAC controls & test the new heater core
- test new house & aux lighting circuits
- assemble & install the dashboard
- finish wiring the fender repeaters
- install fiber optics & headliner
- install the rest of the interior
- replace reverse lights
- bleed the brakes
It’s a lot, but I think I might get it done this month. Halloween will be 90 days since Fezzik pulled into the garage under power—that’s an entire quarter of the year. Woof.
1 Like
Dude. So much love for ol Fezz, and I’m happy you’re still excited (well maybe excited is strong) to work on her. It’ll be worth it as soon as it gets out on the road again.
BTW, it’s me. Remember me?
2 Likes
Journey to the Heater Core Ep. 7
It’s officially been 90 days.
But I think it’s gonna be worth it!
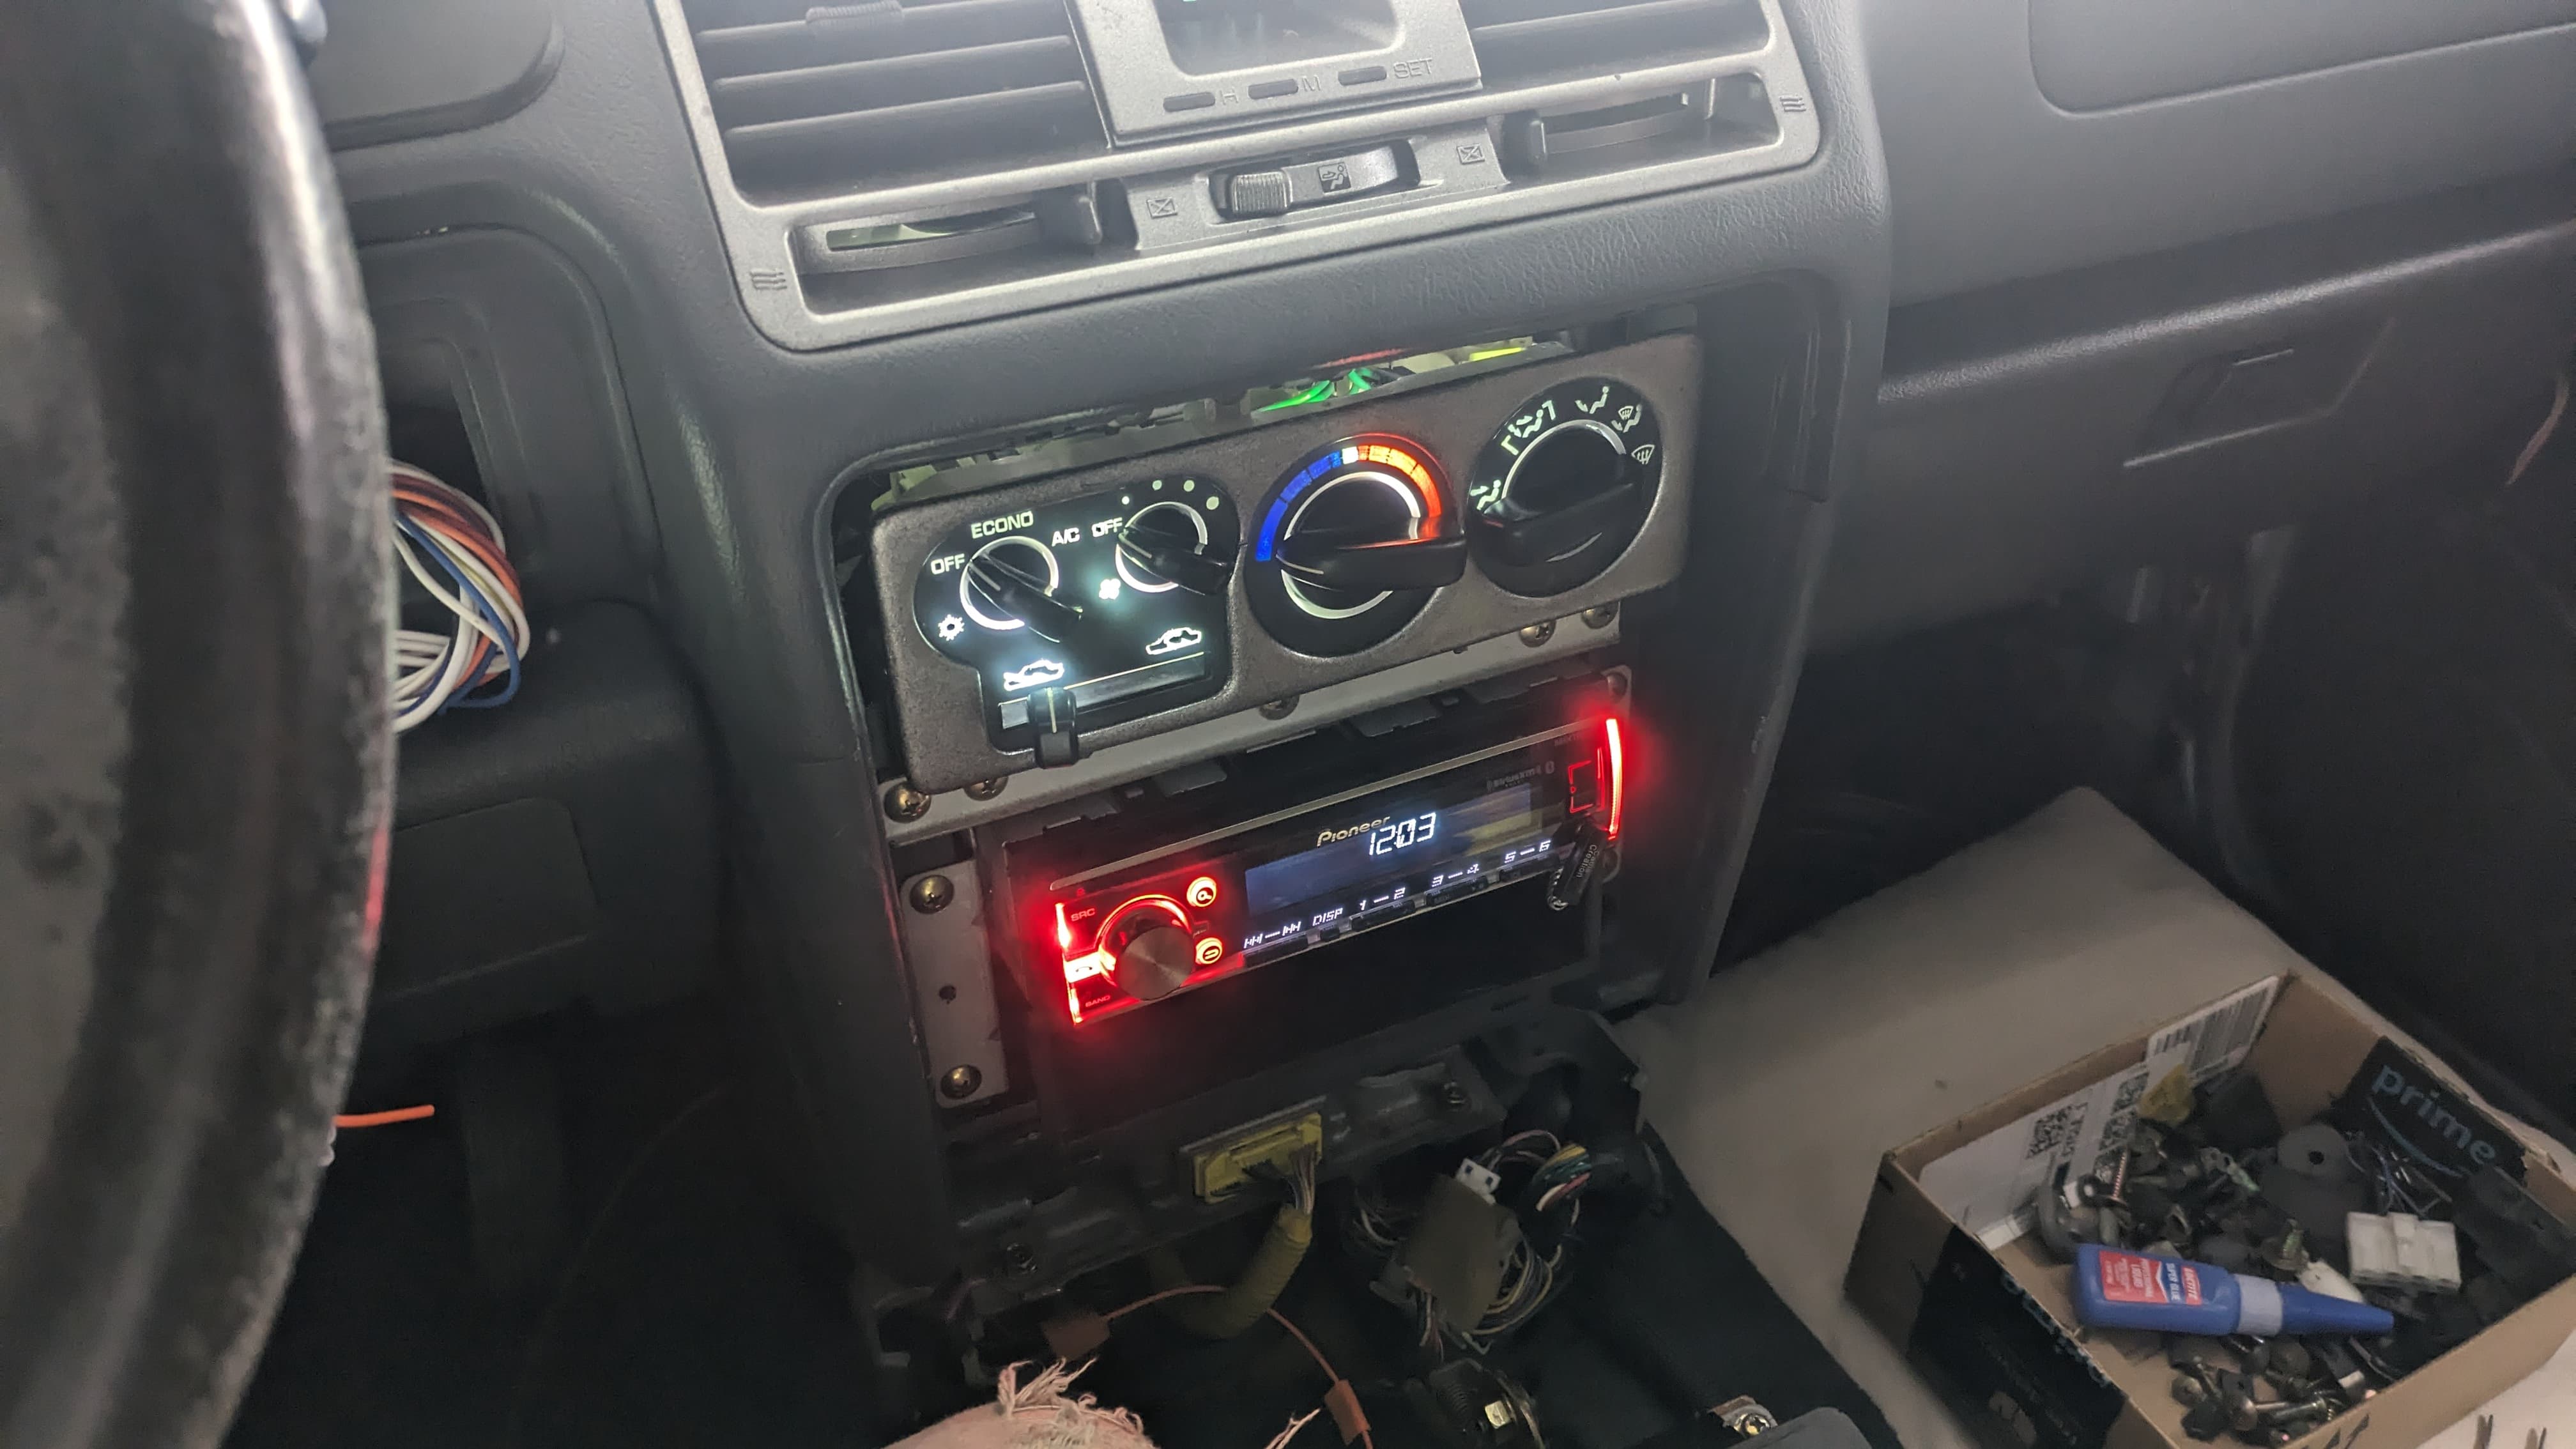
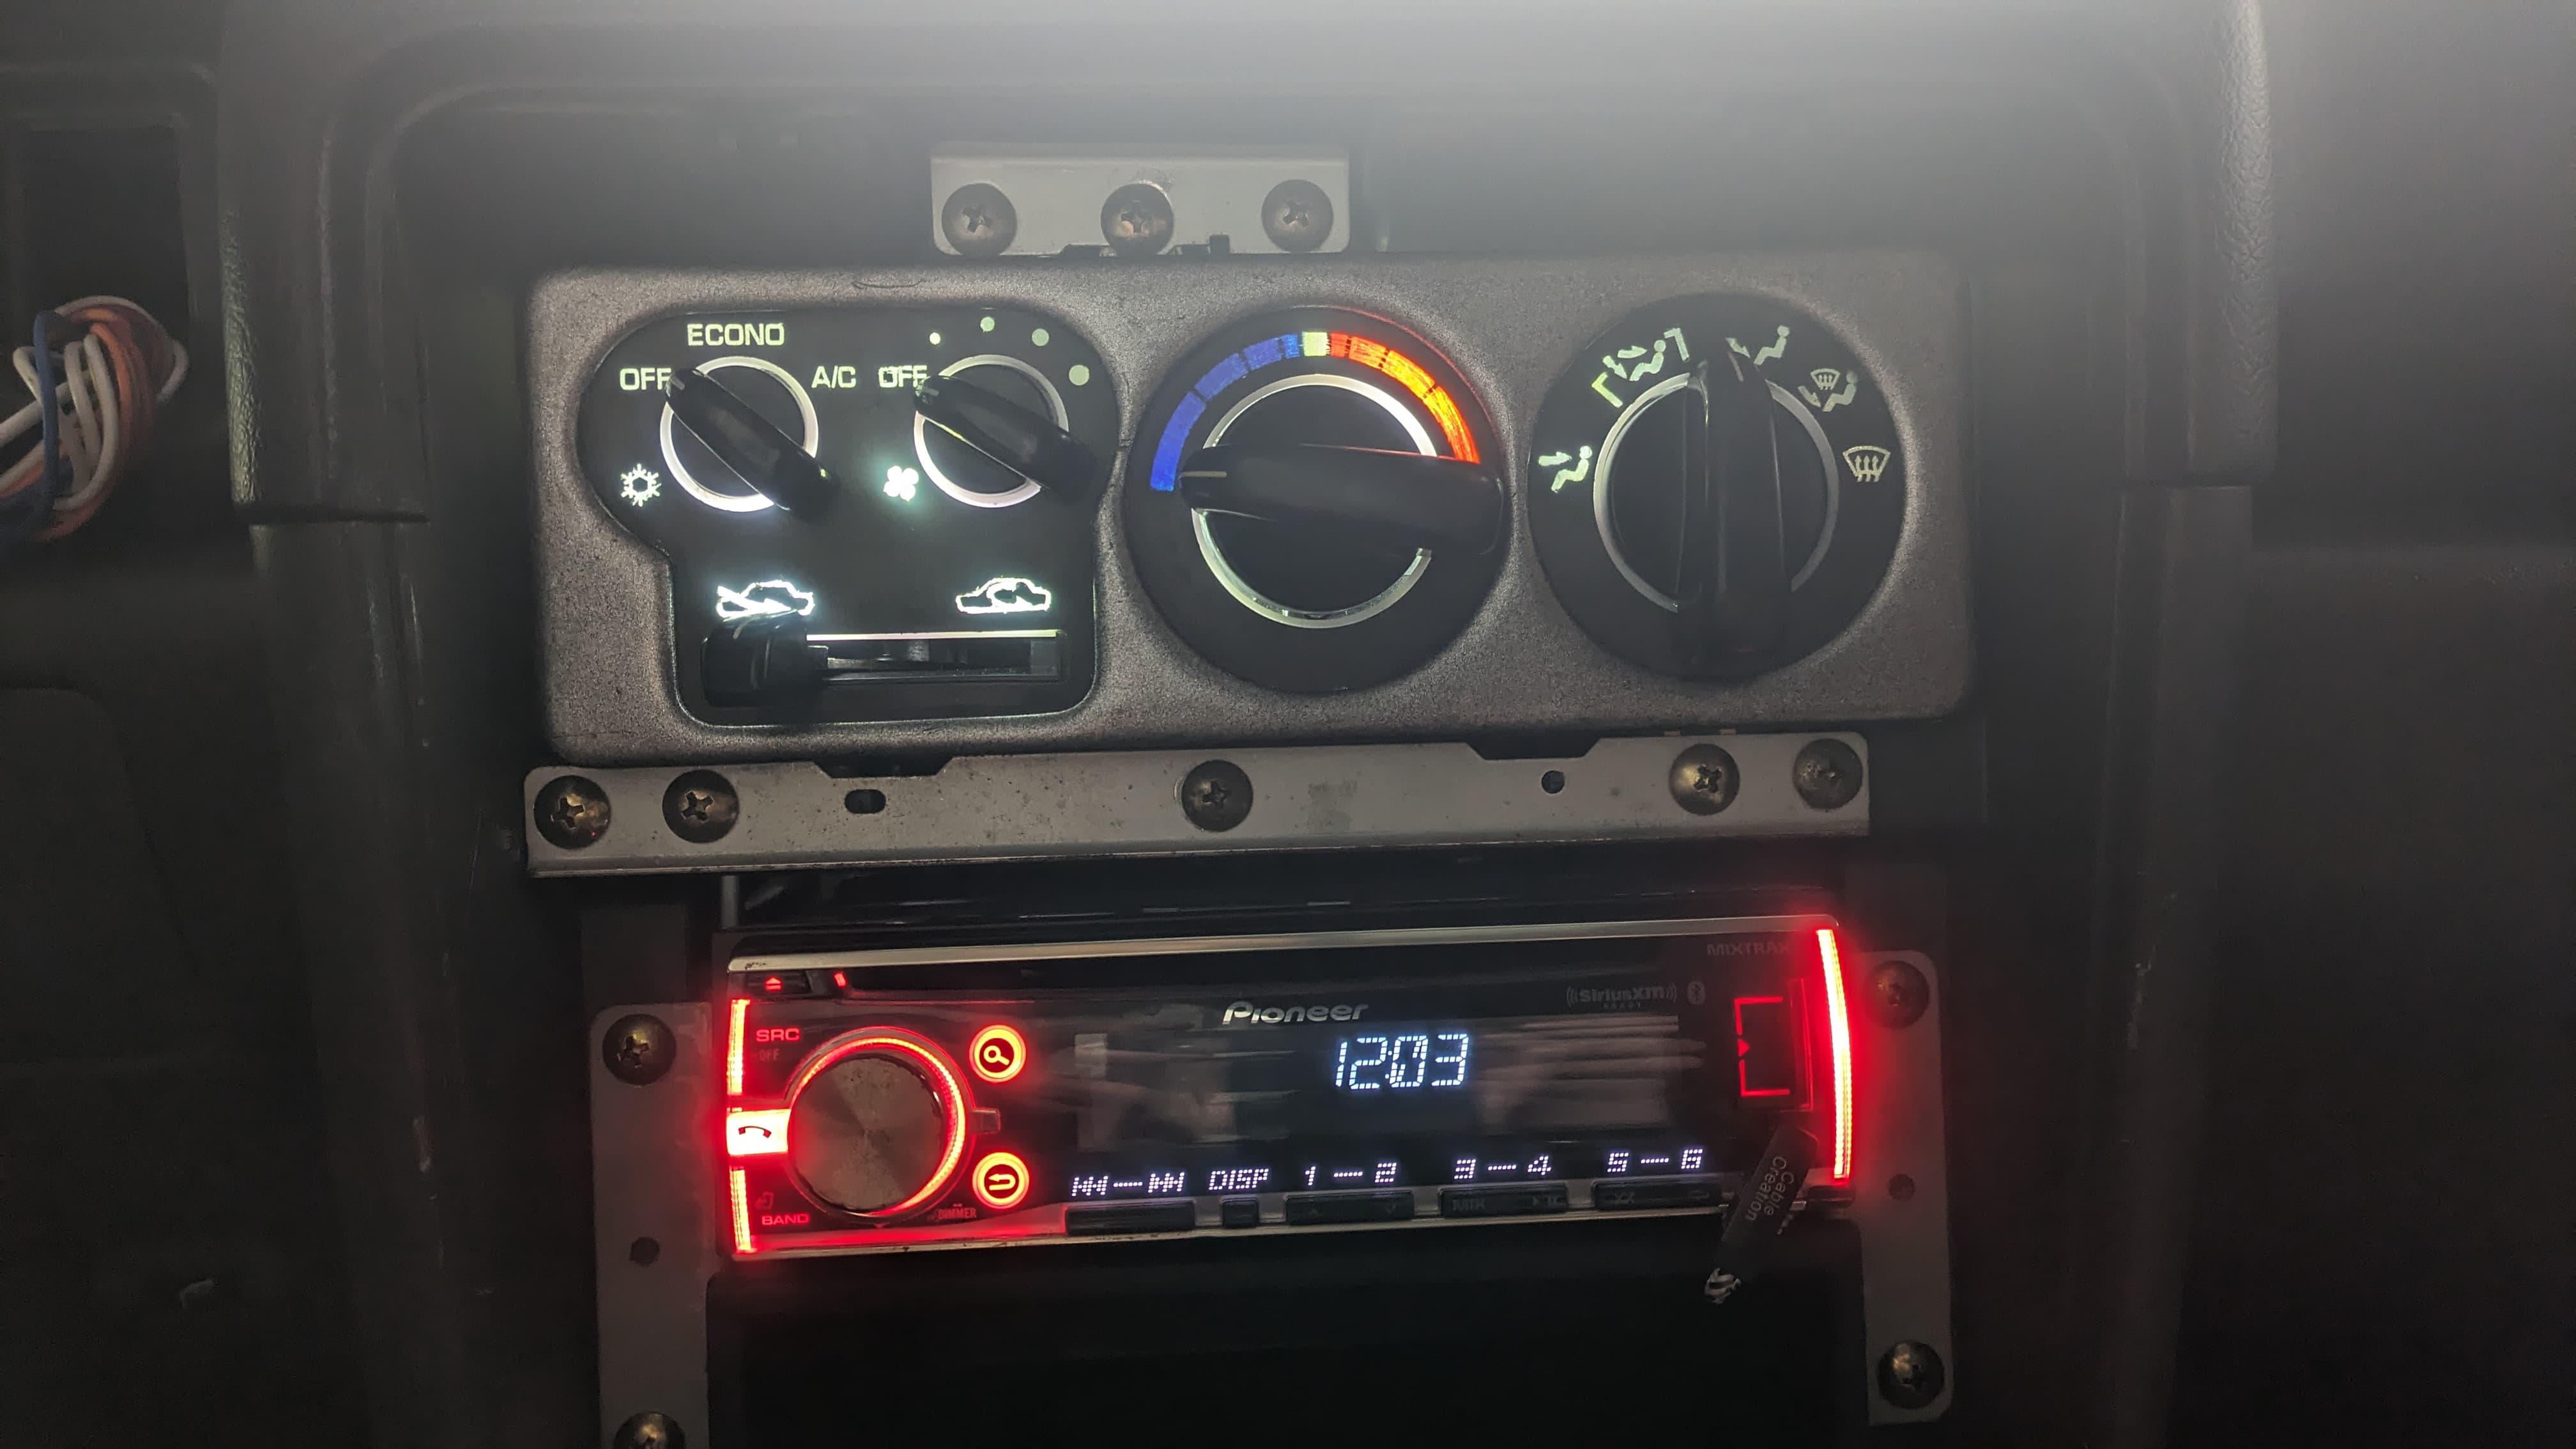
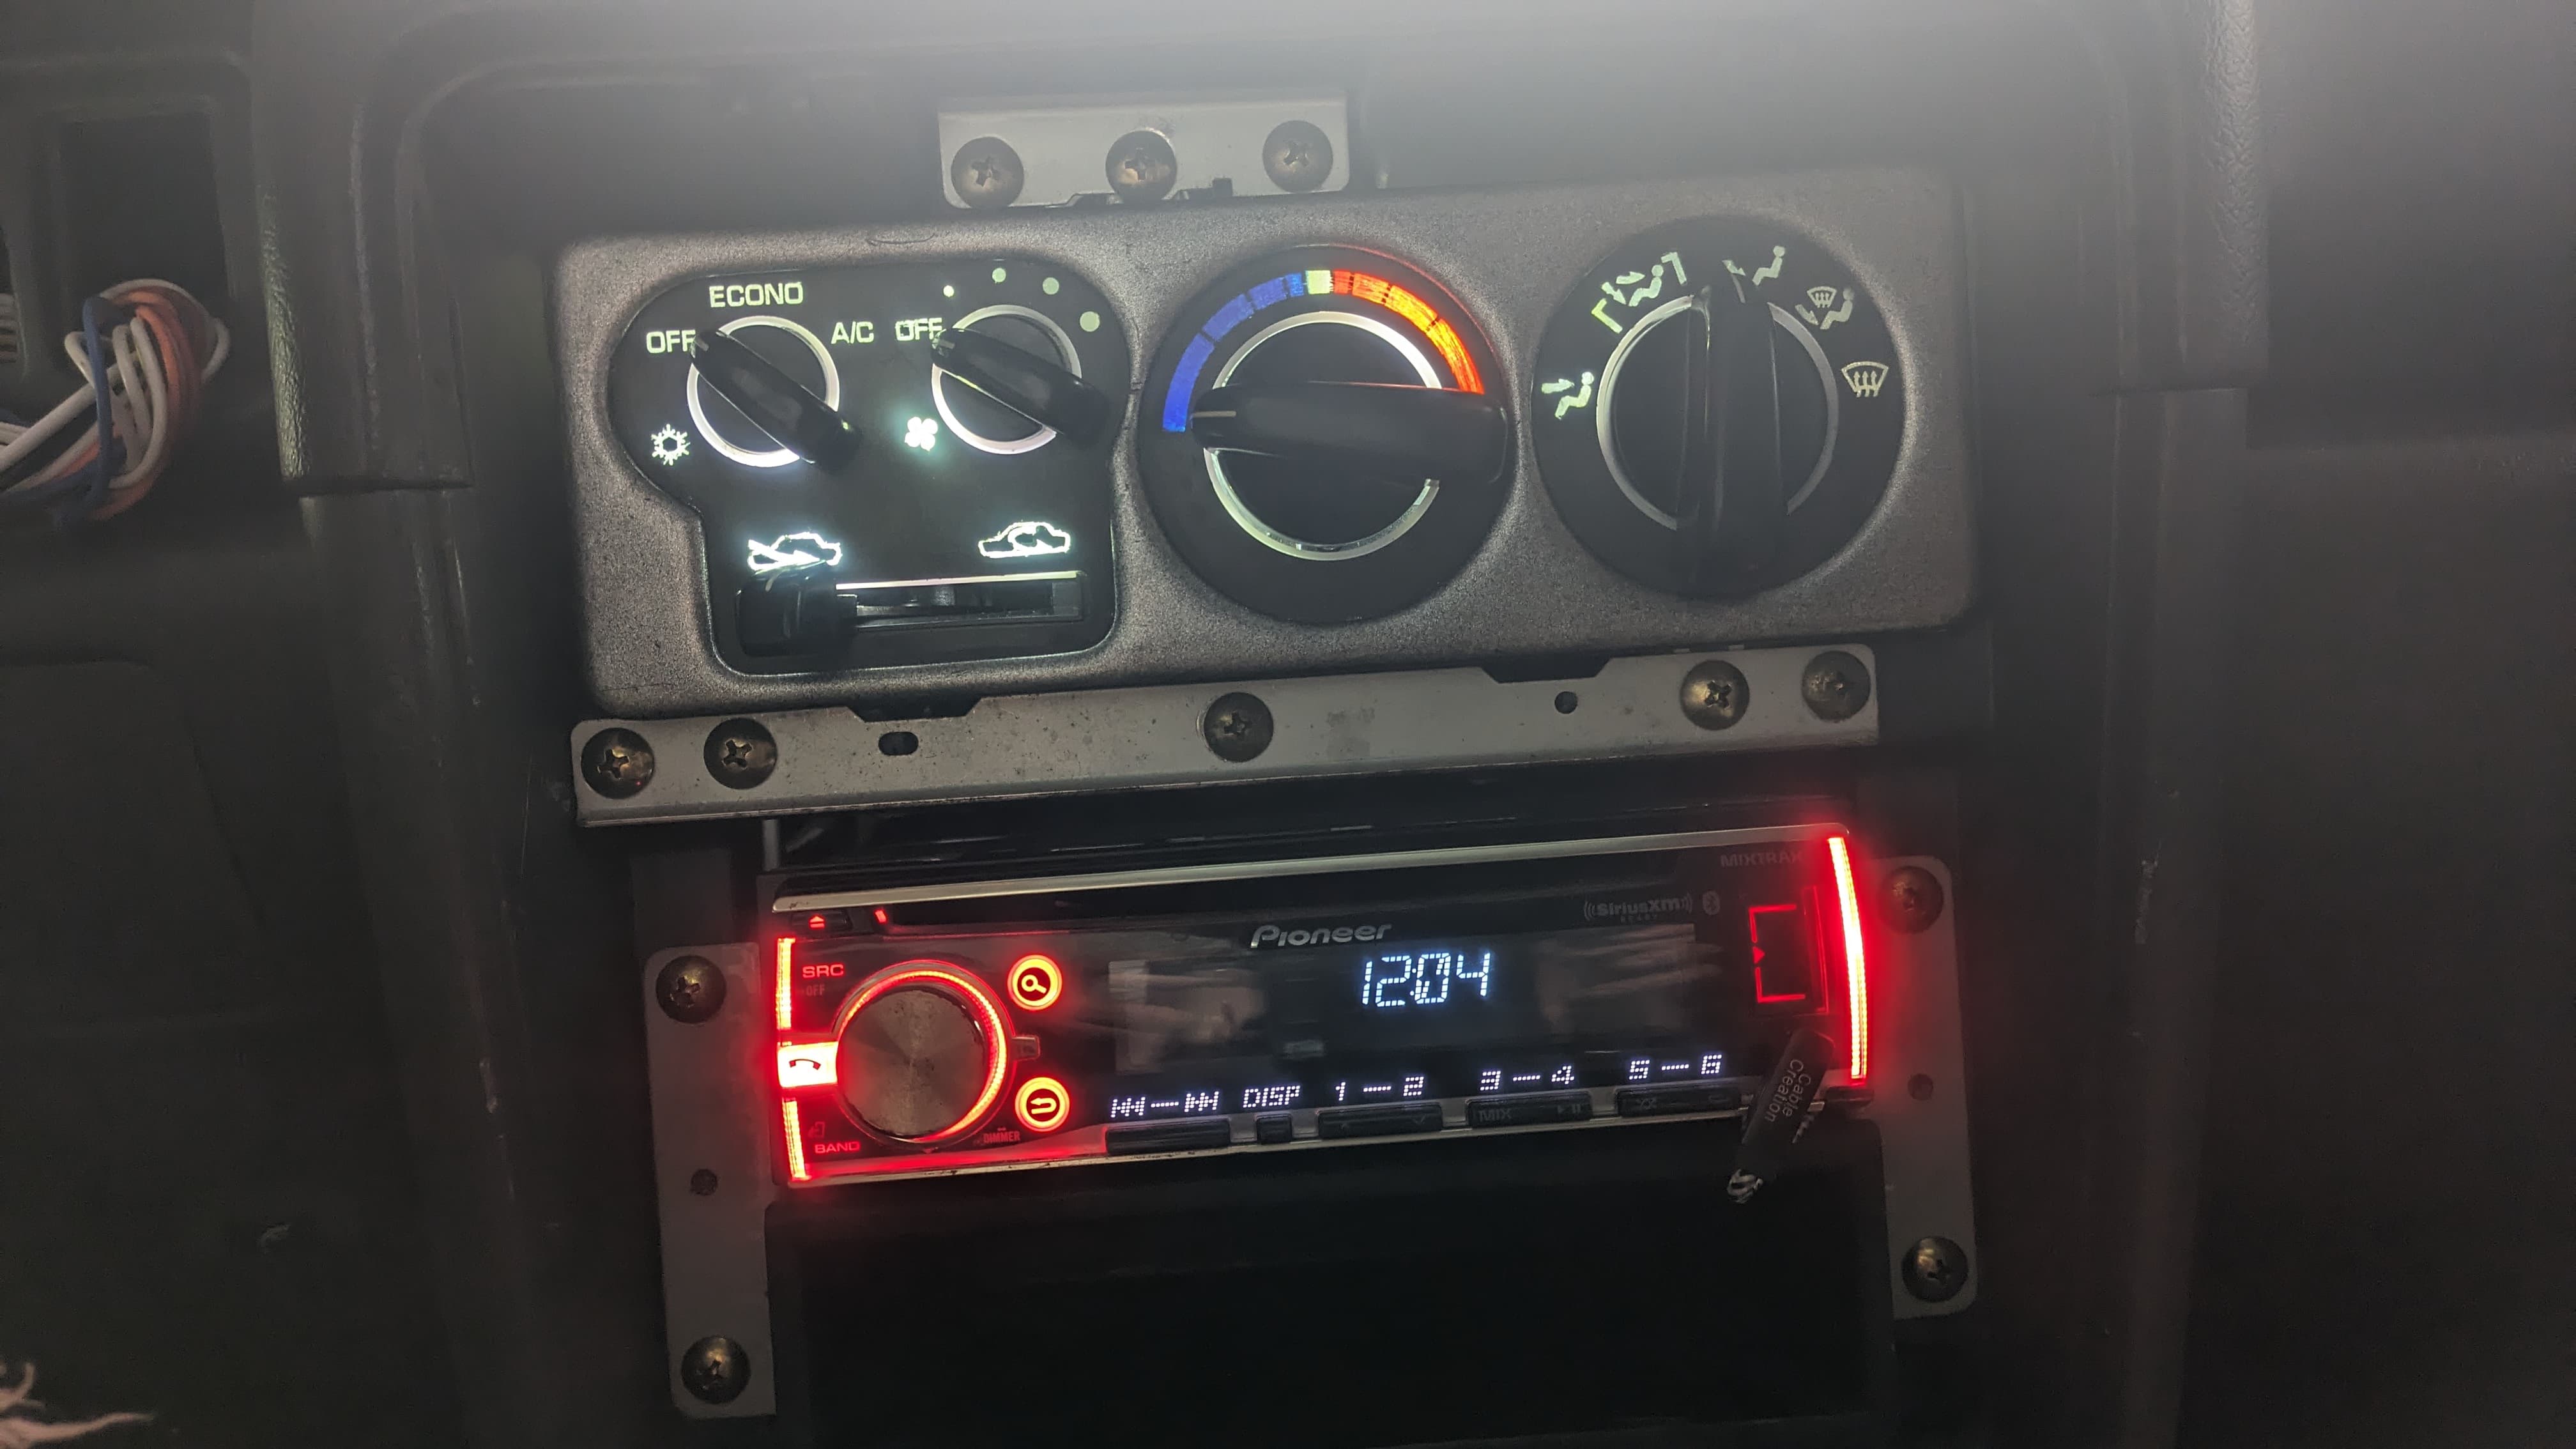
You might be thinking I haven’t gotten much done this month. And you wouldn’t be the only one. I feel the same way. And yet, the pictures almost speak for themselves. The heater core tested good, the dash is back in, Fezzik lives, and I expect to be test driving him by this weekend.
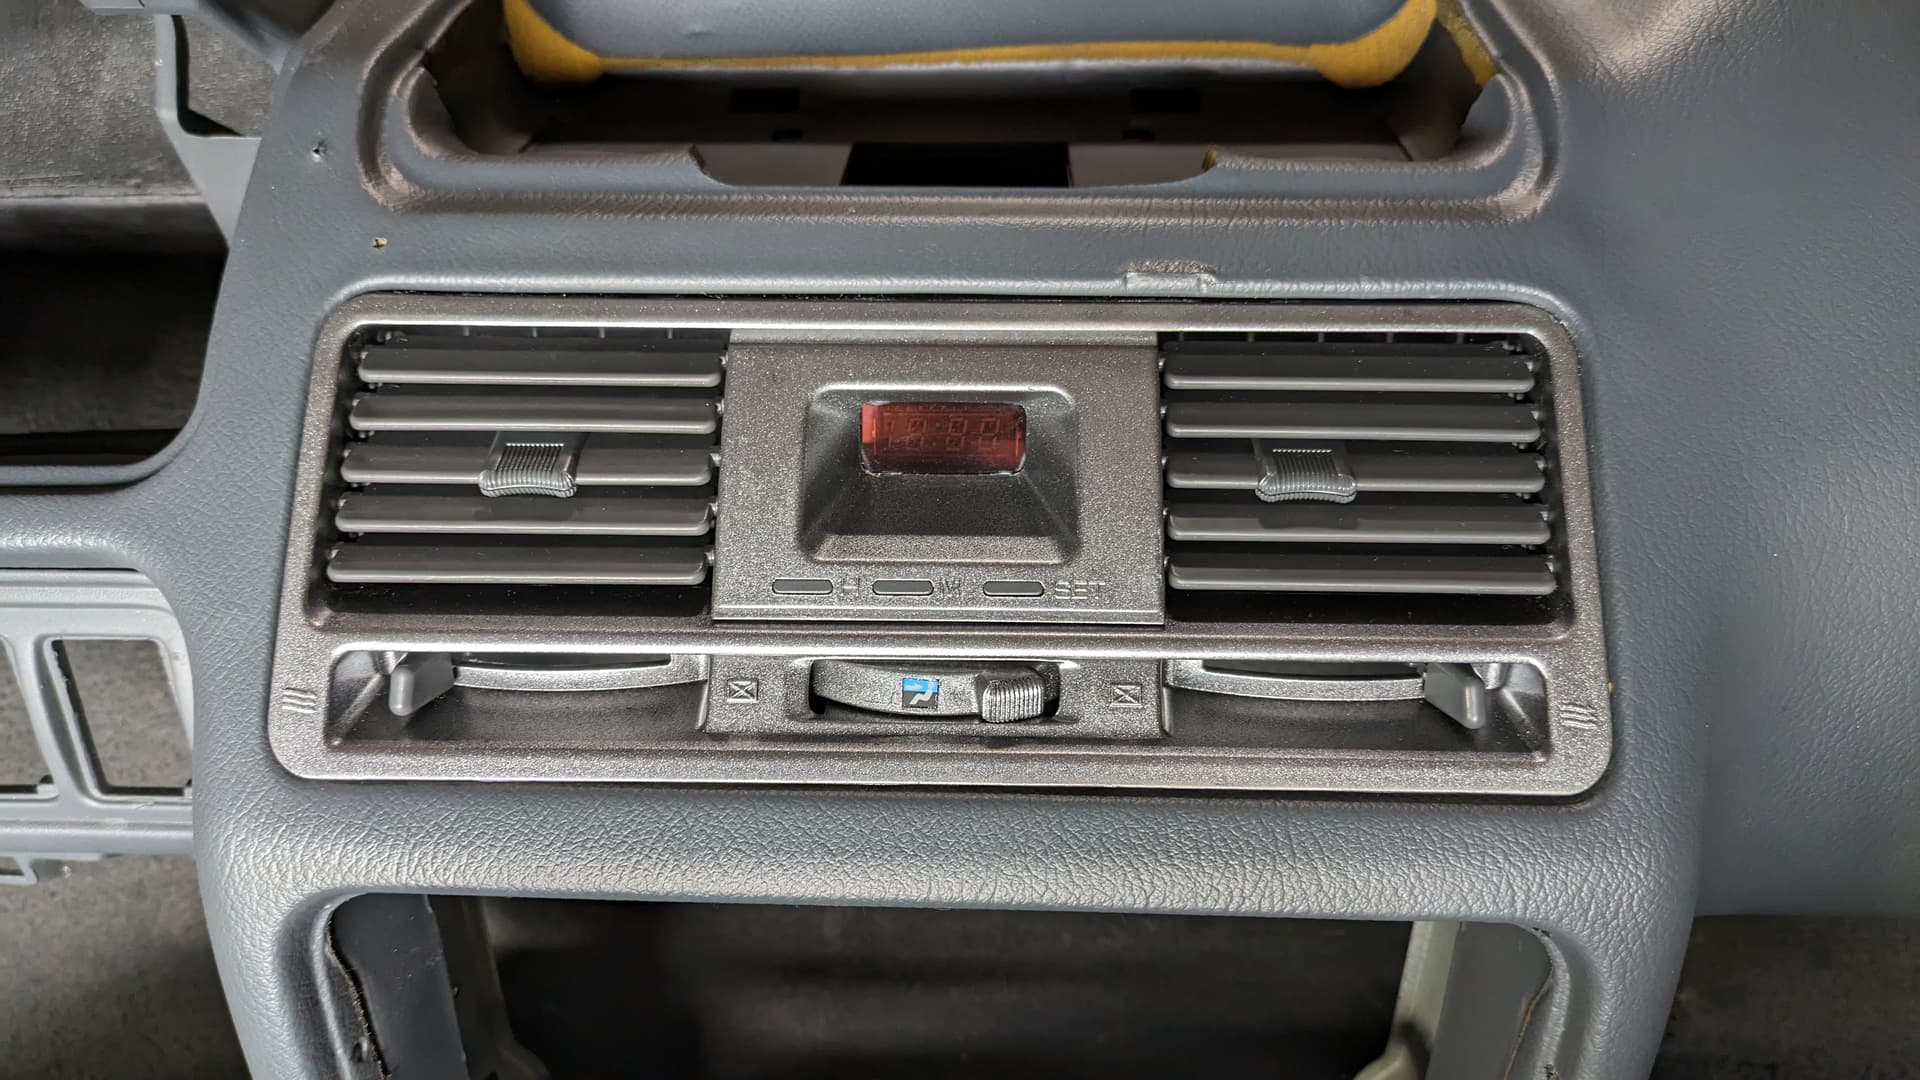
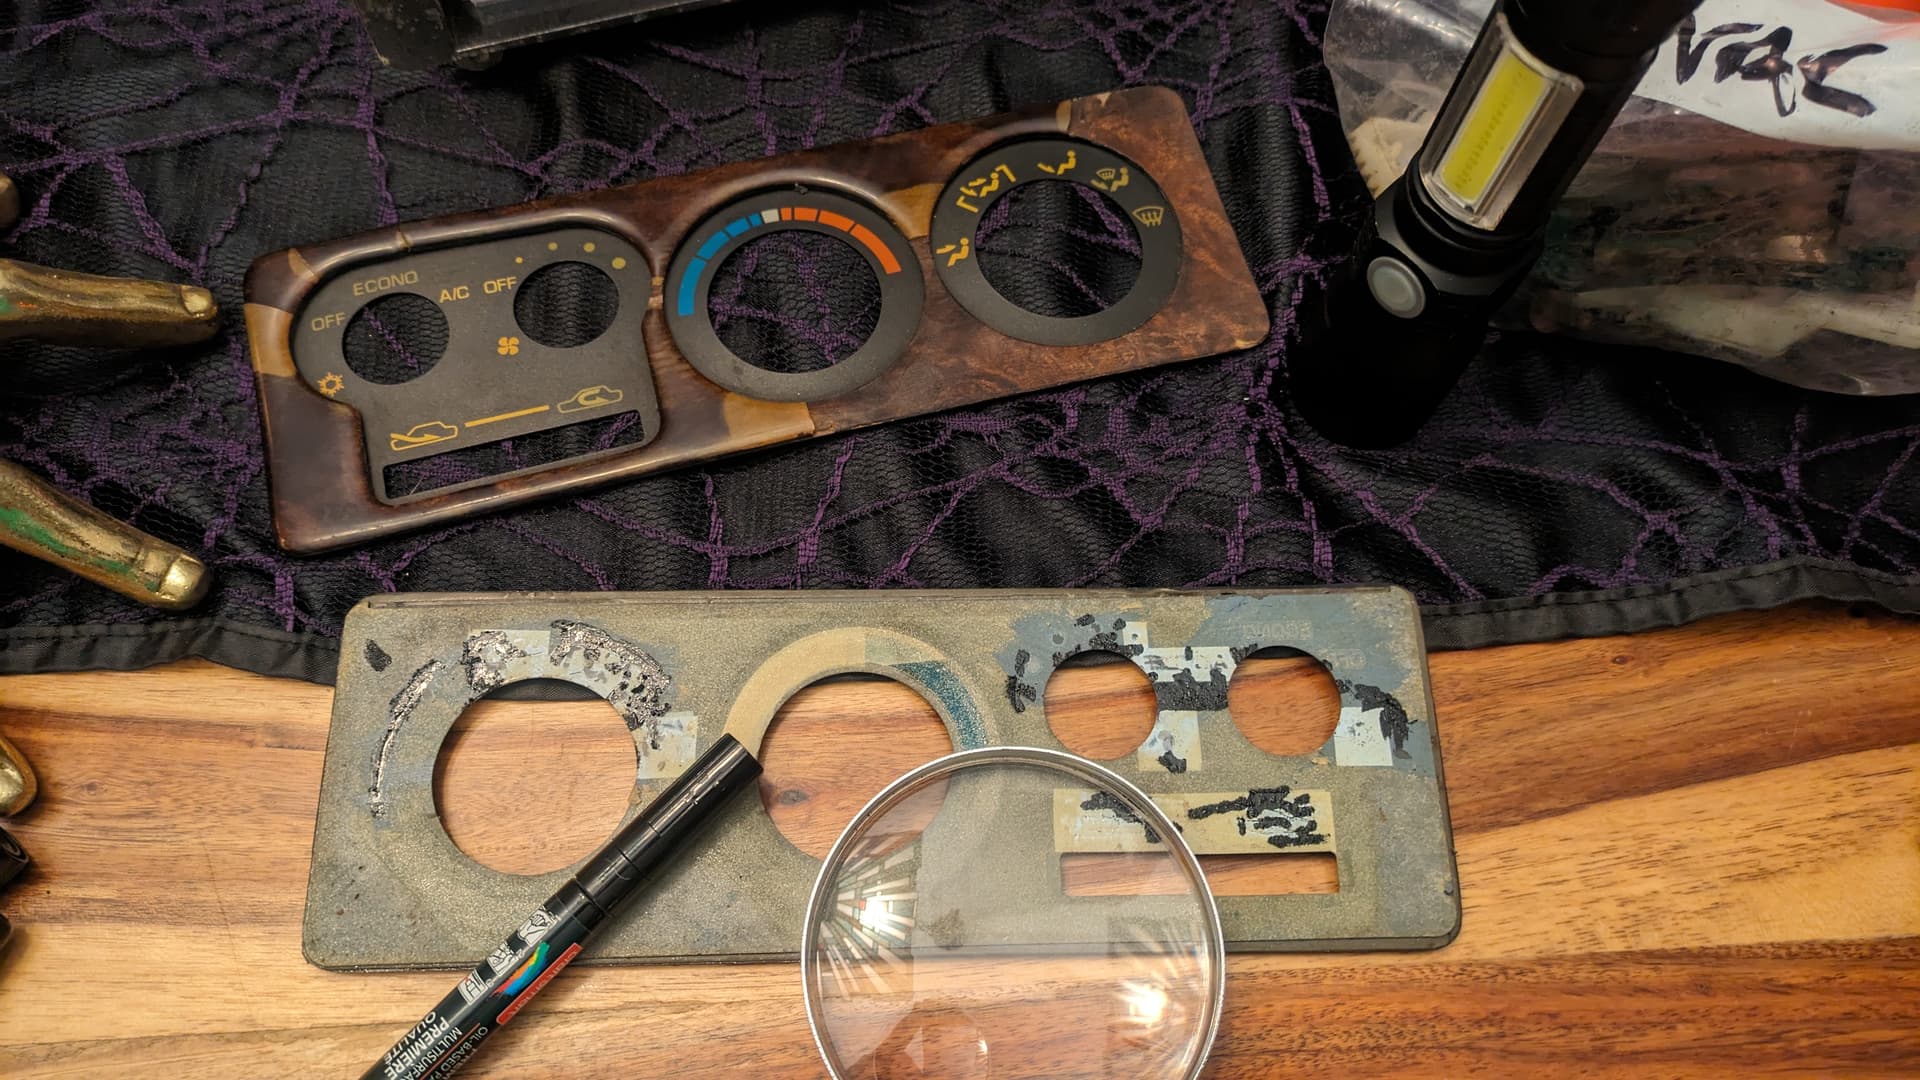
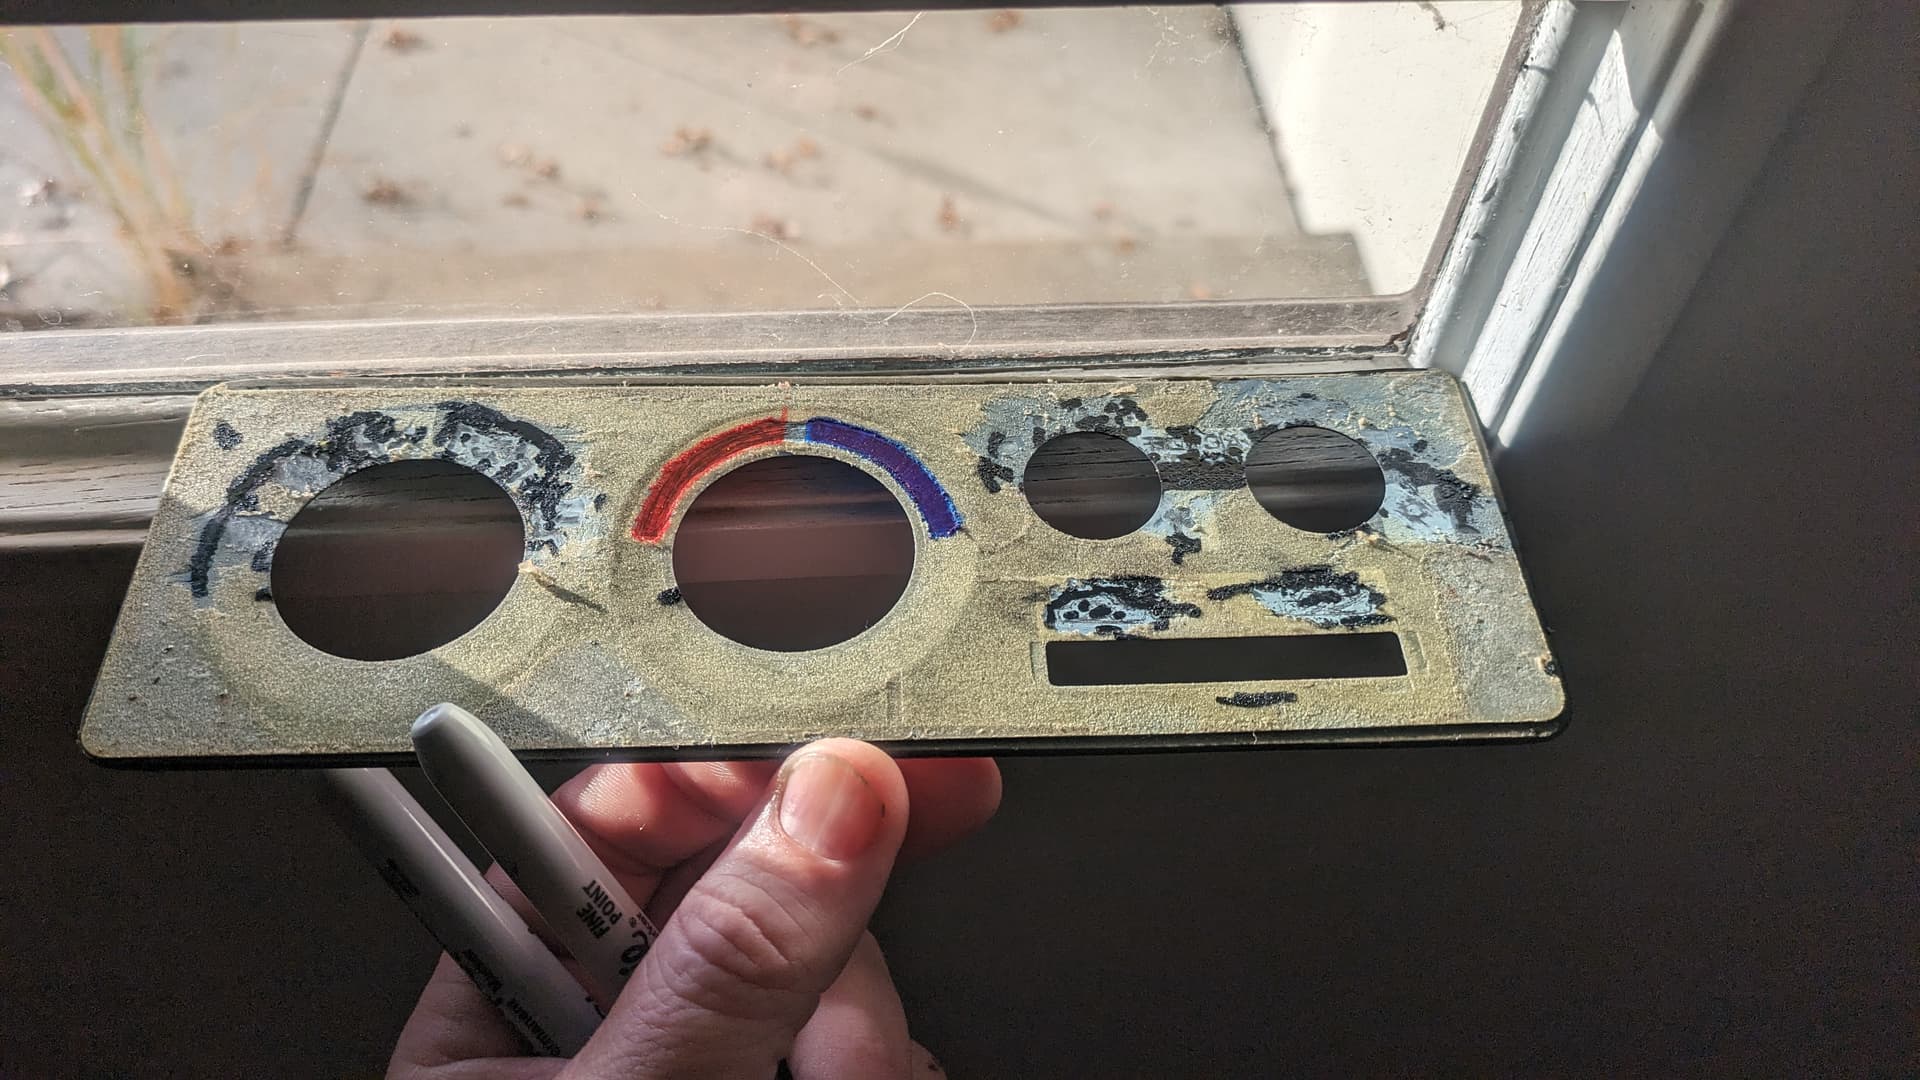
WTHVAC
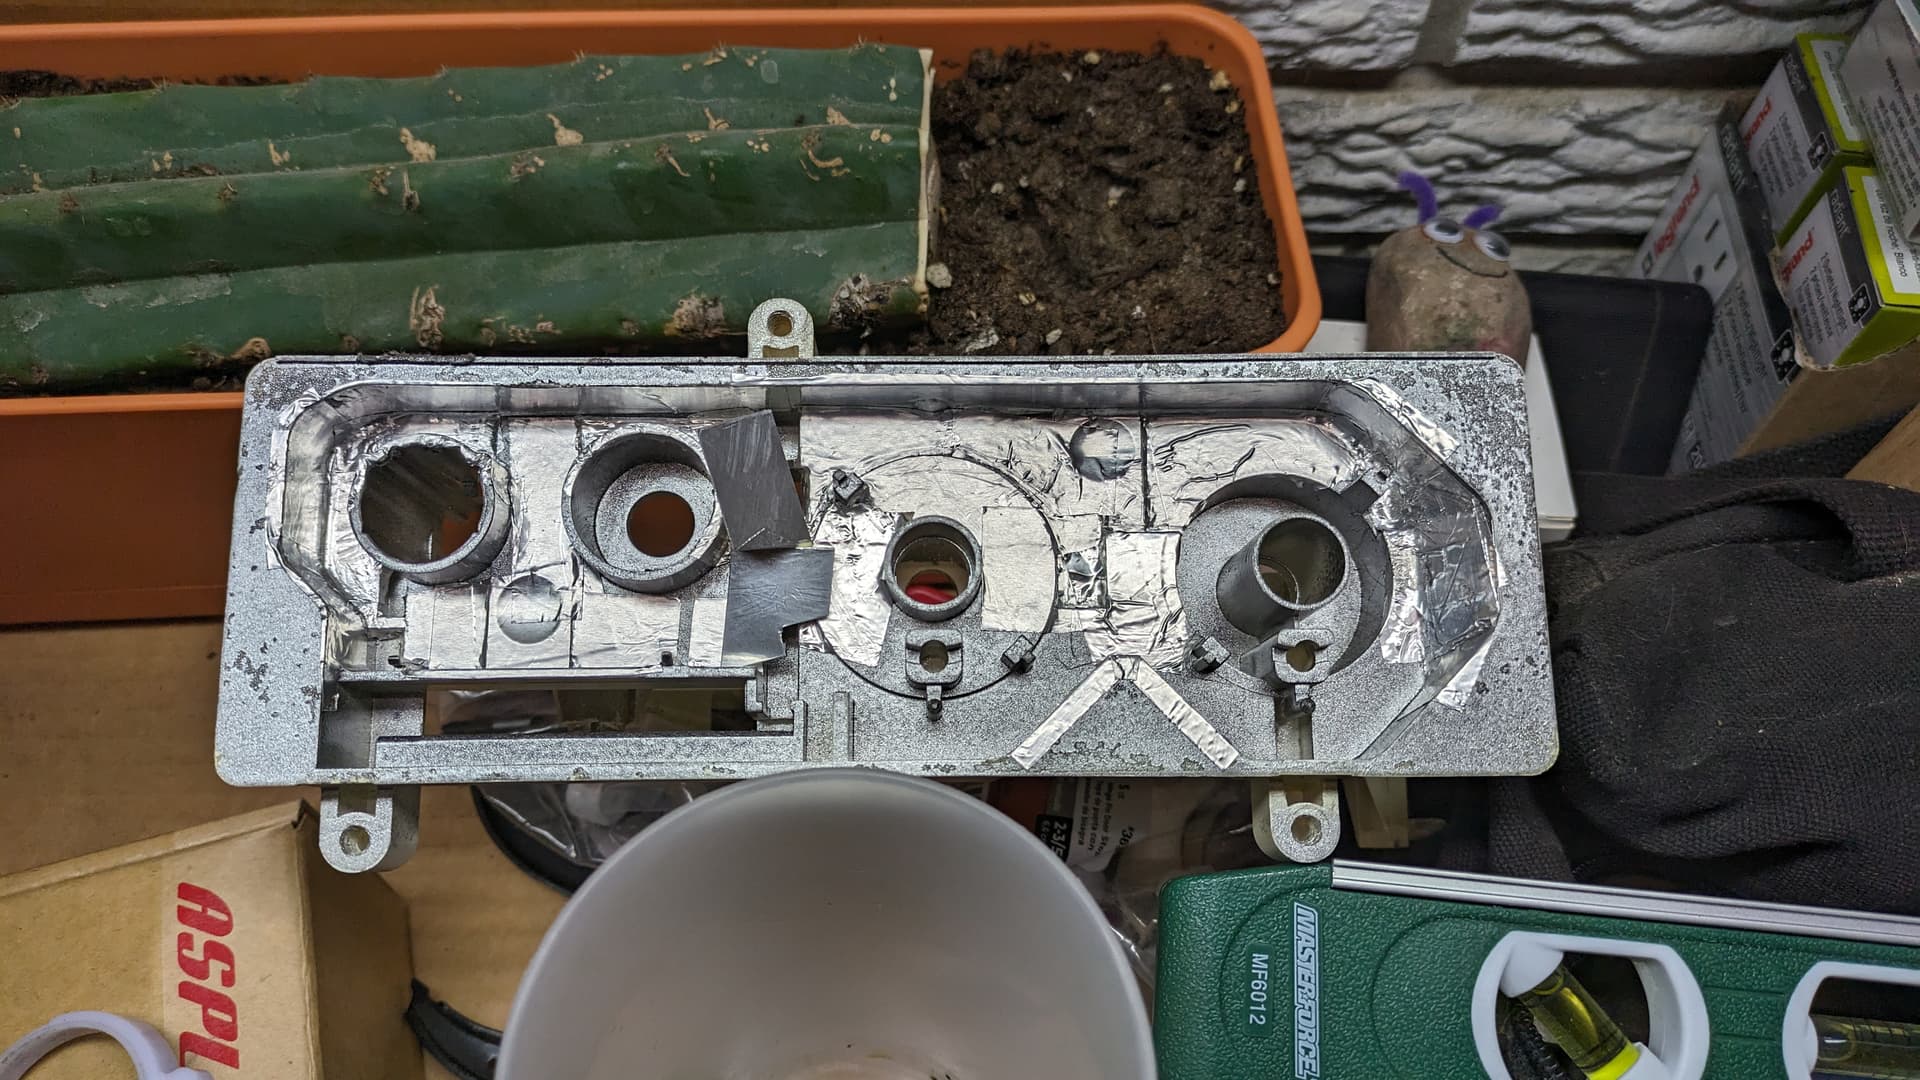
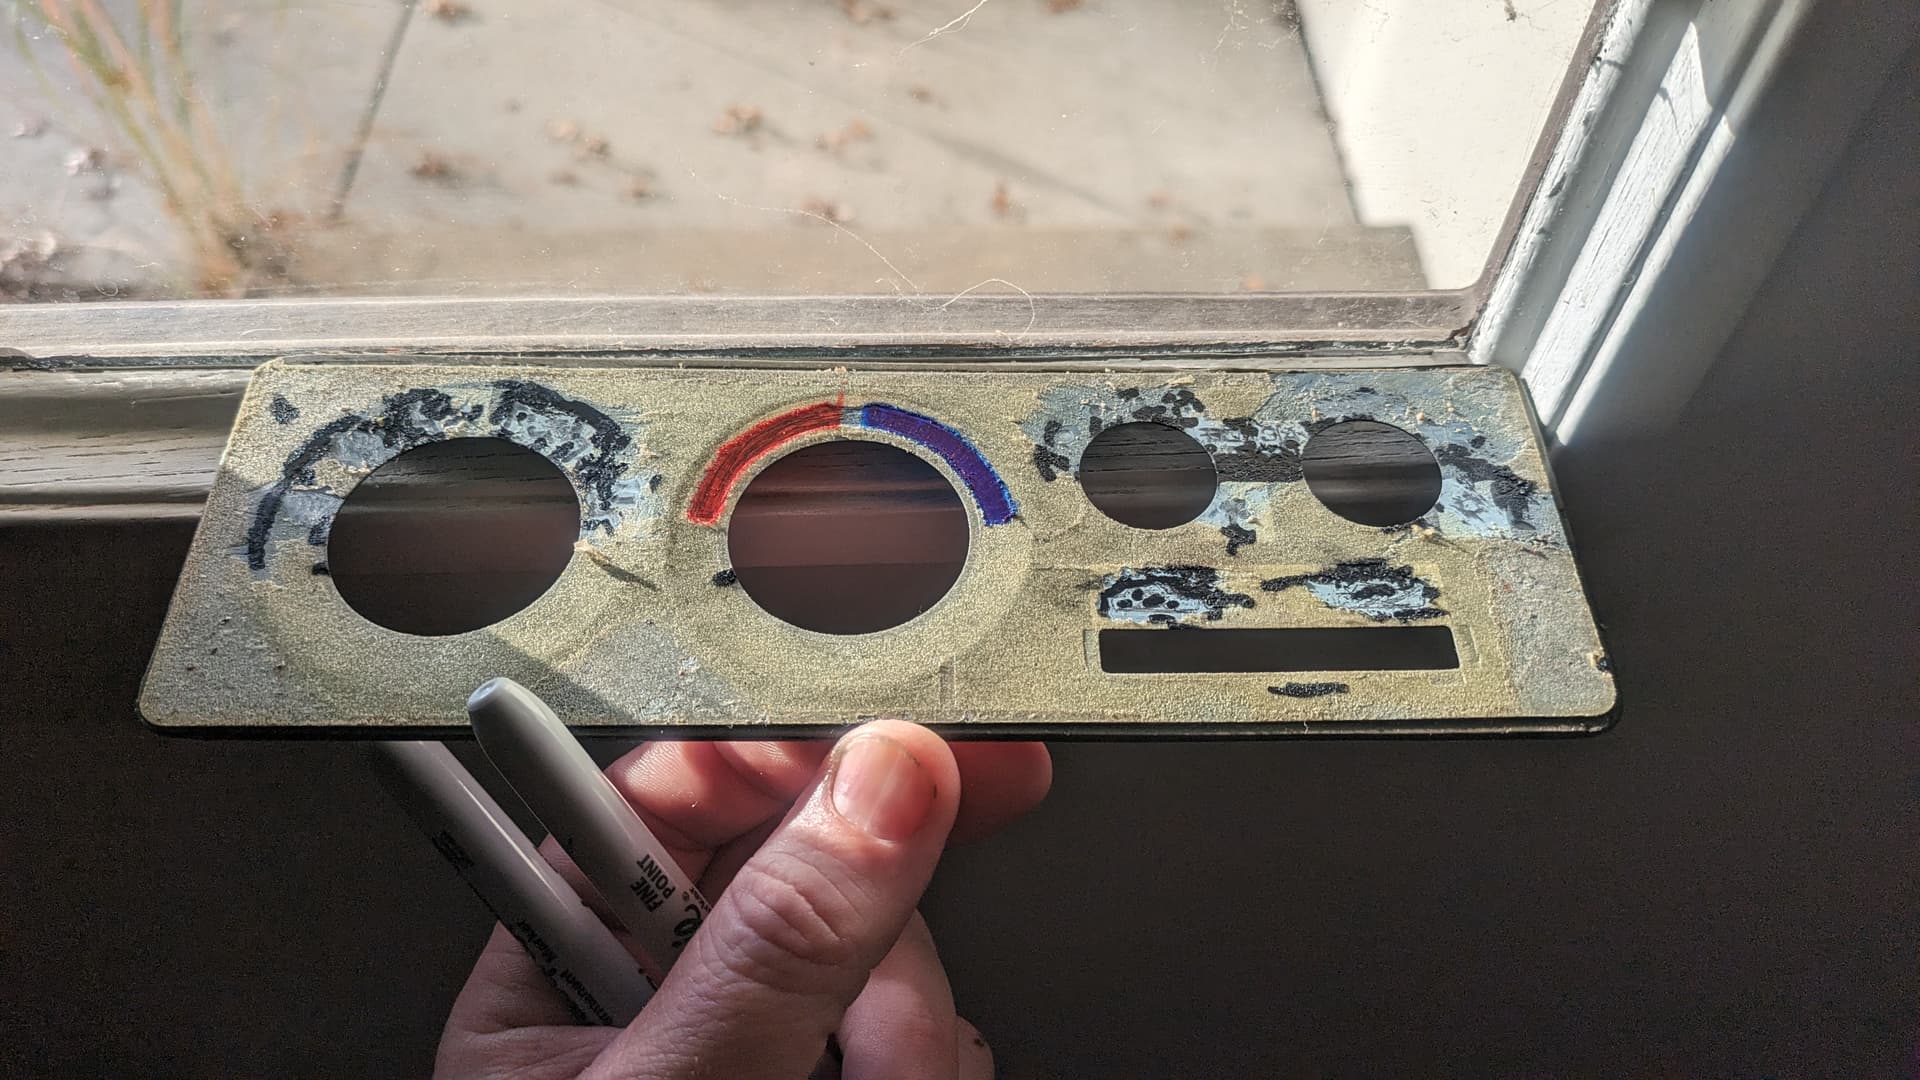
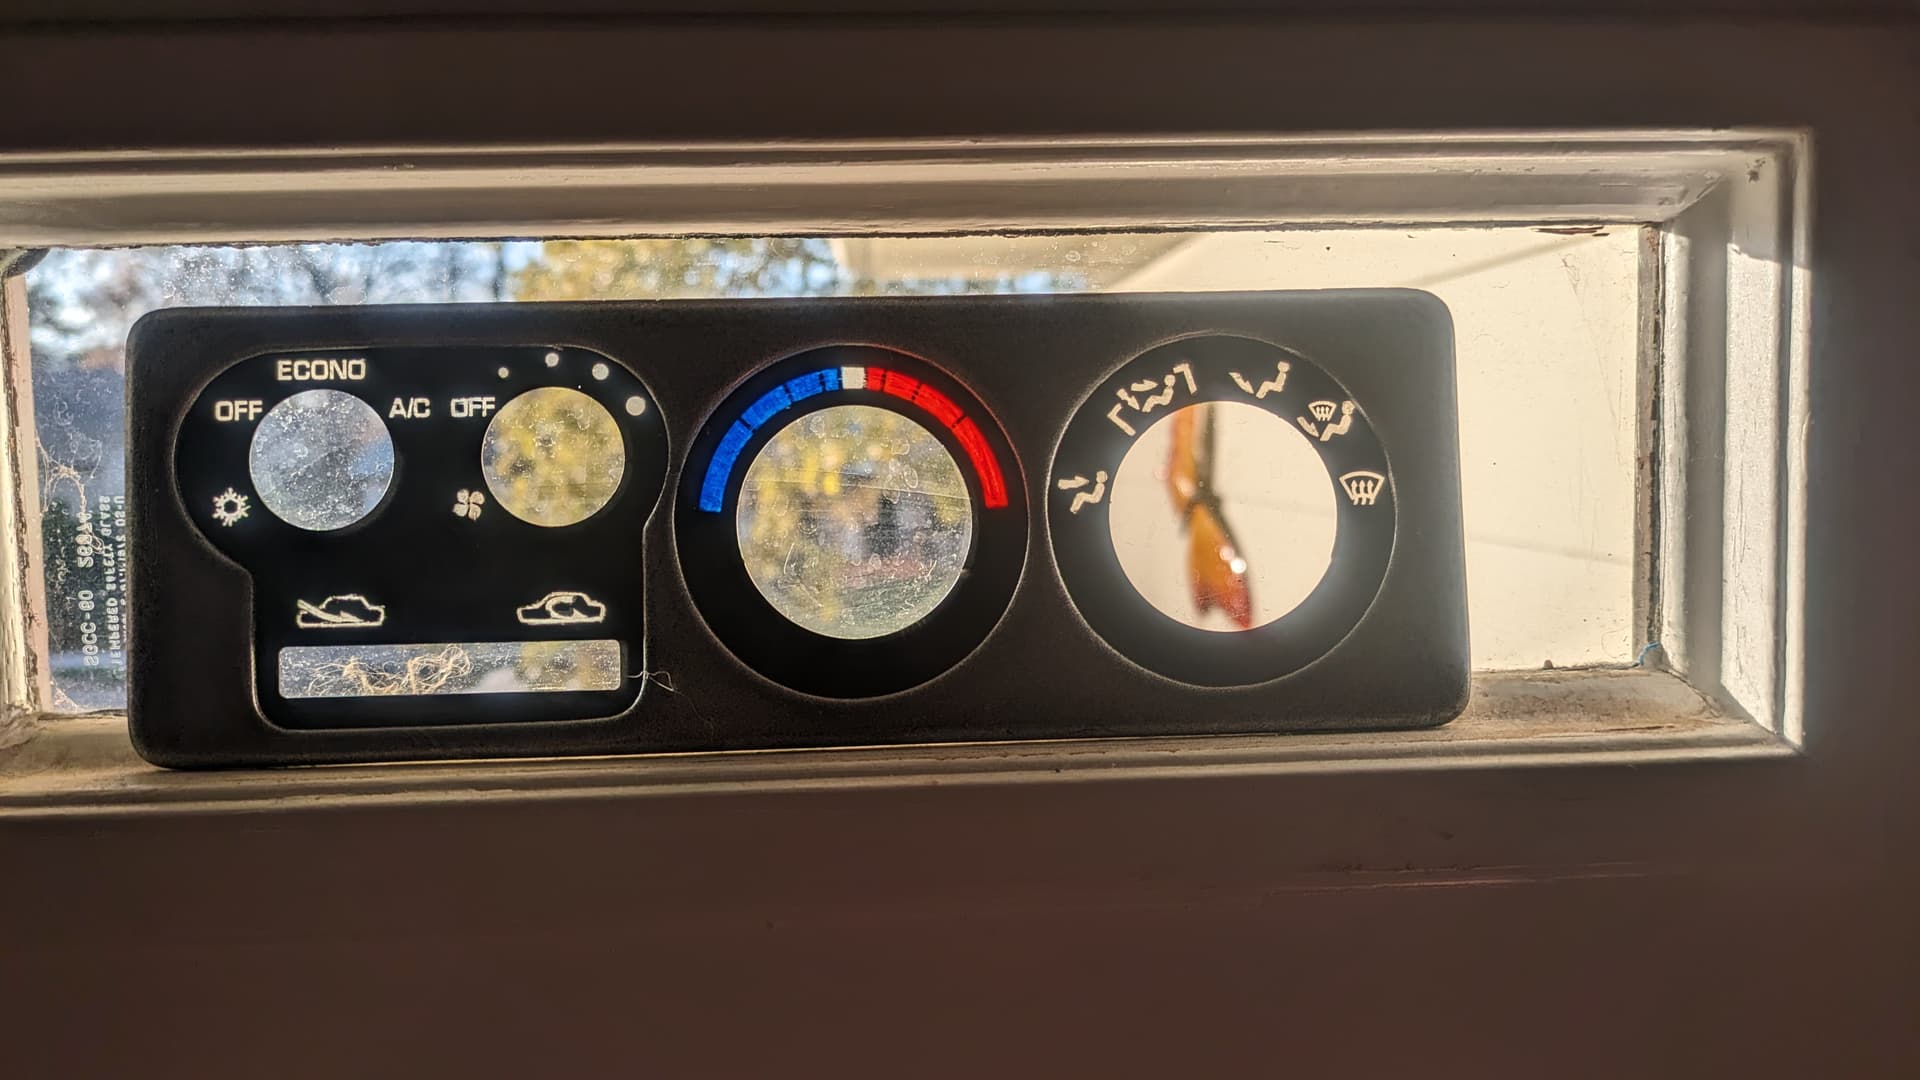
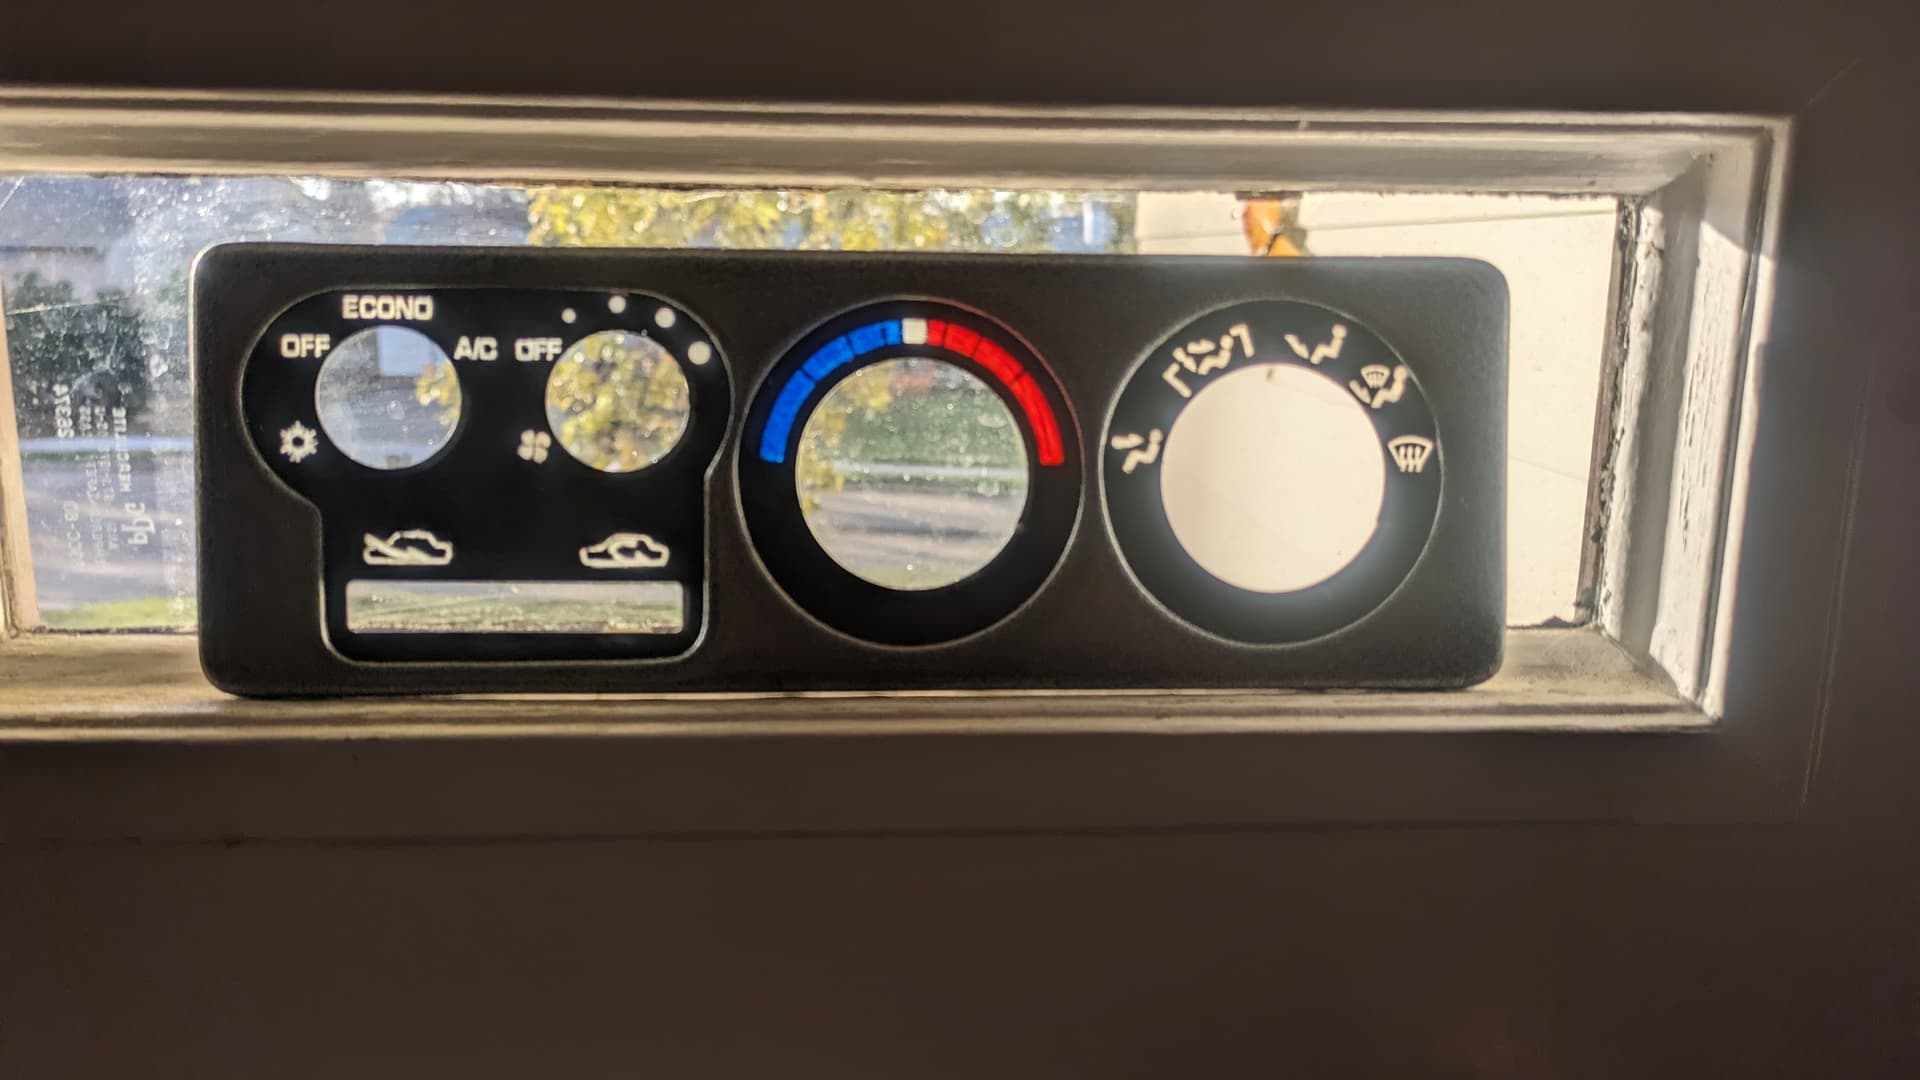
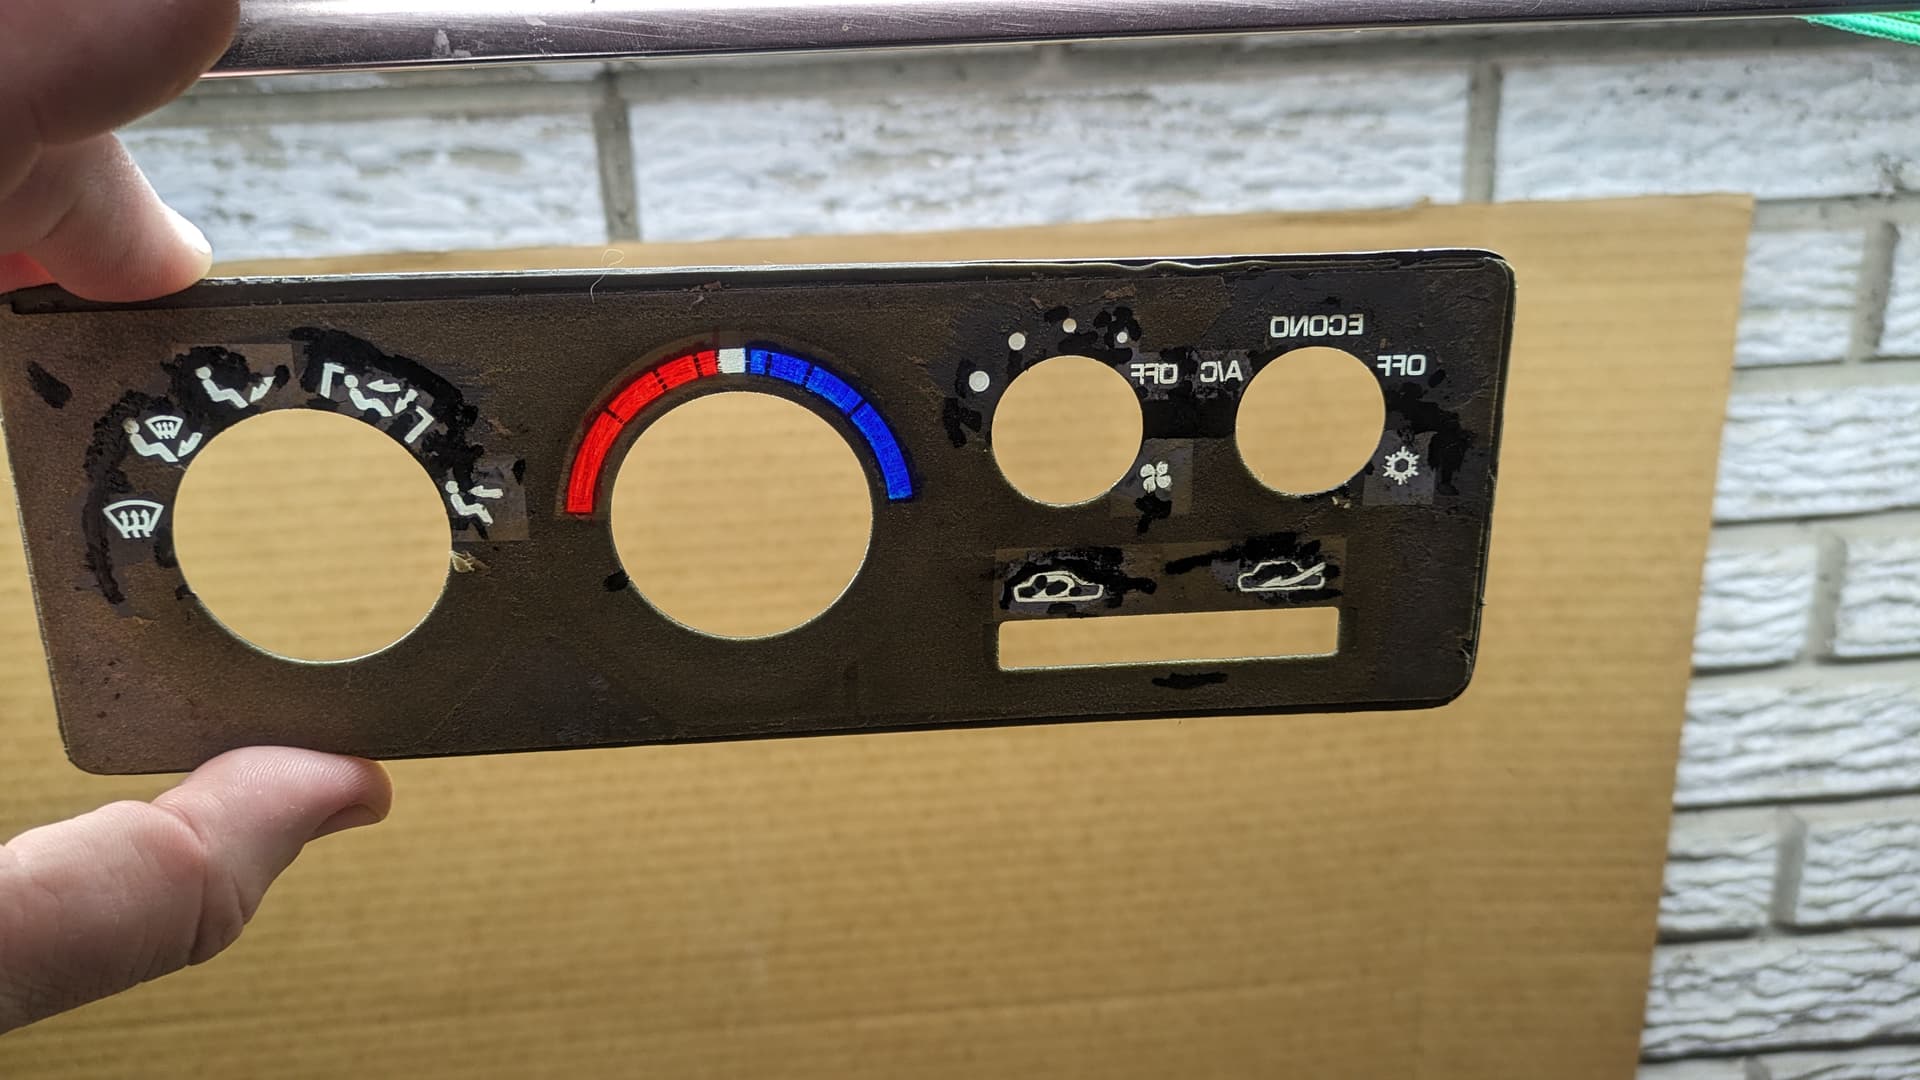
I decided not to go the LED strip route and, instead, opted to cover the inside of the HVAC with foil tape to give a plain old set of LED replacement bulbs a bit of a boost. Things were going well, until I got carried away with trying to clean up the faces. Not only did I remove the old yellow film—I also removed a bunch of the black background too. Now I have to hand-paint the faces to hide all the scratches. (Not shown.)
This is pretty much what’s keeping me from committing to driving today. It’s now freezing outside and I kinda need my heater. Tonight’s trick-or-treating, so maybe I can get it done tomorrow night while P’s at rehearsal. Center vents turned out nice, though, right?
Heater Core Checks Out! No More Leaks!
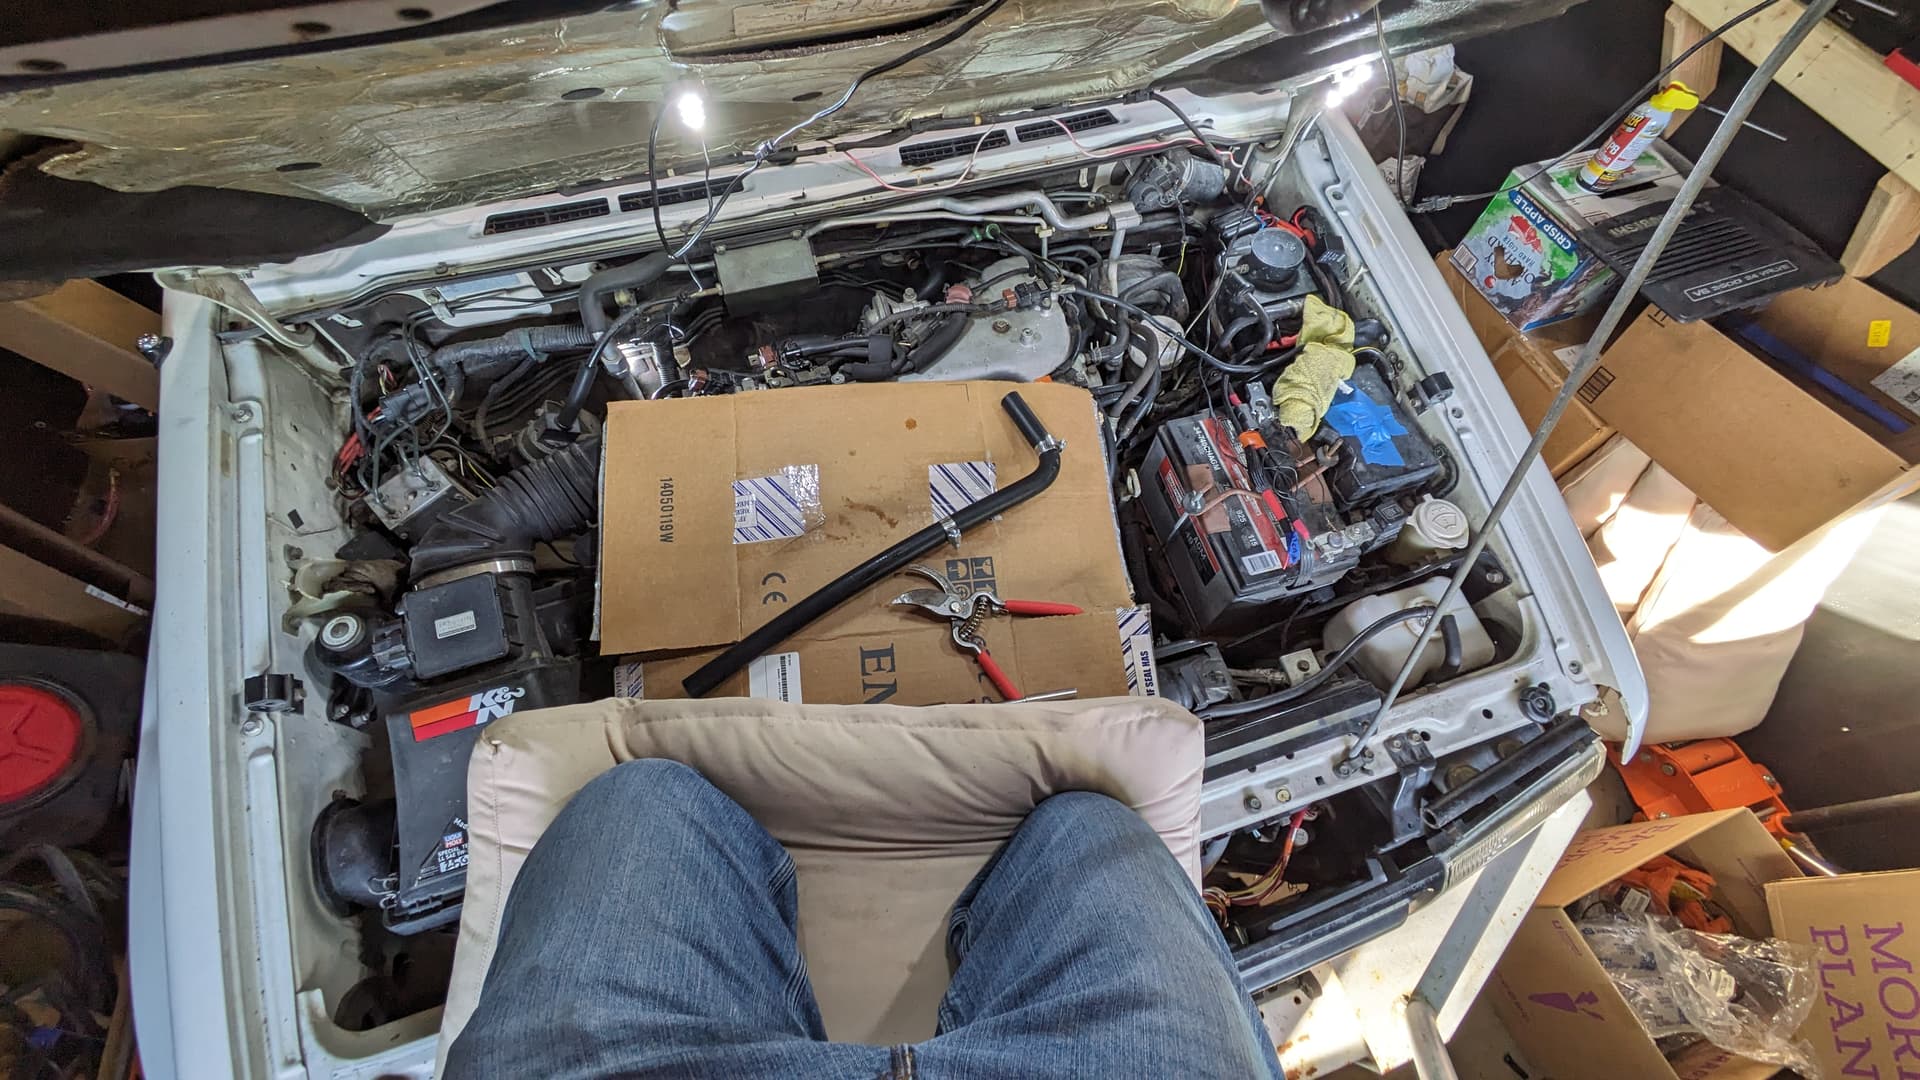
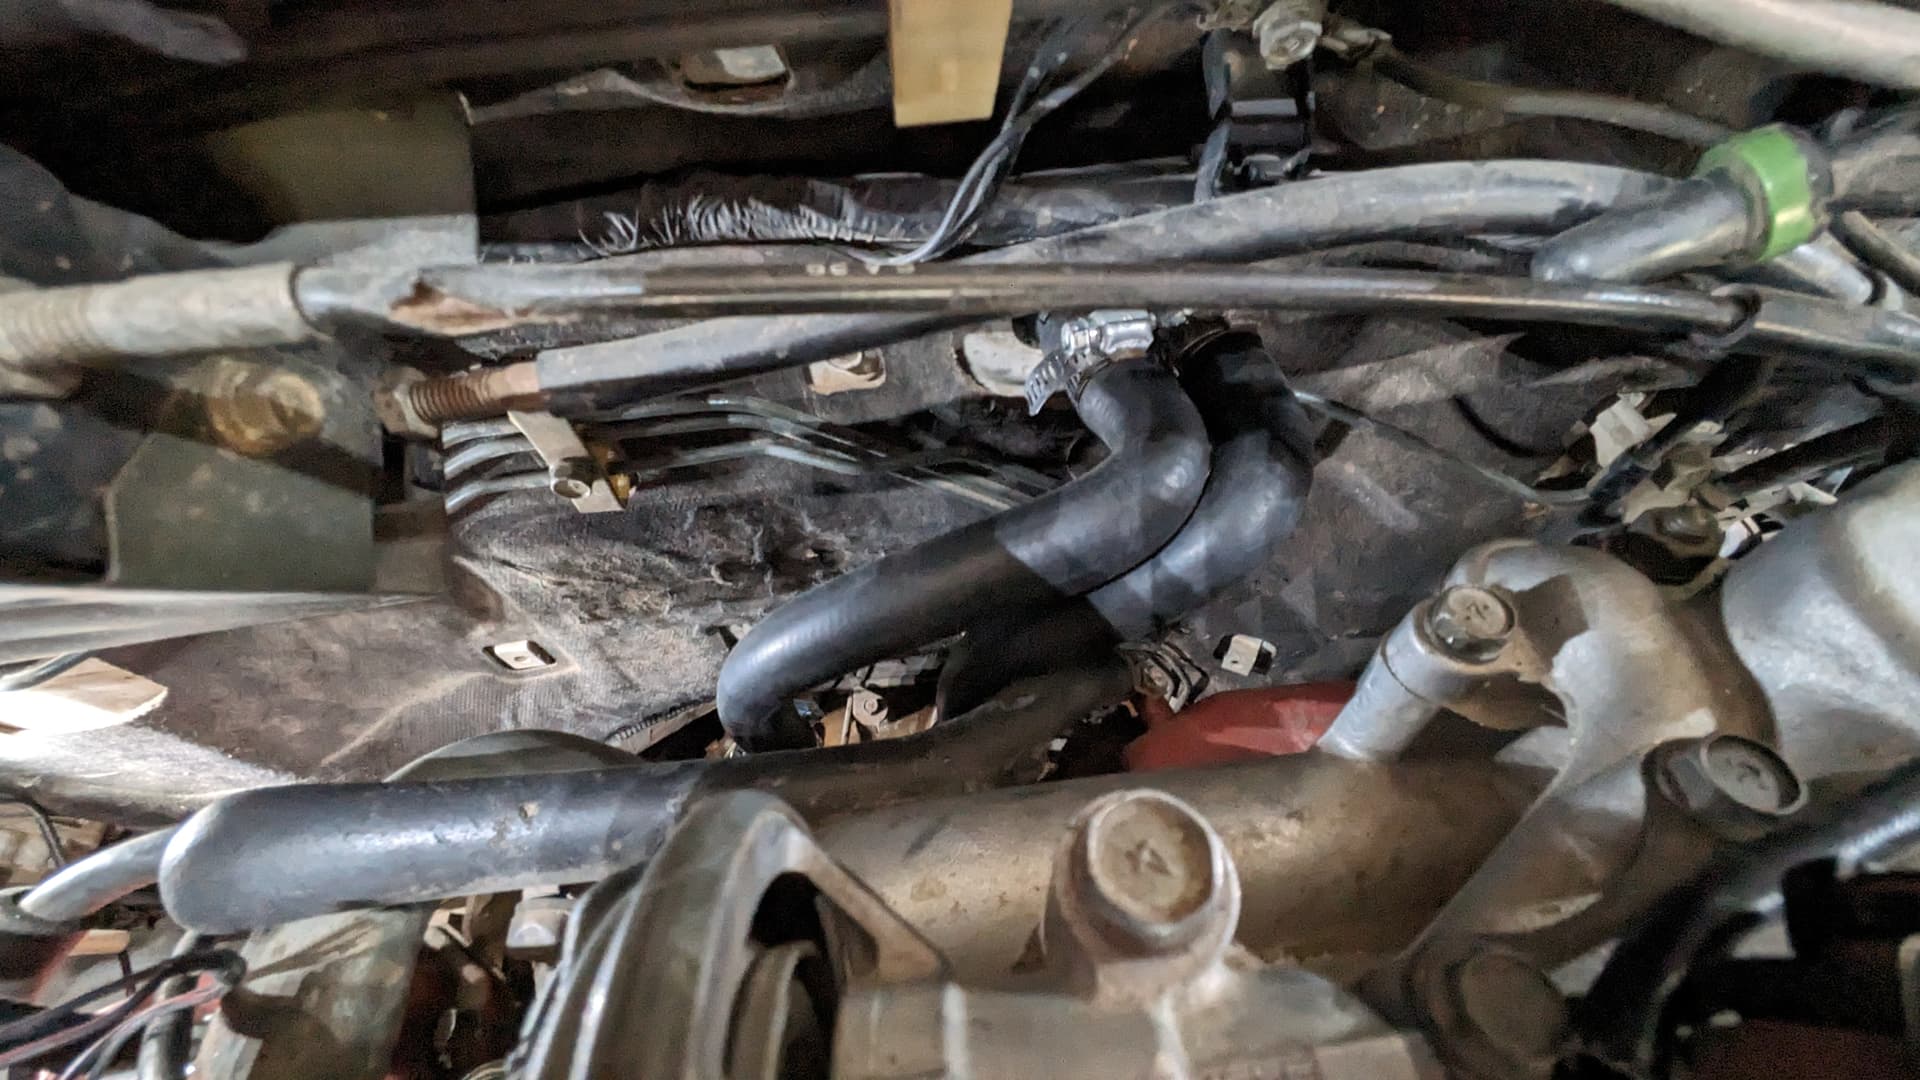
Lol. I keep thinking, White trash get down on your knees. Time for coolant sodomy. I dunno. It’s based on an old Marilyn Manson lyric. And I’ve got a picture of myself on my knees. On top of my engine. Bowing down to the abuse that it replacing heater hoses. ![]()
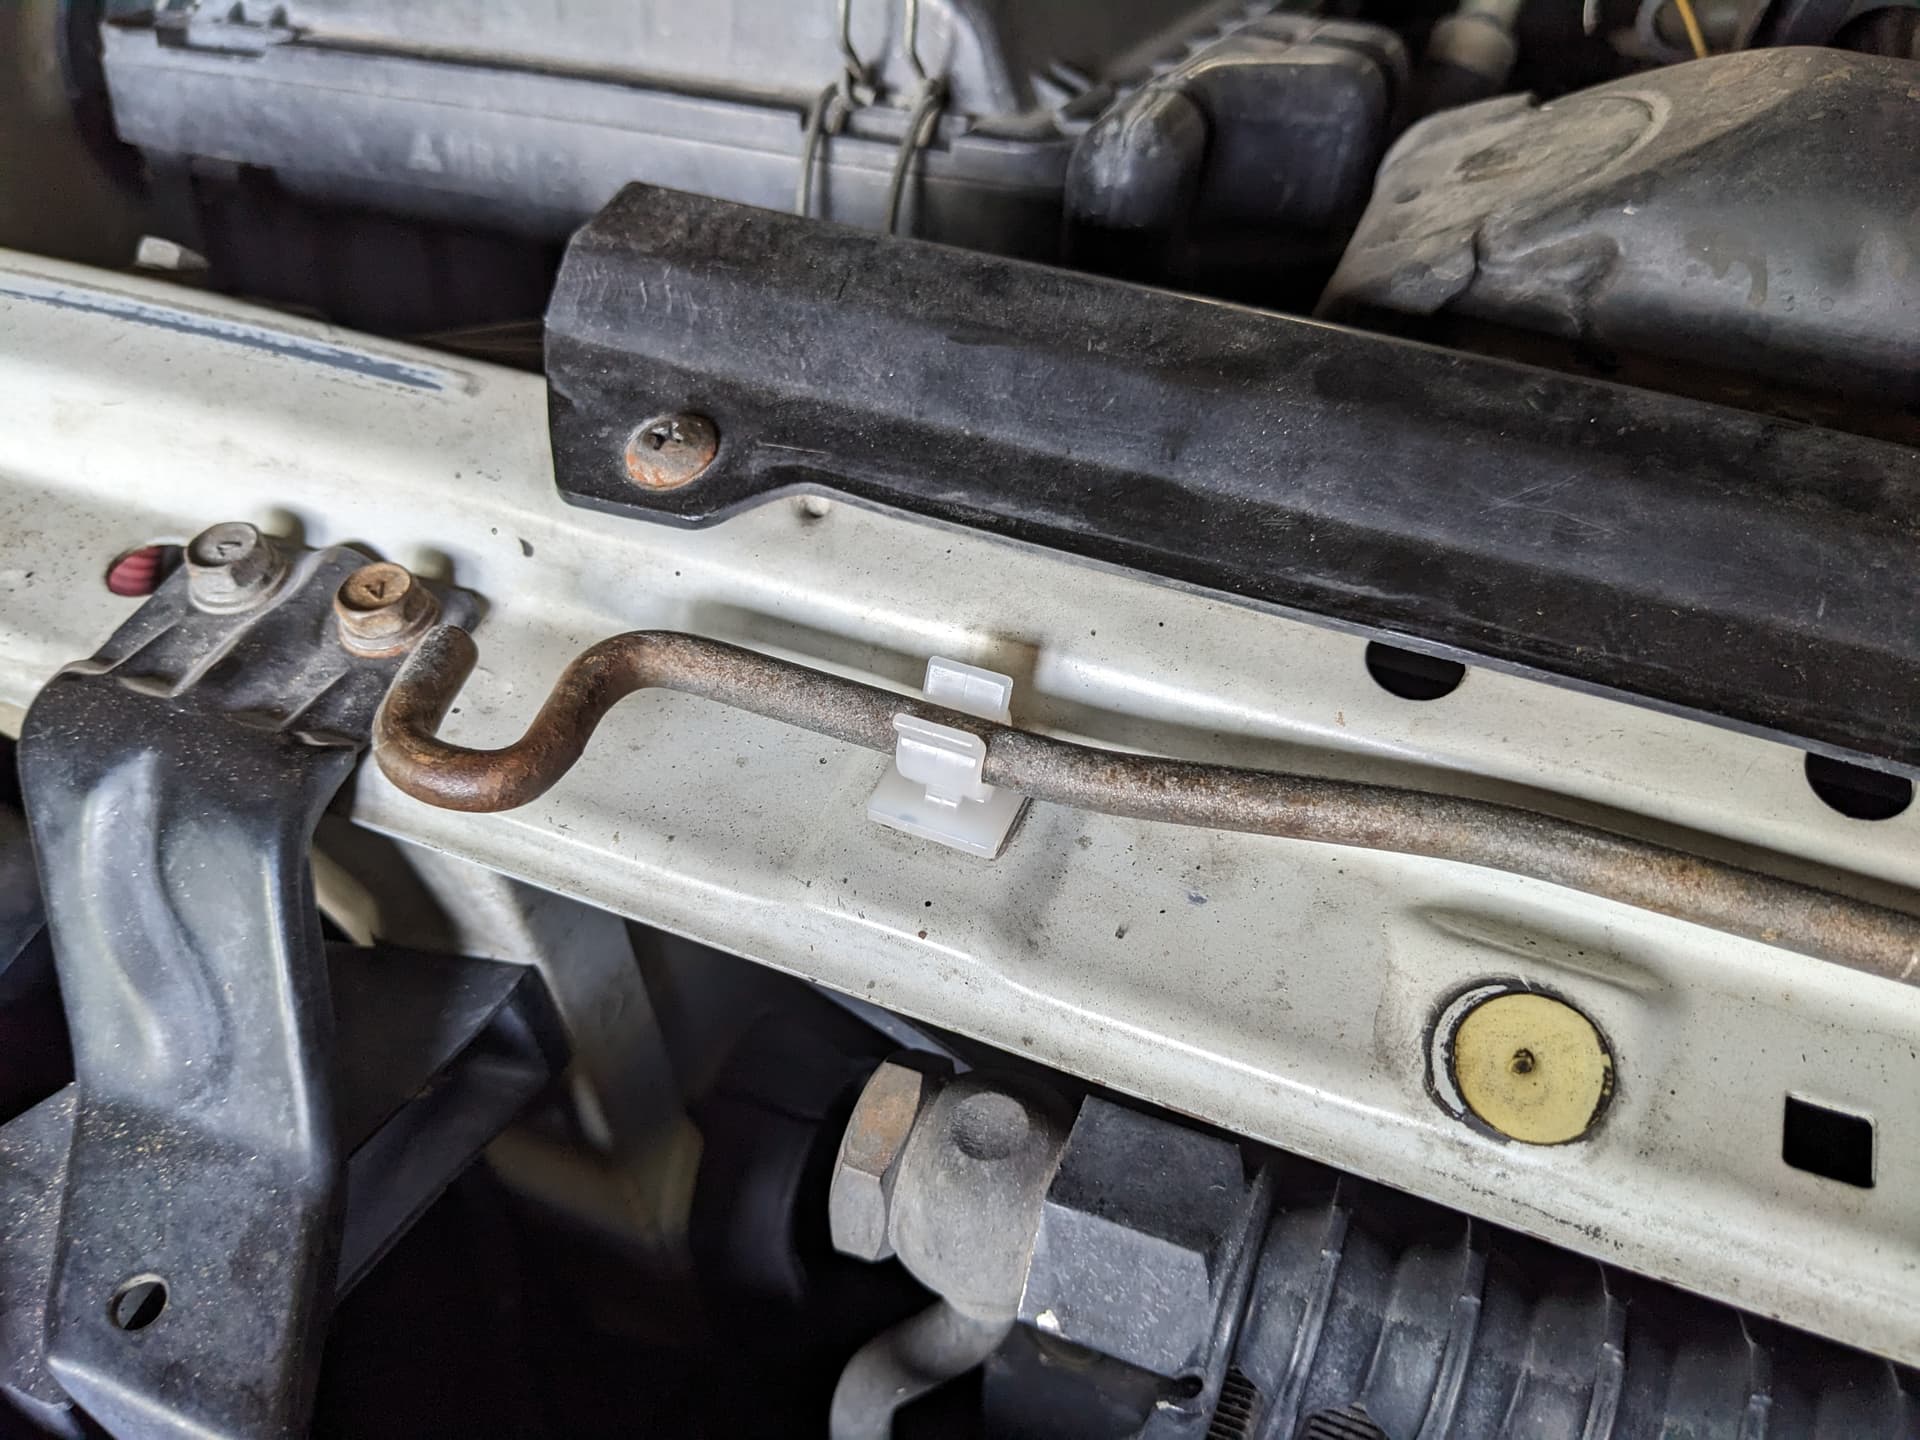
PRO TIP: It looks like the OEM hoses are NLA. Fortunately, I found these Gates 80402s. They’re 5/8" diameter, with a 90° bend in them, making them perfect for the job. I’ve always used plain old bulk hose. And I’ve always had kinks in my heater hoses gurgling away all winter. No more! Easiest swap ever.
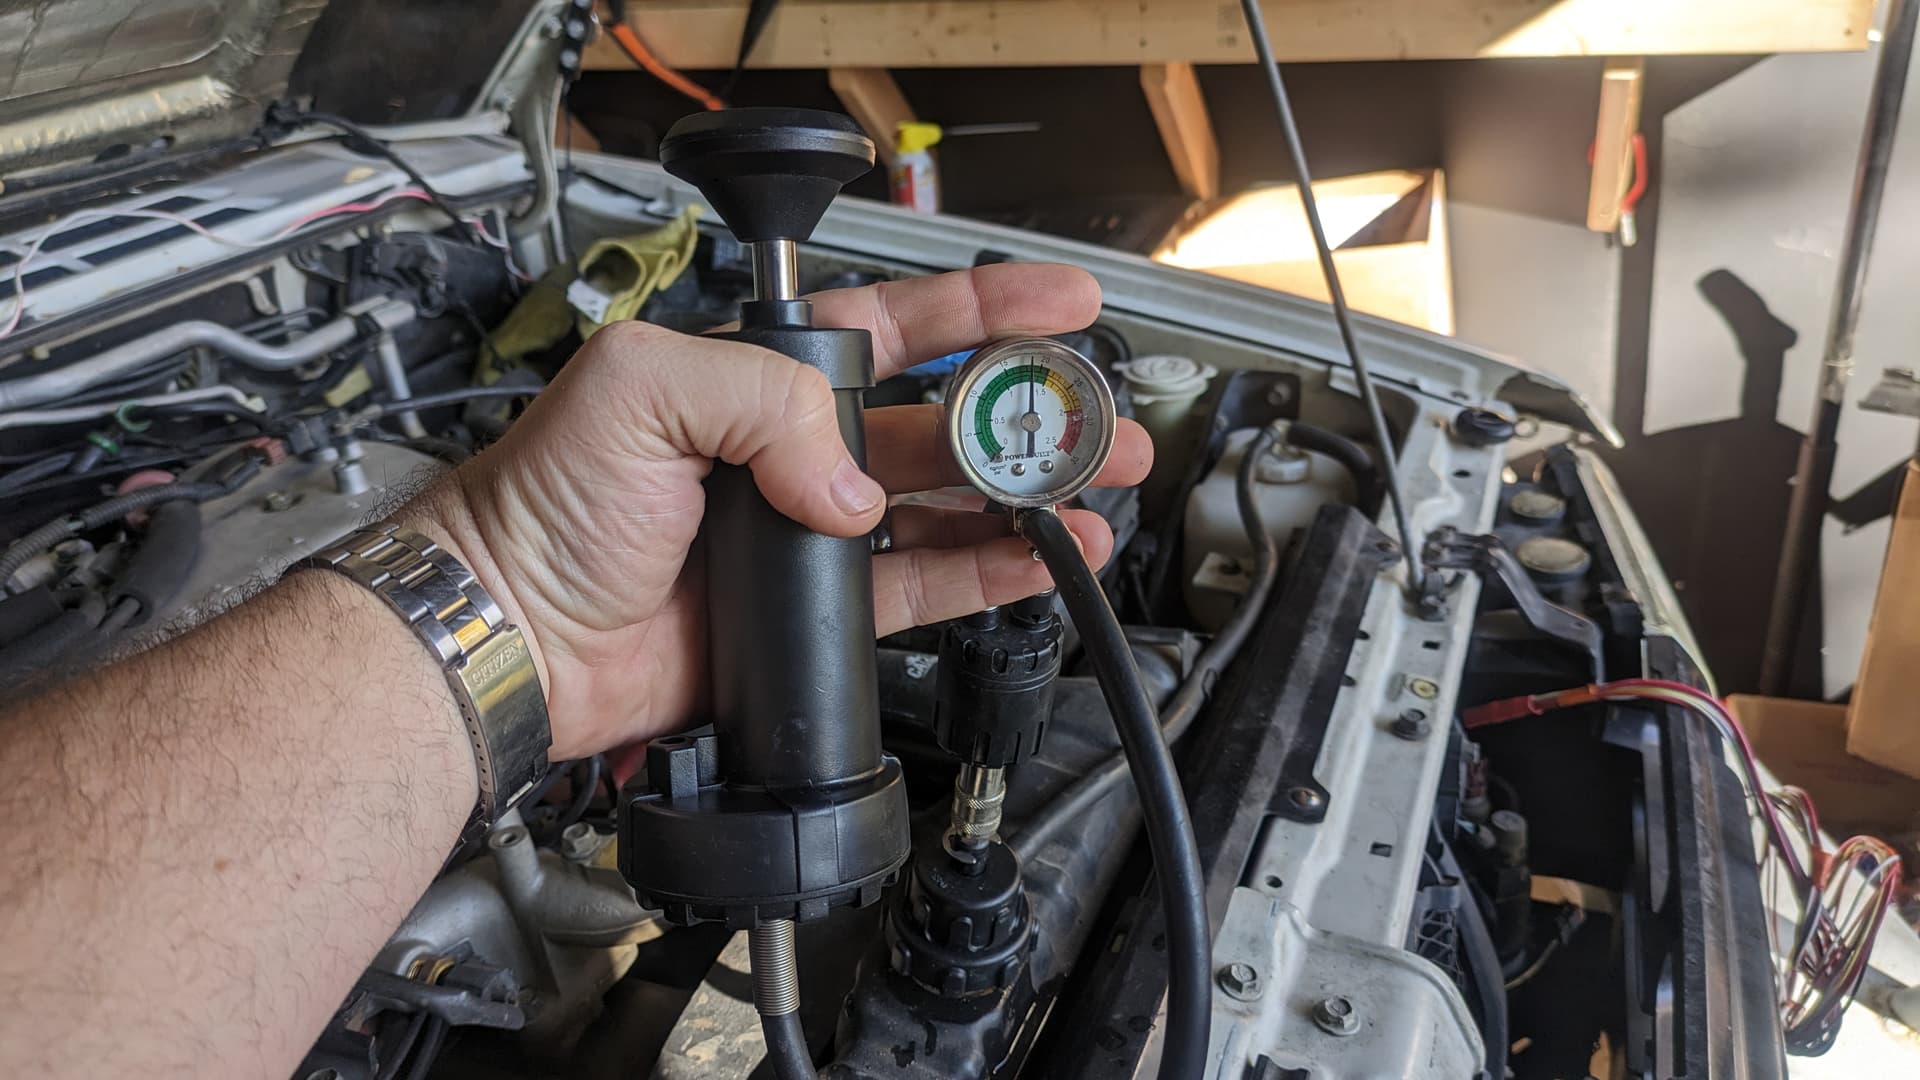
I also rented a $270 cooling system pressure tester kit from AutoZone to make sure everything was rock solid before I put that dashboard back in. Cranked it up 18psi and went back to work. 30 minutes later, it hadn’t moved an inch. #legend

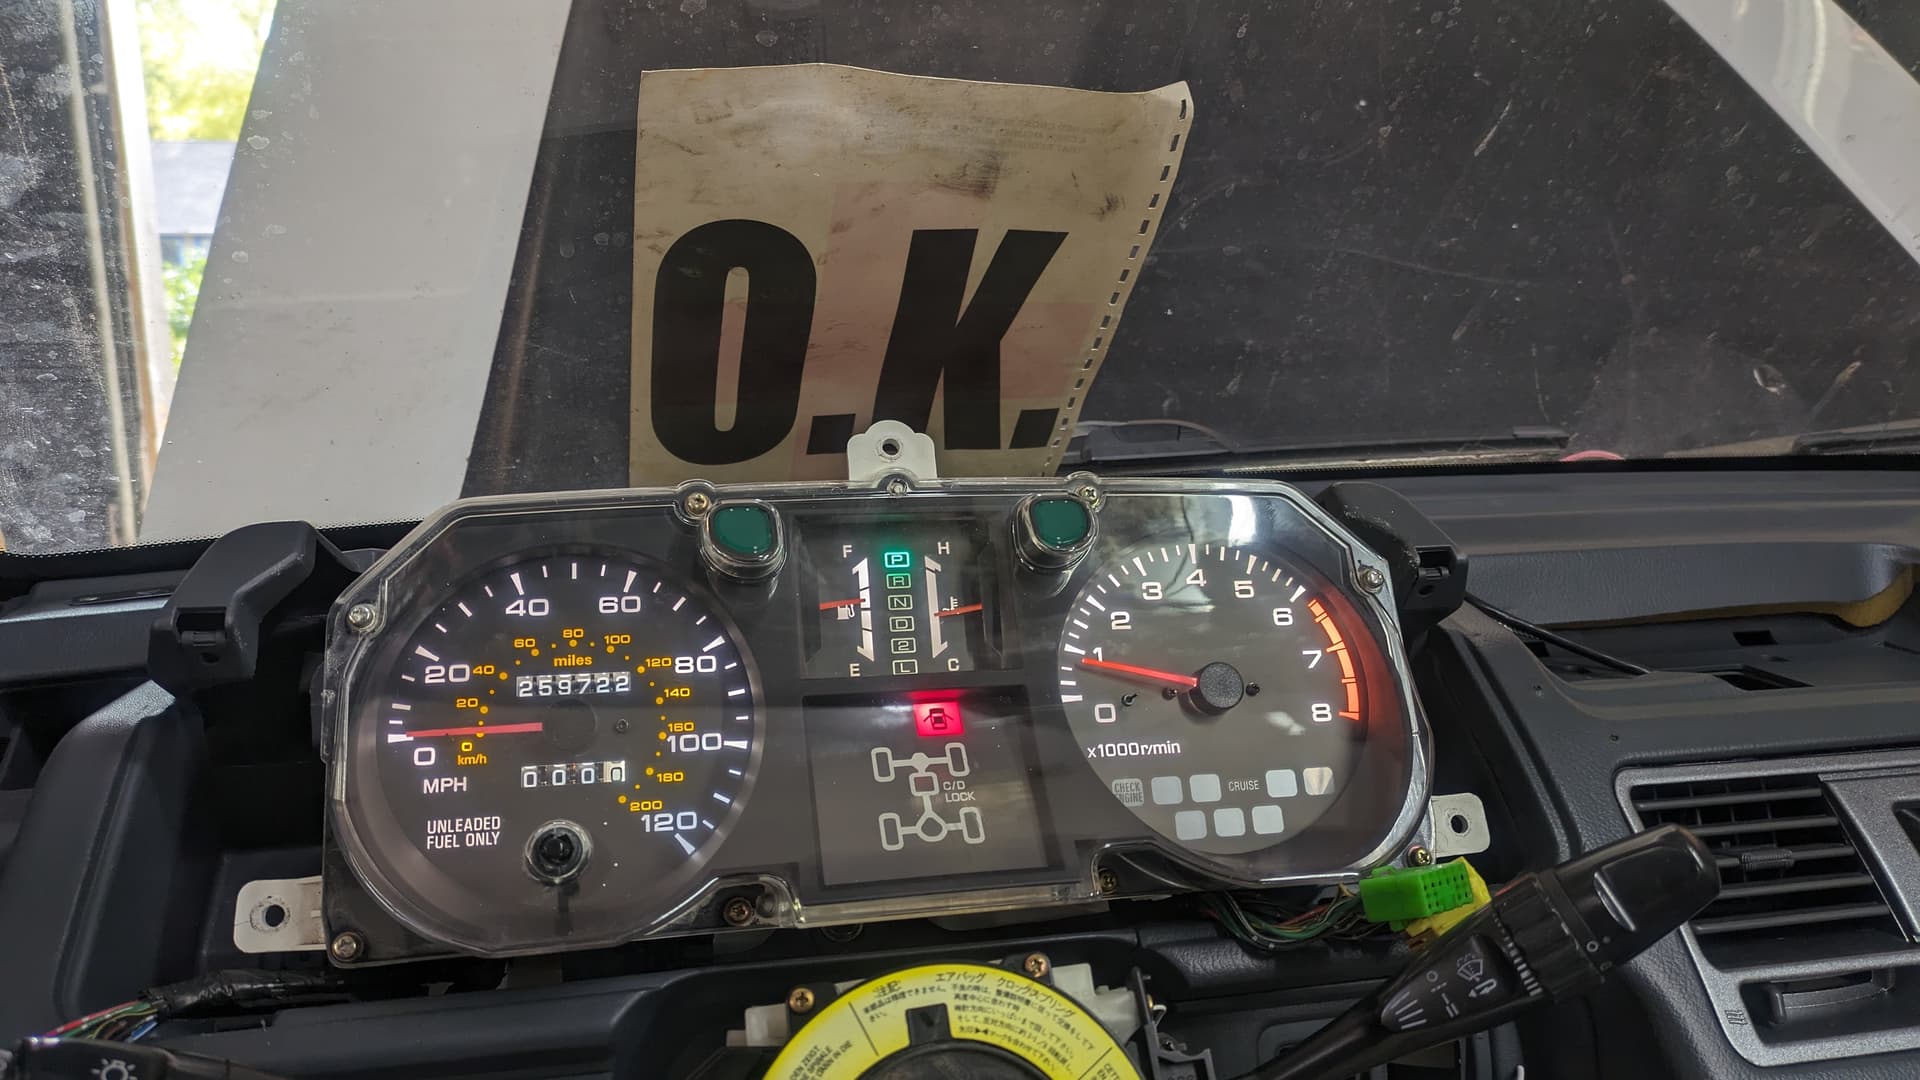
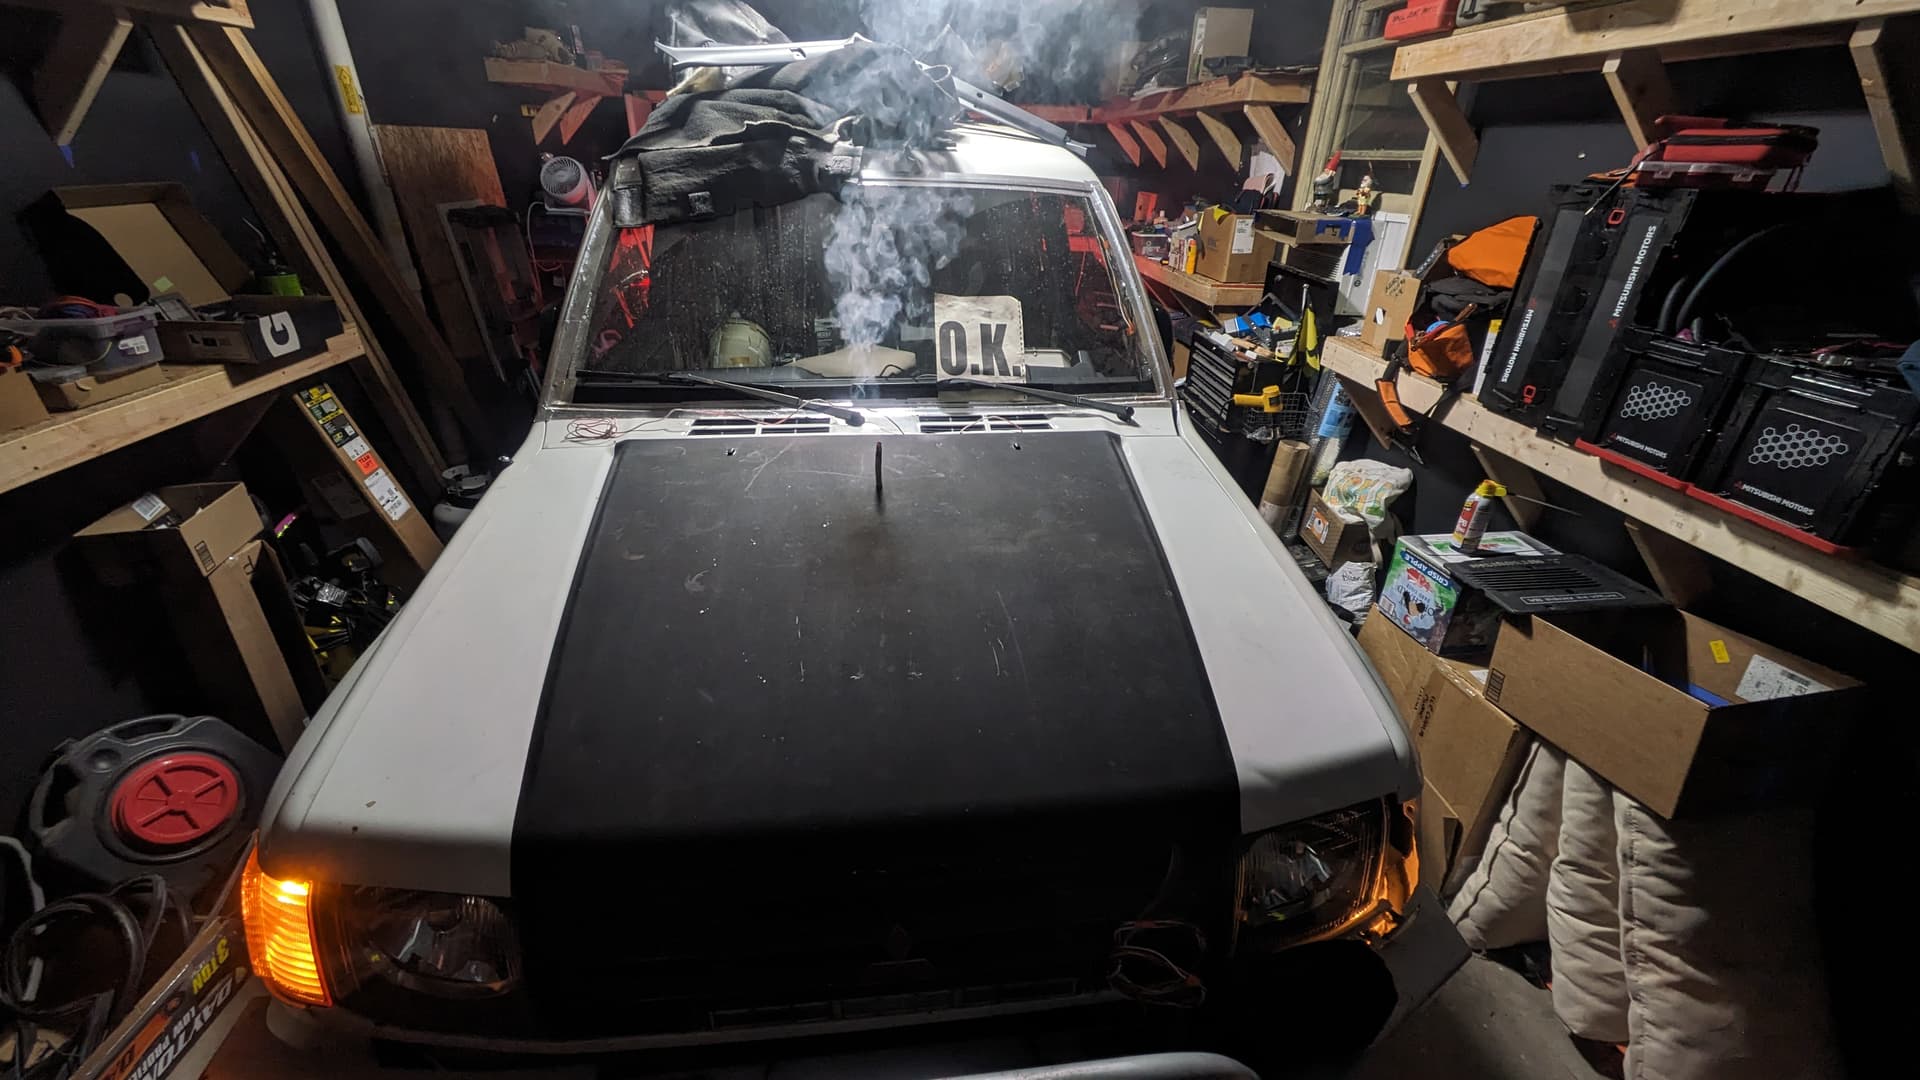
FEZZIK LIVES!
With so many things apart for so long, there’s no telling what I might have overlooked or broke. I pushed those thoughts from my mind, connected the battery, and turned the key. Nothing. I hooked up the old USB booster pack. Nothing. I hooked up the new booster pack. Nothing. I hooked up the motherfuckingMazda. NOTHING.
And then I remembered the factory alarm wasn’t reconnected.
And then I found an excellent write up on ExPo and removed the alarm.
Fezzik started on the first crank with a booster pack.
And I’ve got a pre-wired kill switch!
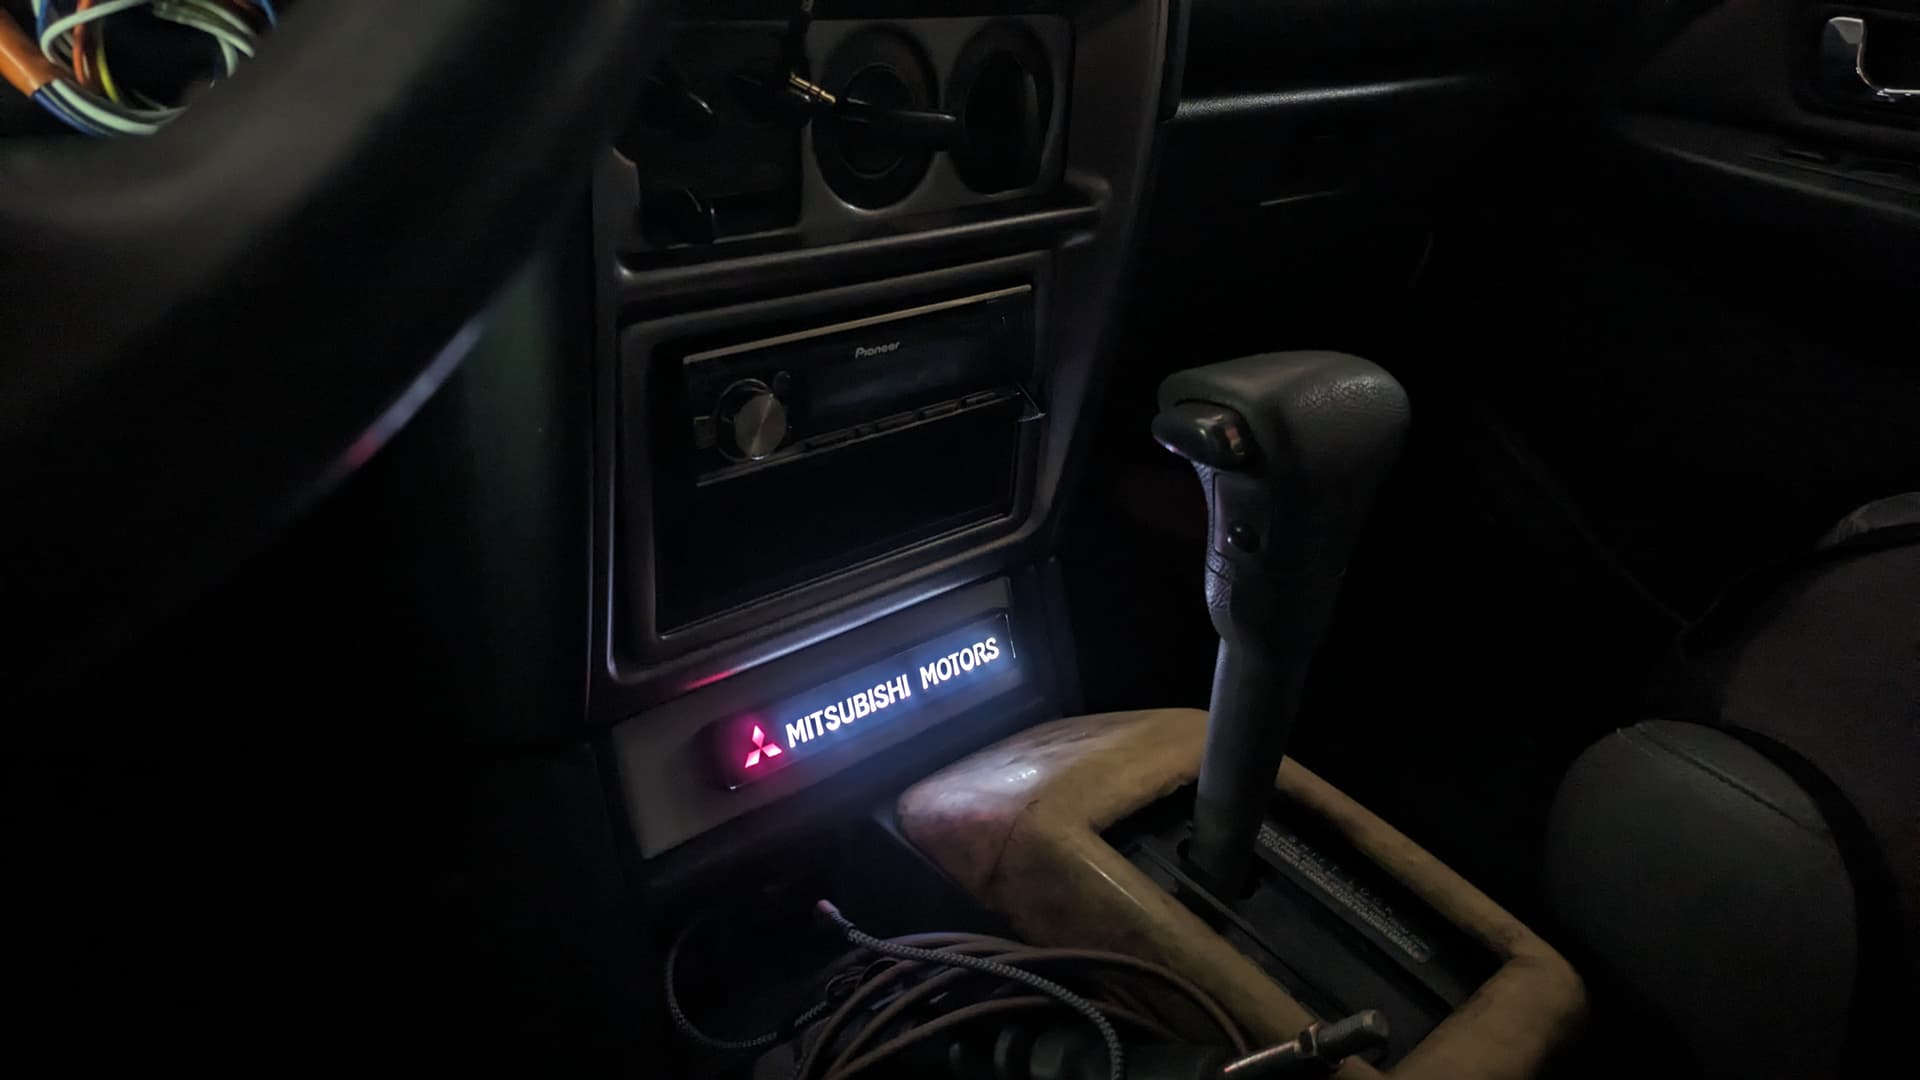
Replaced all the cluster bulbs with LEDs. The key ring too. And, because I’m a big nerd, I added a Mitsubishi Motors LED sign to the center console, powered by the key ring light. It comes on when you open the doors, and goes out with the delayed theatre lighting. #nice


Who’s ready for carpet?
I am! With the alarm completely removed, I now have room for the 3-way crossovers behind the lower dash speaker portals. I can get my entire hand into each opening. That’s good news, because I was wondering where the math I was going to put a couple VHS-sized crossovers.
The underseat subwoofer does not sit under the front passenger seat due to the second row floor ducting. I’m considering cutting off the last bit of the duct (it’s swept upward about an inch) and raising the seat maybe 1/4-1/2 inch.
Oh, and you can also see my pre-run aux lighting wires coming through the dash to the left of the HVAC opening. These are for all the aux lights. I’ve pre-run wires from the combo switch so I can tap for the high beam and parking light signals for my switch panel. I want be able to dim all the aux lights with the high beams or selectively run them with only the parking lights when I need/want.
- Diode Dynamics SS18 bar
- the old LightForce “Oscars”
- a set of ADD ditch lights
- (8) amber/white safety flashers (tied to hazards)
Vibes Alive
Just some nice night shots of a quiet garage where shit’s getting done.
Yeah. I burn some palo santo now and then to clear out bad jubies. It’s a thing.


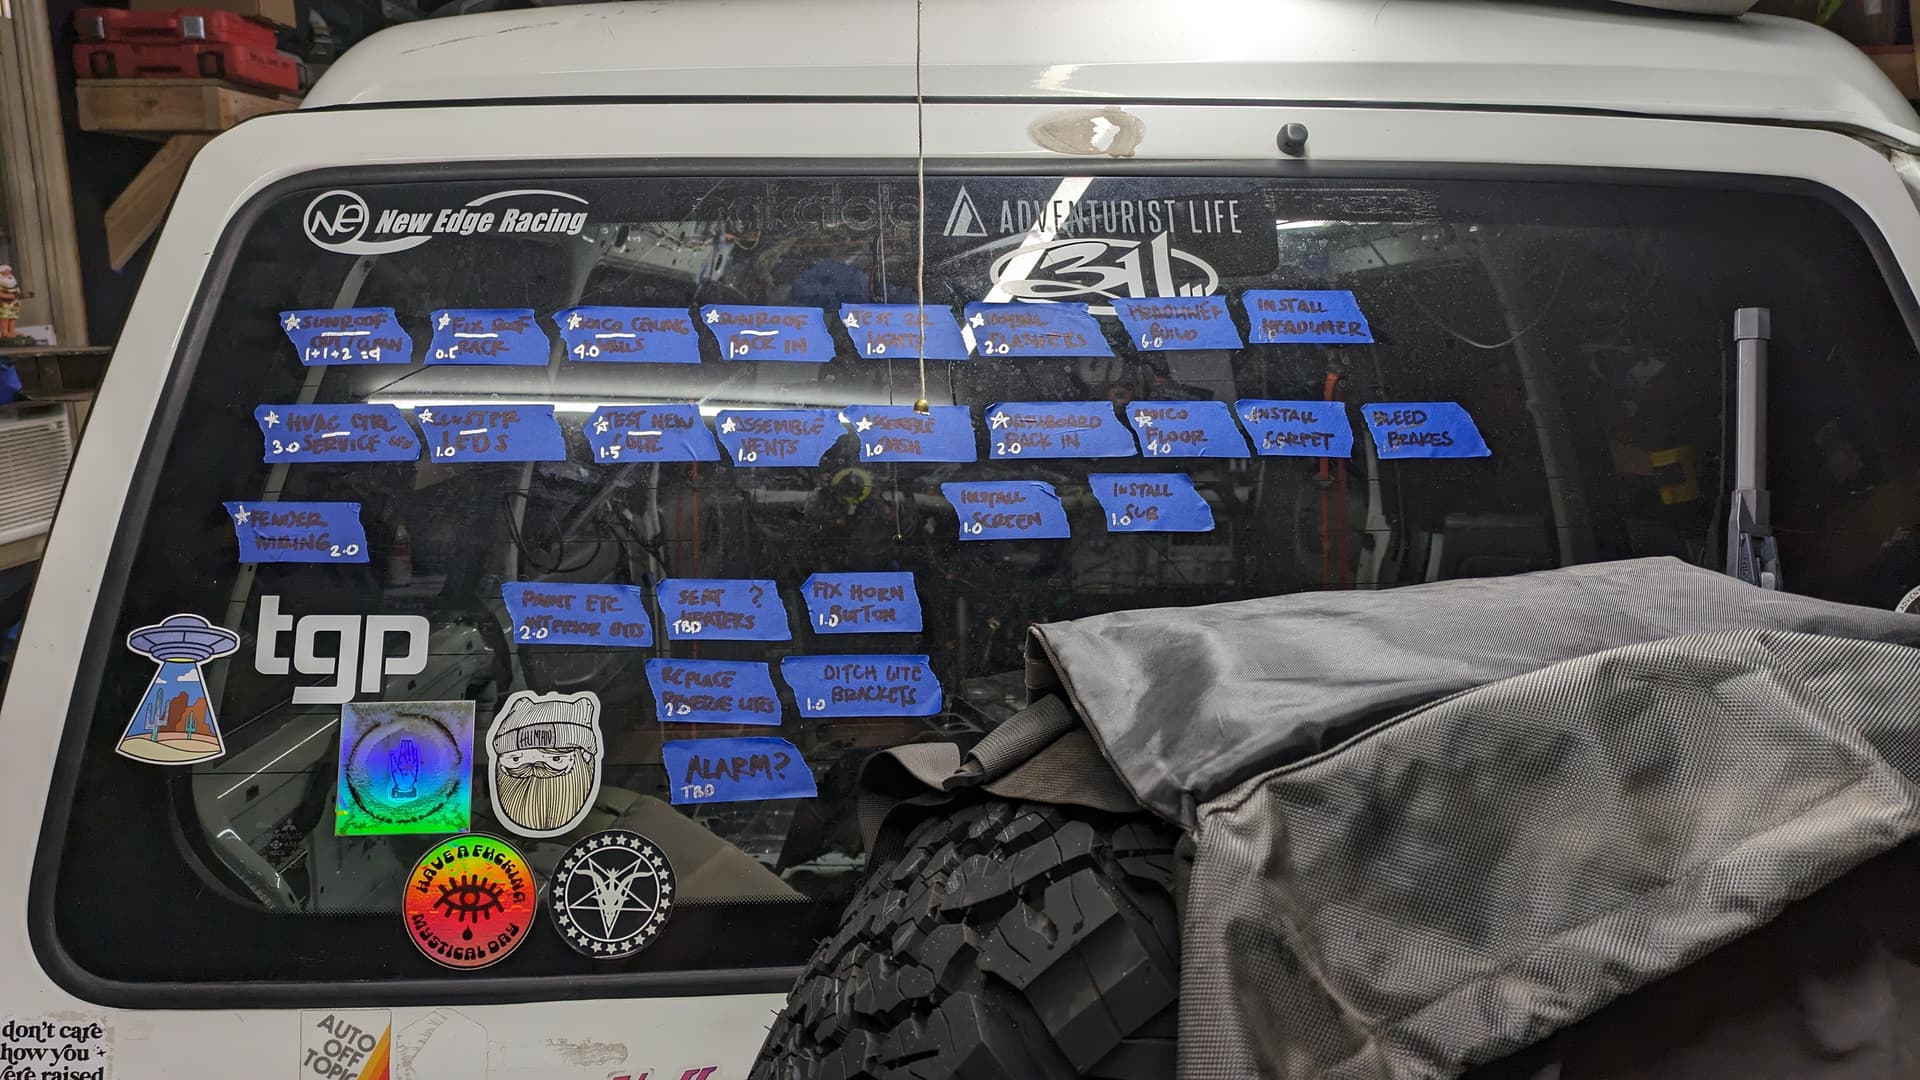
There’s still a lot to do. Including peel off a bunch of these critical path stickies and take a picture. #soon
Man, I’m excited to drive this beast again.
2 Likes
So what you’re saying is the last time you drove it I was active on the forum? Lol it’ll be that much sweeter when you’re behind the wheel buddy. This might be the best time she’s been under your tutelage?
2 Likes
I wouldn’t be surprised if this was the case, Phil. Haha. It’s been a while. And oh, how sweet it is to be driving Fezzik again. I love the Mazda, but I’ve been driving it so long now that I’ve got a running total in my head for what it would cost to throw a full suite of Corksport mods at it and have been trying to scratch that itch with hands-on quality time with Ol’ Fez.
Now that I’ve got two errands and about 30 miles on him, I’m reminded how this whole heater core project superseded a brake system mystery—where the fluid going? The pedal had been getting soft, almost to the floor, and I found the reservoir was low. Hard to spot leaky braided brake lines when everything under the truck is coated in Surface Shield, though.
The joys of driving a better-than-ever machine are kinda hampered by the realities of things we didn’t get to (yet) and things we’ll have to do-over relatively soon. Even so, progress is progress, and aside from all those rear bushings, nothing left on the interior is more than a fun weekend project that won’t keep me from using the truck if I have to.
I’ll upload a bunch of pictures in a reply, but it will be a bit before I can add context. Gonna be in meetings nonstop for the next five hours today…
2 Likes
Journey to the Heater Core Ep. 8
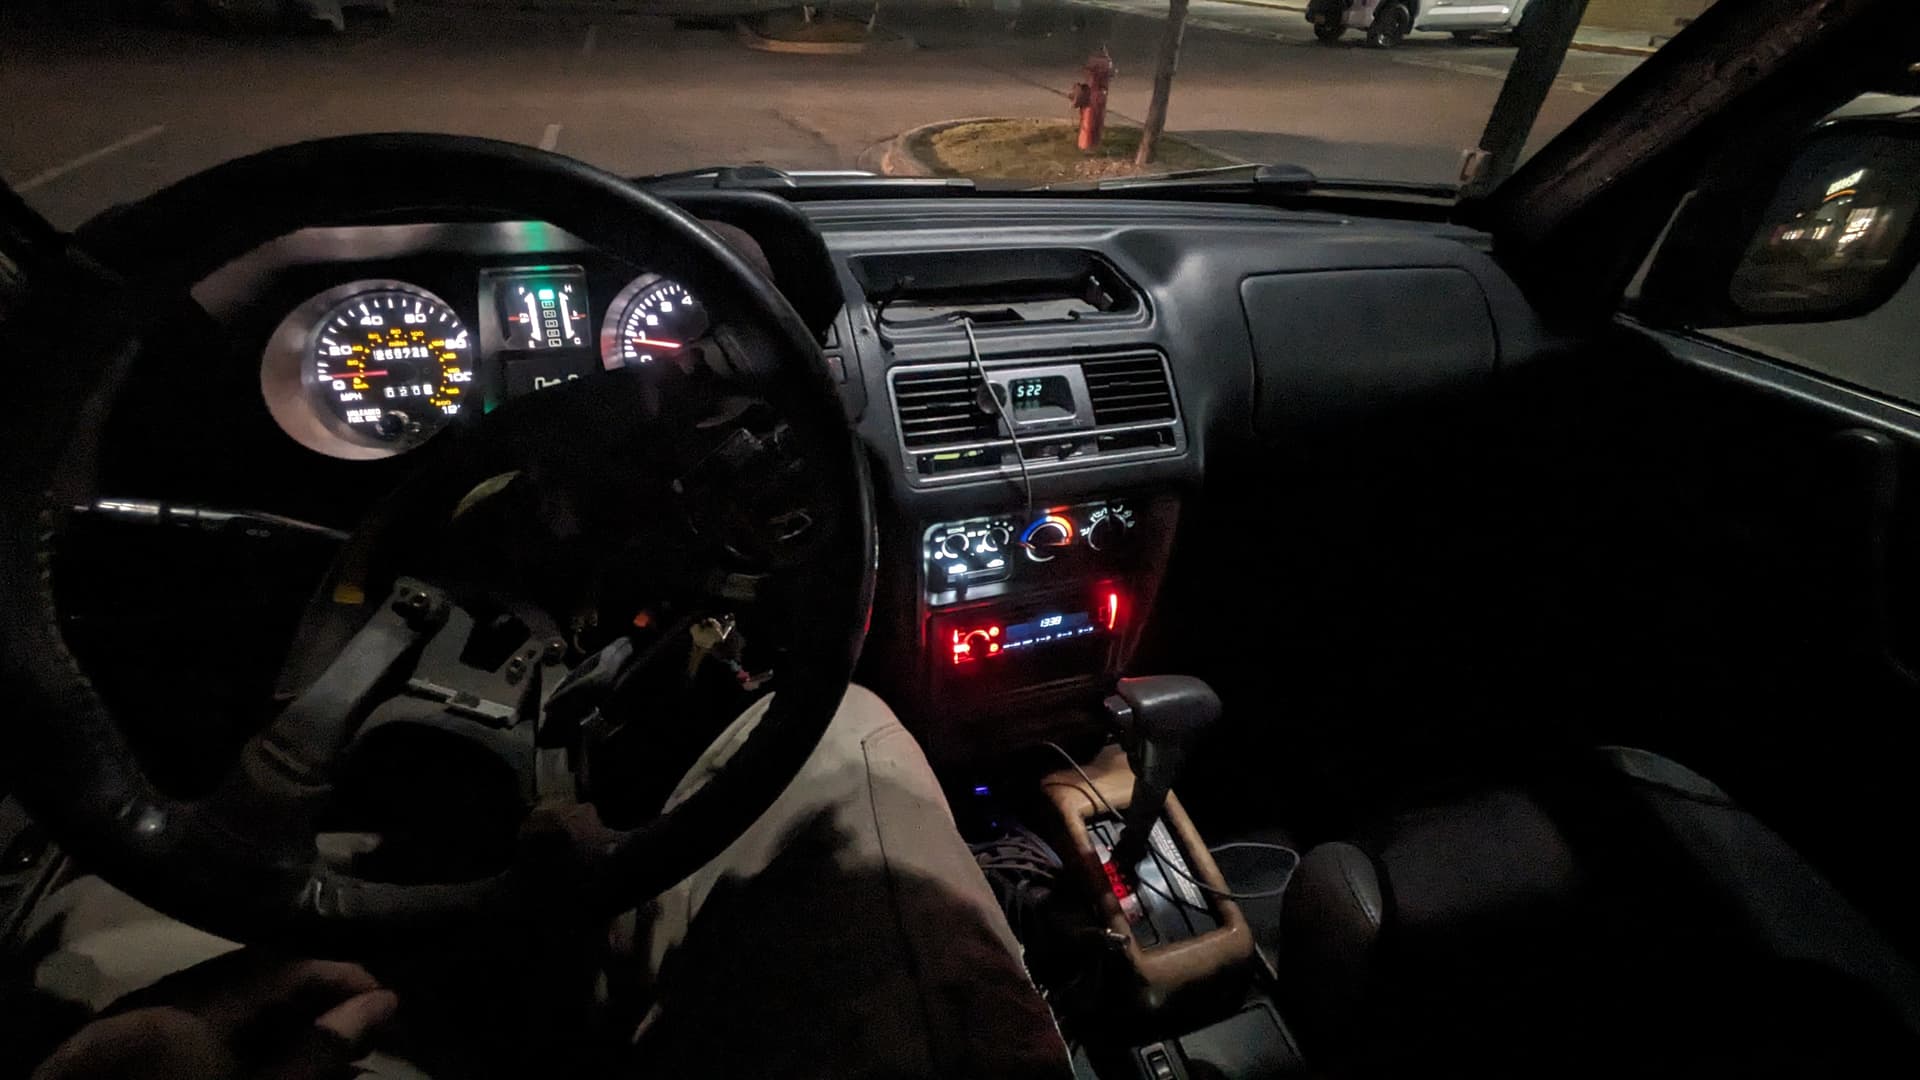
On the road again!
I’ve put about 30 miles on Ol’ Fez since the last update. Uploading all the pictures, but will need to circle back for the stories (though I’m sure this audience knows what they’re looking at). ![]()
Carpet Pad Install
DEI Under Carpet Lite padding under the front seats. Need to order another roll for the back. It’s good stuff. Nice and thick. Already has an entire can of grape soda spilled into it. ![]() Does make reinstalling trim tricky due to the thickness. The carpet is now, like, 10X thicker.
Does make reinstalling trim tricky due to the thickness. The carpet is now, like, 10X thicker.
Makes a noticeable difference to the sound, even without a headliner in place.

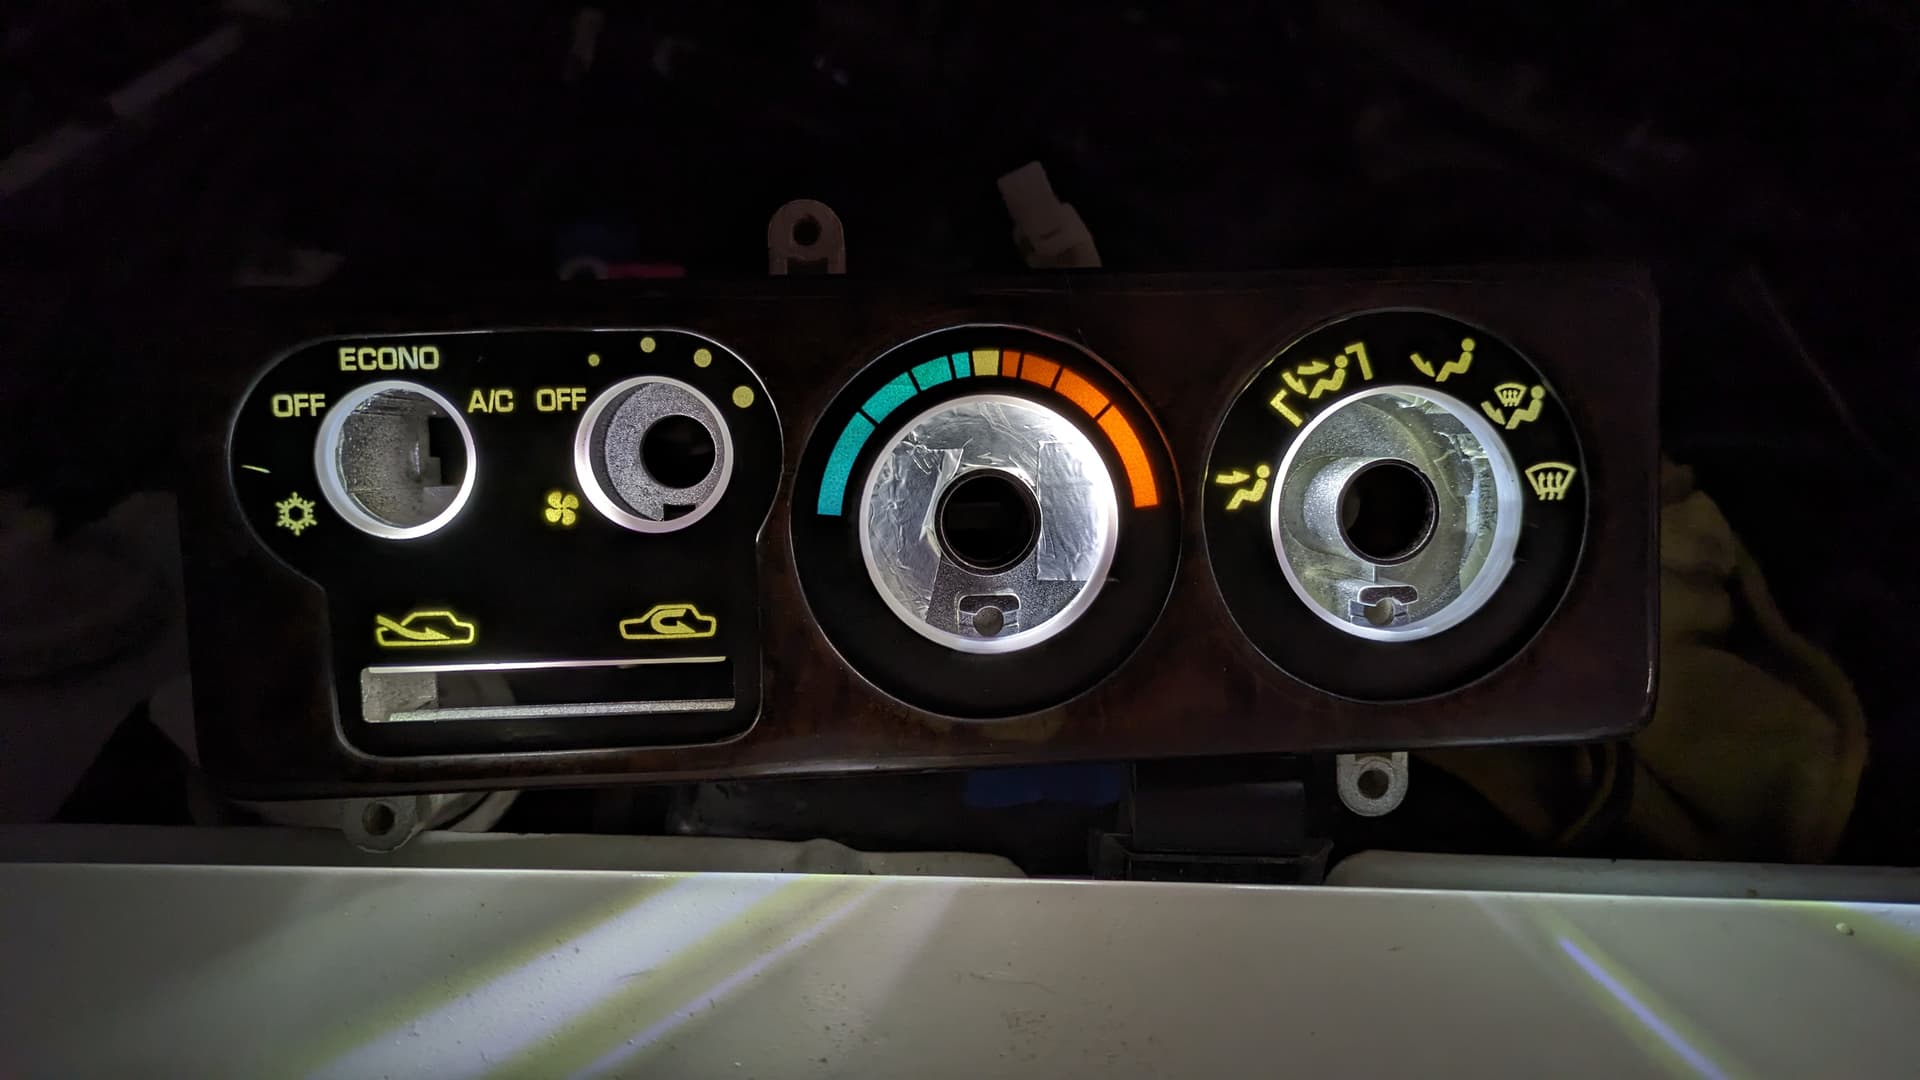
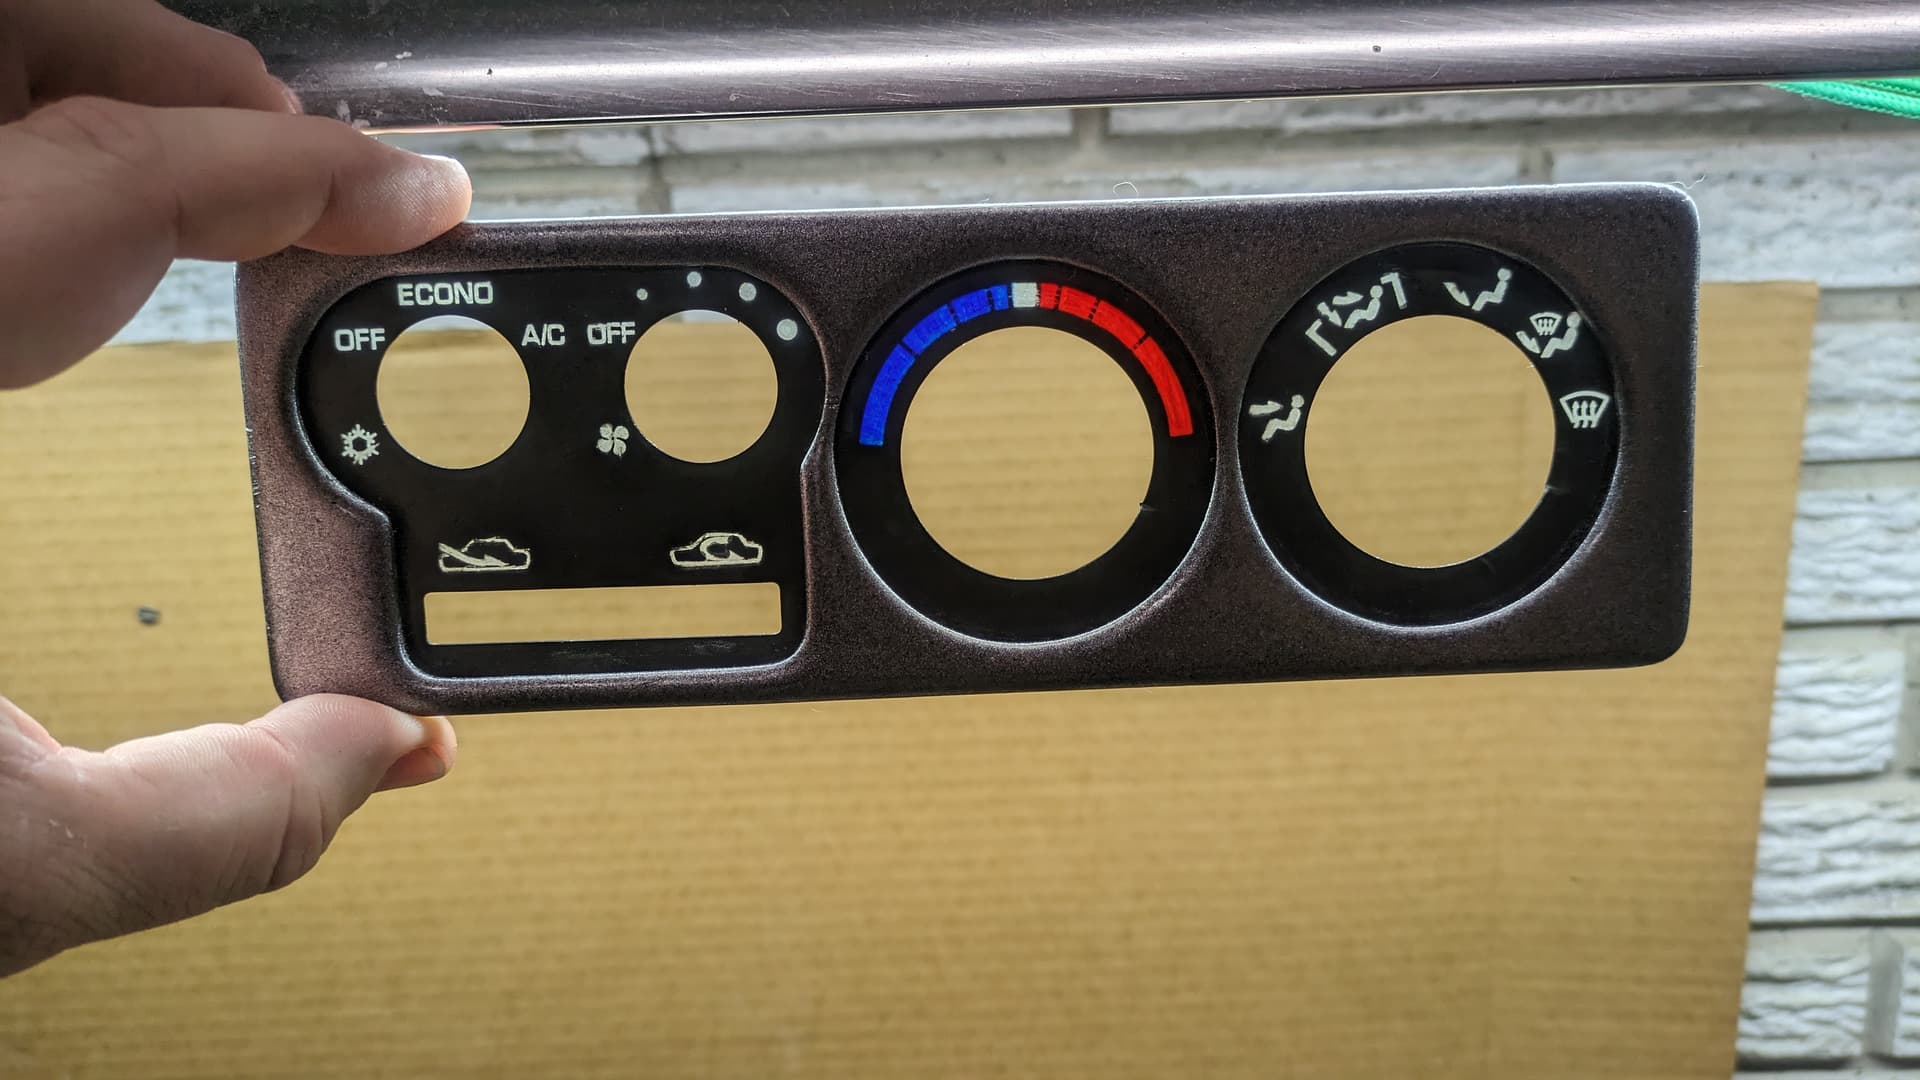
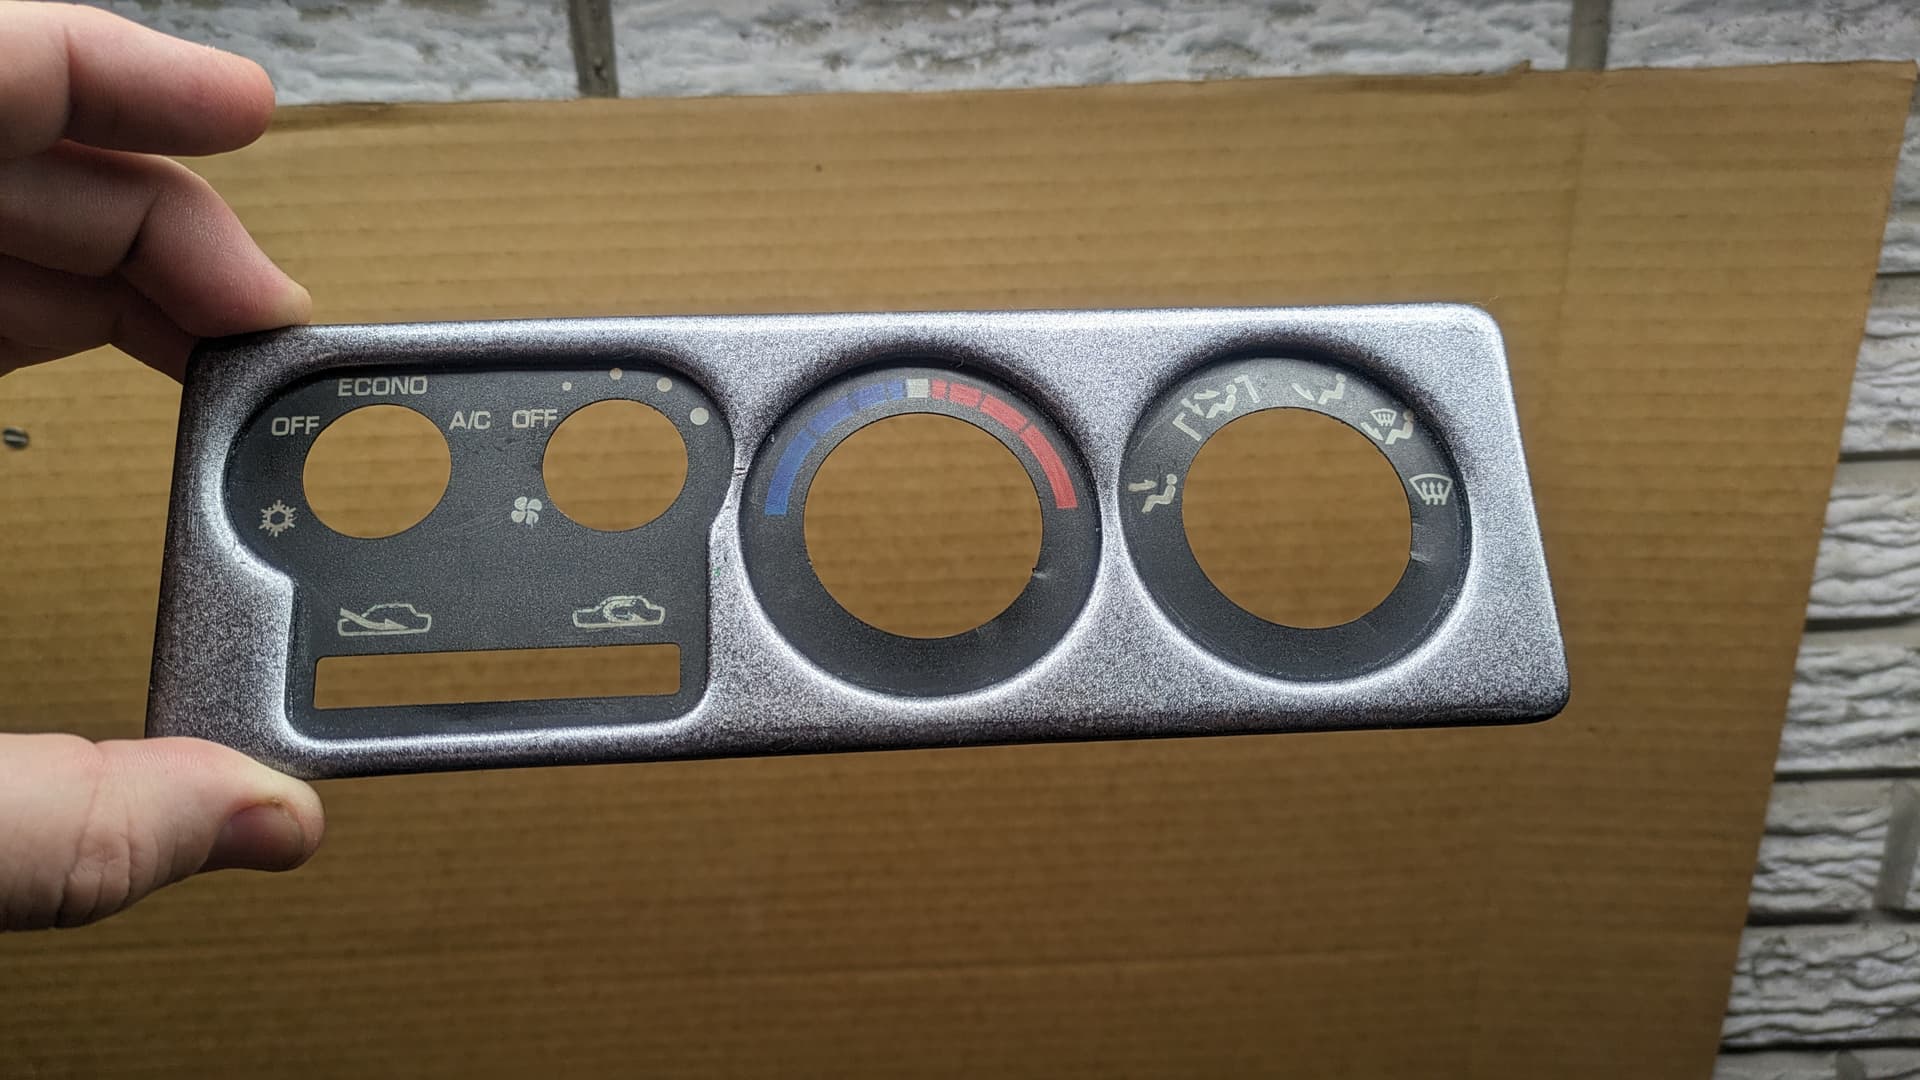
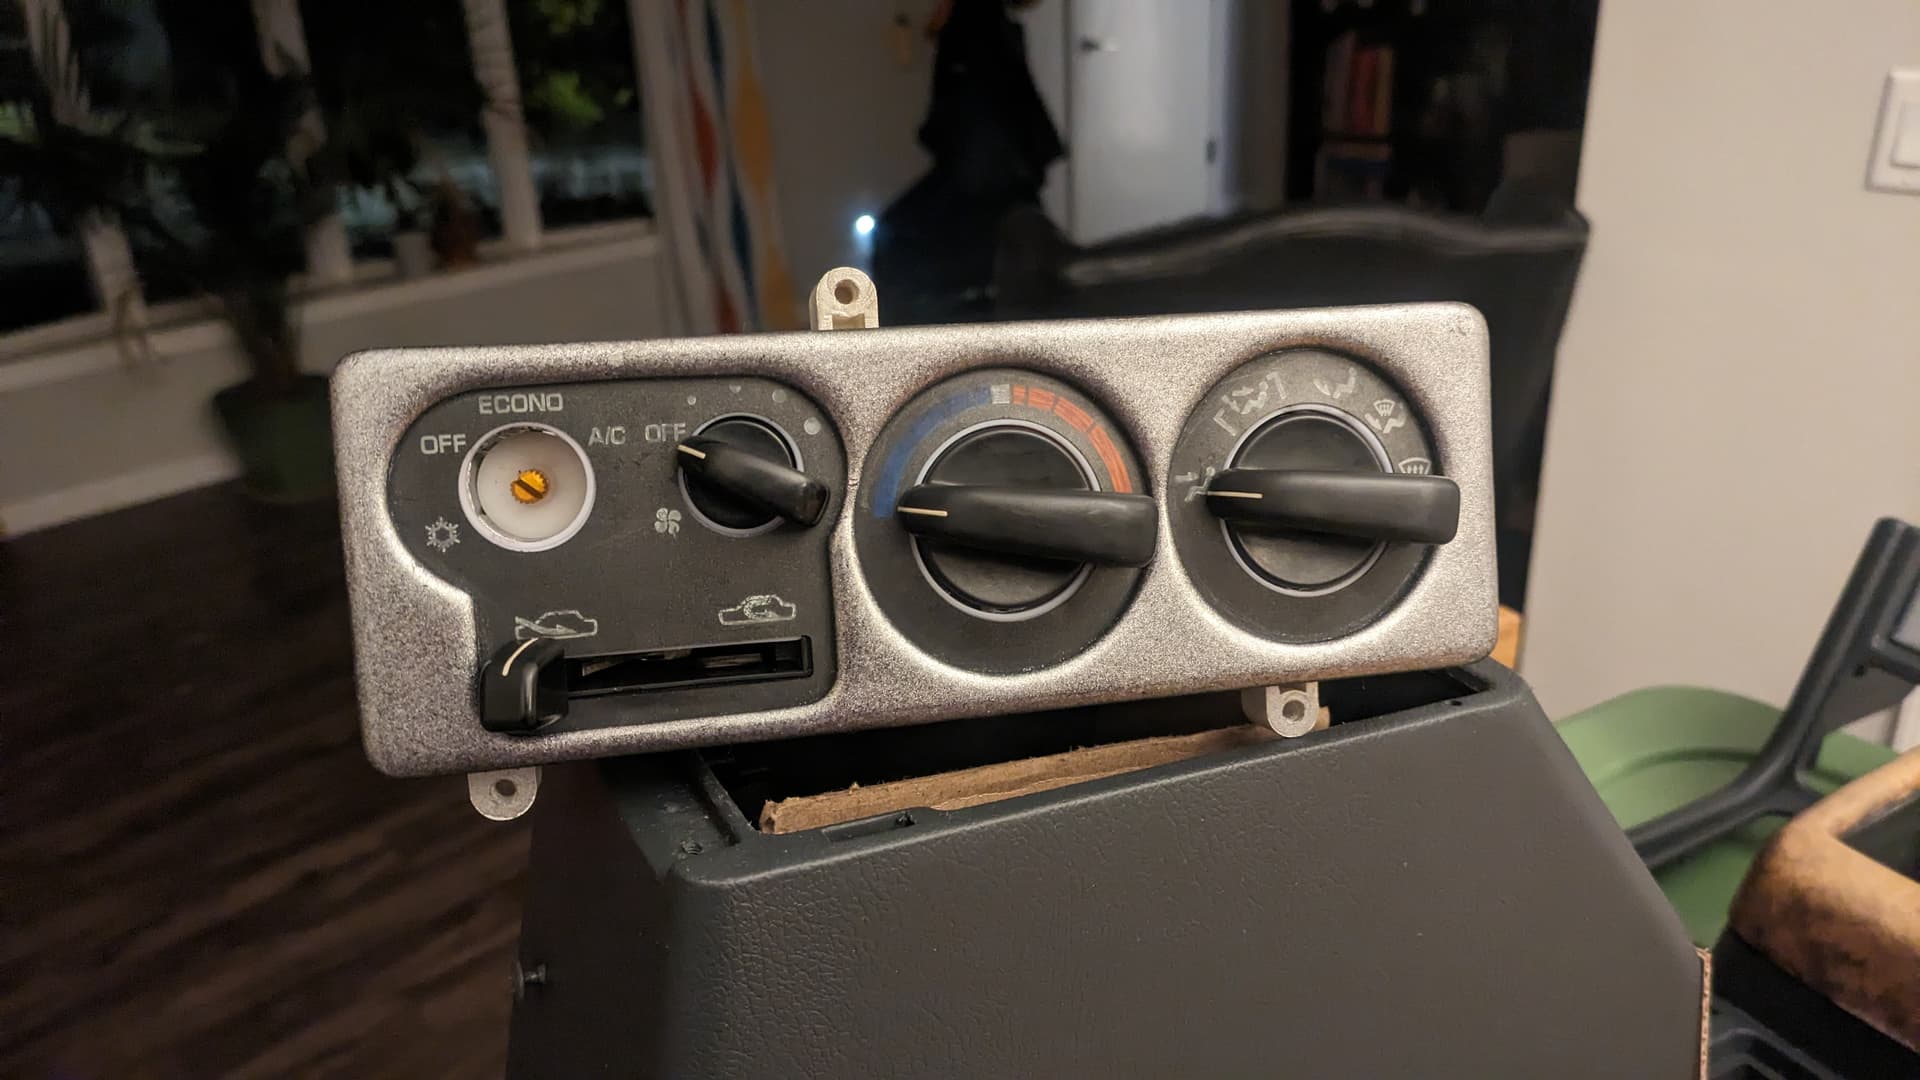
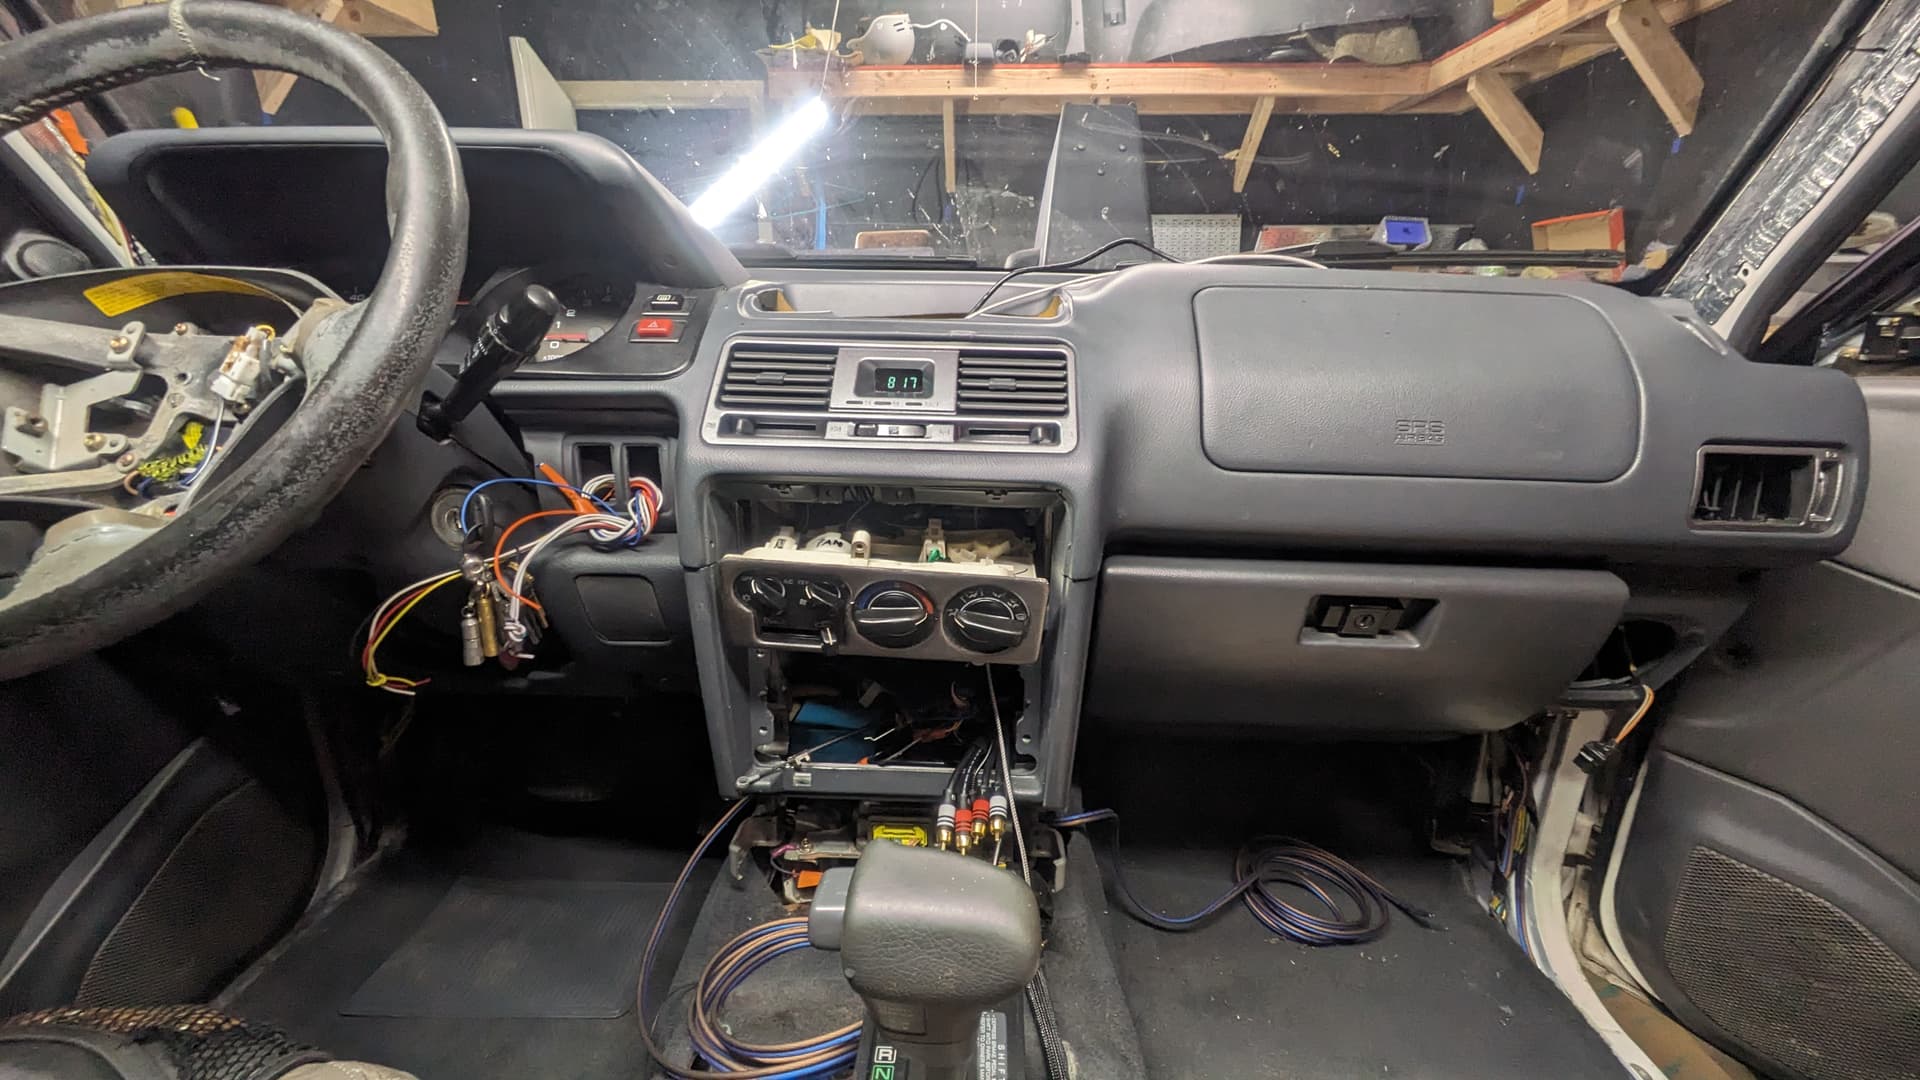
Climate Control Refurb
I am still not happy about this and will be looking for a replacement control set to do a better job on very soon.

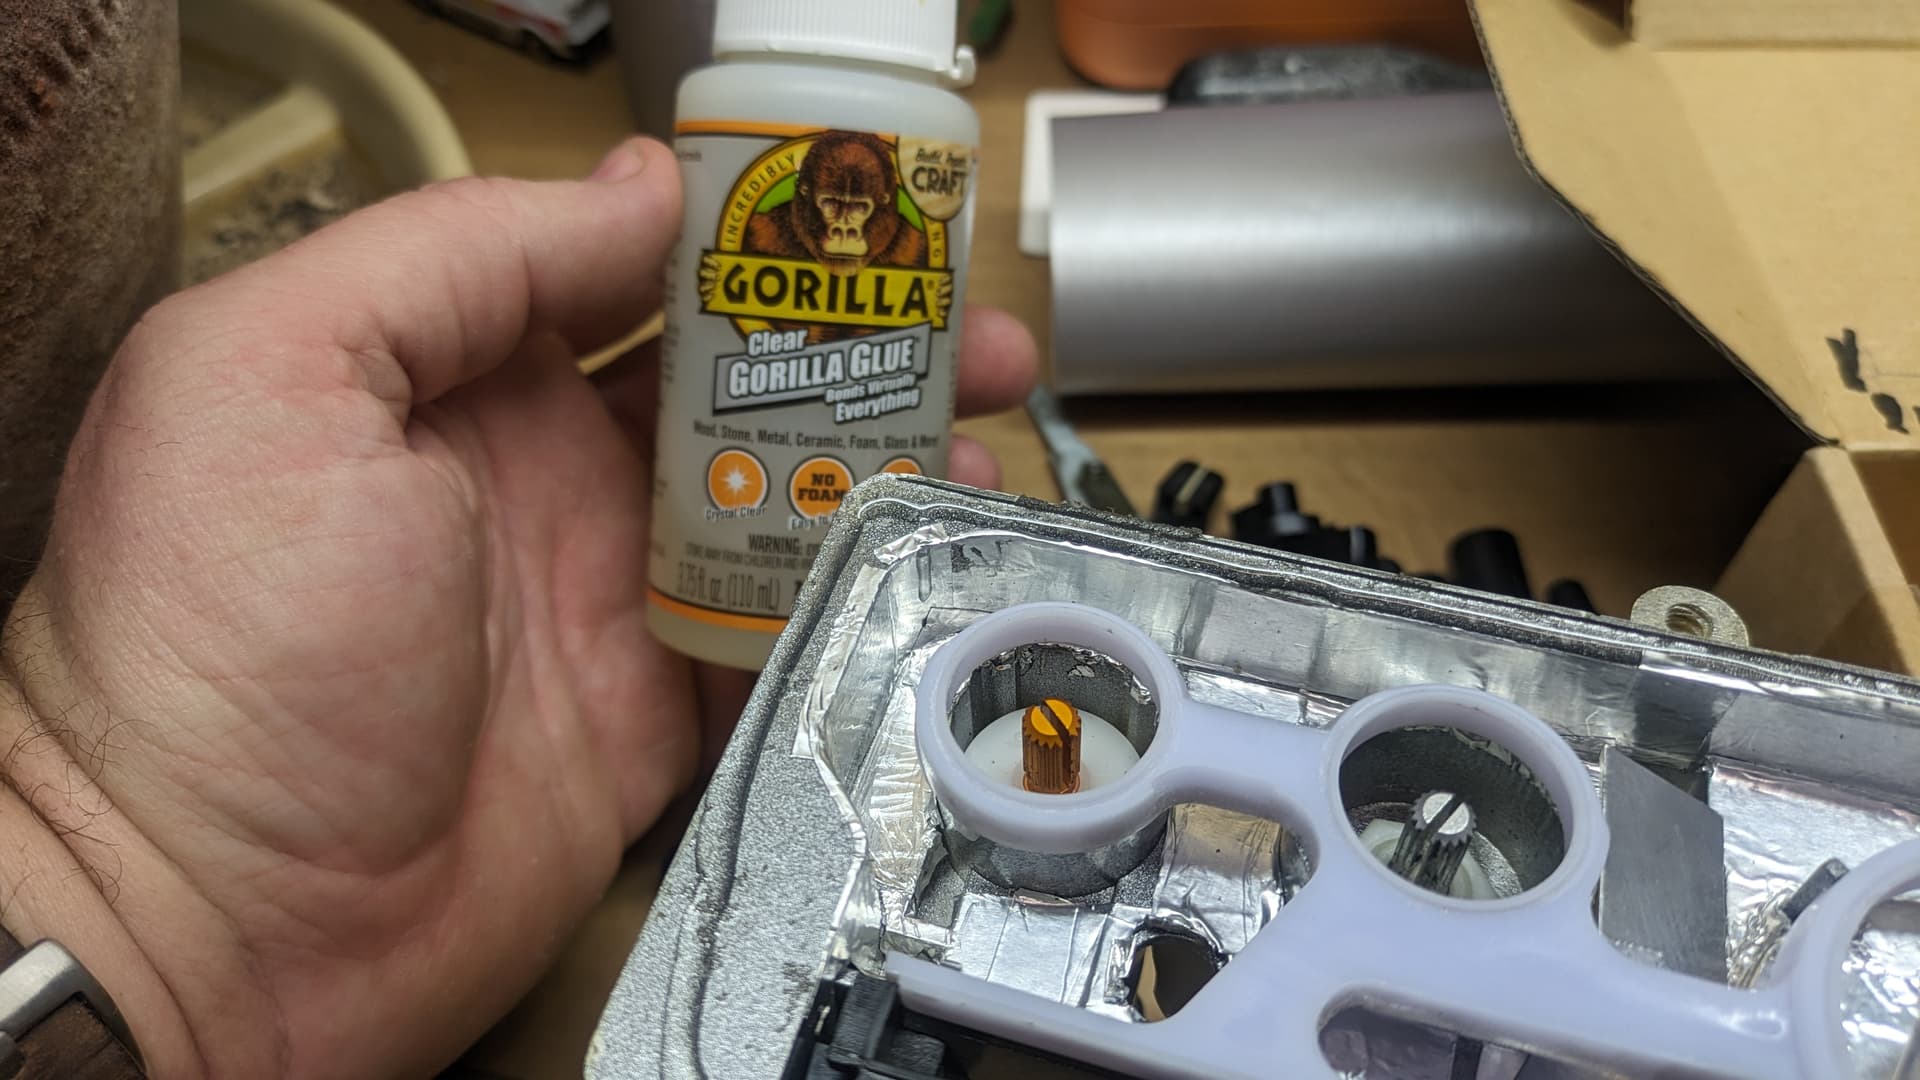
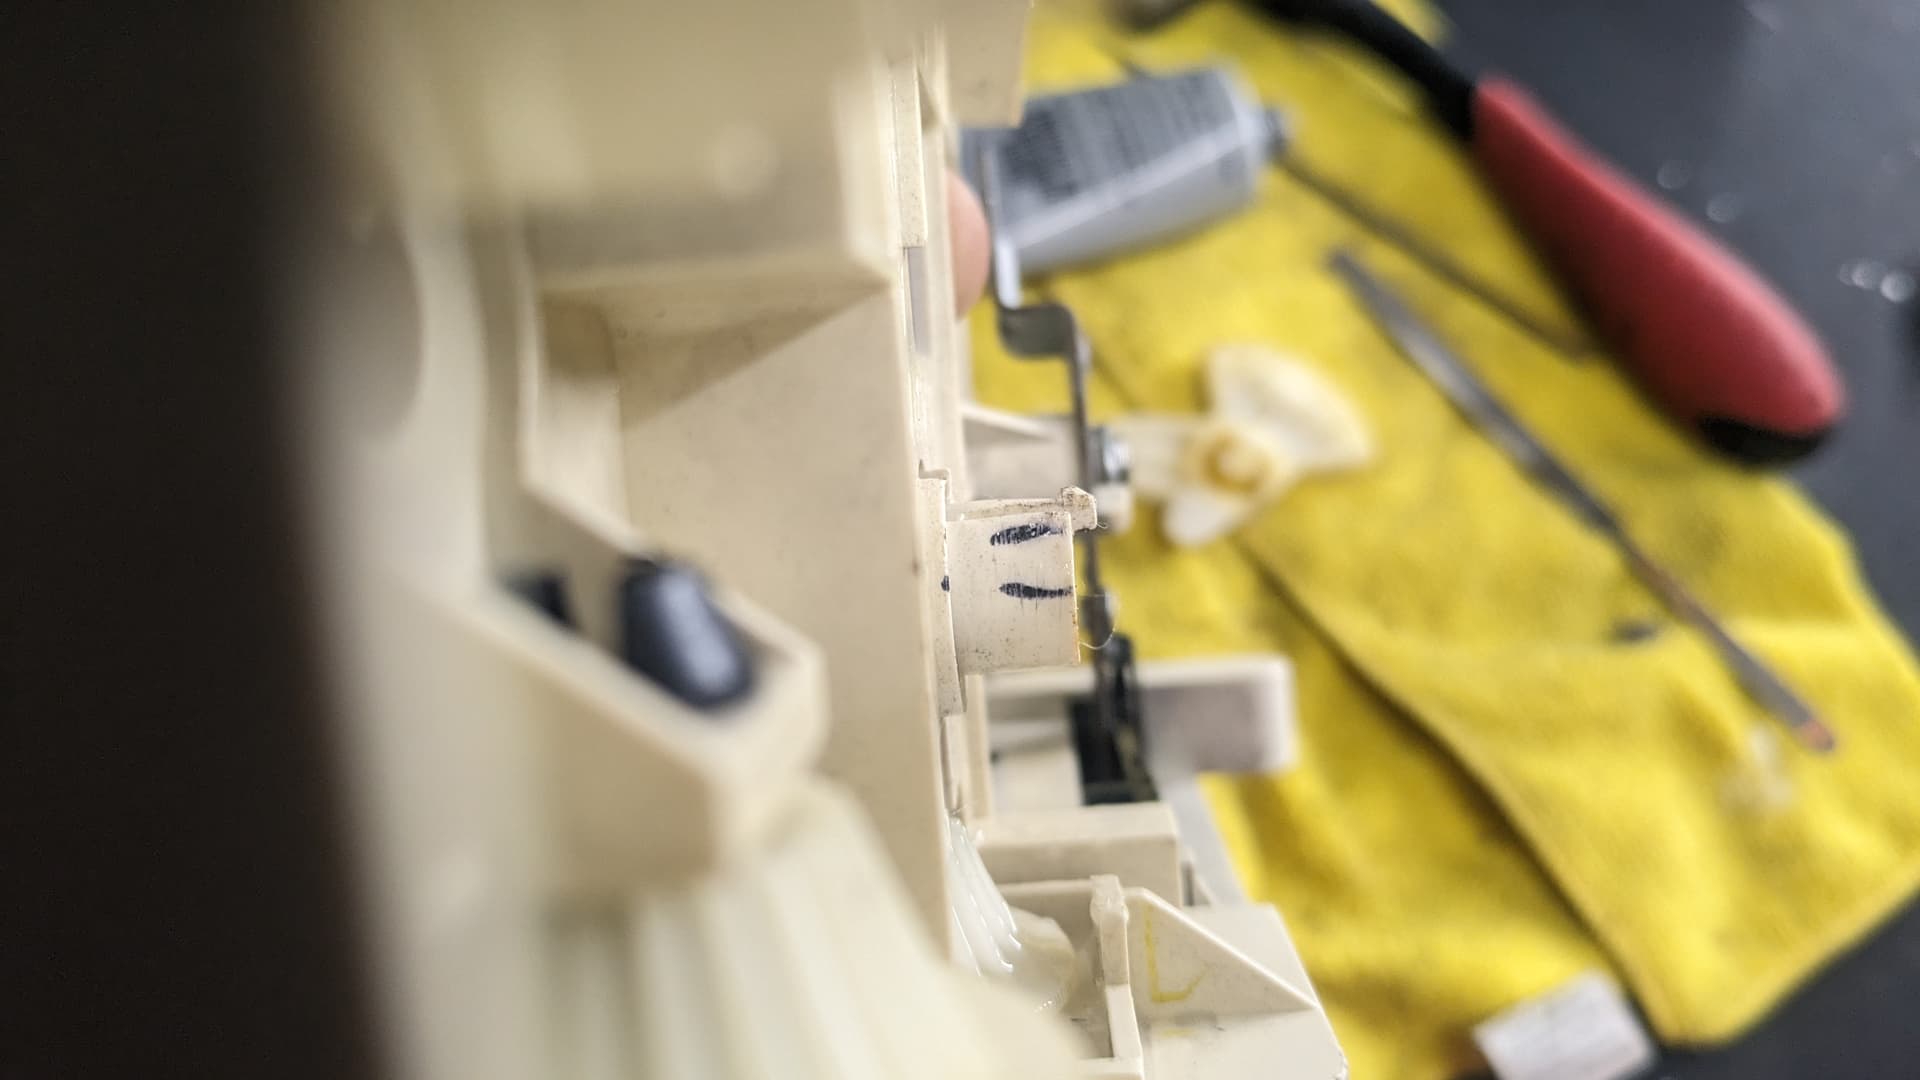

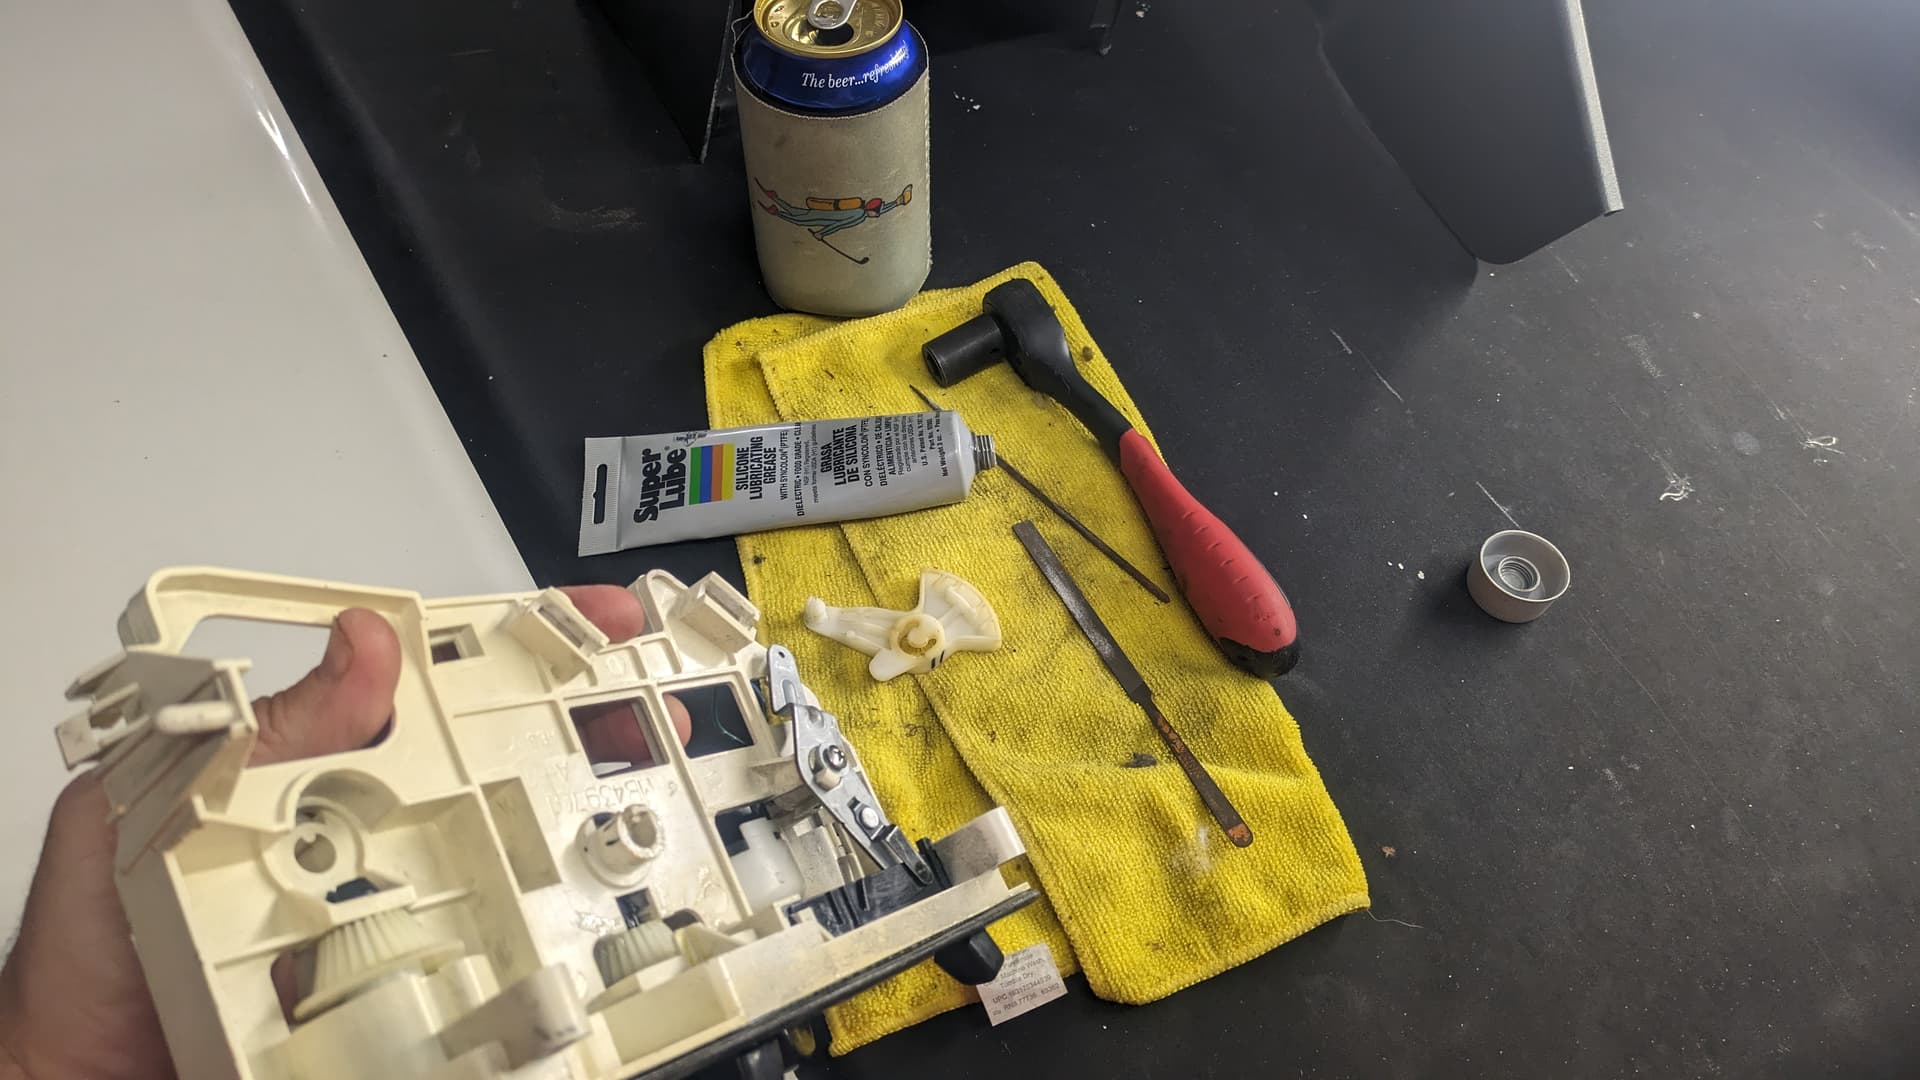
Climate Control Cabling Headache #1
Trying to figure out which cables go where and realized I should have connected the center vent fresh air selector cable to the top of the heater core. Had to remove the passenger airbag and use wooden wedges to reduce the amount of bloodletting.
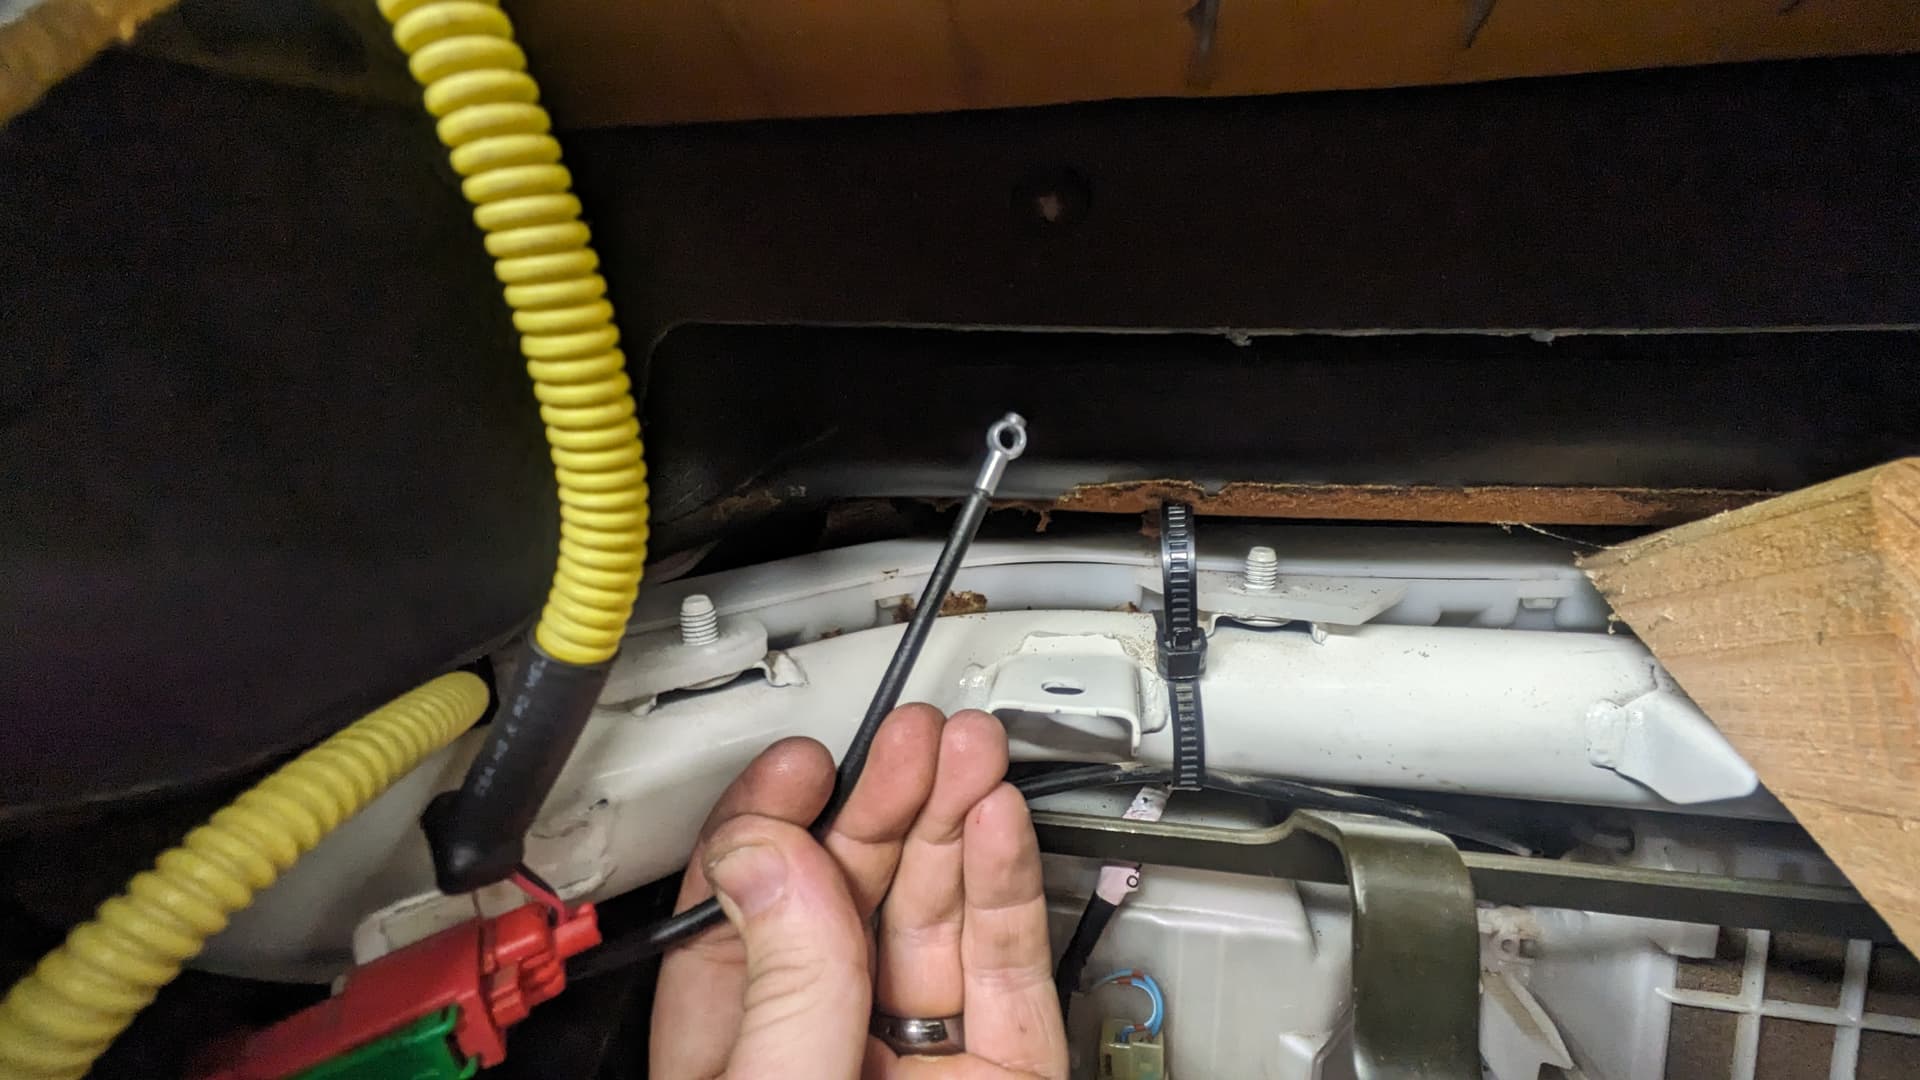
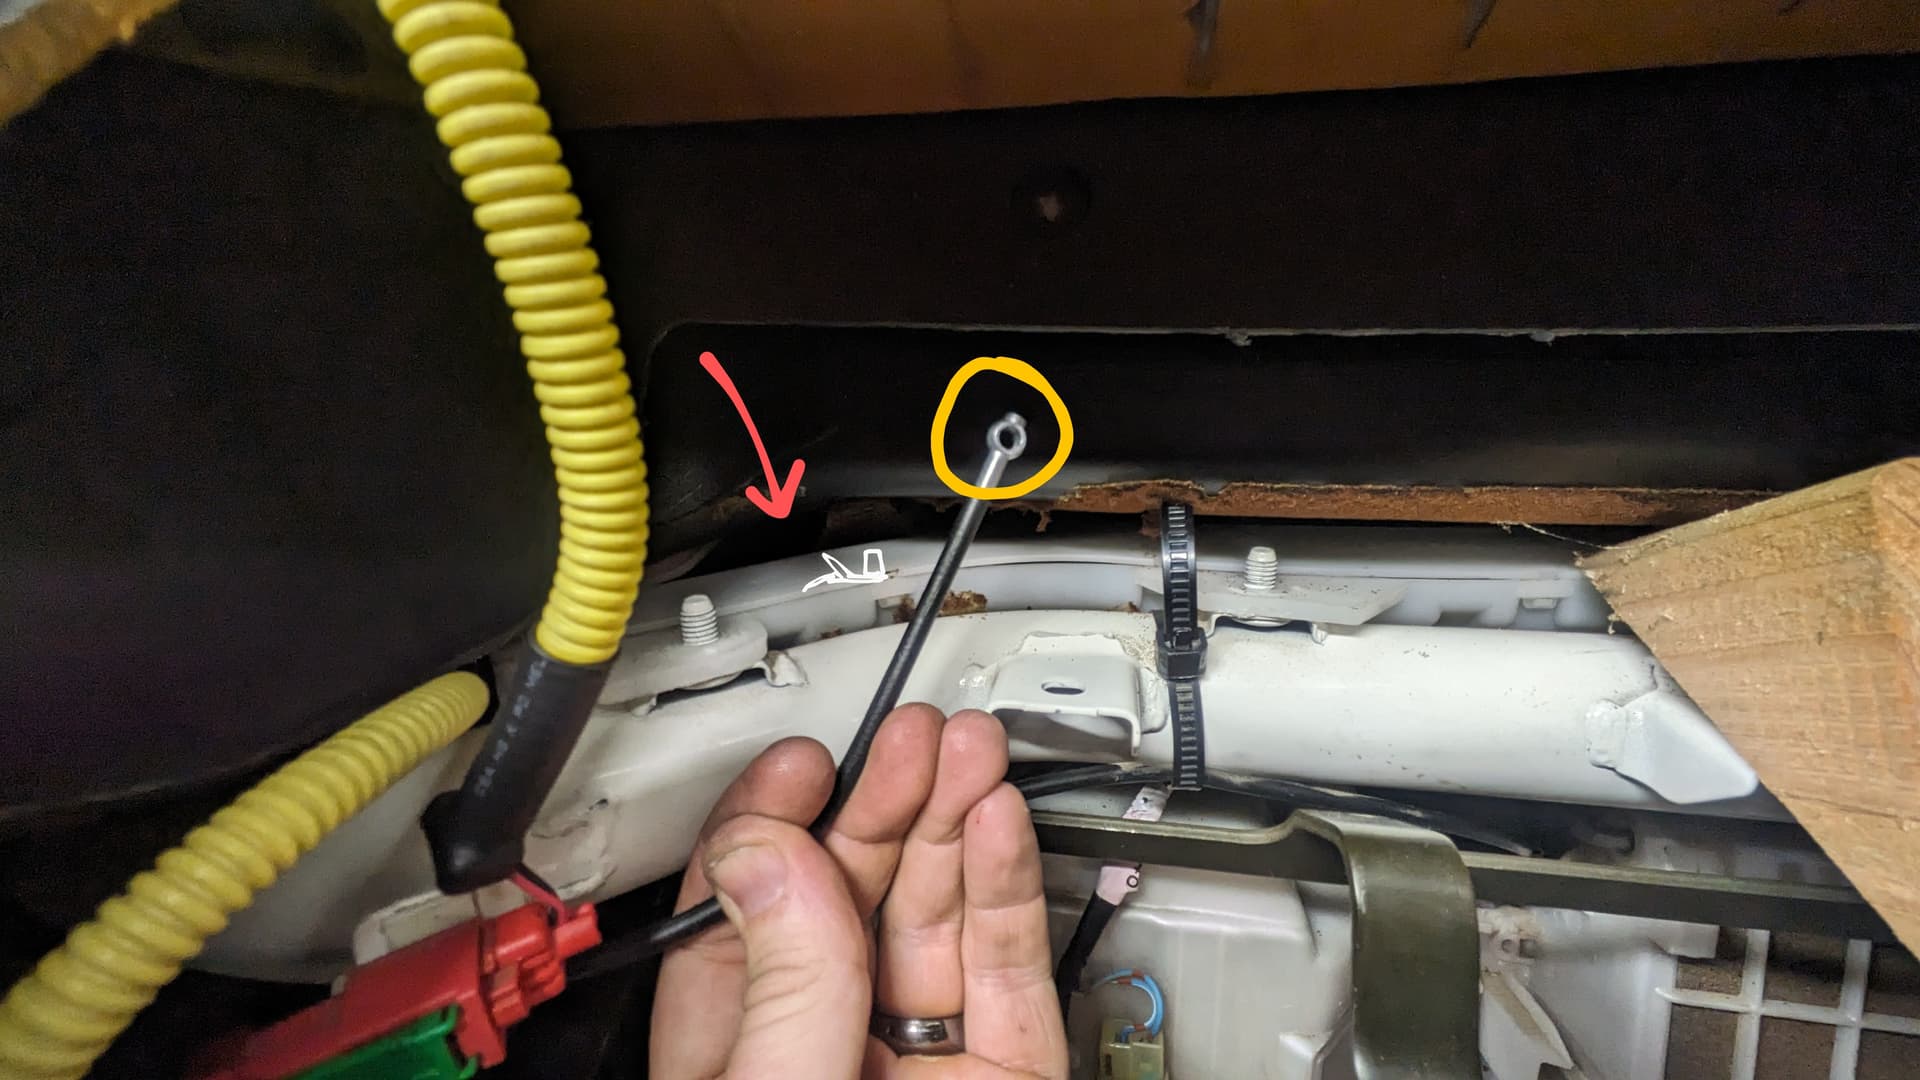
Climate Control Cabling Headache #2
There’s just no room to work in there. See also, the old center vent fresh air cable is still in there and can’t be removed now. And the vent selector (rightmost knob, leftmost) cable is bound, so I can’t select the dash vents. Hey. This time of year, feet and defrost are really all I need, but still.
Oh yeah, and the led bulb on the right side of the controls fell out and shines through the vents.


2-Seater
But I’ve got two seats and a console again. Woot!

2 Likes
17 steps forward and 5 steps back?
Every time I go into a dash it amazes me how stuff is back there. And adding airbags and all that other stuff ramps it up by about a thousand…
This is good work buddy. You realize you’ll never ever be able to sell it now without your services costing about 1 cent per hour to the next guy … I am in the same boat.
1 Like
Journey to the Heater Core Ep. 9
Day 119: The Speaker Follies
It’s taken me two weeks to get the front speakers installed. Two weeks of fairly regular, almost daily effort.
- I didn’t label both ends of my new speaker wiring—so I had to try all the wires.
- I chose to replace the OE speaker wiring—but didn’t run any into the front doors.
- I should have done this while the dash was out—so I had to pull the fenders to run those wires.
- The 6.5" speakers were too big for the stock speaker buckets—so I had to modify them.
- The tweeters were too big for the trim—so I had to modify them.
- The factory Infinity speakers in the lower dash had integrated brackets—I had to fabricate.
- The slim sub didn’t fit under the front passenger seat.
- The slim sub didn’t fit in the factory amp location under the second row passenger seat.
- The slim sub still isn’t installed.

The console hasn’t exactly played nice, either.
- The MMC light didn’t work when I plugged it in for the first time. The truck battery was below 10VDC.
- The new, second row 12VDC outlets are always on. One had a voltage display that doesn’t turn off.
- I couldn’t find the trim piece to install the OE lighter next to the ashtray.
- I found the trim piece, pulled the console, and swapped outlets around.
- Voltmeter is now on switched power & next to the locker switch.
- Now OE outlet isn’t powering any accessories, so I have to pull it all out again.
Two Weeks Ago
You can see I got the MMC sign working, but notice the faint, purple light below the radio in the wide angle shot. That’s a 45W power supply and it’s not coming on when plugged into the OE socket behind the shifter (not pictured). I don’t know that this is enough to power a laptop, but it’s a serious power supply and it’s worth a shot for those “out of pocket” days.
Don’t Make Me Come Back There
I’ve been trying to focus on seeing things through one at a time. You know, install the speakers, then button up the dashboard, then the speaker grilles, and then the final, lower trim pieces around the edges of the carpet and door frames. When that doesn’t work out—when I run into trouble—I pivot to other projects that are more fun than necessary. (Or at least, easier.)
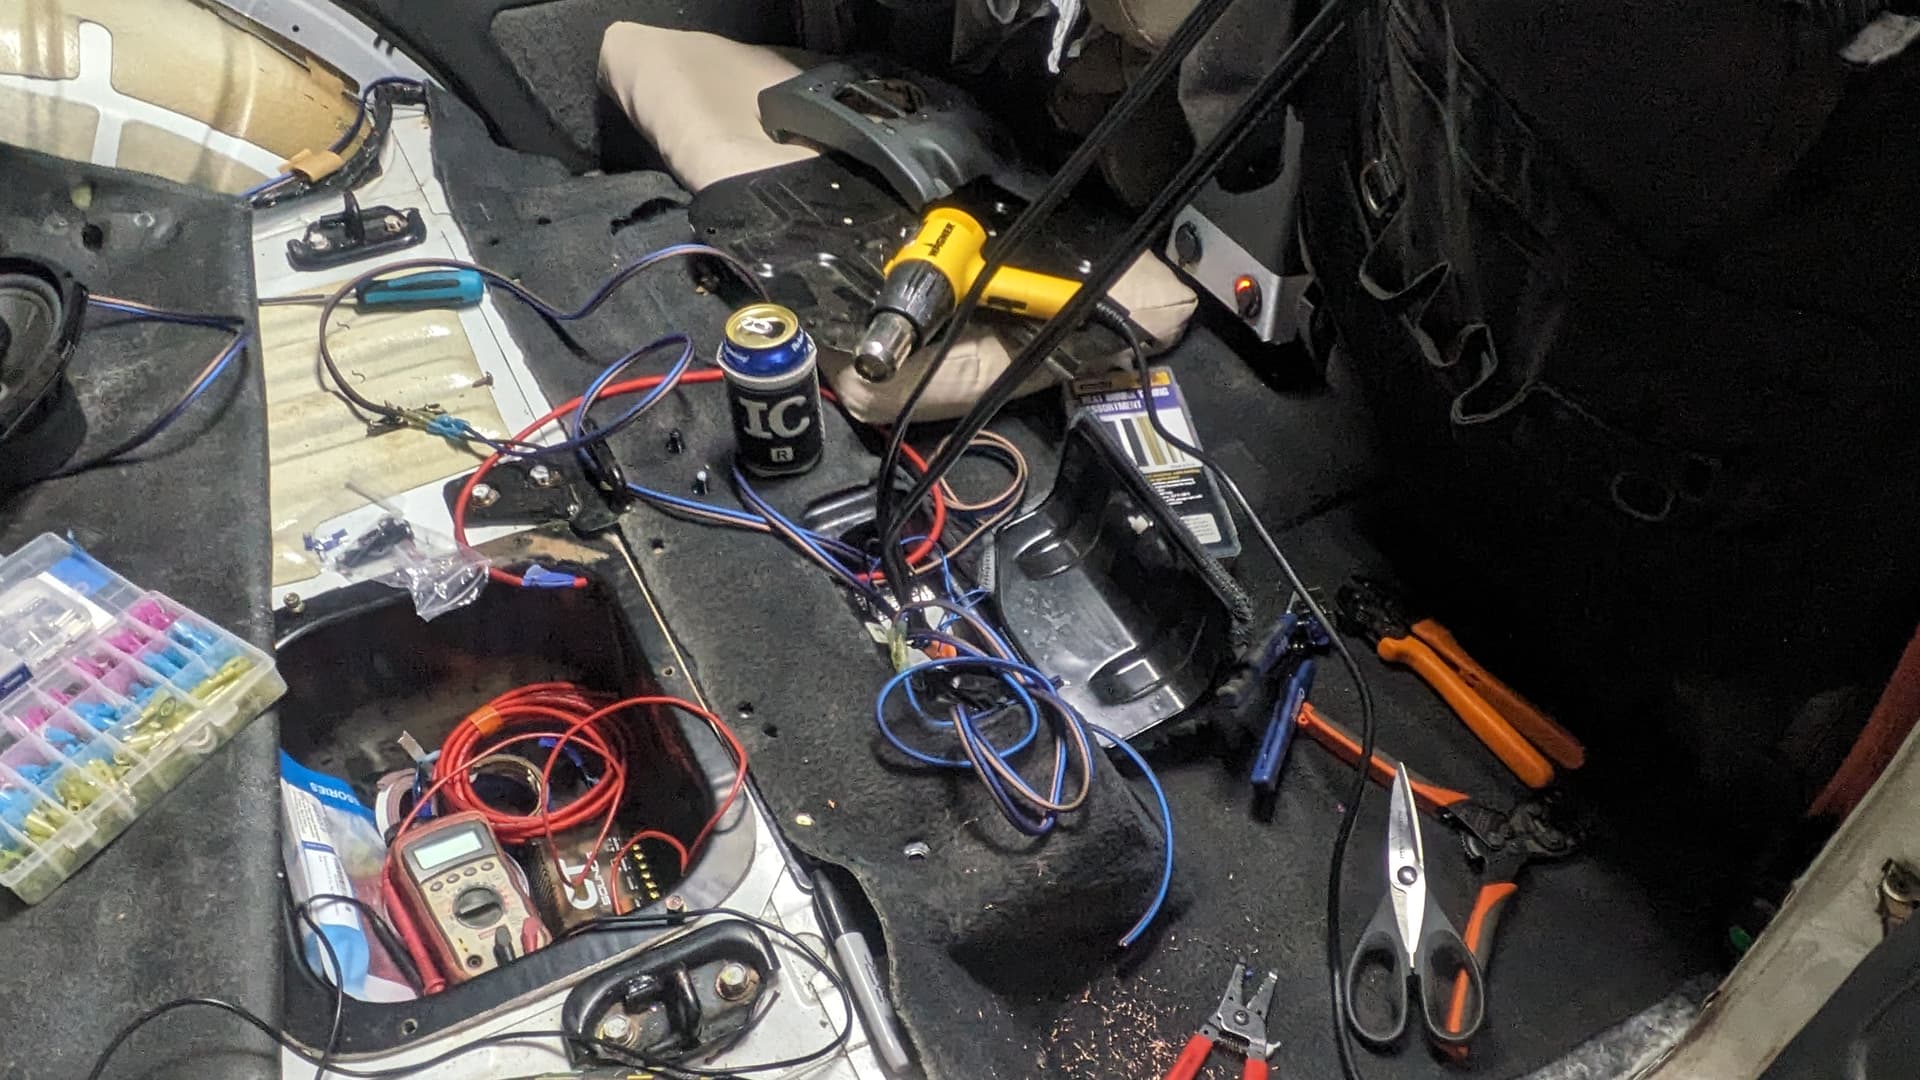
One such side quest was wiring up the rear speakers. I didn’t mark both ends of the new speaker wires when I ran them from the center stack, so I had to terminate all of them and hook up loose speakers to figure out which was which. That took me the better part of two hours one evening.
What’s going on in these pictures?
- From the deck:
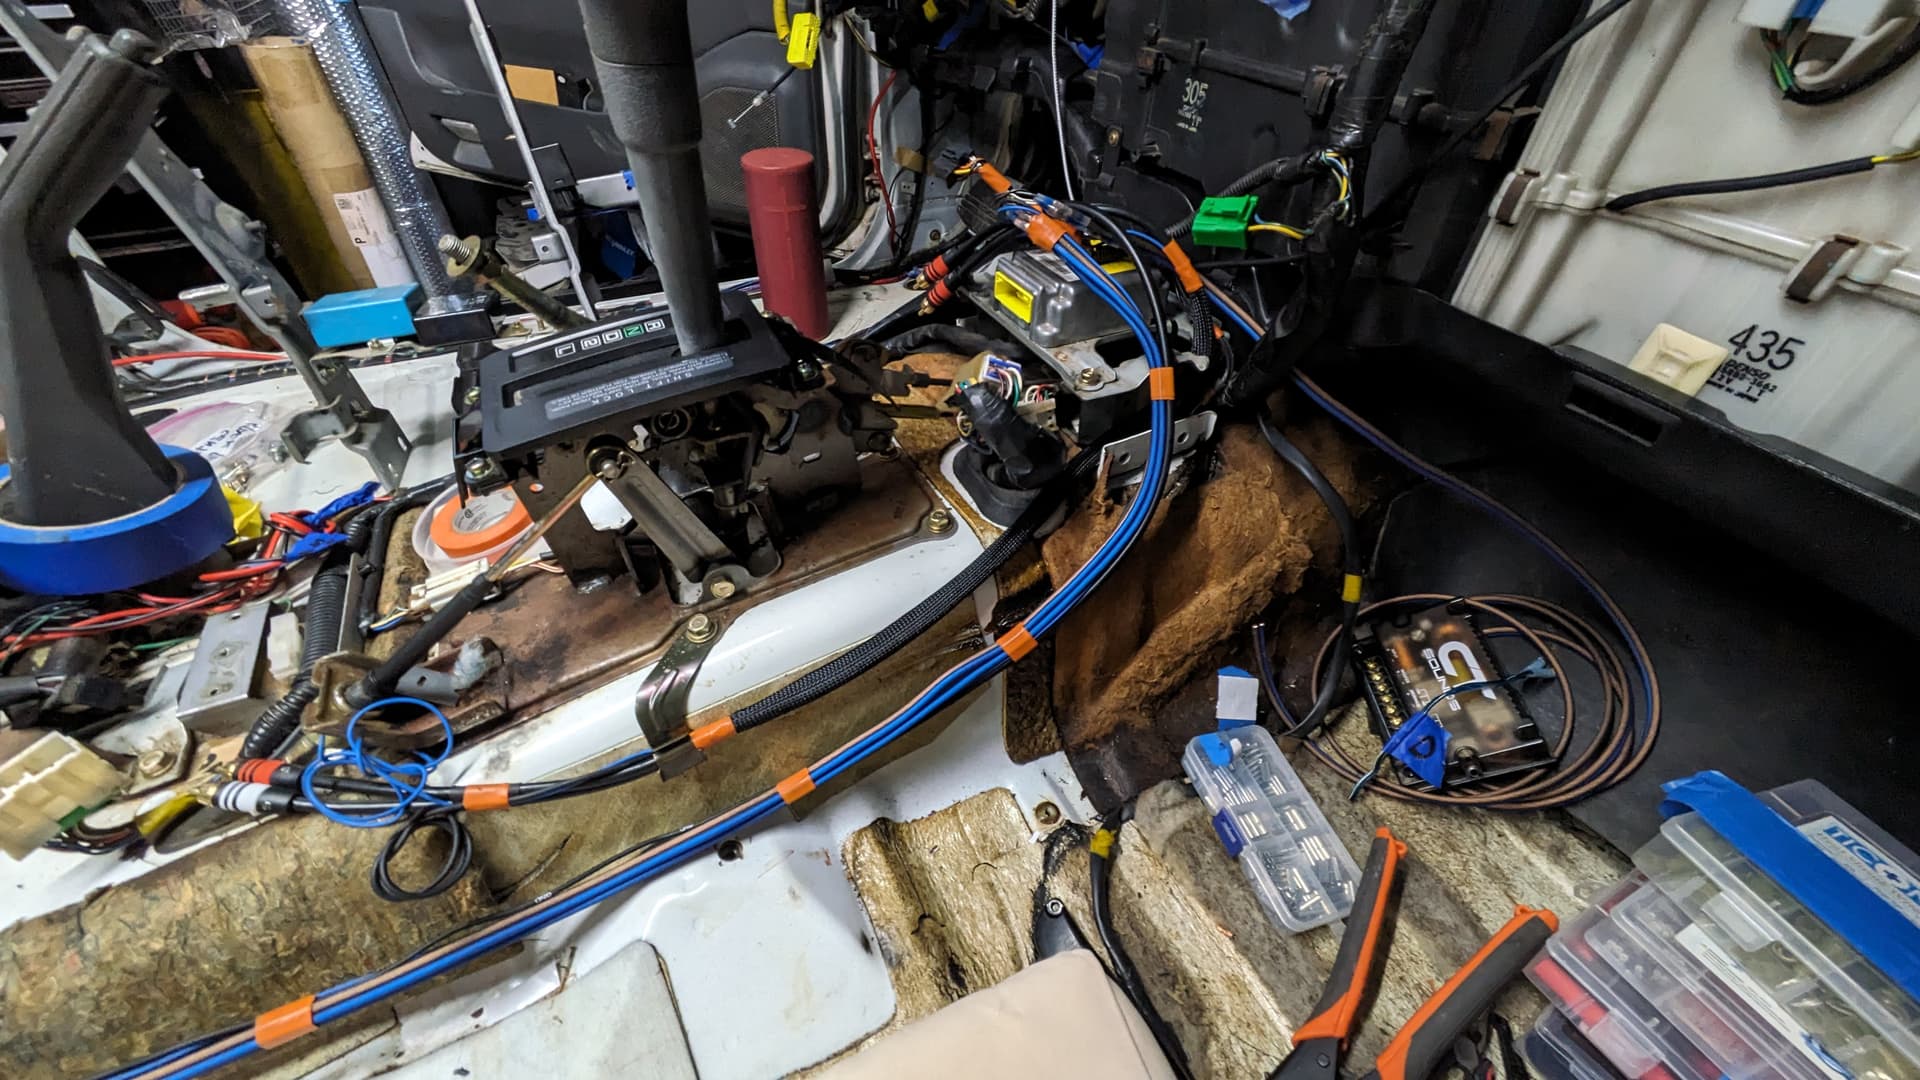
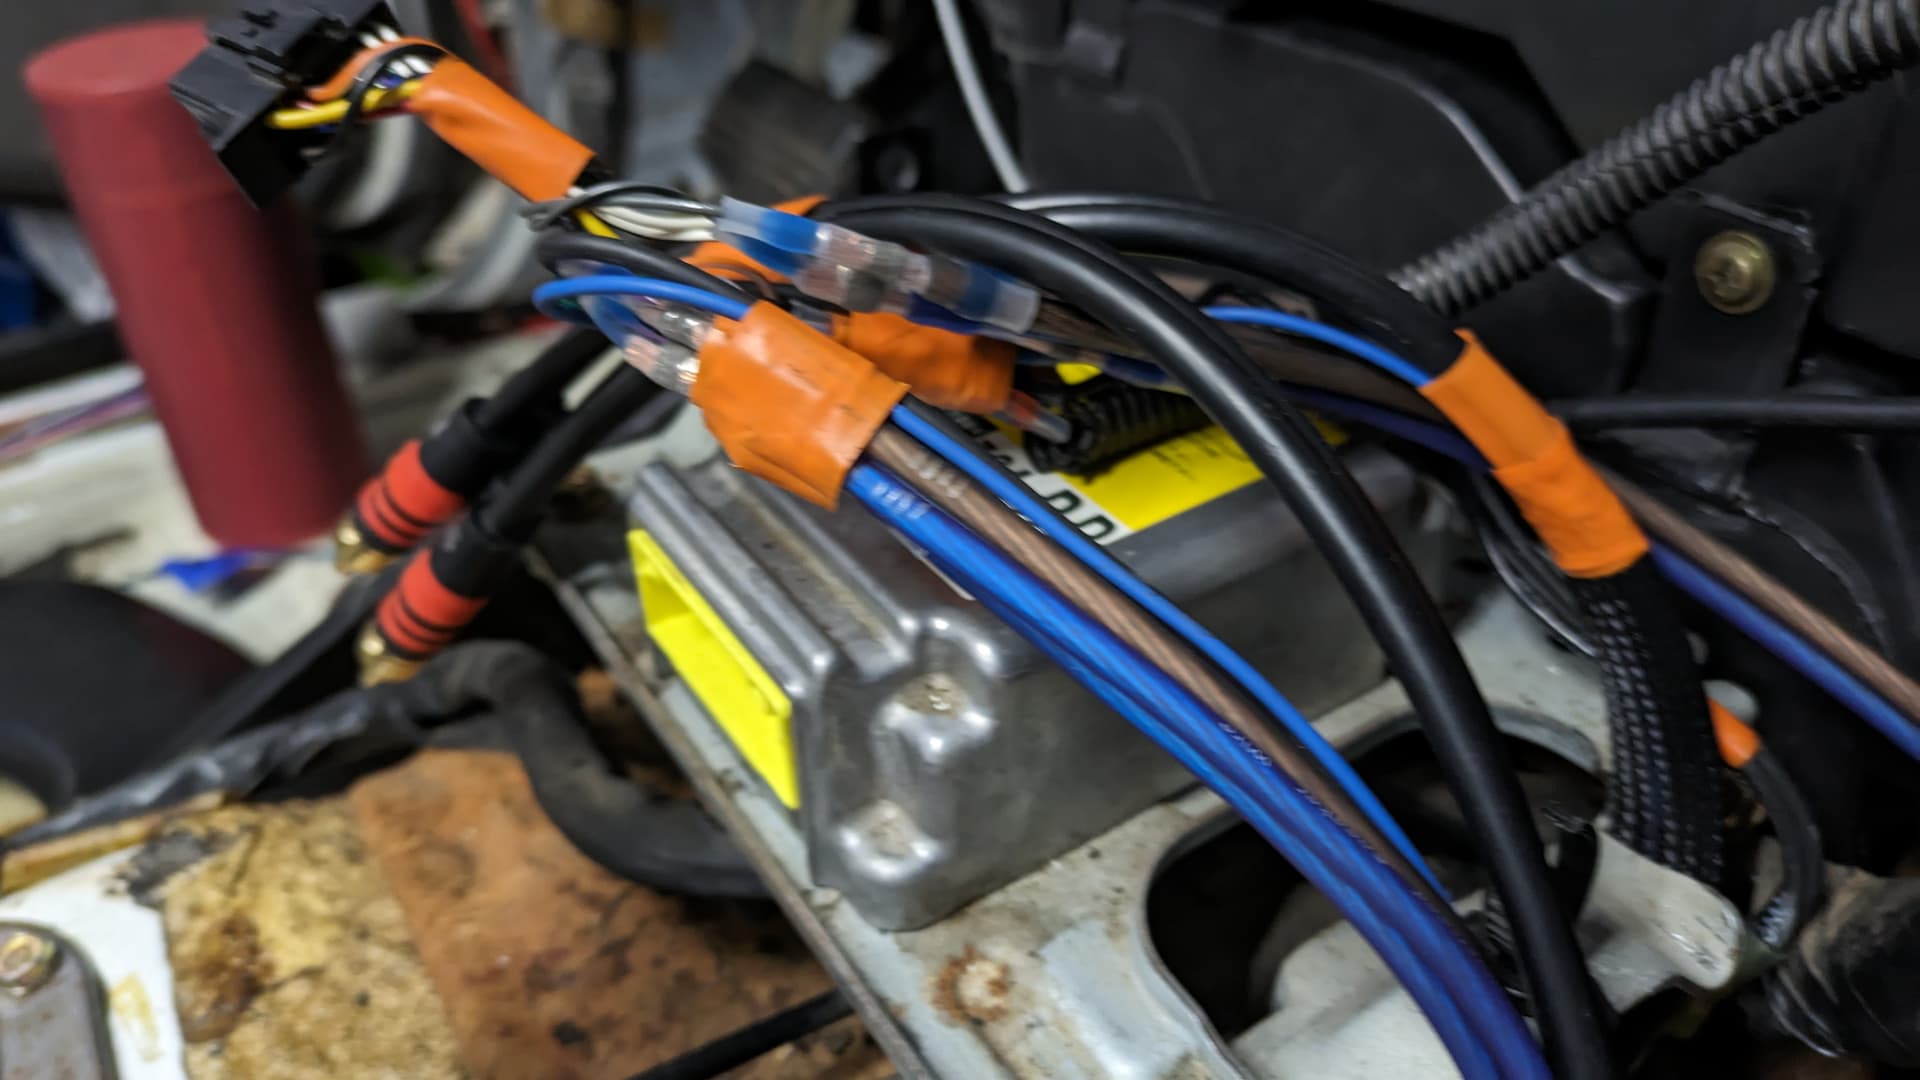
– LF & RF speaker-level wires run through dash to CT crossovers
– LR & RR speaker-level wires run along center console to amp box
– Subwoofer low-level (RCA) cabling package with shared ground & remote signal
– Same for rear stage. (Had to cut the short RCA that ran under RF passenger seat.) - From the amp box:
– LF & RF speaker wires run out to sides and follow sills to crossover locations for future amp install
– LR & RR speaker wires from amp box to LR & RR speakers, ready for future amp install - From the engine bay:
– 8AWG pure copper, multi-strand power wire for amp (& second row seat heaters)
The thinking here is I can maximize the power of my Pioneer deck through the bigger, higher quality speaker wires until I get an amp, but when I decide to get an amp, I’ll already have power and speaker runs to that location, so it should be a quick install; just bolt it in and connect the wires.
Of course, 8AWG probably isn’t big enough to power a 25-30A sub, 30A worth of seat heaters, and another 25-30A amplifier in the future. Then again, if I’ve got four people in the truck using seat heaters, I’m probably not going to be cranking a lot of power through the soundsystem. And if I do, it will be in the dead of winter, with all that copper wiring lying right against cold sheet metal. ![]()
![]()

More to come, but I need a break. ![]()
Journey to the Heater Core Ep. 10
aka: Return from the Heater Core
I was just thinking, the heater core’s been in since mid-September. I’ve been on the journey back from the heater core for over two months, now. In The Hero’s Journey, once the hero defeats the final boss, they take the spoils of victory back home with them to share with the others. We’re deep into those woods now.
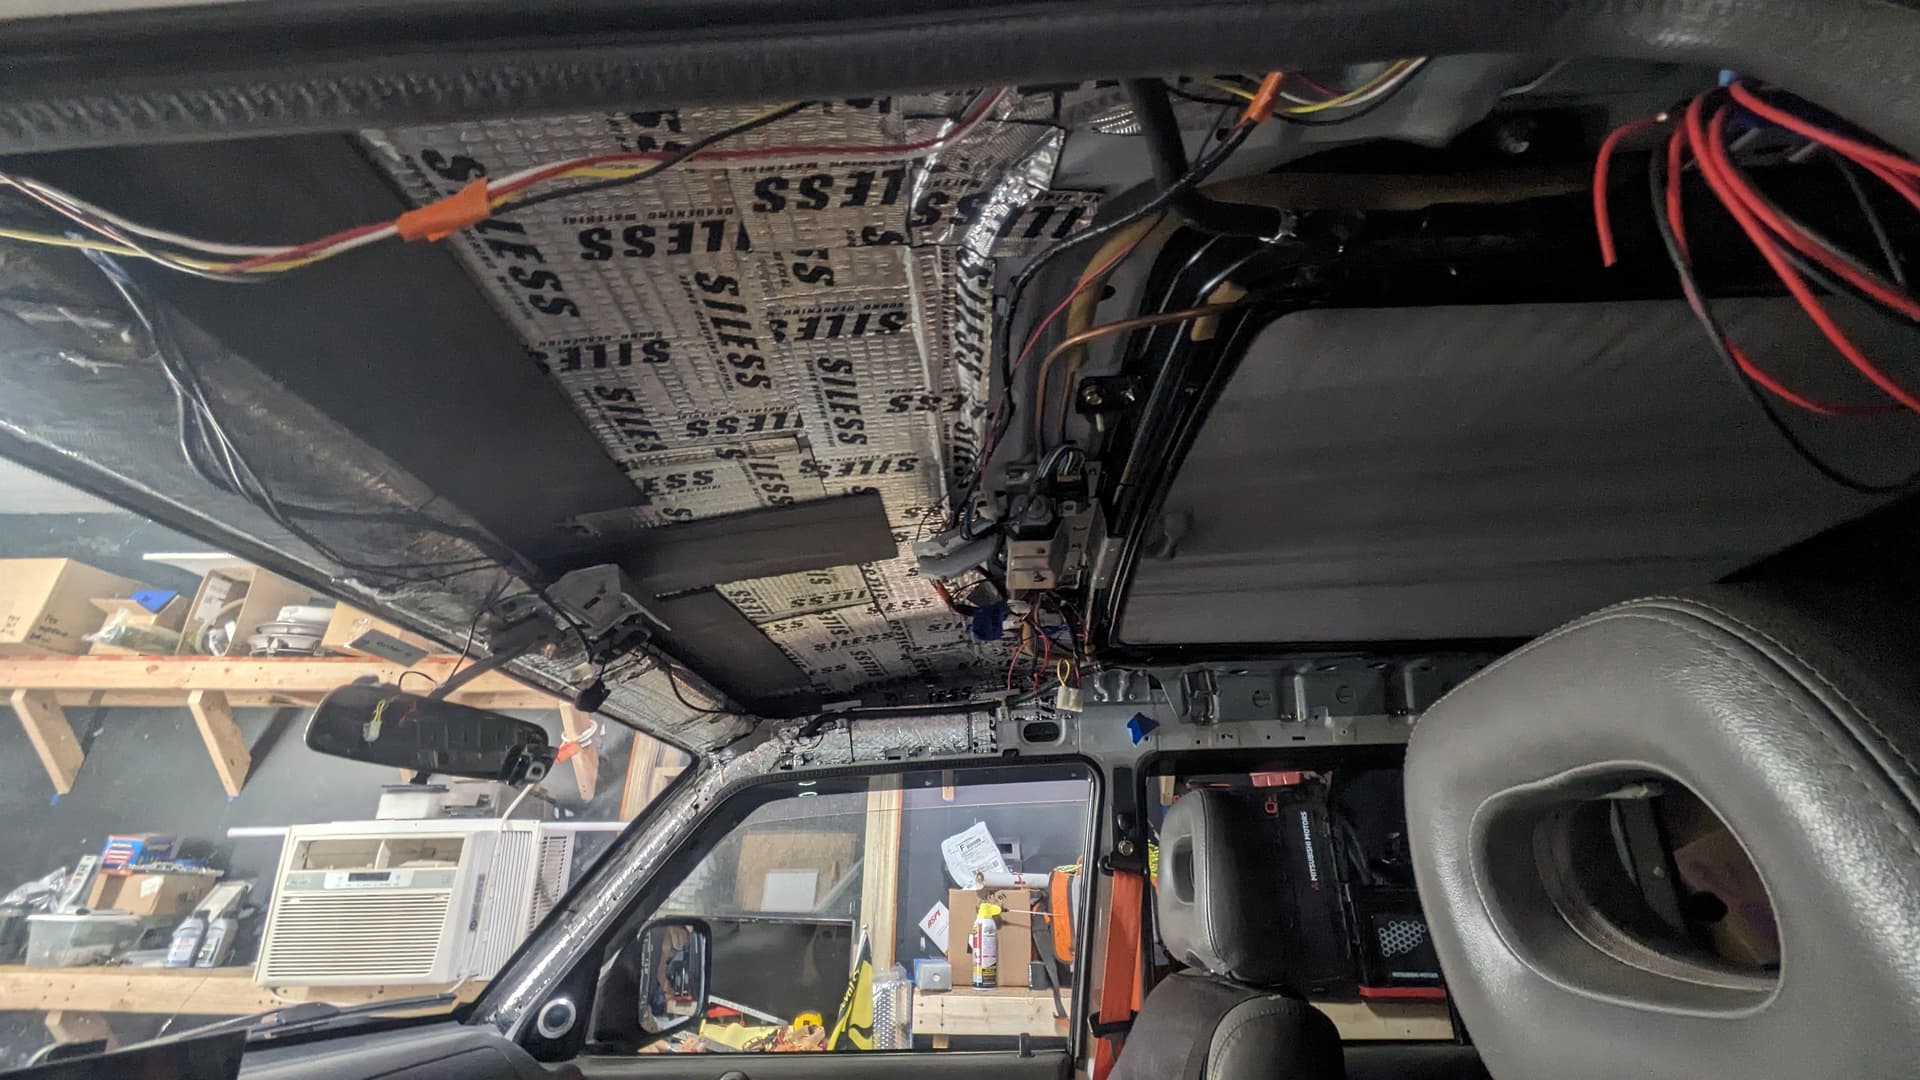
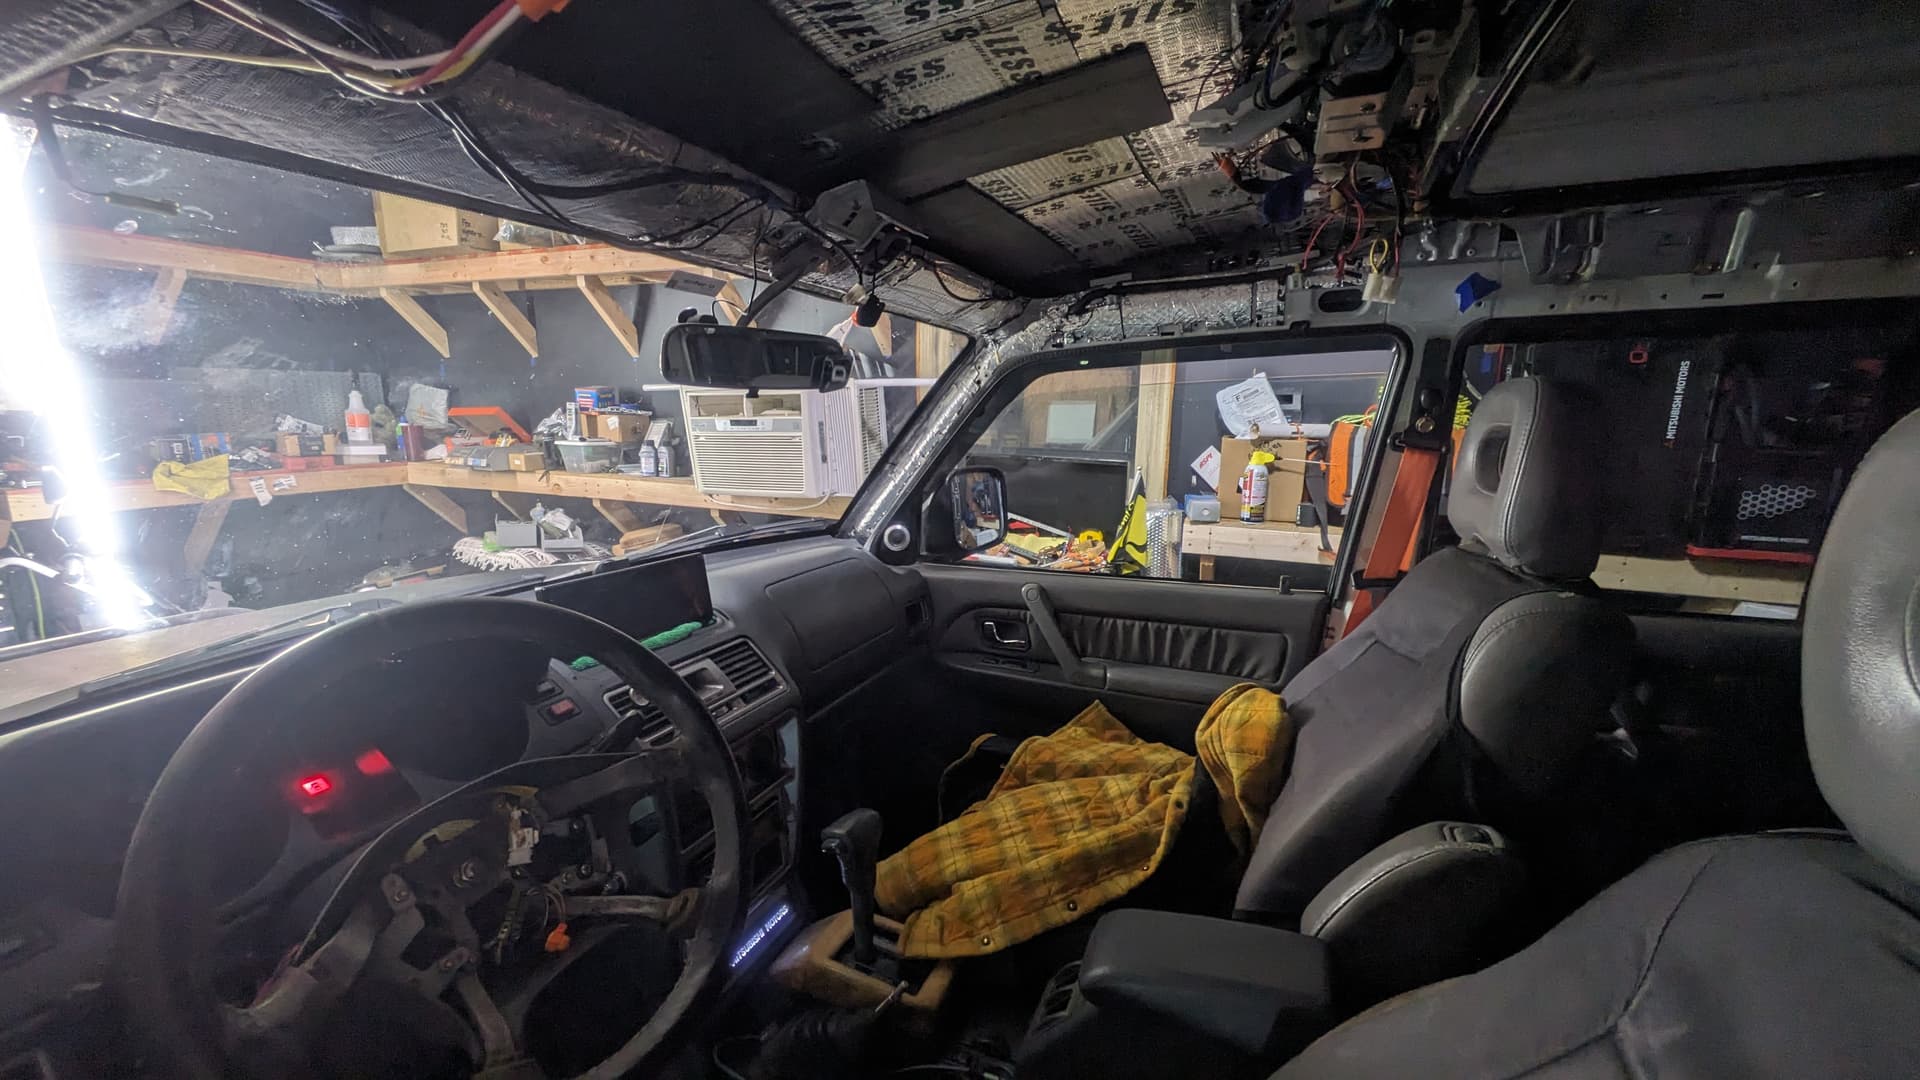
More Noico!
I swear there’s at least 60lbs/27kg worth of sound insulation in the truck these days. And I’ve still got another 20lbs/9kg to go on the roof skin once the “ground floor” is all done. I started on the passenger side. Initially, I sat in the back of the truck, and got on my knees (on a gardener’s foam kneepad, of course) to apply smaller sheets of Noico that I cut one-at-a-time. It was tedious, but it turned out pretty okay.


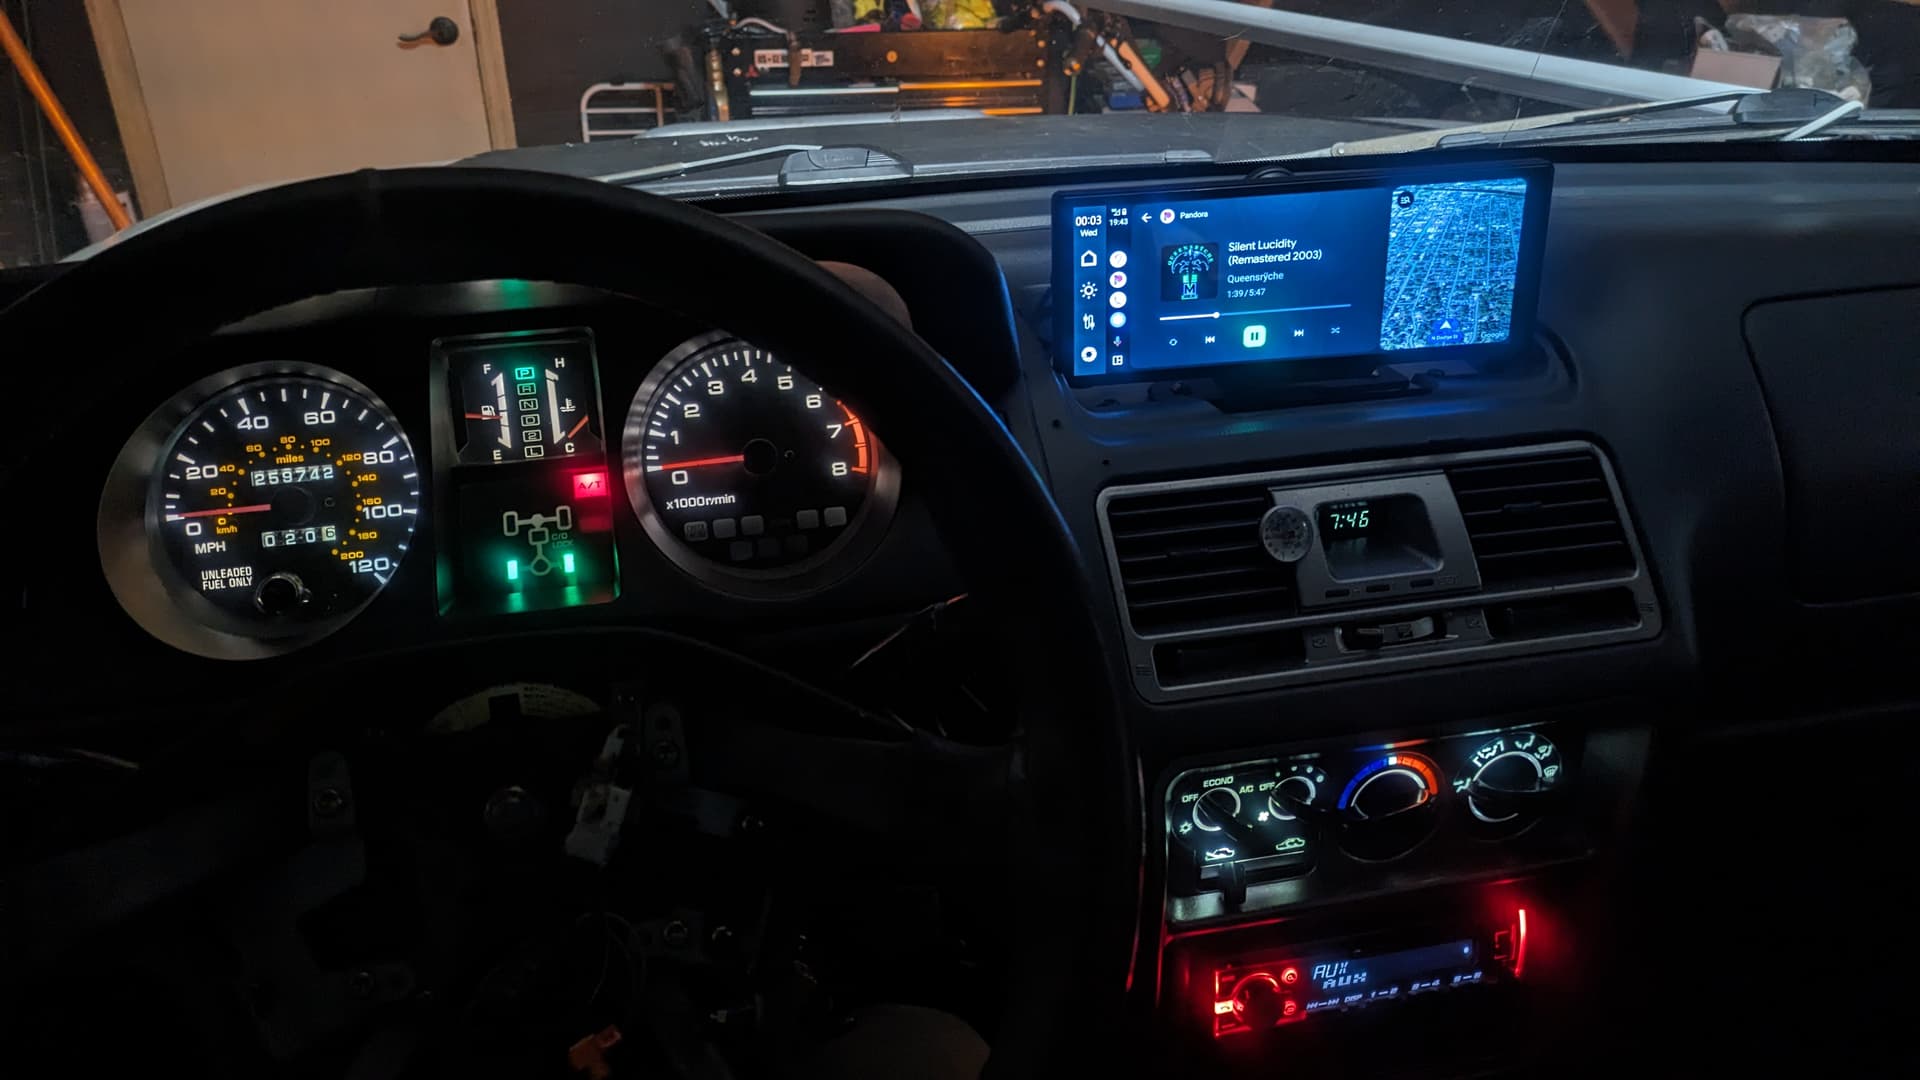
Silent Lucidity I
One night a couple weeks ago, waiting to pick up P from rehearsal, Silent Lucidity came on Pandora. I hadn’t heard it in years. It sounded fantastic on the 12-speaker Bose system with all the fancy digital signal processing in the Mazda. I doubt I’ll be able to match it in terms of fidelity, but it’s a target and I joked that I couldn’t wait to hear that old Queensryche jam on Fezzik’s 9-speaker upgrade.
It Gets Easier—But You Have to Do It Every Day.
I mentioned “rehearsal”. P was in her first play earlier this month. I tried making the most of her schedule for the six weeks it ran. “Tech Week”, the week of the show, rehearsals ran 6-9pm Monday through Thursday, and then she did shows Friday night, two on Saturday, and one on Sunday. For the better part of two weeks, I was in the garage almost nightly, putting in time on the truck.
When I went back to Noico the driver side rear fender and floor, I had a new technique.
I stood at the back bumper and pre-cut all the sheets down into smaller strips before I climbed in. This allowed me to both user larger pieces of material and cover more surface area more quickly. The leverage alone while cutting made life easier. I did it for both the 80mil butyl and 160mil foam layers.
Notice how little (effectively none) sound insulation came from the factory. Now we know why, in some countries, they refer to these as “J-tins”. You pull out the interior and Fezzik wasn’t much more than a glorified tin can. It was very satisfying to put down all this insulation. (You can see how I did a better job the second time around, too.)


No pictures of the final rear floor layers, but it’s entirely covered, from the second row to the tailgate sill. I’d like to pick up another roll of the DEI Carpet Lite mat like I have under the front rows. Should really finish things up nicely back there.
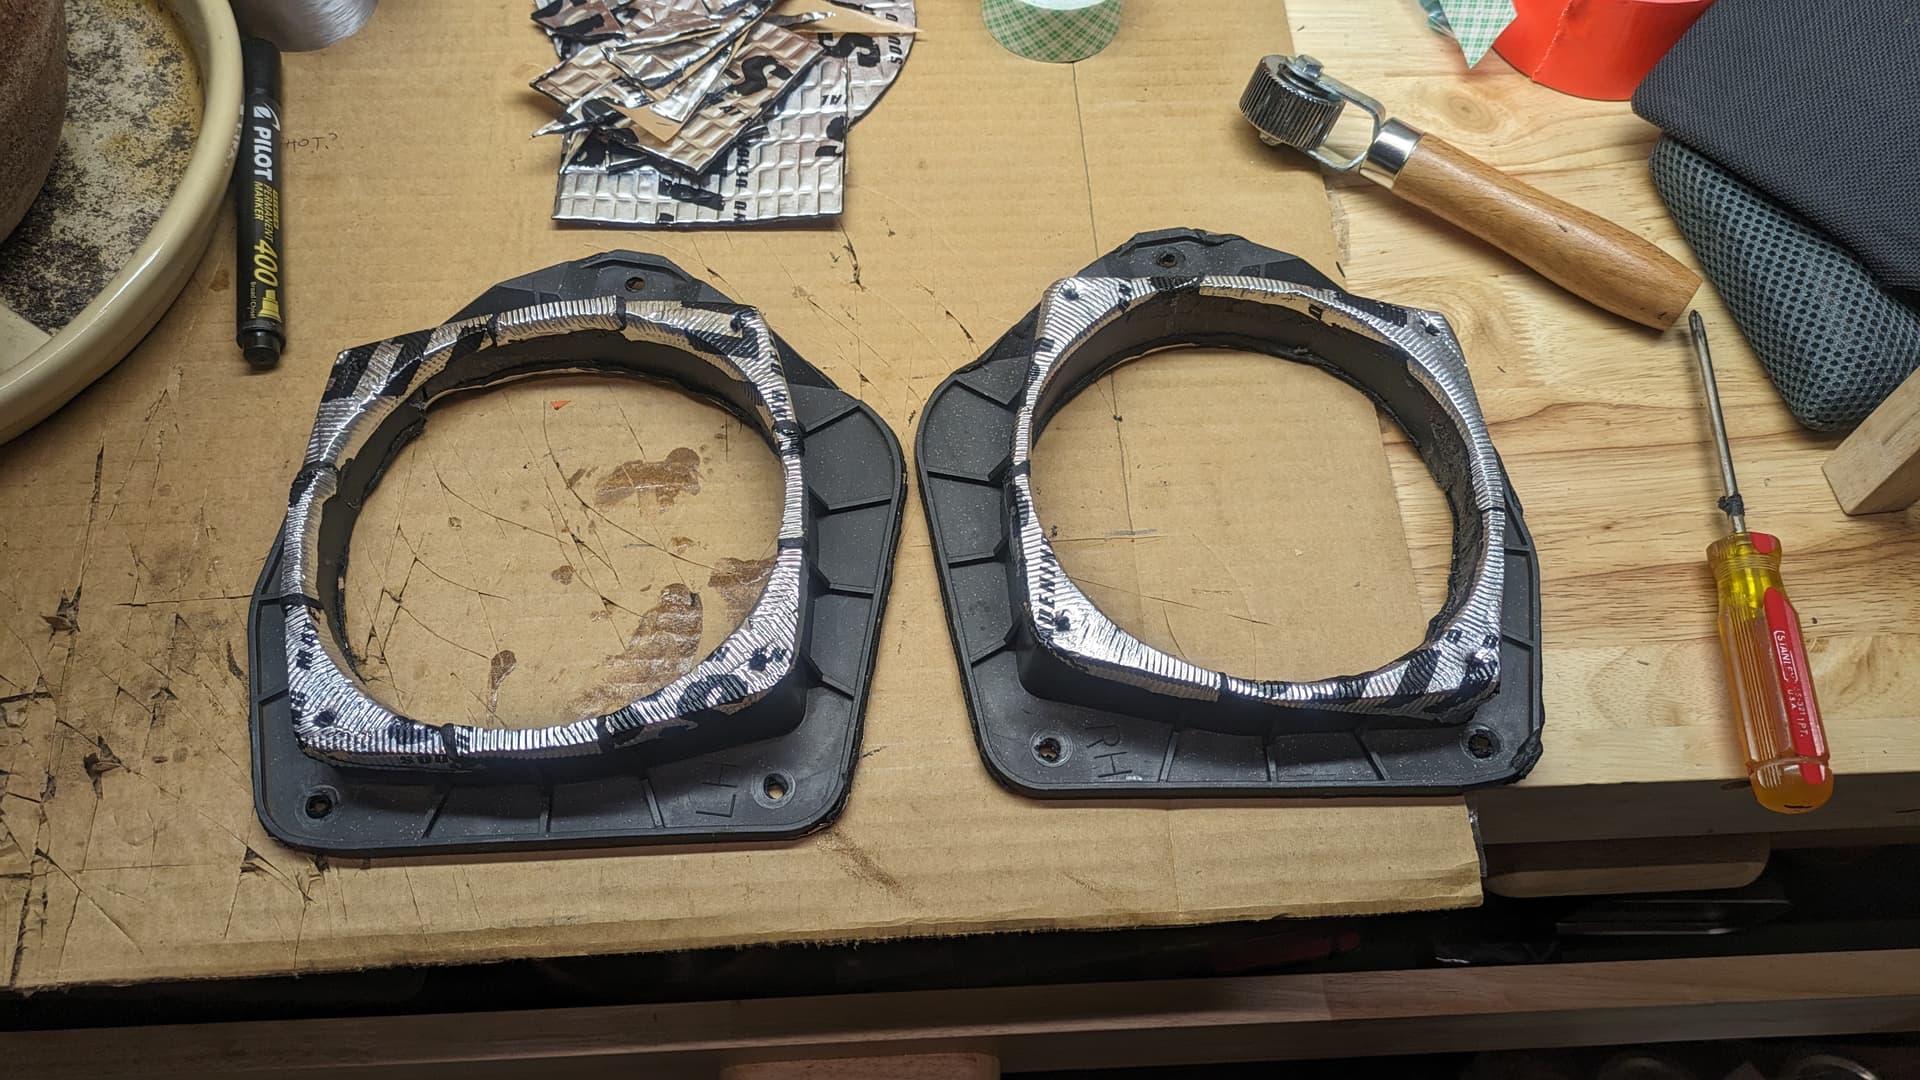
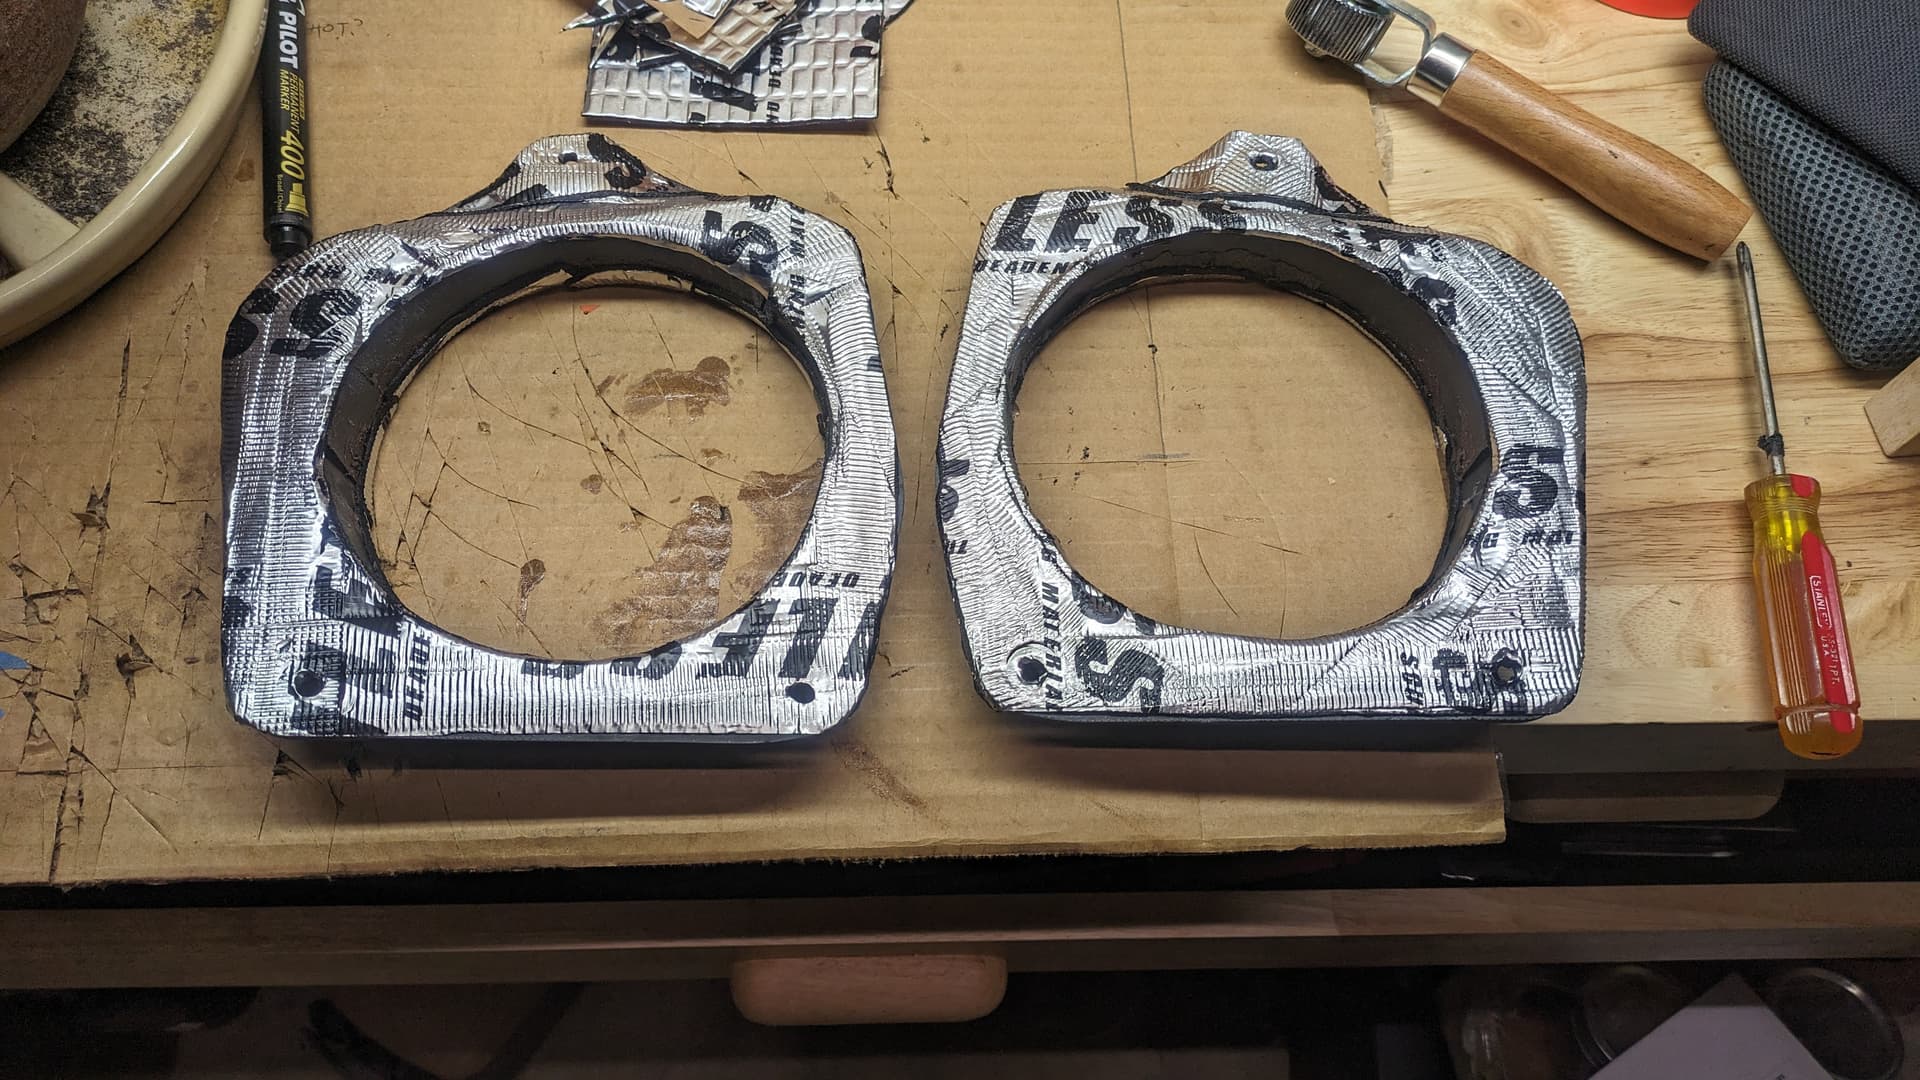
Down In Front
The front speakers were even more trouble. First thing you notice in these pictures is how much exposed metal was left on the doors after I ran out of Noico a couple years back. Next thing you might notice is the big air gap behind the speaker. I’d also like to point out the lower dash trim with the speaker hole below the steering column. It had to come back off to install those speakers.
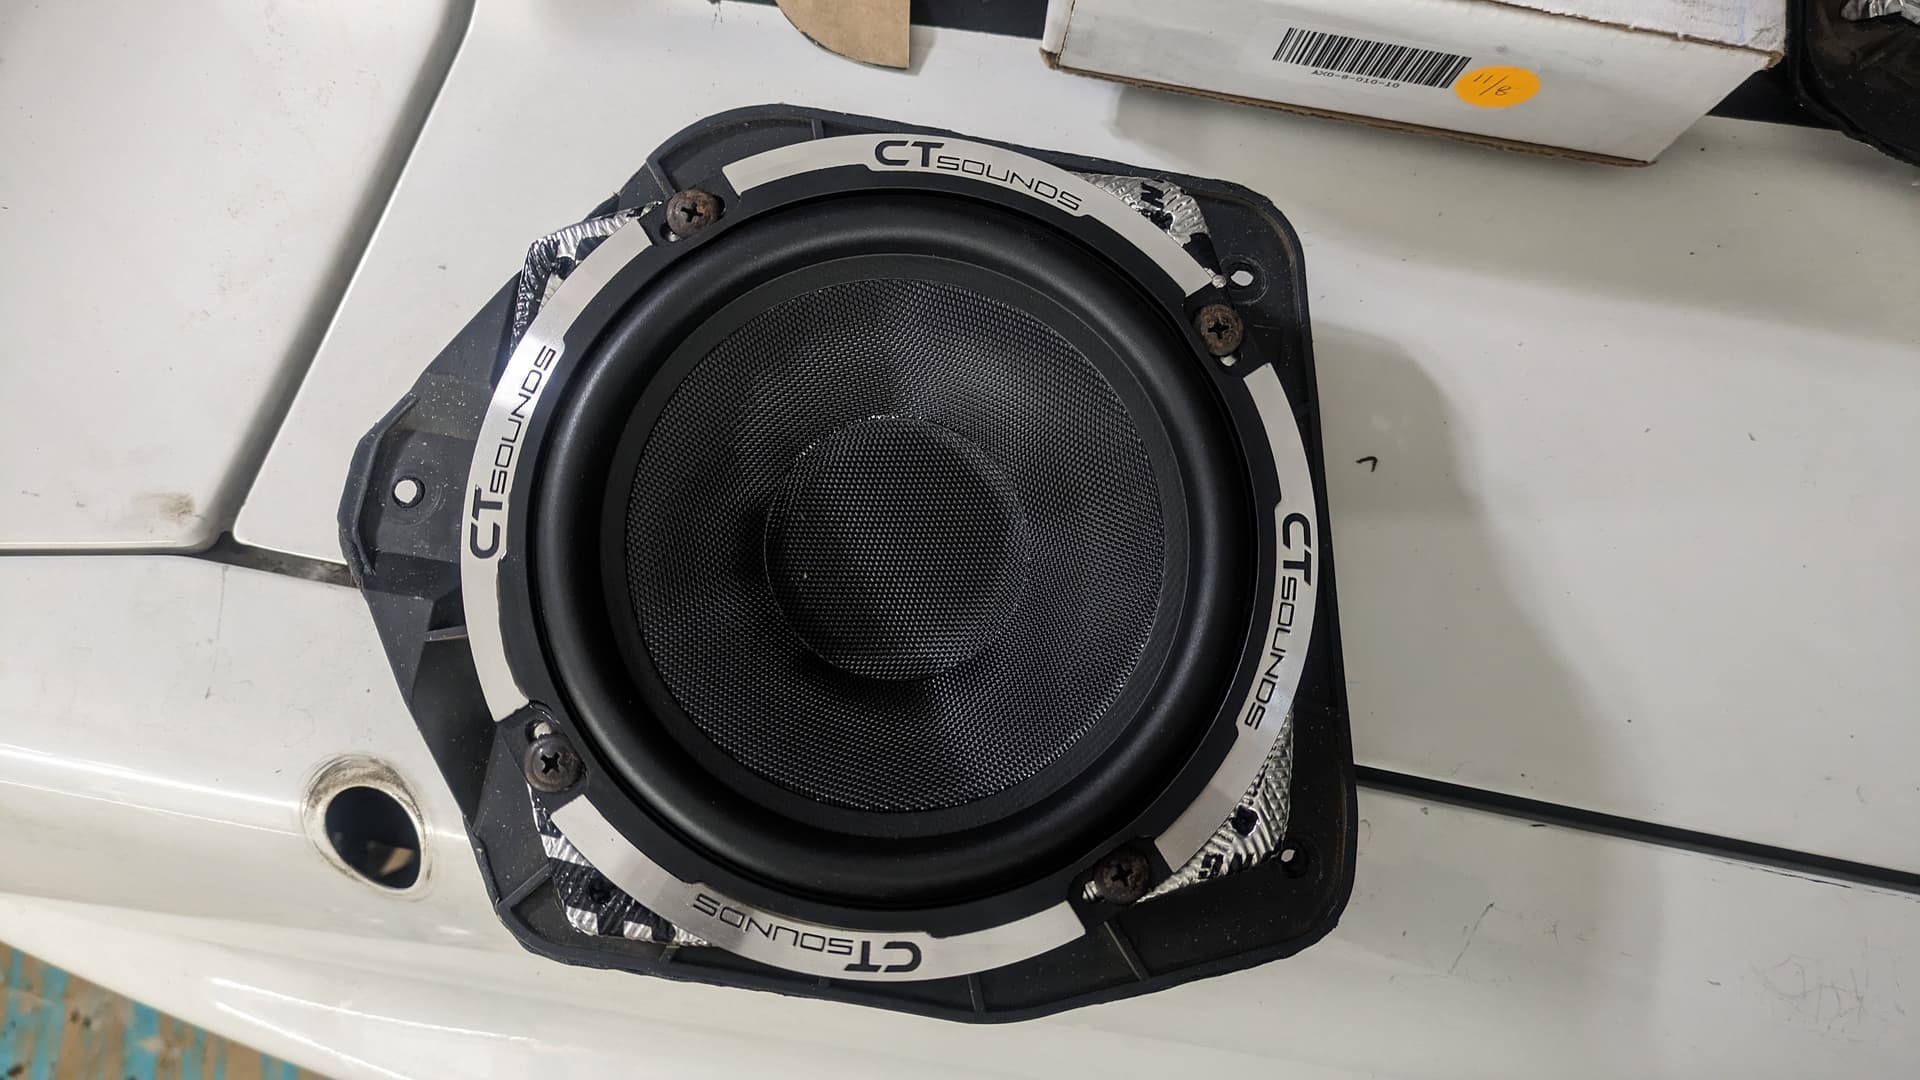
I don’t have before pictures of the front door speaker mounts, but I had to cut away about half the total surface area to fit the new 6.5-inchers. And then I had to use nuts for standoffs to keep the speaker magnets off the windows inside the doors.
I also don’t have pictures of how I opened up the tweeter pods to fit the new tweeters too. Captain Half-Ass was there, and showed me how to hold oddly-shaped parts with one hand while using a jigsaw in the other. Or a 1-inch hole bit. #stupiddangerous
One of the tweeter pods had a piece break out, but I was able to glue it back and kinda hide it. By the time I realized I needed special brackets for the 3.5-inchers in the lower dash—and decided I was done pressing my luck with fingers within inches of a jigsaw blade, I remembered I had a Father’s Day Harbor Freight gift card and bought myself a $35 Black Friday special.
8V Lithimum-powered cordless rotary tool in full effect! I used Dad’s leftover Gorilla wood glue and clamps to double up rough cut wooden brackets, then sanded things down nice and tidy with the new tool before wrapping the wooden mounts in more Noico. (No pictures of this, though.)

PS: Did you see the little gray heater under the steering wheel? I forgot Noico needs to be applied at or above 70°F/21°C to ensure the adhesive works. It hasn’t been that warm in the garage for weeks, so I’ve been keeping a 1500W heater running inside the truck with the windows mostly up for a few days. It’s keeping the interior a nice, toasty 80°F/27°C. Last thing I want is a bunch of Noico falling off behind the trim!
Shit Happens
What’s going on here? It looked like things were so close a minute ago, right? That’s what I was thinking, too. Man! So this was the third time I had to reinstall that lower dash bar on the driver side. If you’ve ever R&R’d one of these, you know how much of a PITA it can be.
See those two, larger arch-looking things sticking up under the steering column in the first picture below? A decent sized, 12mm bolt goes through each of them at the peak, mounting them to the internal dash bar structure. They mount to the fascia trim via little machine screws at the bottom (tucked inconveniently behind the hood and fuel door pulls), and via 10mm nuts that pinch the lower edge of the upper dashboard.
If you don’t tighten any of them down, things don’t line up and it fights you. If you tighten any of them down, things line up even worse and it fights you. In a perfect world, you’d install the brackets, then hang the trim from the pinch nuts and install a couple screws. In reality, you muscle the whole fucking thing into place and hold it with your shoulder while you carefully slip a socket extension through a small trim hole and angle the bolt just right to thread into the internal dash bar. And it fights you.
And then one of the bolts shears in the hole and you decide to spend a couple days playing with speakers instead.
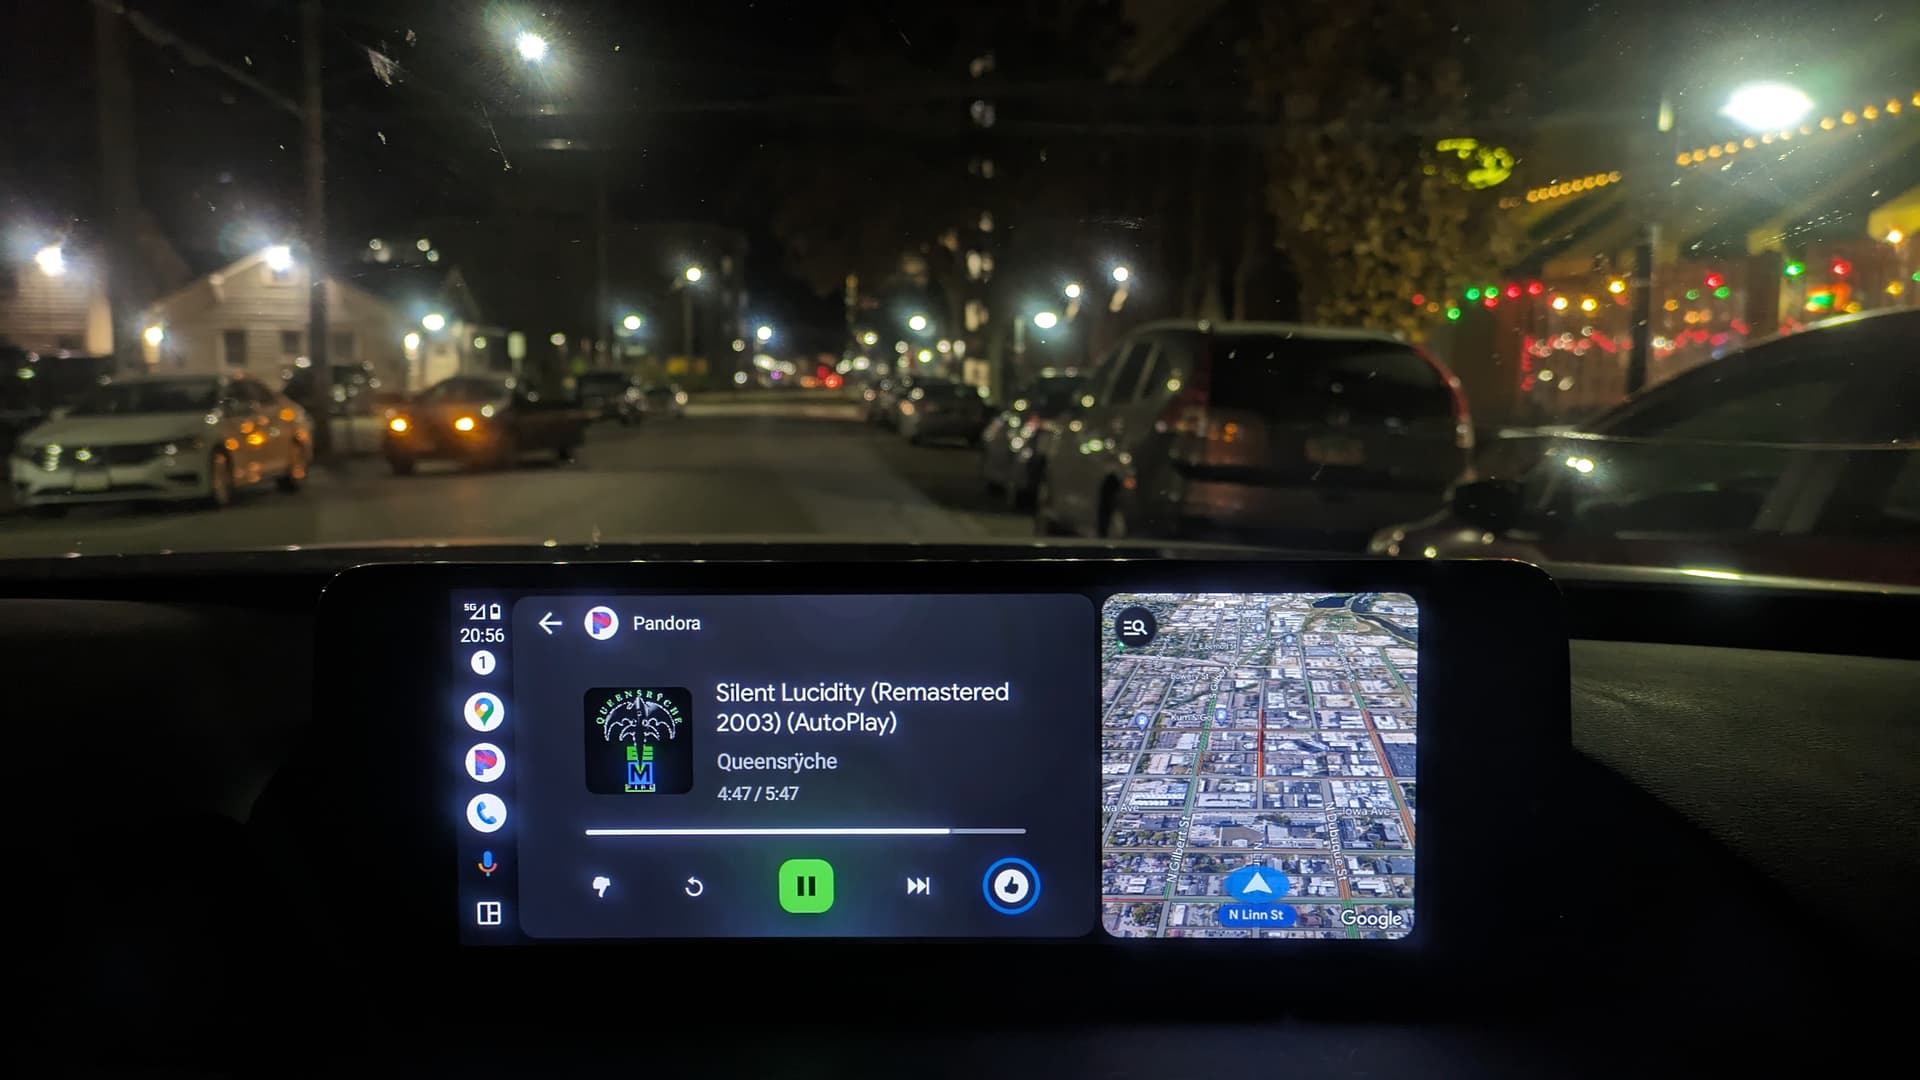
Silent Lucidity II: Android Auto
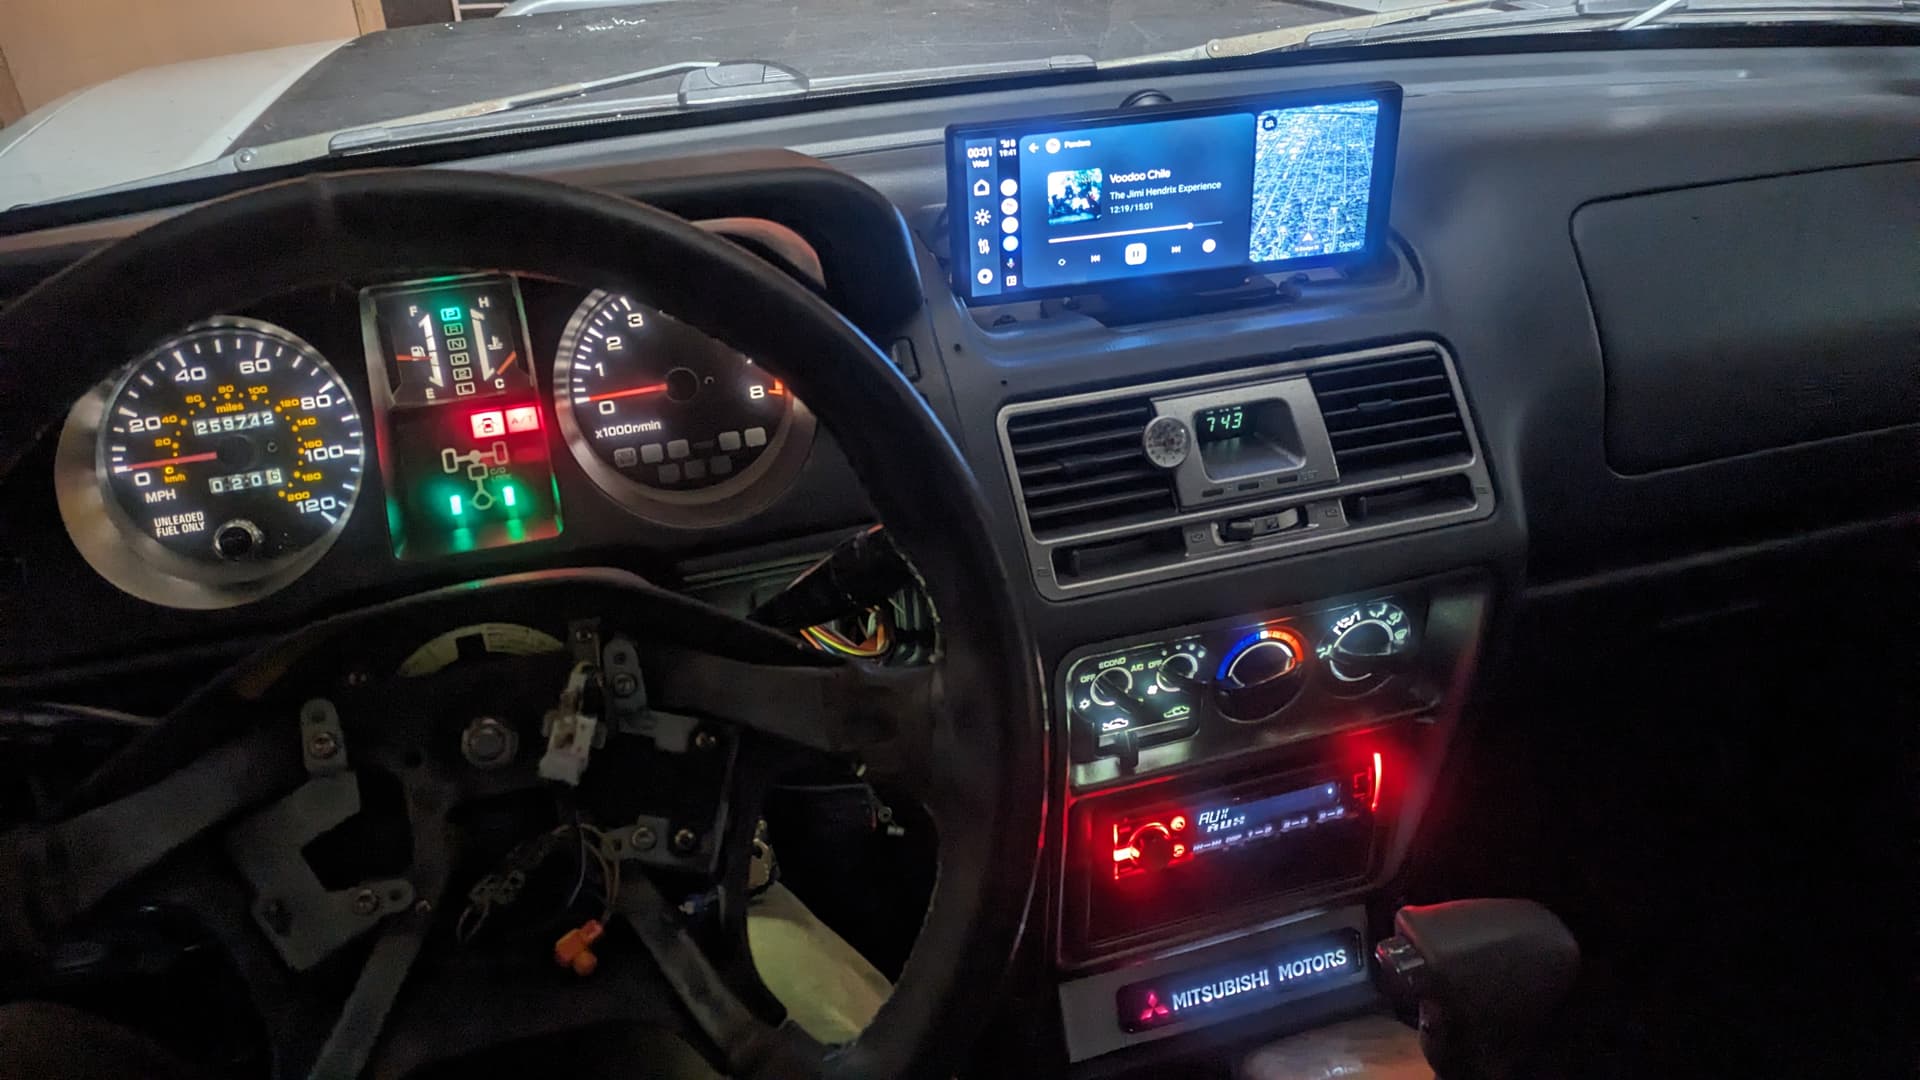
Finally catching up with Phil on this front! I picked up an Ottocast 10.25" touchscreen. It’s got a webcam I won’t be using (because it’s too low to see over the wipers and I already have a front-facing Garmin up behind the rearview) and is hardwired to switched 12VDC under the center console and to the AUX port on the front of my deck.
It takes about a minute to boot into Android Auto, and it doesn’t pause/stop with the deck being on/off, but otherwise, it’s pretty close to what we’ve got in the Mazda. Not entirely sure the AUX output is particularly high quality, but I can dial in the EQ on the deck to adjust.
The OE gauge pod enclosure almost fits, so I’ll be playing with that over the winter, methinks. In the meantime, I’m itching to get the rest of the lower trim installed so I can start daily driving Fezzik again.
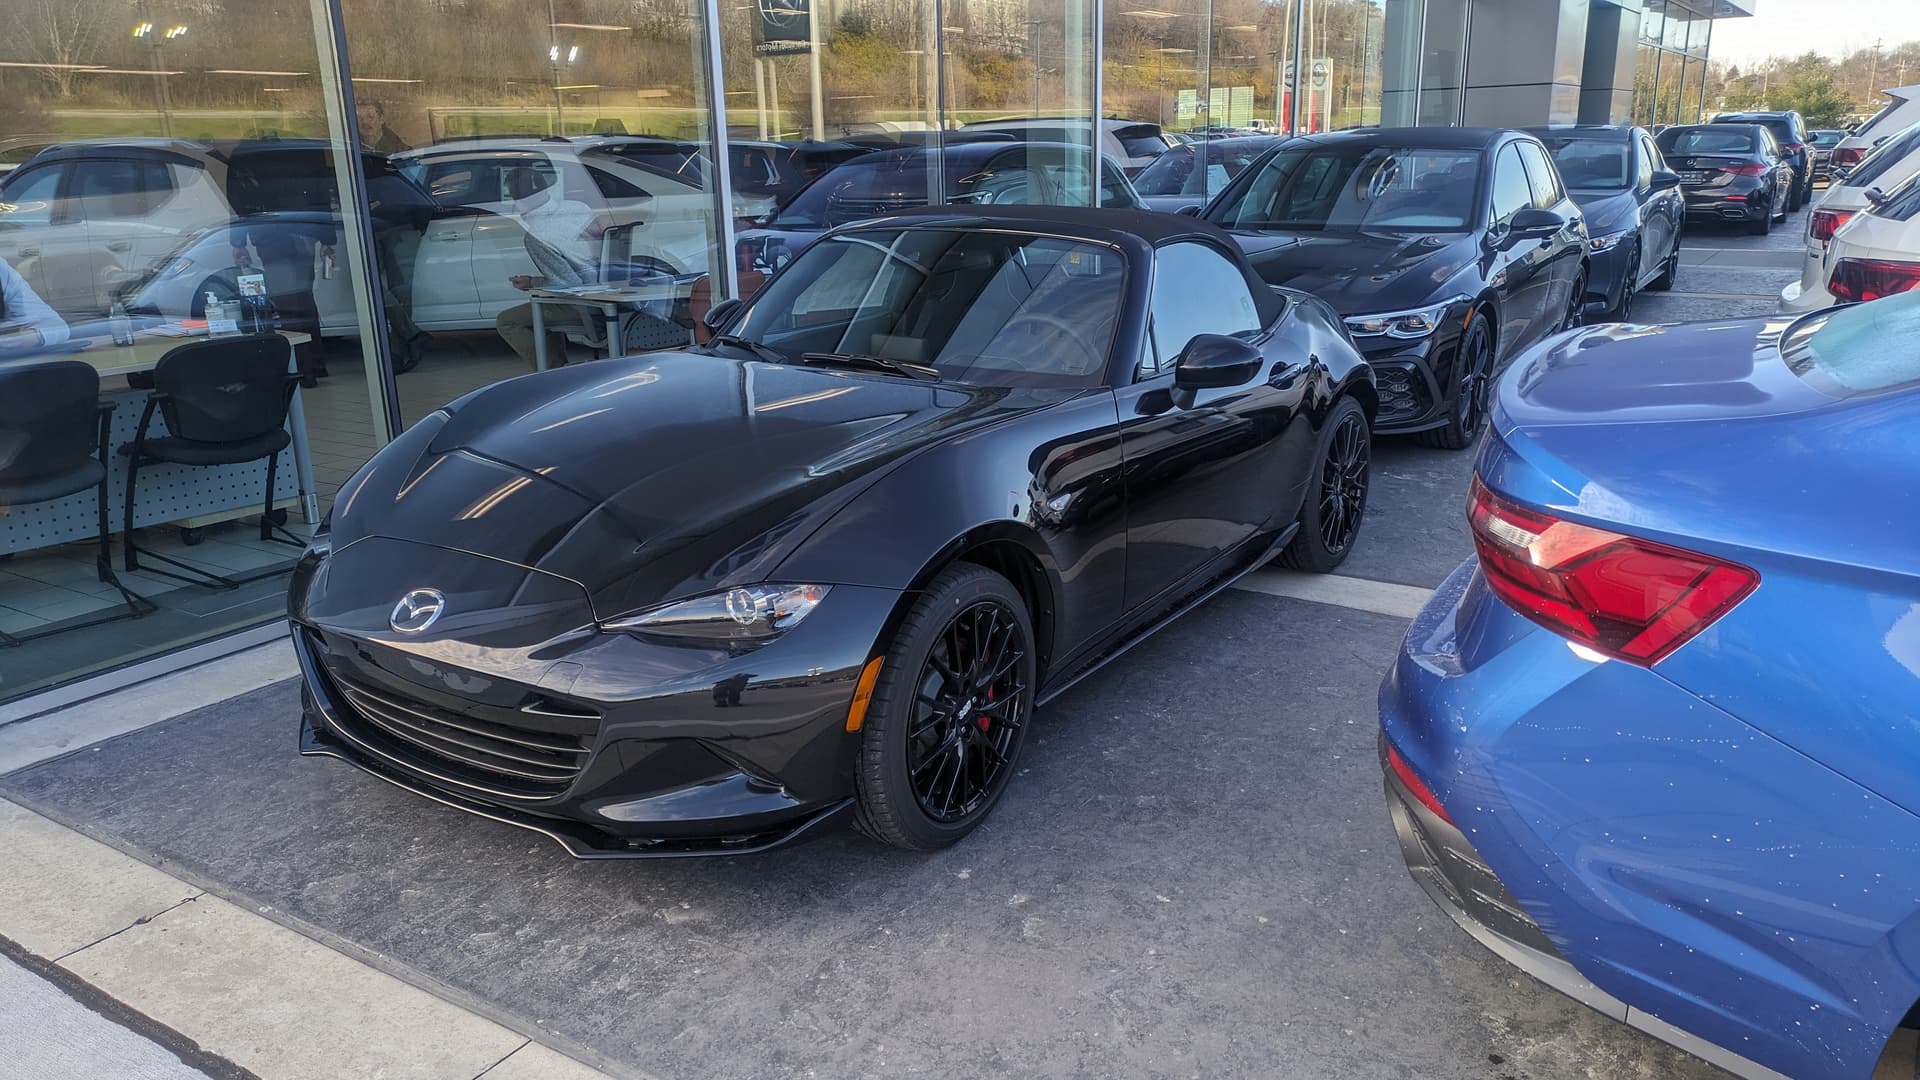
BONUS: Triple Black ND2 Mazda Miata Cup
Black on black on black with BOSE, Recaro, BBS, and Brembo goodies. So. Much. Want. US$37K, though. If I put 10% of that into the CX-50…
What’s Left?
Good question. I need to do some more thinking, but it feels like:
- reconnect speedometer reed switch (so speedo works)
- remove sheared bolt & install lower driver’s dash panel
- r&r/troubleshoot dead 12VDC outlet
- install switches for second row outlets
- pre-wire second row seat heaters
- install first row seat heaters
- paint/install rear interior trim panels
- install amp power/ground blocks in amp box
- install sub on passenger rear wall
- fabricate/install rear cargo cover
- test ceiling mounted house circuits
- pre-install fiber optic light unit
- r&r sunroof
- Noico ceiling
- bleed brakes
- replace reverse lights
- mount ditch lights
- fabricate/install splash guards & mud flaps
- wire up all aux lighting switches

Return From the Heater Core - Ep. 1
Since we last met, I’ve made some progress. Not much. Some.
Things that got done:
 reconnect speedometer reed switch (so speedo works)
- remove sheared bolt & install lower driver’s dash panel
- r&r/troubleshoot dead 12VDC outlet
I got lucky, and got that damned broken bolt out without too much trouble. I mean, if you don’t consider reenacting the Death Star trash compacter scene between a 25-year old power driver seat and a steering column “too much trouble”. (I am looking forward to replacing the front seats.)
Believe it or not, the bolt wasn’t cross-threaded. It just snapped! It was so loose I was able to get a couple turns out of it with my fingers from the back before I had to put vice grips on it, but it came right out without a fight. Bless up!
Pay no attention to the shitty foam ring around the speaker in these pictures. It’s still there, and it’s still just as shitty looking, but it’s hidden behind trim now, so just ignore it. You can see the 3-point connections on those brackets I mentioned previously, though.


Things that got started:
 paint/install rear interior trim panels
- install amp power/ground blocks in amp box
- install sub on passenger rear wall
- fabricate/install rear cargo cover
- pre-install fiber optic light unit
- Noico ceiling
I didn’t paint any of the rear trim panels yet, but I started putting them back in. Well, I mean, it’s just the two big pieces back there for the most part. I can already tell I’m going to have to be careful screwing these back into place due to the almost 0.25in/0.55cm-thick sound insulation now under the carpet.
Anyway, I started building a custom wooden bracket for mounting my little powered sub. While the glue was drying on it, I started figuring out where the light engine for the fiber optic headliner would go. (Factory flashlight location, imo.) And then I decided I didn’t like my bracket design and started over.


The end goal for the sub install is more of a “stealth” enclosure that blends into the interior, but could also be sealed off and converted into a proper subwoofer enclosure in its own right some day down the road. In the meantime, I’ll be creating a sort of accordion-folding cargo cover out of 1/8-inch pegboard and dowels.
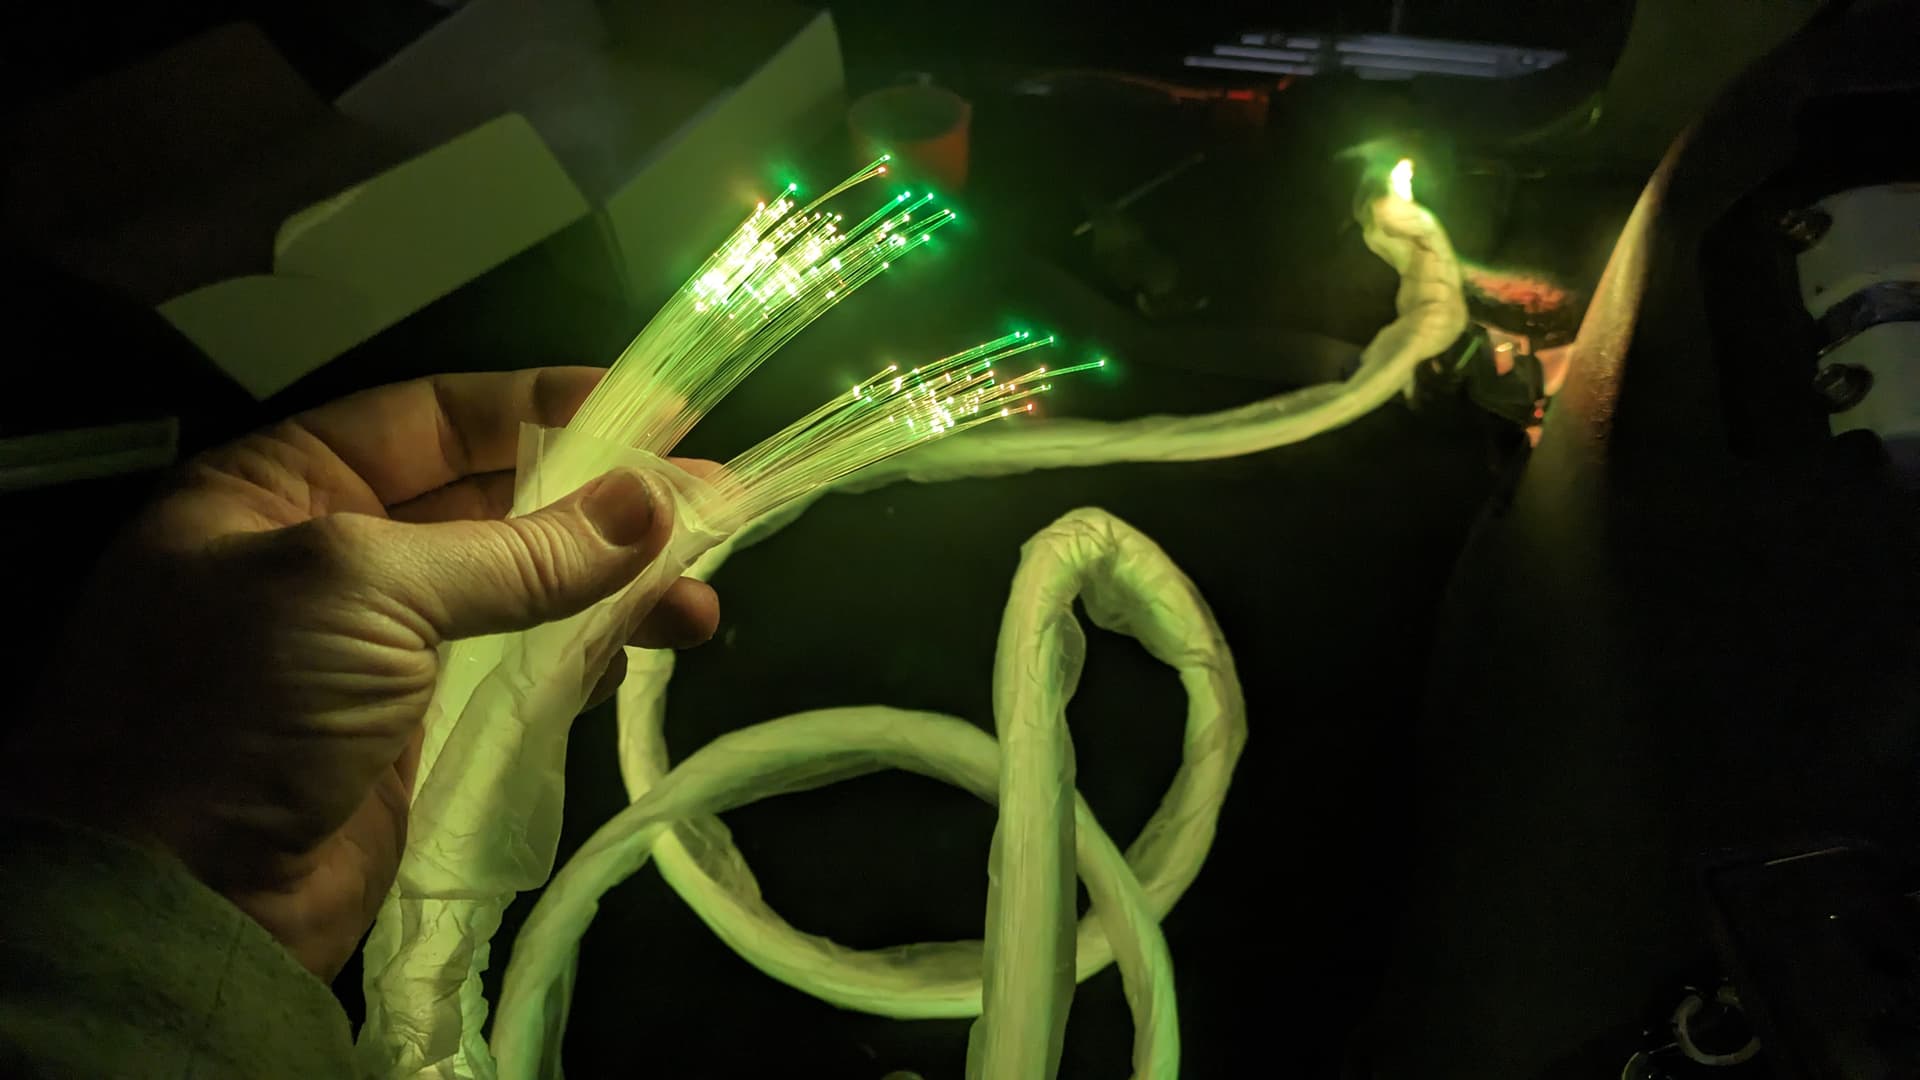
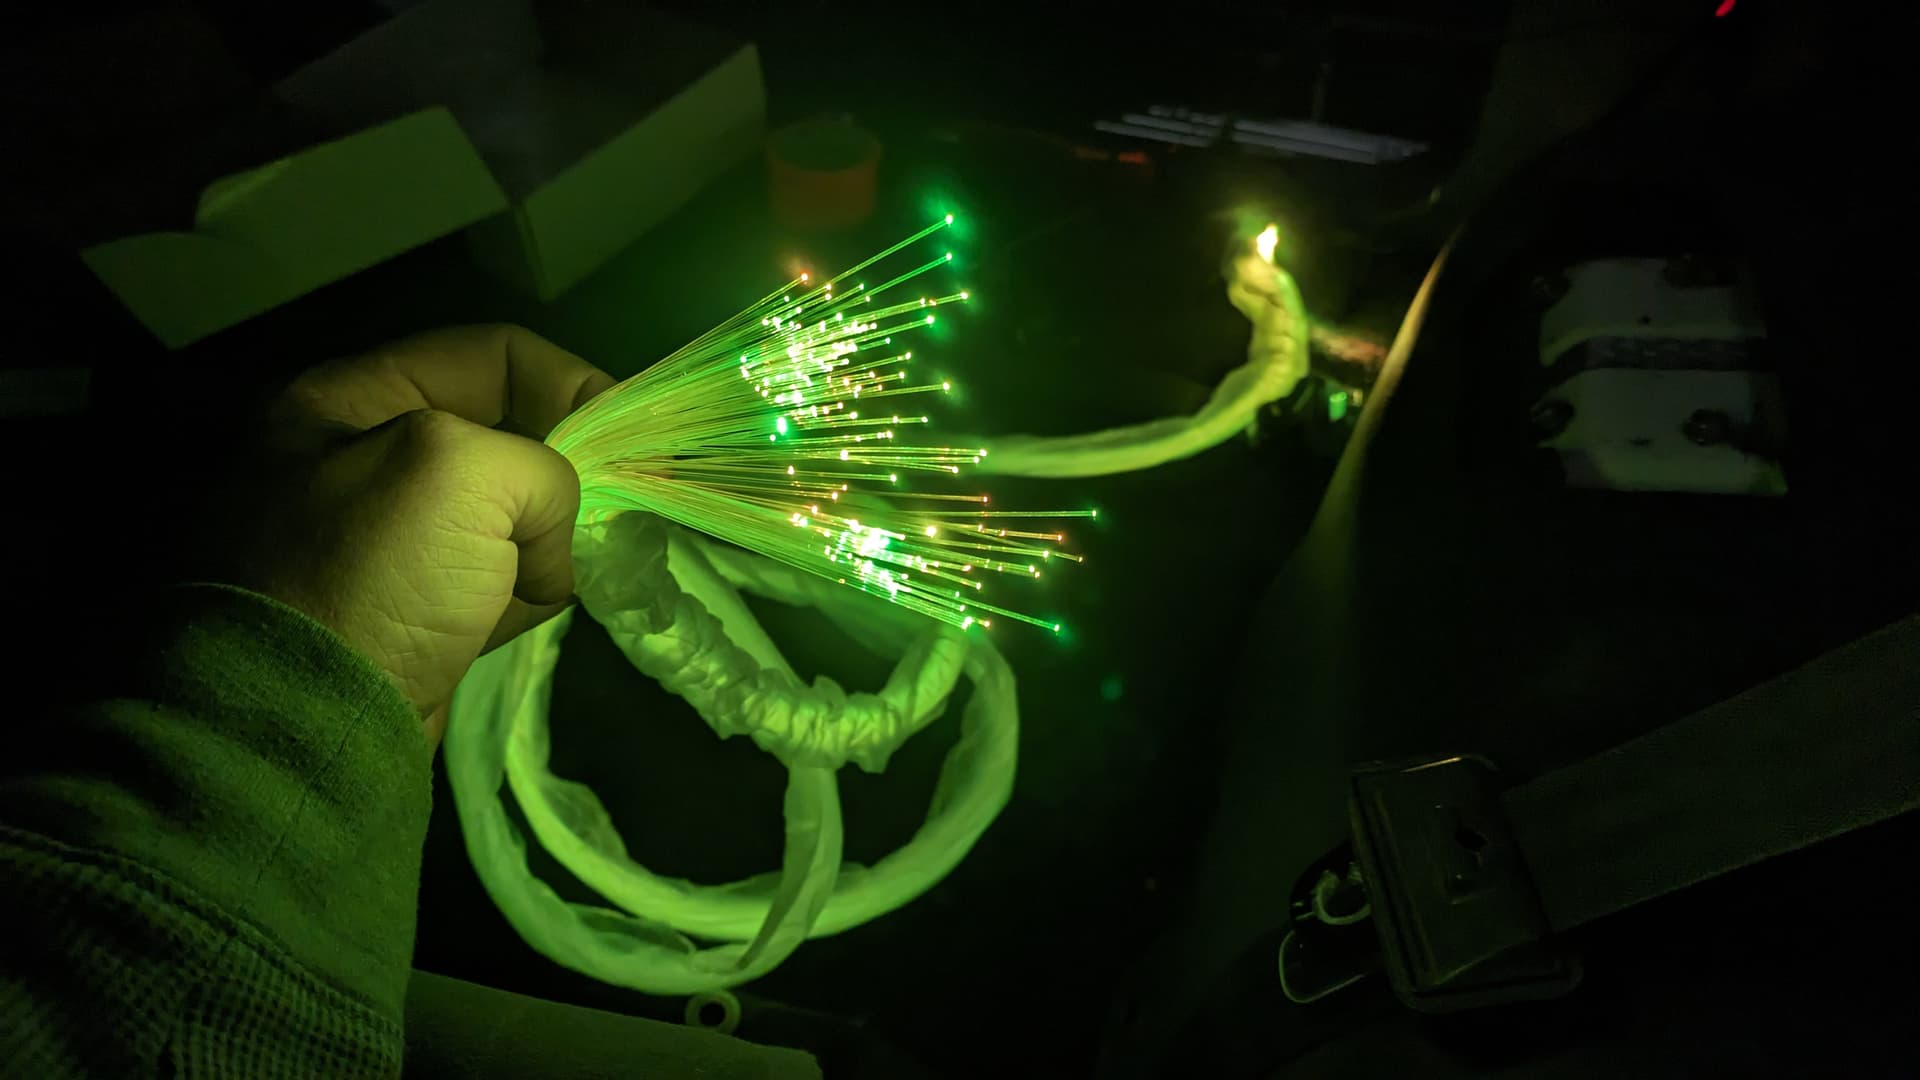
I bought my fiber optic headliner THREE YEARS AGO. January 2021. Can you believe that shit? I guess it means I’m not a hoarder, so I’ll buy that for a dollar, but damn. Pretty excited to see it still works. The remote battery is long dead, but the light engine fired right up and appears to be doing its thing. Which is good, because the girls have marked where they want their stars on the headliner down in the basement, so next step is punching holes and running fiber. Wo0t!

I’ve started working on the ceiling/roof skin. I should have removed the piece of old carpet pad or whatever they glued to the roof skin over the front row before I reinstalled the interior. It might as well have been asbestos the way it disintegrated and covered everything in the front row. Fortunately, I had a shop vac handy, but still. Gross.
“Noico” went on without a fuss, though. And damn my truck is quiet inside now.
Things that will likely wait until after Xmas:
- install switches for second row outlets
- pre-wire second row seat heaters
- install first row seat heaters
- test ceiling mounted house circuits
- r&r sunroof
- bleed brakes
- replace reverse lights
- mount ditch lights
- fabricate/install splash guards & mud flaps
- wire up all aux lighting switches
In other news, despite still needing to finish this project, and then finish installing those rear suspension bushings and panhard bar, I am getting really excited about upholstery work.
@Todd Any chance you’ve got one of these?
1 Like
34 Days Later…

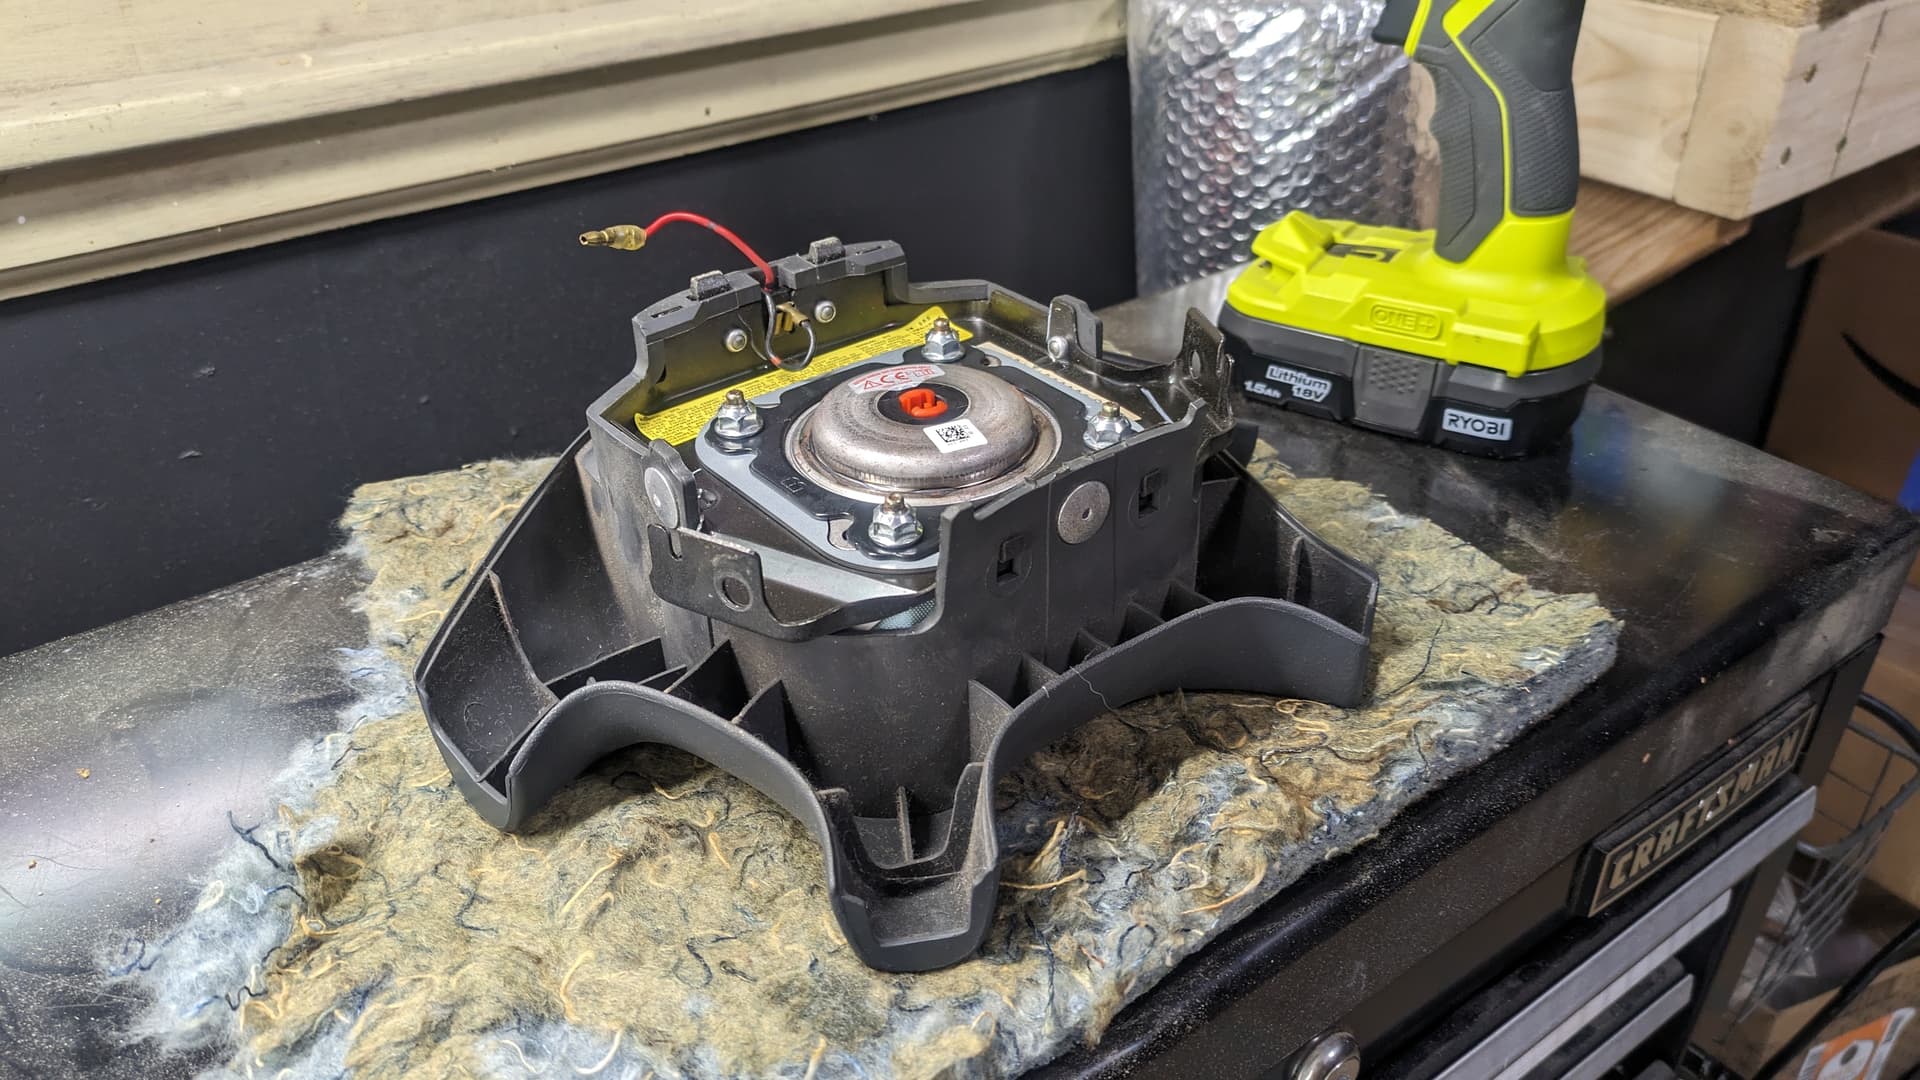
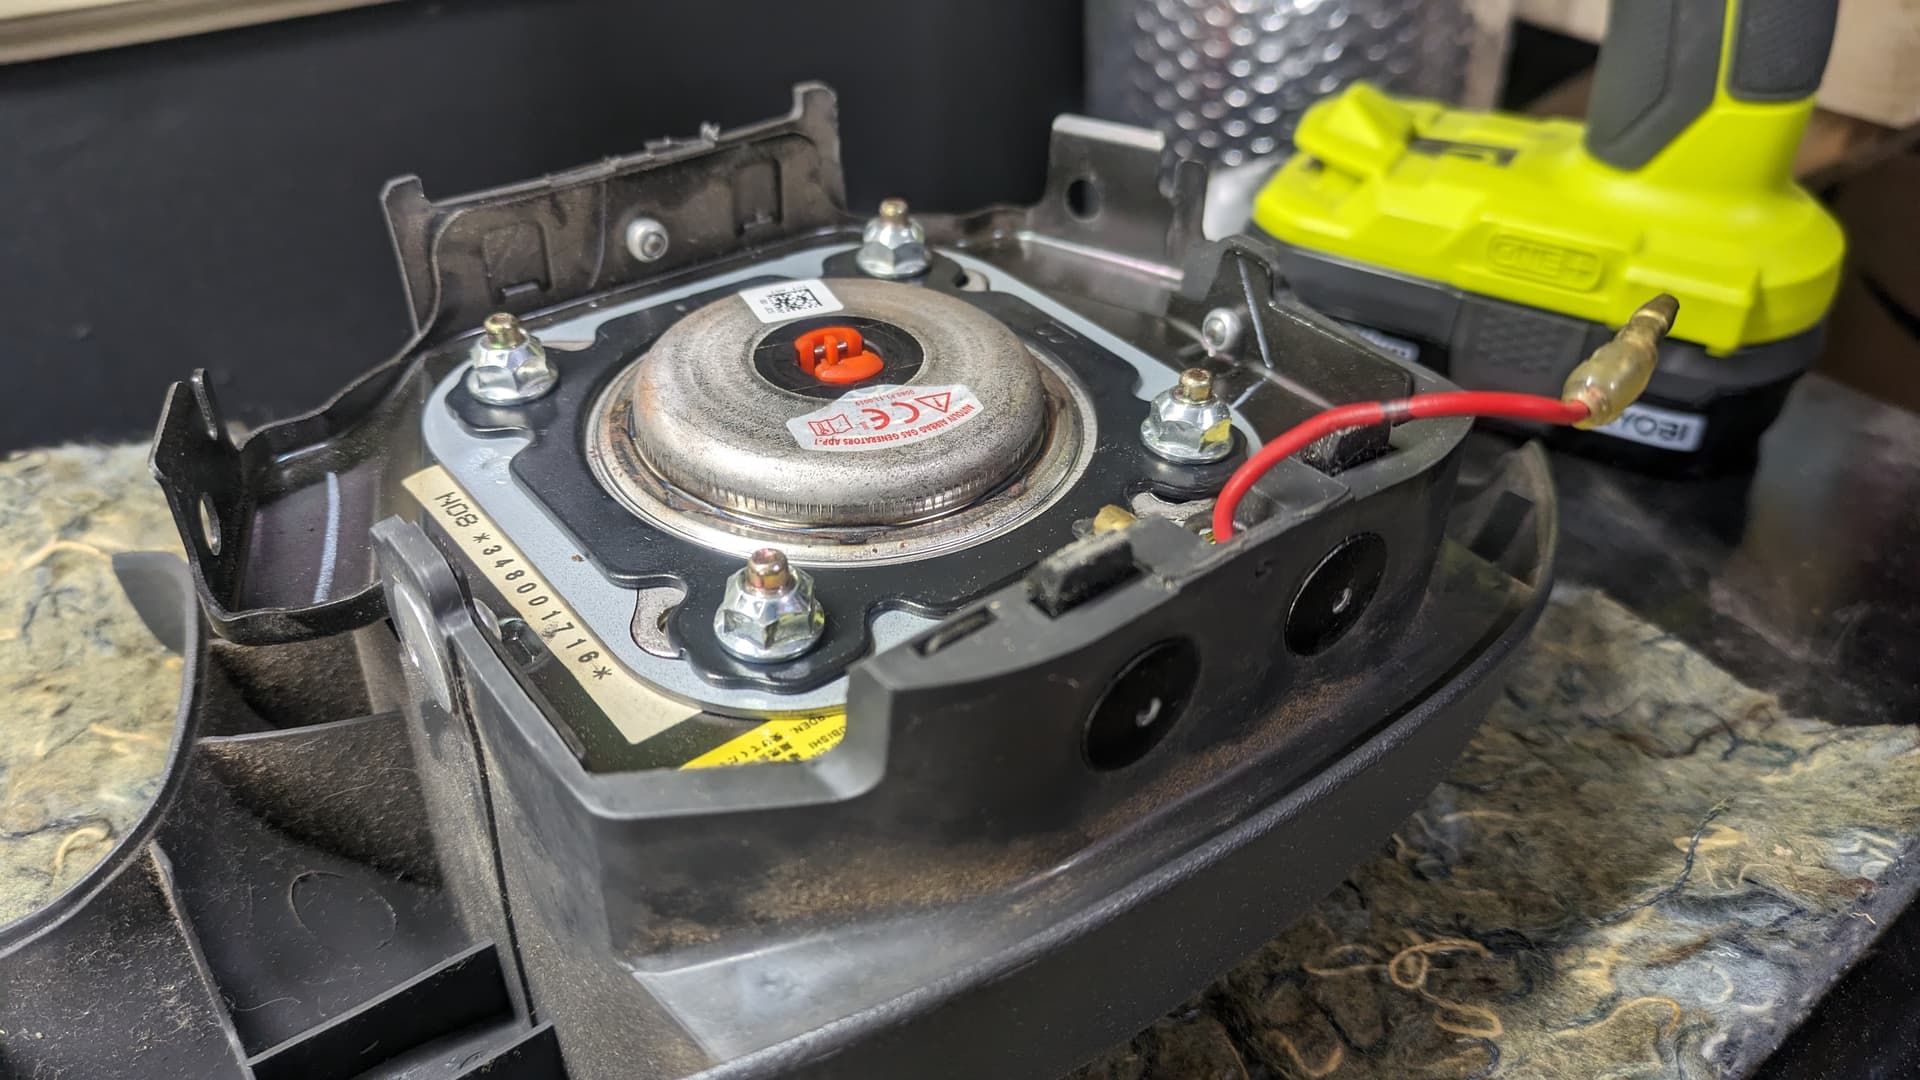
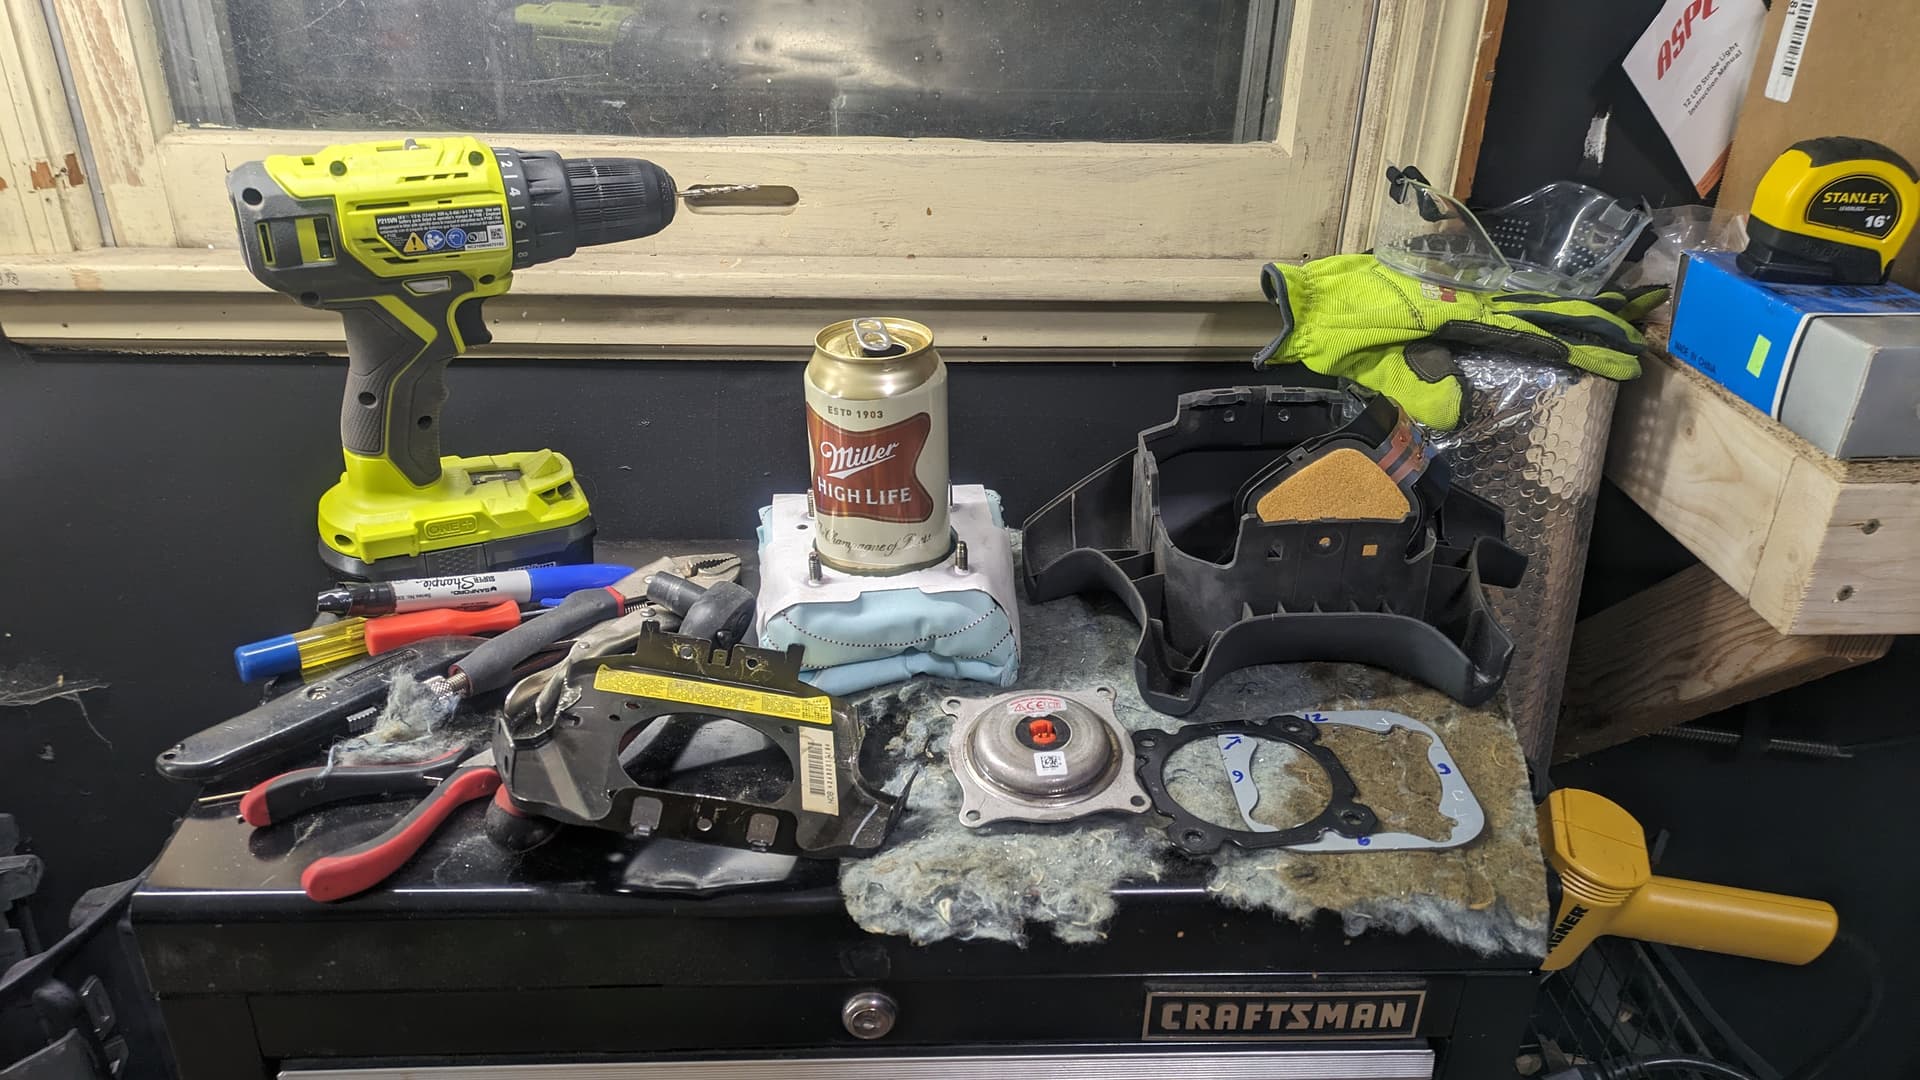
But first, let’s break several drill bits on a small explosive device.
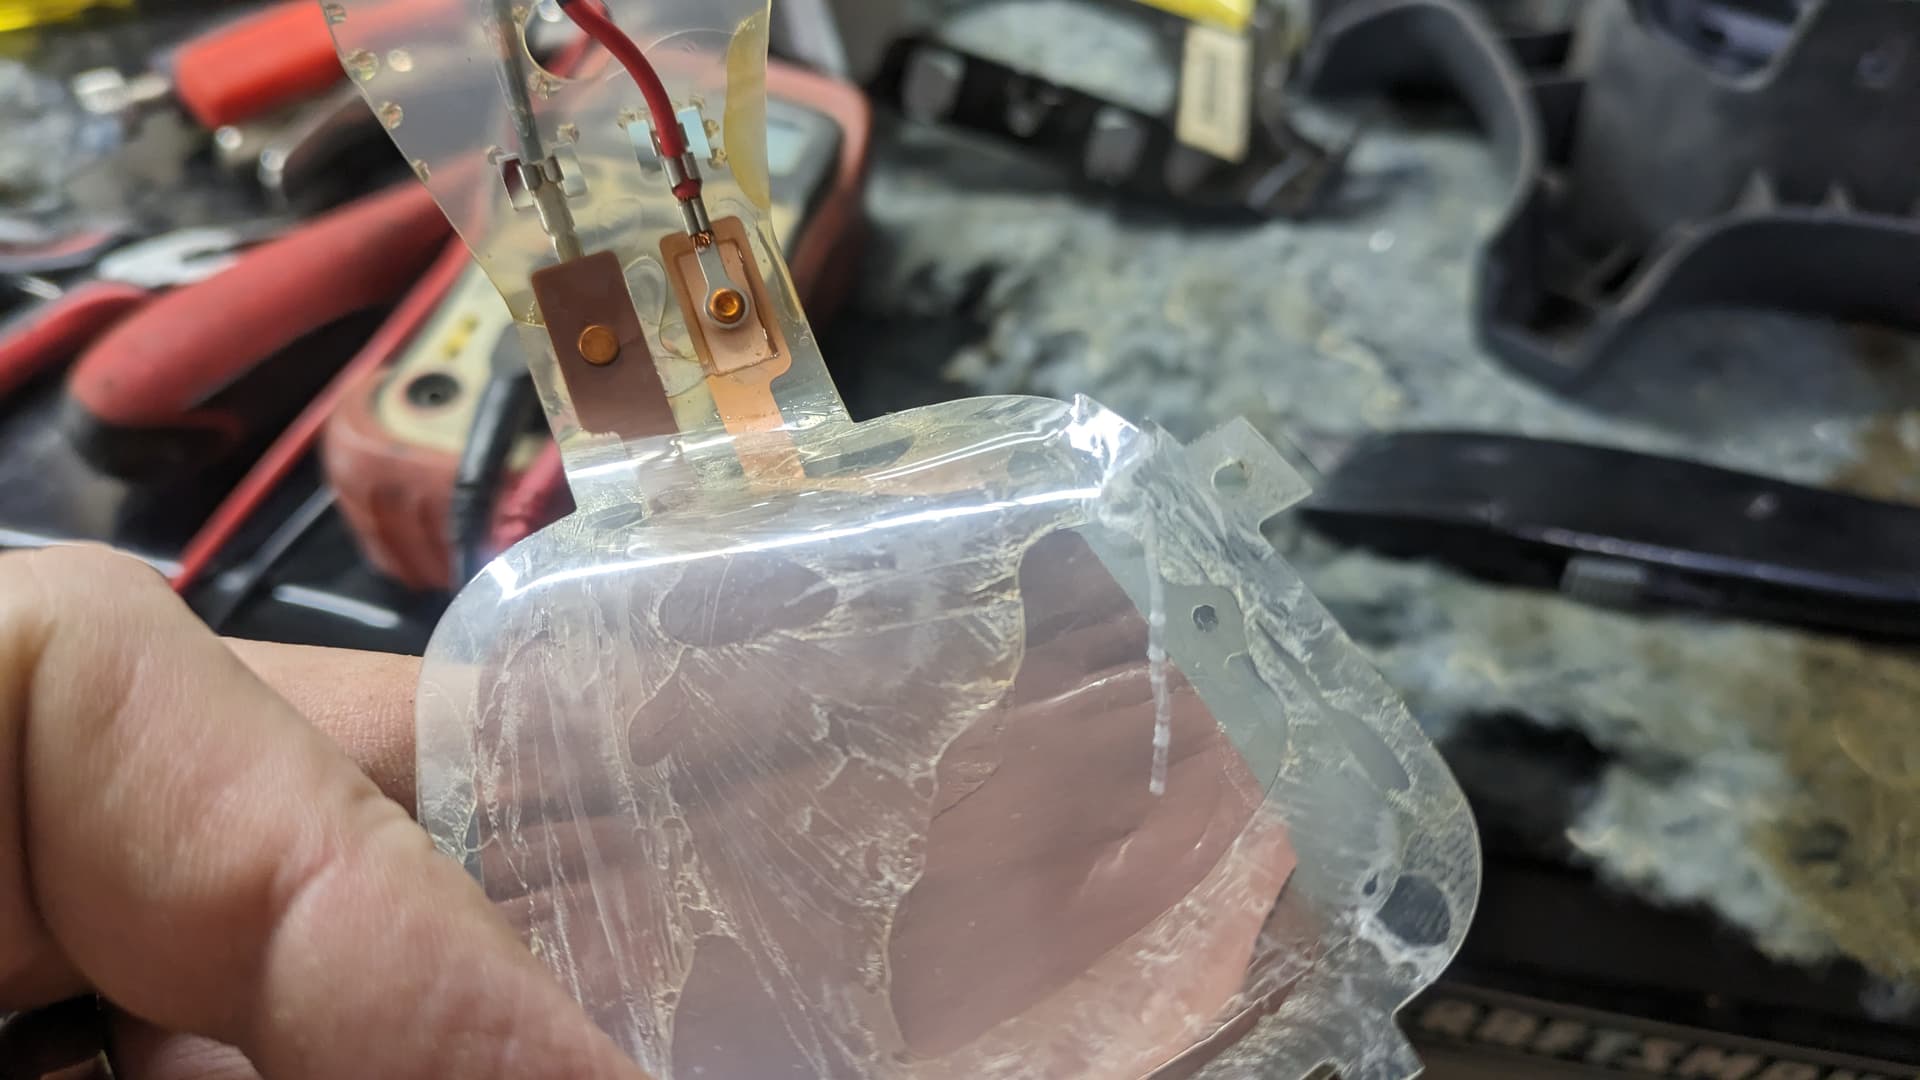
Which is to say, I finally got around to fixing the horn button. It took two tries and four drill bits, but I successfully disassembled the airbag. Theoretically, this might be the most potentially dangerous automotive project I’ve ever attempted. I mean, on paper, at least, right?
I had to drill out six pop rivets to get the airbag assembly out of the enclosure so I could access the horn button. I don’t remember why I ended up fully disassembling things–I used the bag part of the airbag for a drink diaper in one of the below pictures–but that’s how it went. Pretty simple other than, you know, it’s an explosive device.
It’s nice having a proper, OE horn button in the middle of the steering wheel like a real car again. ![]()
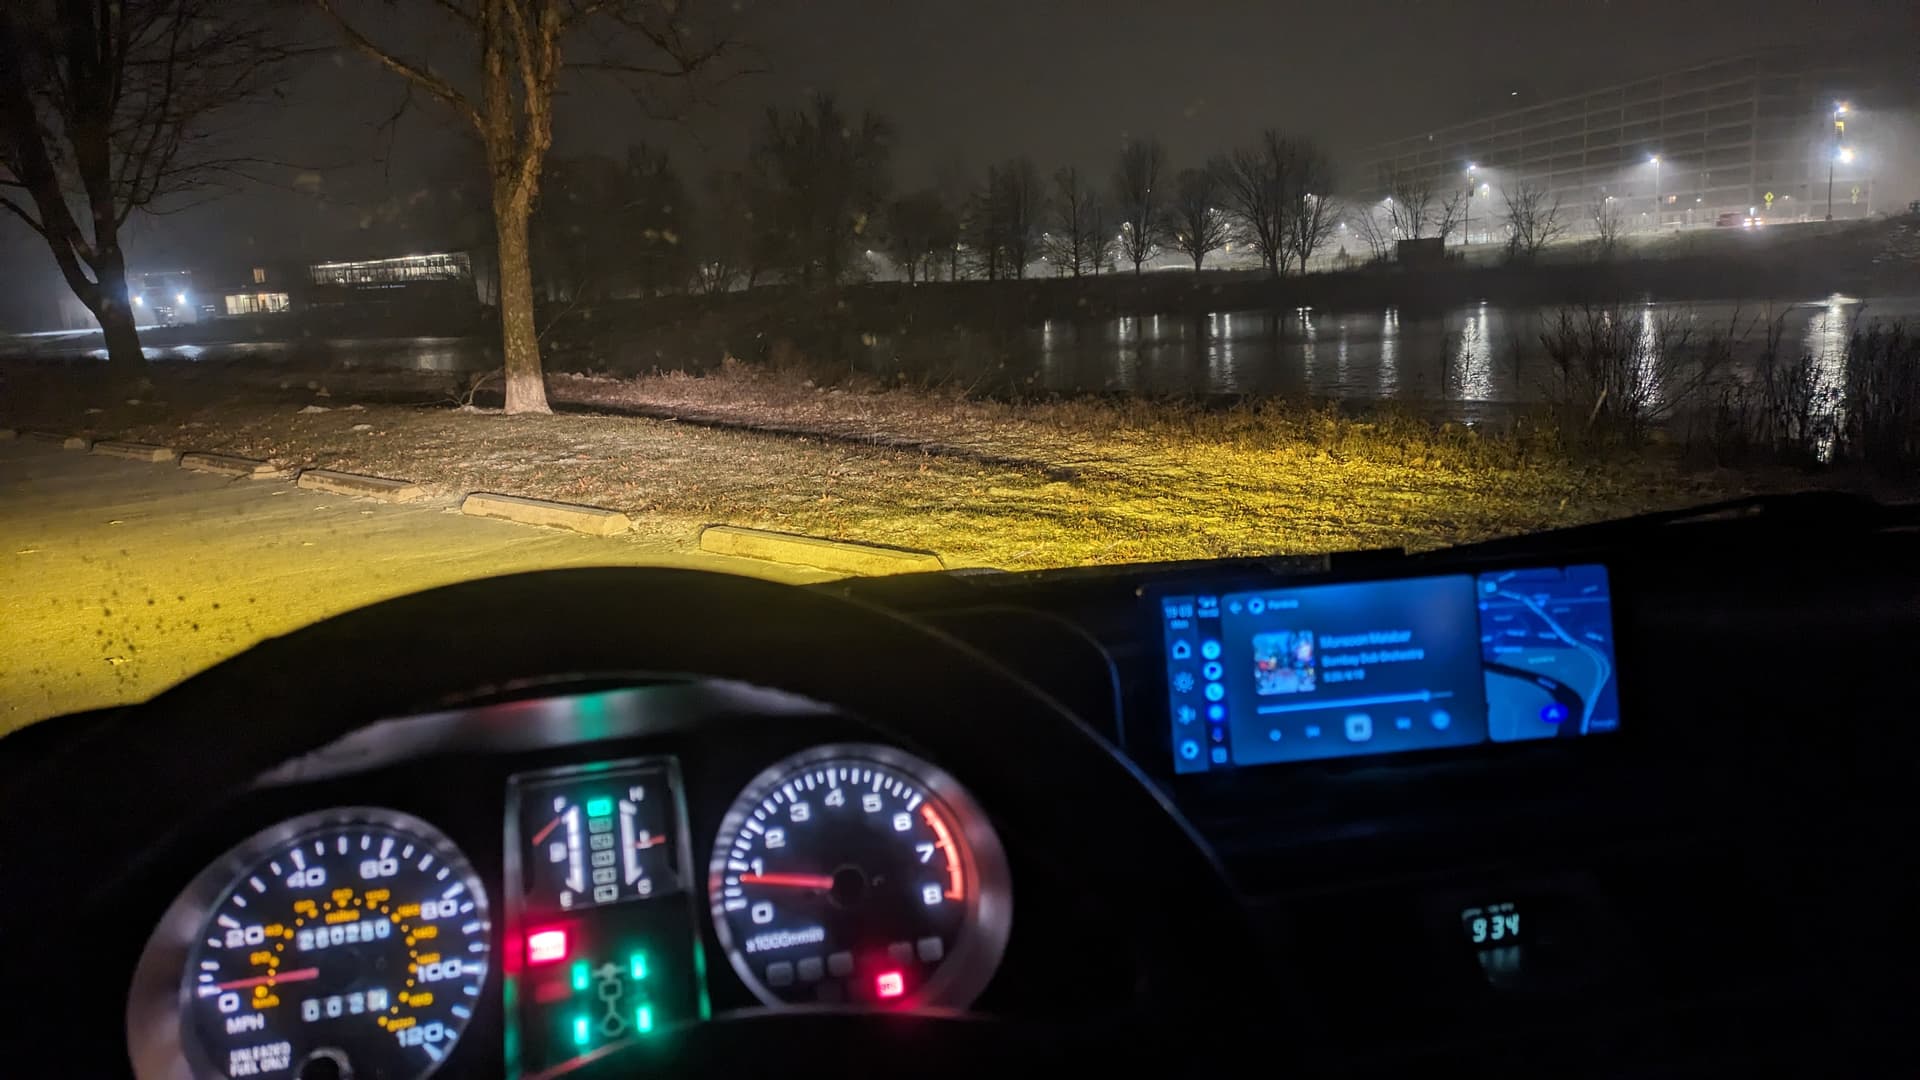
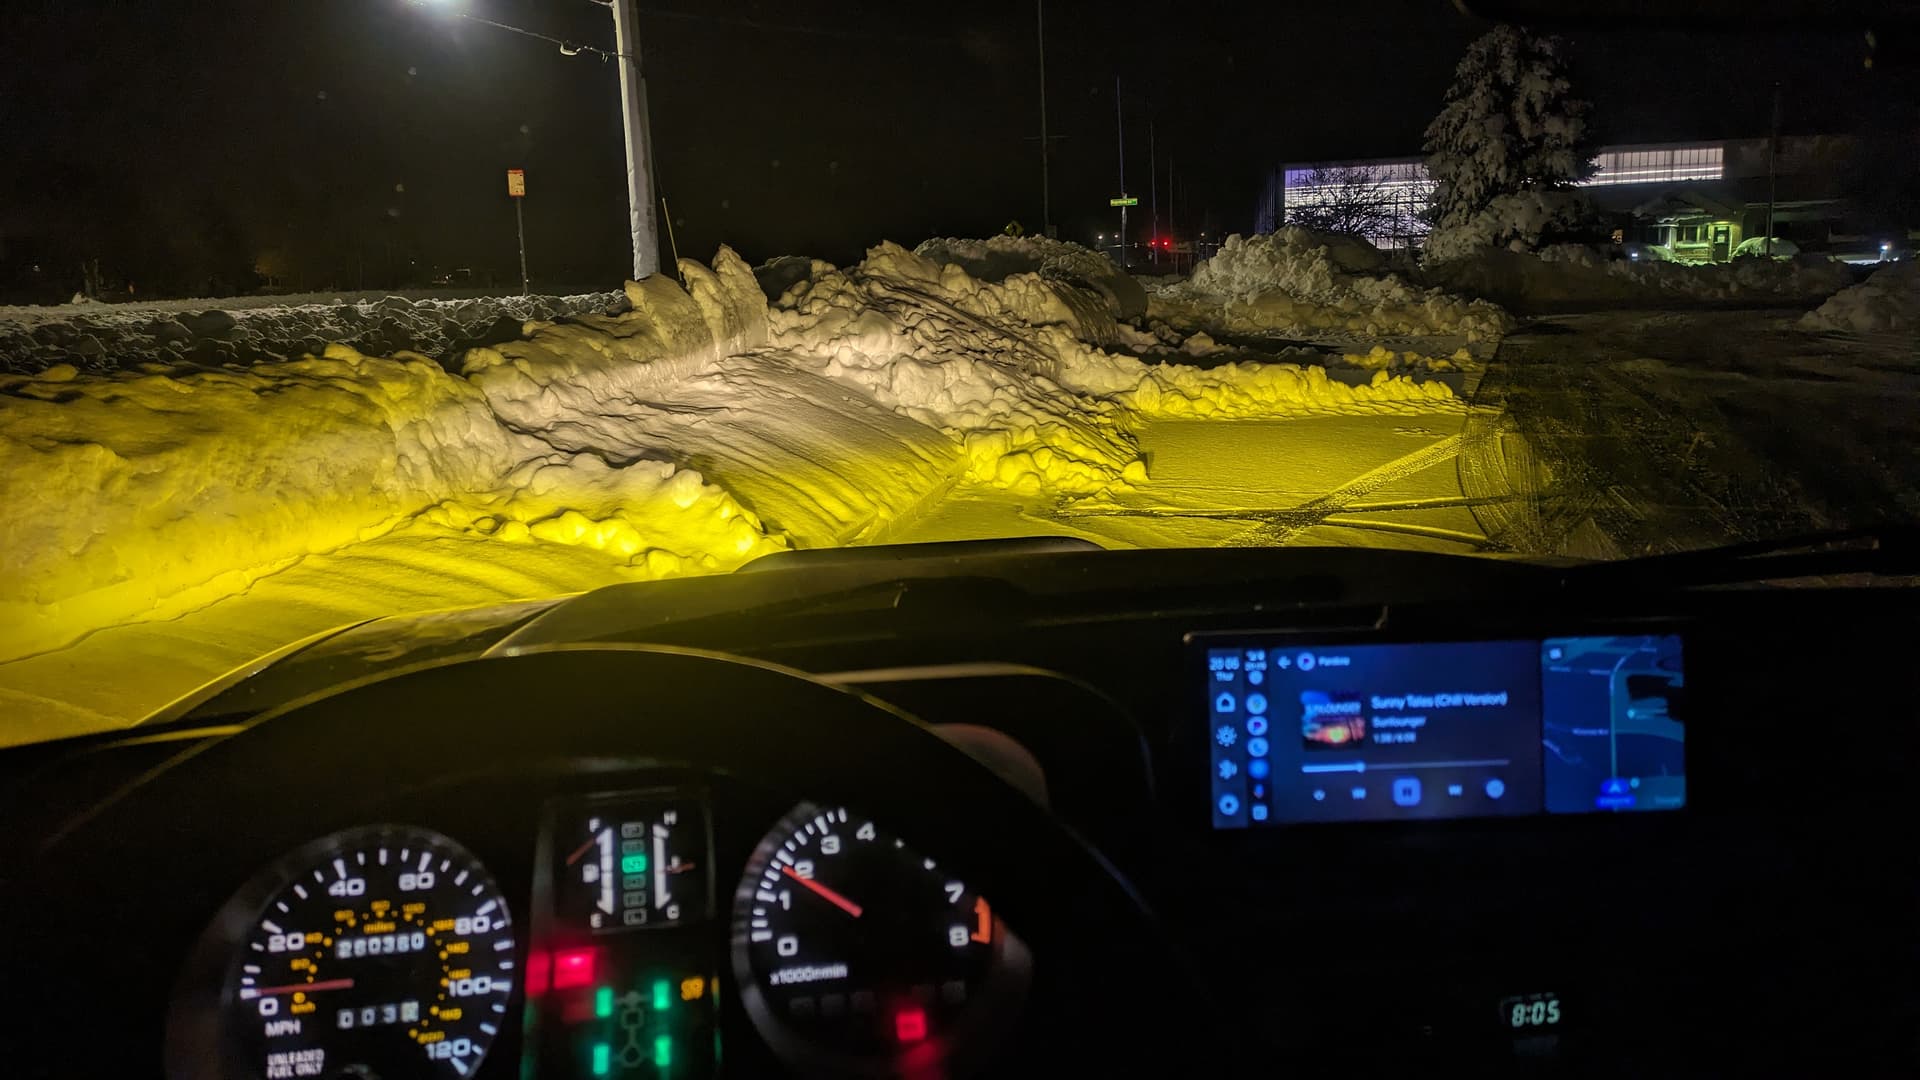
And then it finally happened. It snowed. A lot.
Last week Monday, it started snowing around 6pm. And it continued snowing until after 6pm Tuesday night. We got 15.2 inches (38cm) of wet, heavy snow.
- The front shot where you can see the parking lot lines was 6:30pm.
- Down by the river was 6:40pm.
- Daytime shot in the driveway was about 1pm Tuesday.
- V&P in the park with the snatch strap (and three igloos!) was about 4pm.
- I’m kinda proud of my snow blower work around 5:45pm.


But then, frustration.
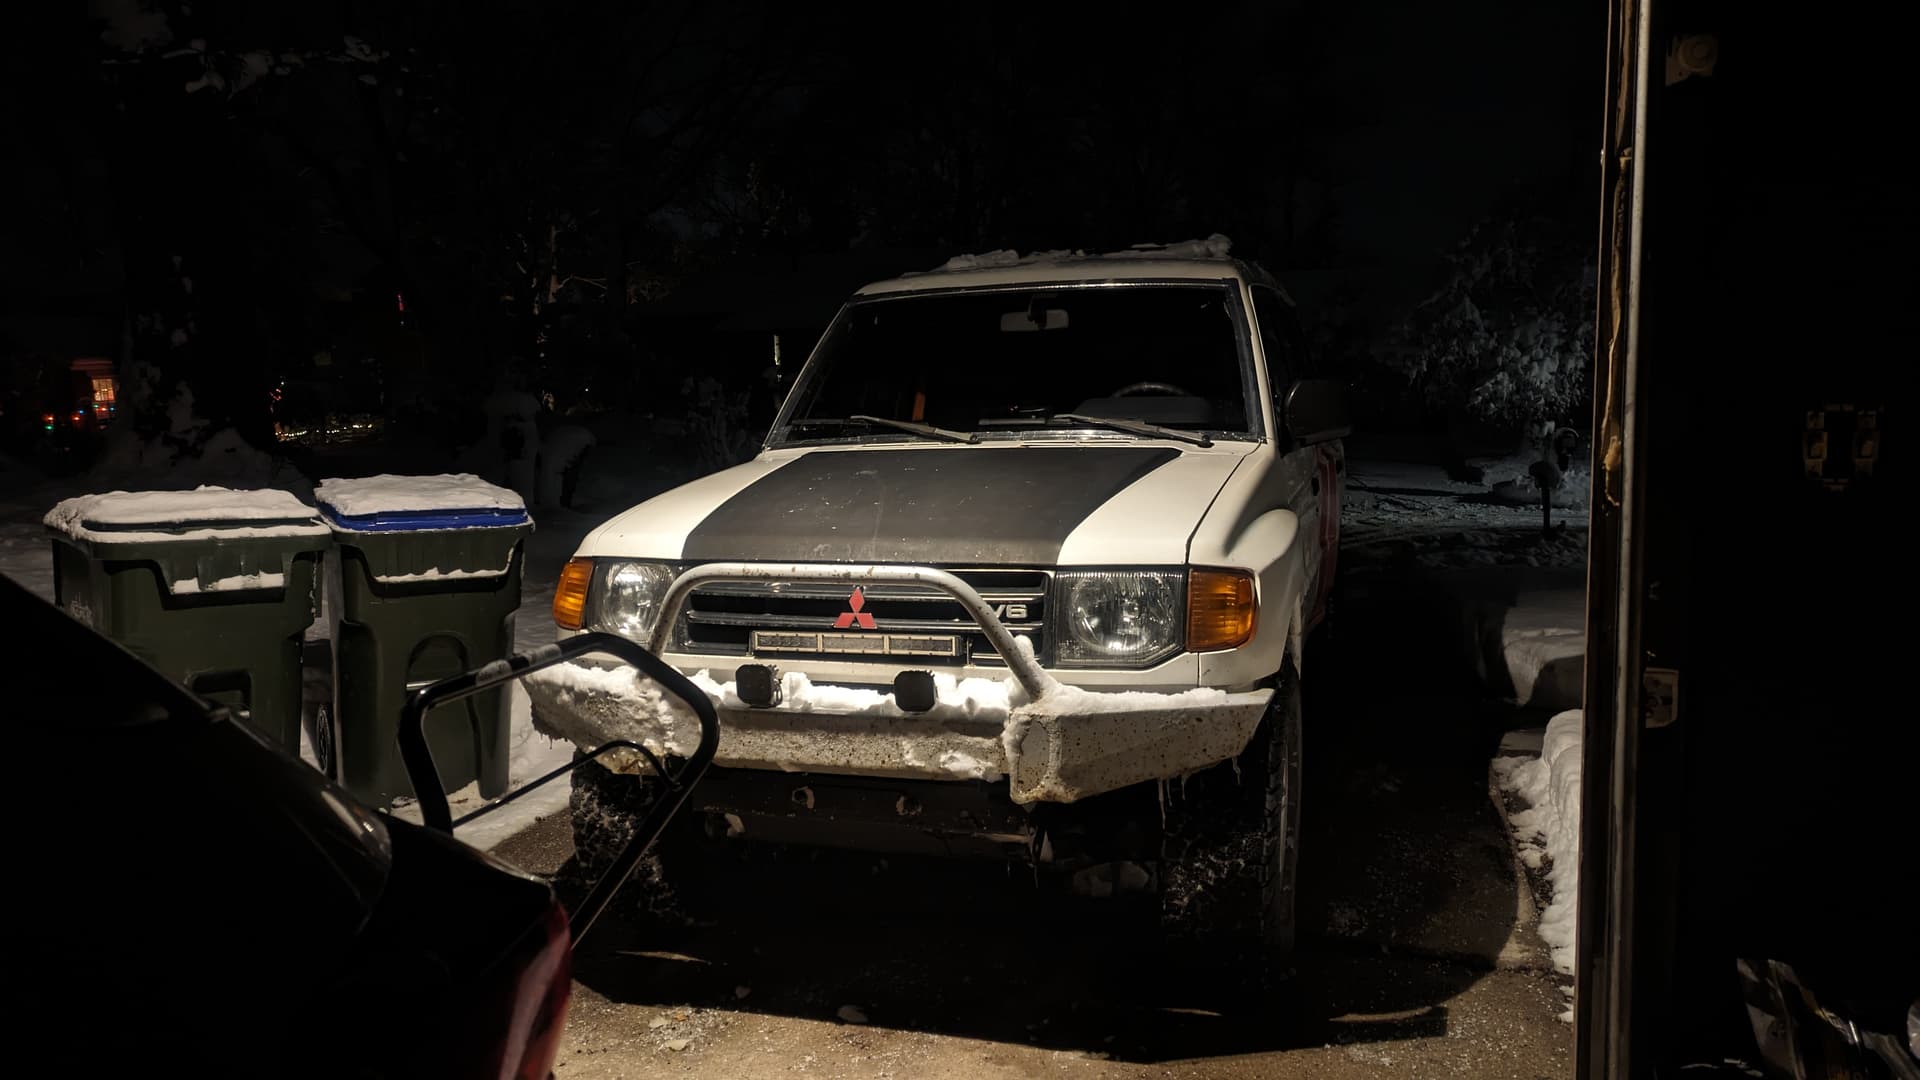
Fez handled the weather like a boss. I mean, he really did. Spray painted carpet be damned, I threw a couple pieces of old pegboard in the back and loaded up the snow blower to clear mom and brothers-in-law’s driveways and sidewalks. Twice. I also cleared two neighbors’ driveways and sidewalks back by our place. Fezzik didn’t miss a beat. He was u n s t o p p a b l e.

^ I really should have had a proper face covering on while I was out in the cold.
And then I was taking a picture of the winter wonderland out my windshield after loading up half a dozen 5 gallon buckets with sand/salt mix for all of the above who couldn’t get out and get it themselves when I noticed my fog lights sure looked bright. When I turned them off, it was immediately obvious my headlights were dim af. “They are almost five years old,” I thought, but a quick glance at my blinky light voltmeter–which was only showing 3-4 red segments had me killing the tunes and connecting the OBD logger.
Fezzik was chugging along on 11.1 volts. 
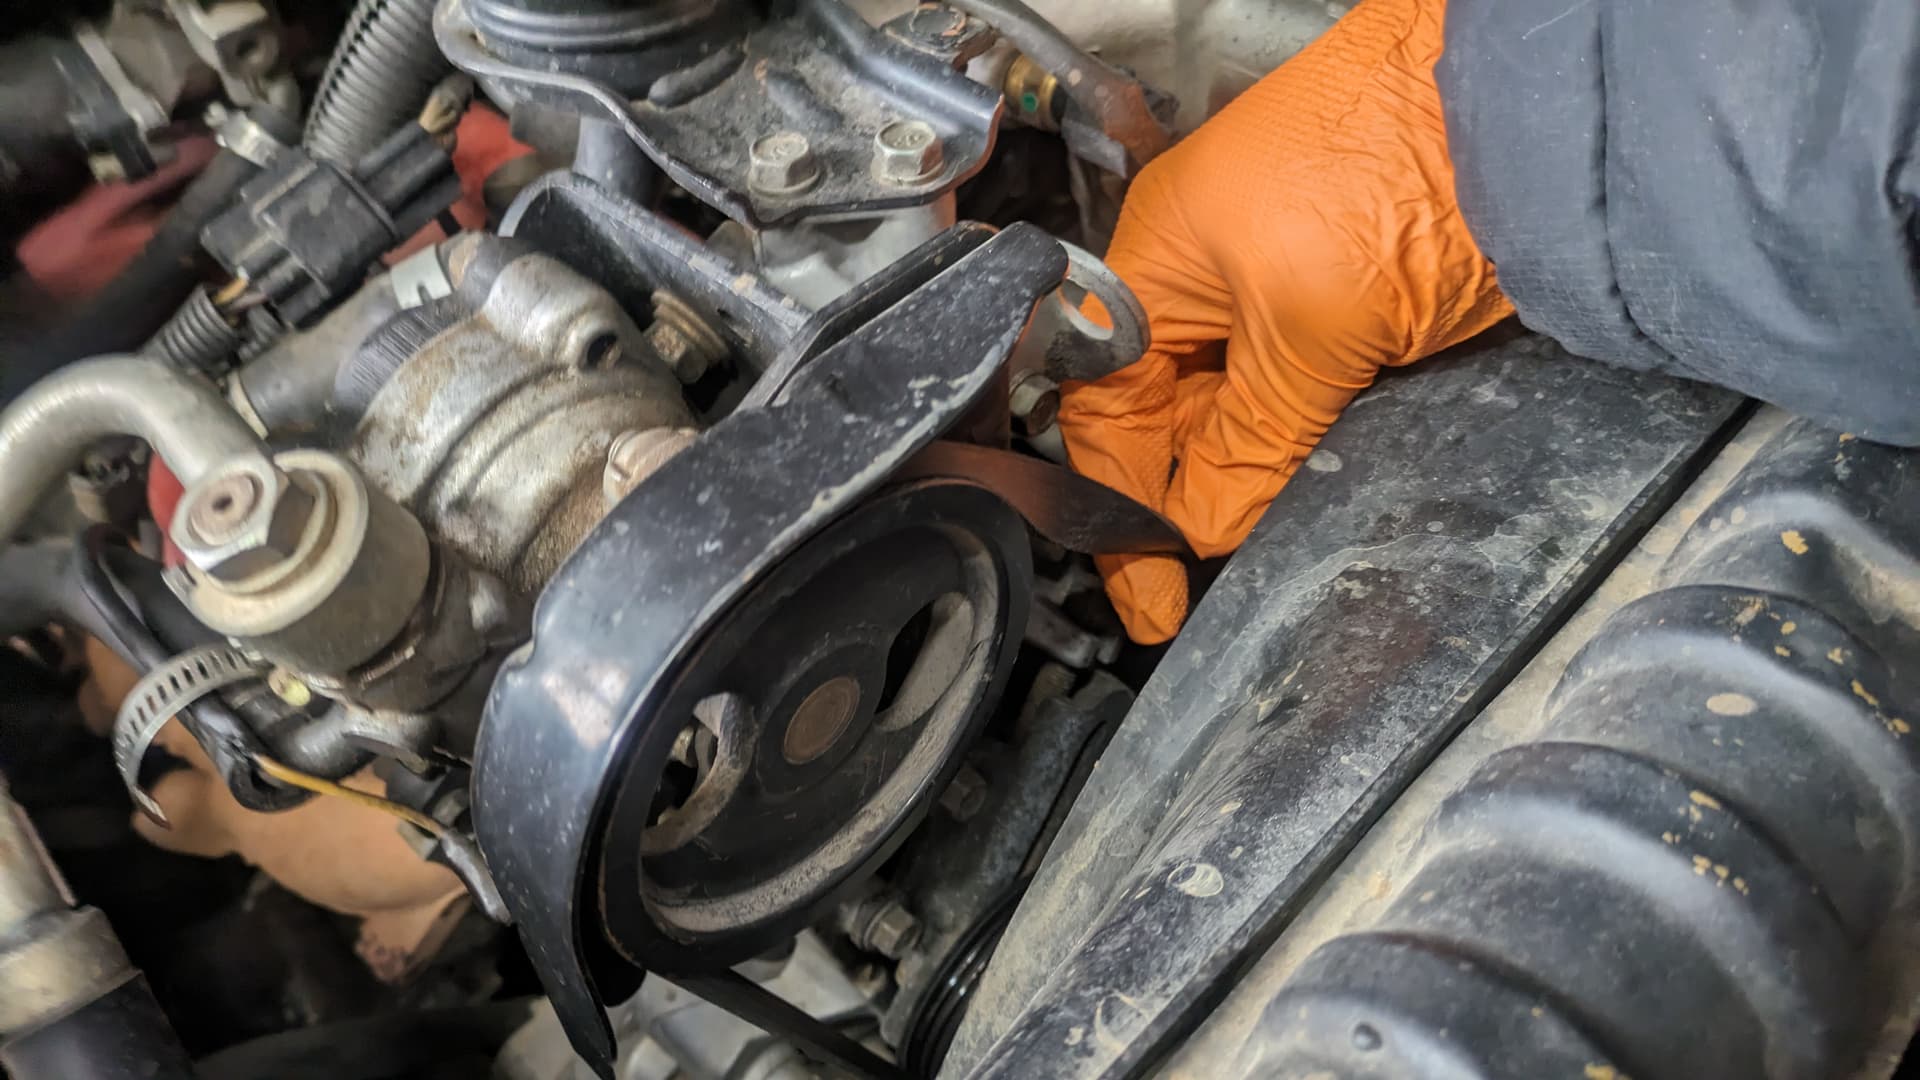
It was still snowing on and off and the Mazda was still nice and dry in the garage, so I ended up popping the hood and re-tensioning the alternator belt in the blowing snow as the temps were starting setting the stage for the subsequent blizzard that landed Thursday-Friday with a steady march to the negative-double-digits. ![]()
I had questions, but I’ll leave them out of this post because they’re now moot.
I am still semi-stranded with what seems to be a bad voltage regulator/alternator.
- I’ve cleaned the battery posts, terminals, connections, and the obvious grounds. It helped, but not really.
- I’ve re-tensioned the alternator belt, which was slipping. It helped, but not really.
- I’ve switched the battery dummy light in the cluster back to incandescent since it’s apparently part of the system.
In between, I’ve left Fez on a trickle charger overnight. Battery gets back up to 12v. Fez fires right up and idles right at 14.4v like a friggin’ boss. Rolls 3-4 blocks down the hill in gear to the stop sign at 14.2-14.4v like nothing’s wrong. And then completely shits the bed within a block under any kind of load as I drive away. Back down to 11.1-11.3v all the way to the edge of town and back, gradually sinking ever lower and lower. I was dipping into 10.9v pulling back into the garage.
The frustrating part is, left idling in the garage long enough for me to then pull the Mazda back up from the street, the volts climb back up to 12v. I hop in the driver’s seat and give it a nice, easy, free-rev to 2000rpm and hold it for about 15 seconds. Volts immediately drop back to low-11s.
(sigh)

I’m not sure what to make of an alternator that can make 14.4v, but doesn’t under load, other than maybe a bad voltage regulator. Did the LED battery MIL in the cluster cook something? Should I really expect more than 7 years out of a Denso reman? Even a Denso reman’d in Japan (instead of Mexico)?
Part of me just wants to order a new alternator and cable and be done with it, but I really don’t have $500 burning a hole in my pocket these days. (sigh)
In other news…
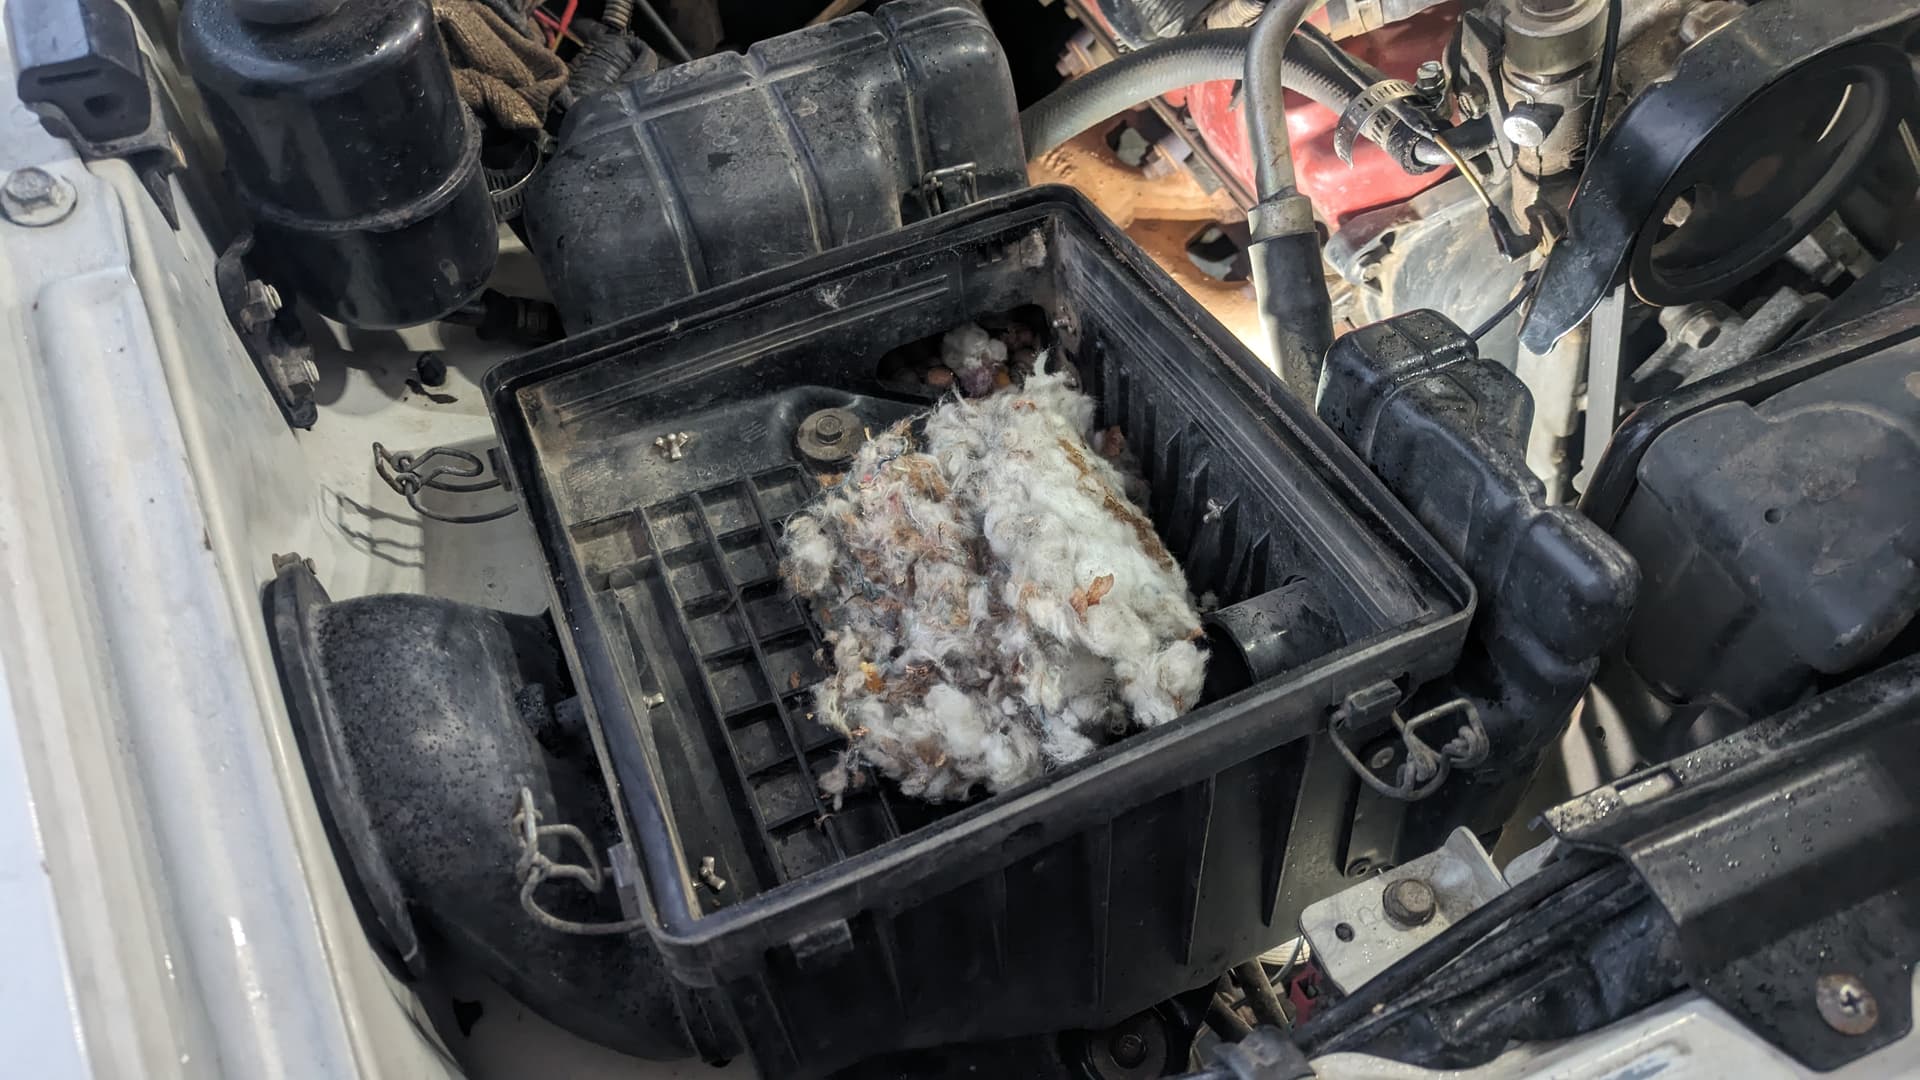
While pulling the airbox to get easier access to the alternator belt tensioner, I found out why I only got 7mpg on my last tank. (I thought it was a bit low, even for being in AWD all week, regularly engaging in dorifto shenanigans.) It was kinda funny. I pulled the K&N and noticed the fuzz on it. I wondered if it might have come from the Butterfly Milkweed growing next to our driveway when I looked at the airbox and saw the nest. It was the size of a grapefruit, easily, and the resonator boxes were full of acorns.
I guess it happens when you park a vehicle in the garage for four months, eh?
Aaand I think I know where I’ll be starting my closer look at the brake lines.
Remember I was dealing with a soft pedal at the end of summer. I couldn’t tell where the fluid was leaking because everything under the truck is covered in rust-prevention snot. Looks like I’m losing quite a bit of brake fluid from the front right corner.
So yeah. Something else to do while I’m lying on the concrete floor of my 20°F garage removing the alternator later this week…

1 Like
260,0XX
- continued electrical shenanigans
I kinda had to drive Fez yesterday. Mom’s furnace was acting up, the HVAC guy would be there at 8am, and I had to clear the driveway so he could park.
Turned the key, and got nothing but 14v for 2+ hours. Hit full lock backing out of a parking spot and saw the volts drop like the alternator wasn’t spinning.
They share a pulley and I remembered seeing the PS pump turning so slow I actually touched it to see if I could stop it with my finger. The PS belt was pretty loose, and I was a little low on fluid.
Still, cleaned up the alternator connections and added new wiring to the todo list. They’re due on principle at this point.
Driving over to get the fluid, MAF cleaner, and a K&N recharge kit, Fez did fine. Volts dipped when idle dropped for a second at stops, then came right back up.
I stressed tested things by turning on all the lights, cranking the HVAC, music, and wipers. Voltage meter didn’t budge. Sawed the steering wheel back and forth at a stop sign and they fell off a cliff. Stayed in the red all the way home.
Trying to burp the PS system with the engine running back in the garage, sawwing the wheel back and forth FINALLY triggered the battery MIL–and the AT light (still LED) came on with it.
Things that make you go hmmm…
1 Like
(sigh)
Tightened the belts add everything was fine. Drove all over town all weekend without any issues.
Start the truck 90 minutes before schedule takeoff for a work trip and it’s garbage again. Had to turn off the lights and heater to make it to long term parking at the airport. Shut it down reading 9v on the logger. Not even a click when I tried to restart.
New belts ordered. Looking forward to getting towed home Thursday night at 10pm.
Maybe V can drop my tools while I’m gone so I can fix it in the parking lot. Ugh.
1 Like