Nice to see it getting some love.
1 Like
$2k will make a pretty major dent in whatever debt you’ve got out there hovering over your future… You can spend all the saved interest money on lollipops and beer on future adventure trips.
Remember the Scott Brady article you always quote… “Your vehicle isn’t finished until you’ve removed the last modification.” Twice as true when there’s debt out there making all potential mods that much more expensive (over time).
2 Likes
Besides, the longer you wait on the awning, the closer you’ll be to being able to steal my almost-as-good-as-Eezi-Awn-but-thrice-as-stealthly-stowed-and-third-the-price custom version…if I ever get around to building it. ![]()
(Hint: it’s based on minimum footprint and maximum utility for vehicles like ours with that big sweeping rear door.)
1 Like
Thanks. It’s a good truck—especially when I keep it in good condition, right?
You talkin’ $200 Bat-wings? 'Cause it sounds like you’re talking $200 bat-wings. ![]()
See also, I’ve got a factory roof rack and an effectively unused Noah’s Tarp. Makes the case for both waiting—and learning how to tie better knots.
Almost 10%, in fact.
This is so important it makes me want to spit up my guts and cry about it, but let’s just say the only thing keeping me from doing just that and making my financial situation better than I deserve [it]to be, if you will, is the knowledge ol’ Fez is long in the tooth and will likely need more than few hundred bucks in maintenance/repairs before I’m in a position to properly budget for those things.
I just cashed out my Stash account last week to payoff a the smallest card in the house and make an extra payment on the big one (to sweeten the scores before a debt consolidation loan next month. It was only $2500—I’d really just been playing with it—but it was hard walking away from a little egg earning 15%.
Our snowball is rolling, and we should be knocking down the last pins short of student loan debt and mortgage come summer 2021. So it’s really tempting to throw this cash money wad at the next target. Throwing $2k at a $17k is nothing to sneeze at, but I know that doing so would likely mean I’d be putting repairs on that credit card come summer.
Initial numbers suggest the fridge, rack, and awning are nice-to-have things. I have a very nice tarp. I have a basic roof basket. I have a cooler I can improve with a drill and some expanding foam.
Could I get by on leaky ball joints, creaky seats under $20/pair covers, with barely-hanging-on door cards, and janky seatbelts? Probably, but being that guy who always ended up putting most of the insurance money into the house or other bills, I’ve also been that guy constantly chasing weak link failures and hating life.
Which is all to say that I really appreciate this perspective and have been thinking it through quite a bit. Debt is a trap. Debt is suffering. Debt is literally indentured servitude.
We need $26k/year just to cover the minimum payments on our current debt load (including student loans). I couldn’t even file bankruptcy and move into a van without an $800/mo nut until the year I turn 65 (or emigrate to Canada, more likely Mexico). That’s BS.
Any chance you’d like to join me for a podcast to talk about this sort of thing? ![]()
Free-standing in wind is the goal, but just a narrow square/rectangle (narrow enough when folded to rear-mount without sticking out, since no one makes one…that can handle wind). It’ll be DIY plans, not manufactured, so $200 or $2000 depending on the materials used (there’s some real pretty canvas out there).
1 Like
I love that model. It’s like, Hey, I figured this out. Here’s a set of plans so you can do likewise. Curious, would you sell the plans or give then away and offer a complete product a couple times a year or something like that?
Give the plans away, good will and publicity are worth far more than a handful of $5 sales.  I’d be down for an occasional complete product, or perhaps make-on-demand, but that probably needs to wait until a shop gets built.
1 Like
It’d be the shortest podcast ever. I’m an idiot.
I can dig it. Just struck me there used to be entire sections in the backs of magazines full of offers selling plans for this, that, and the other, be it a shed, a trailer, a sailboat, etc.—and there might be some interesting dots we could collectively help people connect with in our built-not-bought, DIY-minded counter culture, ya know?
1 Like
Fezzik is just getting started man. I mean…it survived a undercut punch from the rear from a Camry and passed emissions. Main thing is to tackle the things one by one. Progress is better than being stagnant!
Yes indeed, my friend. Yes indeed.
At this point, I’m scrapping the fancy overlanding gear plans in favor of repairs and maintenance. Current short list looks like this:
-
tcase & diff oils
-
replace janky seatbelts
-
ADD trans and fuel tank skids (to complete my set)
-
sweet talk V into a day for junkyard hopping to load up on things like:
– fuse box cover
– scratch-free instrument cluster lens
– Sport steering wheel w/ functioning horn button
– center vents/trim
– tweeter cover (just need one) 
– cupholder lottery
– non-power, non-leather seats
– front interior door cards, spare switches
– oh-shit handles
– functional second row, non-leather seats
– factory jack/toolkit lottery
– spare rear window latches
– stock rear bumper
– spare tire cover
– extra rearview mirror
– and all the nuts, bolts, clips, I can carry
Beyond that, I would like to treat myself to a nice set of driving lights so I can see where I’m going in the woods at night. (Found a nice set of rally LEDS for $160/pair that look really nice.)
1 Like
Let me know if she’s not up for it, I wouldn’t mind cruising down for a visit to a bigger (more diverse) yard.
You want the Lightforce LEDs off the Disco? They were slated for the Forester, but I’m going a completely different direction with that car now so I don’t need them anymore. They probably have less than 20 hours of runtime.
1 Like
Yes! Let’s discuss.
And I’ll let you know when I get some junkyard time. Sooner then later.
1 Like
Minor Update & Request for Advice
First, I made a run out to a junkyard in the east valley last weekend to source some parts. Good news! There was a decent rear bumper (with LED reverse bulbs)! Bad news, the rest of the truck was pretty much picked clean.
Apparently the interior on this thing was mint. Those in the Montero Collective who know Doug (AZPAJERO) might have seen him amazed at the nice interior bits he got from this thing. I noticed the broken CDs of little kid music and a broken window and hoped no kids were hurt.
Lots of receipts from Idaho, and there was some crustiness behind the bumper, but it won’t grow.
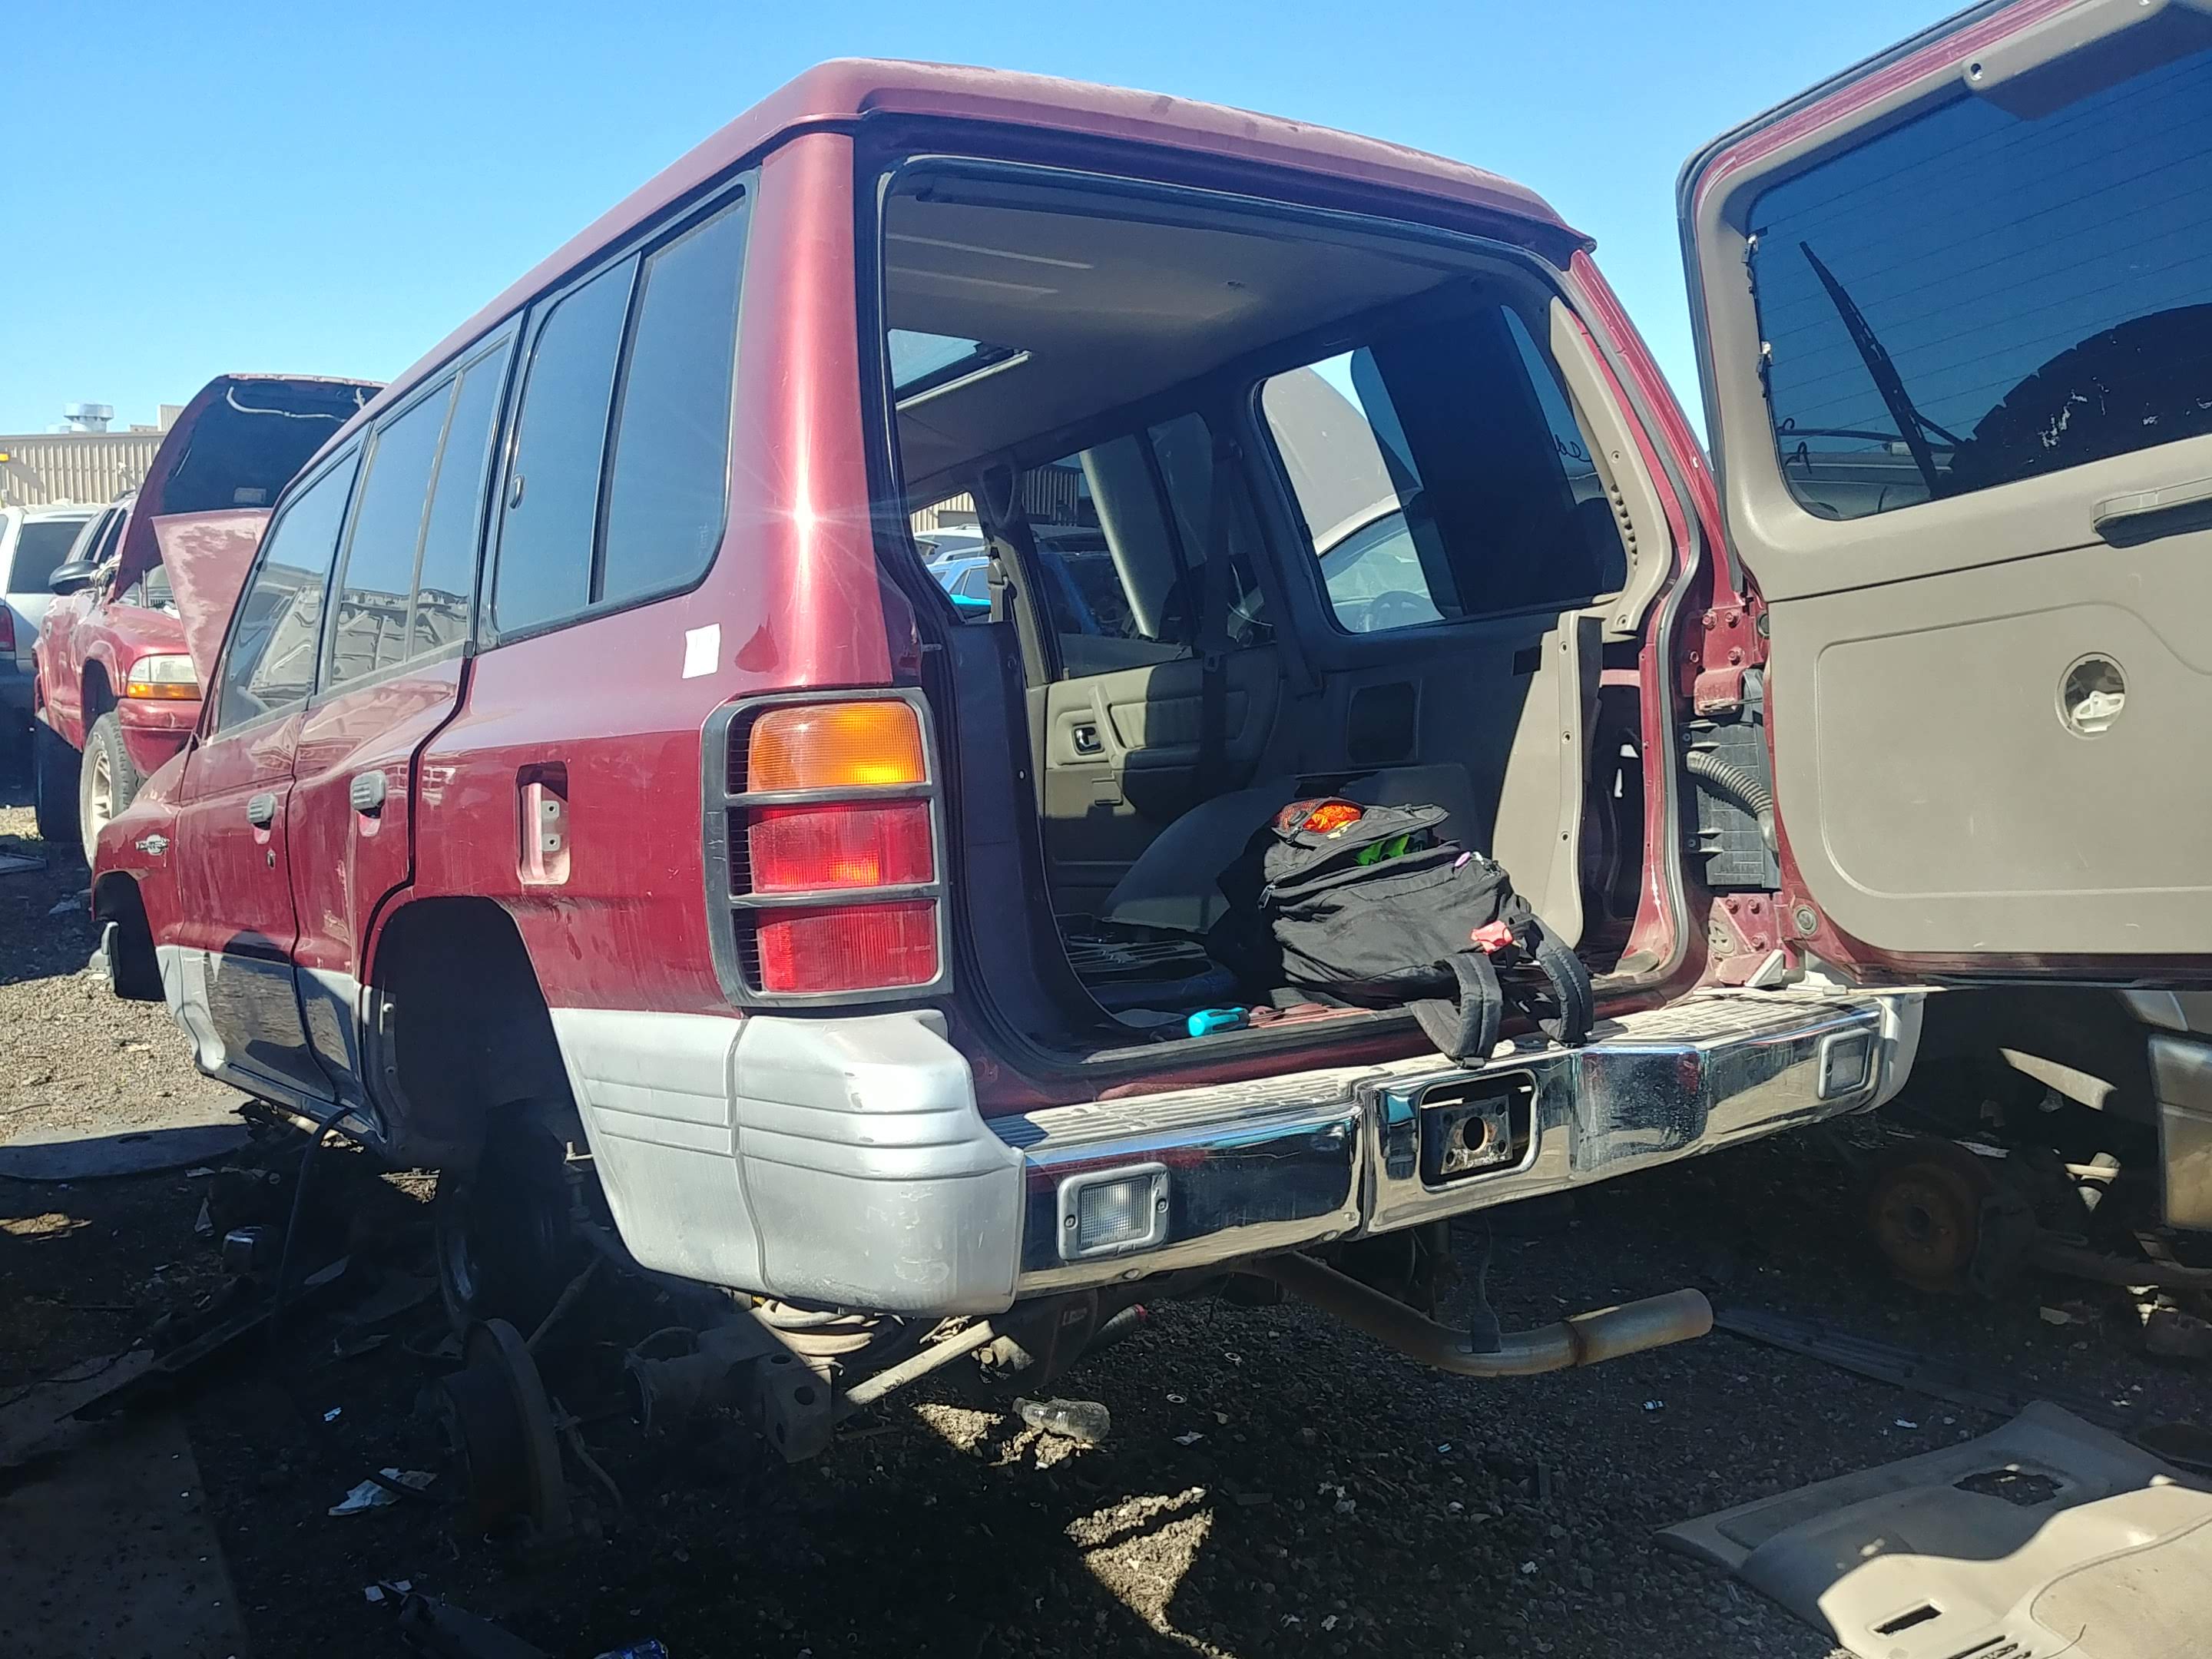
Later that day, I got home with the bumper, a non-leaking PS reservoir (with new low pressure hose), front door weather stripping, rear sliding window latches, and a clever center armrest out of a Diamante.
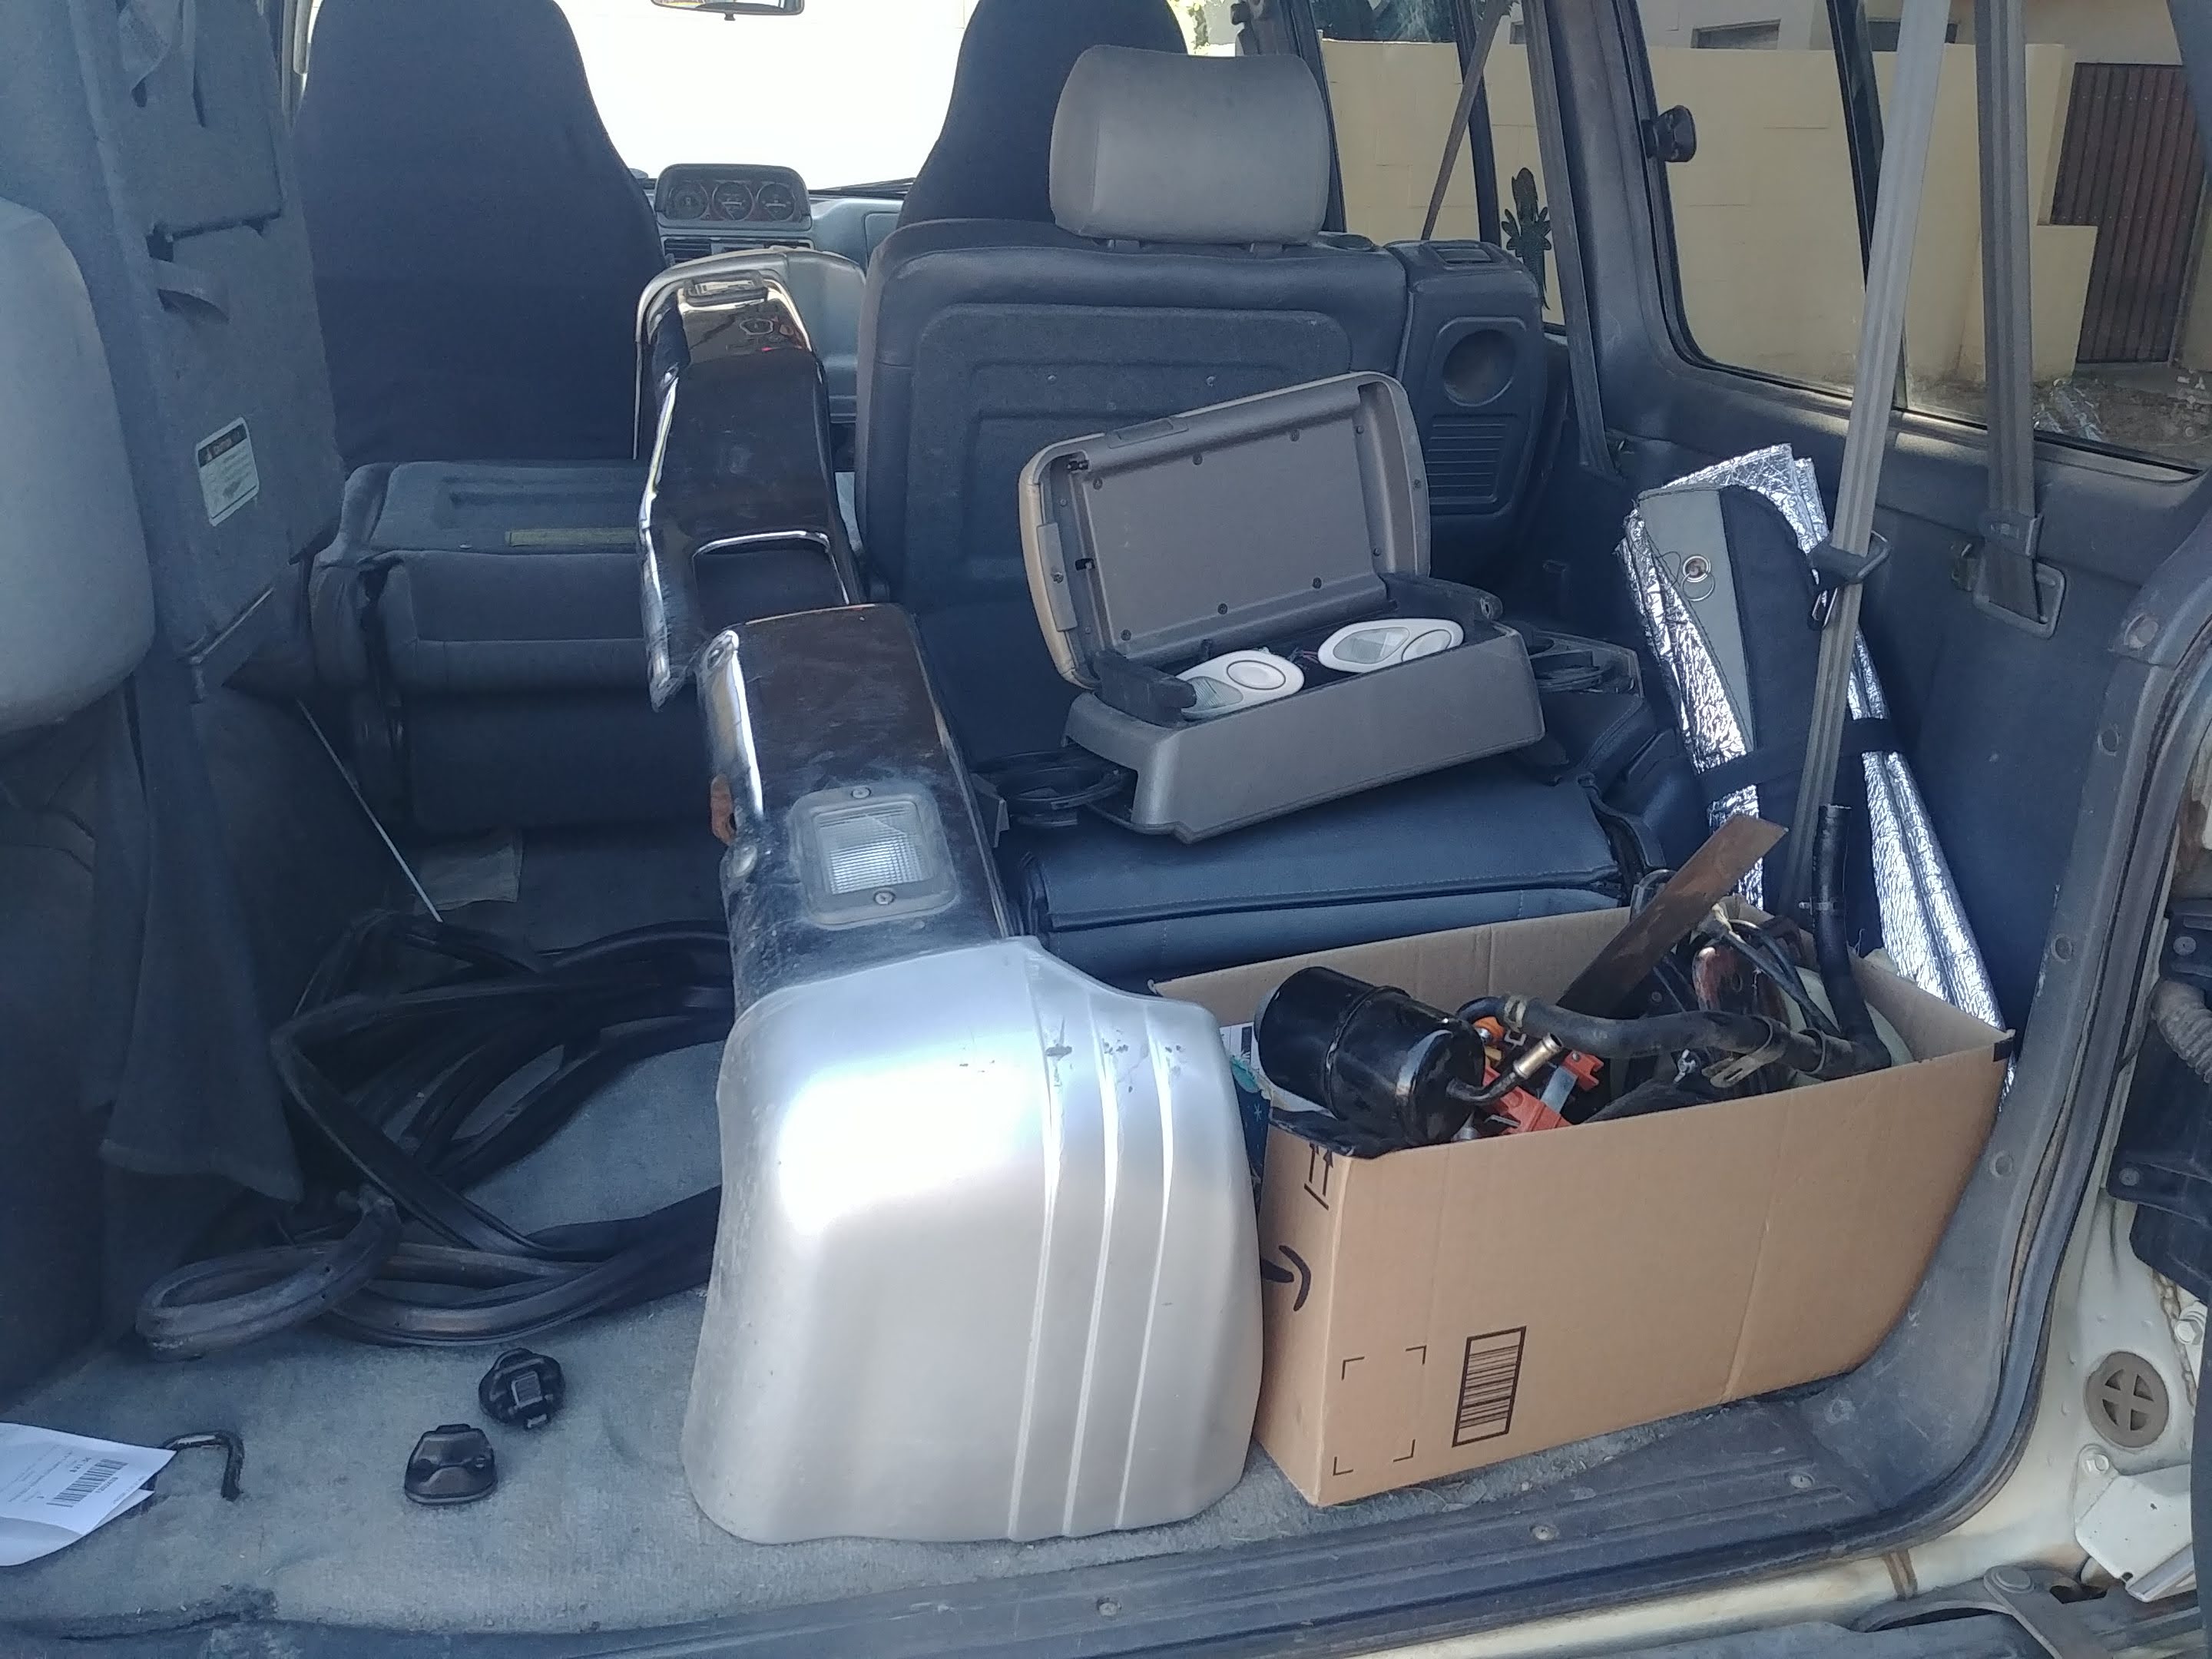
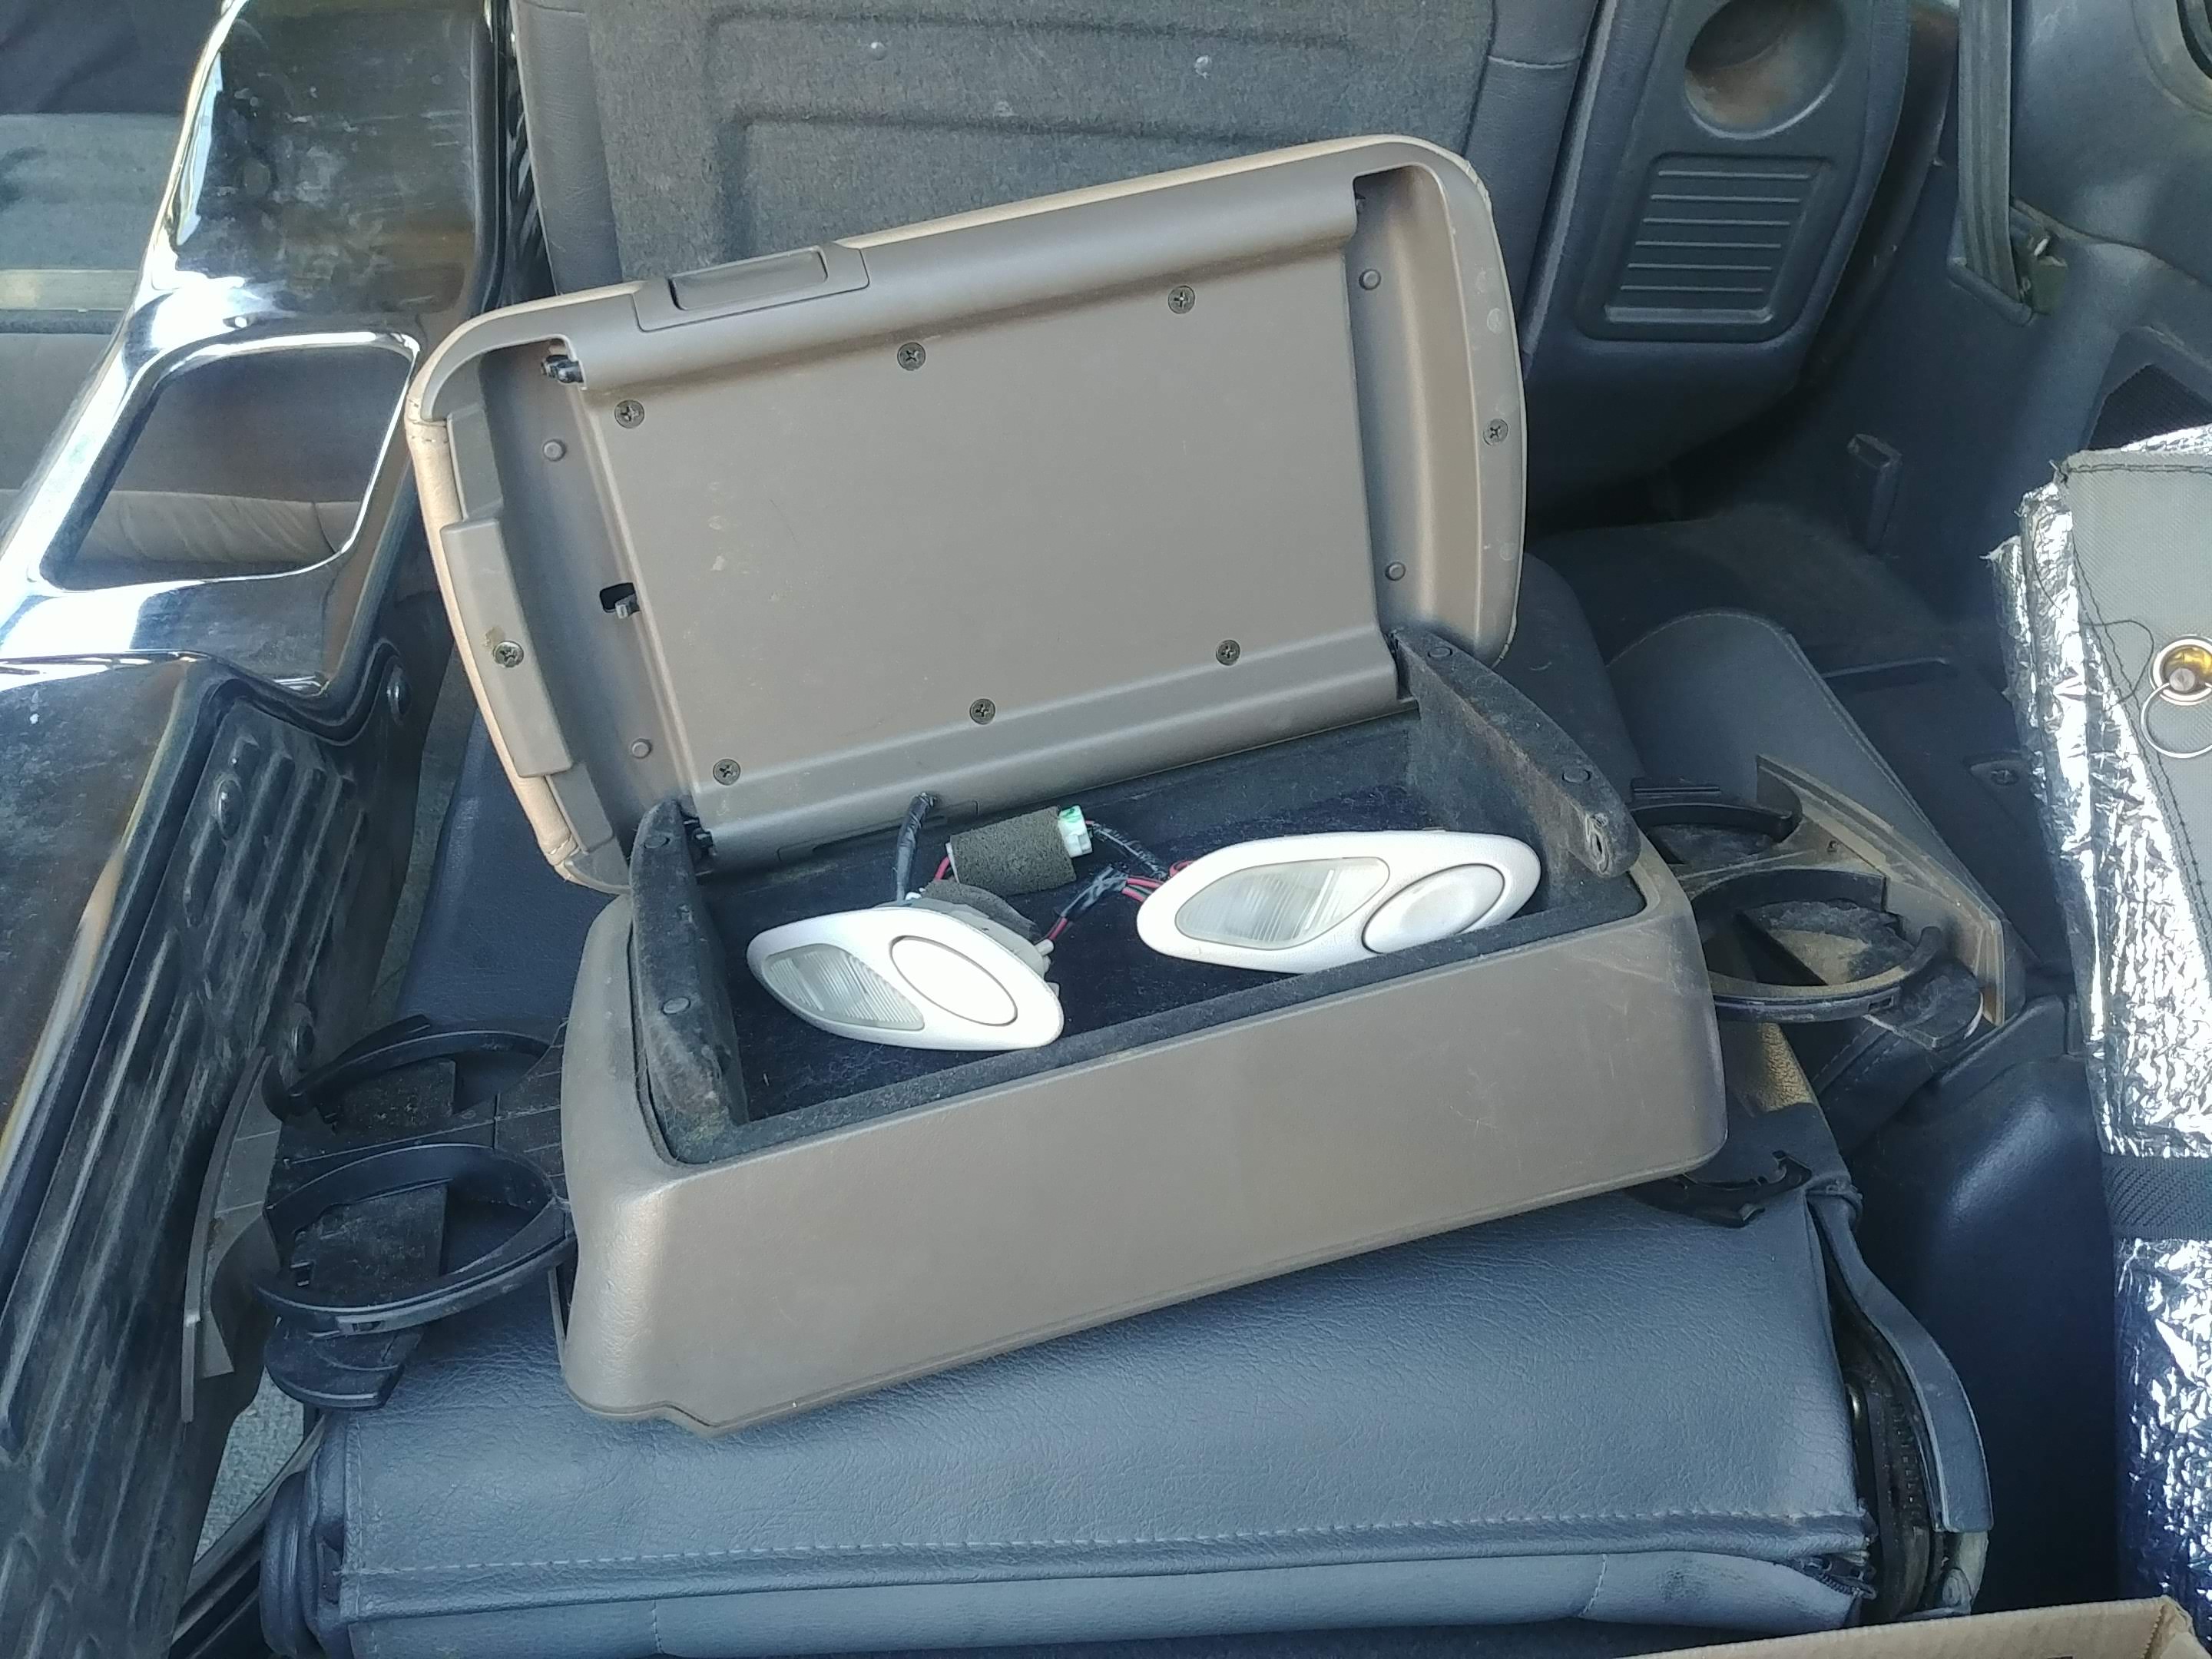
Note the dual slide-out cupholders. See also the top flips open to either side. It’s about 3-4" longer than the Montero unit, but it looks like it could work nicely. Oh, and those are little opera lights from the C-pillar on said Diamante. I’m thinking possible second row interior lighting.
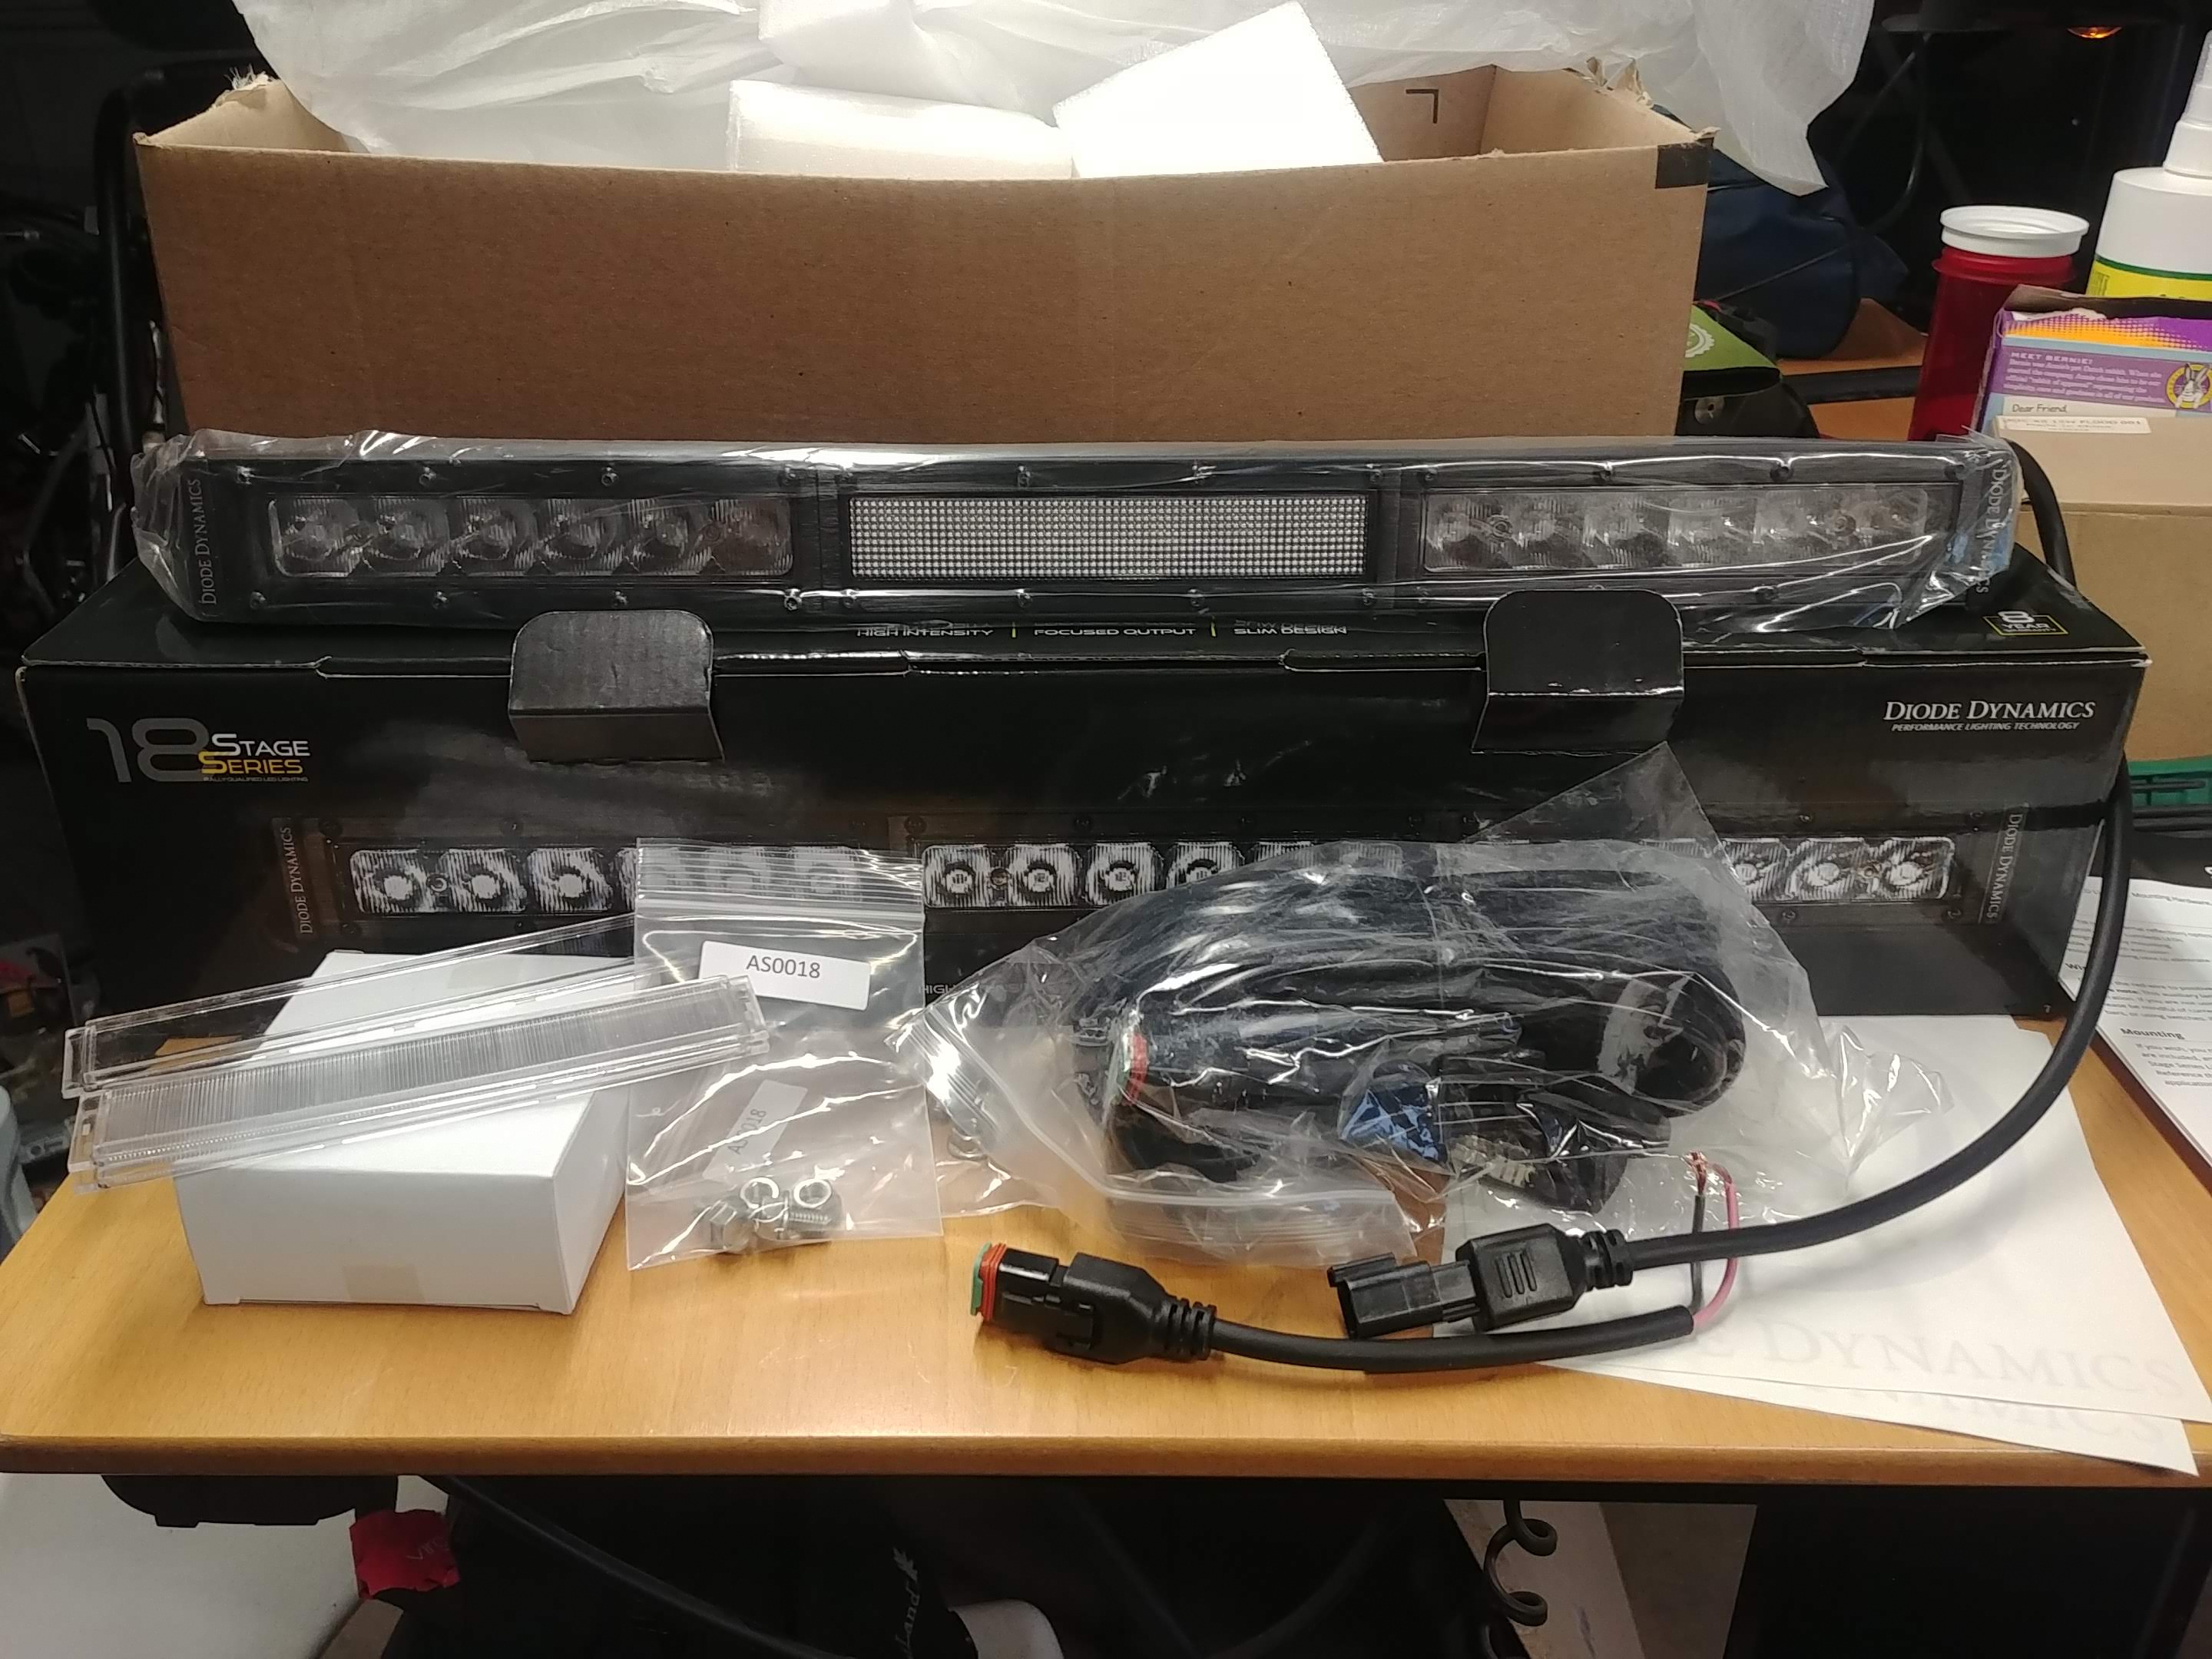
Beyond that, parts have started coming in. Behold my Diode Dynamics SS18, 18" LED light bar. It’s super slim, made in America, comes with a 3-year warranty, and came recommended by a known stage rally racer who runs their SS6 units on his daily driver. I’m stoked for this one, as it’s my one splurge.
Now for the advice part! I need wiring design and component selection advice, please.
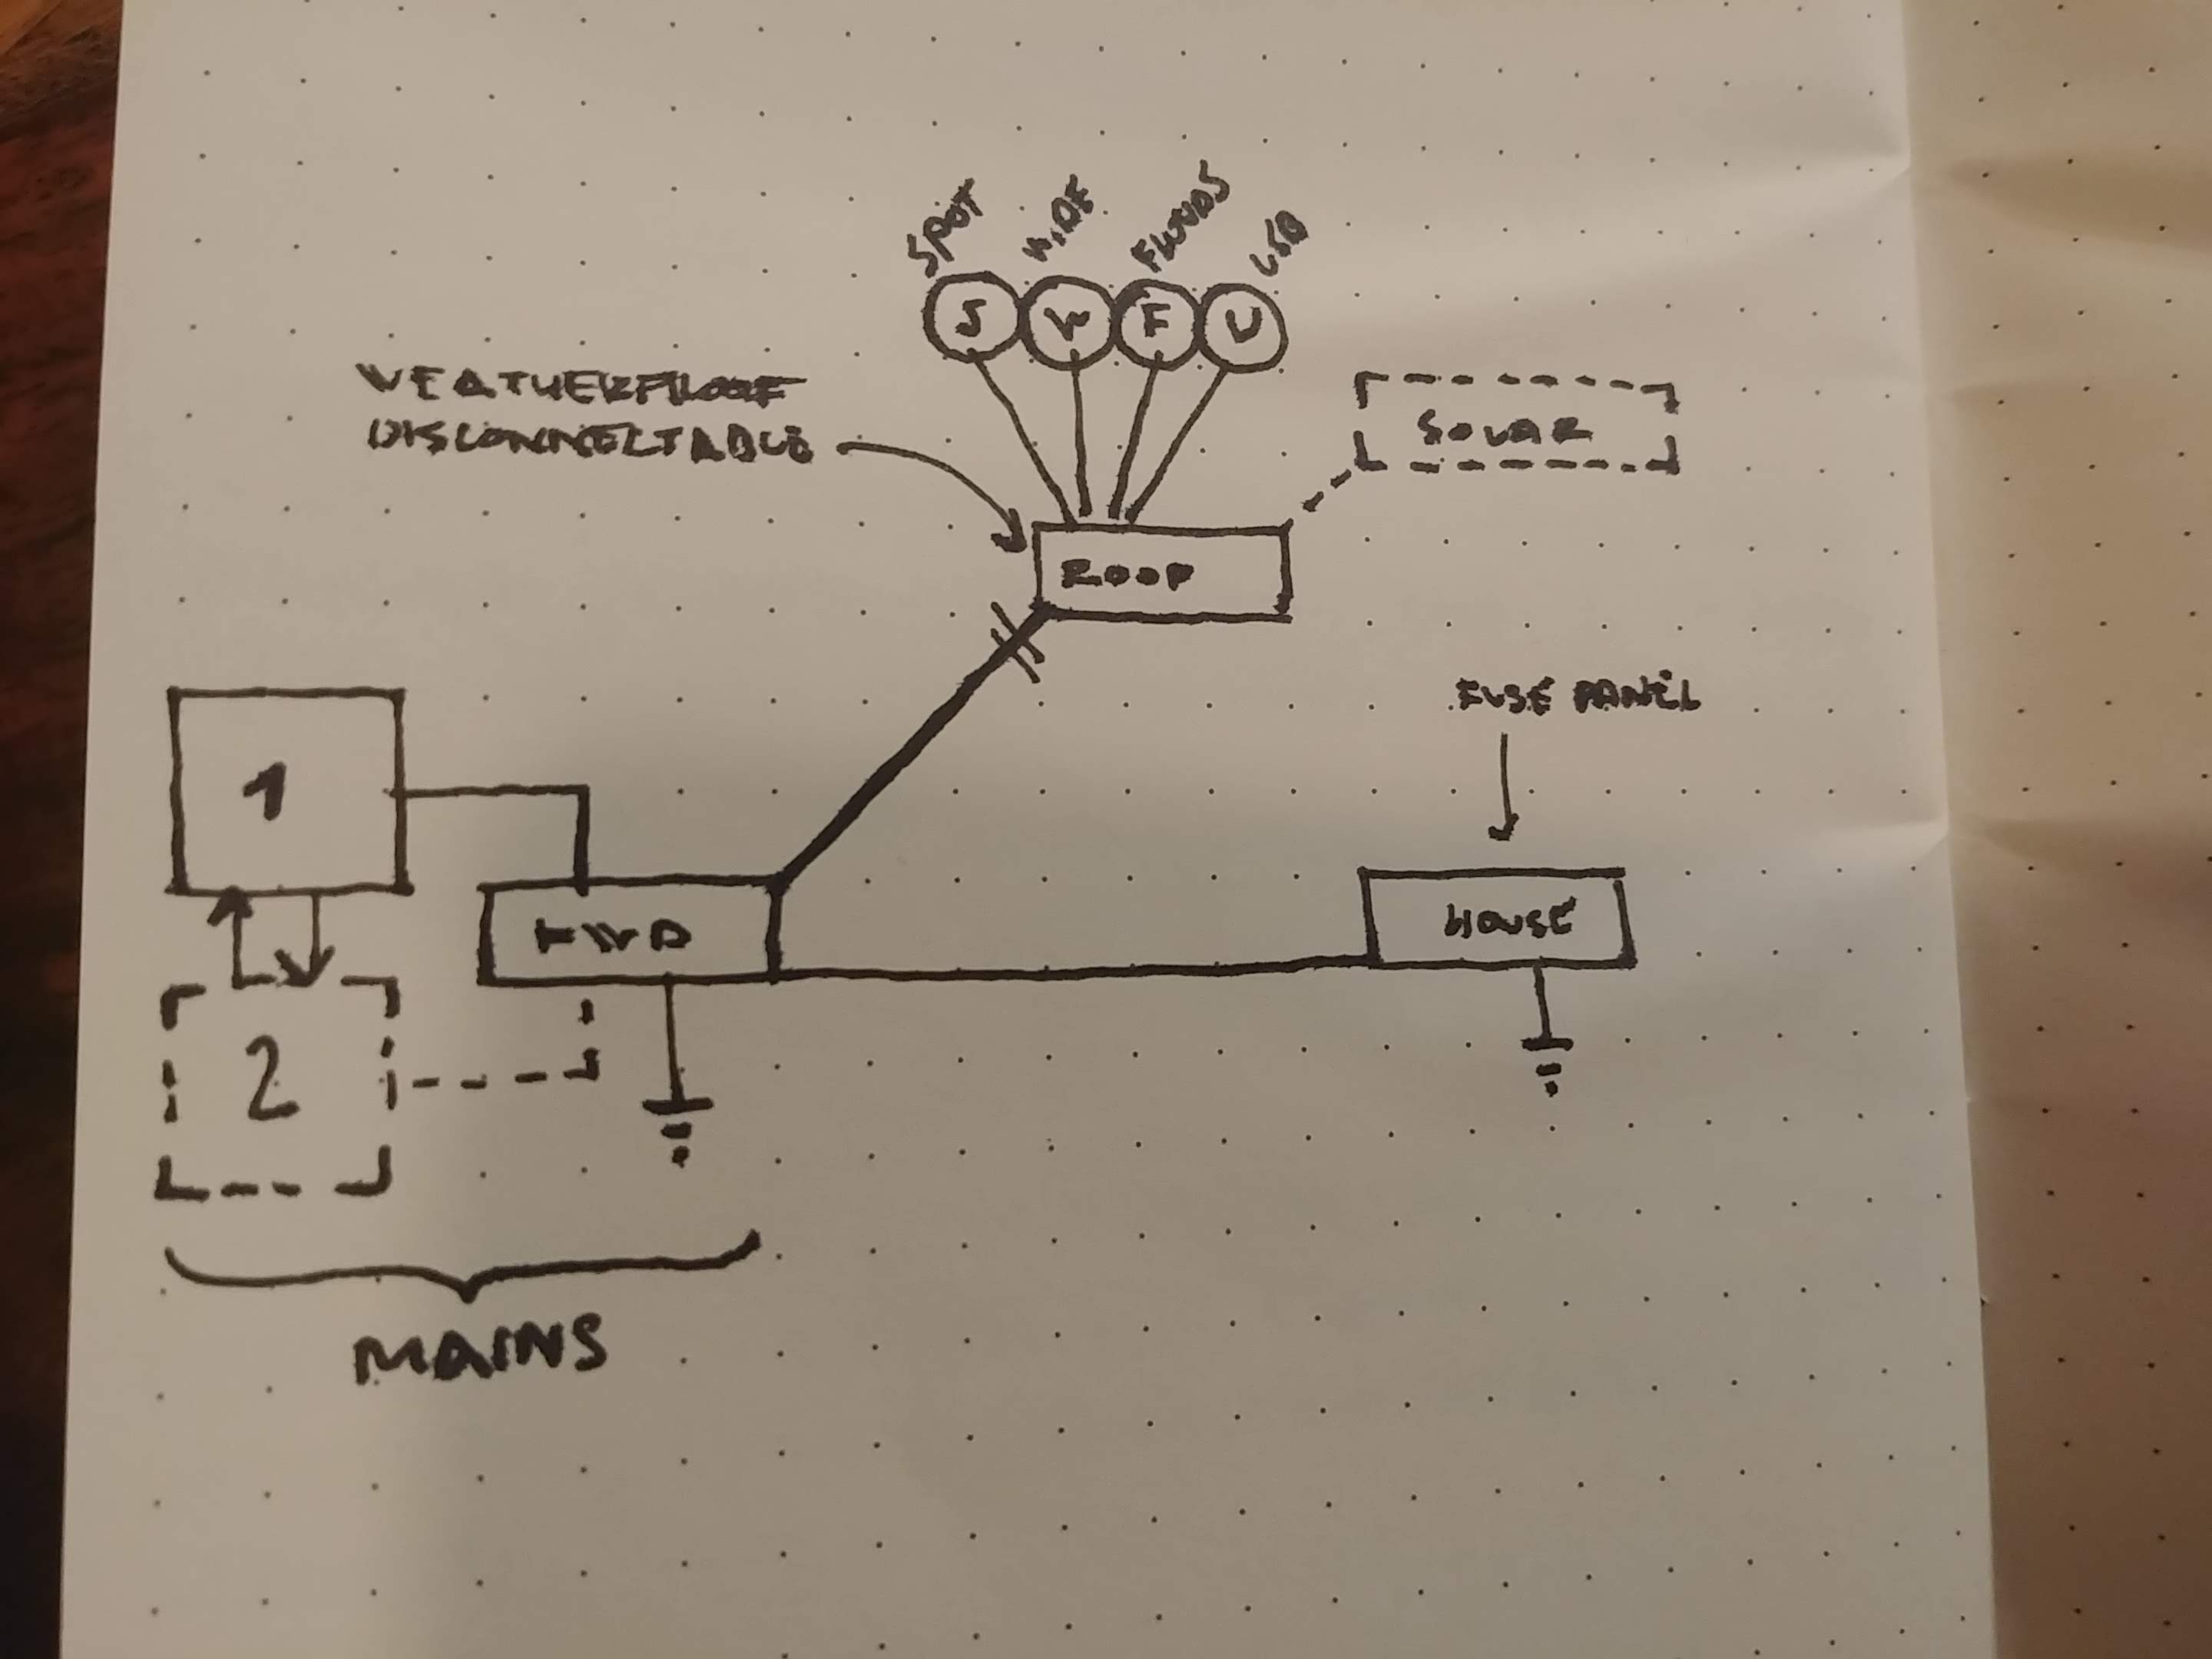
Here’s the plan:
- I’d like to do a simple dual battery setup down the road.
- I’d like to have a main panel in the engine bay for forward and otherwise permanent accessories.
– think: bumper mounted lights, rock lights, the odd string of xmas lights - I’d like this main panel to feed my removable roof rack panel and my rear-mounted house fuse block.
I’m not entirely impressed with what I see from Blue Sea or Bussman, and Painless looks a bit proud of their shit when it comes to pricing. Right now, I’m trying to wrap my head around how to do this up right.
I’m going to mount a pair of 7" spots and a pair of 5" wides to the front of my basket. Down the road, I’d like to add area/flood lighting to the sides of the basket, and maybe a USB port or two for the odd speaker or xmas lights at camp.
- I’m thinking circuit breaker on a constant hot from the main panel up to the basket with a matching ground (8AWG).
- A relay/fuse box in the basket would allow me to just run small gauge switch leads up there and wire up the basket independently, right?
- Any ideas on the box to get?
- Any ideas how to set this all up?
(Fuse panel in the back is easy. Run a fused 8AWG to the panel in the back which gets grounded to chassis and then install fused doodads down the road, imo, but please correct me if I’m wrong. Unlikely to put anything back there more than a fridge and/or fan.)
Thanks!
1 Like
Continued research surfaced “SPod” thing on eBay for $70. Feels pricy, but also perfect and very time saving?
I also saw something called a “Littlefuse HWB18” that looked like the same box but for 3 circuits, no wires, for $20.
I could mount one of these on the rack, route longer leads down the A-pillar to the battery/switch areas, and then maybe I’d need another one for the engine bay?
Hmmm… That seems a bit excessive.
I respect the philosophy of keeping everything not original to the car on the “house” side of the diagram. On your picture, instead of having a line from the “FWD(?)” draw it from the “House” fuse panel. That way any aftermarket issues are easily isolated aft of those fuses/relays, and easily isolated with some kind of switch.
Have you seen this thread on ExPo about the basics of dual batteries?
https://www.expeditionportal.com/forum/threads/how-to-make-a-cheap-isolated-dual-battery-setup-for-50.77503/
1 Like
That ExPo thread is the definitive resource for “complex” overland vehicle wiring on a DIY/budget. I’ve actually got the entire thing saved in my Evernote, and many of the well-selected components already in inventory. ![]()
All highly overrated, except Blue Sea, who is decent but a bit wasteful when it comes to footprint vs. features.
I’m tied up much of today/tomorrow, but let me read it over and write up a few suggestions (and links).
One thing you will need to calculate is the total length of wire from battery-to-house-battery, and from battery to roof lights. Also, the amps (or watts) from the lights and other accessories. This will allow us to calculate the safe wire sizes to get the power where it needs to go.
Yep, a roof box will work great as you’re thinking, I ran exactly that setup for several years before I went to platform racks. There’s a multitude of good waterproof boxes, just stay away from the plastics (Pelican’s only last about 2 years in the Arizona sun).
Solar you’ll want to run on a dedicated line back down to a weathertight area. Technically yes, it could trickle power back down the main line to the roof, but it’ll need to go on a charge controller to keep things reliably topped up (and not overcharged/dead). Fortunately, it’s a low current circuit so small wires will be fine.
Chassis grounds are sufficient, but I’d recommend running an actual ground back to the battery/distribution block for everything you add. Less holes in the chassis, less points of failure, and keeps the power as “clean” as possible (meaning stray noise, not pretty).
If you find a deal you like on the sPOD it’s a solid control system and takes the complicated fab-work out of making a switch pod.
Also, if you want a second set of hands/eyes when building this thing…I know a guy. ![]()
1 Like
Say, I have seen that ExPo thread, but not recently. Gonna spend a little quality time reading, playing with numbers, and will be back…
Several hours later…
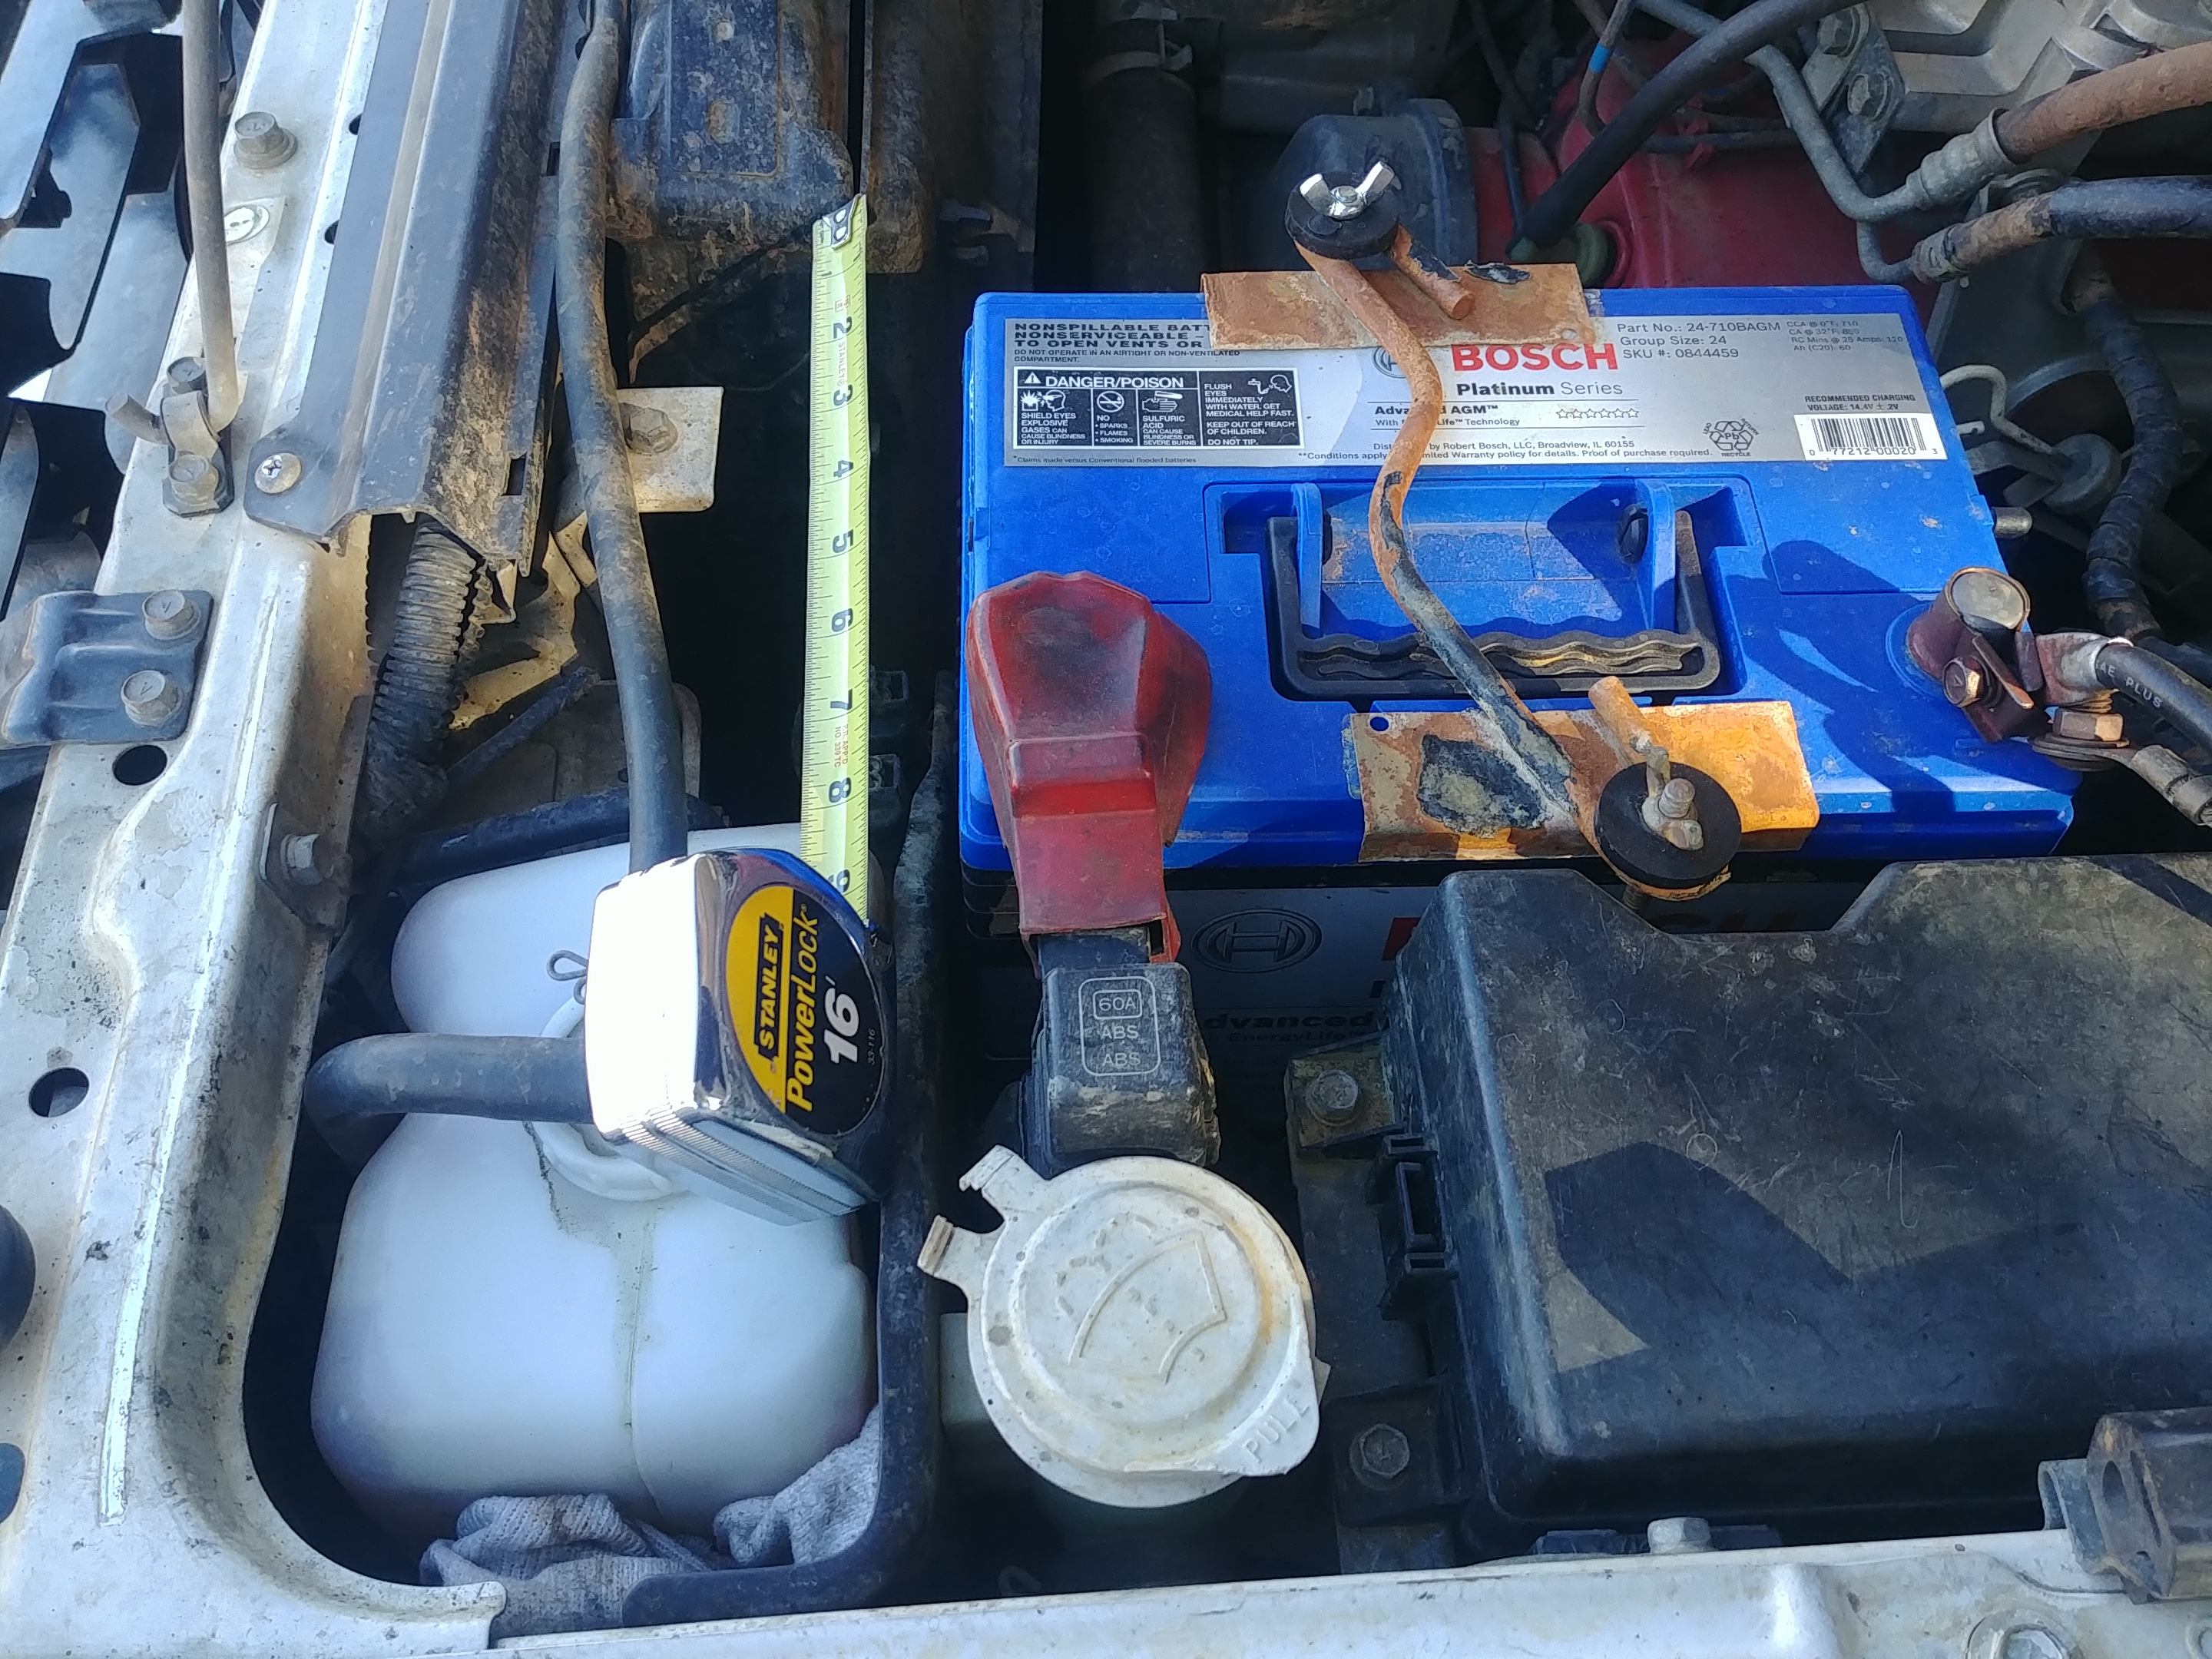
You know, I’ll be damned if I know where to put a second battery in this brute.
There’s a nice 3x7ish to mount a main panel right next to the battery, but that’s about it.
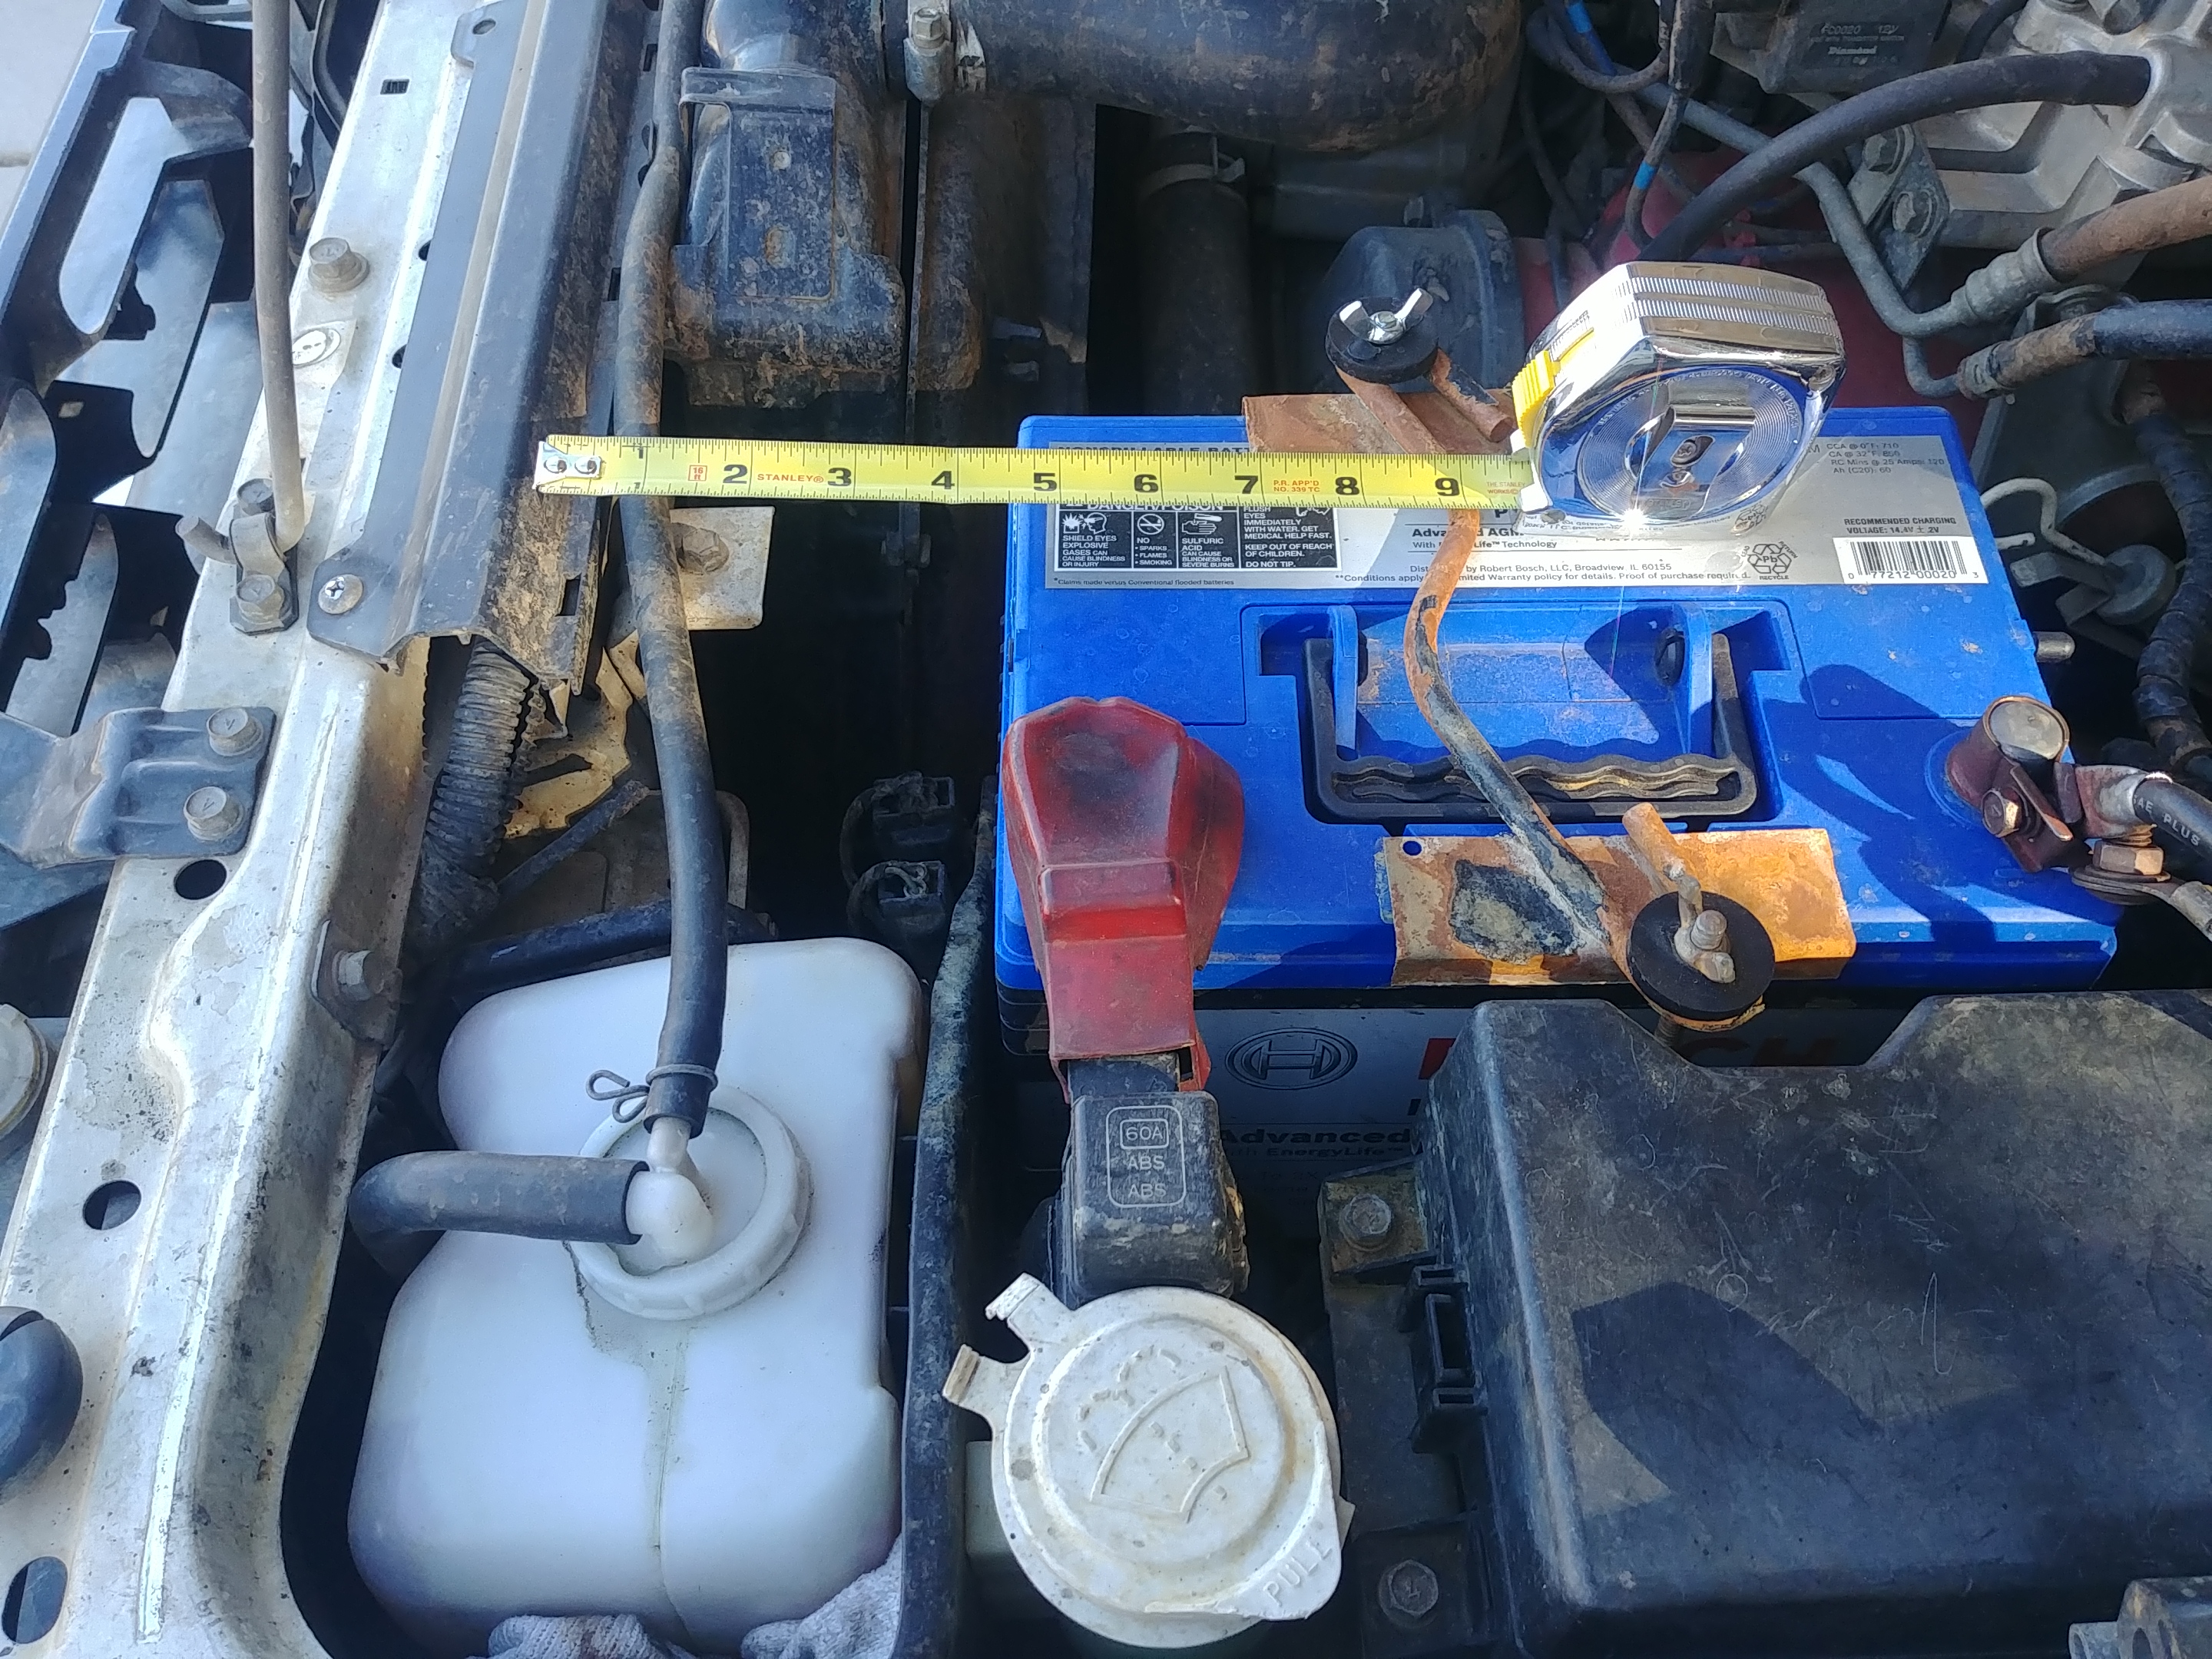
Generous–but not too–measurements suggest a 10ft run to the roof up the A-pillar via the fender harness. It’s 16ft along the frame rail to the rear corner, though, and I’m not sure I want to put that much distance between the two batteries.
22x,xxx
- rear bumper replacement
- install cheap, reverse LEDs
Kinda proud of this one. Story to come tomorrow. Friends showed up. We went out. (Fez looked mad fresh in the parking lot lights tonight. Fo reelz.)
1 Like
So the first bit of advice I have is something I wish someone had told me when I started getting serious: select a single type of connector as your “standard” (or two, one waterproof outside and one cheaper not waterproof inside). There’s no real wrong choice here as long as it’s a quality connector and you stick with it, the goal is to avoid finding bullet connectors on one end and blades on the other end when you go to redo everything in five years (or have to make a trail repair).
I’m partial to Anderson for interior—a little pricey, but the benefits far outweigh the cost when running multiple circuits (other benefits include super-simple and inexpensive distribution options, there’s no male/female so reconfiguring is a plug-n-play endeavor, and they can be locked/unlocked so you’ll never worry about them coming undone on a bumpy backroad). Powerwerx has a crap-ton of cool Anderson based thingamajigs, but they are overpriced on the basics compared to Amazon.
Deutsch for the exterior of course, whatever number of pins is appropriate for the device (or BYO harness). If you don’t like the idea of building the Deutsch connectors you can get pre-made pigtails and crimp them on your wire (see heat shrink below). I also keep a handful of female blades around for things like switches (relays get a proper relay connector).
Second is having the correct tools/materials instead of just making do with what works. A quality (not expensive) snipper, stripper, and crimper are worth their weight in gold, preferably as separate tools. Also, always split-loom and zip-tie…everything. I recommend using non-insulated connectors and insulating them yourself with good heat shrink after they’re crimped on, you’ll get a cleaner and much more durable connection that way. I usually heat shrink the ends of the split loom too, overkill, but it looks and functions nice. Oh, and a proper heat gun, none of that stick-a-lighter-under-it nonsense. ![]()
On to the Fezzik-specific
Is your desire for duals to have redundancy or capacity? You might be able to squeeze a Group 31 in there, which in capacity terms, is a dual battery system.
If the width fits, and I’m guessing at a glance, we could probably still fit what you need for distribution under the hood.
Roof & Rear
Fuzzy math is fine (+/- a foot). 10 feet to the roof isn’t much, especially if you’re sticking to relatively small LEDs up there (likely under 5A per circuit). I probably wouldn’t recommend the roof box as the wire gauge requirements will probably be small enough to still squeeze it into 1/4 or 3/8 split-loom (remember, only one slightly larger ground wire, so 5 total to the roof). Yep, they make a 6-pin Deutsch and a cap for it when you’re running rackless.
If you do want to stick with a roof box a pair of 12- or 8-gauge should be ample, depending on the total current of all the lights. Throw in a single CAT-5 cable and you’ve got control for up to 8 circuits (it’s 22-gauge, more than ample for the trigger signal of a 12V relay). All three will be about the same size, so they’ll drop into split-loom and zip-tie together well.
16 feet to the back is no problem to keep the house battery topped off, just use a decent size wire. The second Group 31 in the Disco is a 20-foot run, front left to right rear corners, and keeps up with the fridge/water/lights/etc on 4-gauge (still a manageable size). The only thing I can’t do is self-jump from it…I probably could but it’d be pushing the safety margin.
Under Hood
Depending on how all of the above winds up, the main panel might wind up being way smaller. Yep, the rear just needs a circuit breaker (70A at 4-ga.), and if you go roof box that’s all it needs too (30A at 8-ga. or 20A at 12-ga.). Each individual circuit from the rear panel / roof box will need it’s own relay and fuse at those locations, of course. (I don’t recommend fuses for the big main lines: too expensive, not re-settable, fragile, and don’t provide you with an easy manual-override to disconnect).
With the above scenario, I’d just upgrade the battery terminals instead and allow them to serve as distribution blocks—zero space cost. Then you can add a simple fuse-relay combo for each bumper mounted accessory since there’s only one or two. Note the battery terminals linked above have a 0-ga. port too, so they can handle a winch if you ever add one.
If you skip the roof box you can skip it’s breaker and drop in a fuse/relay box wired direct-to-battery instead (I’d still recommend the battery terminal upgrade). Might even be able to upcycle a good fuse/relay box from a junk car (Subaru has some nice tiny ones).
After the Pelican I was running on the roof disintegrated I switched to a metal surplus military medkit box, Swiss I believe. It was around an 8x8" square 3" high and split in half along the 3" sides for easy access. With it bedlinered up it was barely noticeable.
I’ve used all of the above and still have most/all of it on hand if you want to check any of it out in person before deciding on it. I might even have some extras since I’m completely redoing the Discovery and have one less main line to deal with this time.
1 Like