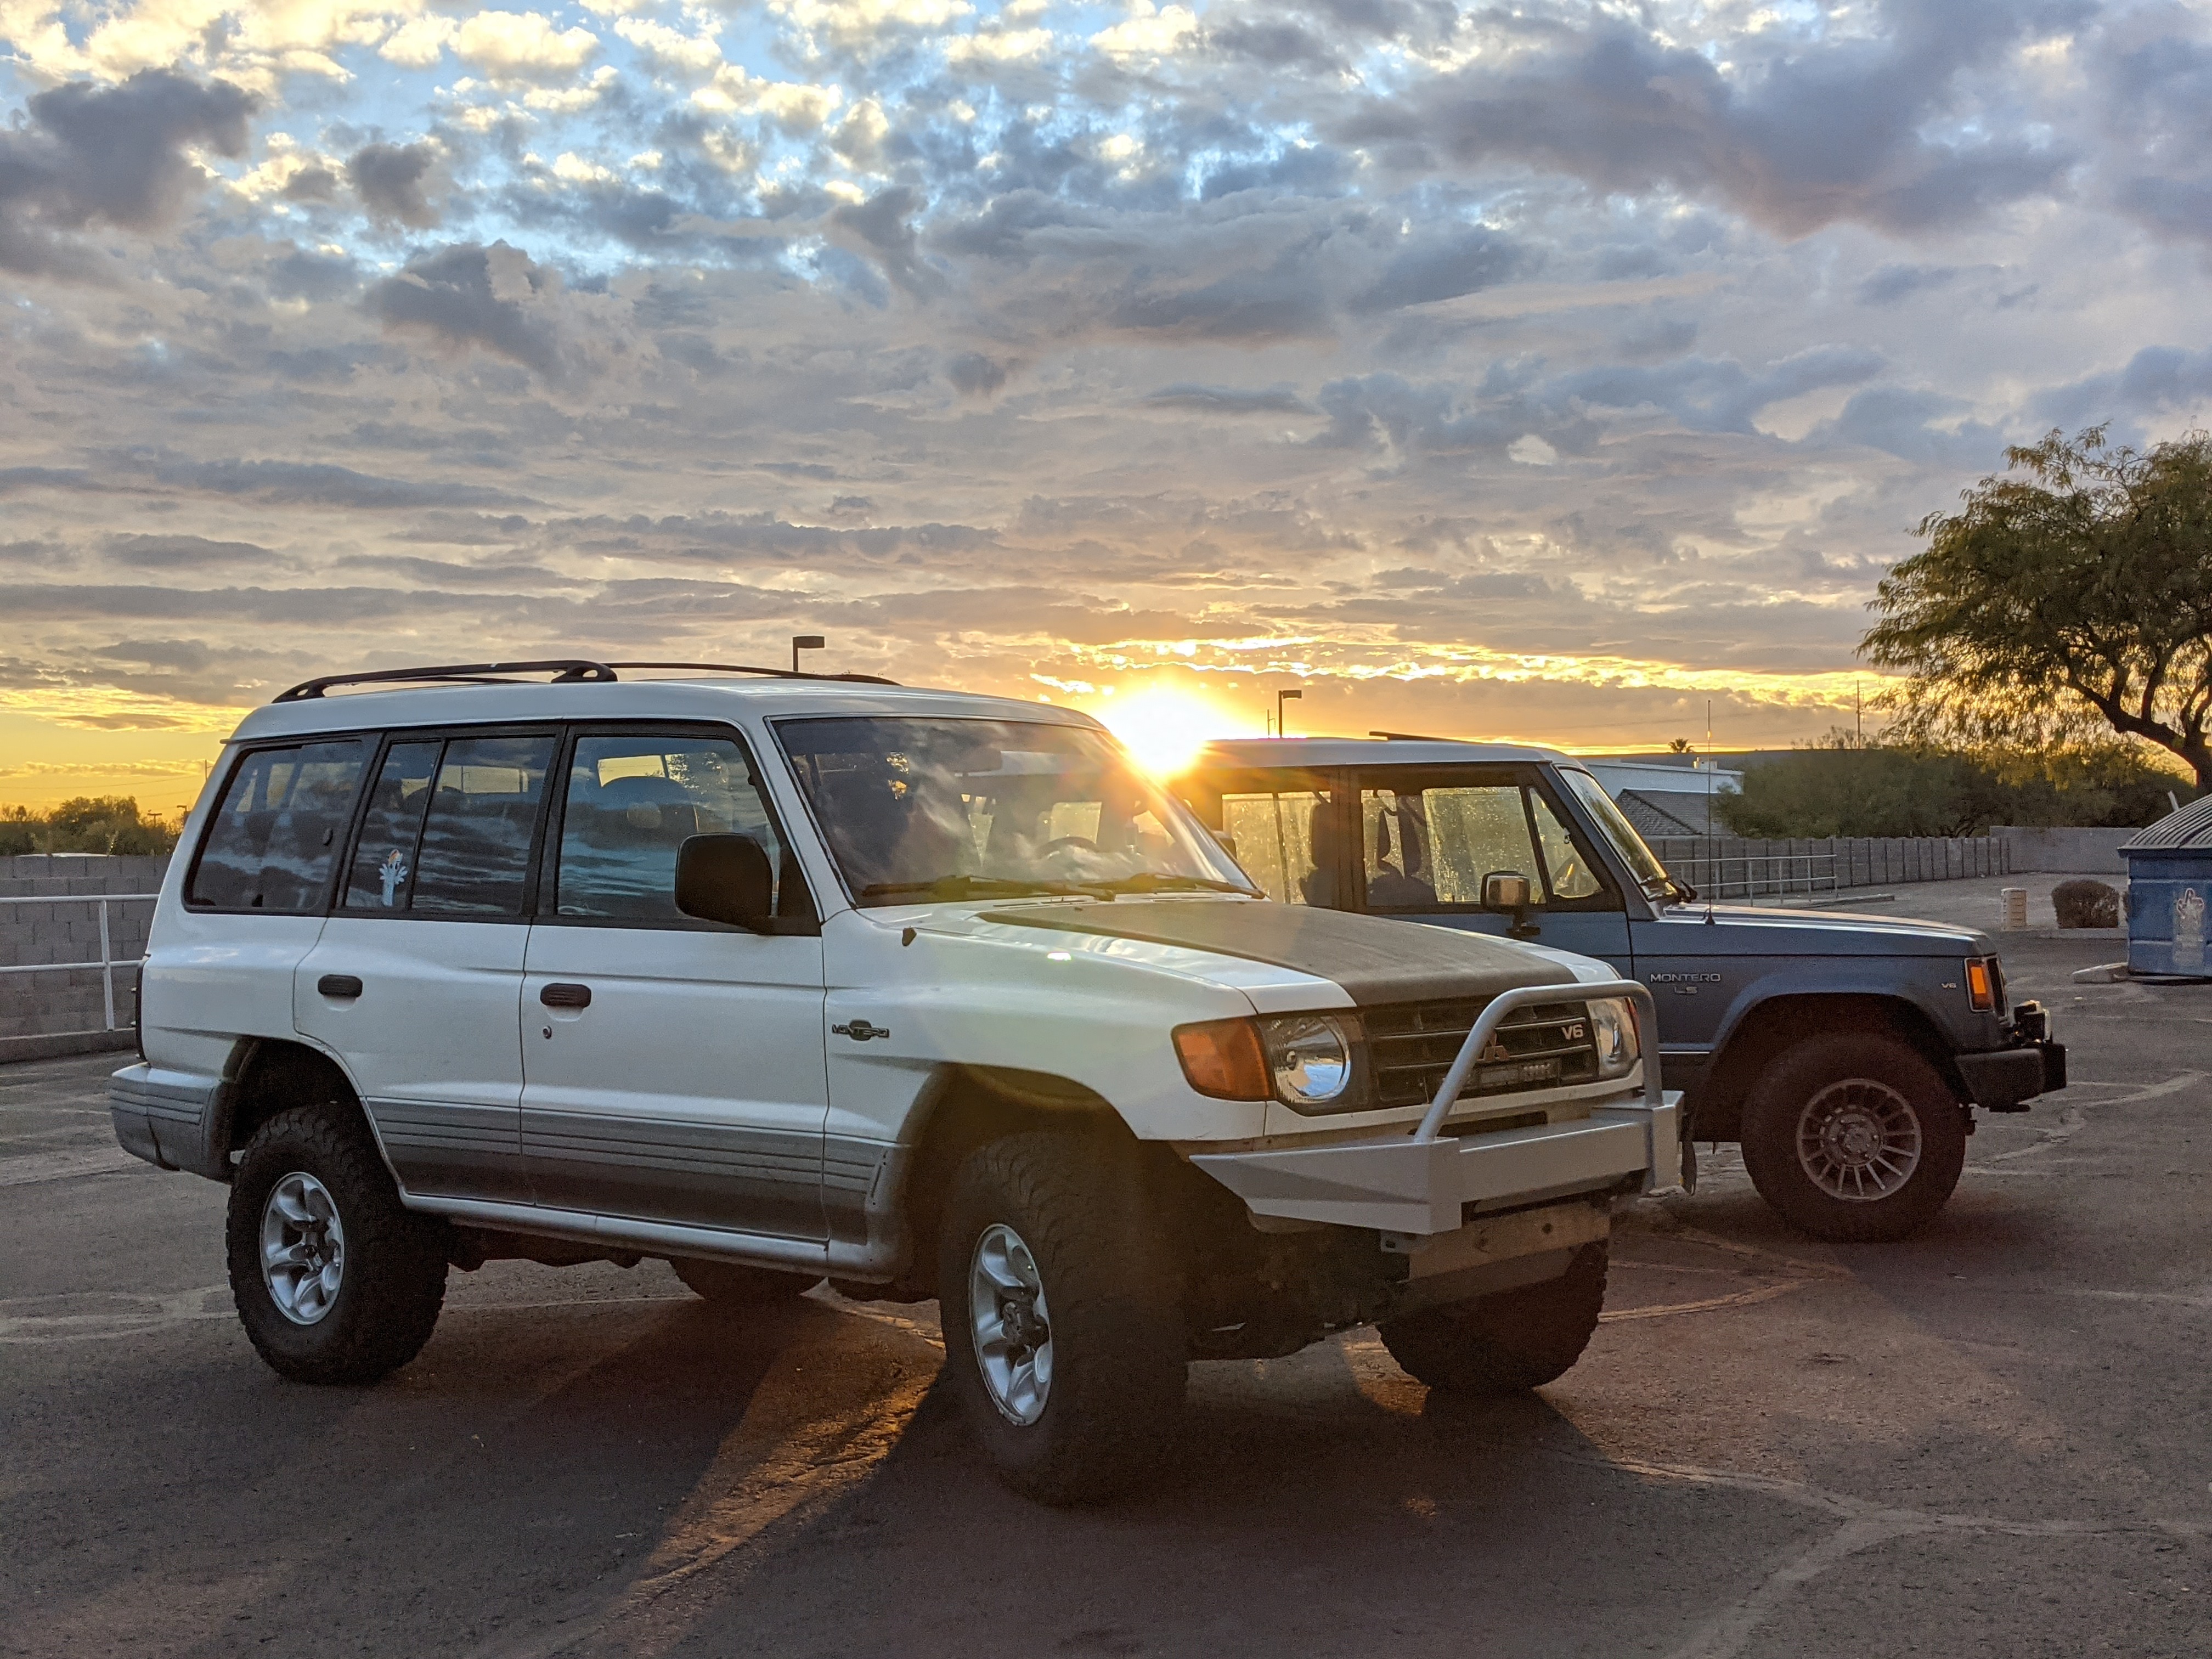
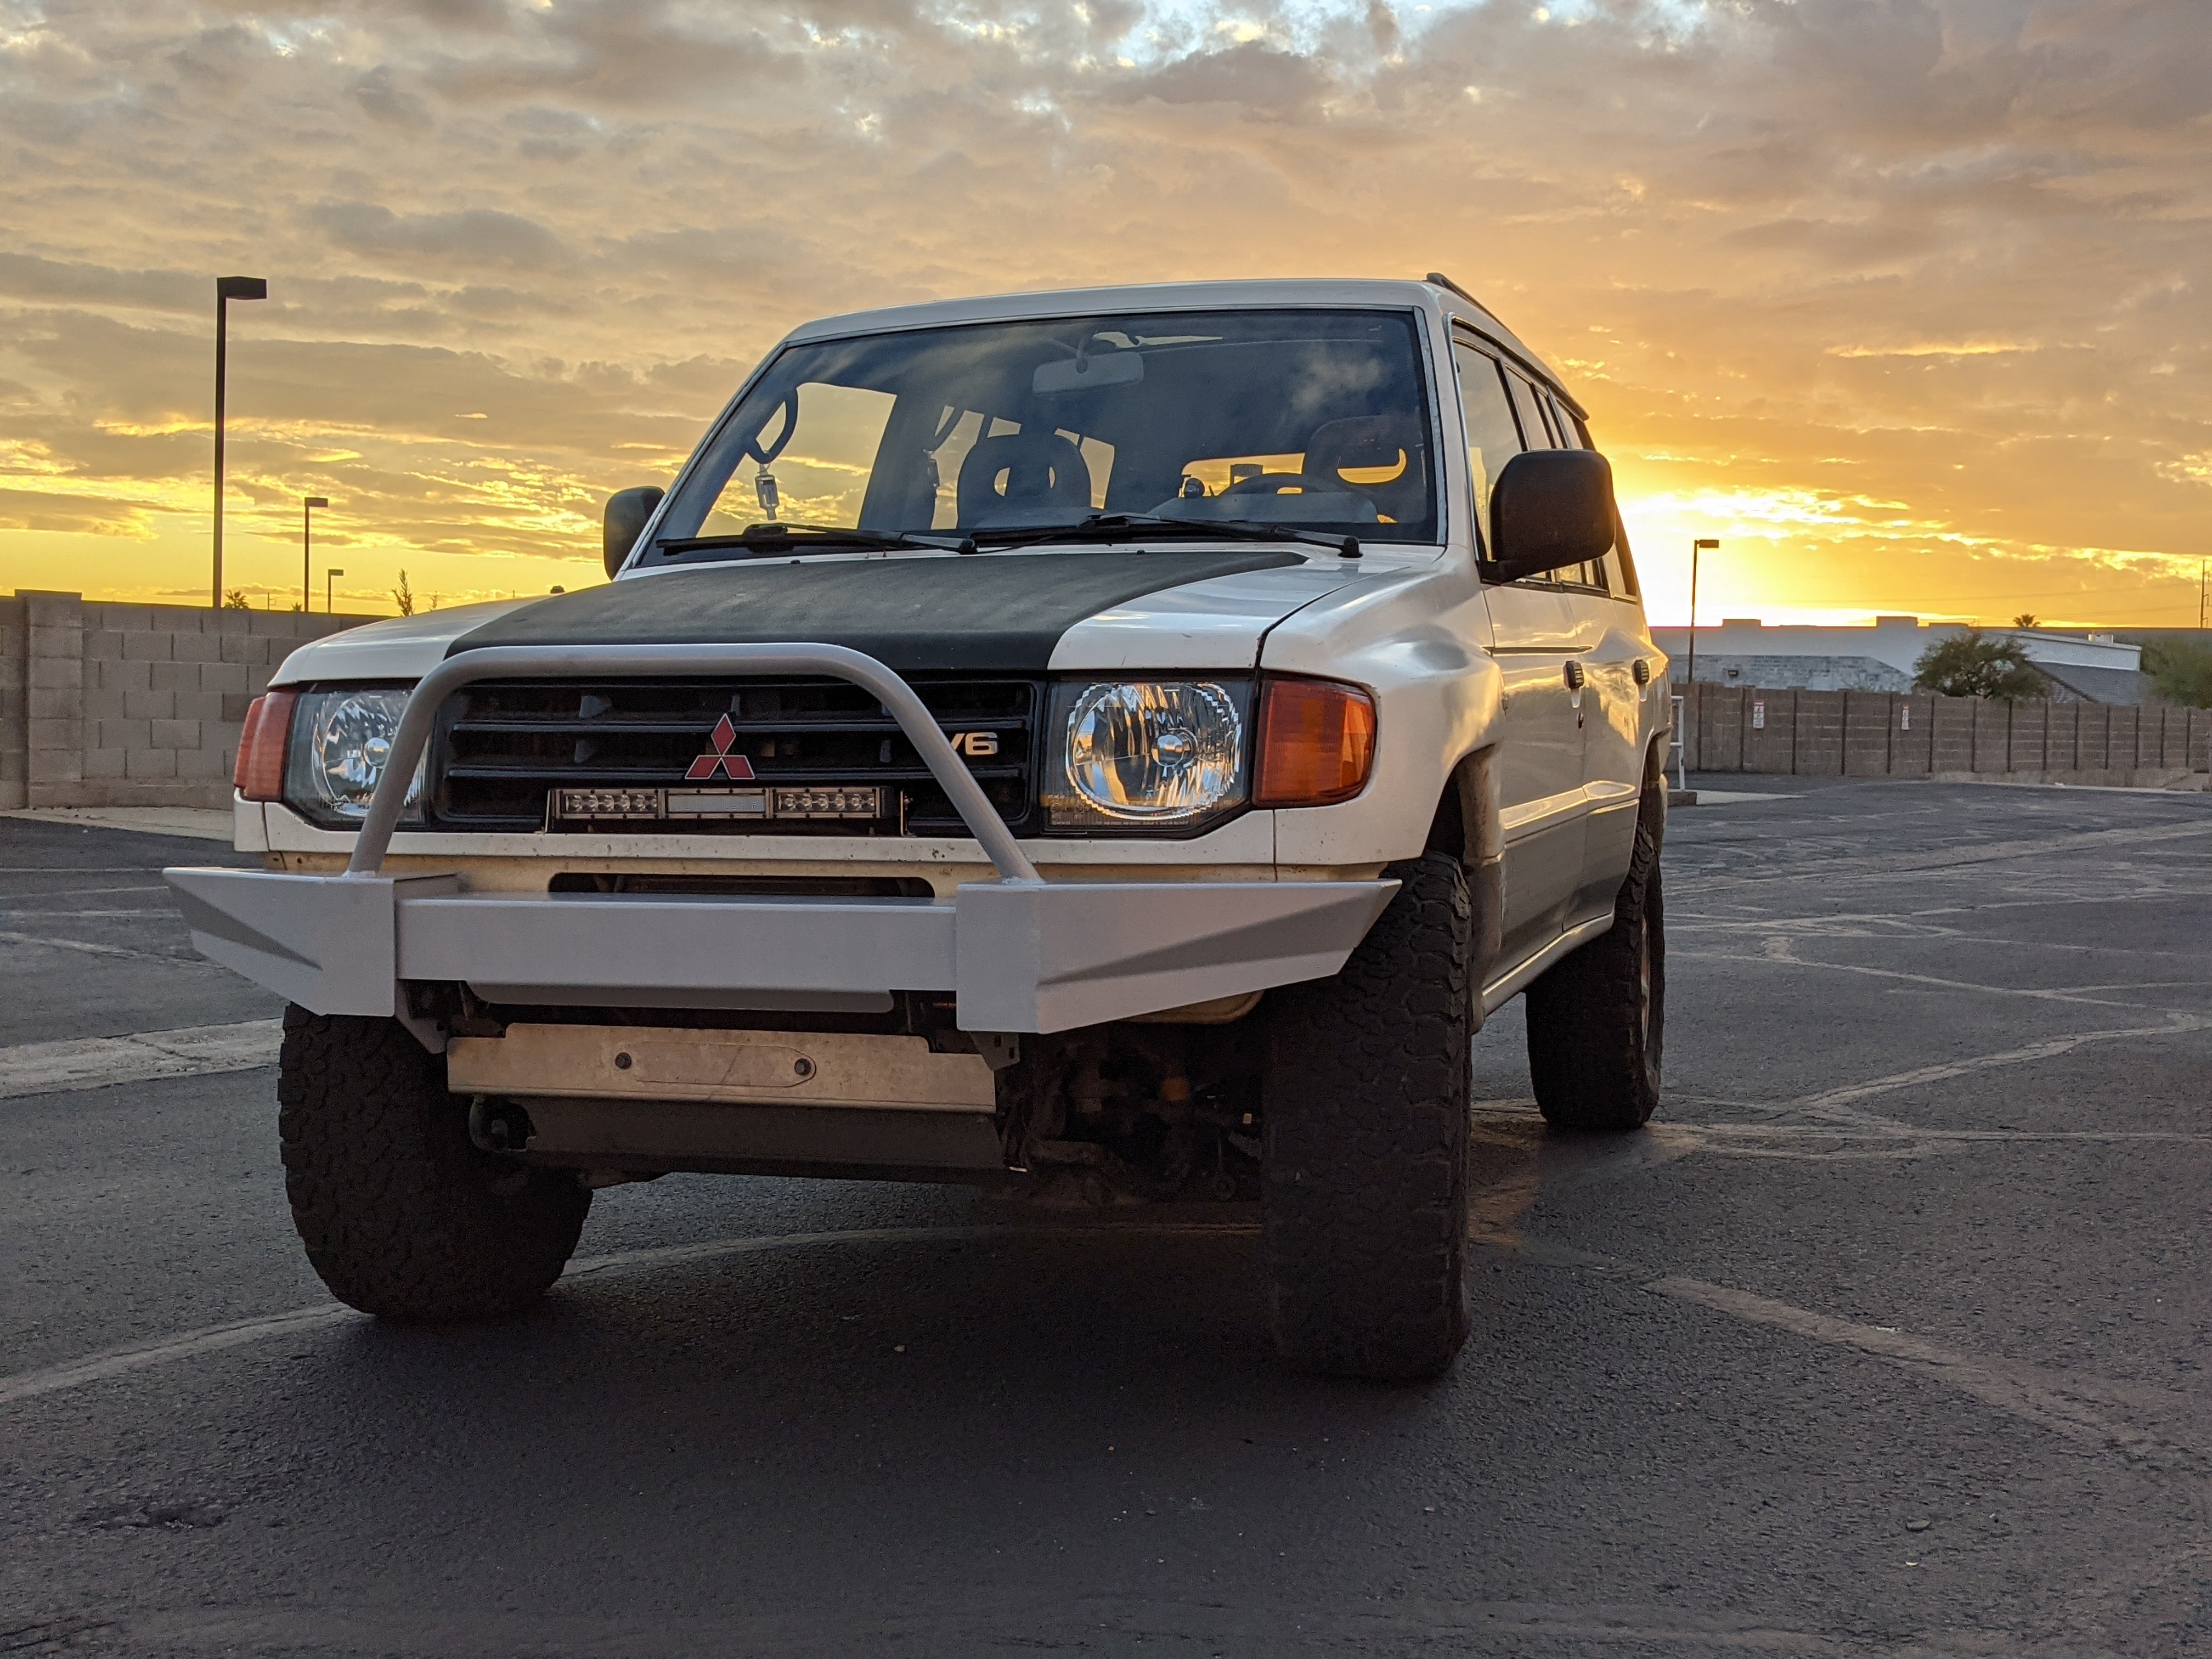
Word.
I"m taking the truck into the shop this week to get the PS sorted and fix the trans leak.
Headers are a WAY, way down the road thing. Maybe even something I’d only jump on if it happened to cross my path. Thanks.
Word.
I"m taking the truck into the shop this week to get the PS sorted and fix the trans leak.
Headers are a WAY, way down the road thing. Maybe even something I’d only jump on if it happened to cross my path. Thanks.
233,224
$506, parts & labor.
Frankly, I was tired of fucking with it.
I’ve probably got eight hours of more into the noisy PS pump situation at this point. Replaced the pump. Replaced the lines. Replaced the reservoir. Replaced the o-rings on the pump. Replaced the lines again. Bled it with the wheels in the air. Bled it with the engine off. Bled it with the engine on. Bled it until the reservoir overflowed, resulting in a 2-foot oil puddle under my truck.
Turns out I should have filled it with Dexron 2+ instead of the Prestone “safe for all systems” shit. And replaced the other two pulleys last fall instead of just the one.
And my fiber optic headliner kit came in today…
E: Two steps back, they suspect a coolant leak behind the front cover (water pump gasket), the oil pressure sending unit–at a minimum–is leaking, and the front diff is leaking too.
I trust Ernest will address the diff when I take Fezzik back for the tcase swap. And I’ve been looking for an excuse to replace that gauge. But I do not want to rear down the front of my engine.
This likely pushes control arm bushing replacements to fall. Need to make room in the garage now. #actionplan
Pics and project write-ups to follow.
So many pictures missing from this thread. If I don’t chip away at it, I’ll be missing the most active, marathon build threading I’ve ever done on the truck!
There was so much urgency to get a LOT done in short order. Ernest’s struggle to find my 4.90s burned up an entire month. So let’s roll the clock back to 12.02.2020. Fezzik was at the shop, where Josh, Keith, and I got to work.
Brother Keith having a proper shop meant Fezzik could spend some quality time up in the air. We used a transmission stand to support the rear axle at full droop so Josh could install the still-in-the-box OME rear coils and donated OE catback exhaust.
Notice how one spring is taller than the other. Pretty smart factoring in the driver’s weight.
Here’s a couple shots of Josh snaking the exhaust back past the axle. I’d tried doing this myself last summer, but again, couldn’t get the rear suspension dropped enough to clear. Even with the lift, Josh and I must have removed and re-installed the coils three times to get things done right.
Peekaboo!
Meanwhile, I set my sights on replacing the front brake pads and sway bar end links.
Nothing special here. I just love the lighting from this angle. This side also got a new ABS sensor. Upon battery reconnection, my ABS MIL went out and stayed out. #SOLVED
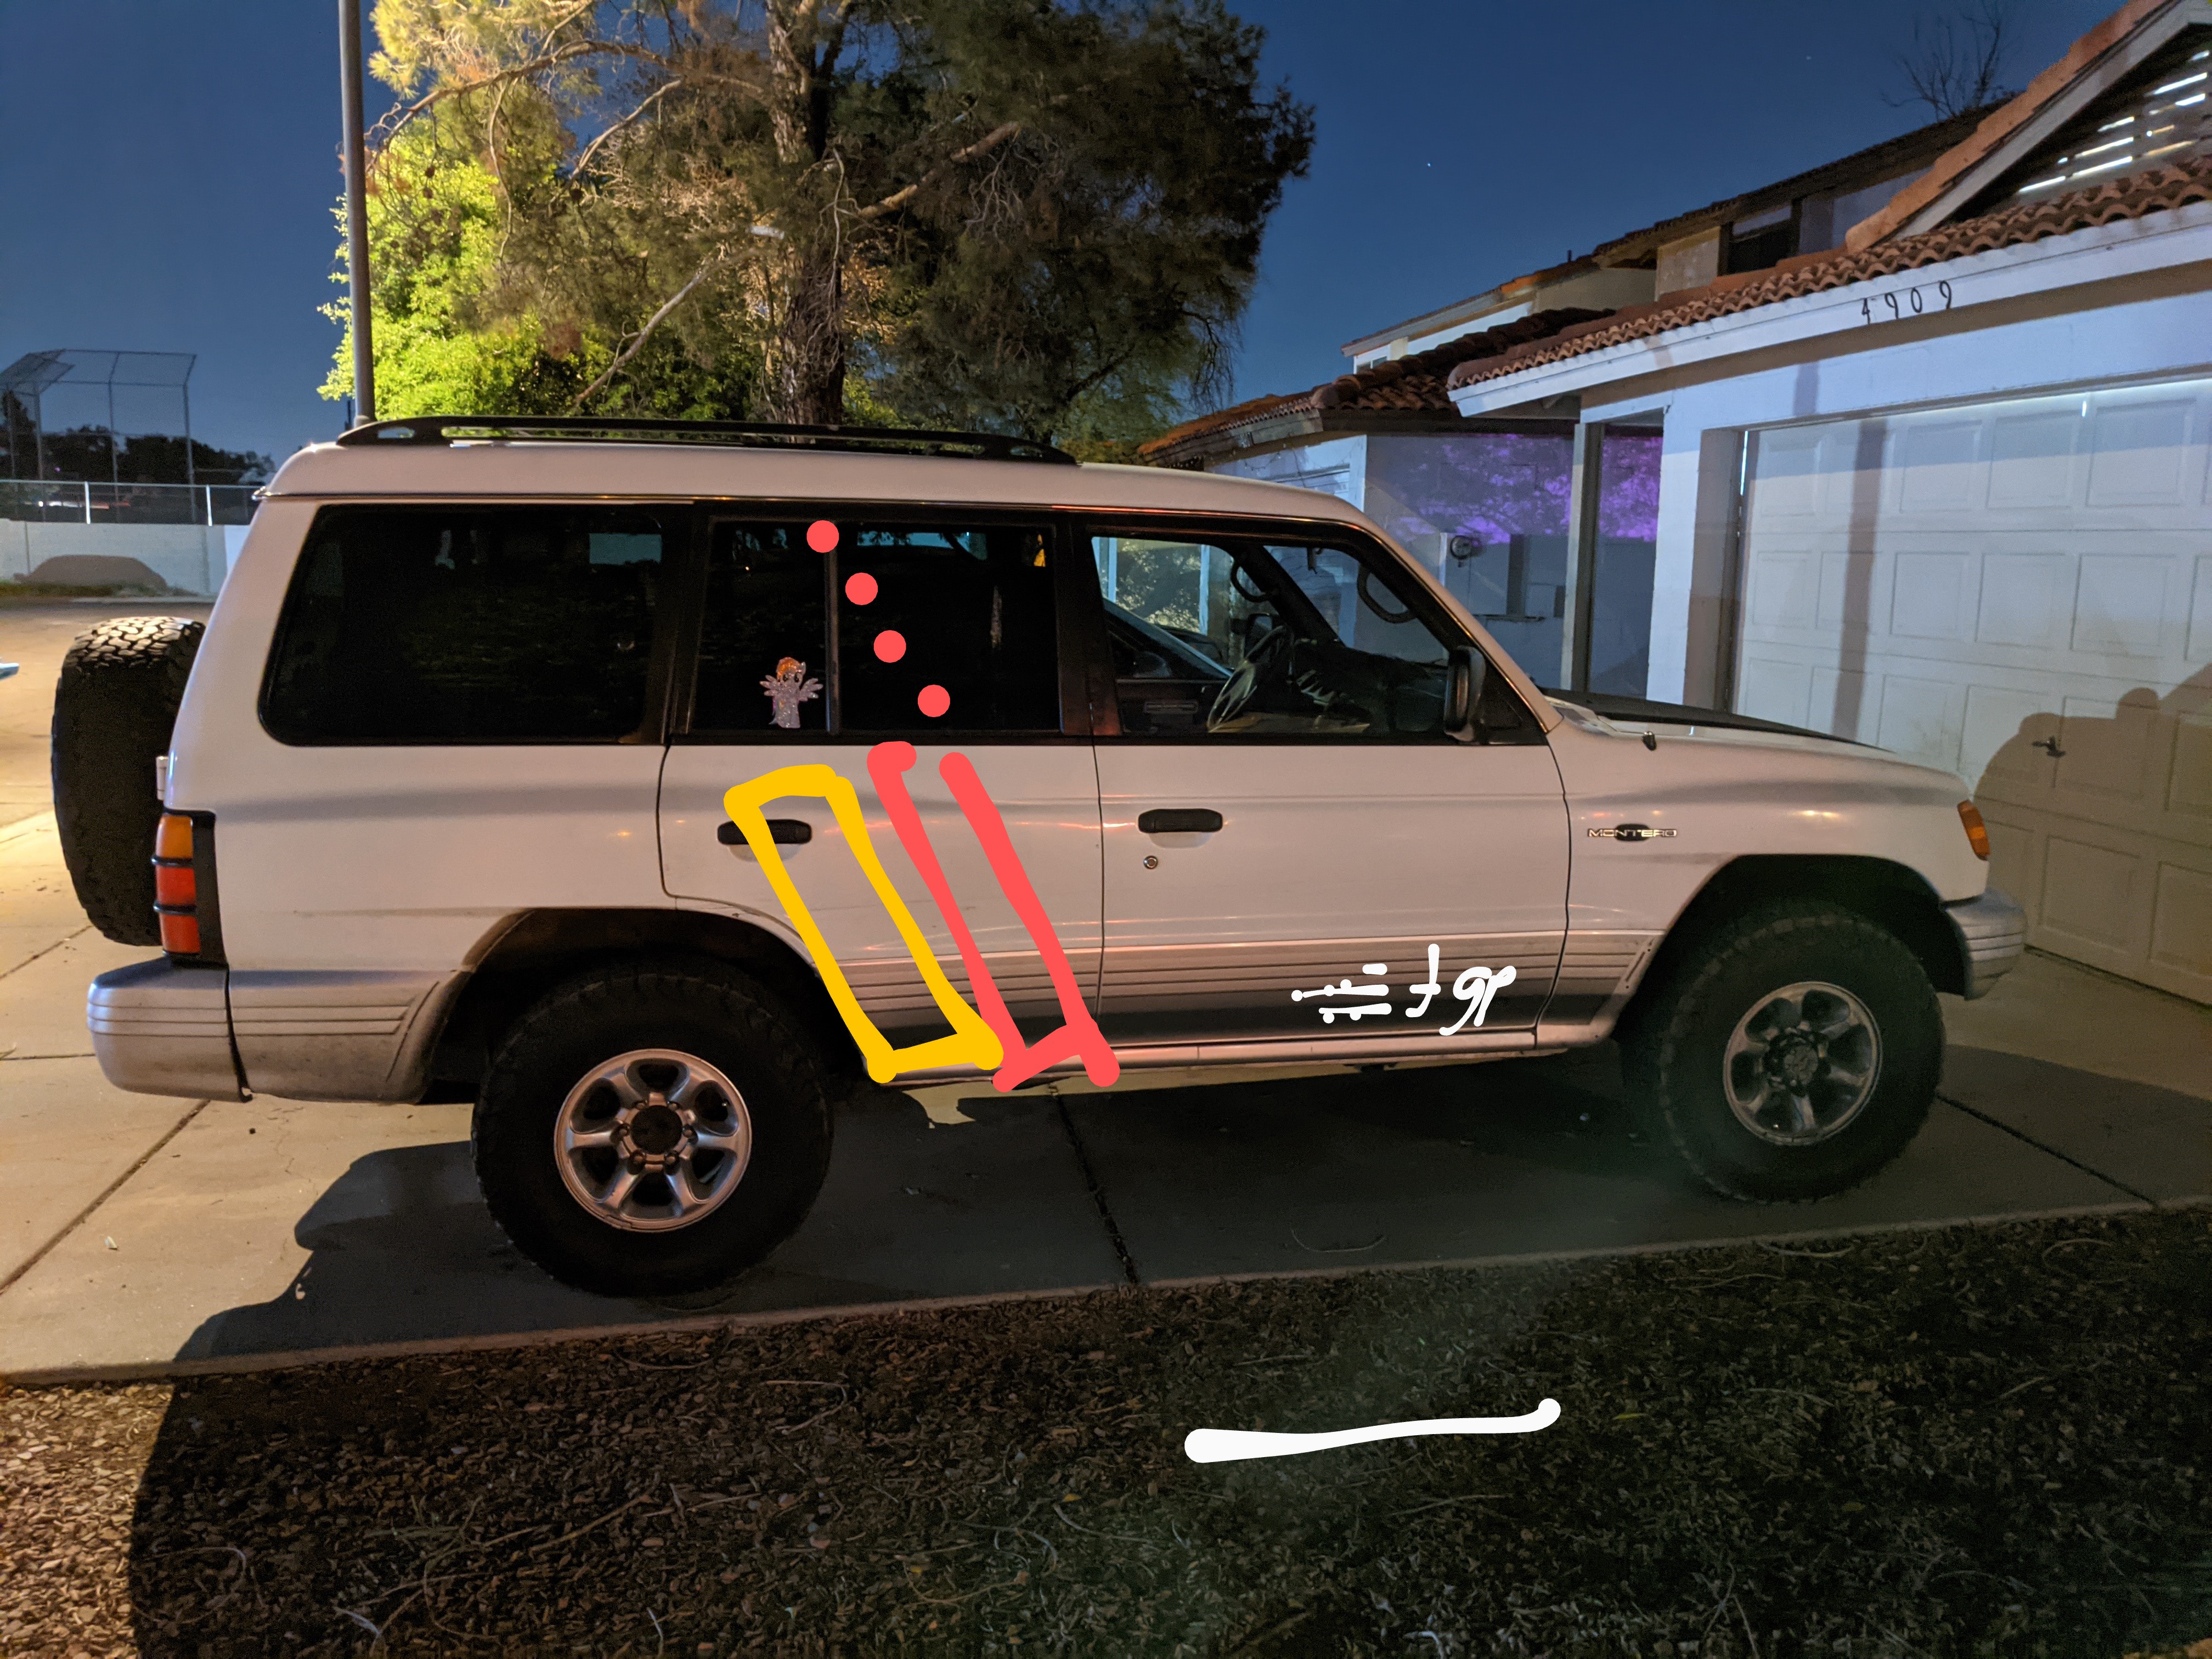
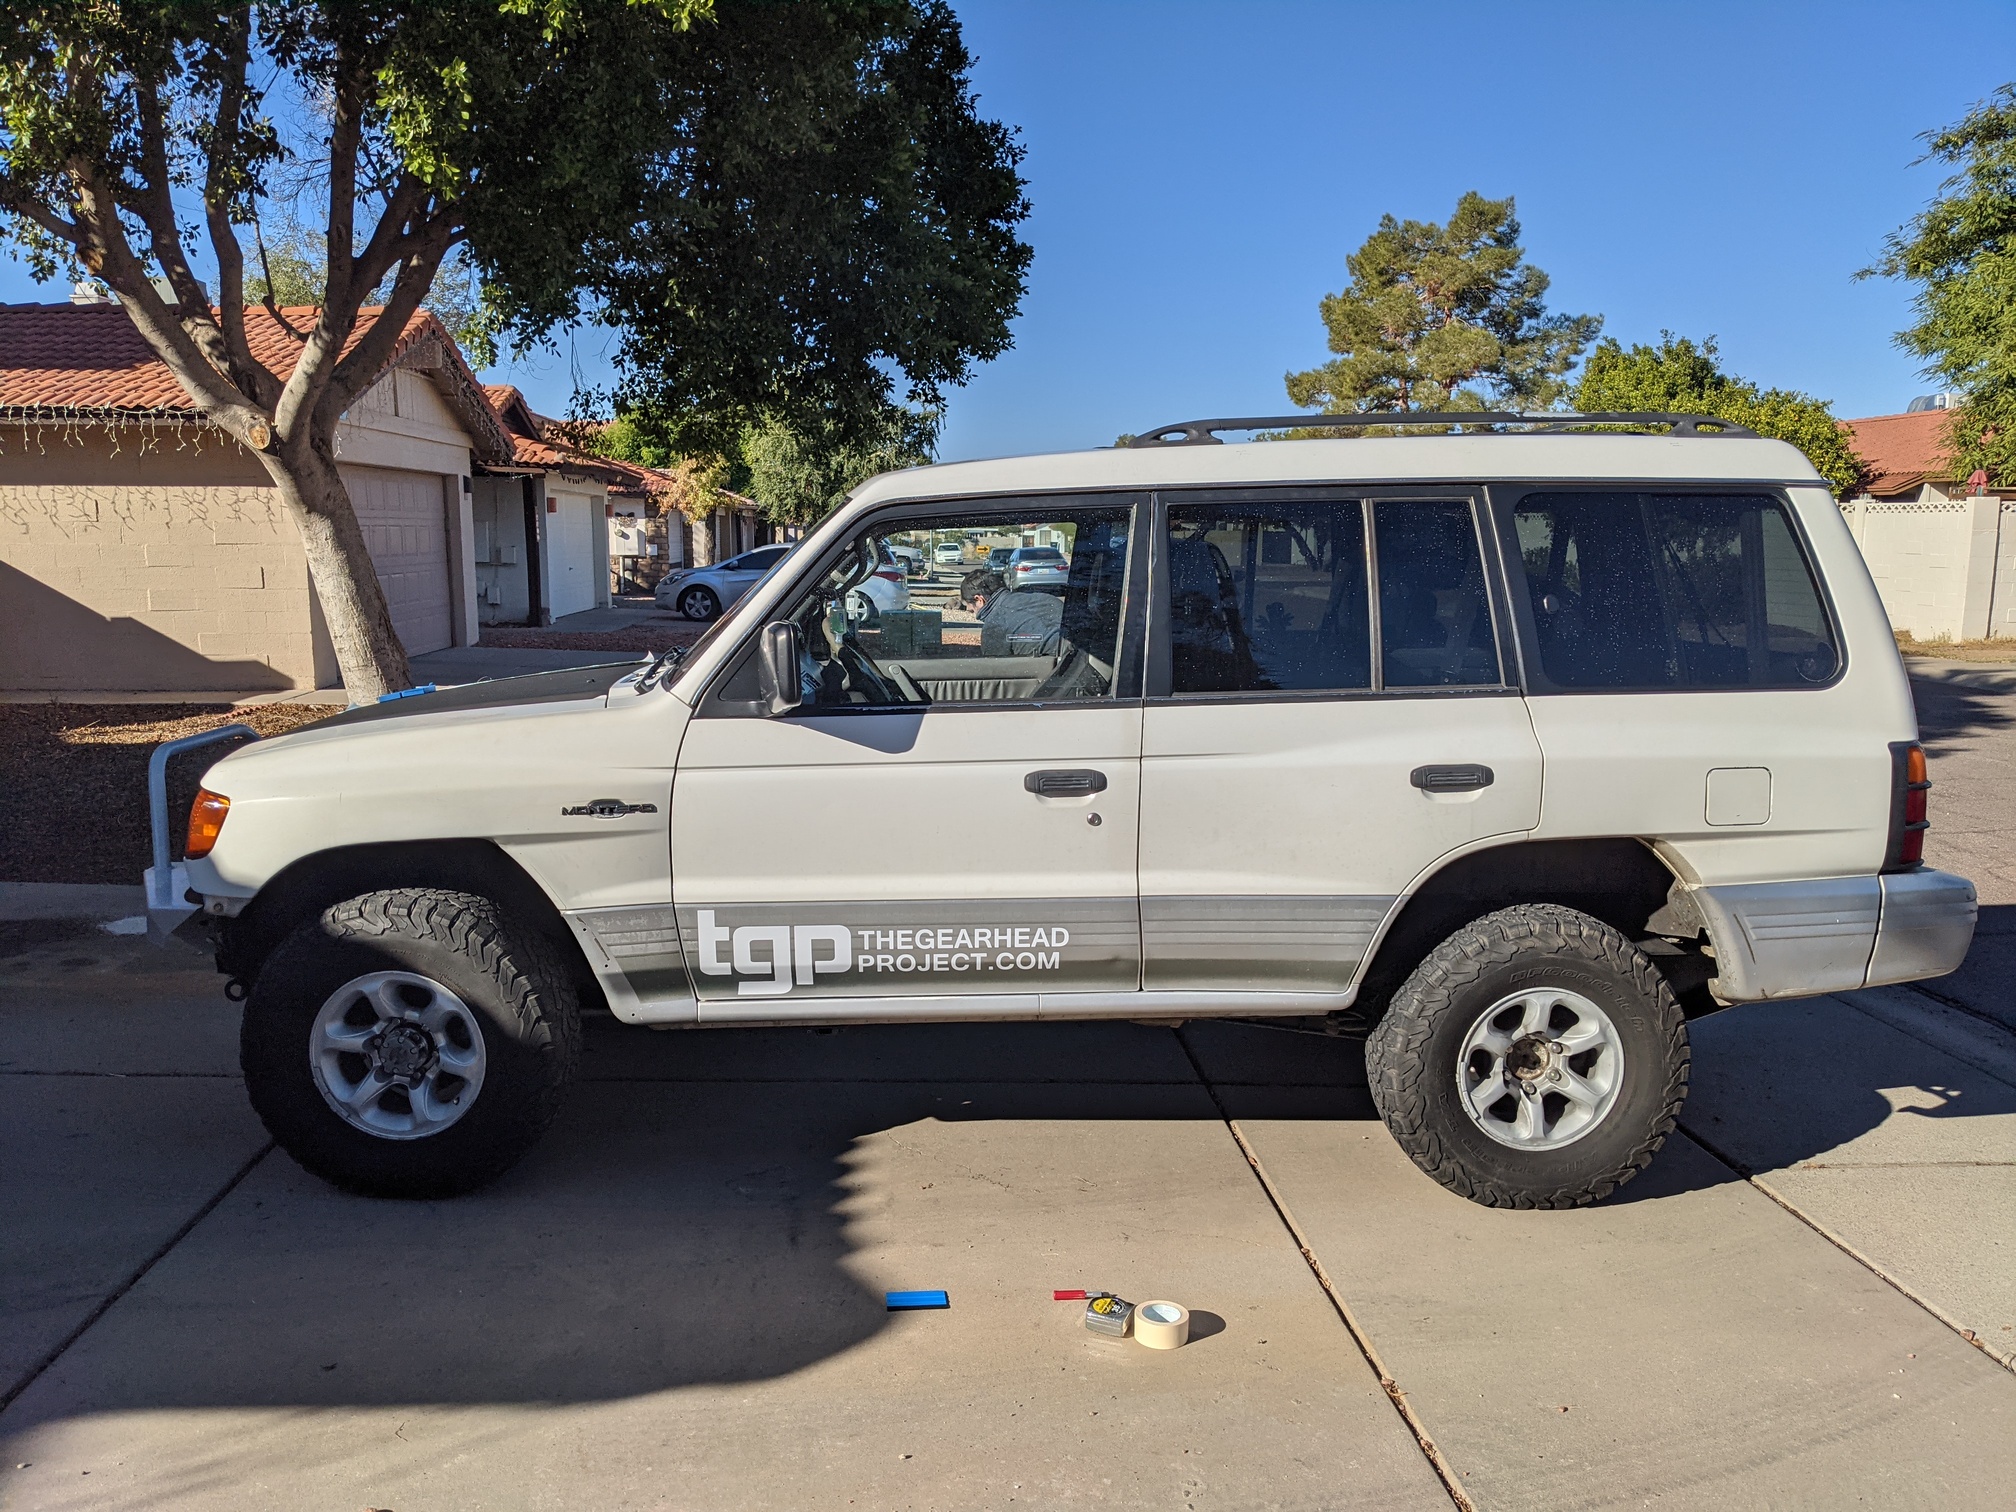
Now, about this time, I got this crazy idea in my head that I needed some vinyl on the sides of my truck. I found this old picture of the side and sent it to @DHymers down in Tucson.
I also sent these pictures…
And we all know where THAT led.
Continued…
[ note: affiliate links in this one mean I might make a buck or two if you click through and buy ]
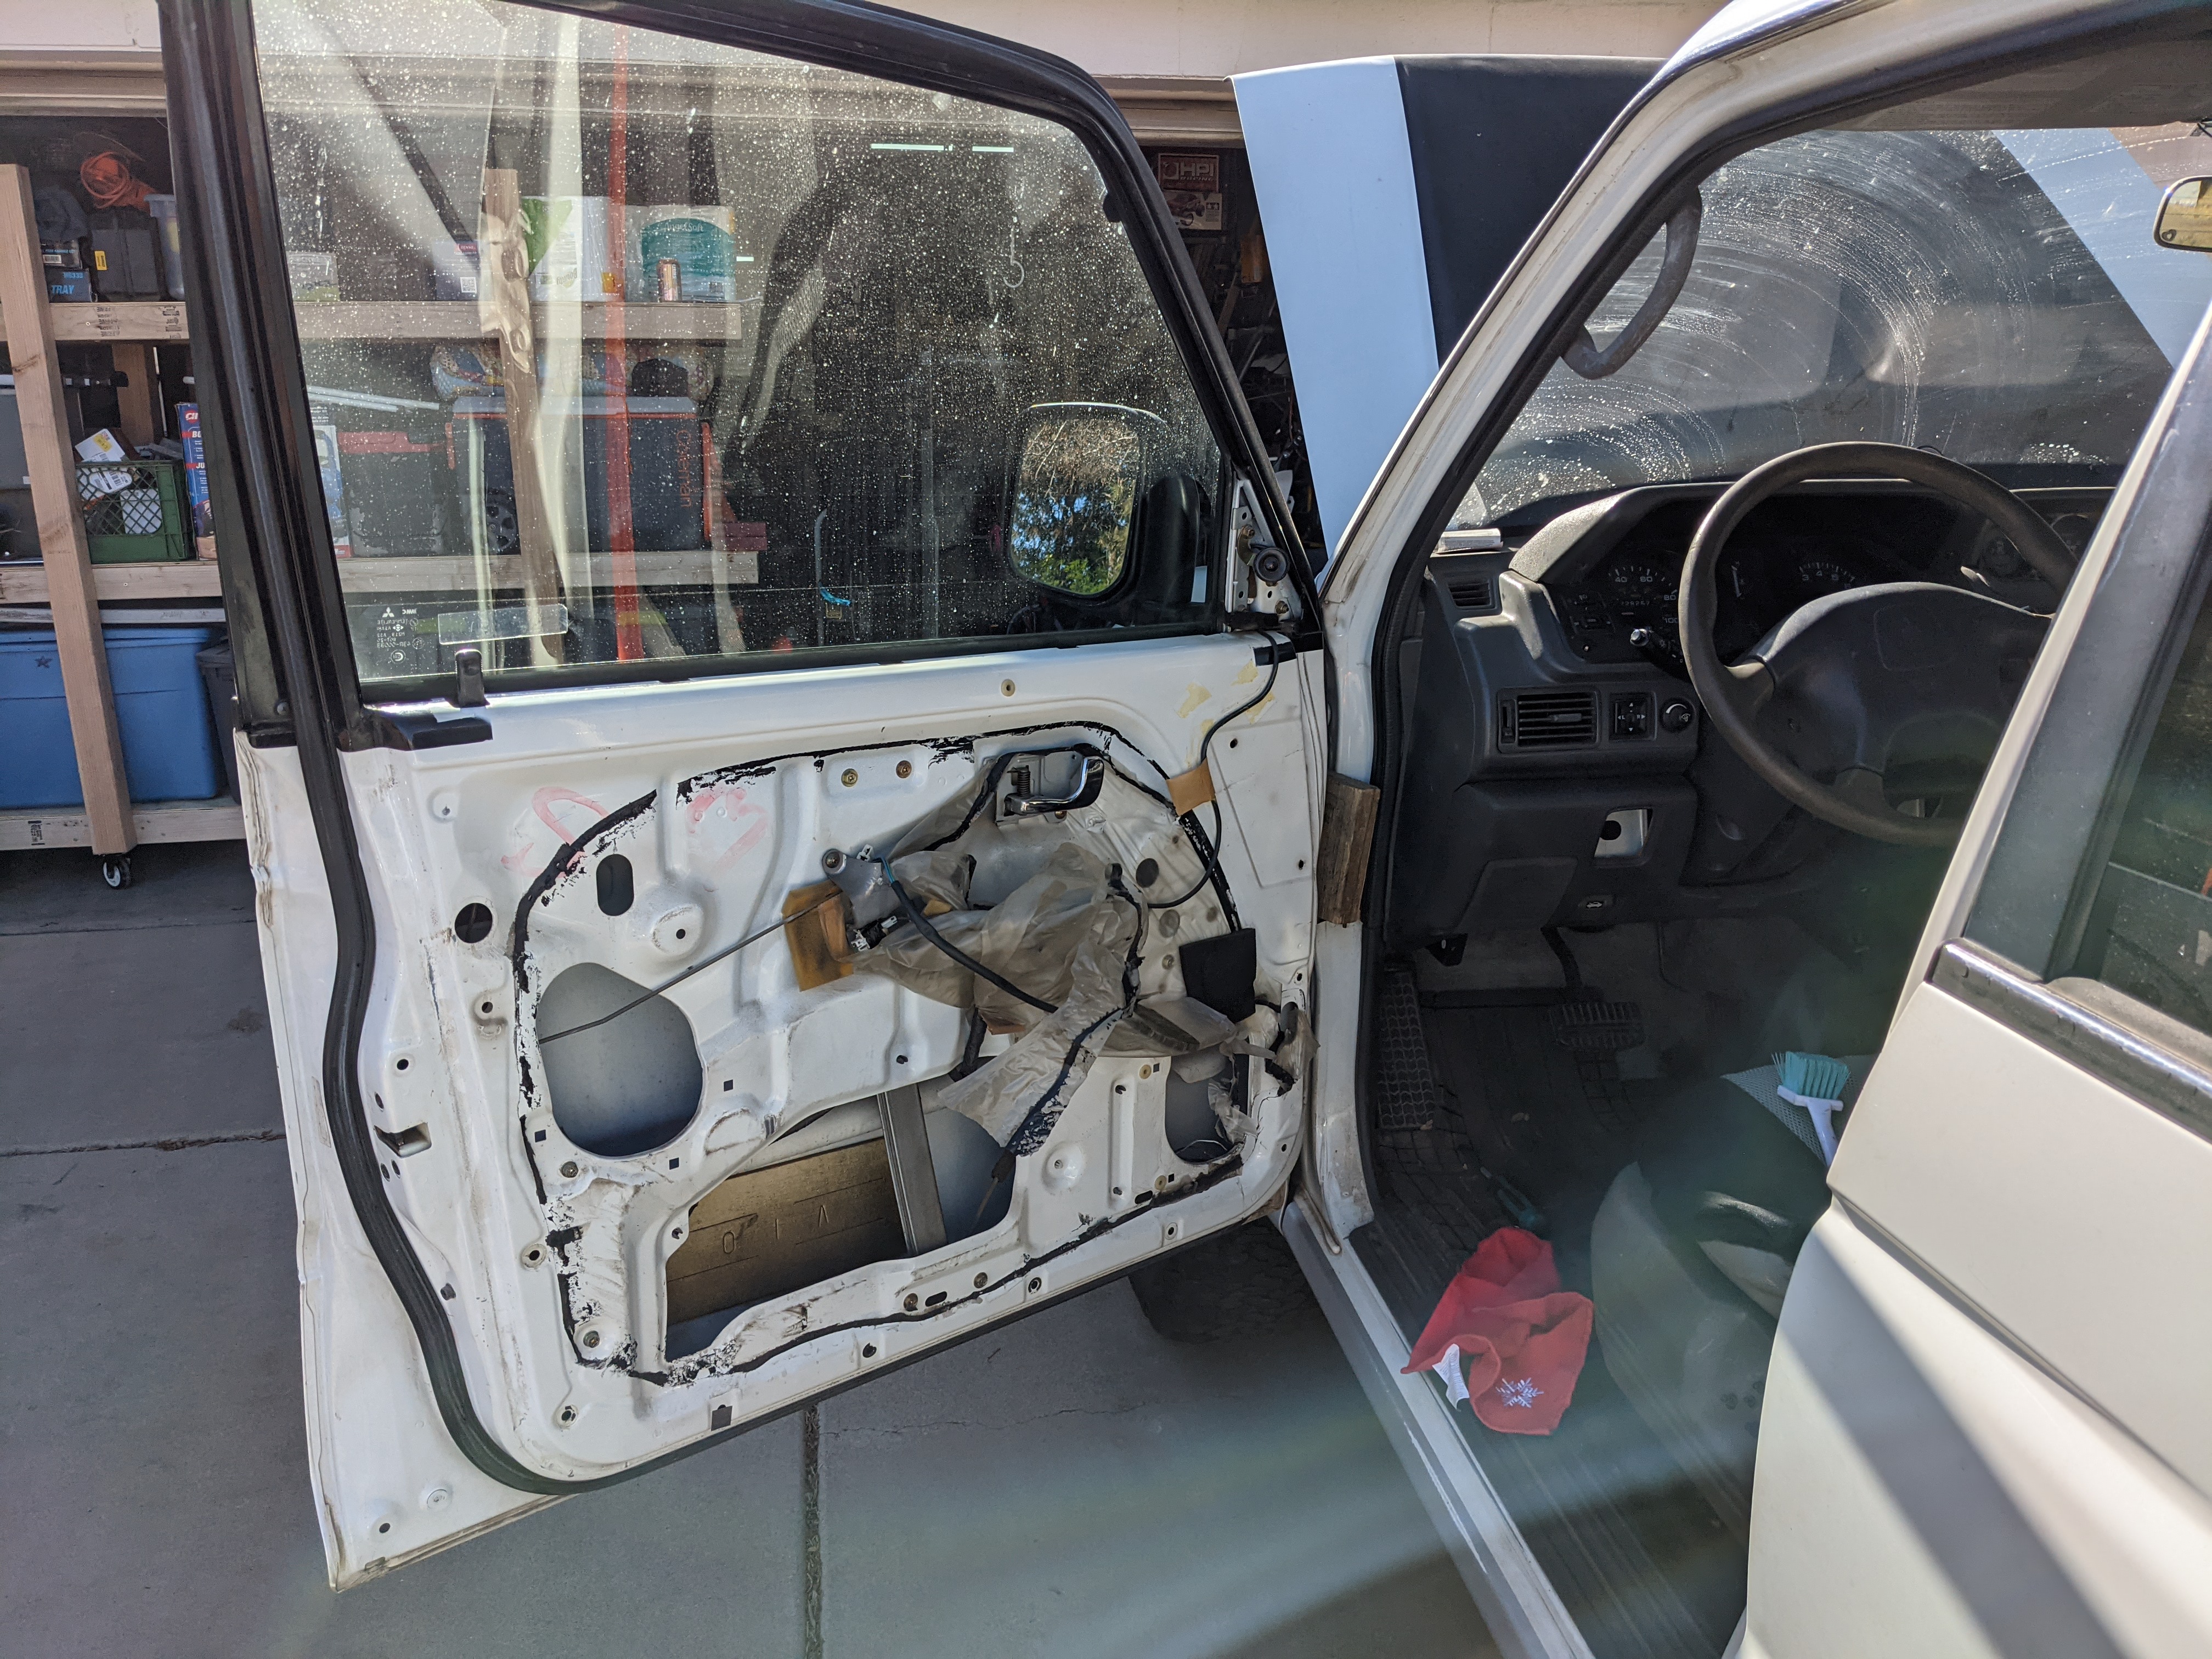
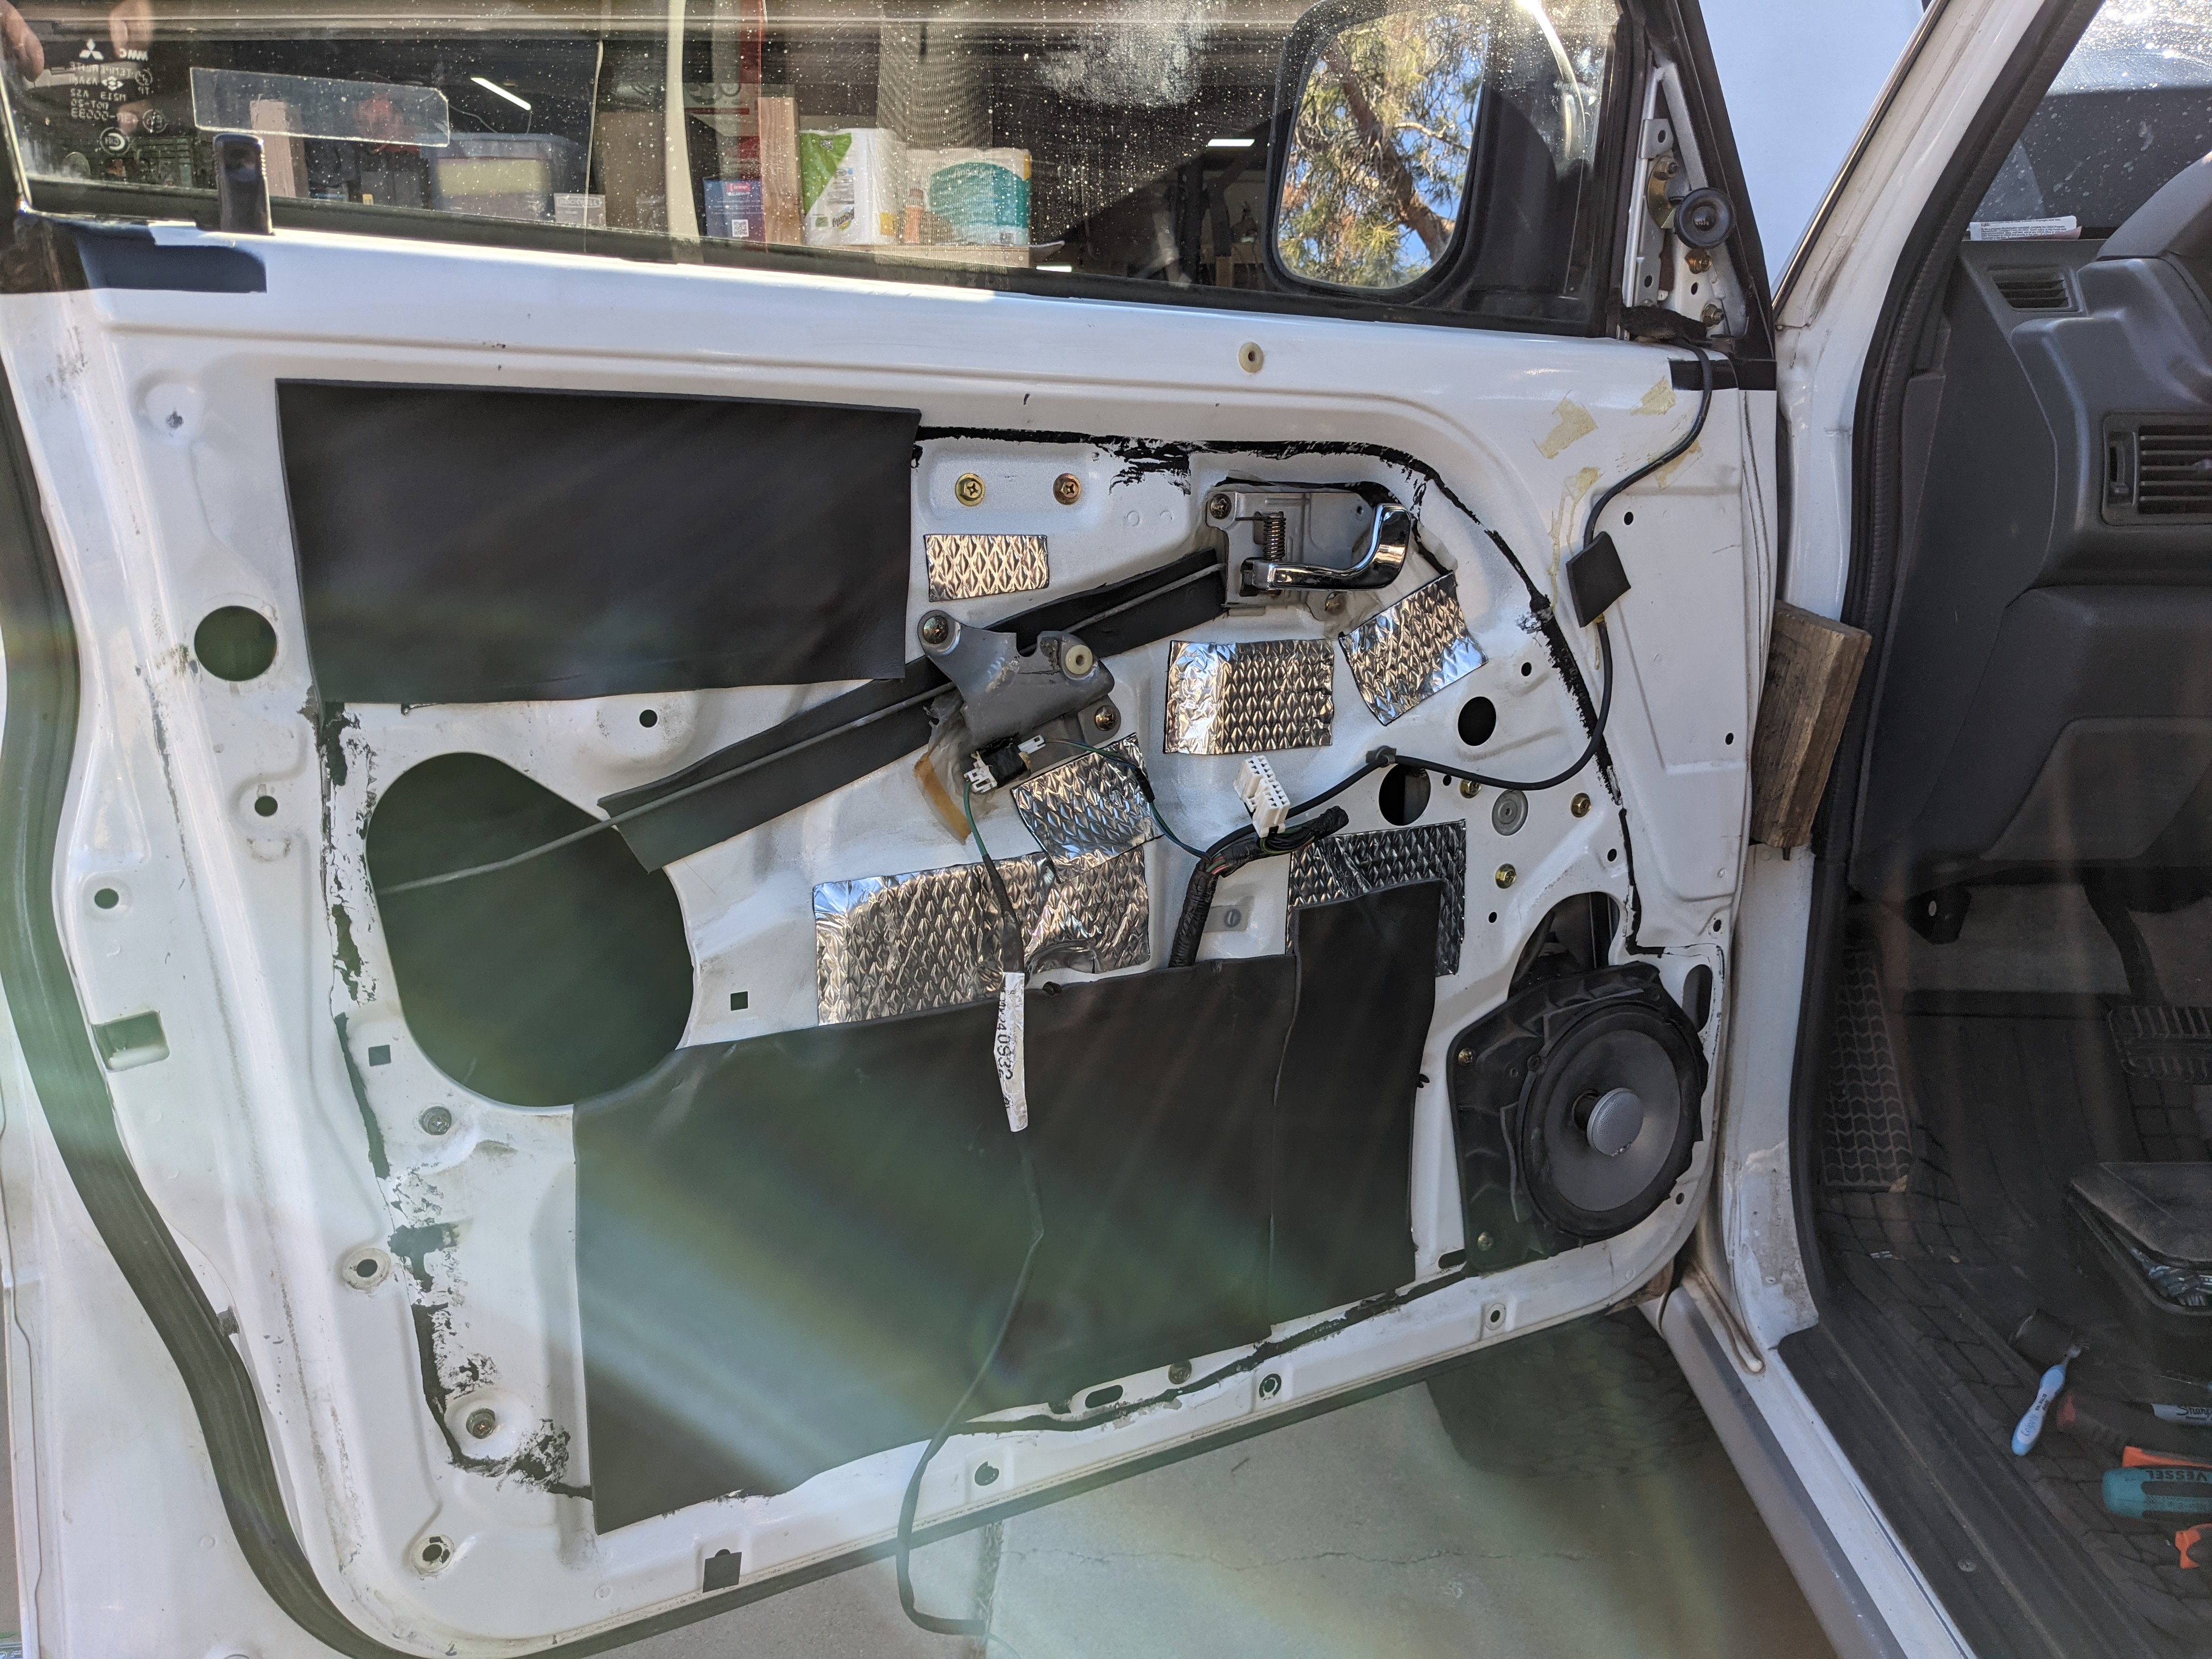
A couple days later, I was in my own driveway installing Noico. This was recommended by our old friend Kurek aka: Shovel. He knows his stuff. I trust him on this. And so I invested in a 36sq.ft. box of the 80 mil stuff. It was just under $70. I have a couple sheets left, but have already had a second box delivered so I can continue the good work in the back of the truck and more. I also picked up a box of the 150 mil stuff.
Here’s where I started.
Some in progress pictures. I really just eyeballed things and cut smaller sheets with a razor blade. It’s VERY satisfying to slice, let me just say. The first door took the most time as I was getting used to it, but like Erik said, it’s not rocket science. Give the exterior sheet metal a tap. If it sounds tinny or hollow, start slapping Noico behind it.
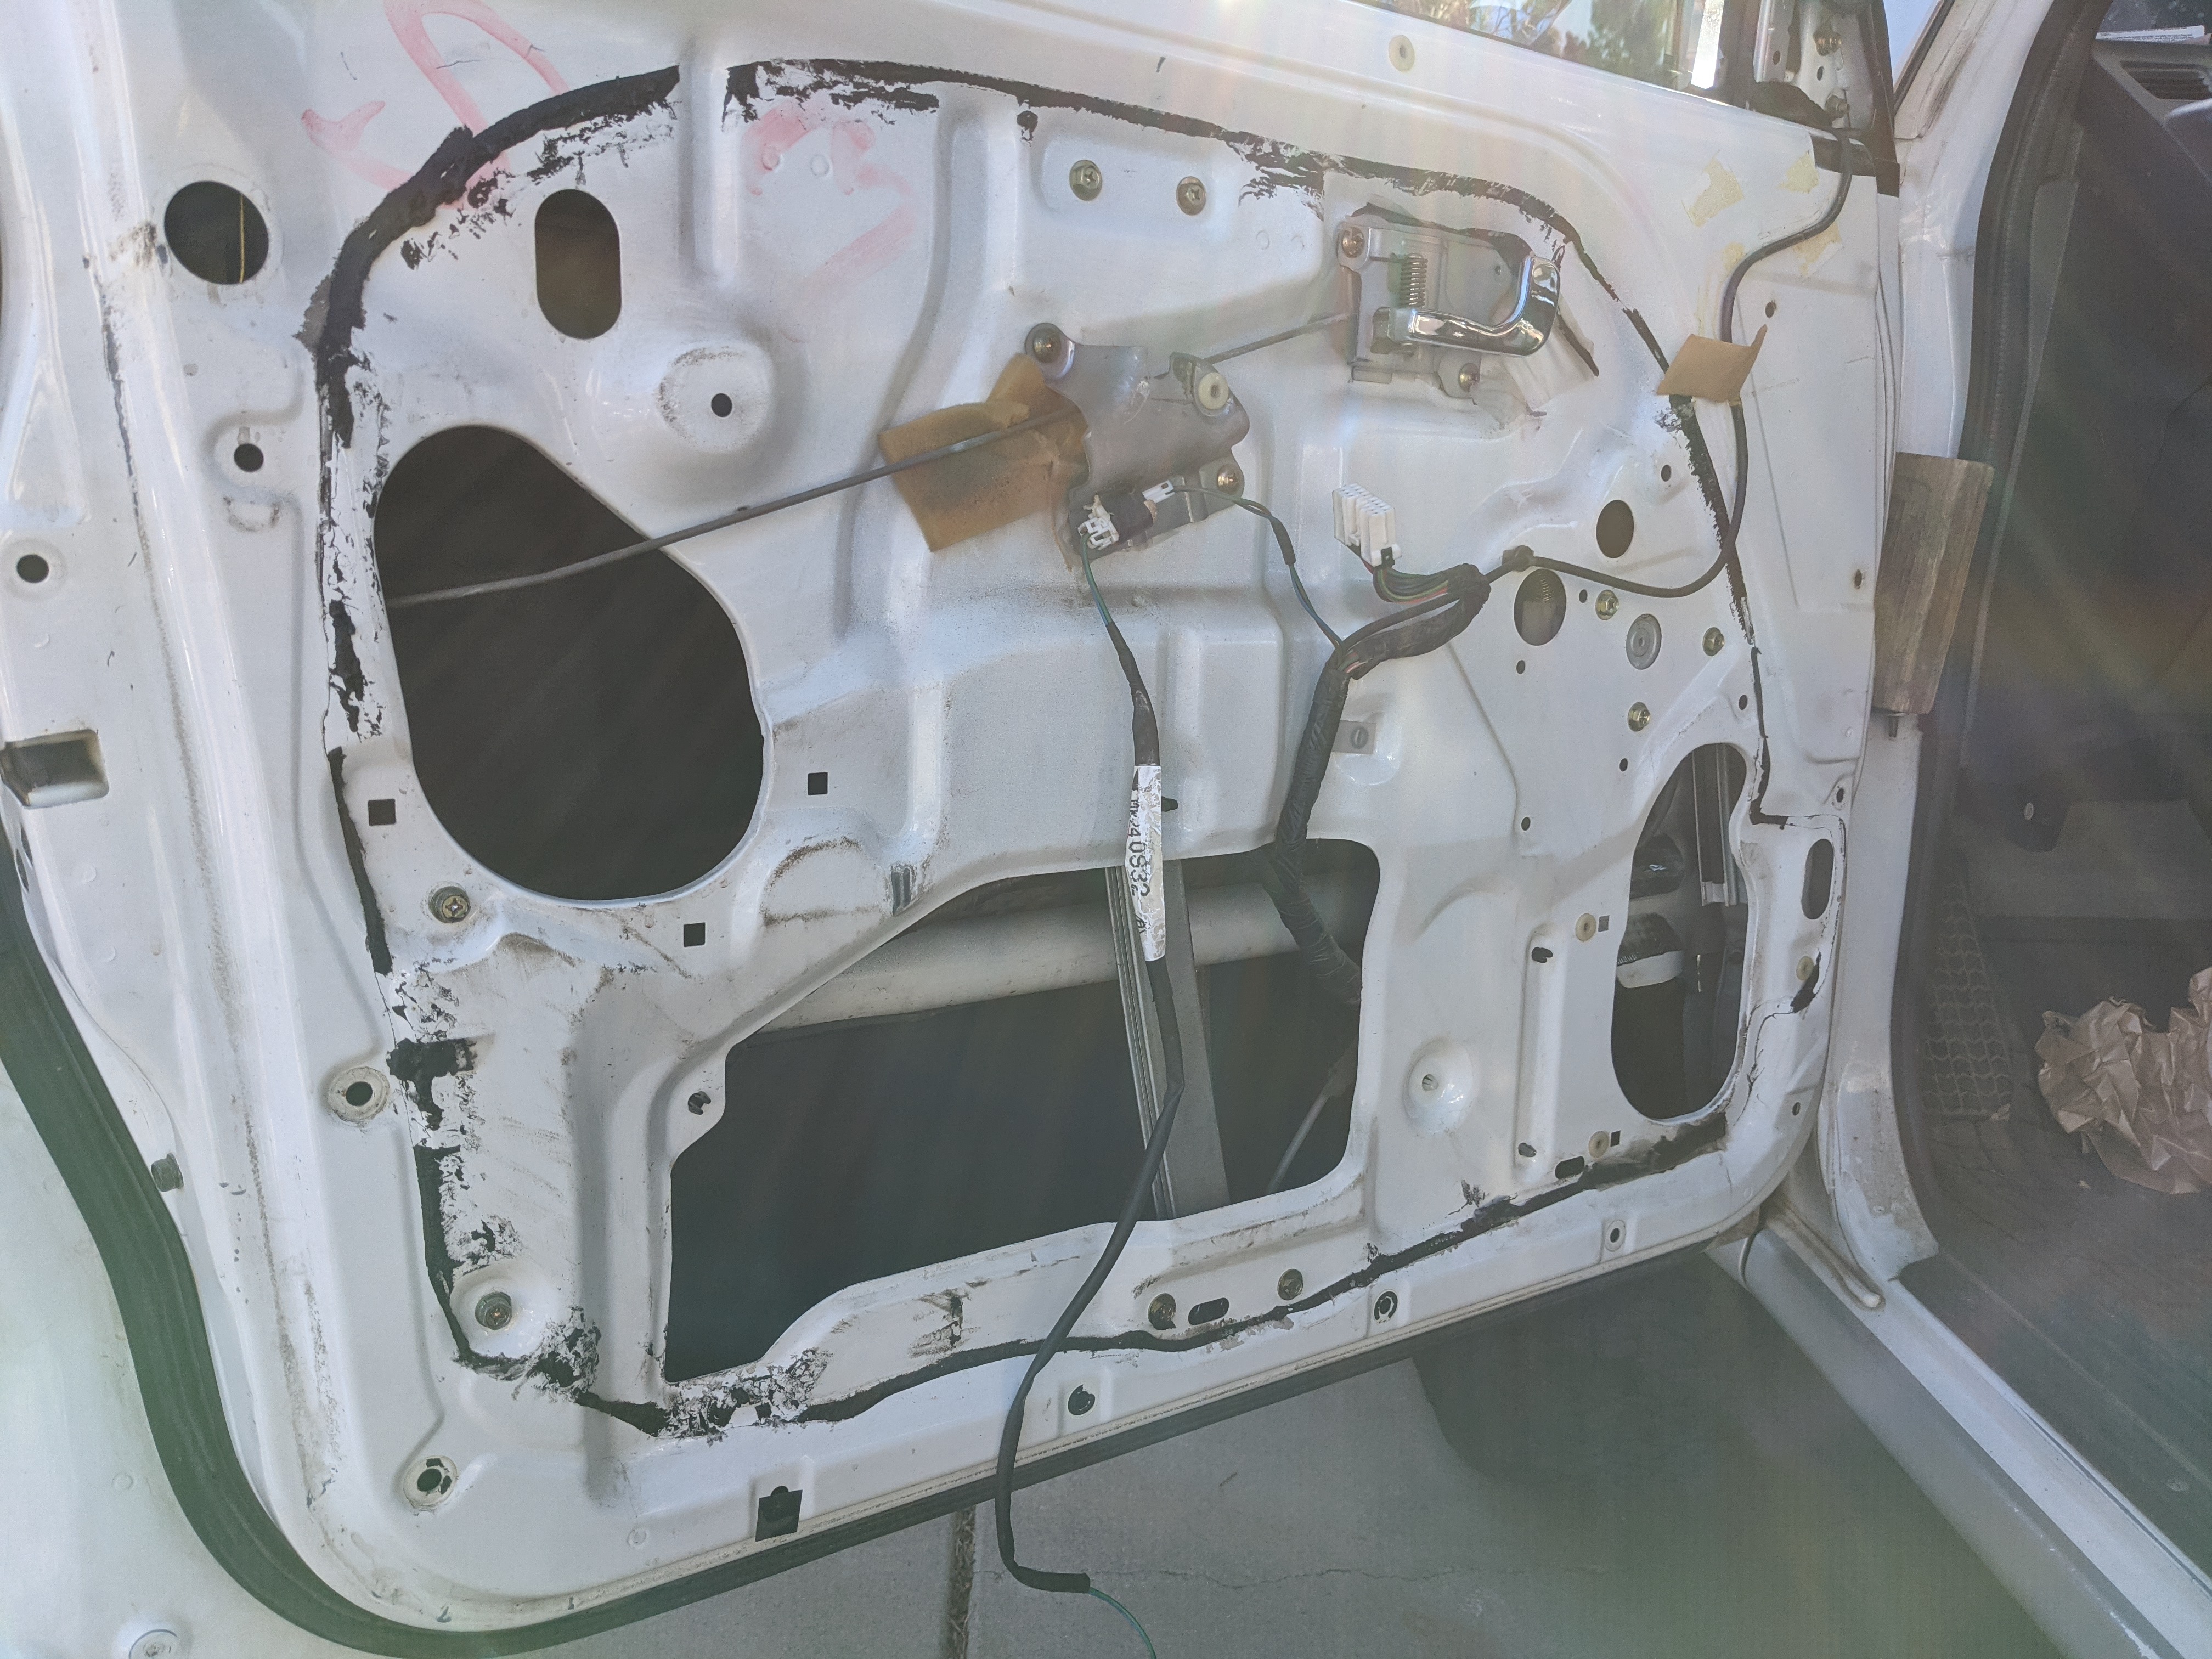
With the 80 mil stuff in place, I added a layer of the 150 mil on top of it. (I should add I also used an old, alcohol soaked rag to wipe down the interior before applying this stuff. Nothing crazy.)
Because my OE plastic sheets were torn to shreds, I opted to use Noico to cover up openings in the door skin. Didn’t get a picture of the finished product, but you can see here where I was on my way.
I should also mention that Erik recommended removing the speakers and applying Noico behind them and to their mounting surfaces. This sort of reinforces the speaker, allowing for tighter, rumblier bass. Added bonus: the quieter interior makes it easier to hear the music at lower volumes.
If I haven’t made it clear yet, this is seriously one of the best mods I’ve ever done. The reduction in road noise was immediately noticeable. I mean, I had to readjust the equalizer on my stereo because the sound changed that much. Installing this took me the better part of an entire day, but it wasn’t difficult. A little dusty, and I scratched my hands up a bit with all the reaching into crevices, but talk about a zen job you can just zone out and do while listening to music.
I’m going to put the rest into the A-pillars, down the center transmission tunnel, under the headliner, and down the sides into the back of the truck. I am REALLY looking forward to hearing how quiet Fezzik is inside after this. Definitely one of my pre-summer projects this year.
Continued…
[ note: more affiliate links in here, you know, just in case ]
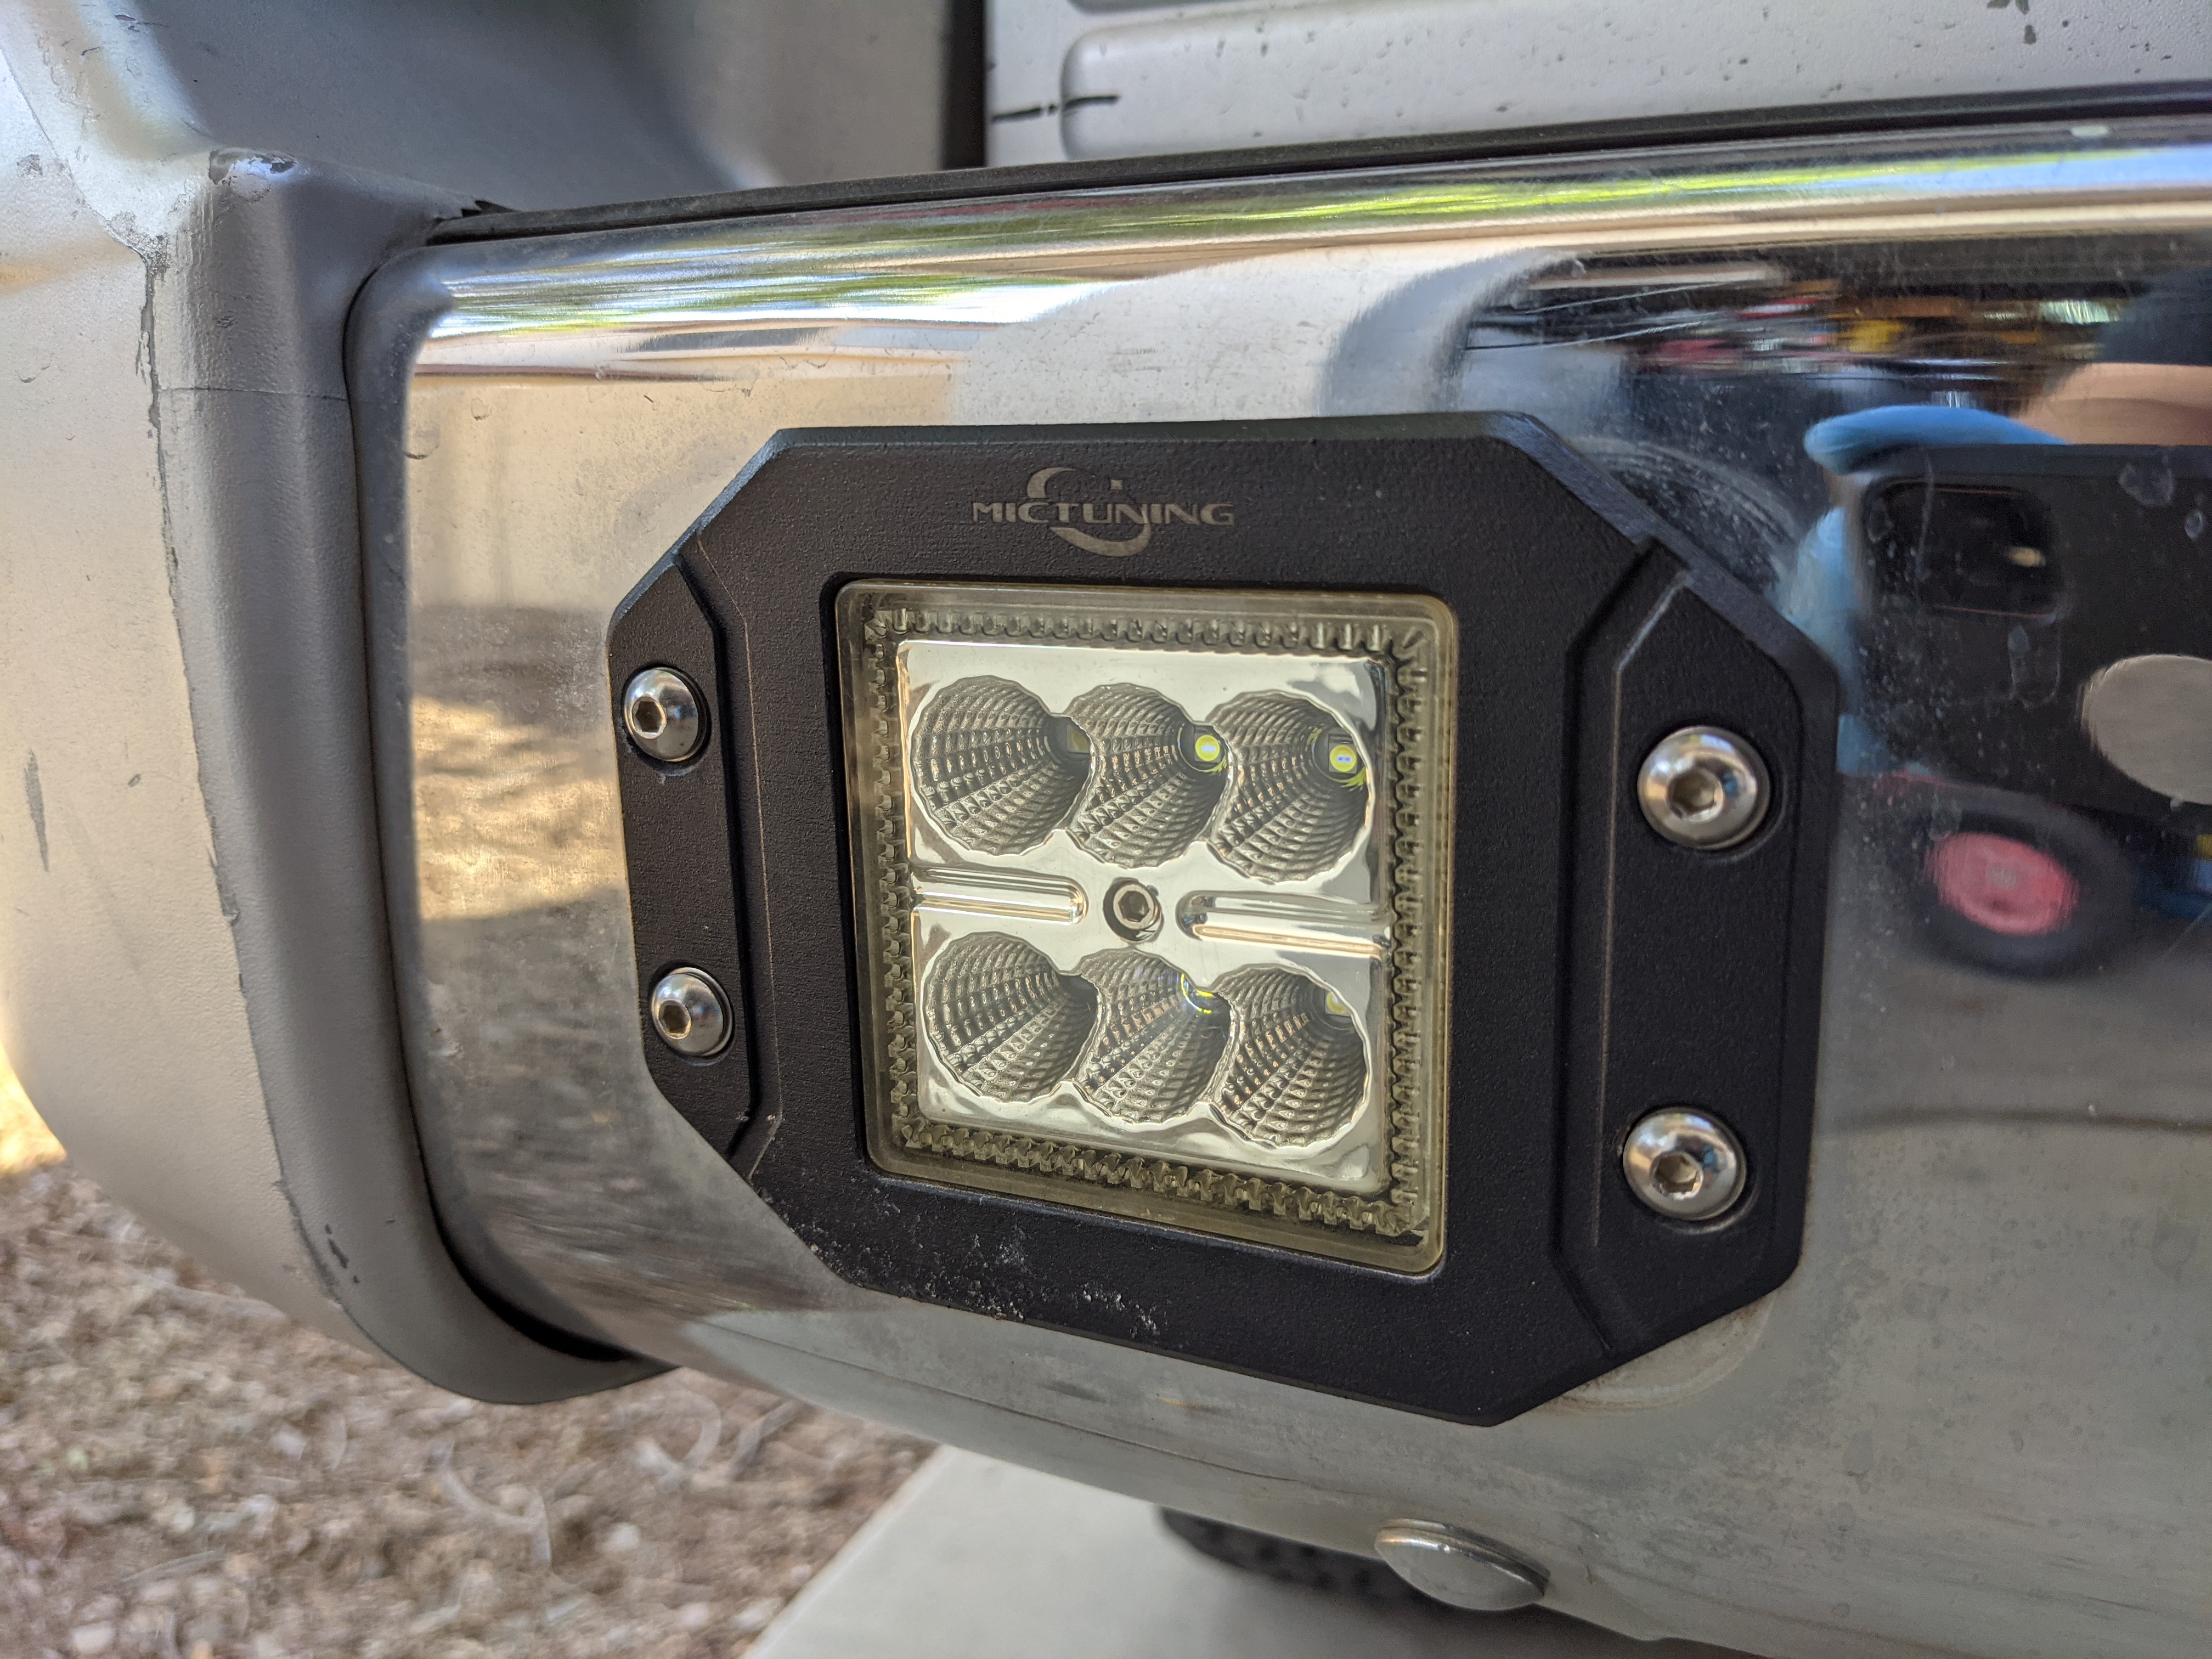
Those drop-in, LED reverse lights are not created equal. I’d seen and heard of Nilight on Amazon, but for some reason ended up with a pair of Mictuning jobbers in 2019. Not having the proper tools (read: drill bits) when I went to install them meant I slagged my drill bits just getting one installed. It was halfway dead less than a year later when I finally got around to buying drill bits and installing the other half of the set.
That was over the summer. In this picture, Fezzik is idling in reverse with the parking brake set. Notice how bright the Mictuning LEDs are.  Also notice the set of Allen wrenches I inherited from my father-in-law. Thanks, Pap!
Here’s a closeup of the lights you do NOT want to buy. For some reason, I don’t seem to have any pictures of the completed install. At least, not yet? Turned out the Nilight jobbers were a hair too big to fit the factory light holes and required a bit of clearancing.
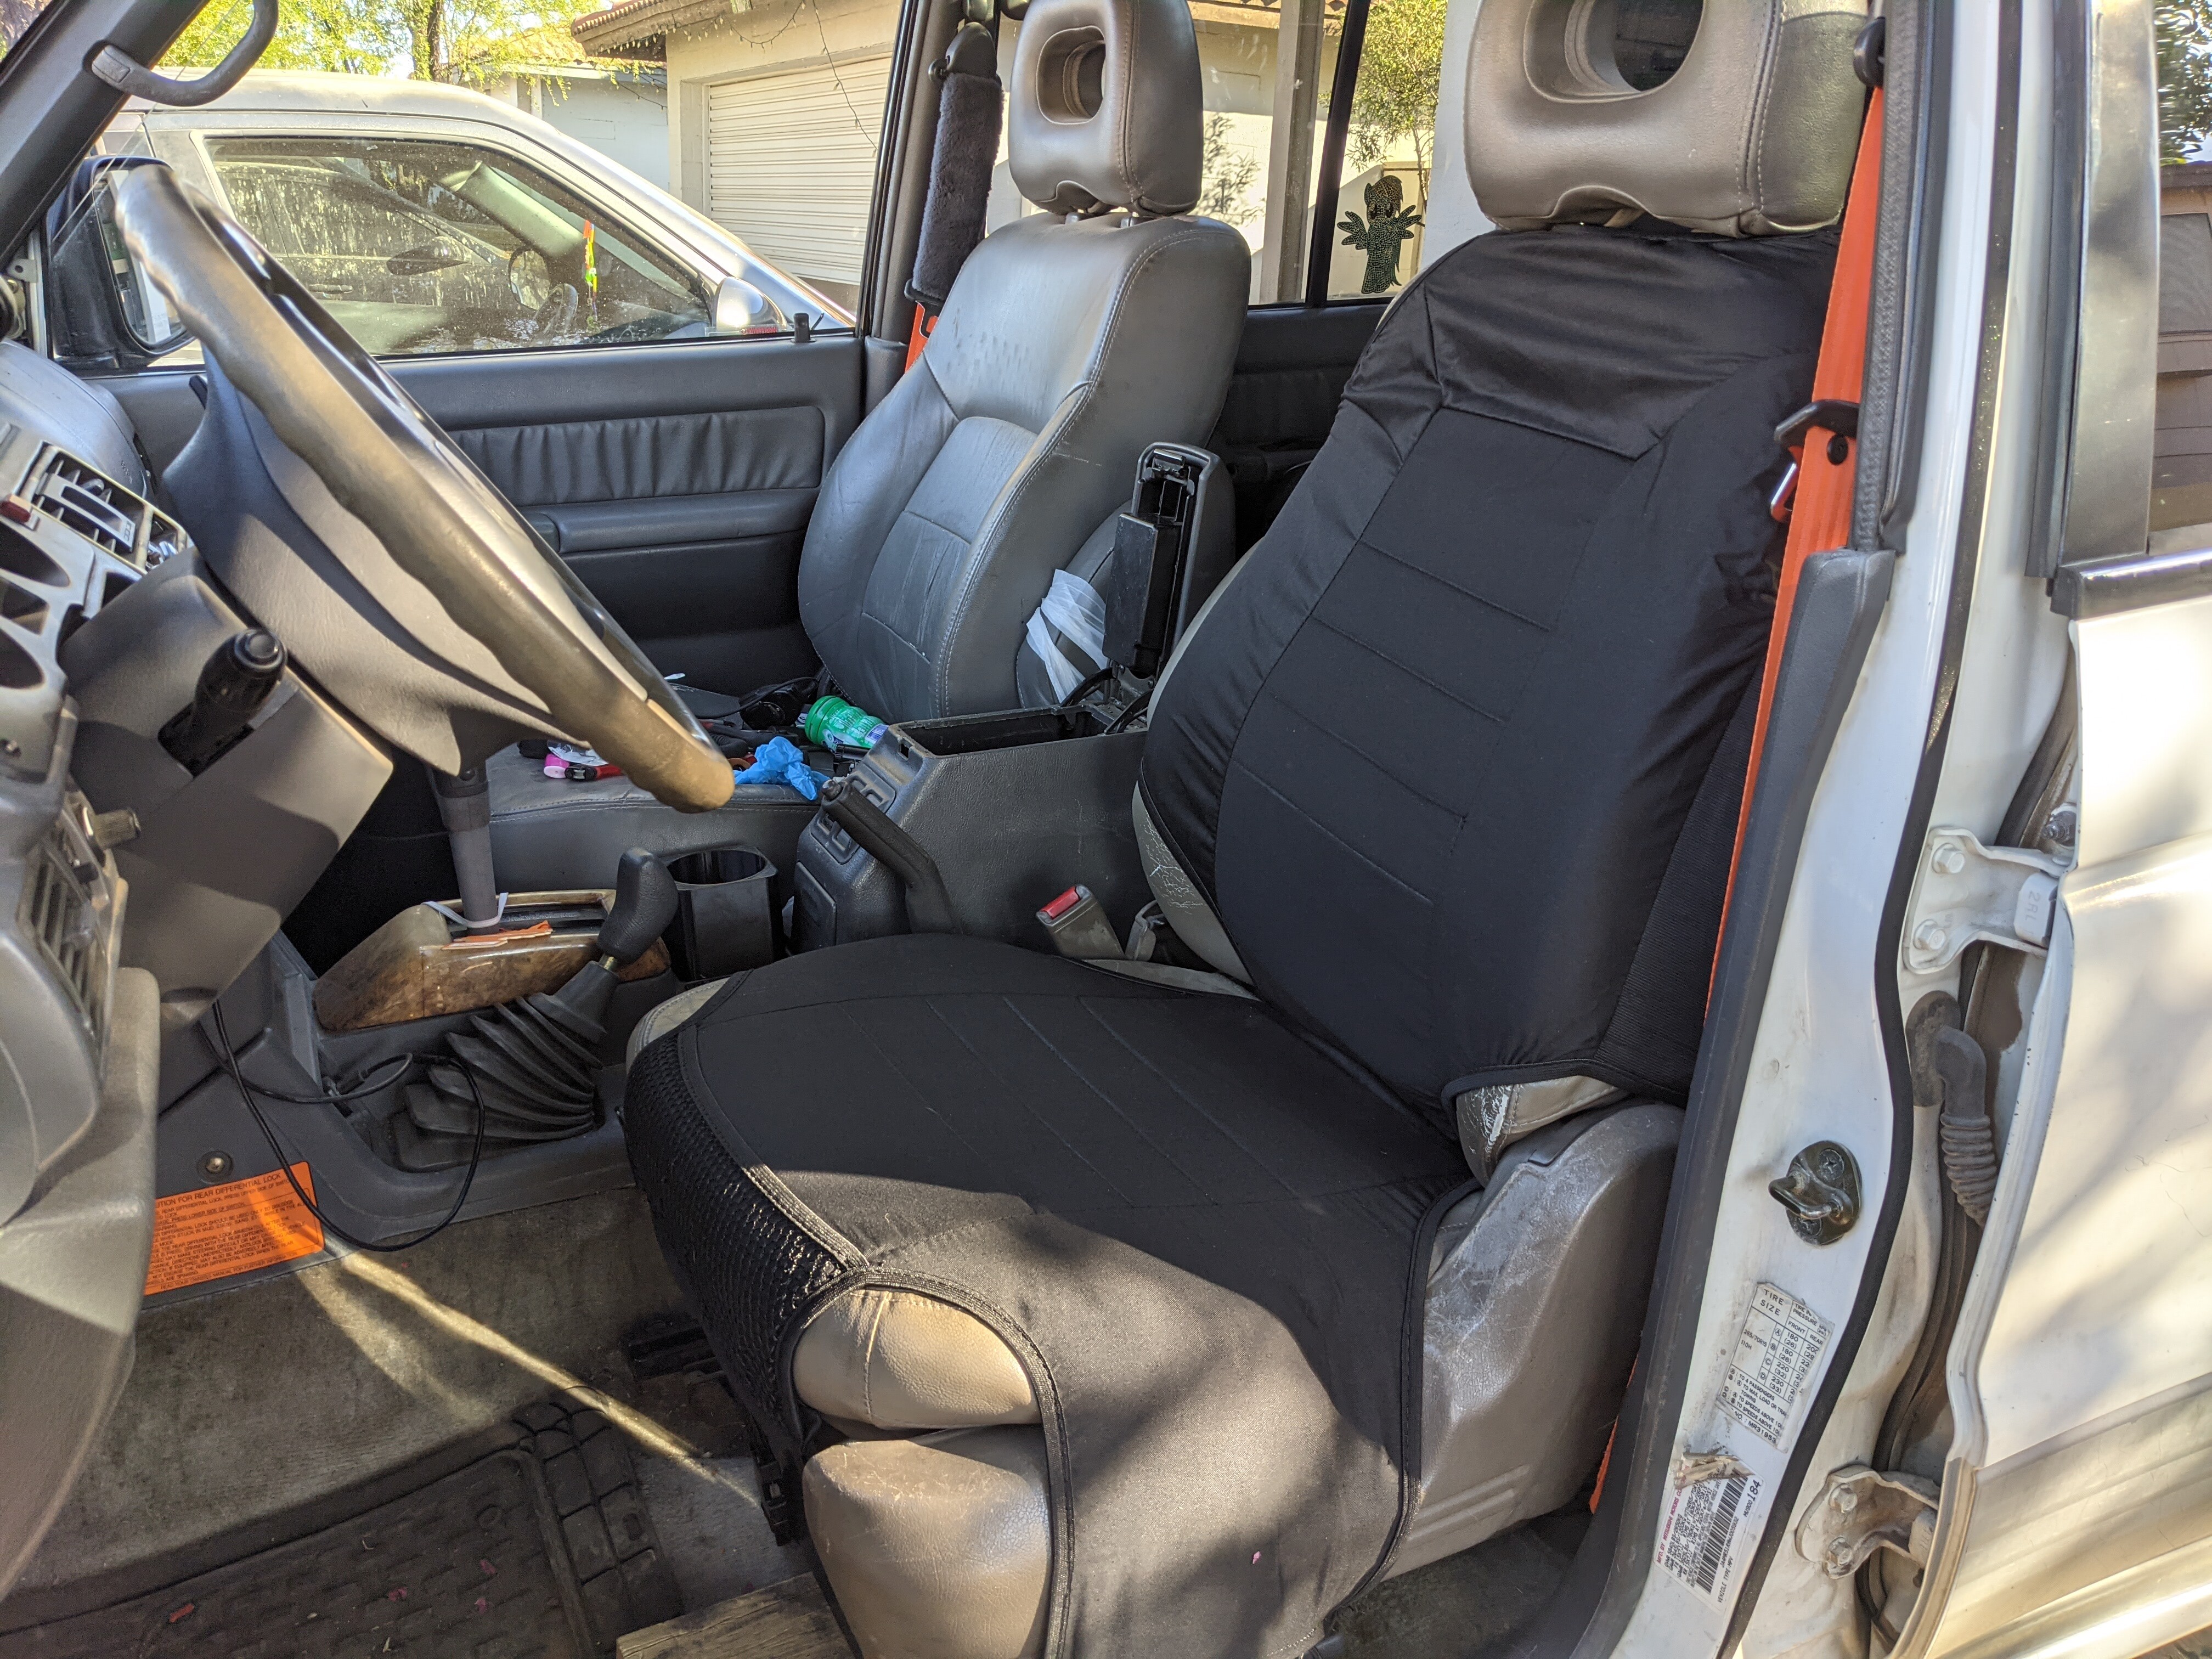
With the Noico installed, I set my sights on installing my new seat covers. I forget which brand they are, but they’re very solid and it took me a few tries to get them installed right. PS: I am SO tired of these shitty, power seats. Seriously thinking about set of Scheel-Mann seats, but damn. They expensive. Like $700+ each if I’ve heard right.
Covers look pretty good though. (Note: This one was NOT installed properly when I took this picture.) 
Oh! And years ago, when I was collecting kit for my failed rally car build, I bought one of these. I finally mounted it inside the center console. Neat!
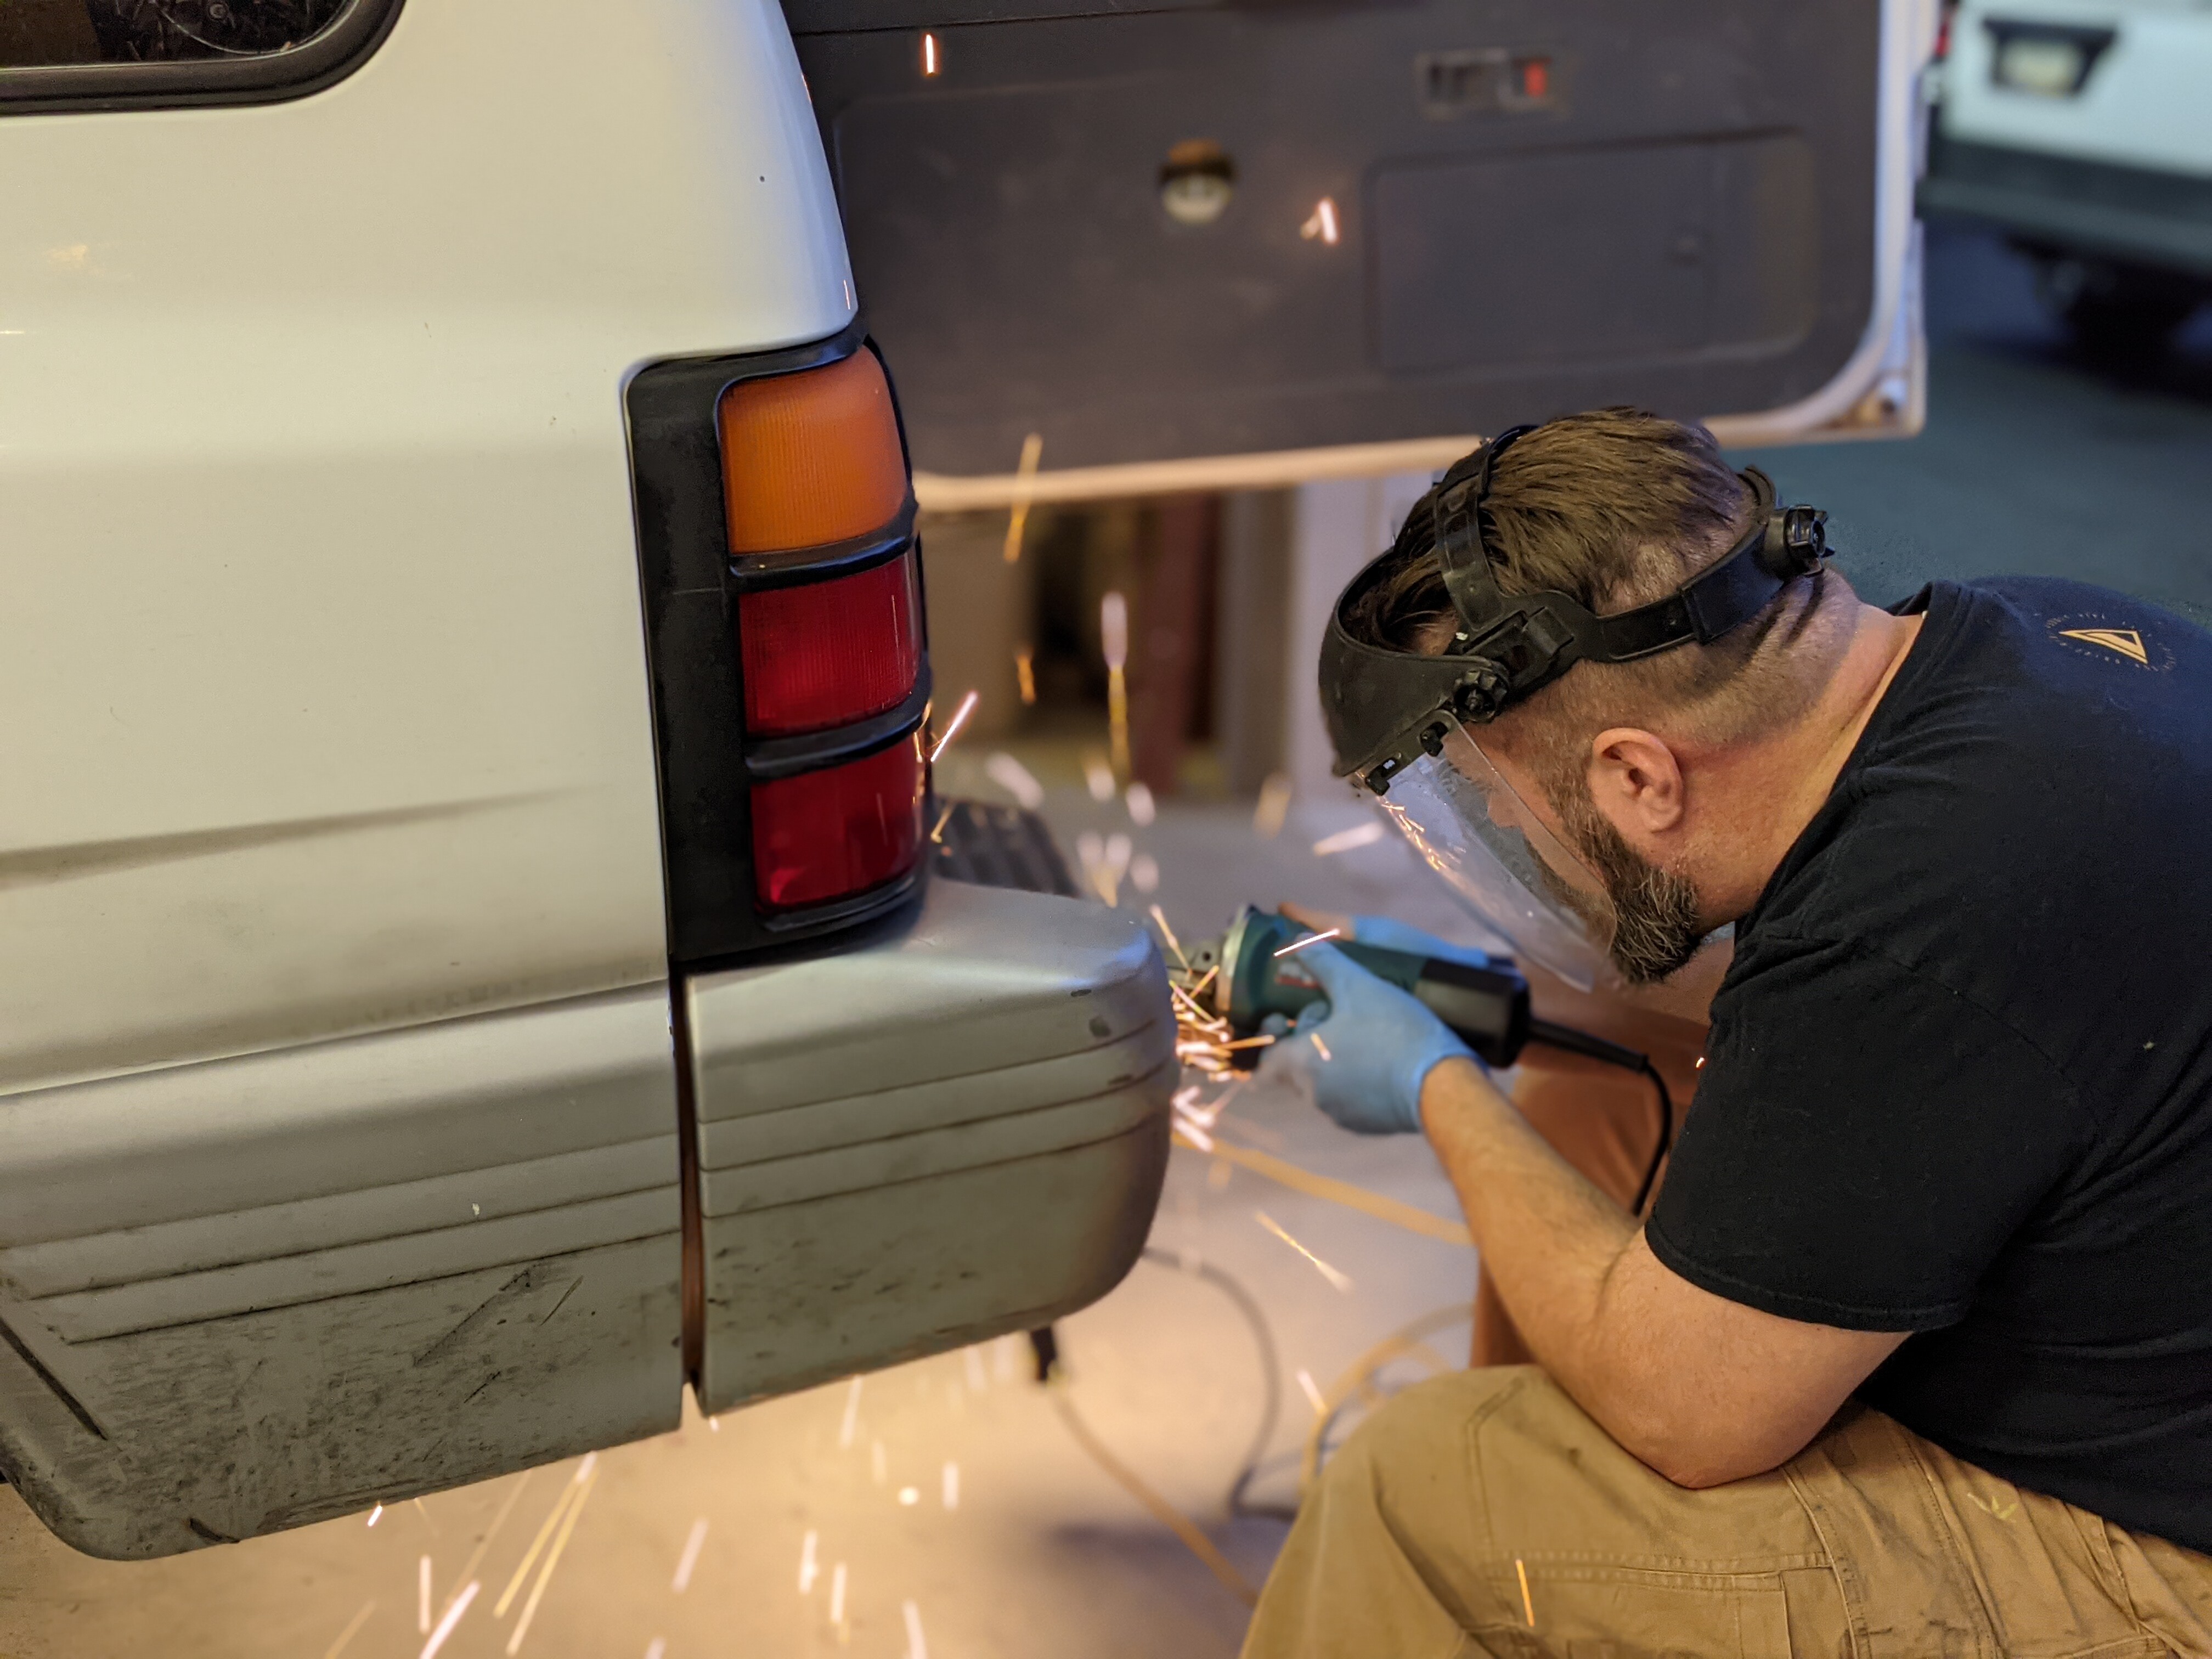
A few nights later, I was back at the shop, where I sweet talked @BradD into taking a picture of me while I was using an angle grinder to open up the holes to fit. Thanks, dude! (PS: I still have three Adventurist Life shirts in my closet. They’re nice.)
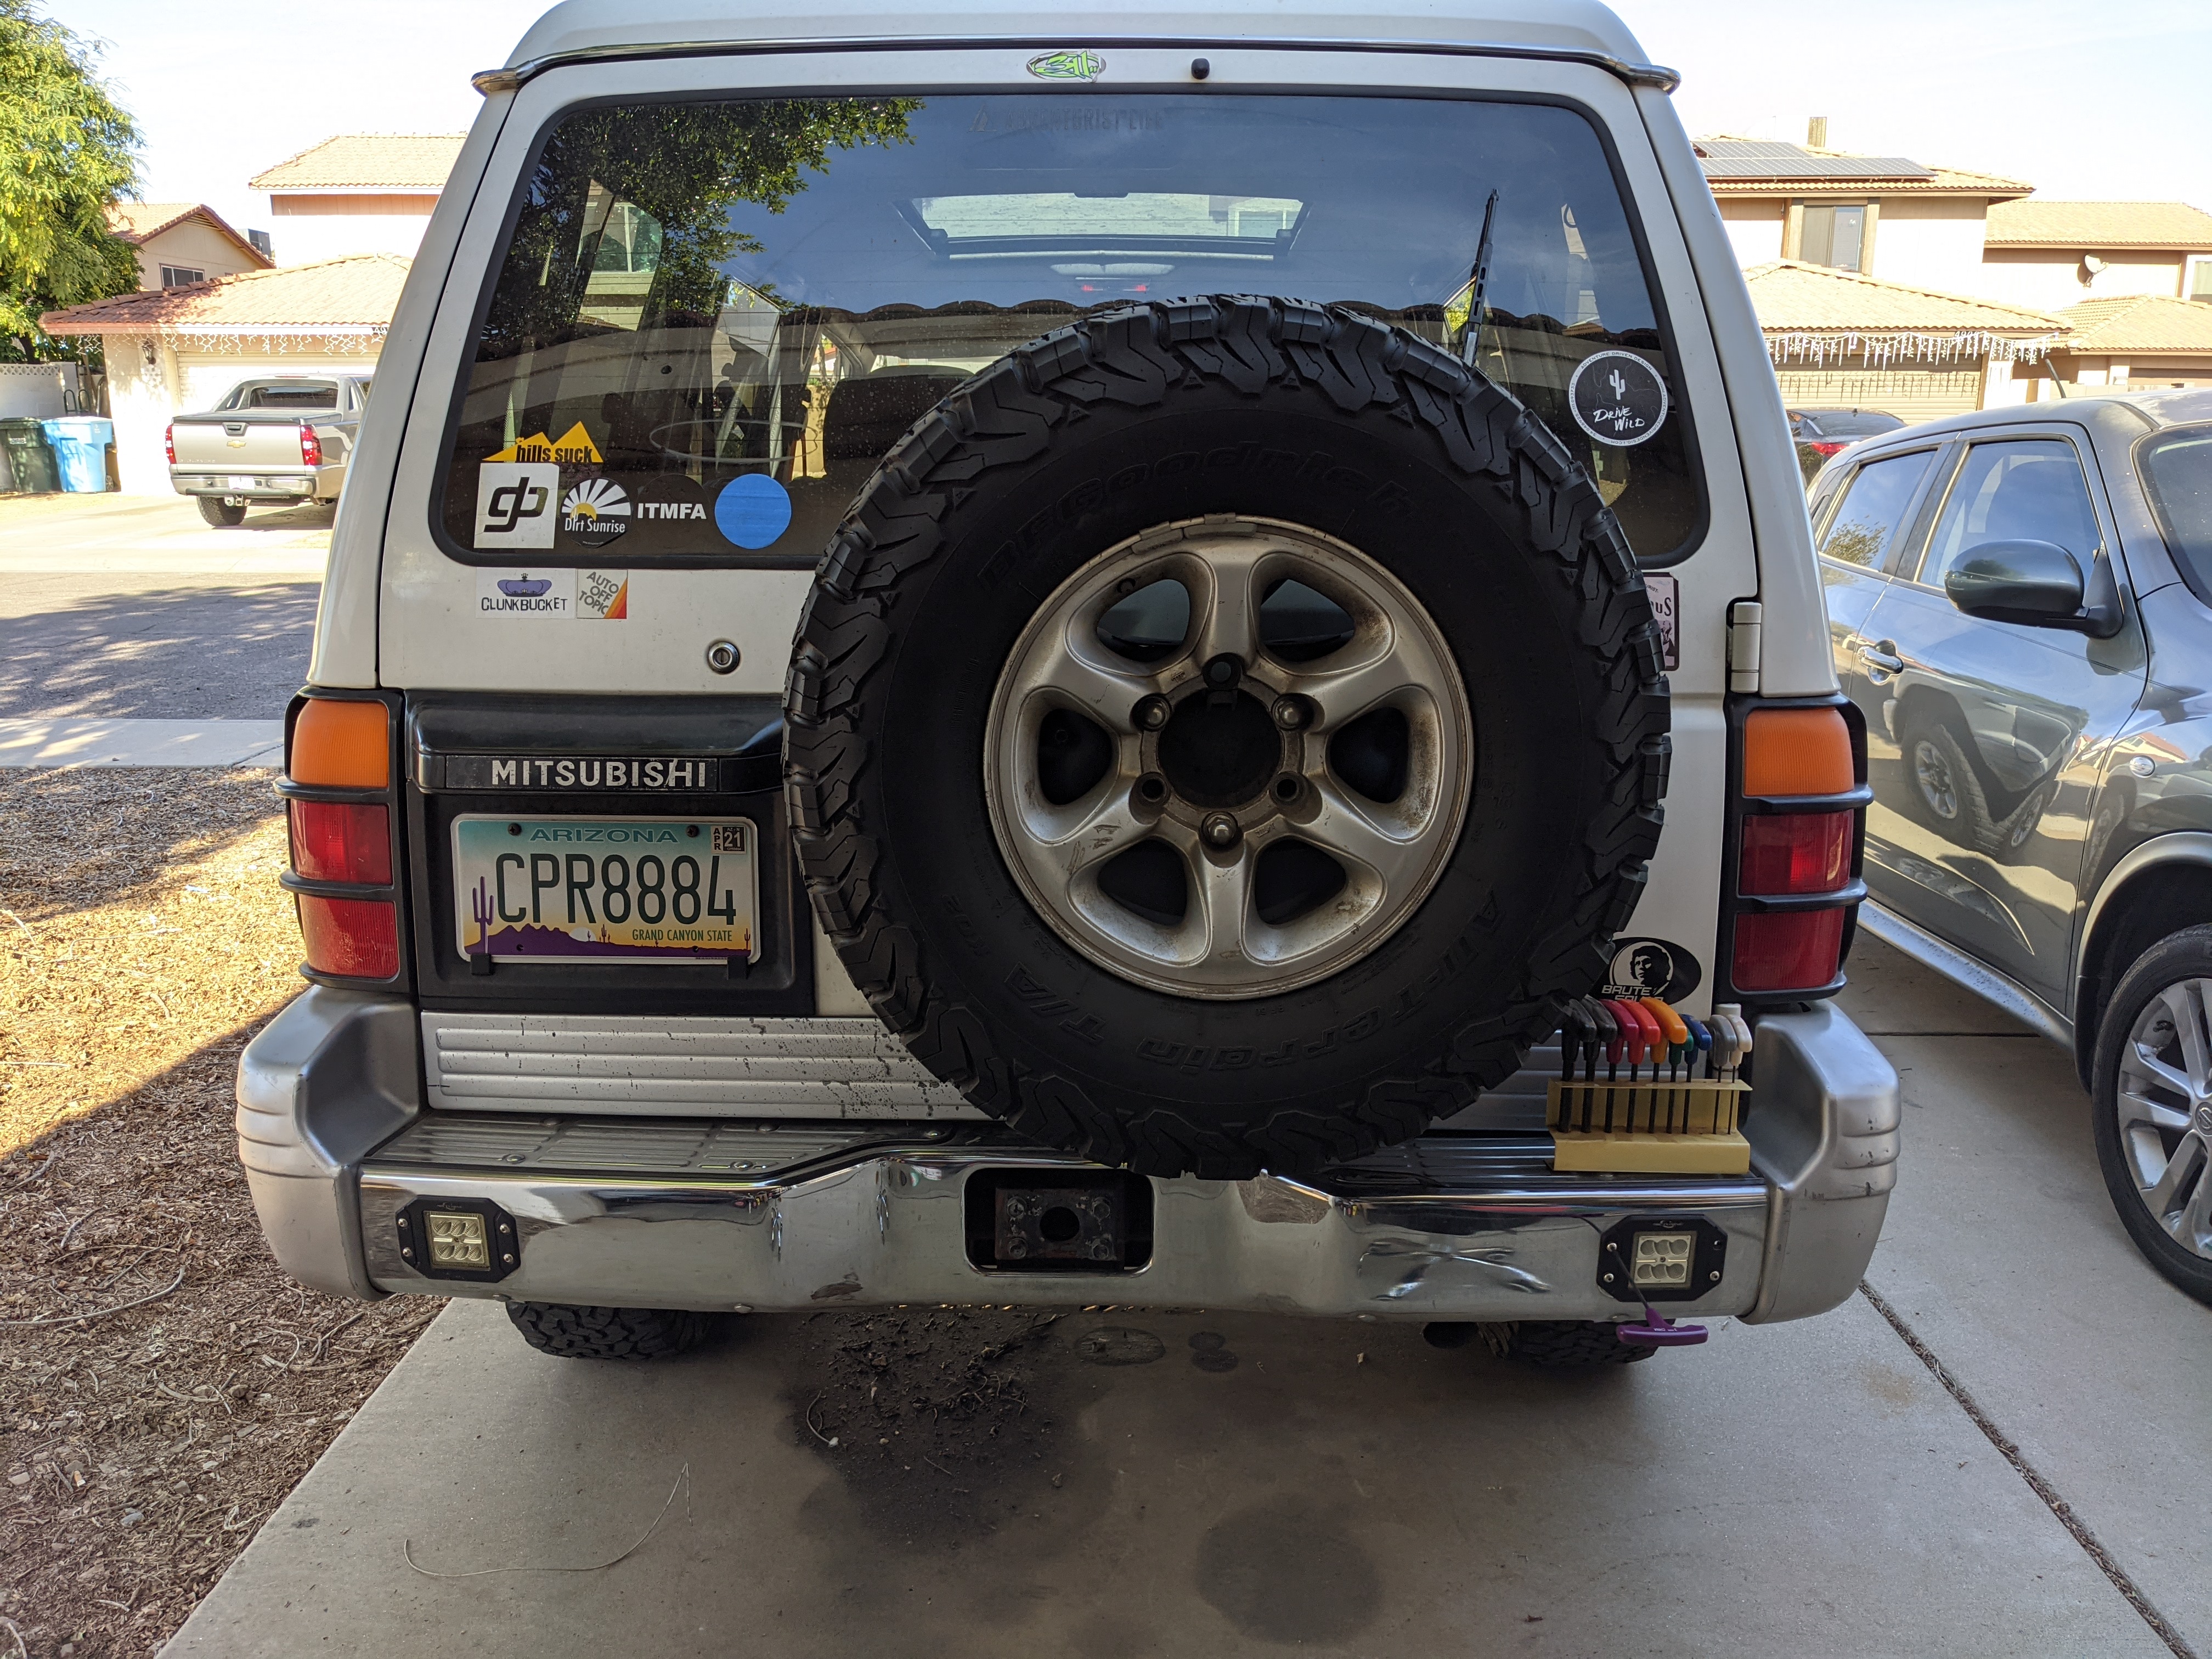
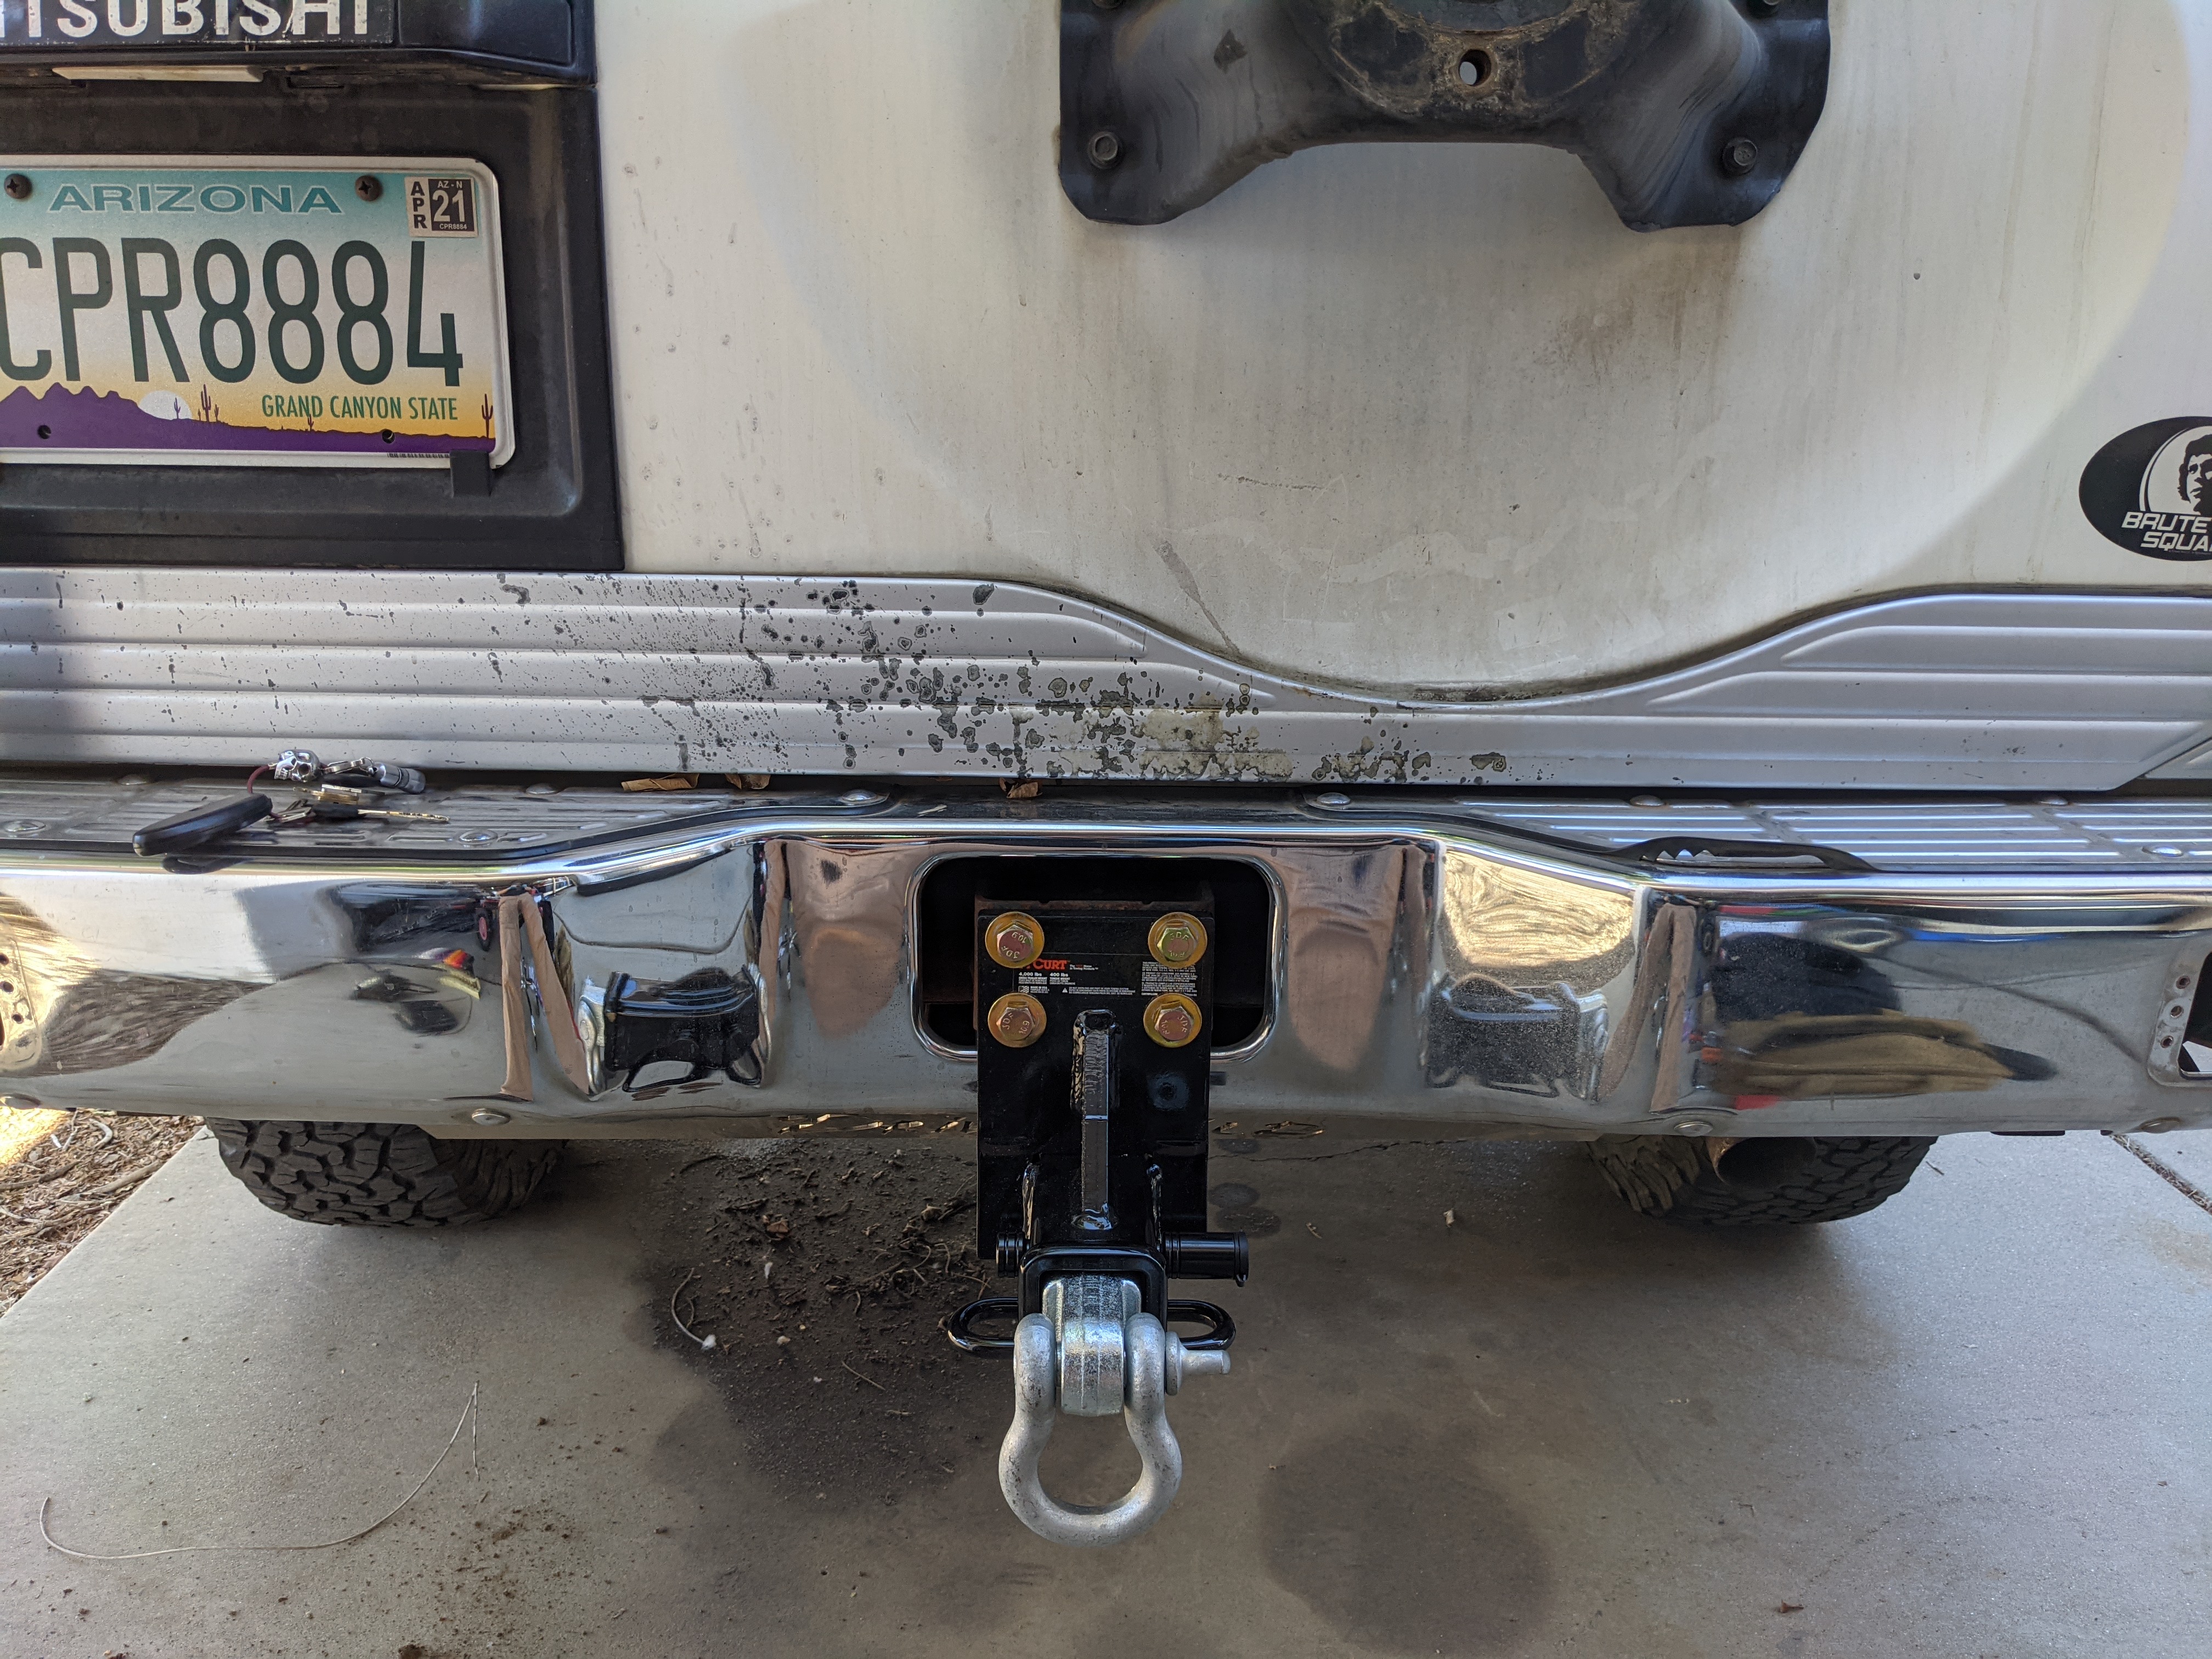
Did you notice my fancy new hitch two pictures back? It’s a Curt 13091 Class III receiver I found on Amazon. I paired it with the solid cast Warn 29312 shackle that Andy referred to as being somewhat Soviet. It’s not that big, but it weighs almost 7 pounds / 3 kilos. And it locks into the hitch with a Curt 23518 hitch lock.
Okay. I’m being called away from the laptop now, so I’ll have to resume later. 
Okay now. Where was I…?
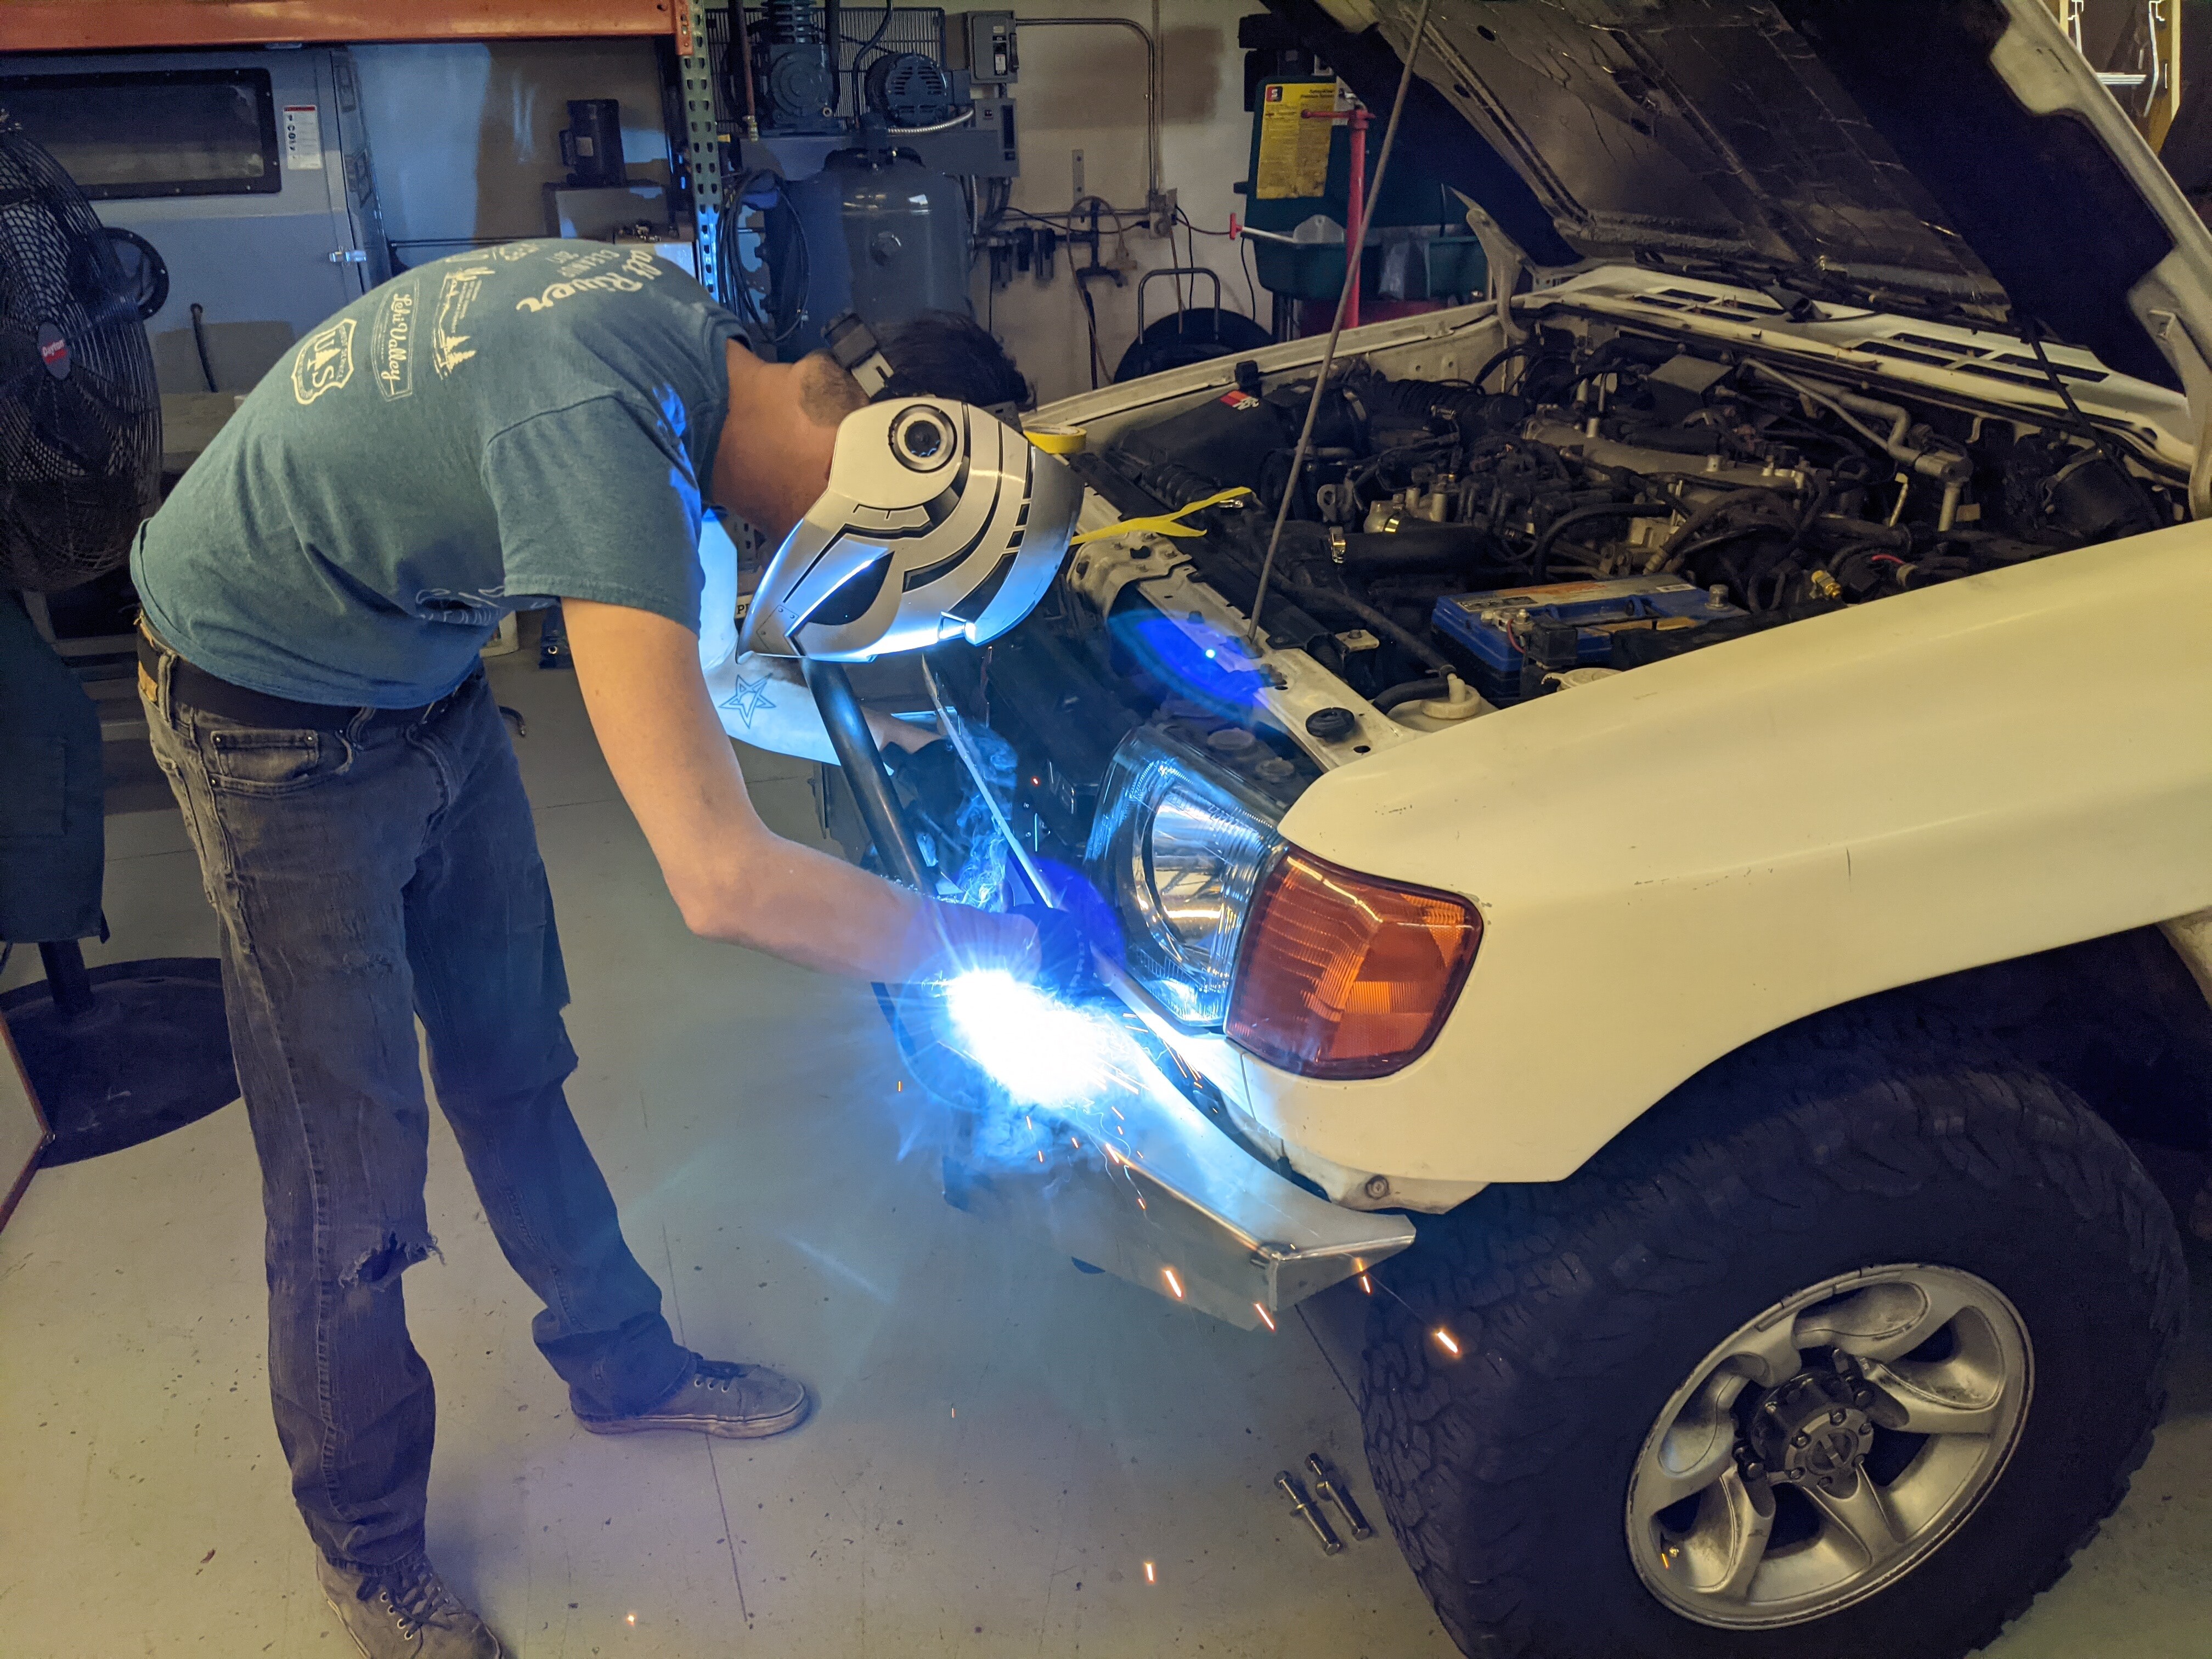
Oh yeah, so it’s now 12.08.2020 and Josh has started tacking the ADD bumper together on the front of the truck.
Meanwhile, I’m at the rear, still grinding away. PRETTY SPARKS.
For some reason, I forgot to check bolt hole alignment when I test fit the light on this side. I can only get three of the bolts in. The lower left is just a hair off.
With the front bumper tacked up, Josh moved it outside to a table for proper welding. I’d wanted to do some of the welding myself, but we just didn’t have the time. (Notice Pacific Coast Blue and Brad’s Colt in the background. They dropped by to hang out for a bit.)
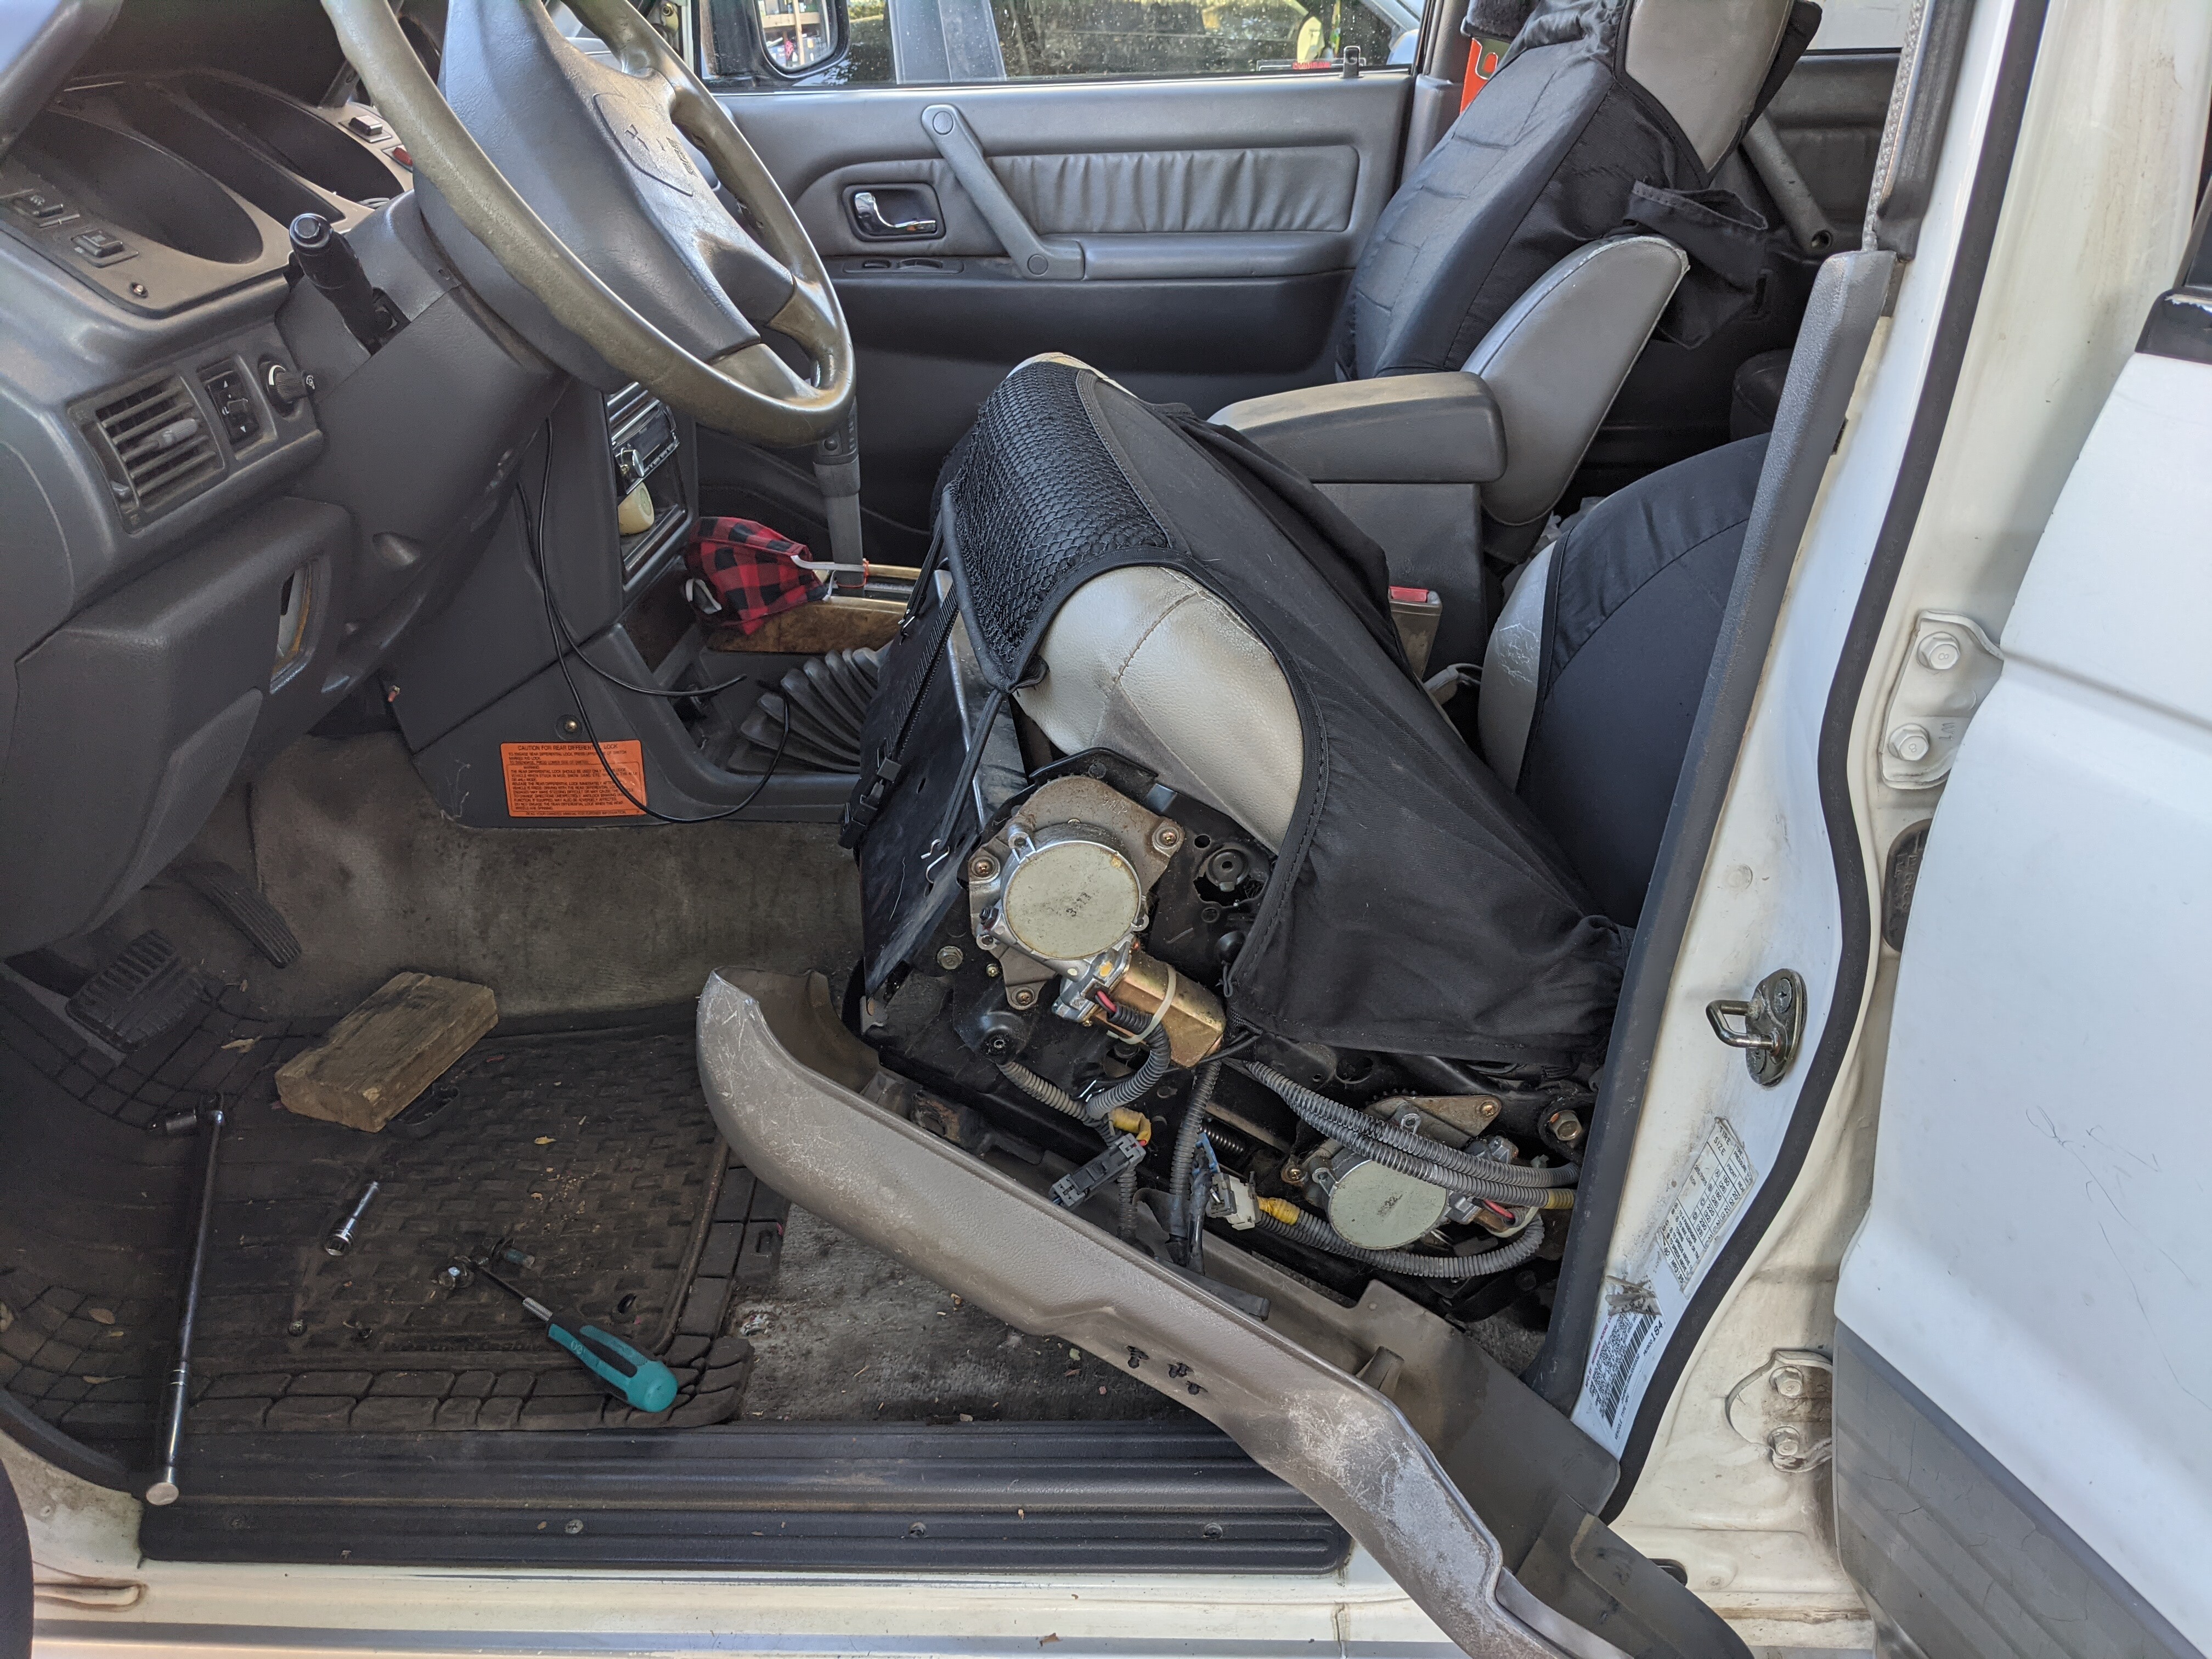
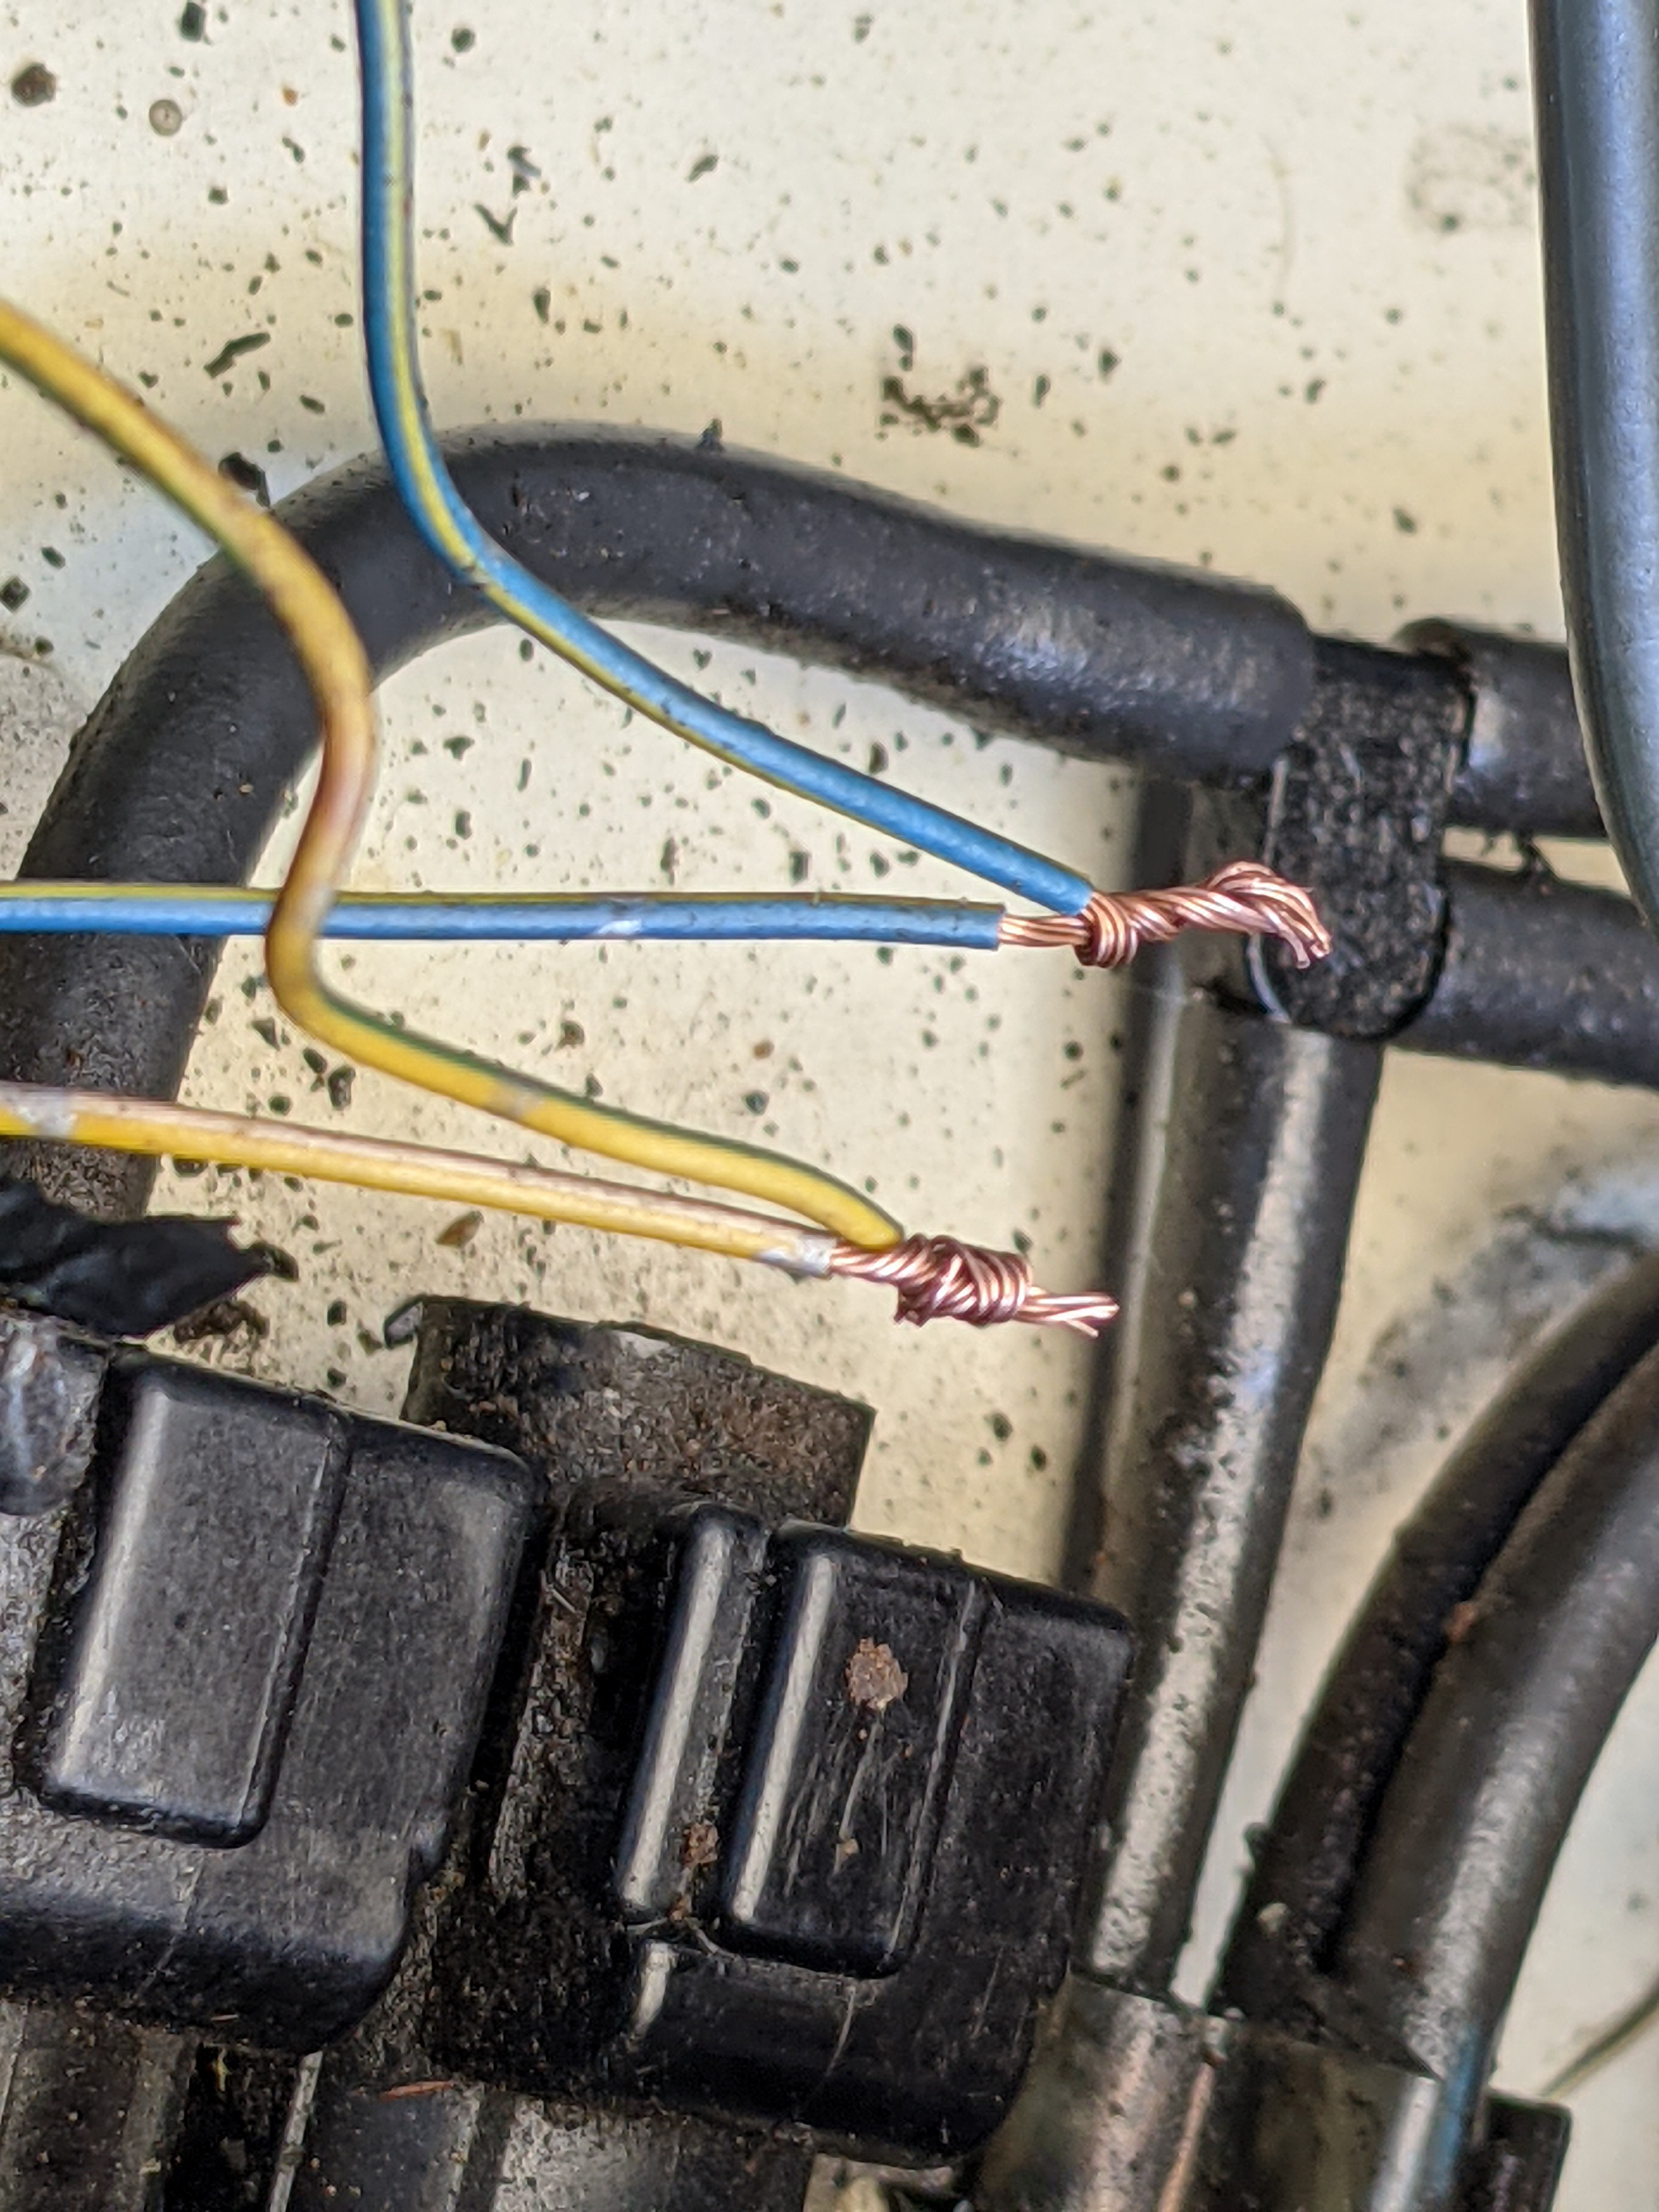
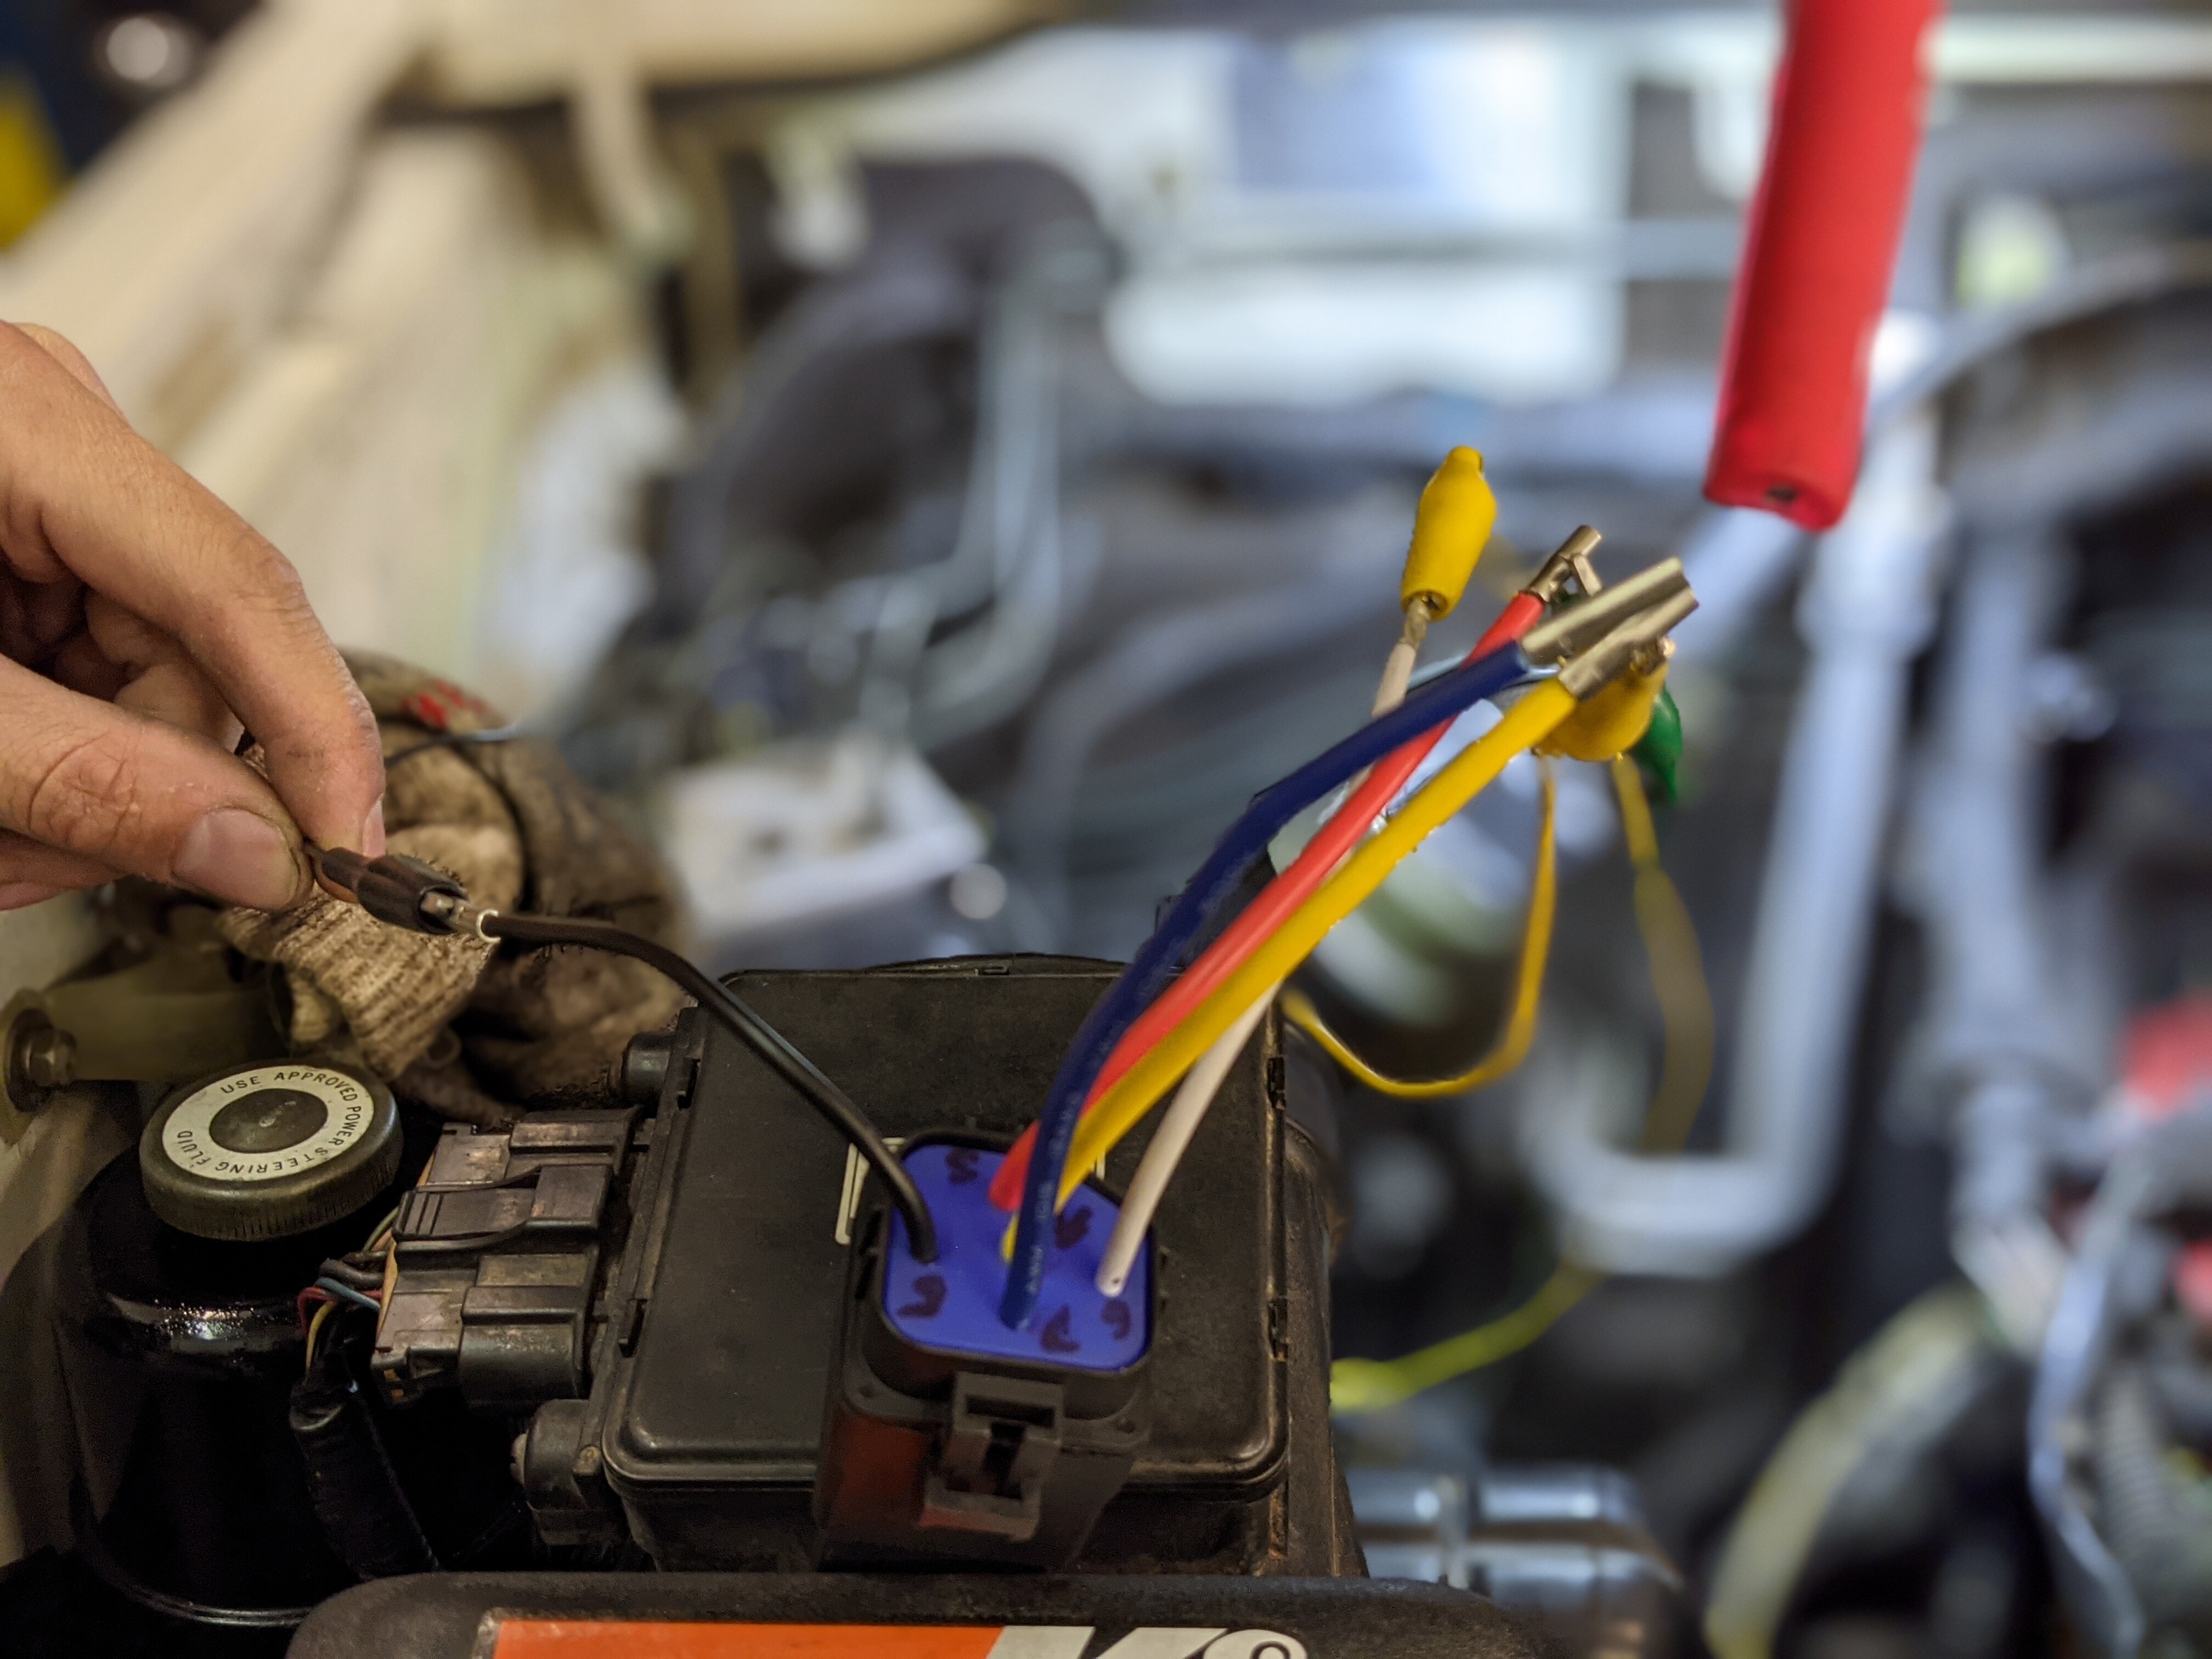
Switching to a non-disconnect front axle meant I had to either do a little wiring so the PCM would know when I was actually in 4WD and retain functional ABS—or live with constantly blinking front indicator lights in the cluster and no ABS on the trail.
After reading a couple threads on the ADD forum and beyond, it was clear that, Kurek was the expert on the subject. Unfortunately, while his instructions were simple, he didn’t have pictures. So I started cutting and splicing the wrong wires. #rookiemaneuvers
These are the wires going to the solenoids under the air cleaner.
Ernest confirmed that this guy, dangling behind the axle, used to be connected to the front axle disconnect switch that no longer existed. THOSE were the wires I needed to splice through a relay.
12.09.2020
Josh had the pieces to add Jeep “stinger-type” bars to the bumper. The main hoop looked awesome, but the shorter supports that connected to the hoop would have blocked the headlights, so we just put the hoop on.
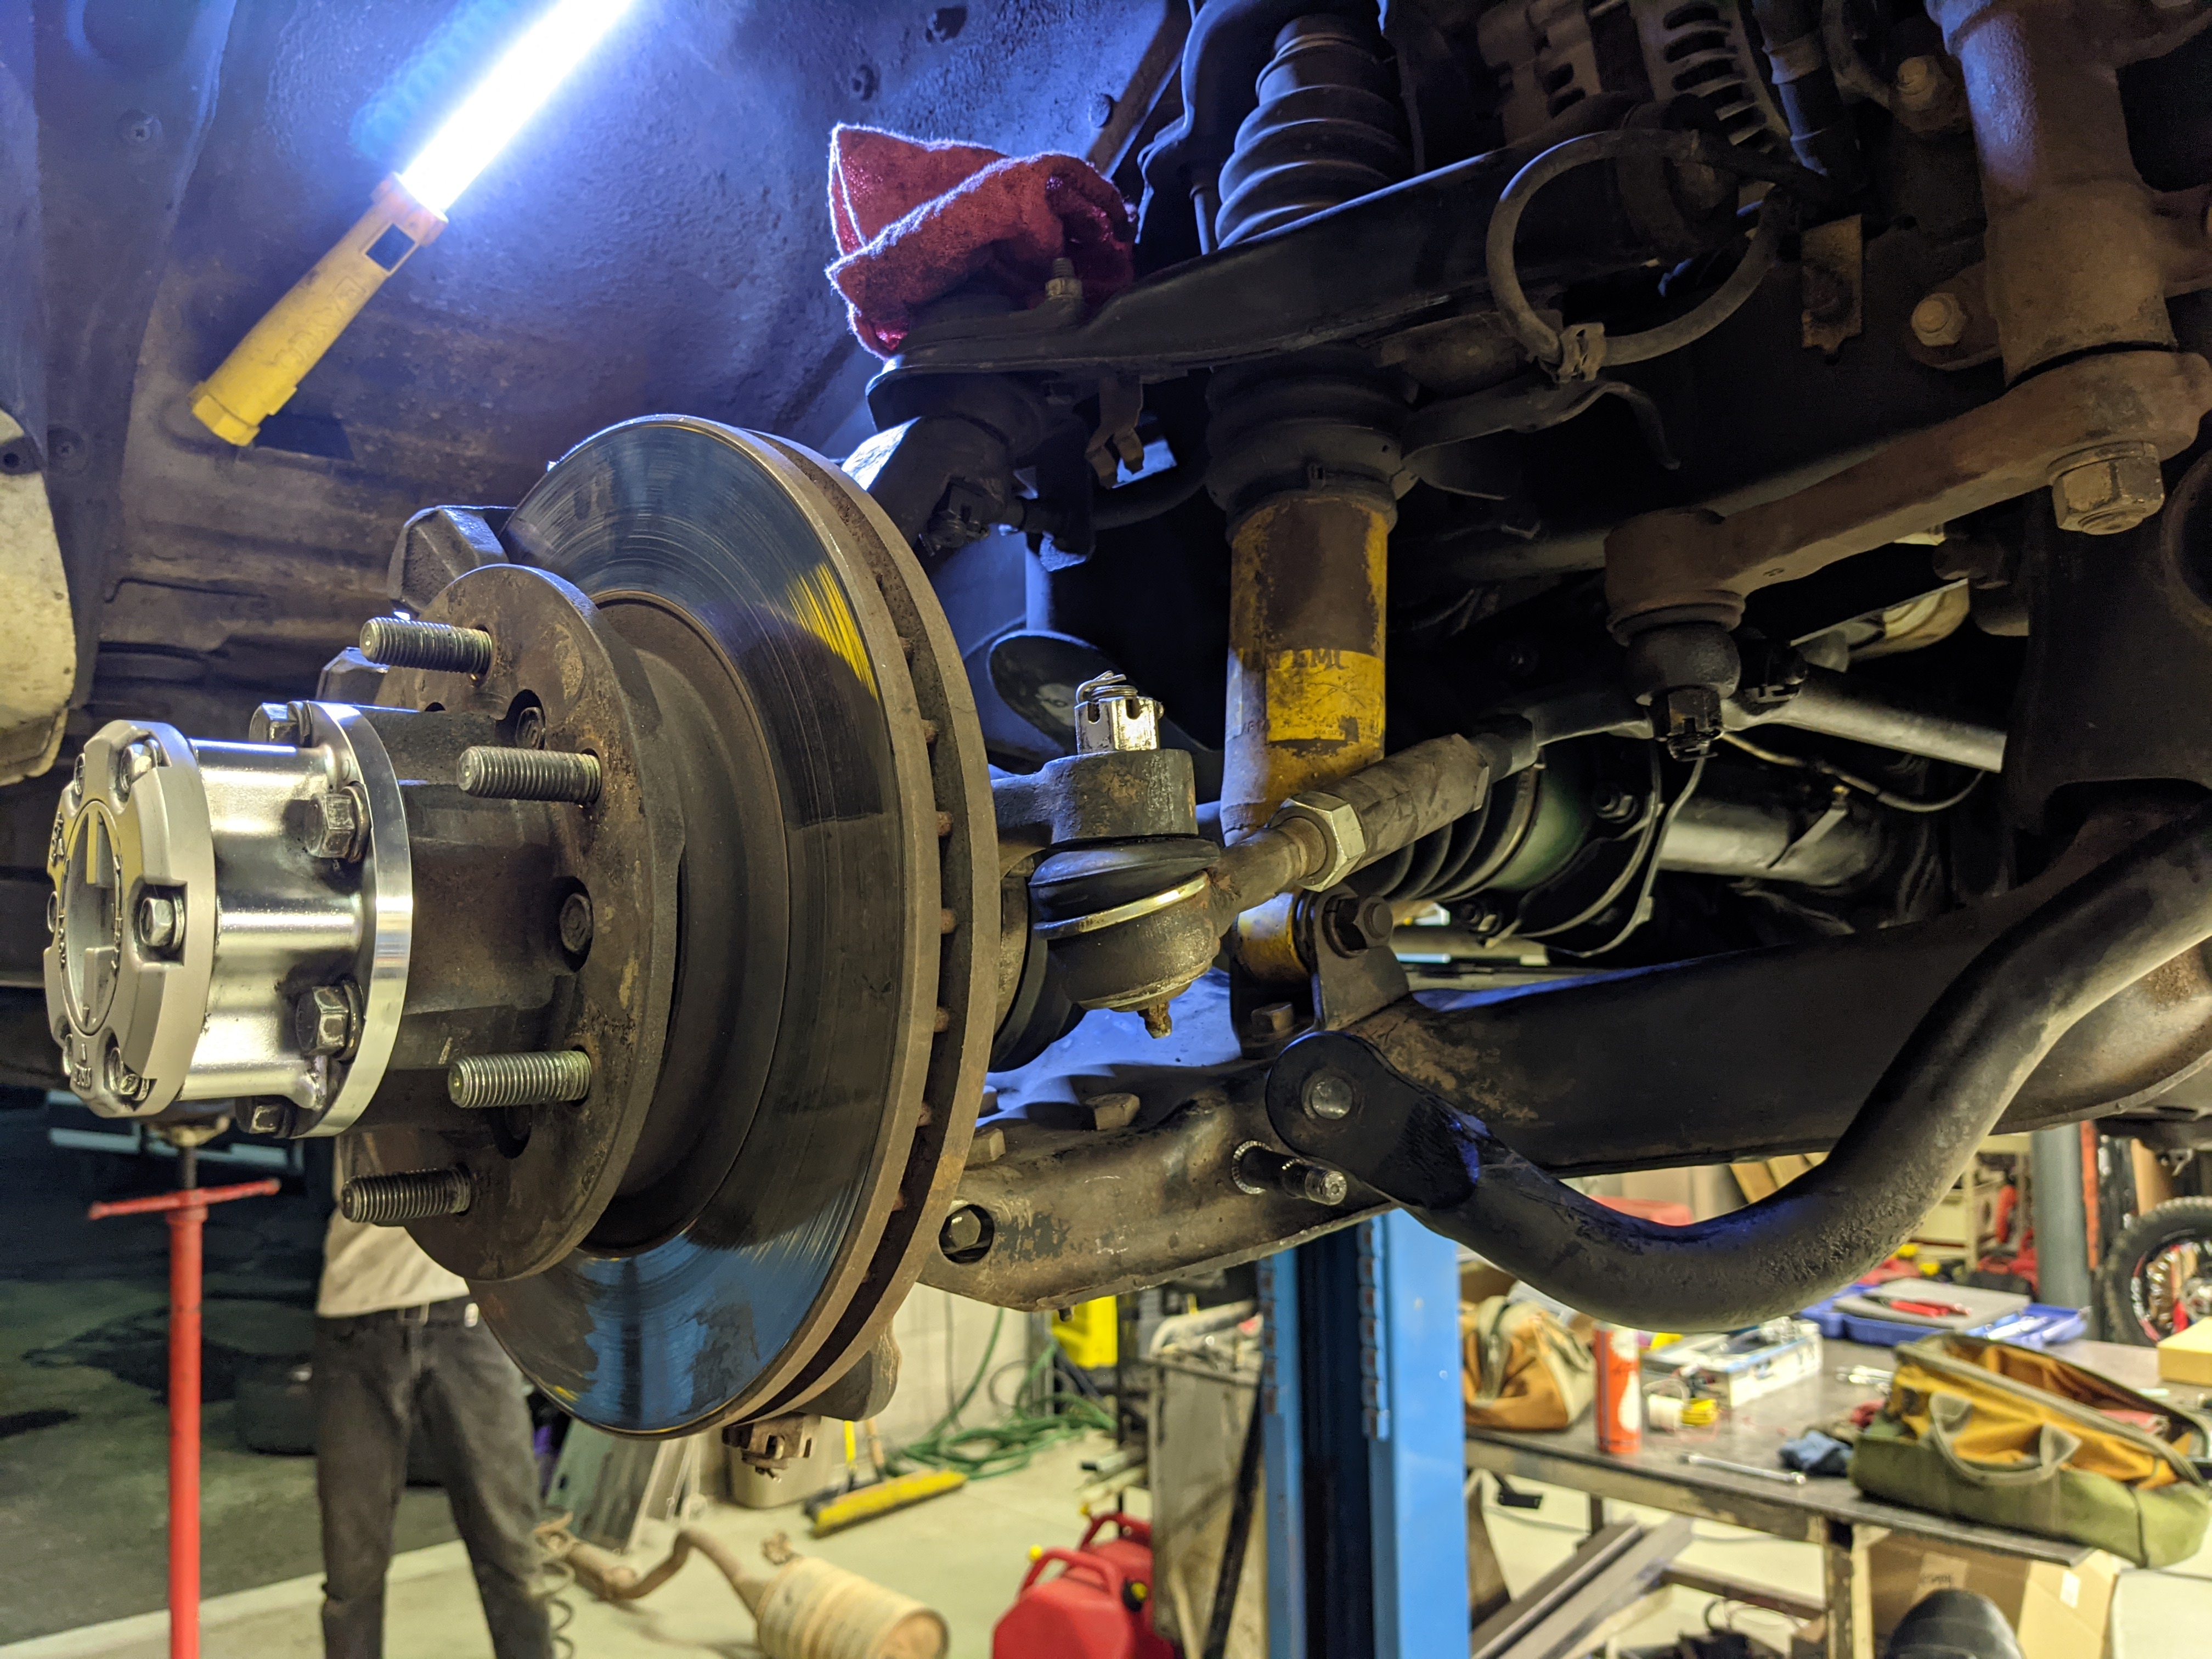
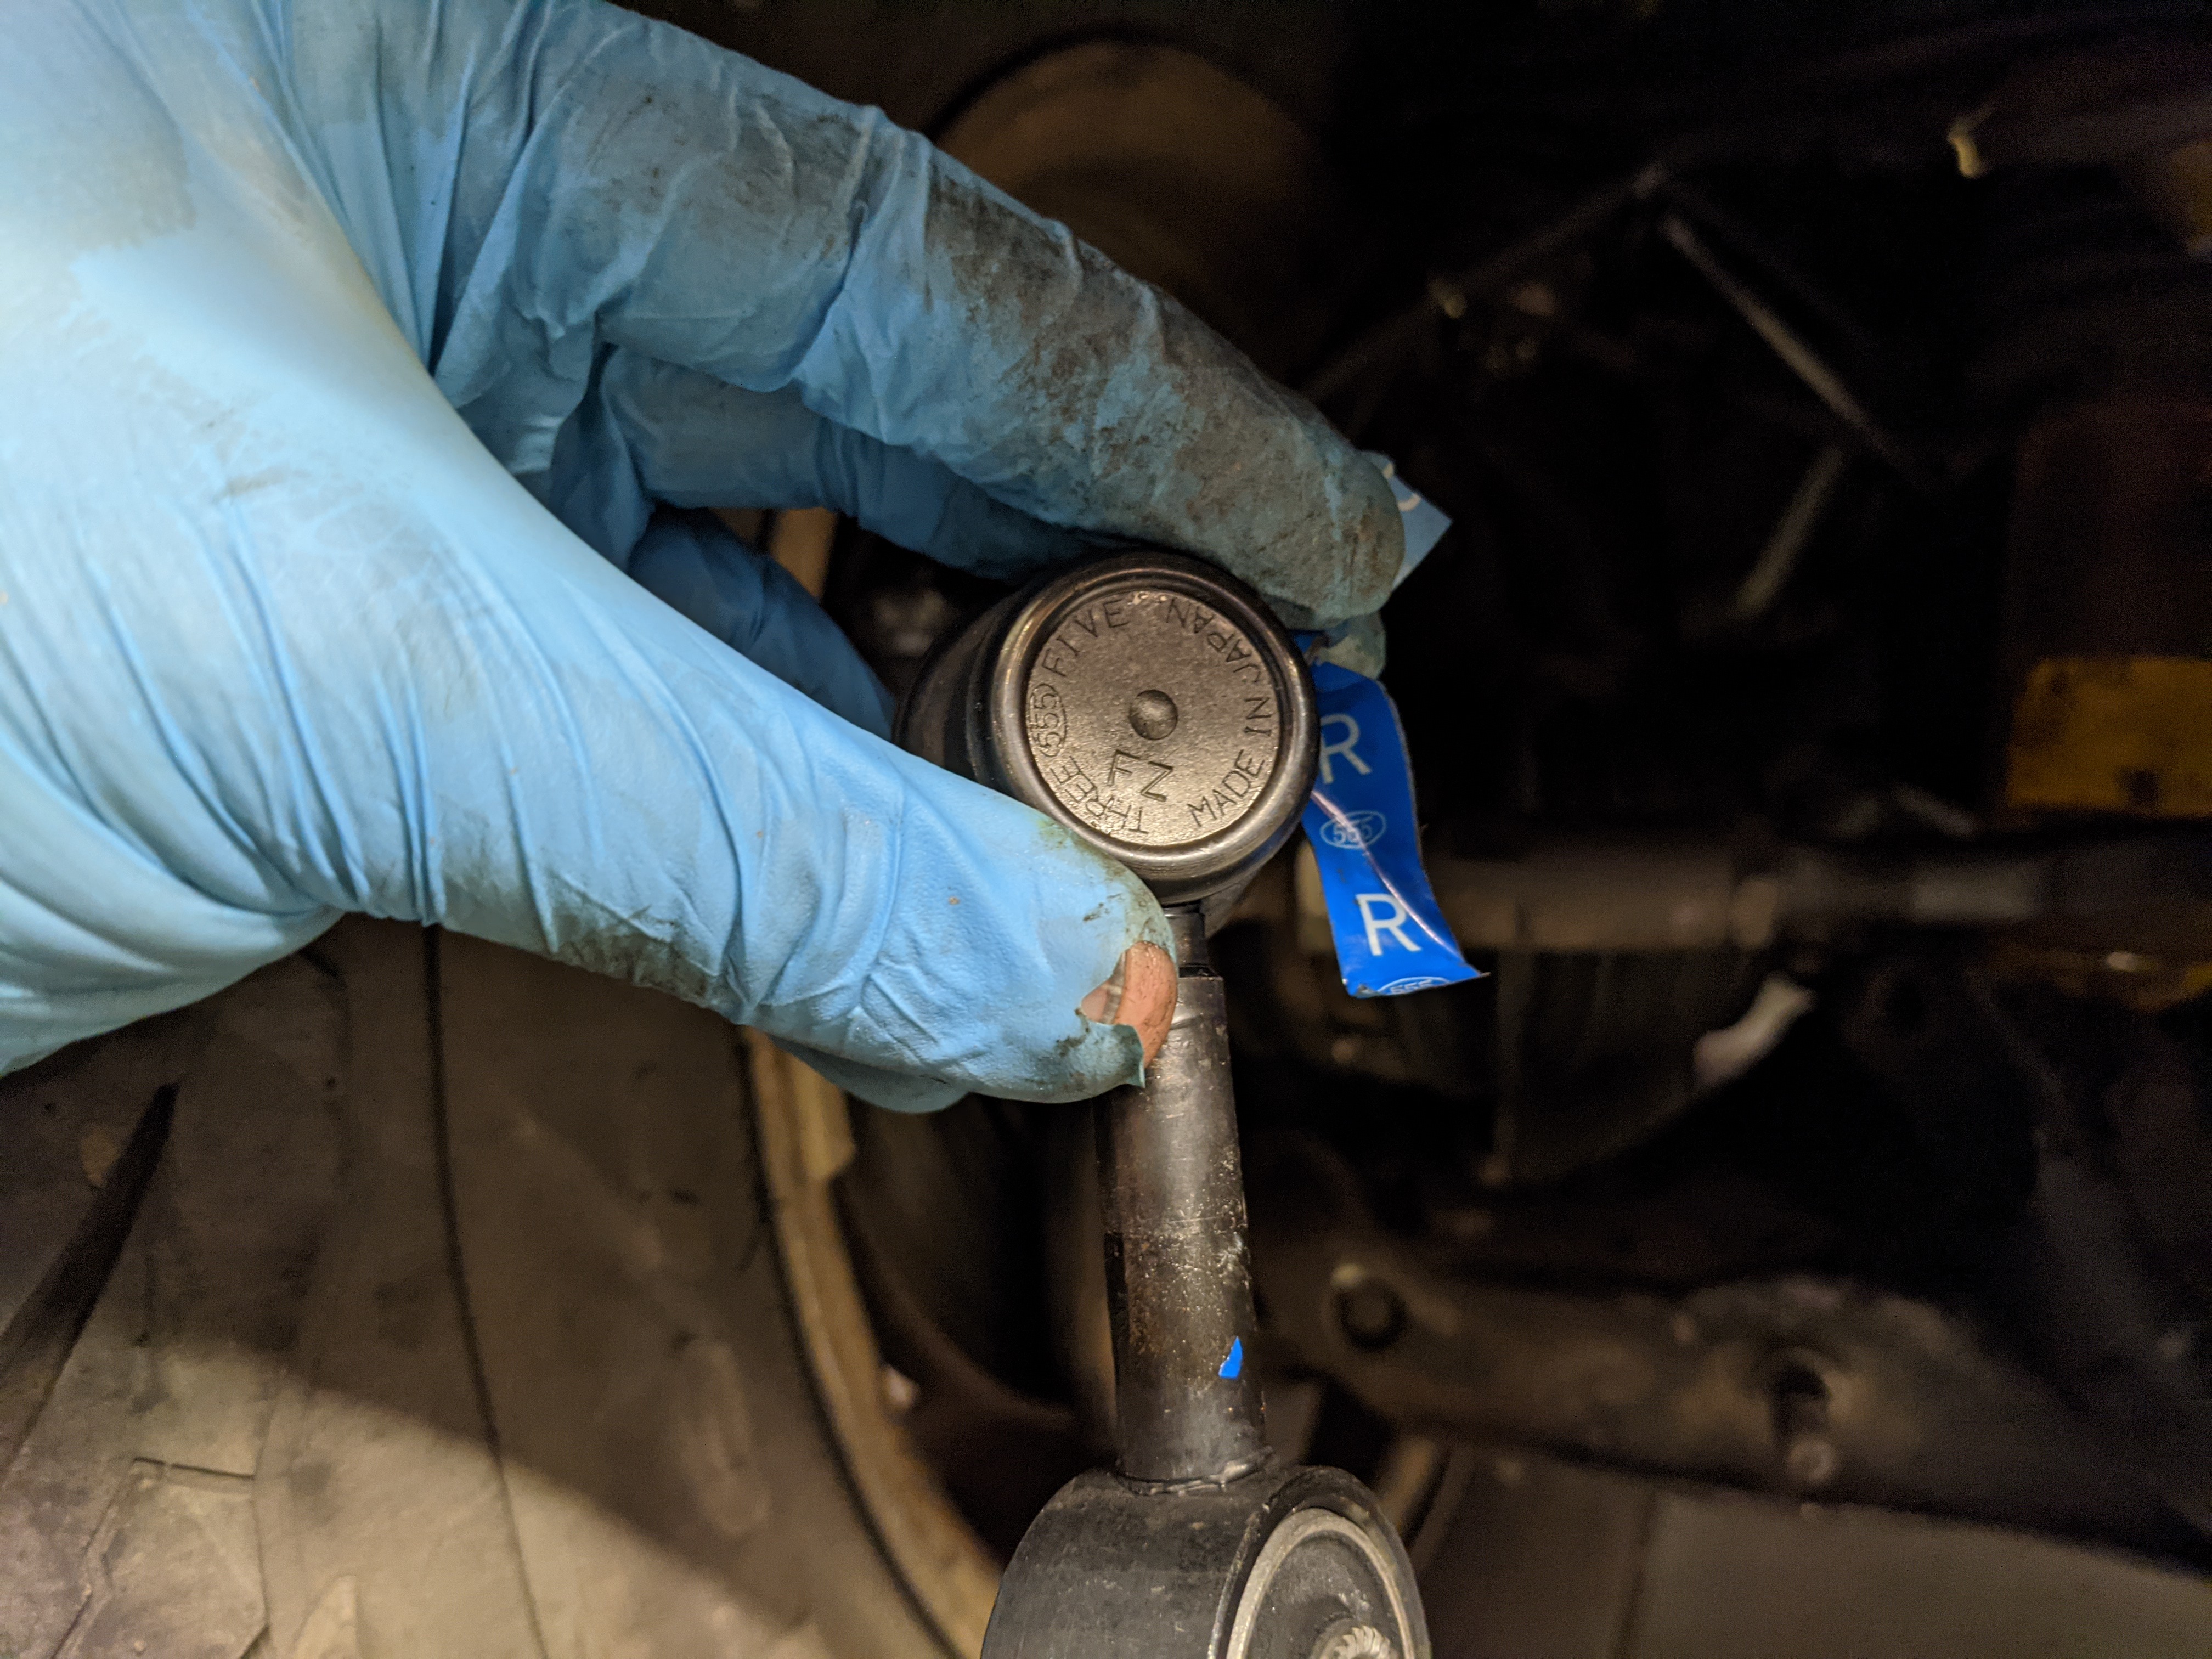
My front swaybar end links were shot and creaking. Thinking they might be the noise I thought was my lower control arm bushing, I bought new ones. Of course, I had to buy them from two different sellers on Amazon, and both ended up being the same part (driver side), so I had to return this one. Note the “Three Five” stamping. Made in Japan, baby.
Alright, so it was getting late, we were all getting a little batty. Brother Keith had spent the evening in the other bay trying to troubleshoot cam angle sensor issues on a GVR4—to the point he made his own harness to bypass the engine harness and test individual pulses to the ECU. Josh and I fiddled around with the axle disconnect wiring project.
This is what that kinda looked like, as we connected wires, shifted into/outof 4WD, and checked dash light behavior until things worked the way they were supposed to. We triple checked our notes once we had it sorted and Josh wrote things down so we can save everyone else the headaches.
Why I don’t have a picture of the final product concerns me. My lights still blink on me now and then, suggesting the connections aren’t that great, but I’d like to be sure we’ve got things documented somewhere.
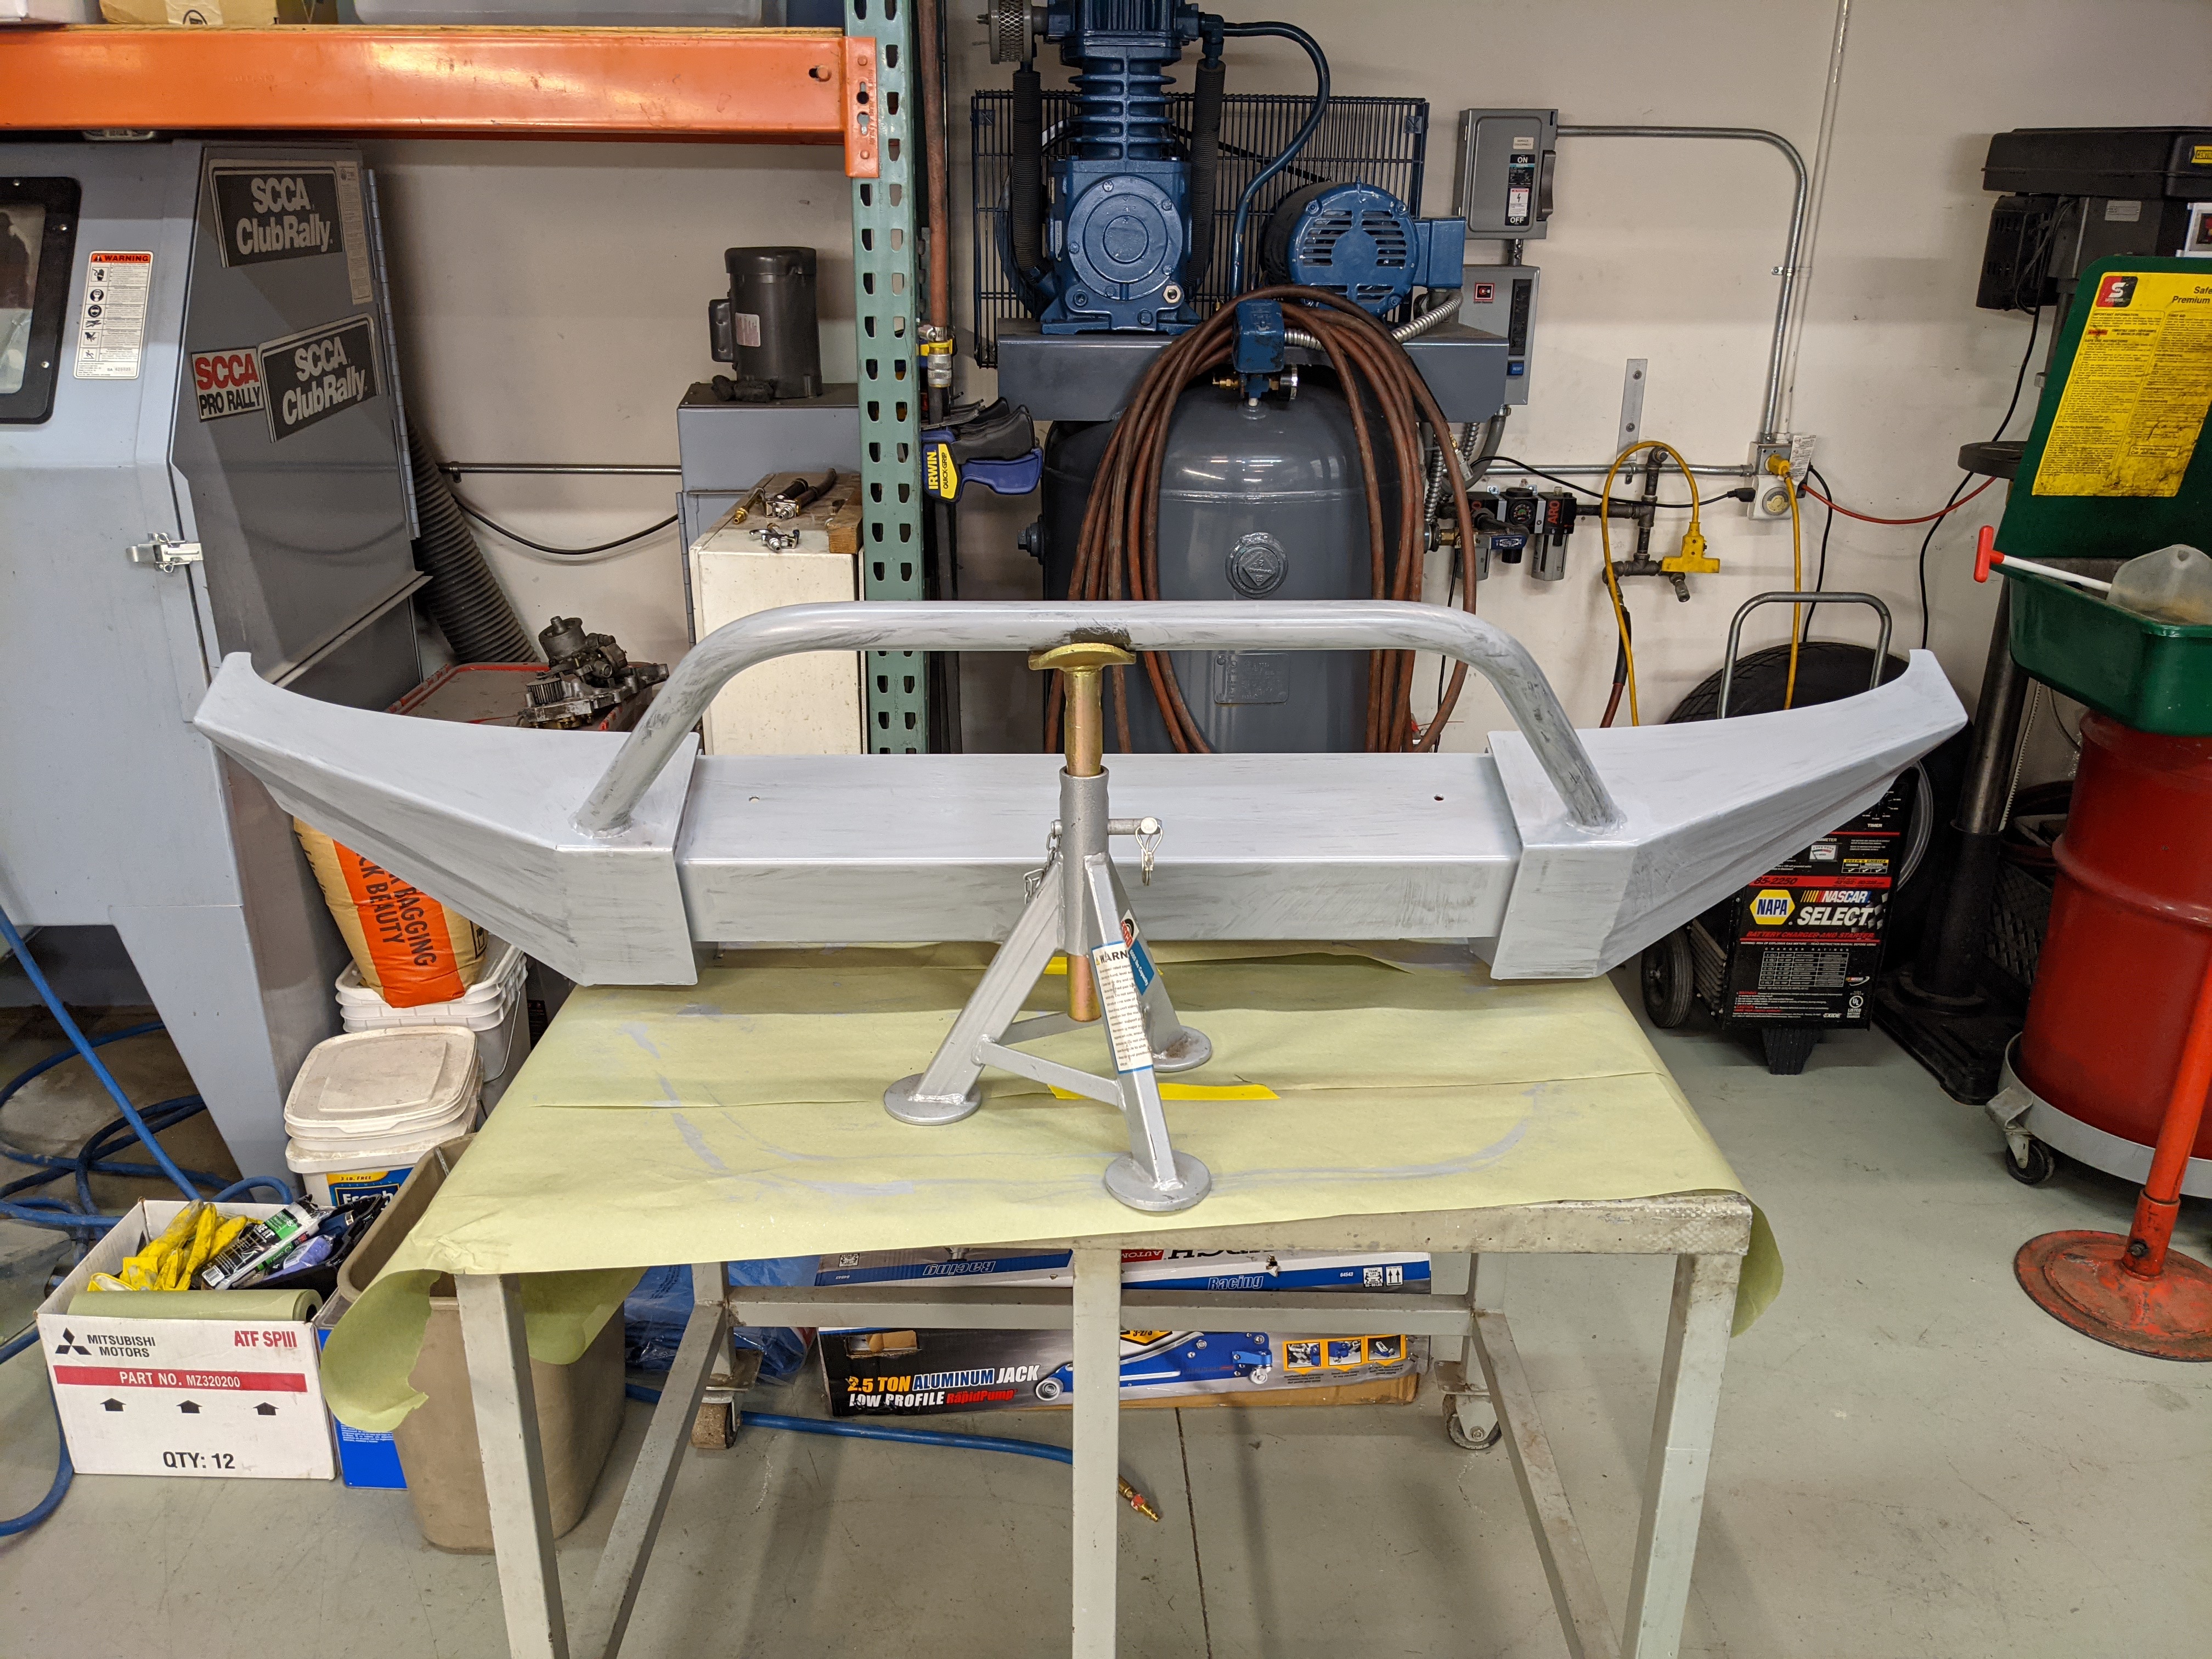
Anyway, we mixed up some paint, trying to kinda match the silver in the lower body stripe for the bumper. It turned out pretty good.
Next day…
We decided the paint needed more time to cure before we tried installing the bumper, so we left it at the shop. The next day, Josh rolled it out into the sun and applied a couple more coats. I showed up after work to get it installed. A mini photoshoot followed because that sunset.
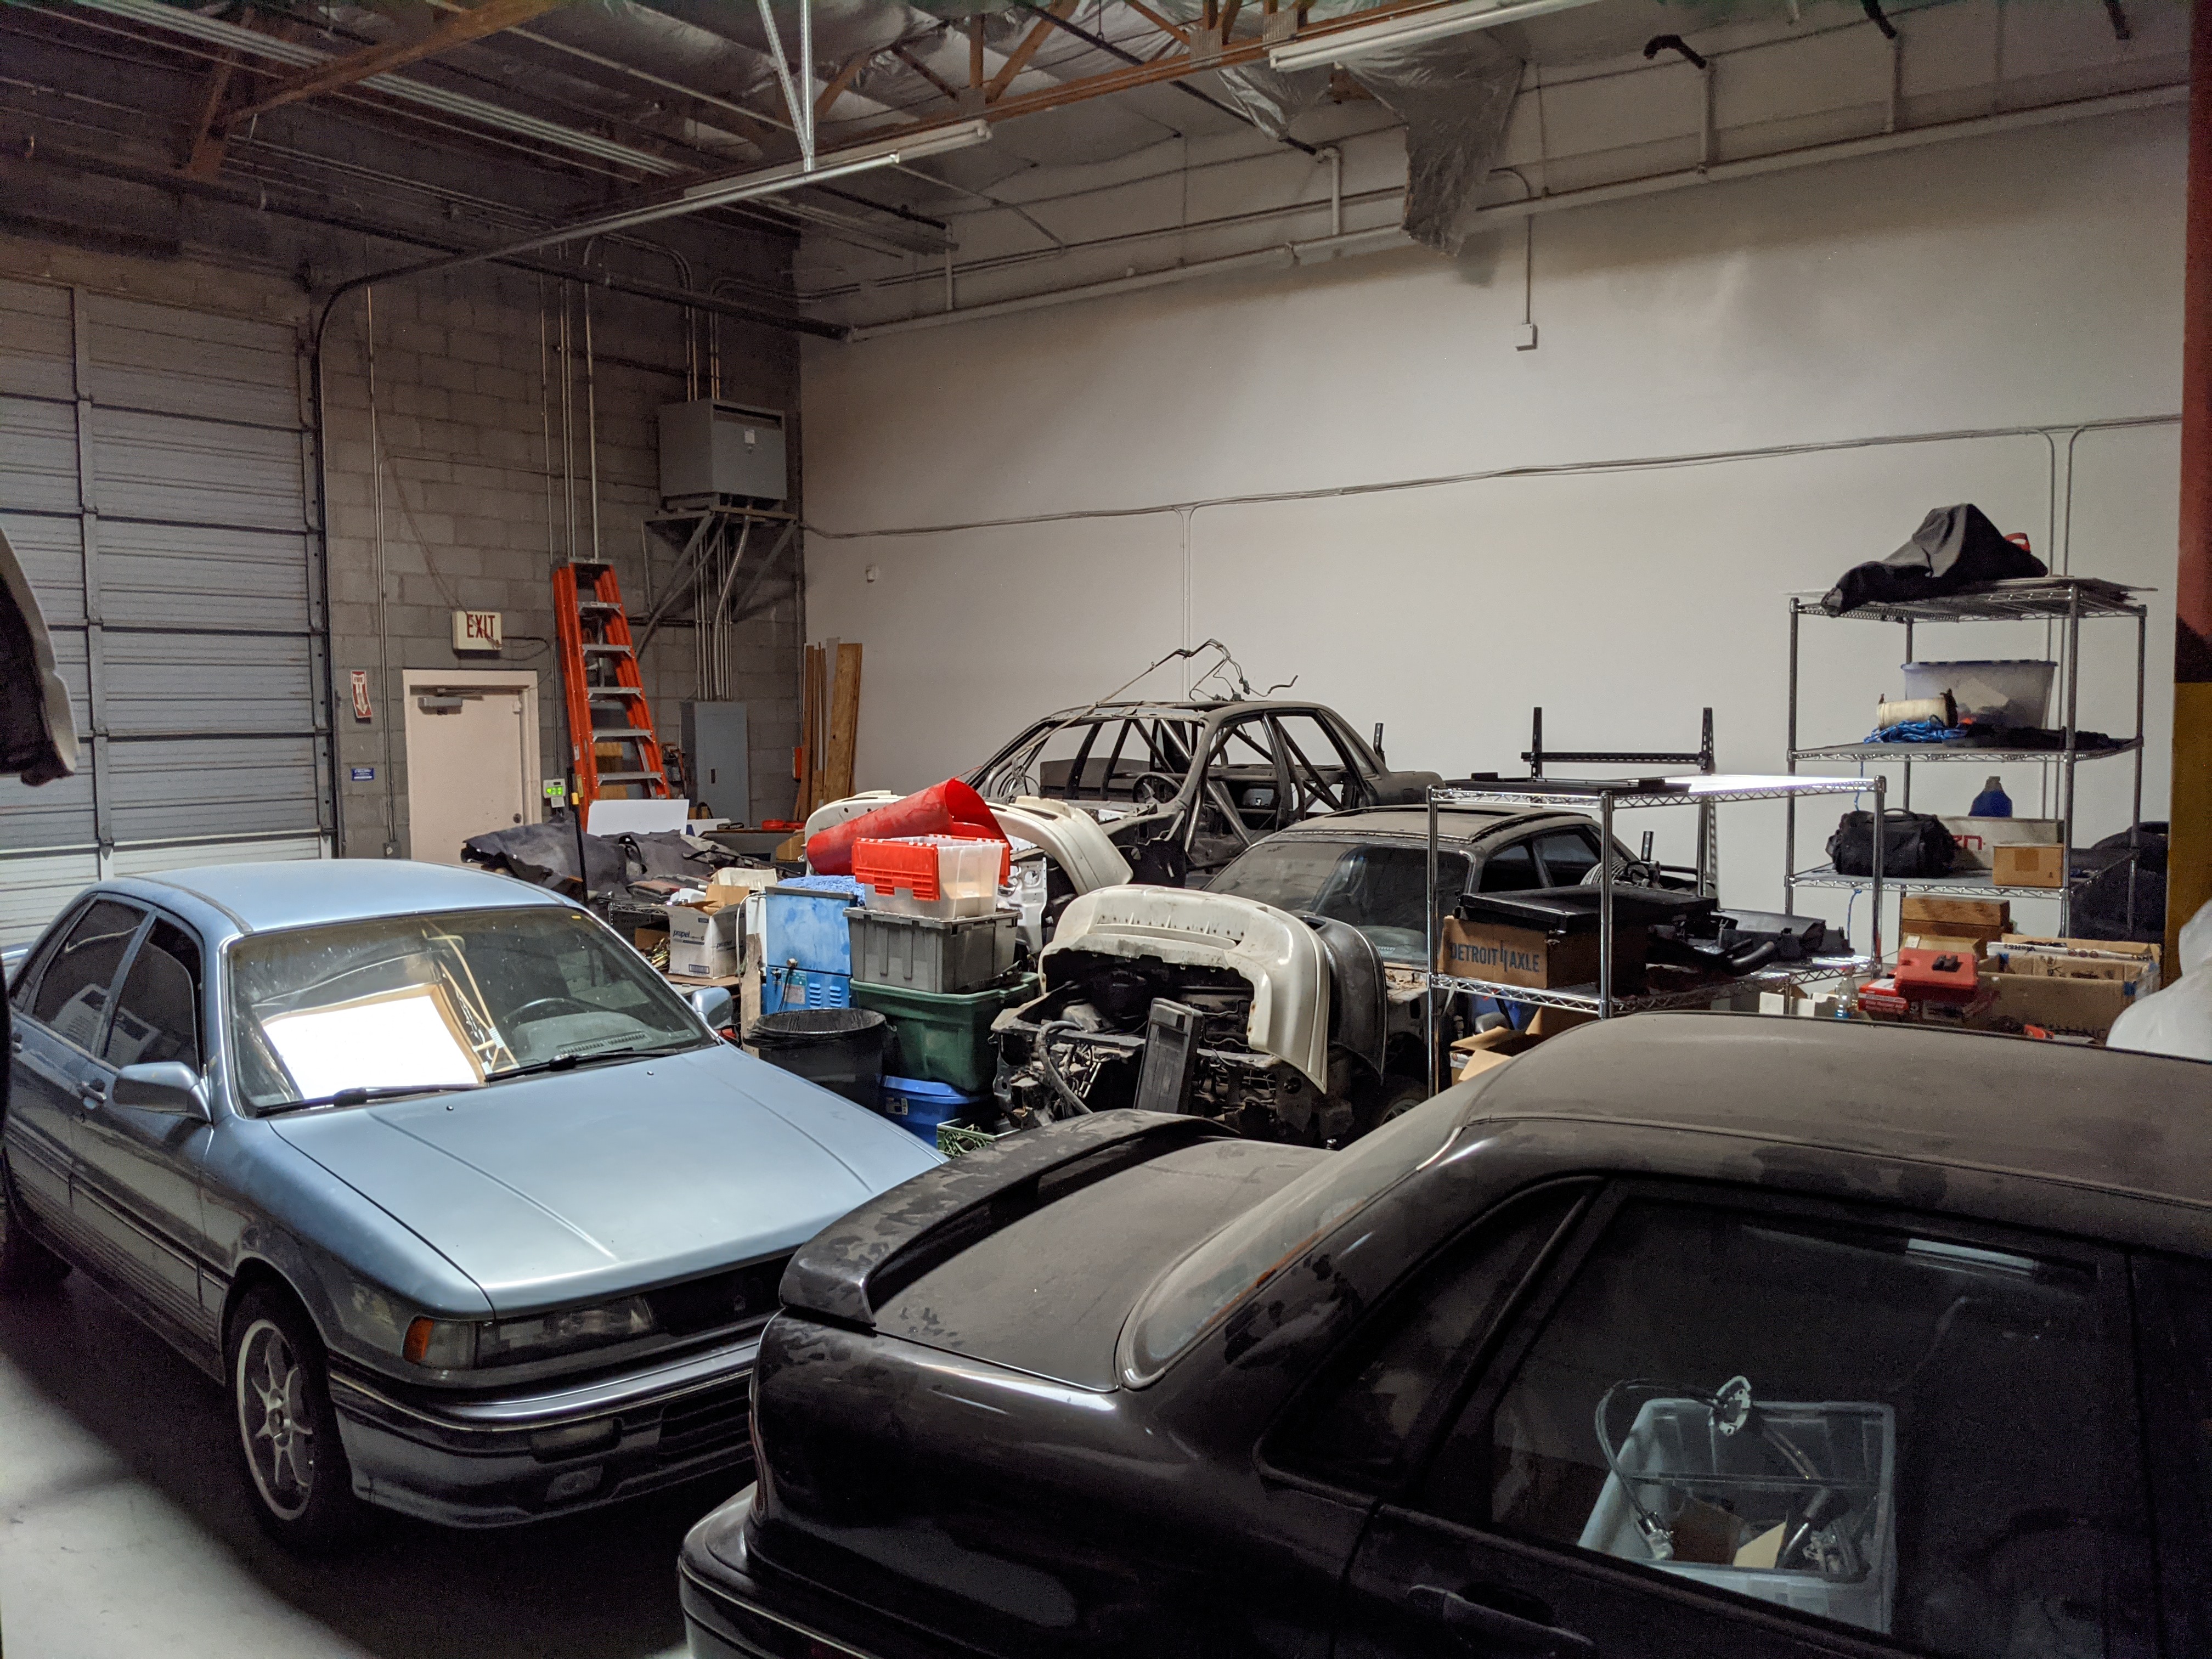
Before I left, we snuck a peek at the GVR4 collection. That’s 195/2000, my old would-be rally car project in the back with a more thorough roll cage installed. Of the 3,009 6th generation Galant VR4s sold in North America in 1991-1992, I’d be surprised to learn there are still 1,500 in salvageable condition. Seeing four in one room (and another in the bay next door) is pretty special. Three of them move under the own power.
12.13.20 - 6 DAYS TO DEPARTURE.
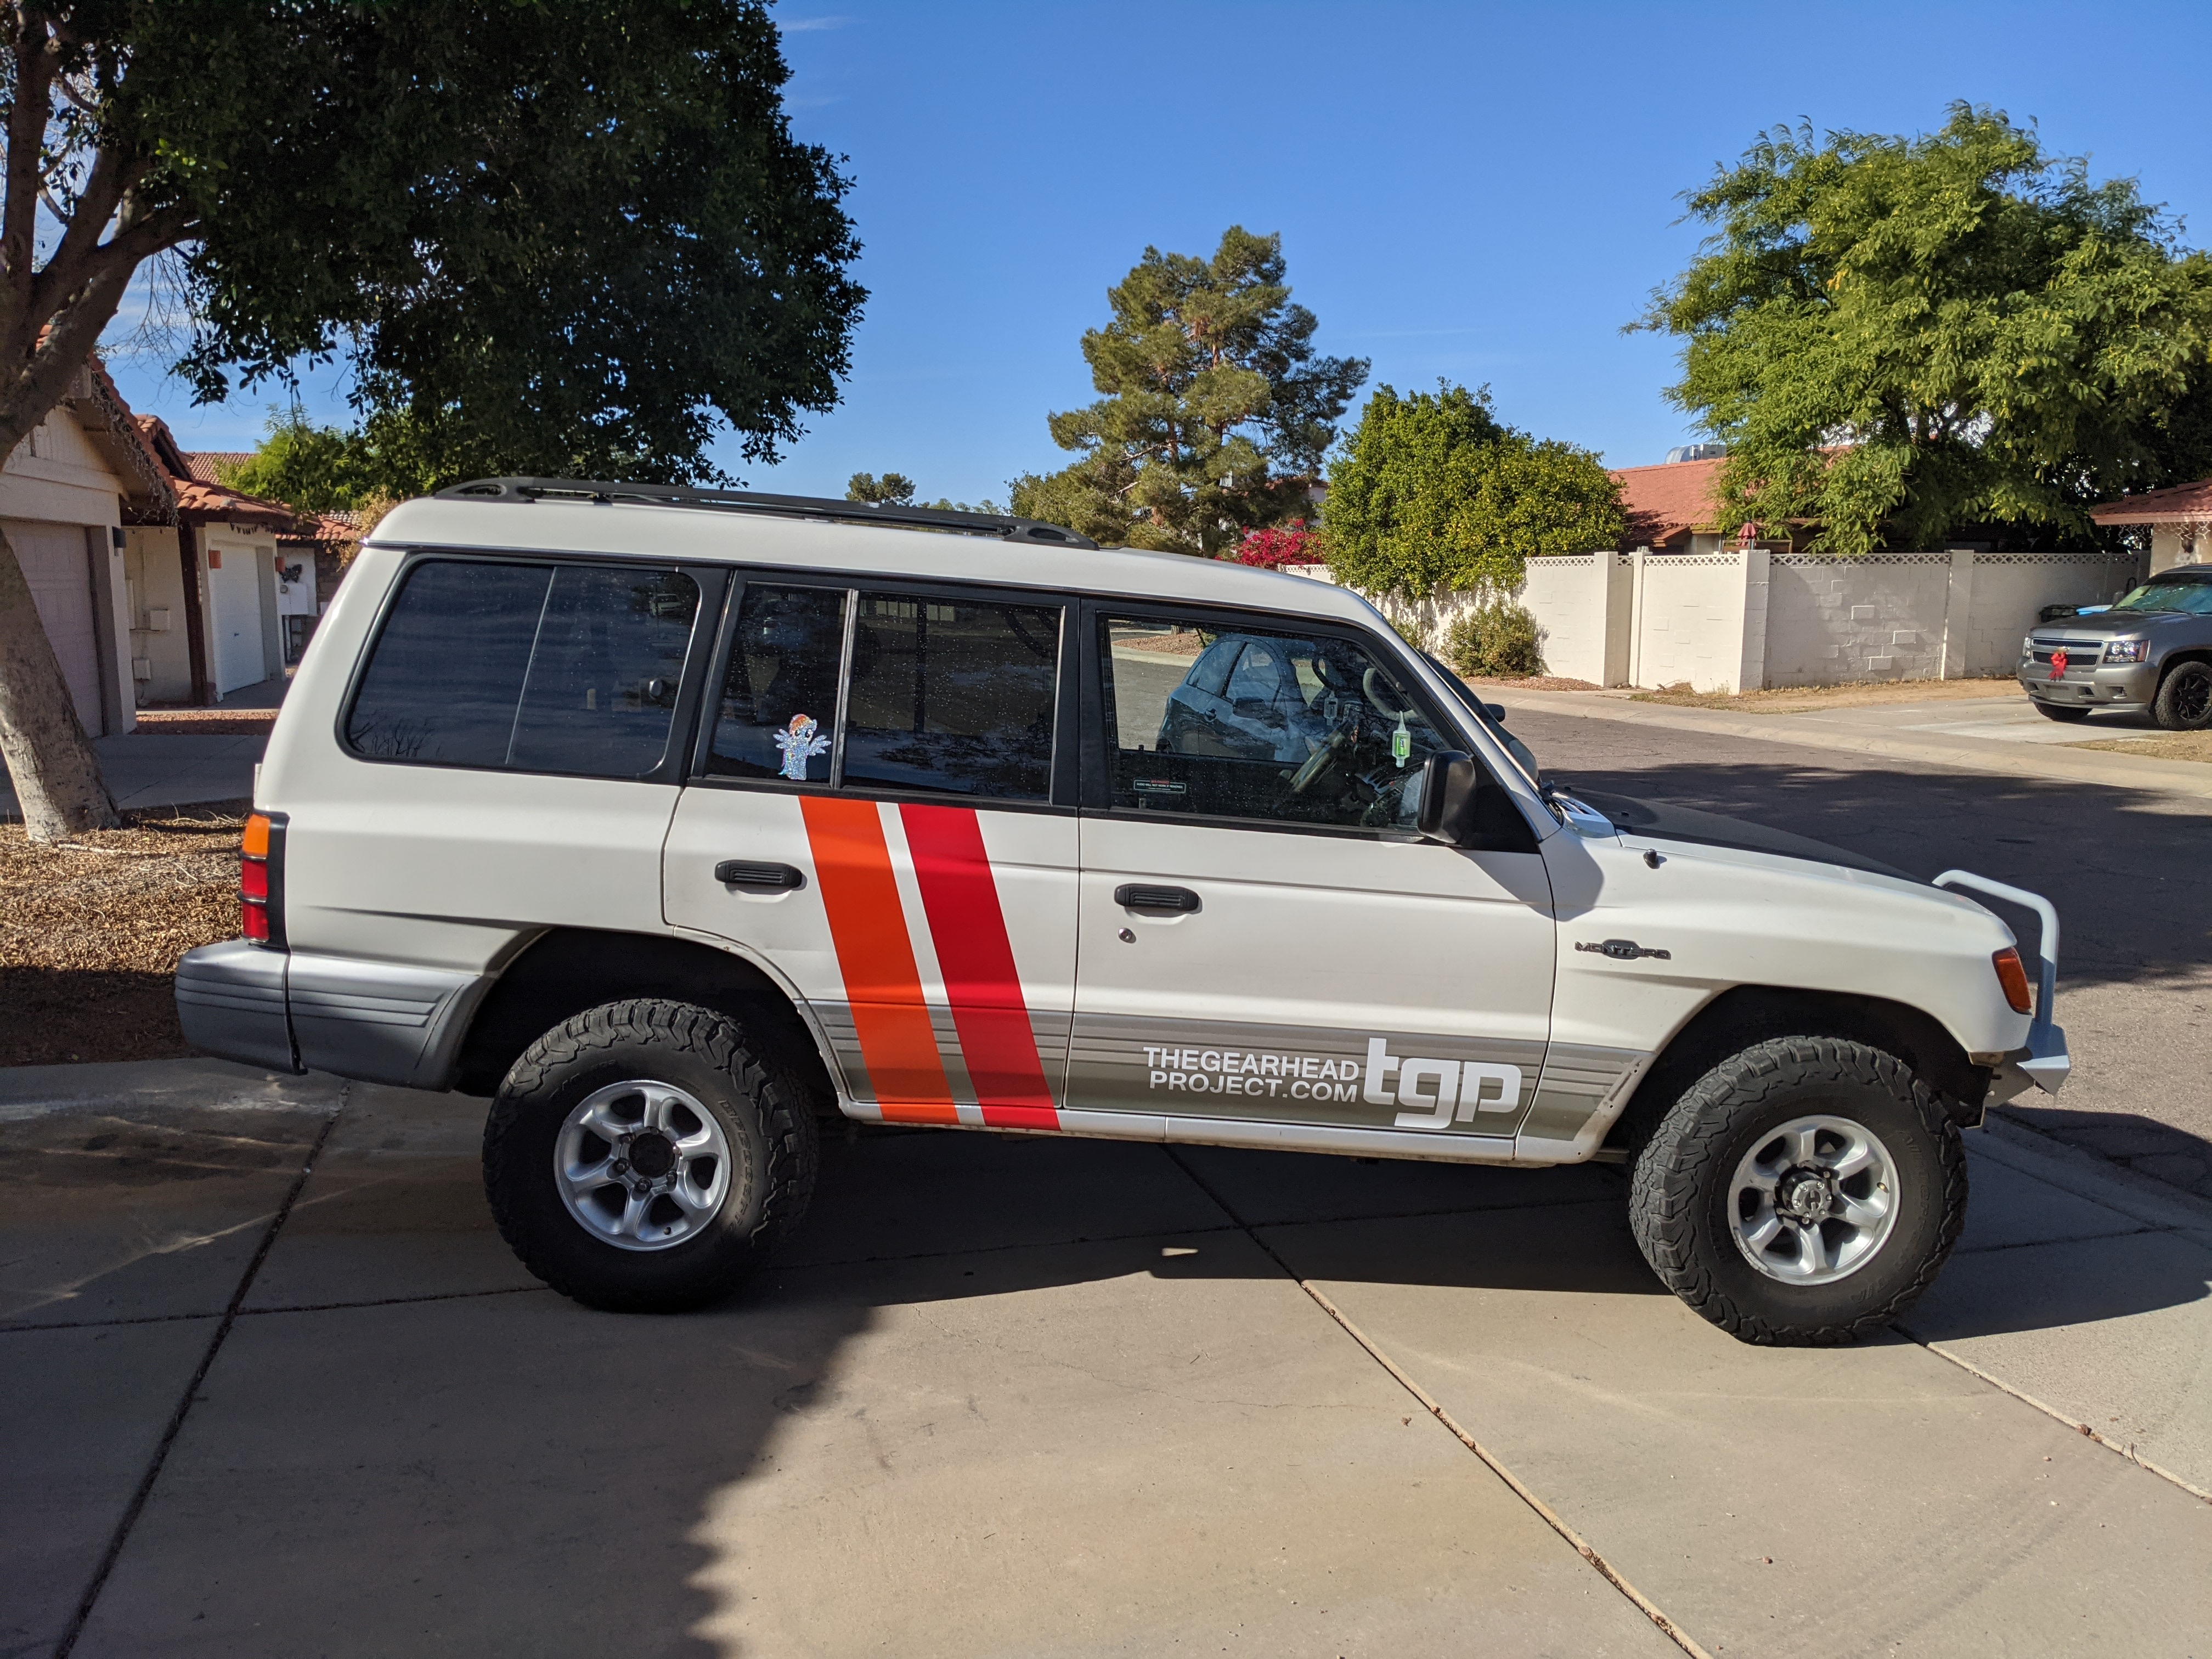
@DHymers drove up from Tucson to professionally install the livery package. His attention to detail was incredible. I would have totally ruined things by installing crooked, but Dave was meticulous in his measurements and everything looks great. Thanks again, Dave!
I pulled analytics data for the site from the states we drove across after the trip. About a dozen people spread out across all the larger cities we drove through visited the website within 24 hours of our driving through. And I’ve had a couple people roll their windows down to ask about TGP since I’ve been back.
Certainly makes the case for more/better landing pages to track who finds us—and eventually joins—because of Fezzik’s body art. 
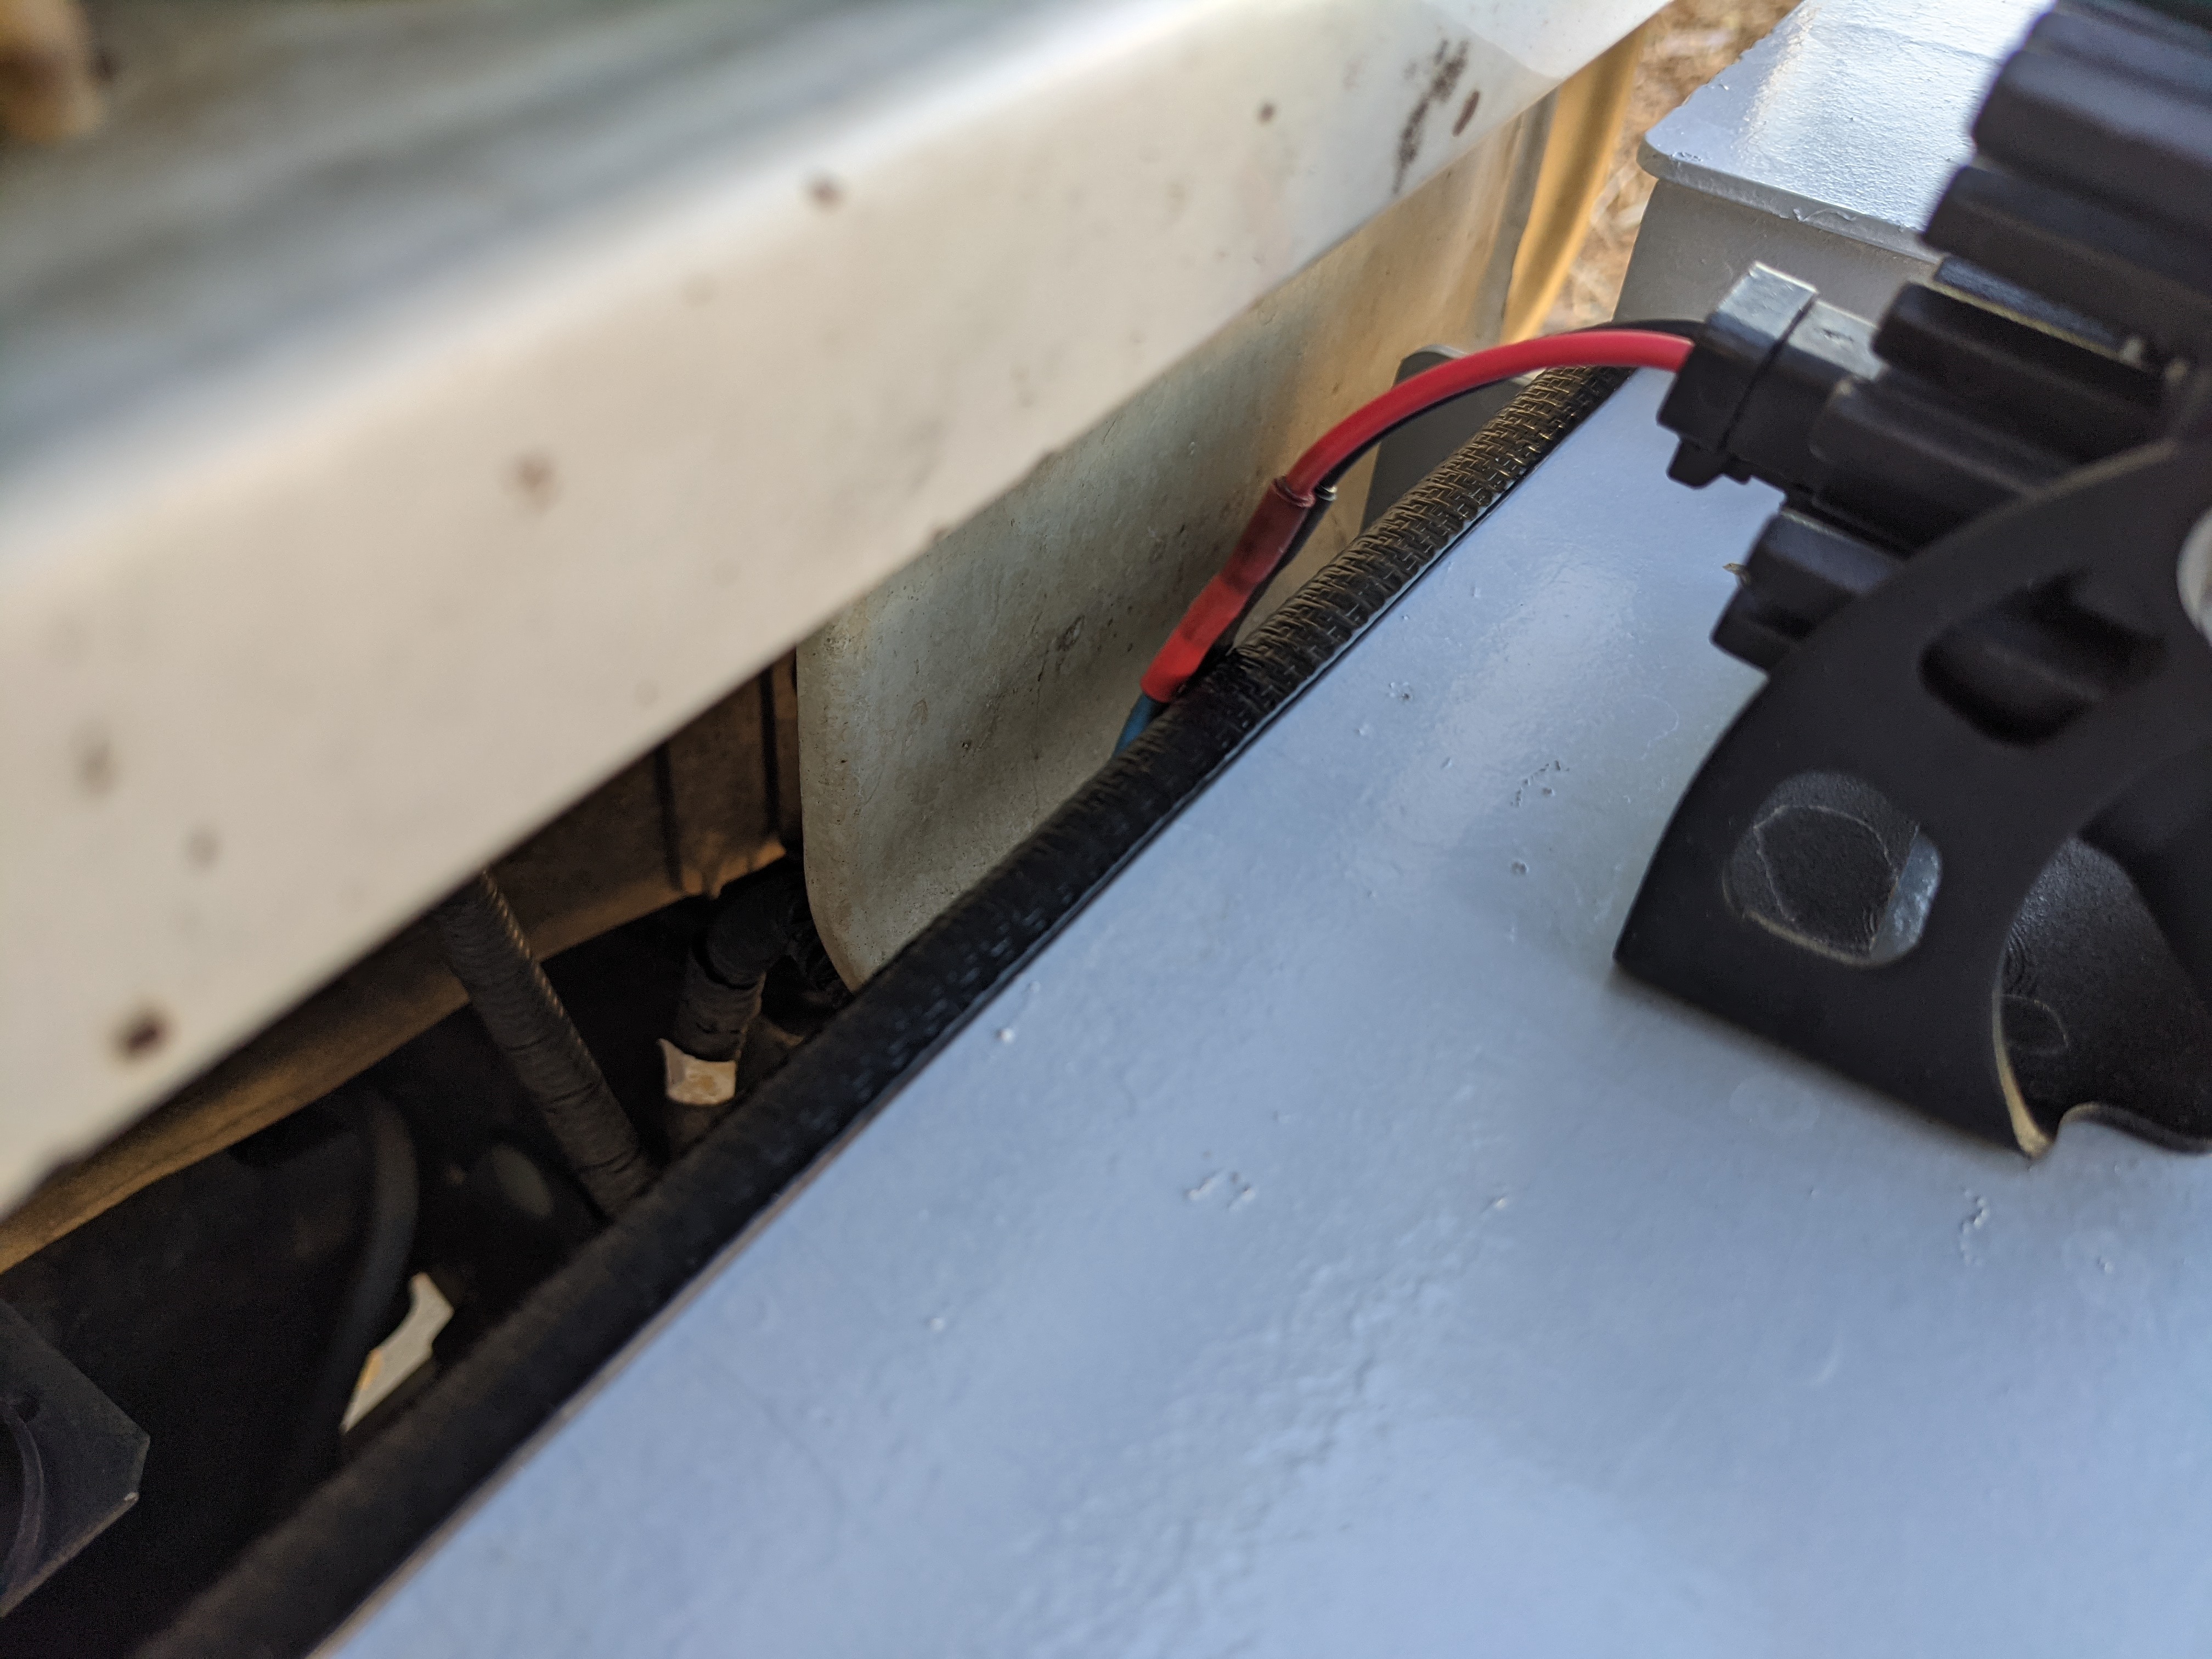
Later in the day, I installed some door trim protector on the back of he bumper where the light wiring was rubbing. It was a nice, secure fit and I have plenty left over.
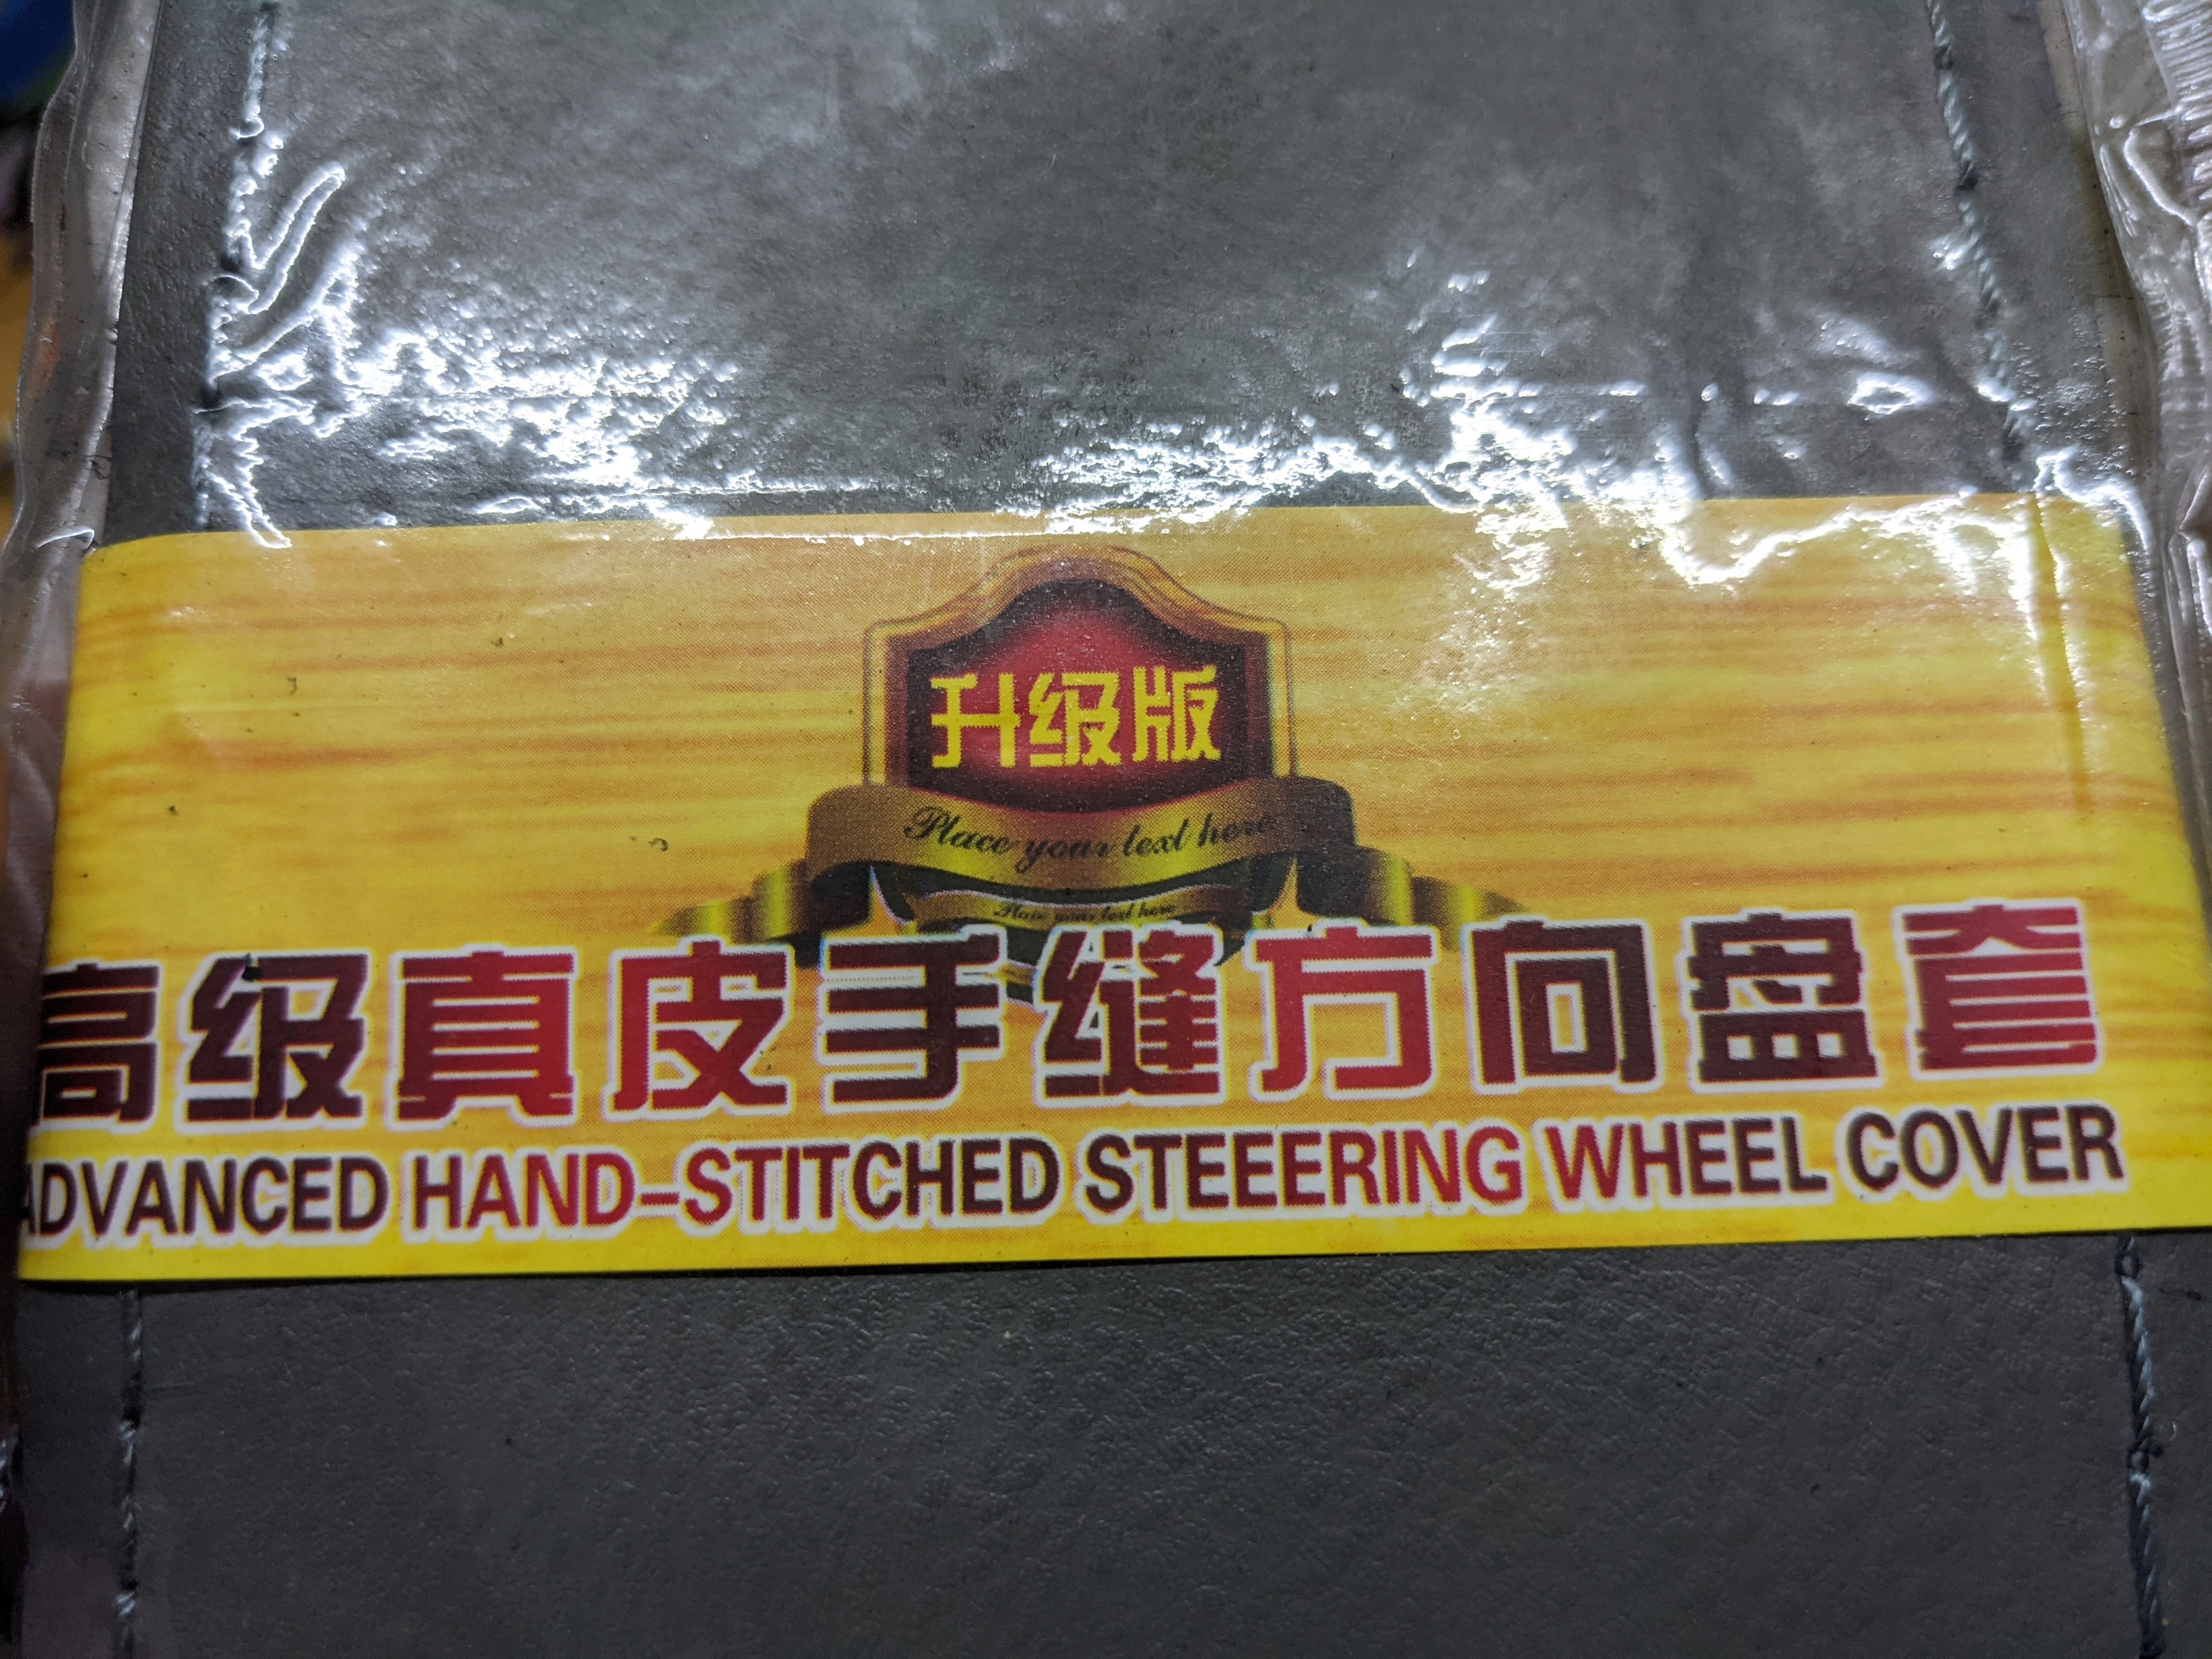
And even later that day, I sat in my nice, quiet truck, talking to my buddy Dino on his 40th birthday, while stitching up my ultra-premium steering wheel cover. Reel lether, my friends. Just peep the attention to detail on their branding! If you can’t read the text in the ribbons, both lines read, “Place your text here.”
Jokes aside, this is a pretty nice cover and I will likely get another one for my new steering wheel when it goes in.
12.15.20 — FOUR DAYS TO DEPARTURE
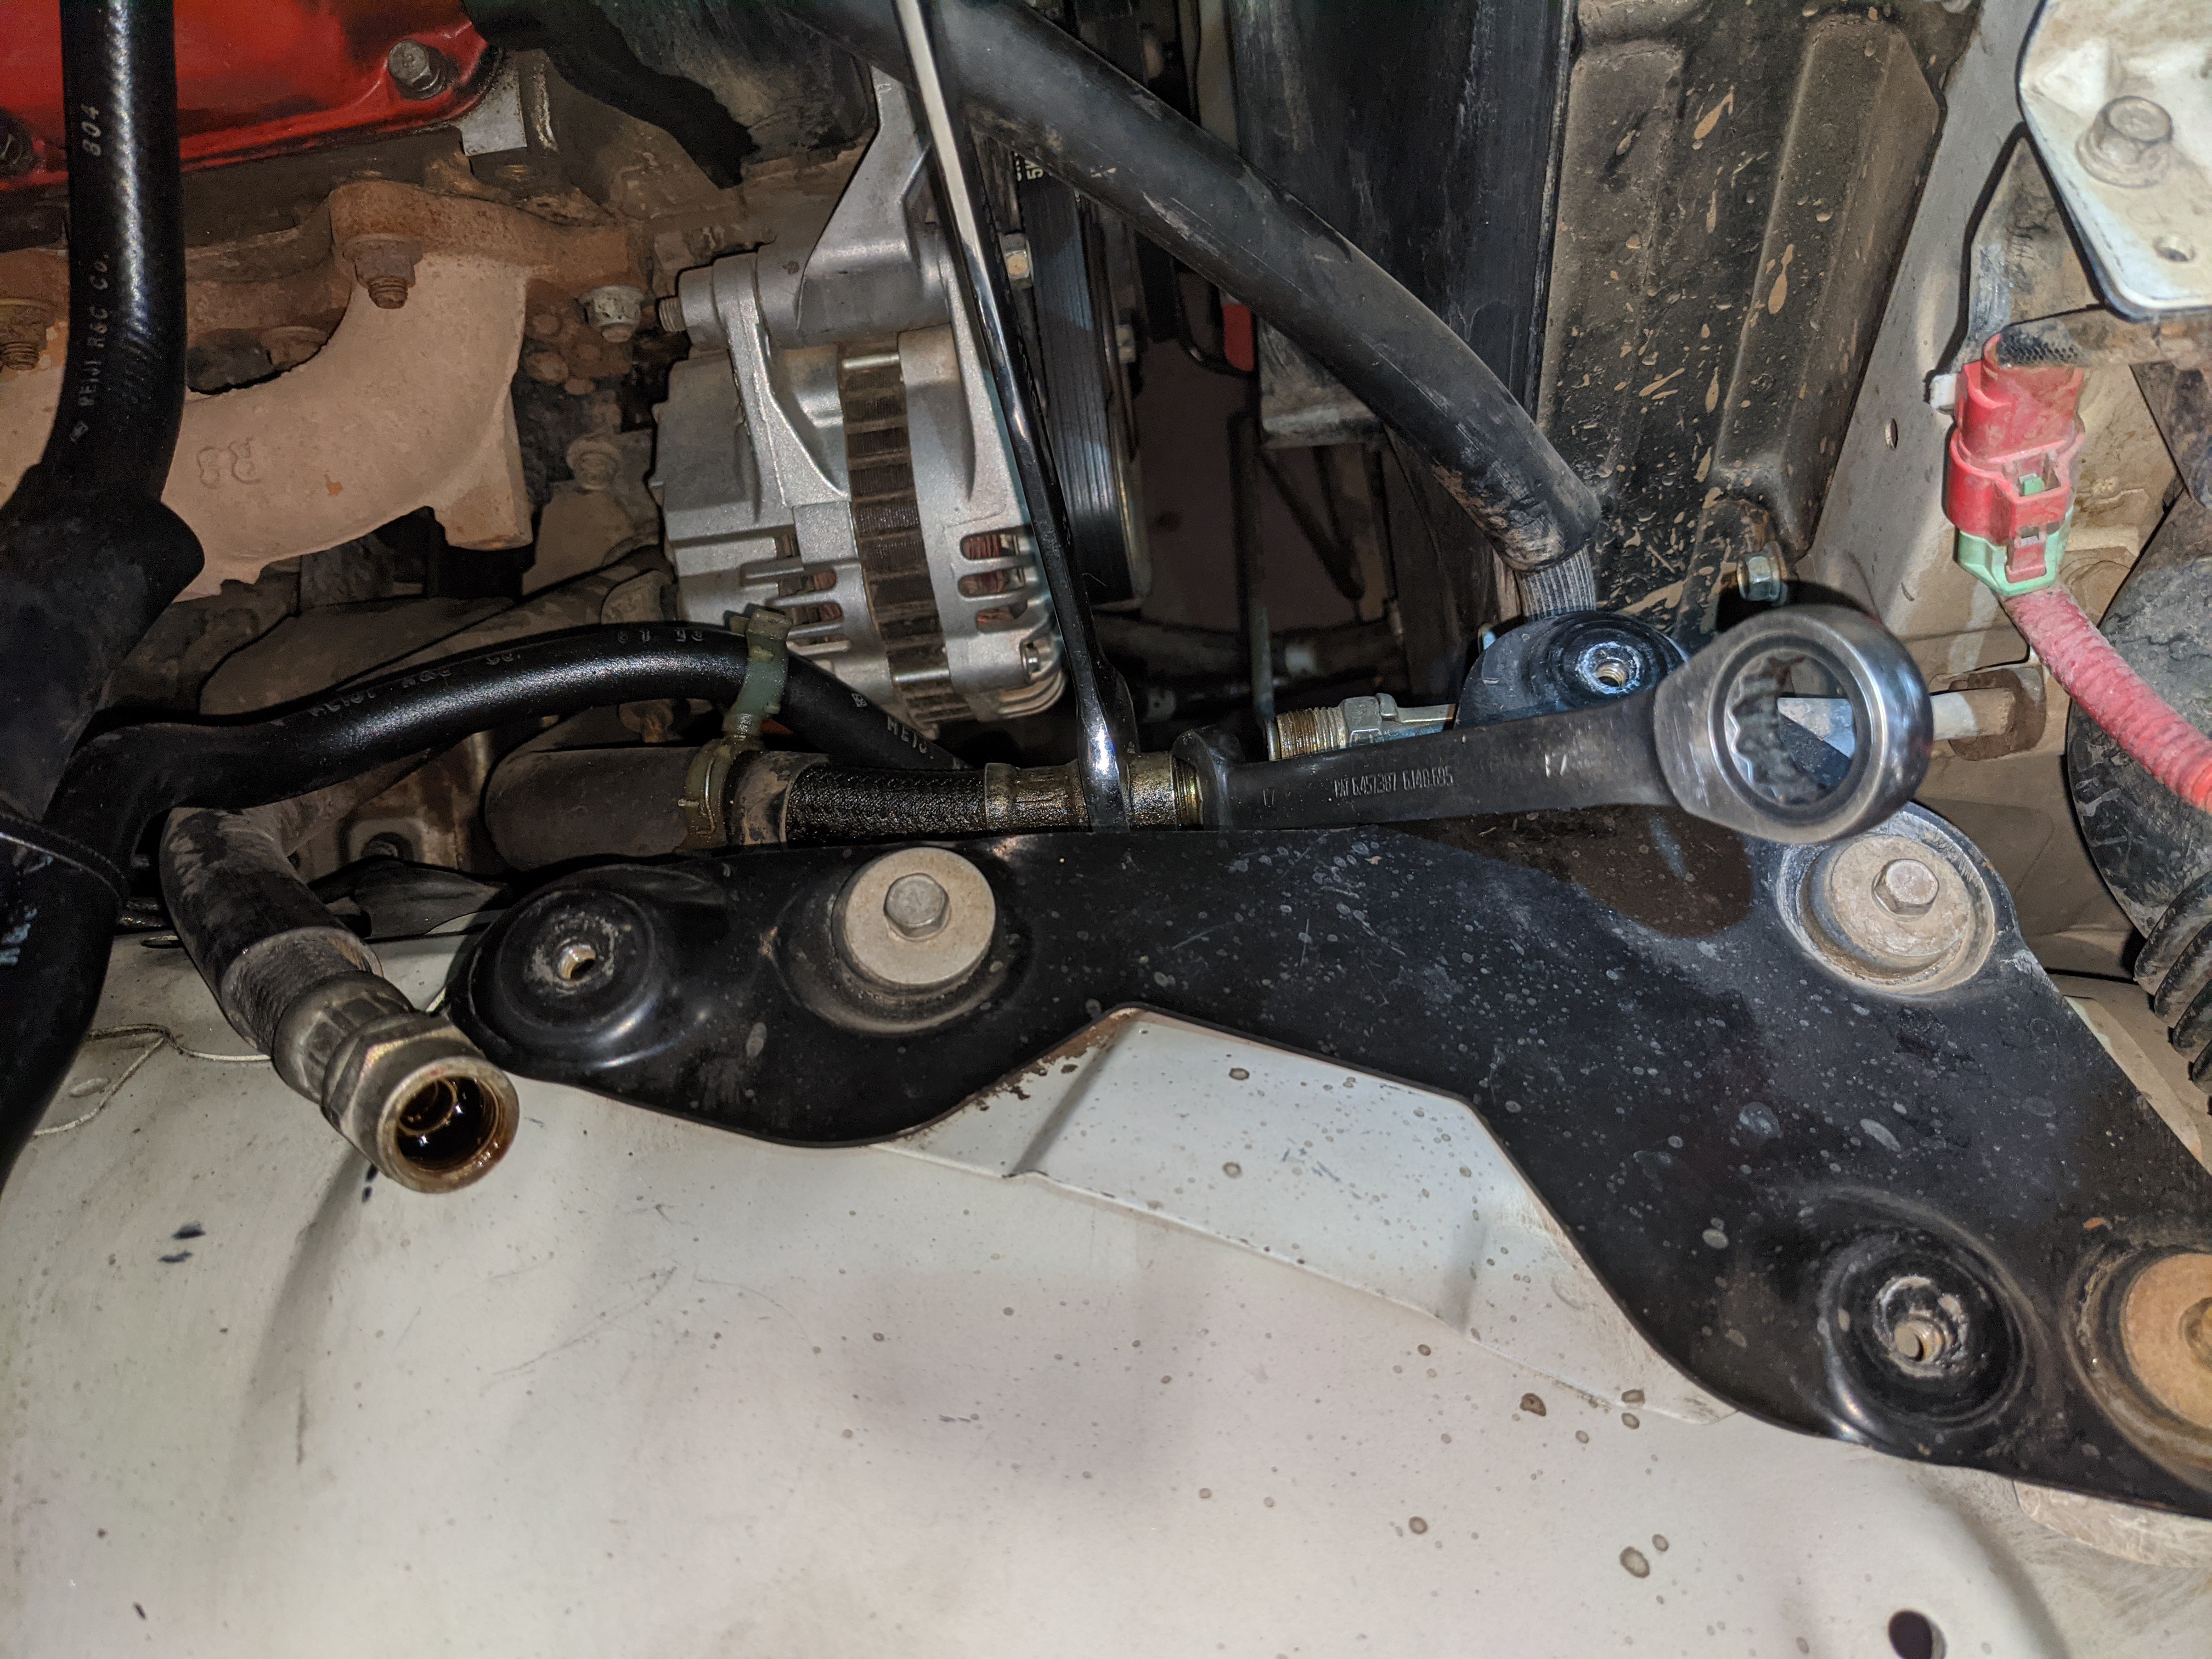
Having installed shiny new stainless steel skid plates a couple days prior, it was very easy to see the massive oil leak I had going on. Turned out to be one of the OEM oil cooler lines was on the verge of failure. Not so much the connections, mind you, but rather the rubber hose itself was soaked and weeping over pretty much its entire length.
Josh made a few calls and got a set of brand new, OEM lines shipped in from Texas for me. I picked them up two days later at the dealership. I think they were something like $190 with tax. Being banjo-style fittings on the oil filter housing end, I assumed I’d need copper crush washers. I also assumed copper crush washers would be something any Mitsubishi dealership would have in stock by the dozen.
This was not the case. The washers are LIKE the usual copper washers, but they are not copper and they have a silicone gasket around the inner edge for serious sealing power. Part number is MB033054.
There were none in Arizona. I found them for $6 a pop on Summit, in-stock, and available for rush delivery. So I paid Summit $28 for the washers, then $27 more for 2-day delivery on 12.11. (Couldn’t justify spending over $70 for overnight.)
Long story short, FedEx delivered them the next afternoon—to my next door neighbor. And by “delivered” I mean "threw the padded envelope over the wall. My neighbor, who was out of town at the time, walked them over to me on the 15th.
In between, I ordered another set from Amazon, where they were less than $2/each. Grand total came to $16 and change. And they ultimately arrived on 12.26.
Which brings me to THIS messy AF affair. On the plus side, I was doing an oil and filter change anyway, but still messy. Step 1 was disconnecting the upper ends of the lines.
Step 2 was sliding underneath and removing the other ends. Which was a ROYAL PITA because I didn’t have the right tool for the job.
Those big-ass banjo bolts are something like 24 or 25mm. I forget now, but while I had a 24/25mm socket in my OLD toolbox, I had not transferred it to my new tool BAG. And completely forgot I had it. So I’m laying under the truck with a foot-long, close-enough SAE box wrench, removing them 1/16 of a turn at a time due to the big wrench being limited by pretty much everything.
This picture shows the new lines back in place, which was a piece of cake once I dug into the toolbox and found the right tool for the job.
One thing I liked about this messy job was how I left the new lines in their plastic bags until they were installed. I cut the ends of the bags off and slipped the new bits out for connection. Once connected below, I simply slipped the bags off just before connecting them to the oil cooler hard lines. Finished install looks really good from above, but I’ll have to get a picture some other time.
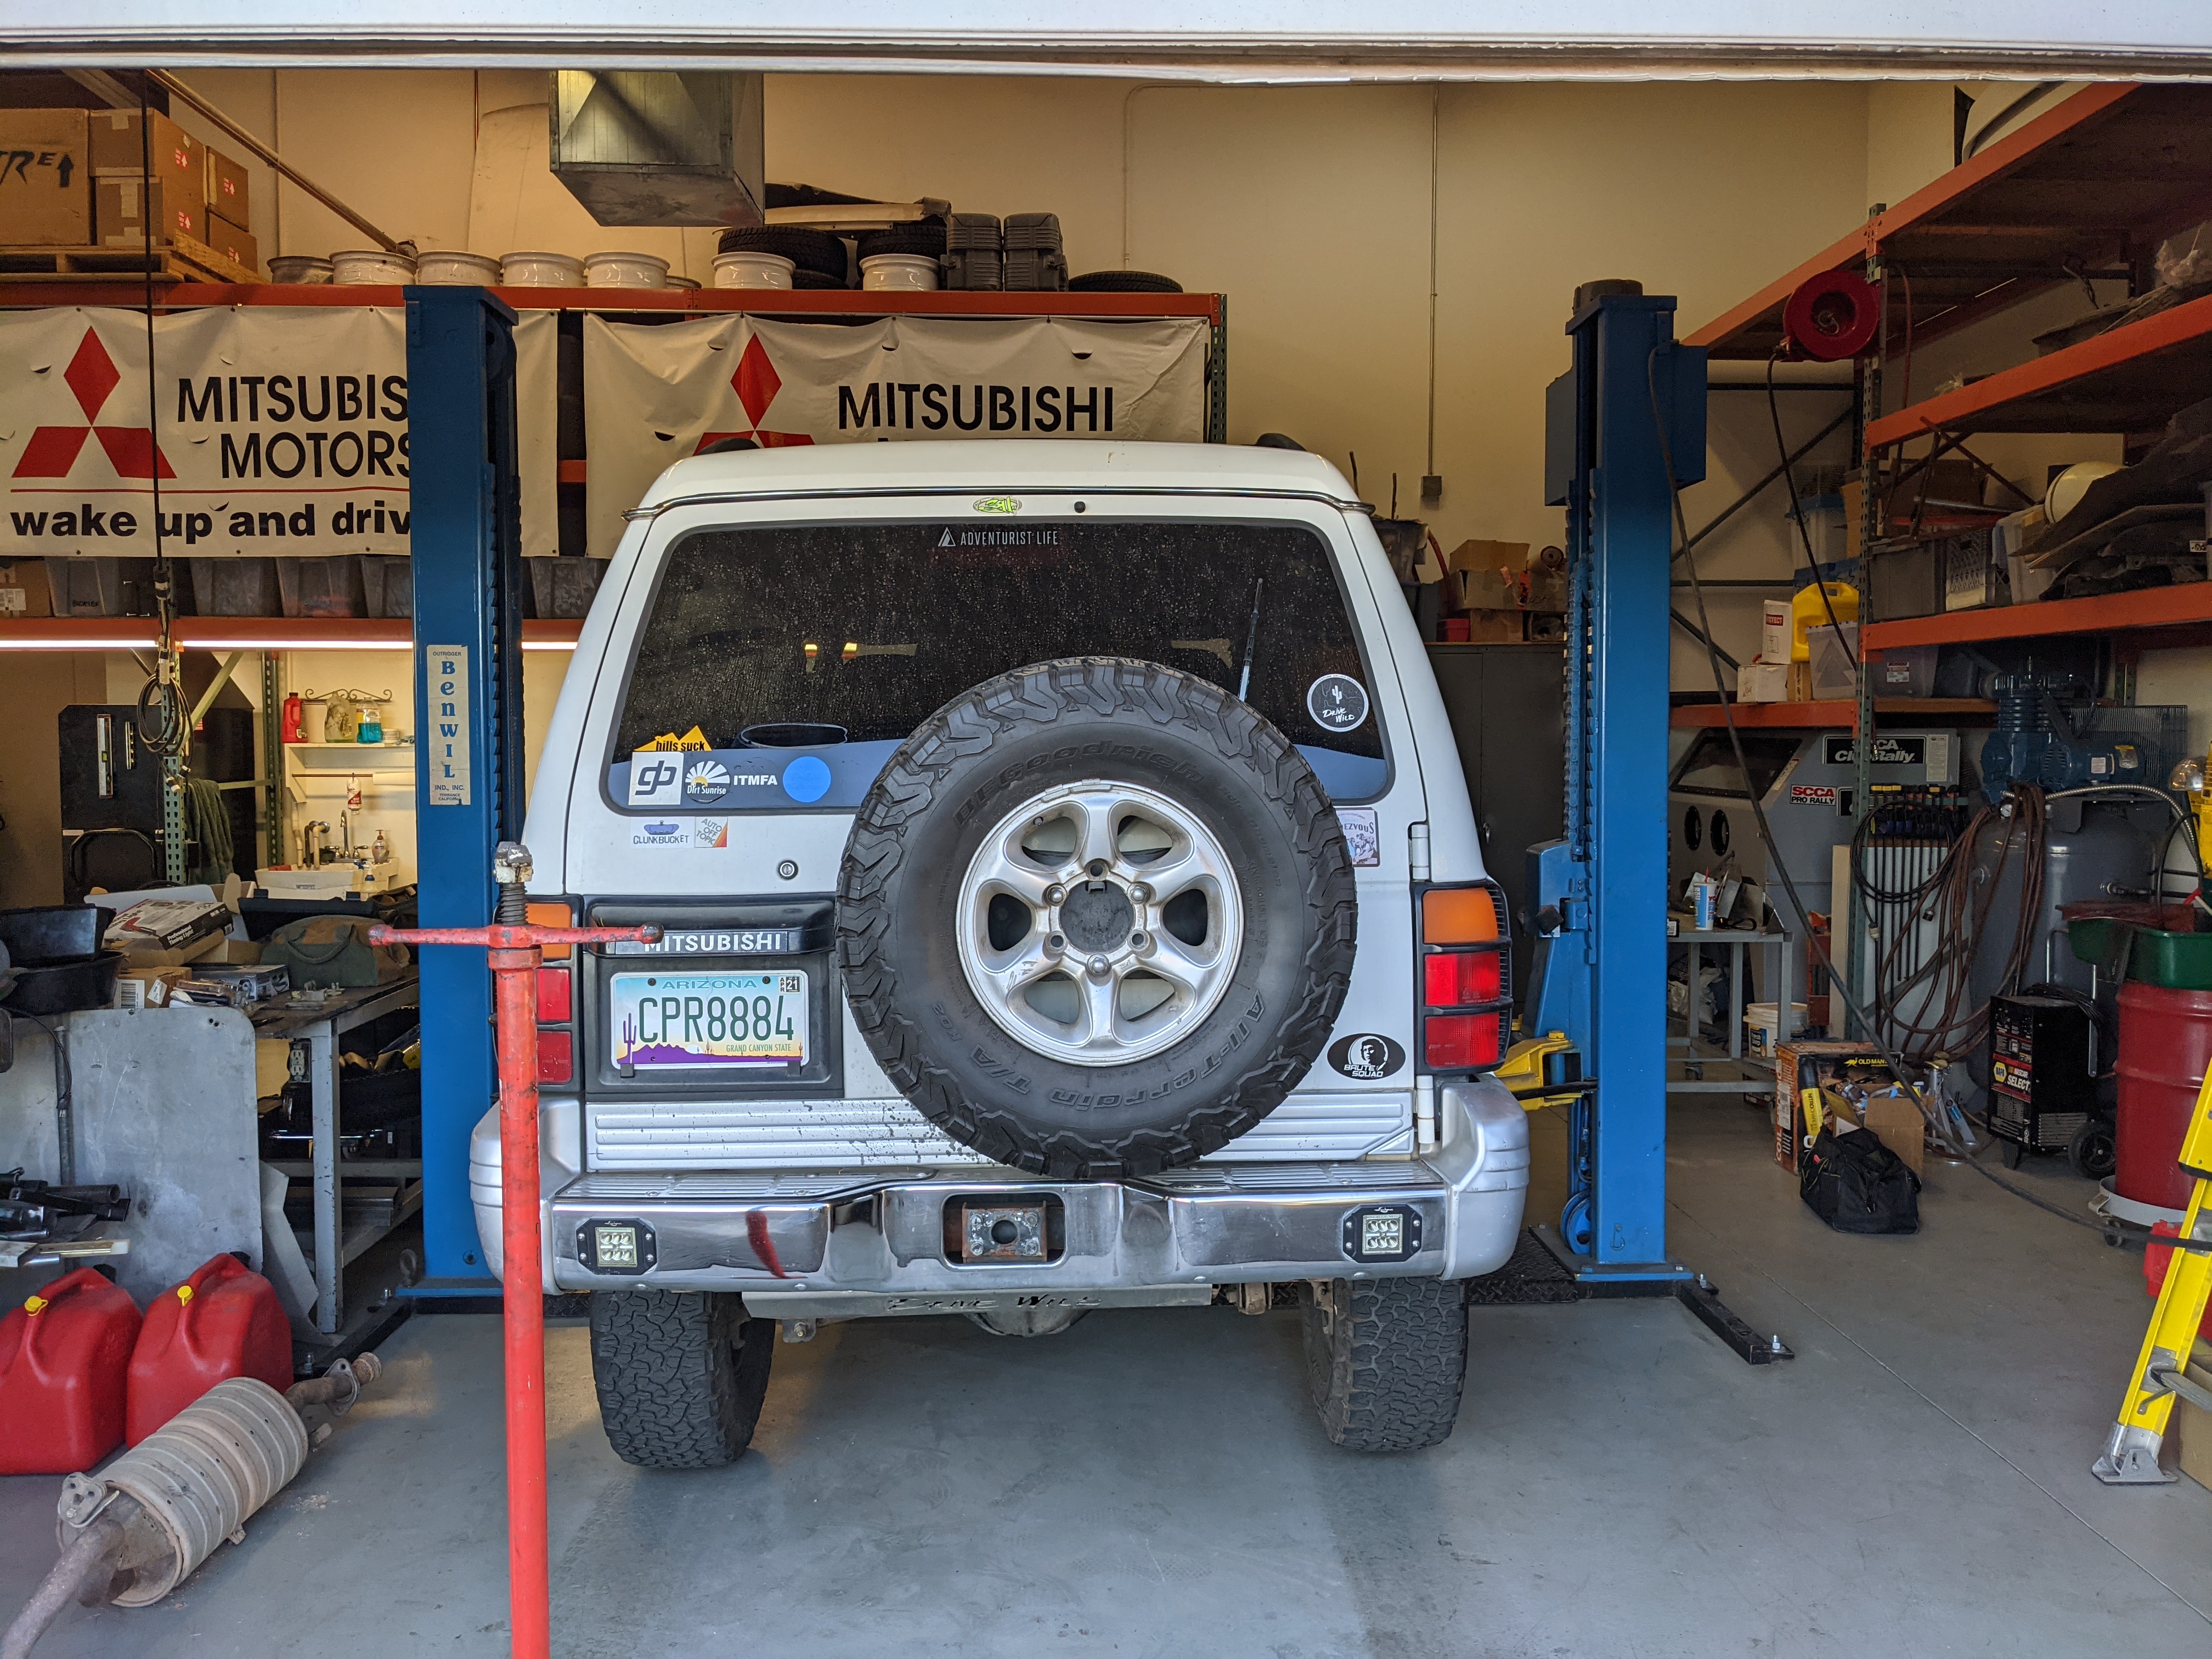
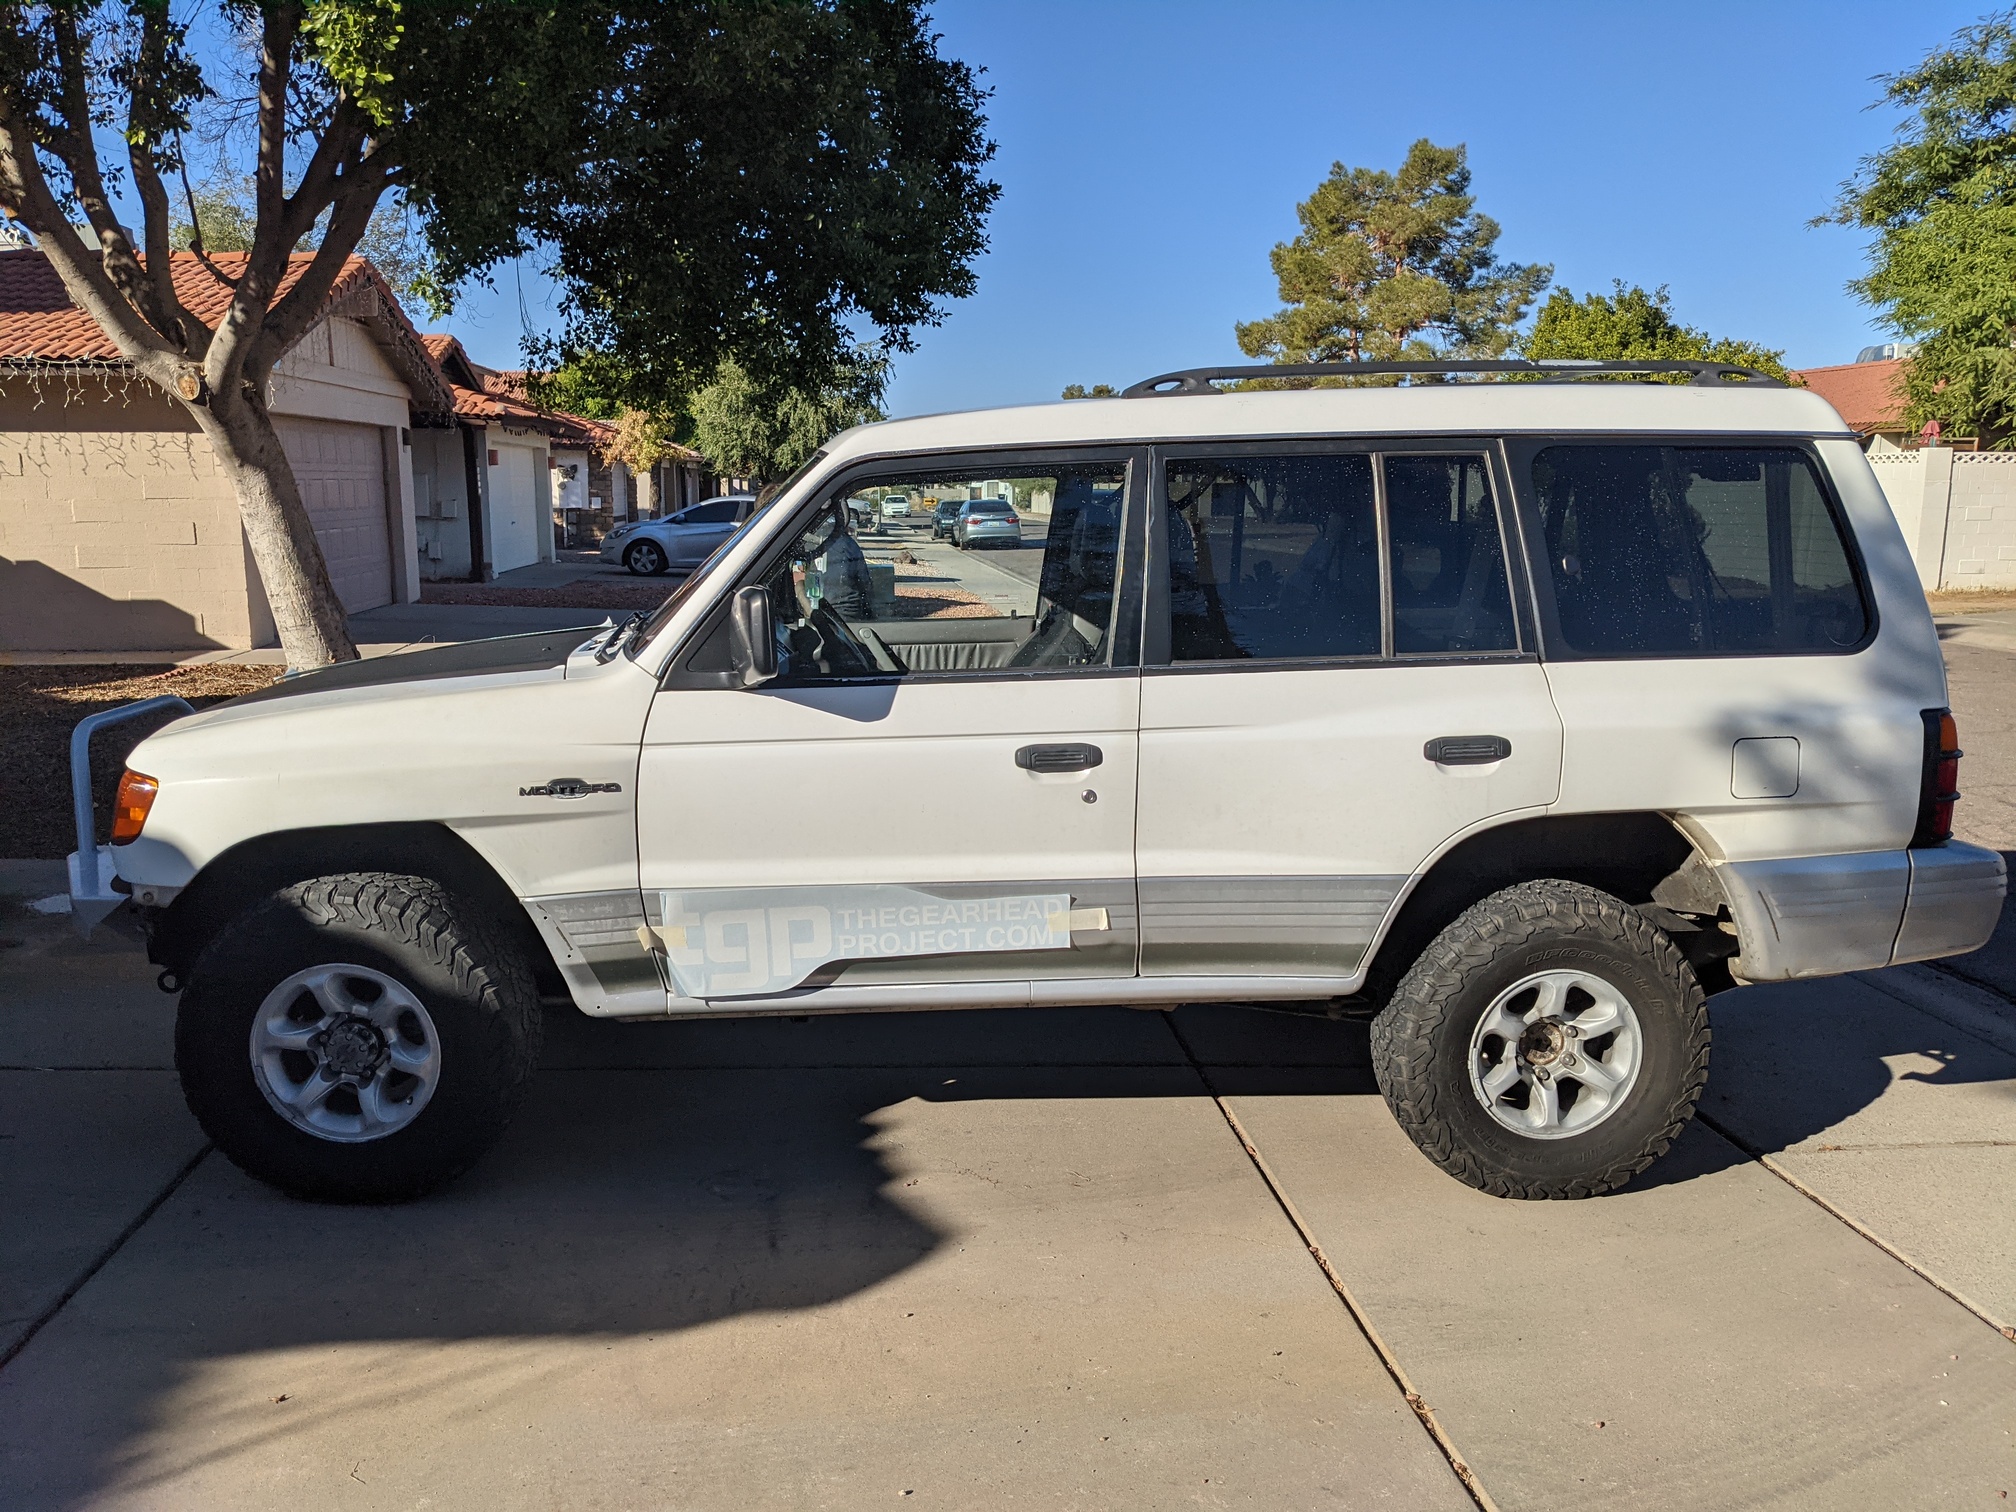
And here we were, four days to departure with 228,698 miles on the odo.
Soon. I’ll be tackling this same job when I go to replace all of the 16 year old speakers in the Disco (14 of those years in Mojave/AZ heat). That 150 mil is foam instead of foil? Any significant thermal bonuses with it?
That bumper looks fantastic! (So does the new livery.) I also like the little detail of adding a winch blank for the interim, instead of just a big gaping hole like most folks get stuck with.
Seriously. One of the best mods I’ve ever installed. #DOOEET
The 150mil is said to have some thermal insulation properties. I’m not sure how effective it is in that regard, but it can’t hurt. I mean if it keeps the frost at bay, right?
The relative rigidity of the 80 mil makes it easier to install, but the flexibility of the 150 makes it easy to cover large areas and even openings. Fire example, there are places I just laid it right over door and lock rods, then used a razor blade to trim the slightest gaps for them to move freely.
One caveat: I do NOT want to ever try removing this stuff. No way. No how. The adhesive is aggressive.
Novel idea: I’m actually considering covering the entire ceiling with 150. A little 80 here and there to reduce harmonics, but then 150 across the whole thing evenly, using gaps between sheets to run wiring. A little tape to keep wires in place, then attach a simple, fabric sheet with velcro tape for a headliner.
They also have a 315 mil product. And the 80 is also available in black. 
Indeed. I’ve never had sound or thermal issues, but figure while I’m in there every little bit helps. I’ve got something similar (probably just a nock-off brand) on the floor now before the new sleeper/storage goes in, was planning to hit the roof too as I also have headliner woes to figure out.
Did the Disco come with sound insulation in the doors and stuff? Being a premium brand, I’d think it would.
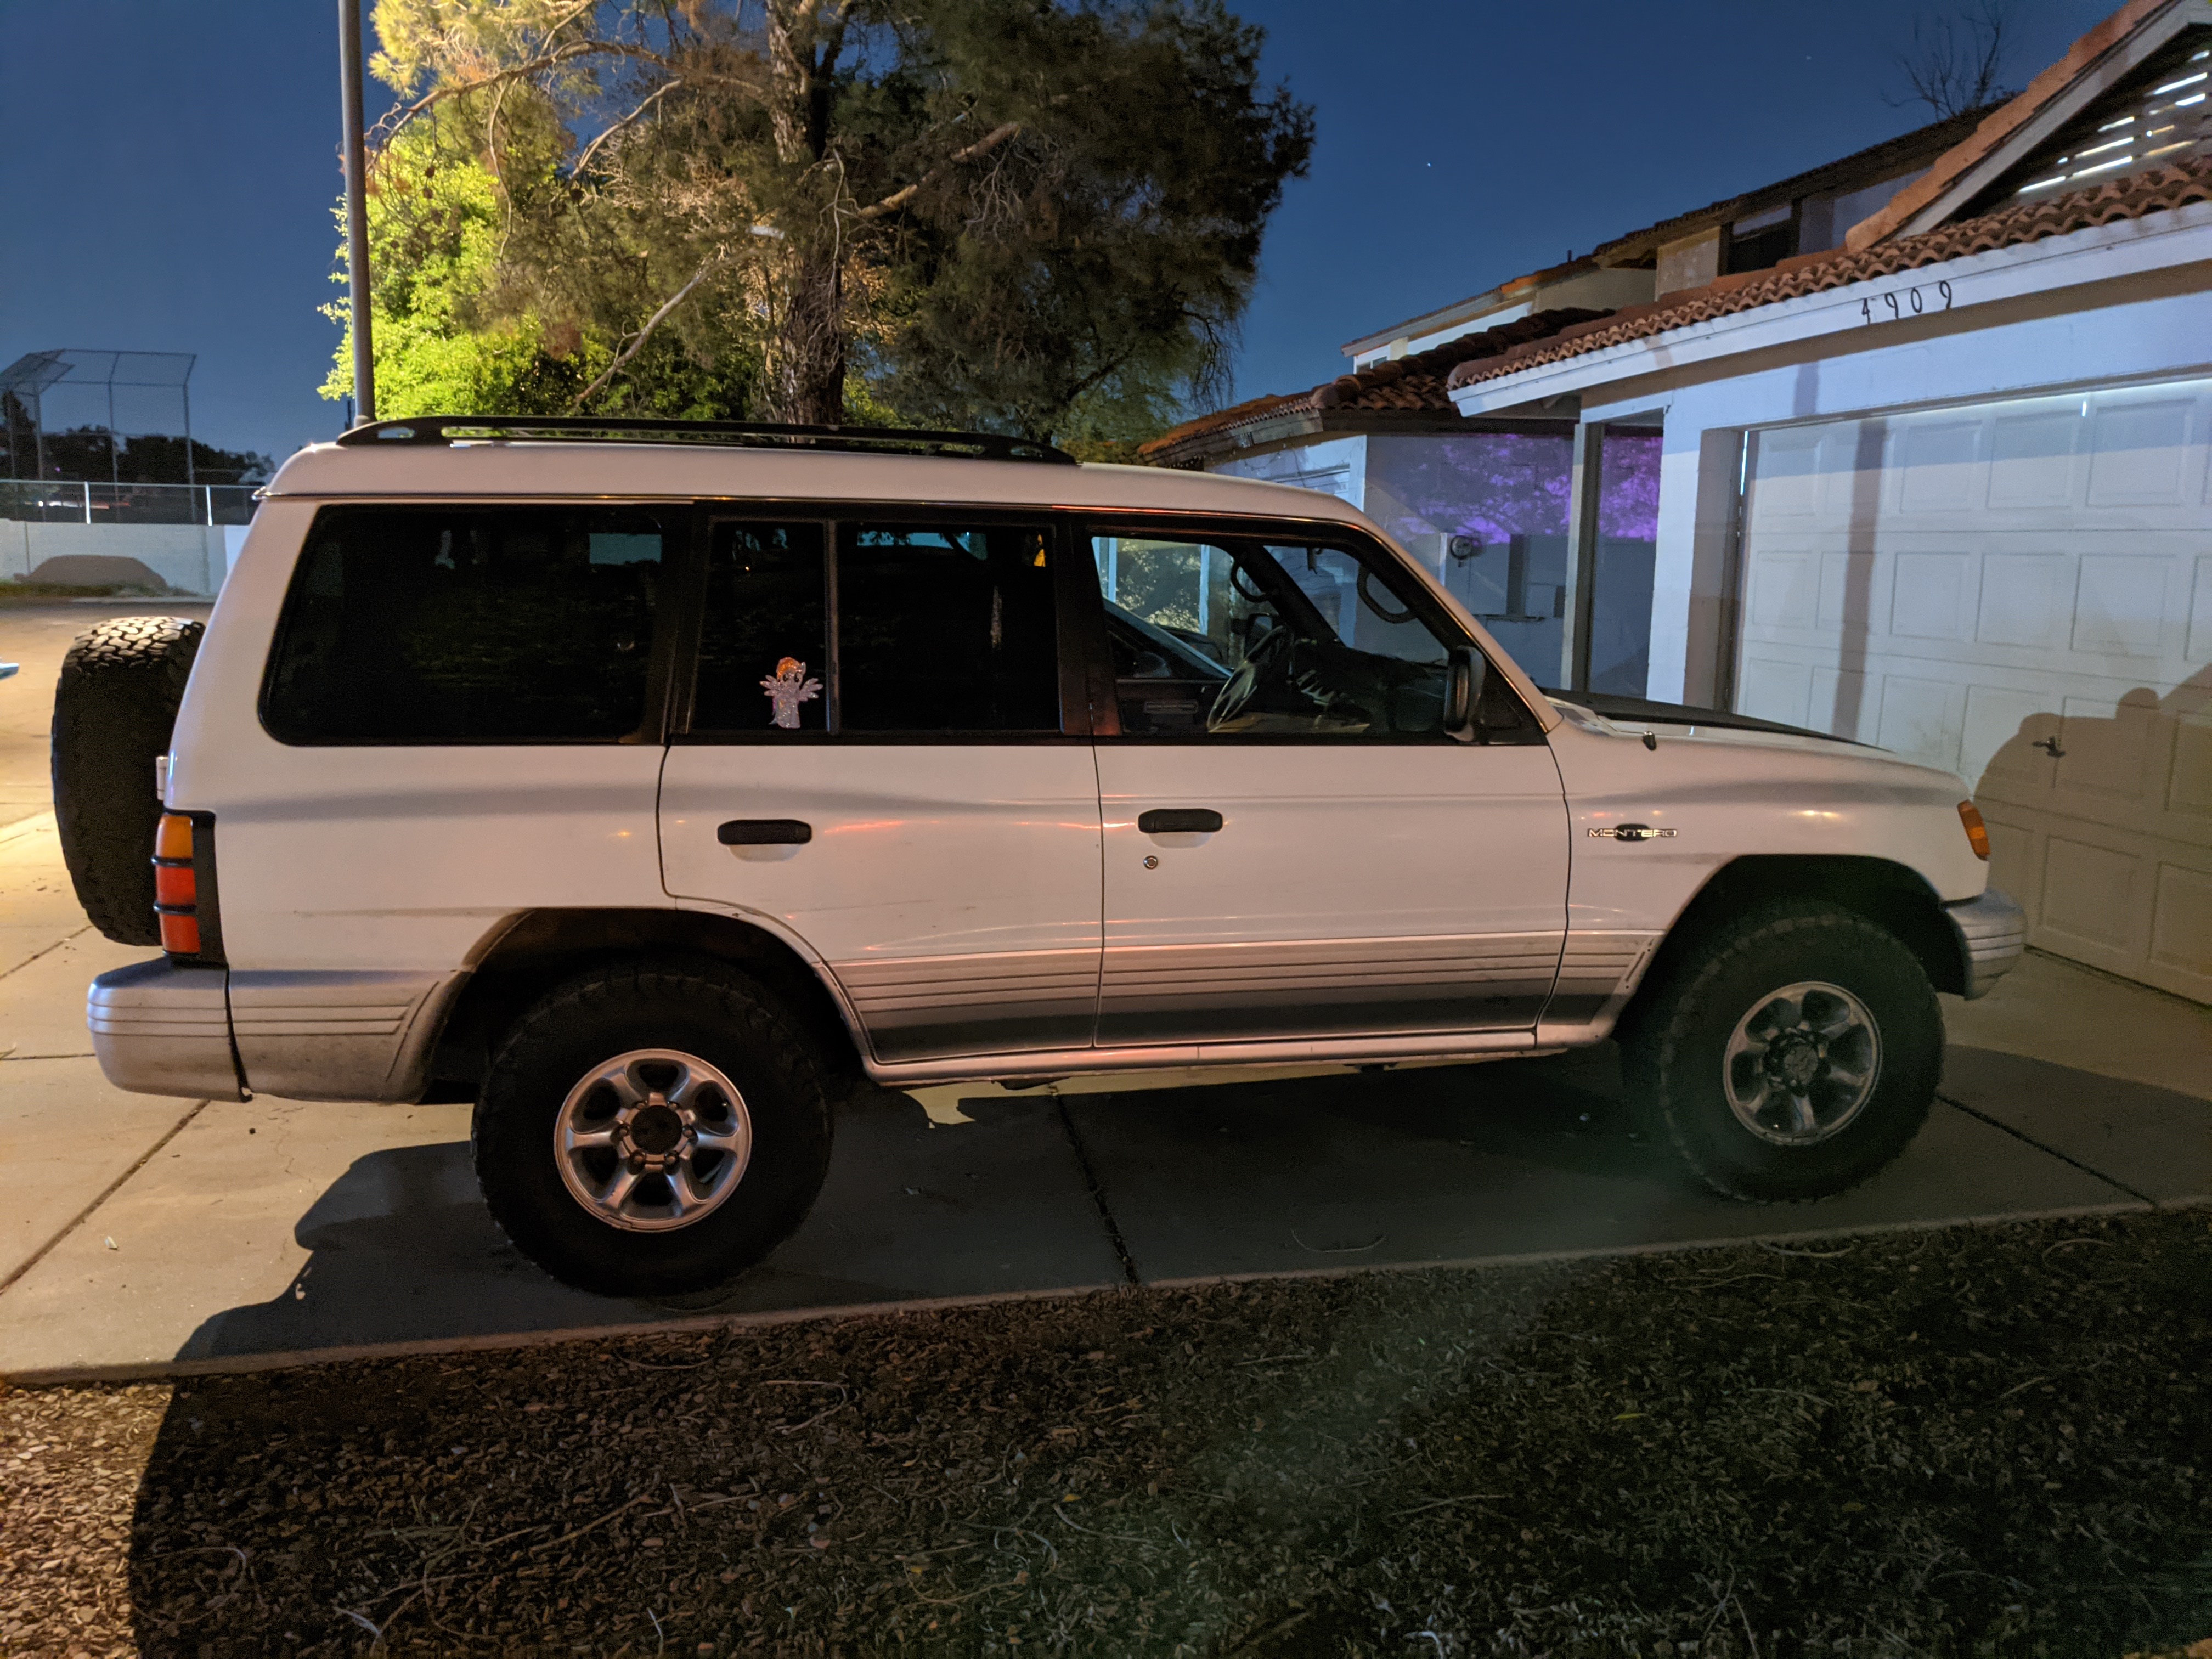
Even though the Montero was the second most expensive model Mitsubishi sold at the time (behind the 3000GT VR4, a hair above the Diamante), there was literally zero sound dampening in the doors. They’re like empty tin cans. Haha.
Considerable amounts, it’s pretty quiet inside, but it’s molded in as part of the inner door panels, headliner shell, and carpets (nearly 1.5" thick). There’s nothing on it like the modern peel-and-stick “space age” stuff we can get off Amazon these days. 
This was one of Marana Decal’s most enjoyable jobs of the year
Yeah, dude. It still looks mad fresh. Thank you!
233-something
#rookiemaneuver of the year, I ordered a set of window vents for 92-00 Montero Sport. Damnit.
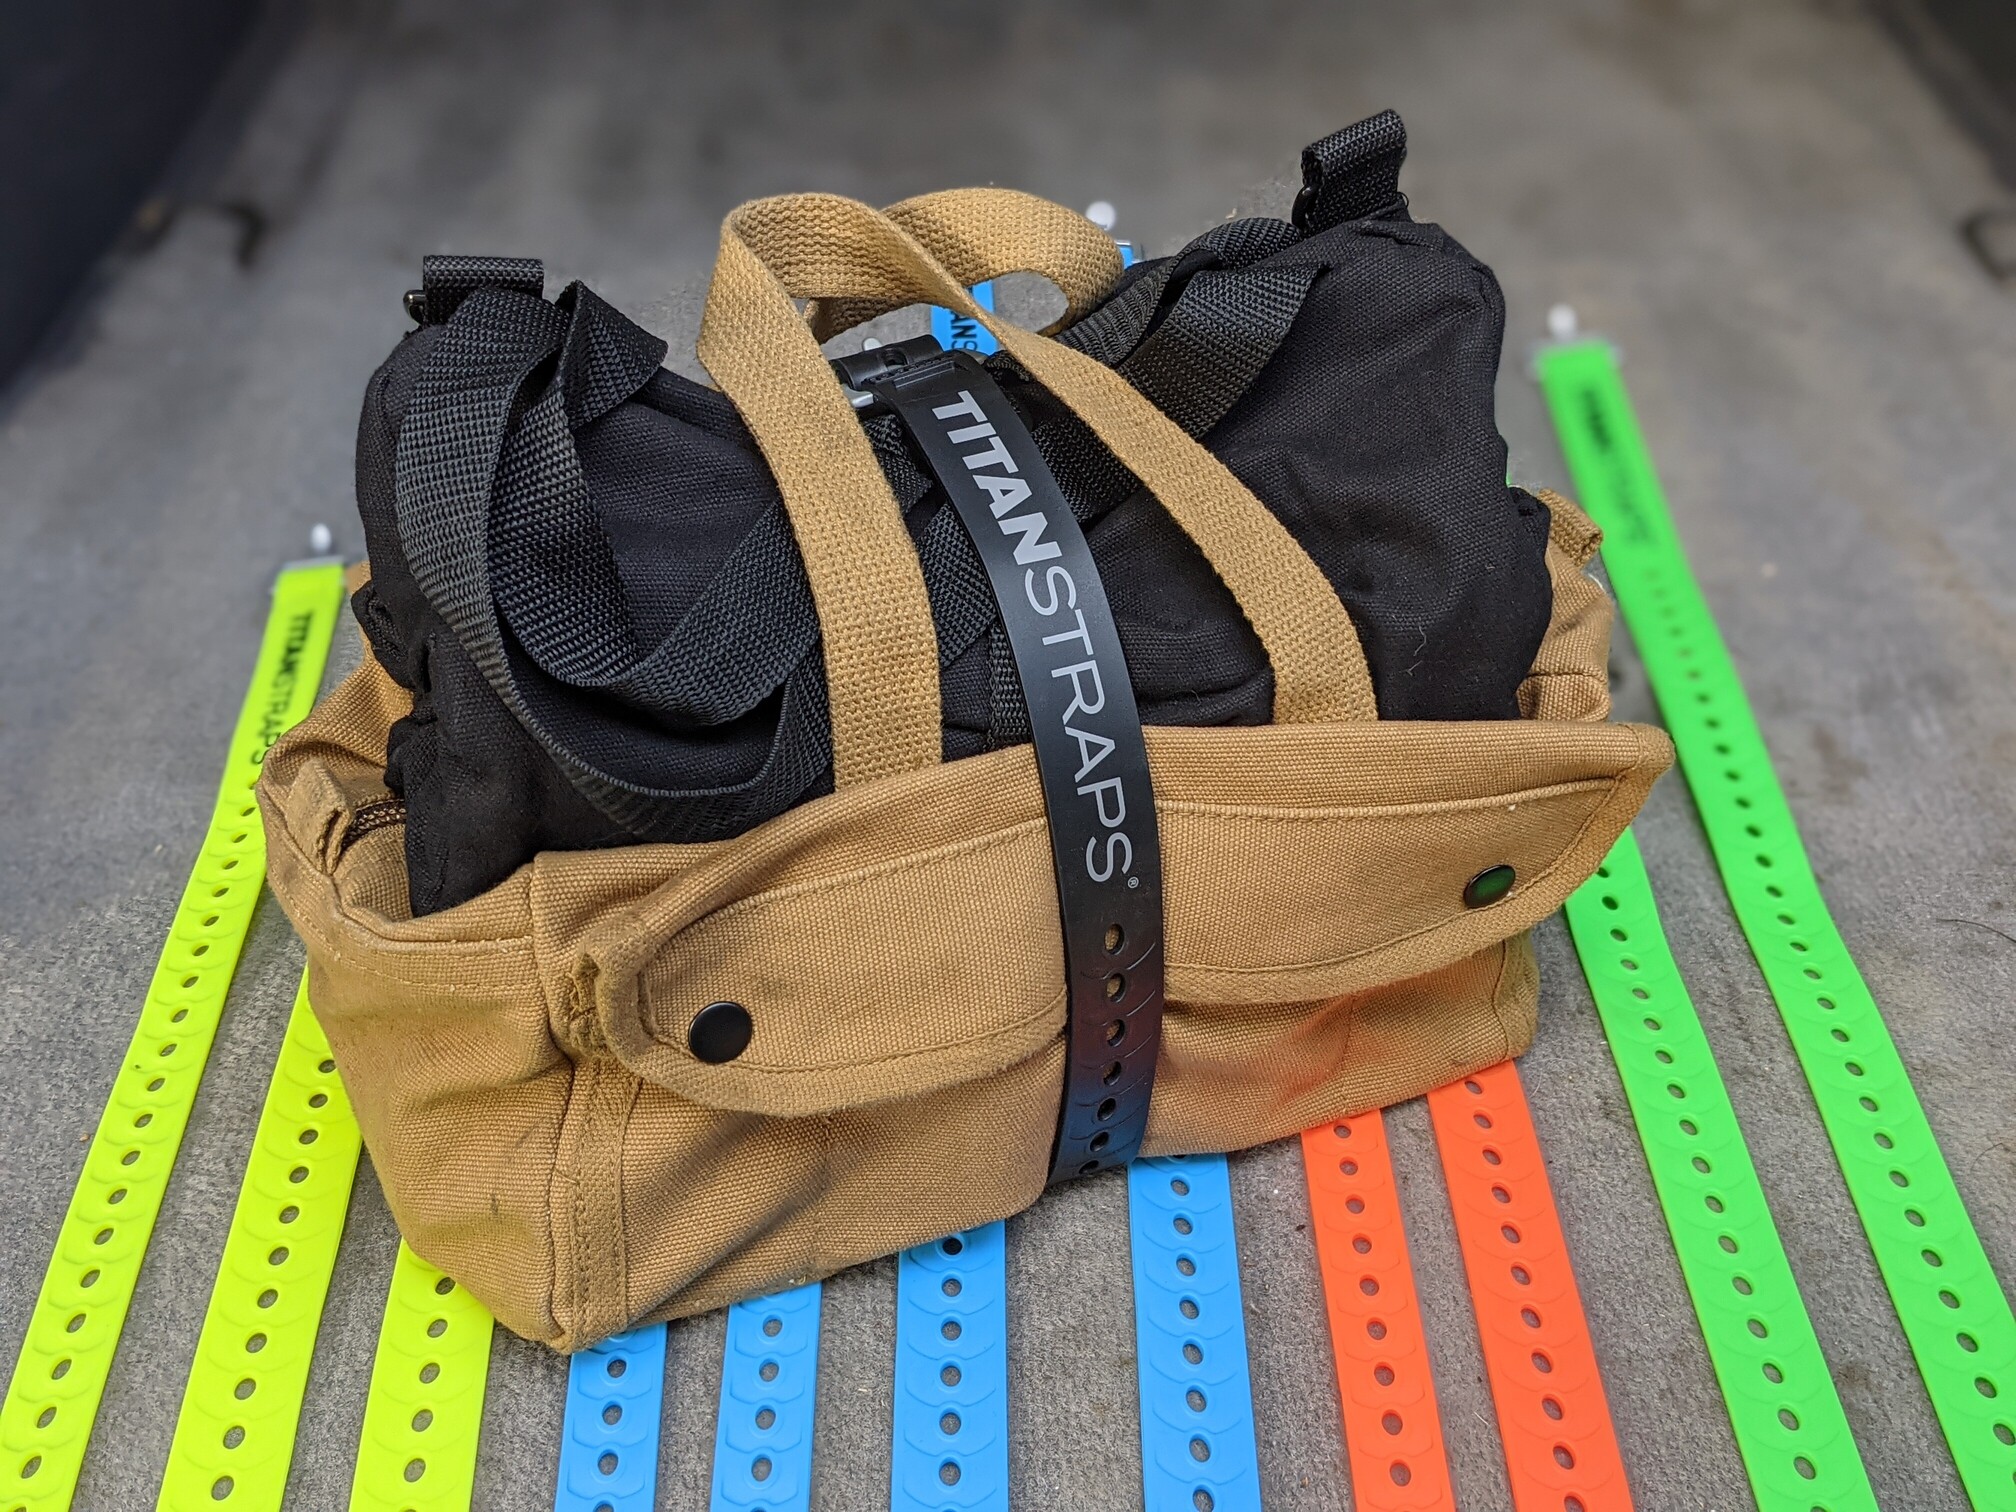
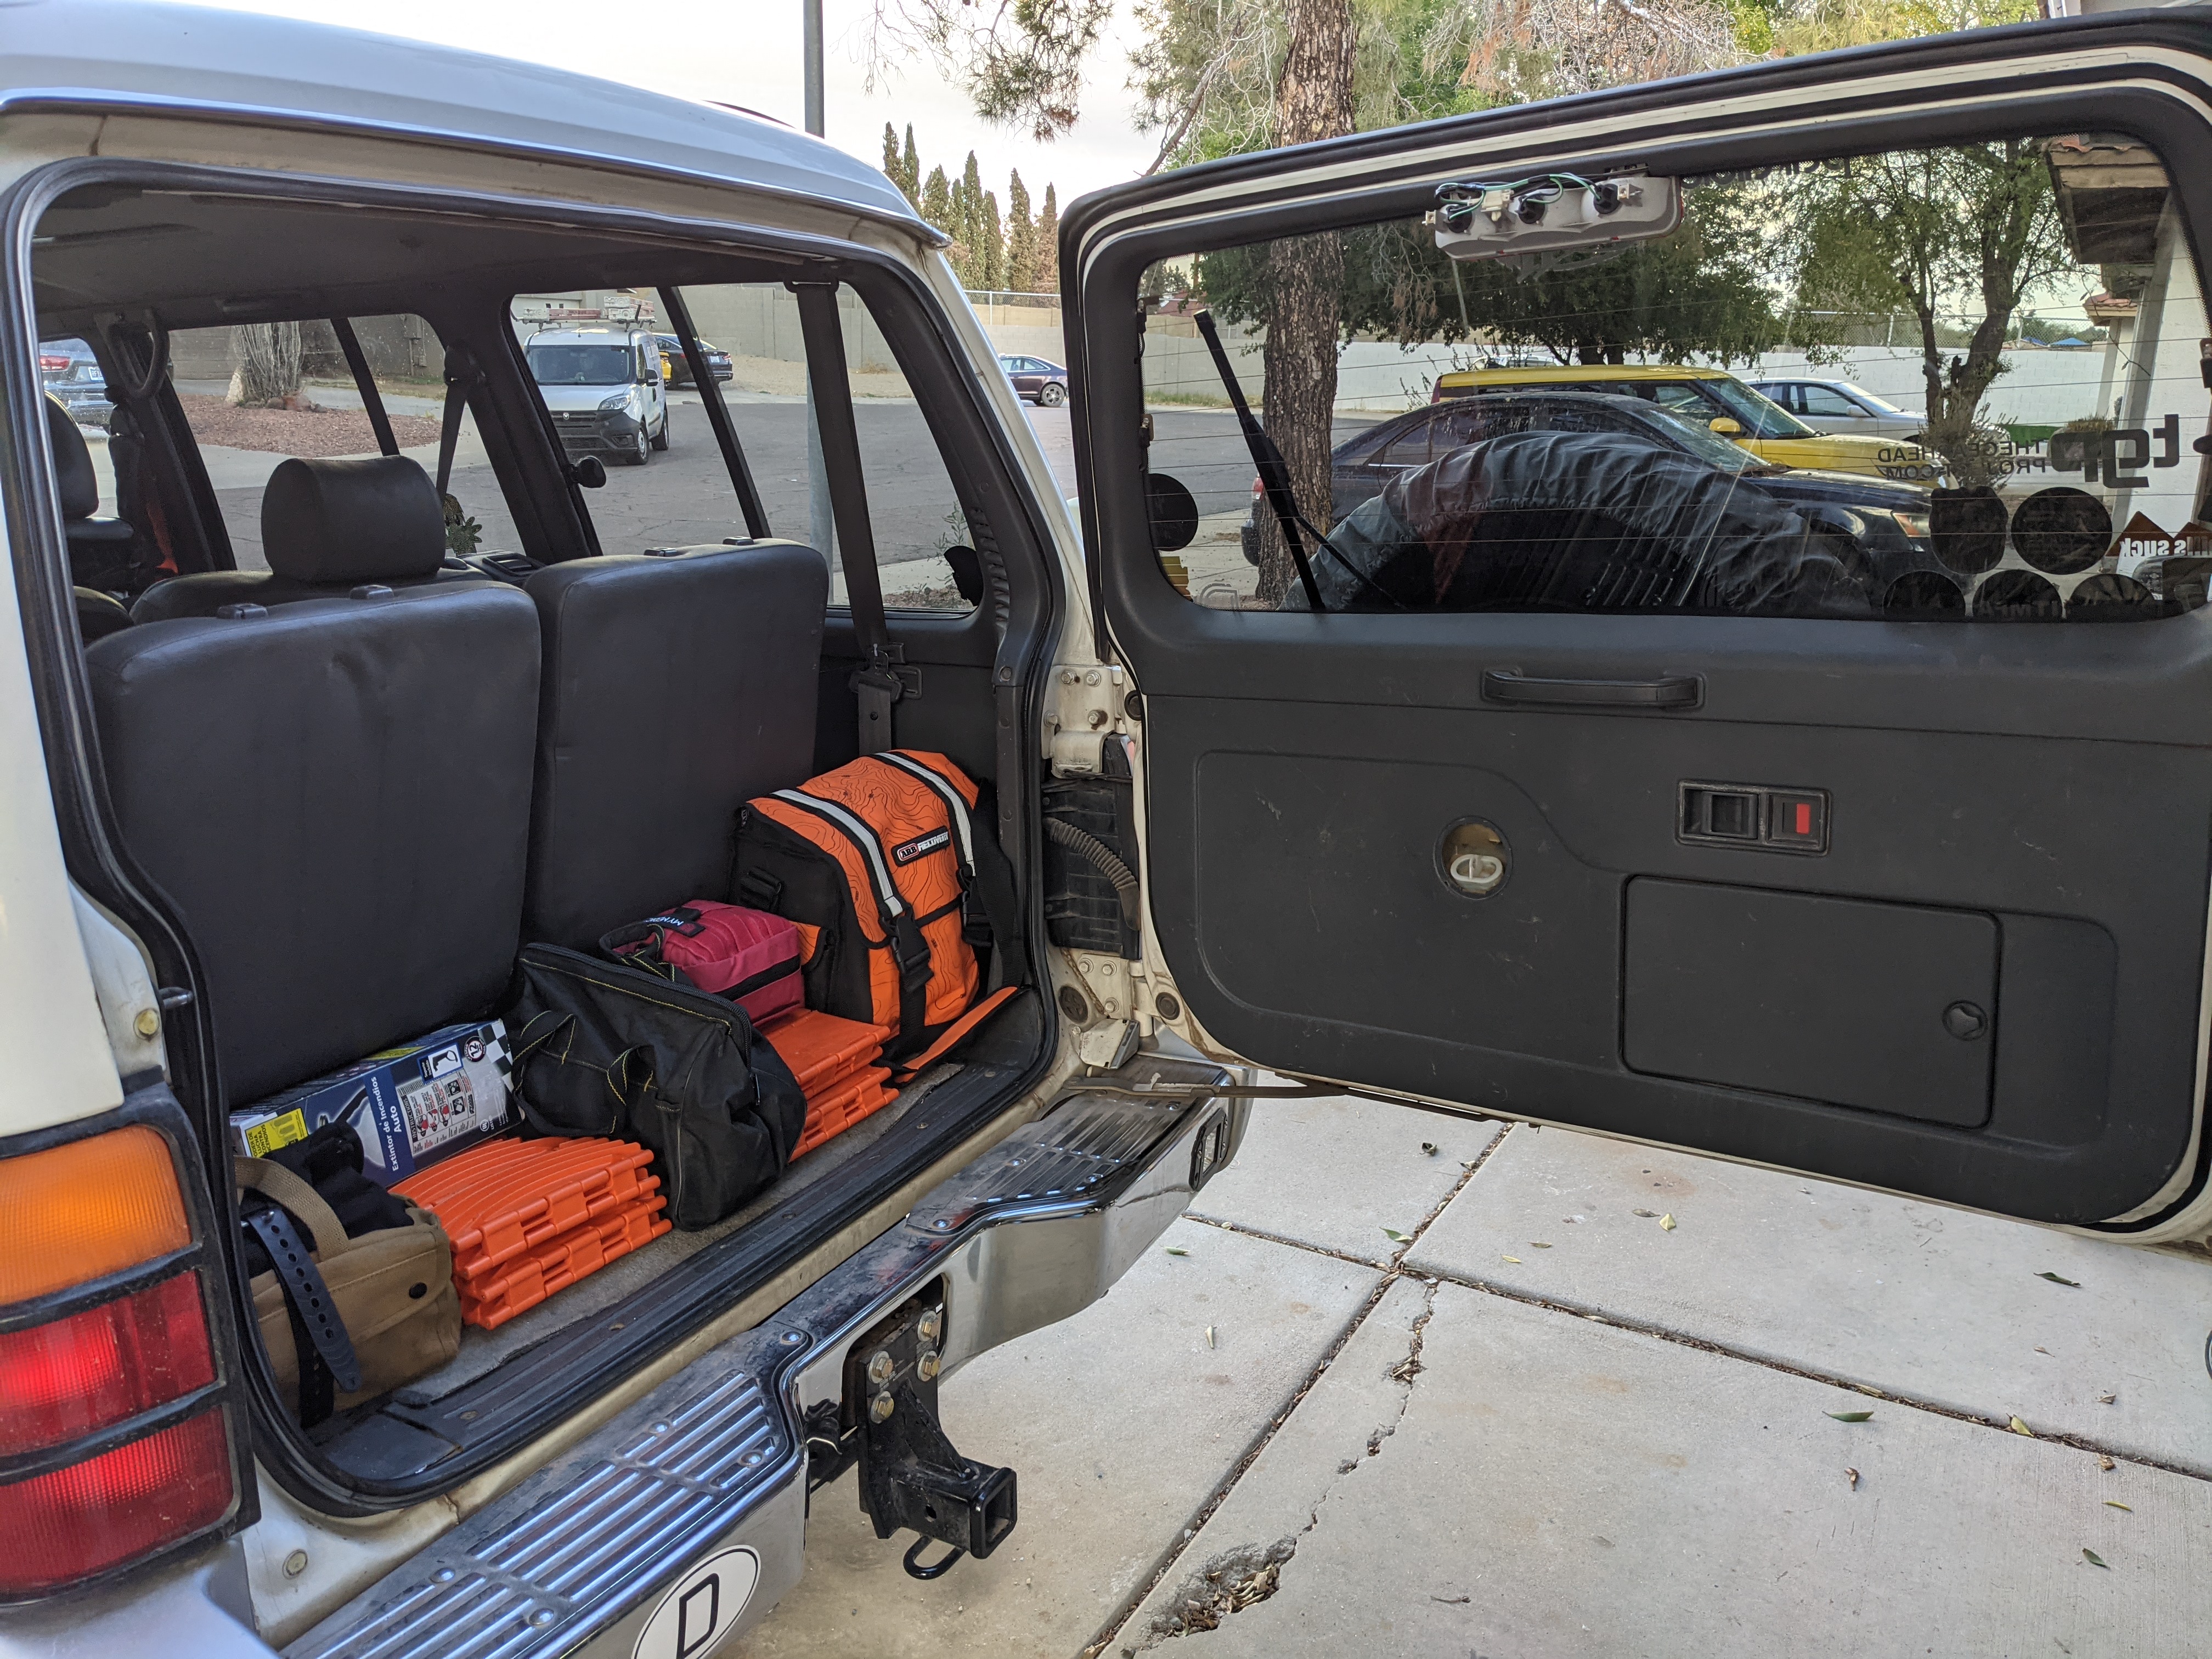
While I went out to re-install the jump seats (we’re gonna chase snow tomorrow), I got lost re-configuring my truck toolkit.
Nevermind the tan backpack. Everything else used to be in the brown bag, which then went into the big black bag.
I tried to take careful stock of what I might actually need to fix on the trail. Mind you, if I was actually going out on the trail or a road trip, I’d also have spare belts, hoses, radiator cap, and recovery gear.
See also–but not seen in these pictures–the truck came with a basic tool kit in the tailgate. Most of mine walked off long before I came into the picture, but there are places for 10mm, 12mm, 14mm, and 17mm open wrenches. I tried to keep that OEM simplicity in mind as I considered what stayed and what went back in the garage.
This is now my truck toolkit. Two full sets of sockets, 8mm-19mm box wrenches (many doubles), screwdrivers, pliers, etc., etc…
I also downsized the recovery kit. All my straps are in the big orange bag. Here’s how the truck currently sits ready to go chase snow with a couple little kids in the jump seats.
Seems like, no sooner do I remove the jump seats, I need them. They’re coming back out before next weekend, that’s for sure.
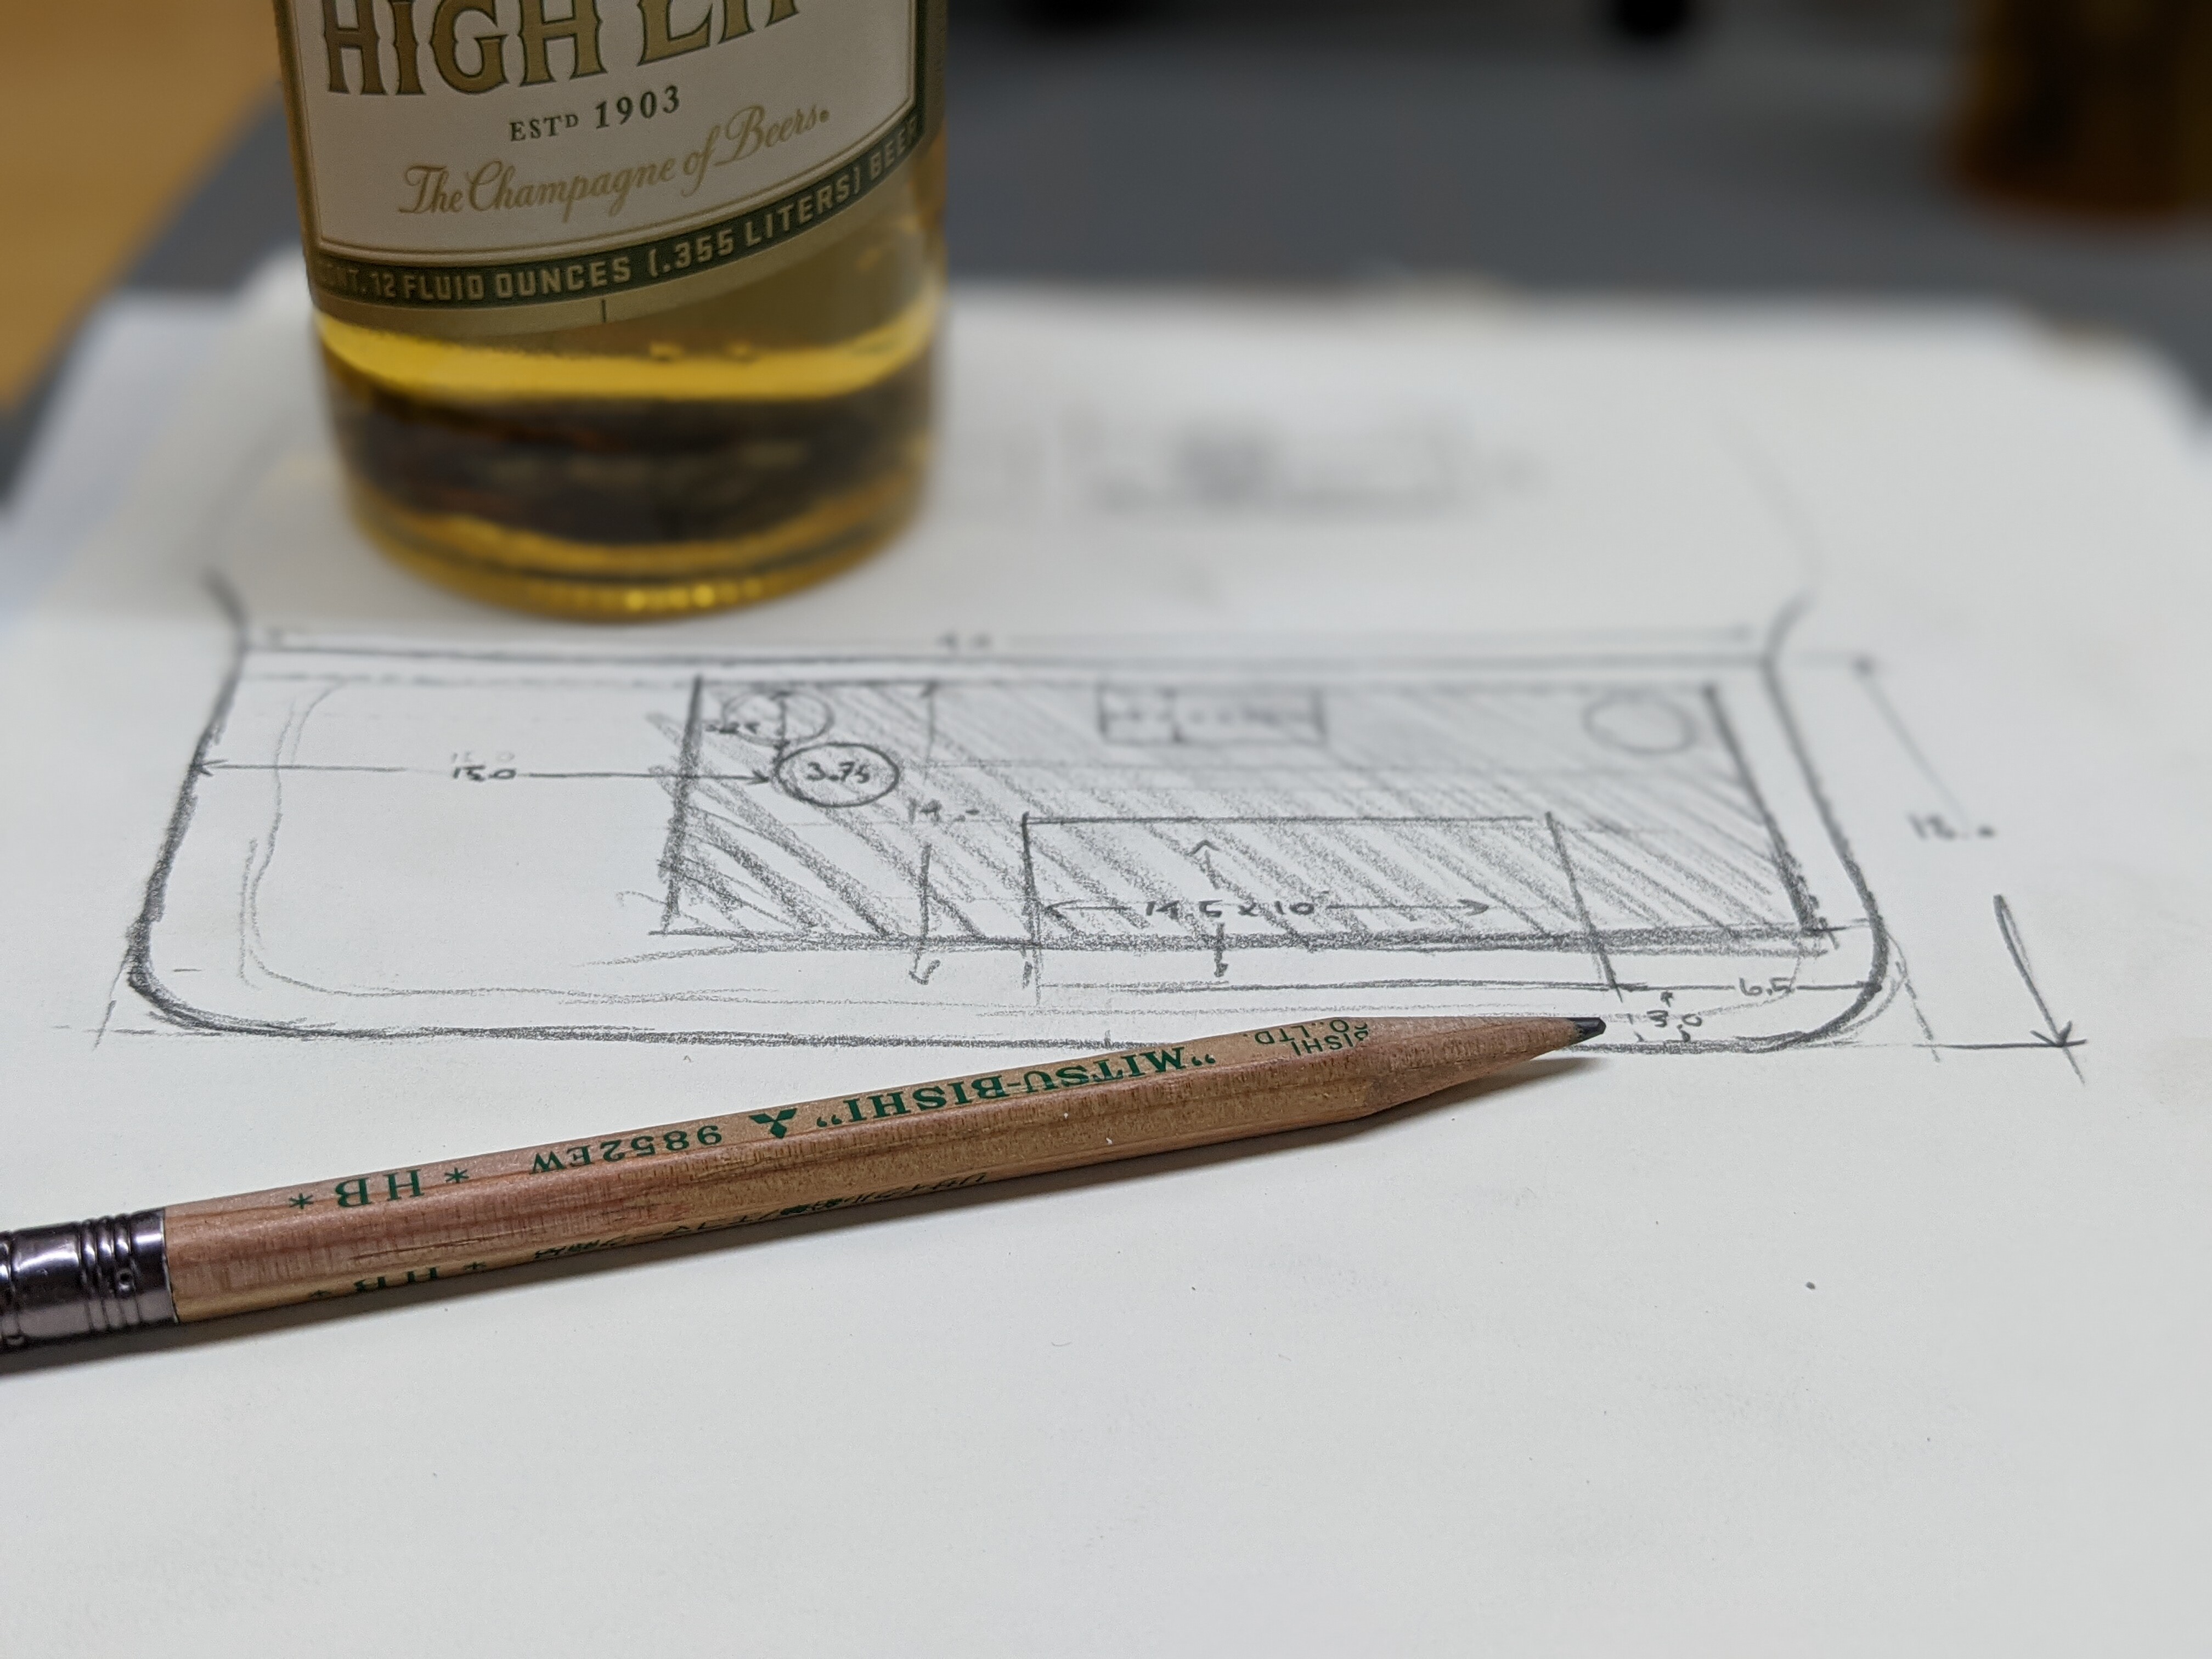
I want to mock up some drawers. Still playing with ideas, but definitely think a fold down table would be a great place to strap my fire extinguisher, first aid kit, and maybe even tool bag–above anything sitting on the floor behind the seats.
And here’s what I’ve got so far. Roughly to some kind of scale. Not sure what to do about the incomplete factory tool kit cubby. It holds some of the jack tools and would be blocked by the table (shaded area).
Maybe I should get the jack out and make sure it’s complete and actually works while I’m at it…
This is a great wrapup dude.
A few comments.
Scheelman, I think you might need to add 1k in front of the price of. Each seat. Maybe more?
Love the new mods. Bumper, rev lights and livery are highlights. Reminds me I need to create a JDM journeys logo at some point. Cool that there’s an actual proof of advertising effectiveness! Wow!
Noico. Another mod on my list esp behind an extremely enthusiastic diesel. Kilmat gets decent reviews and is way cheaper up here. But noico is gold standard. Either way… I wouldn’t compromise the headliner for it. Install underneath and then refit,. Imho. Removing and replacing with fabric would hurt resale but more importantly would possibly begin cycle of reattaching falling fabric every spring? Maybe I’m just a skeptic. Prove me wrong! 
Every time you modify something I’m surprised how similar our two vehicles are. Like, 7 people seatbelted properly in chassis as small as ours? Yep. I think you’ve got the edge on remaining cargo space in that scenario though, a Disco’s 3rd row leaves just about enough space for those Gotreads.
On the table vs. cubby dilema, would it be possible to make the table taller/wider so it covers the entire cubby door? It could even replace the cubby door at that point if you felt like keeping single-stage access to it. If you’re using a piano hinge, they only get stronger the longer they are.
Also, don’t forget to check the table against your floorboards for level in case the door tilts up a little as it swings out. I’ve got that same problem, except something like 15 degrees of tilt…