Third! Love my riv-nut gun!
1 Like
Damnit, guys! 
I am kinda in a similar dilemma with the front end bushings. Part of me wants to get brand new OEM arms and have confidence they will last 200k+ again or upgrade to Siberian bushings. Problem I am not getting info is long term durability. Yes polyurethane is a great material…but not sure if they have the durability and longevity of a OEM bushing.
This isn’t like building a “race car” which the main focus is performance enhancing. The Montero is focused on durability, reliability and longevity in most areas.
Decisions 
1 Like
Right? I’m going to pass on doing the bushings right now, but keep my eyes peeled for a set of stock arms in the future to do a proper swap. Will probably make a point of spraying everything down with silicone when I’m in there doing the ball joints.
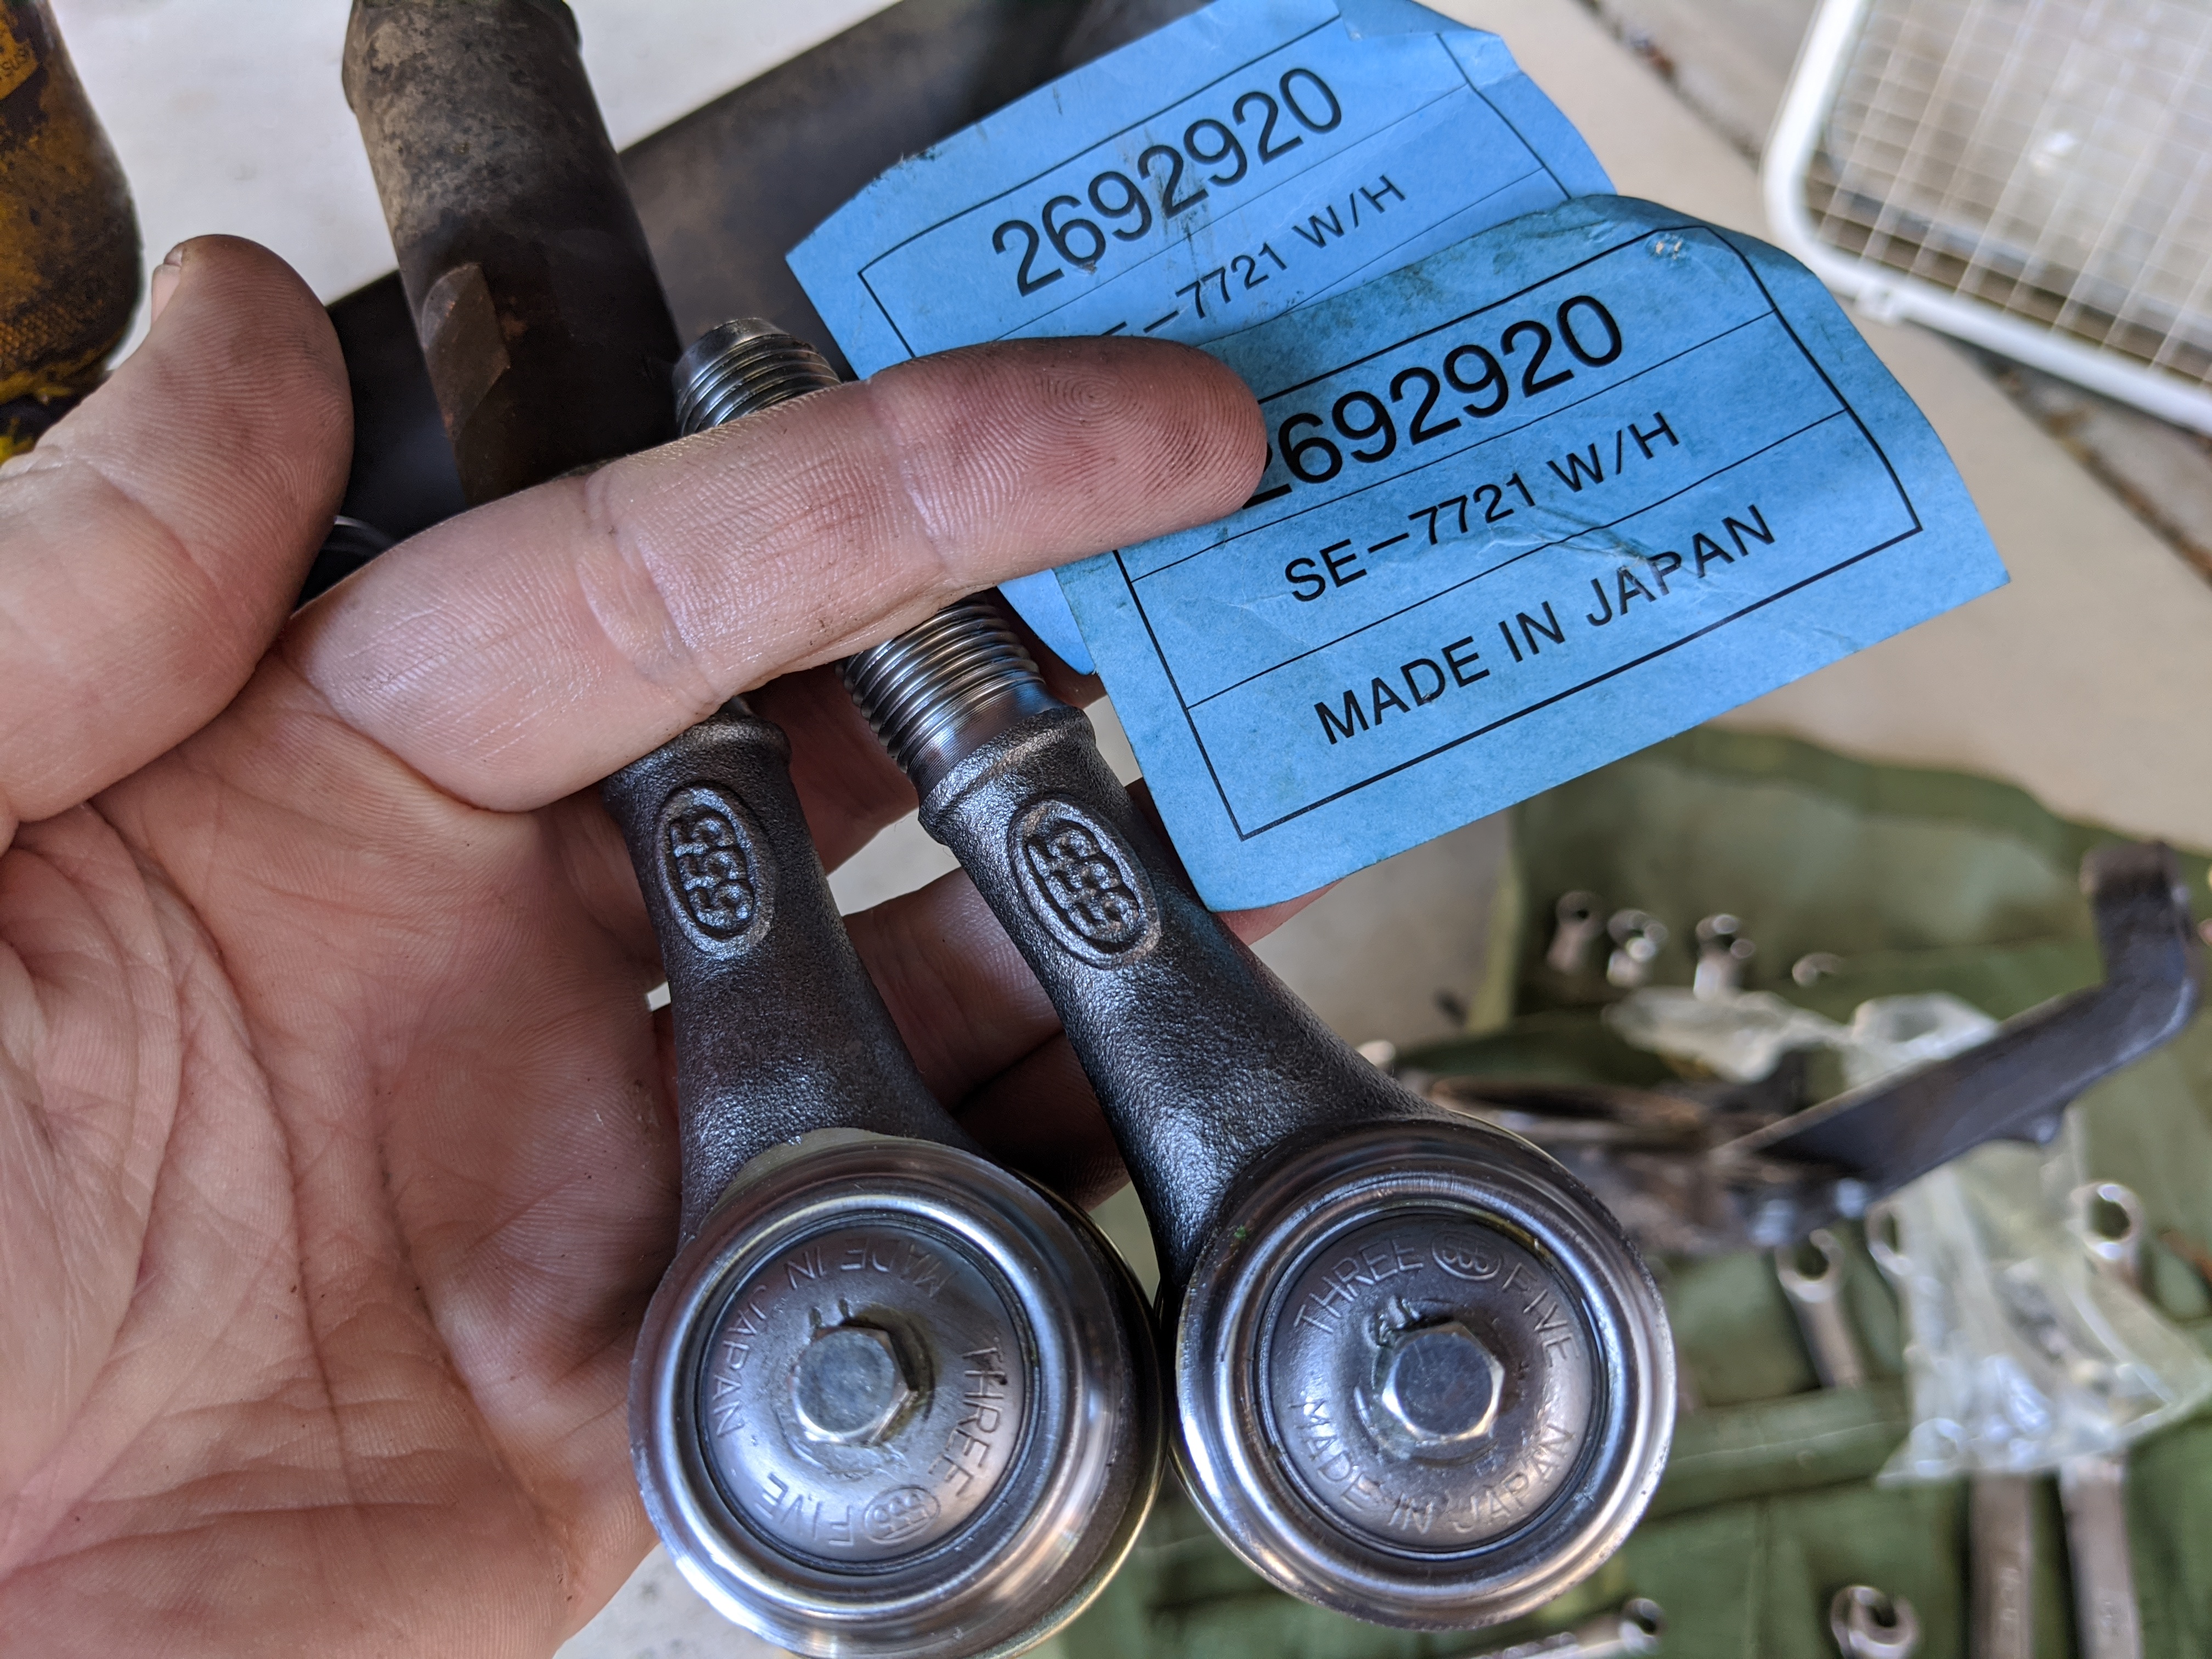
By the way, @MrGalantguy, you pointed me to the ‘555’ stamping tie rod ends. The Delco units on Amazon come with zerk fittings, but the Beck Arnley do not. Considering they’re the same castings, shouldn’t I just be able to reuse a zerk from something else on my truck, say, an old ball joint?
Reason I ask is my brother in law saw I had the Aisin hubs and Delco tie rods on my Amazon wish list as high priority—but he missed that I needed two of each when he generously bought them for my birthday. I’ve since got the other hub, but the Delco tie rod’s been out of stock for over a week and I’d like to get this job done in the next couple weeks. I wonder if I should just order the Arnley unit and go.
Thoughts?
Really? All the Beck Arnley ends had zerk fittings. The actual fittings weren’t installed as they were packed in their own little bag and the opening for the fitting had a seal cover.
1 Like
Thank you.
Just went to order the Arnley unit. Amazon has it for $25 shipped, but earliest delivery was 5/20. Damnit.
NAPA has the exact same “555” casting in stock and I can pick it up locally Wednesday–for $42.
I think I’ll start taking things apart this weekend, maybe get the job done, but at least start.
@humming when can I swing by to borrow ball joint tools this week?
Any evening is fine Monday through thursday.
1 Like
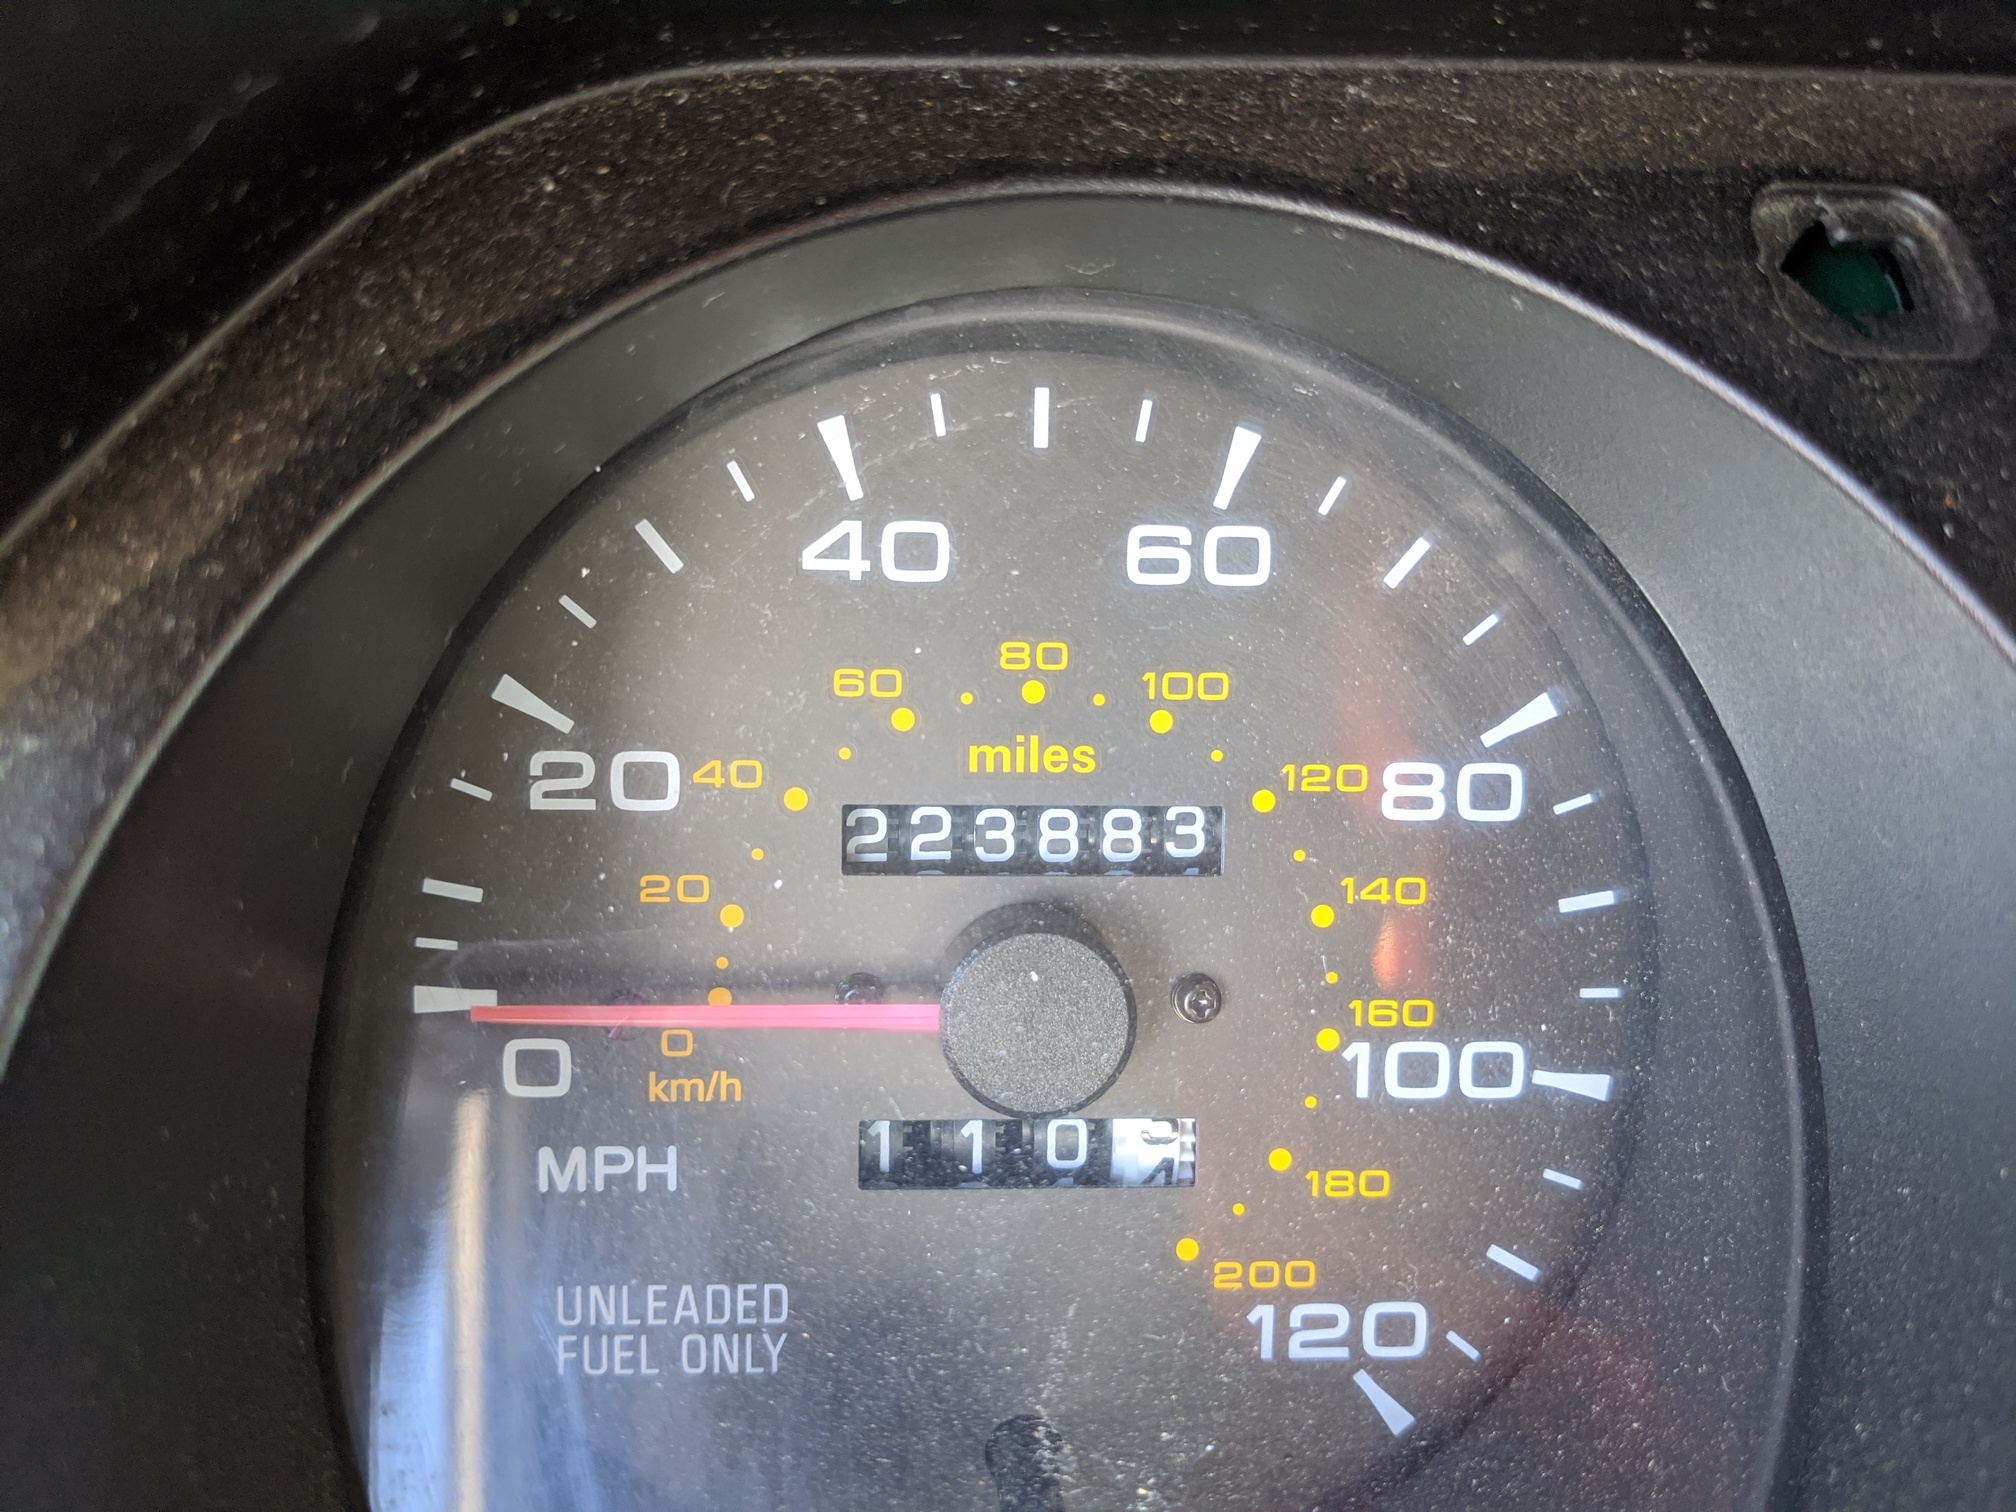
223,883
- upper & lower ball joints
- outer tie rod ends
- manual hubs
Working from home for nine weeks now due to covid-19, I haven’t rolled out of bed much before 0700 in at least a month.
We did a birthday party parade for one of P’s friends from kindergarten at 0930, grabbed a couple Super Sonic breakfast burritos after, and I got started at noon.
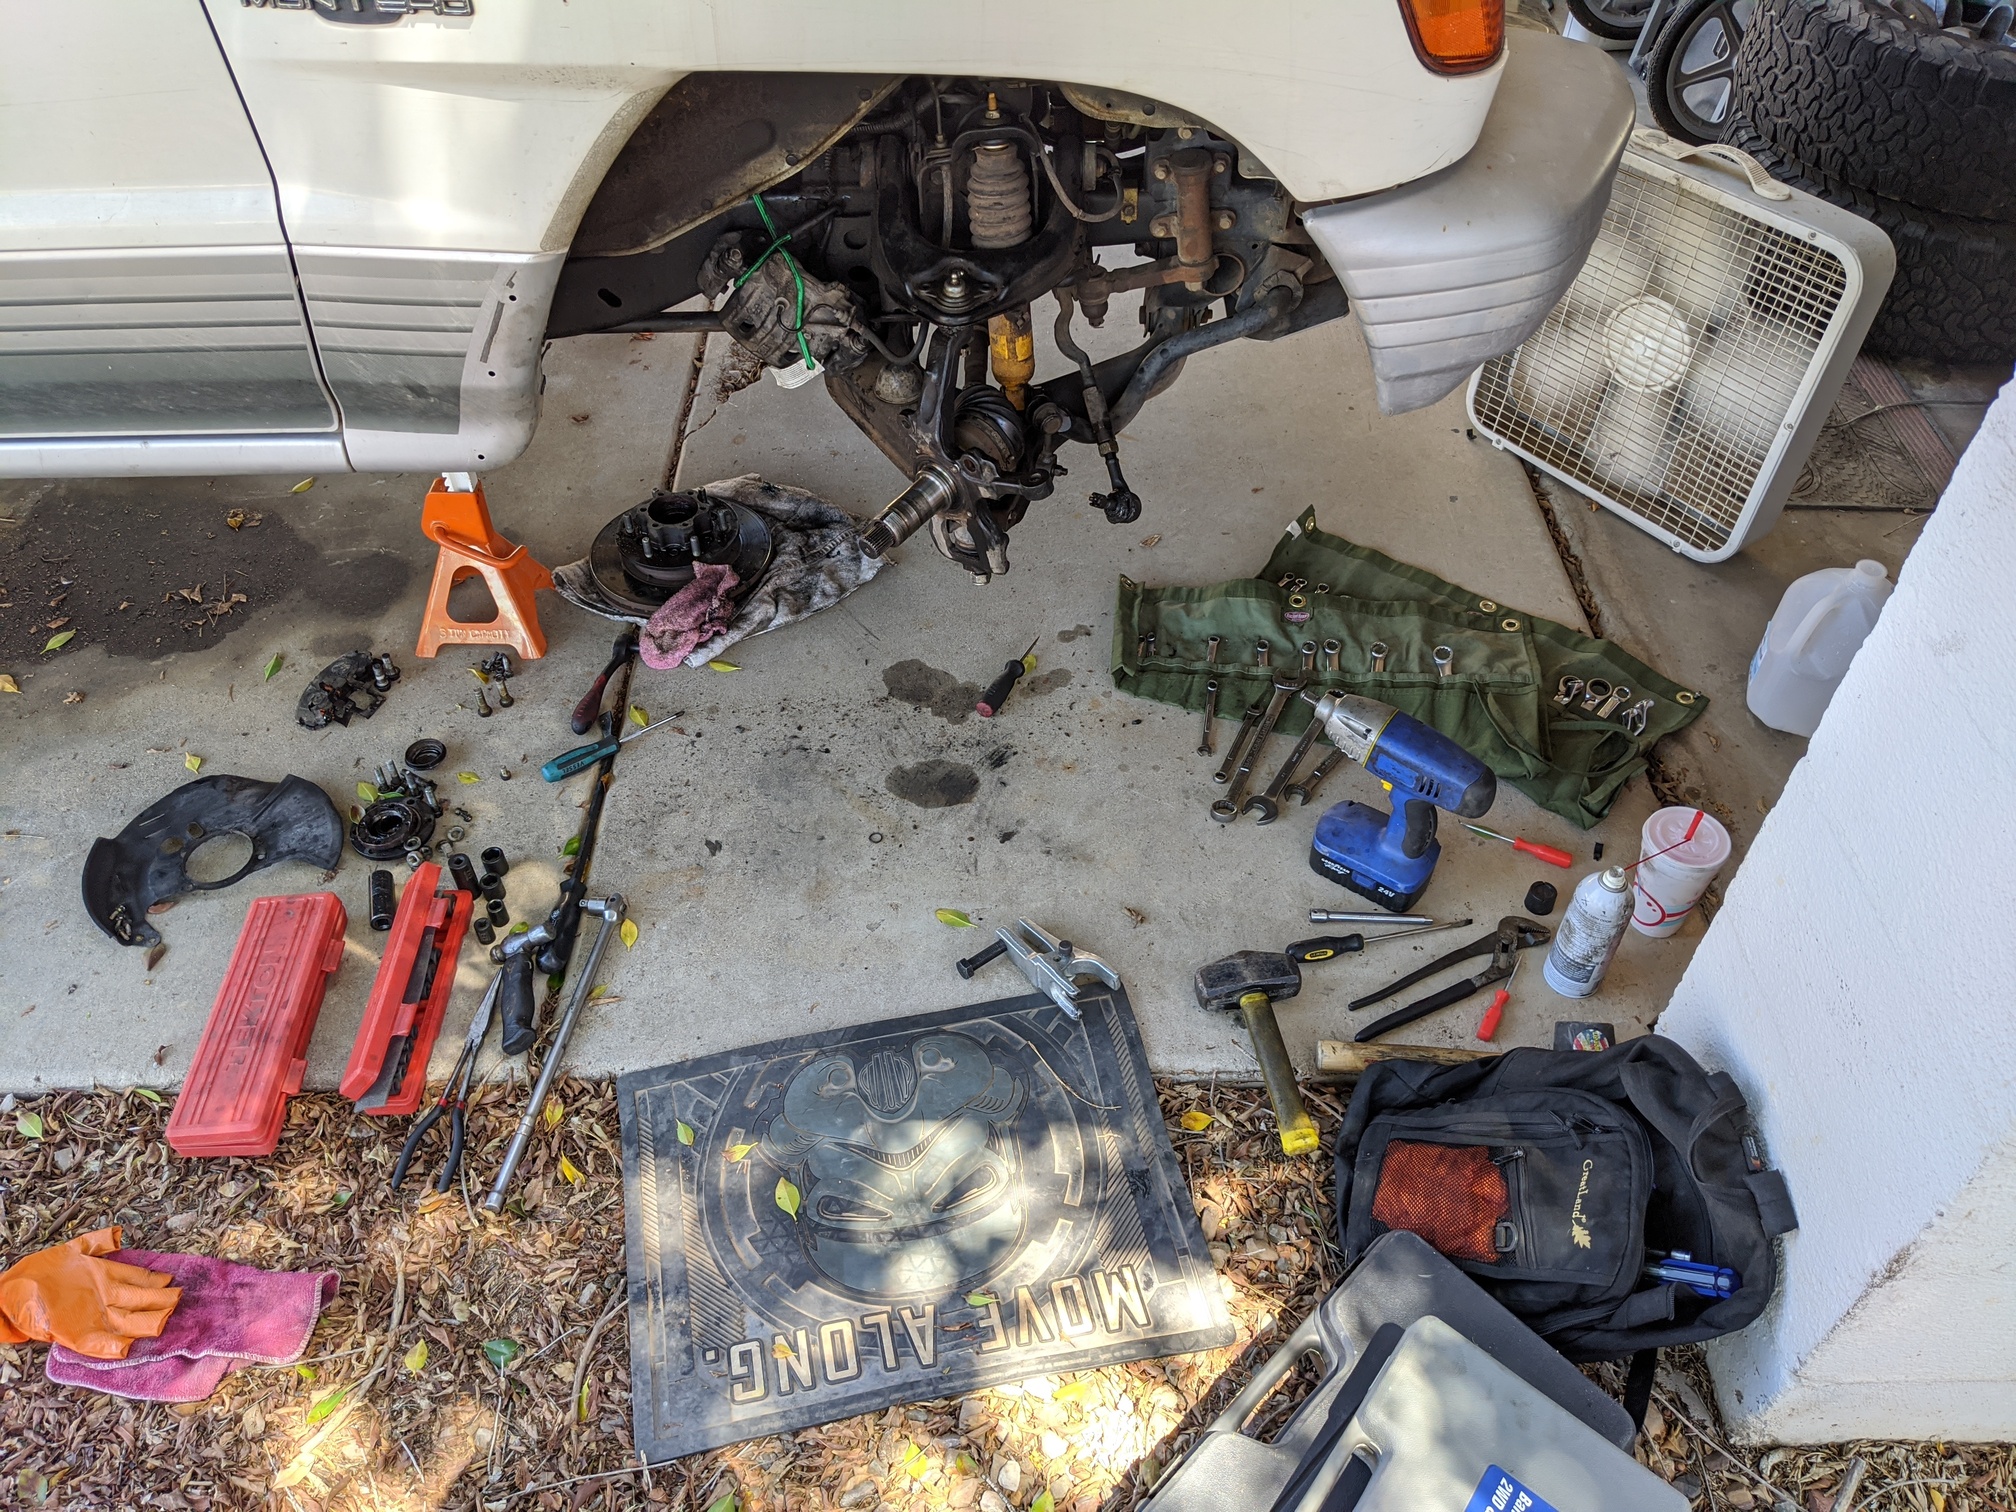
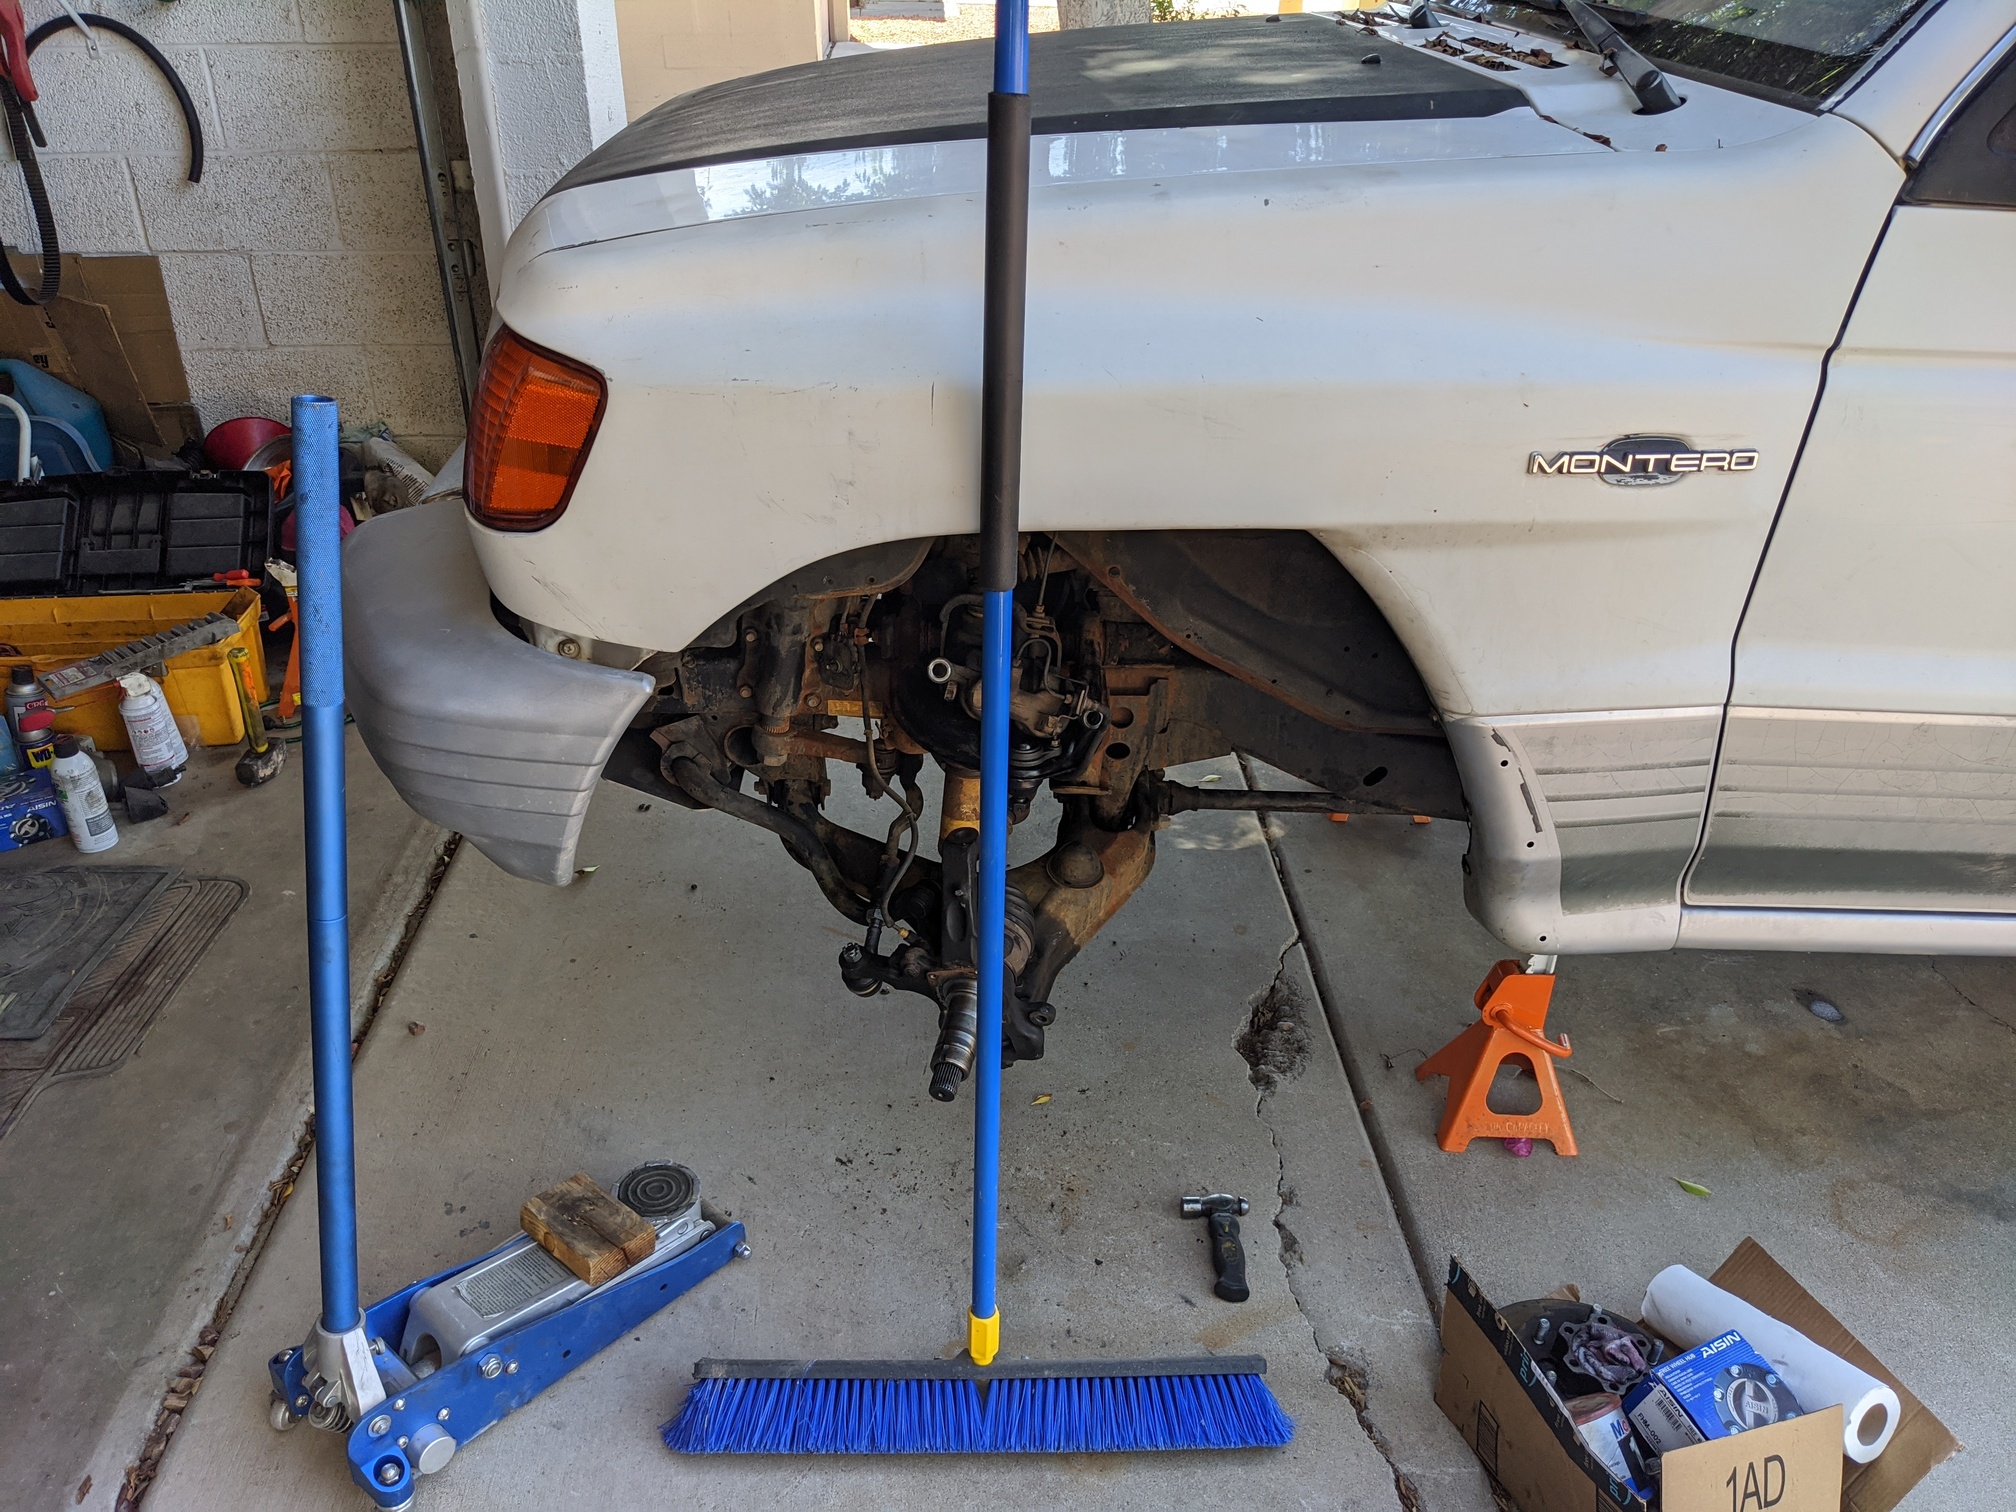
I moved truck right up next to the garage door to get the front end in some shade and set up my tools… and a fan.
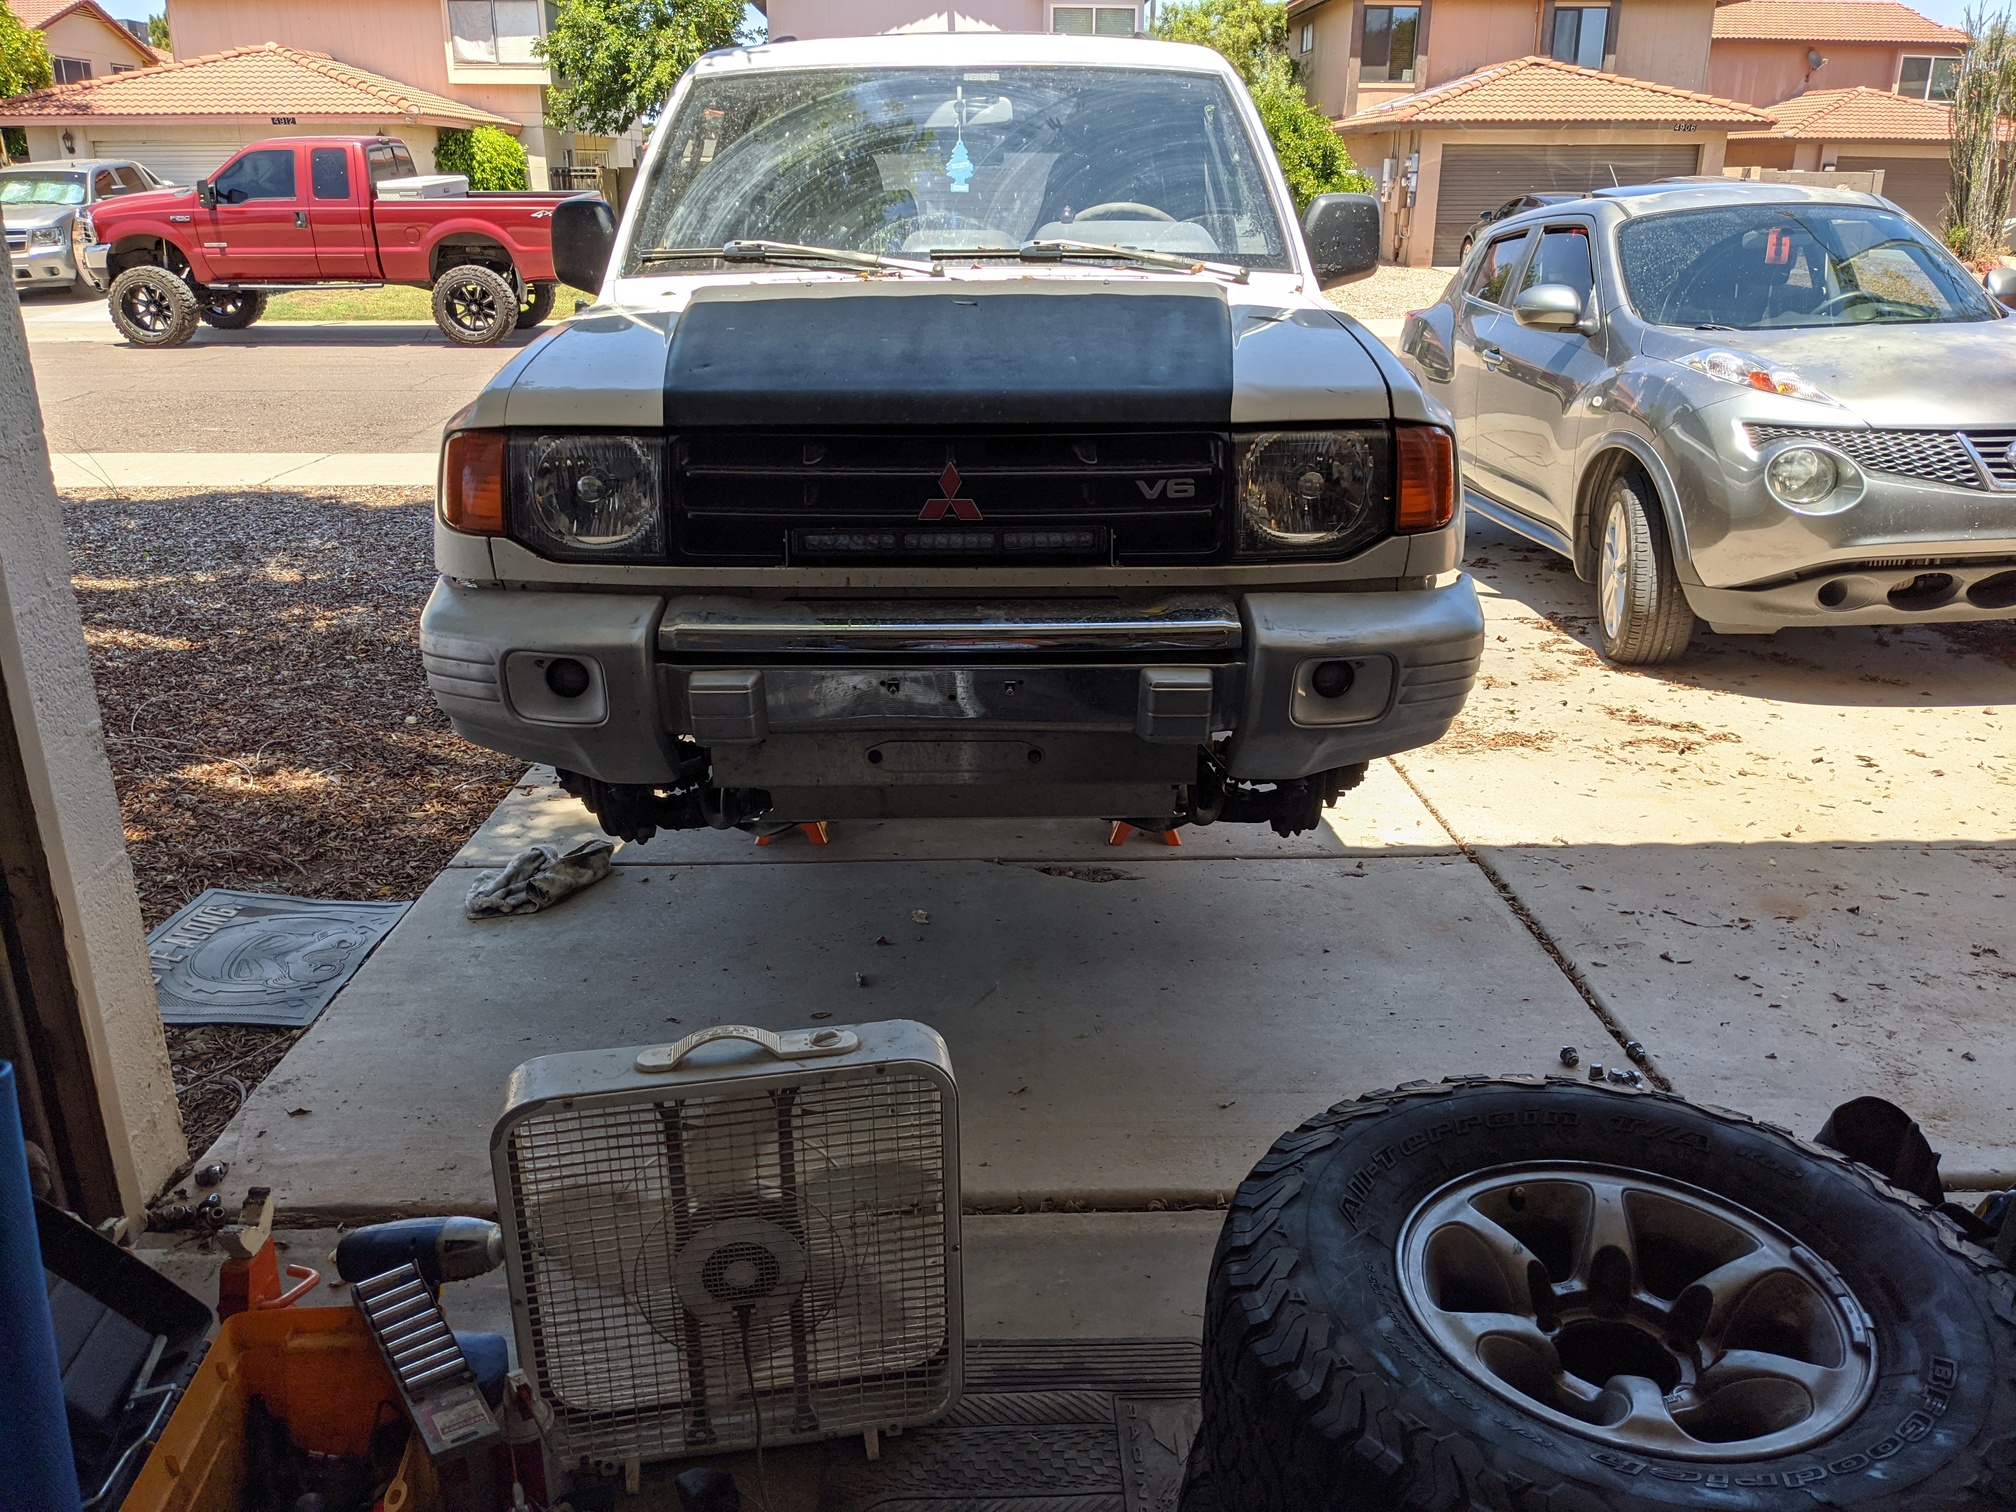
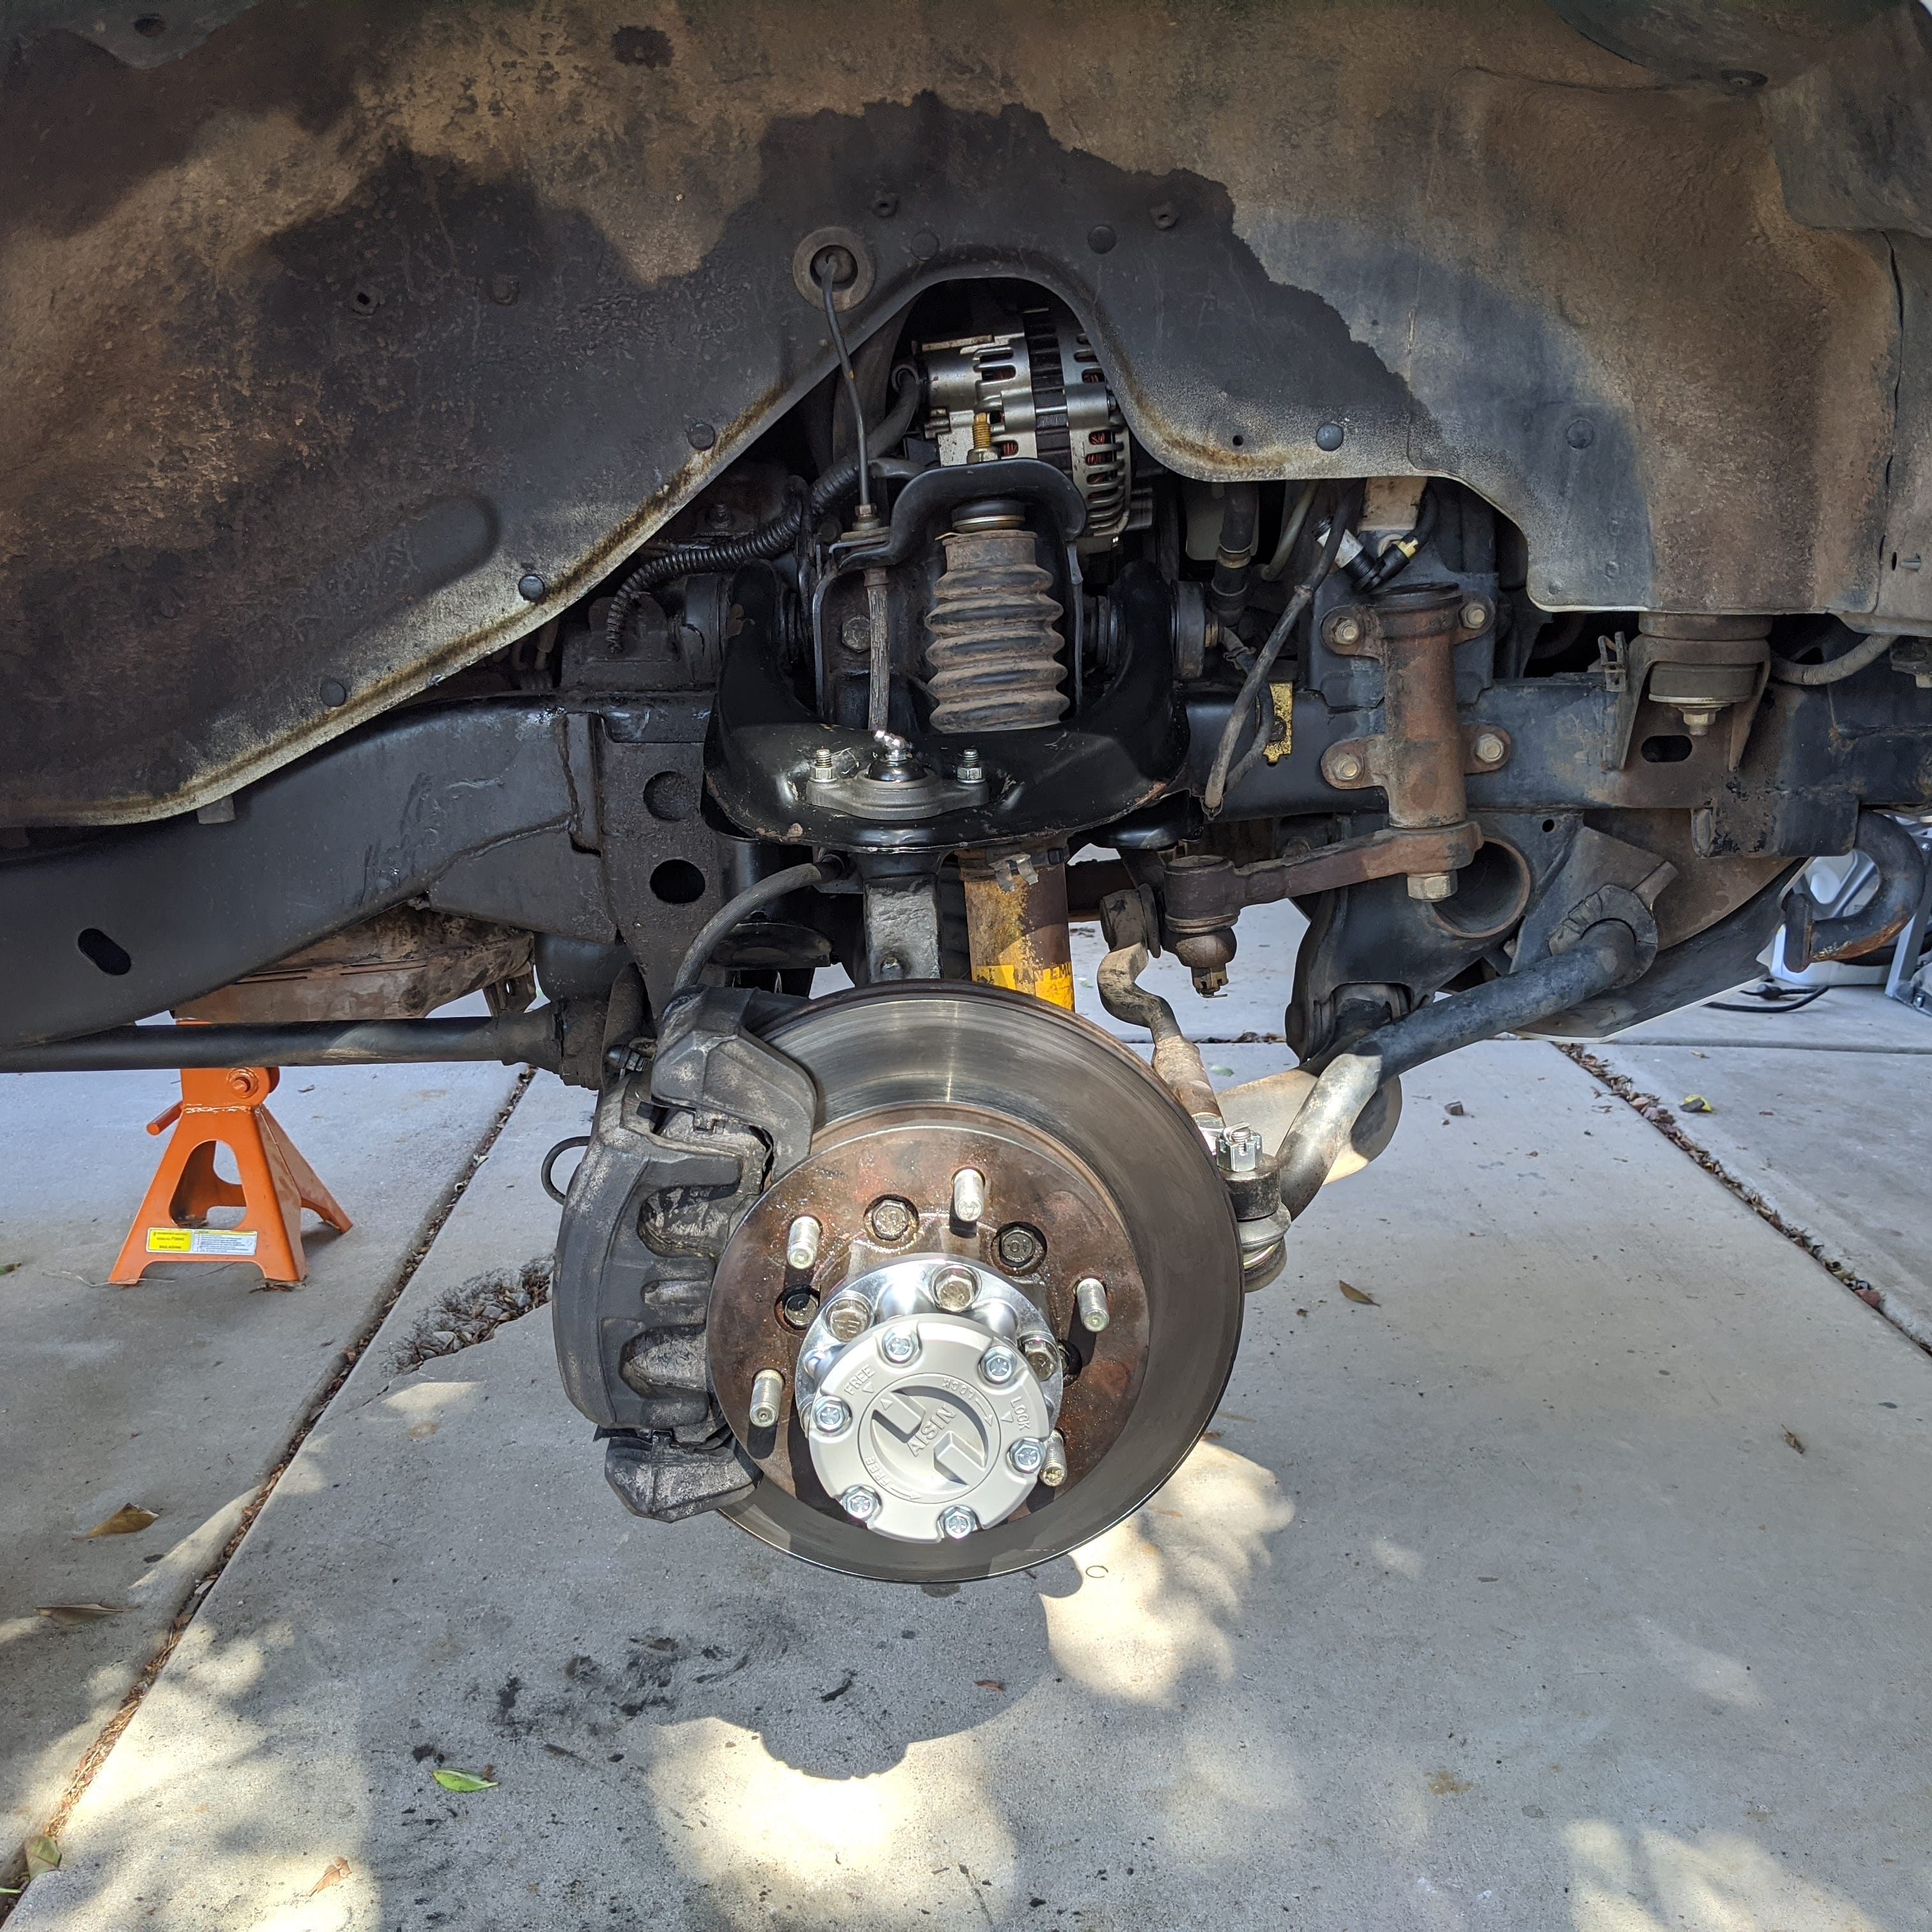
Here’s where I started. Passenger side (since there was more shade and that’s the side that’s been making all the noise).
To be continued…
3 Likes
… continuing …
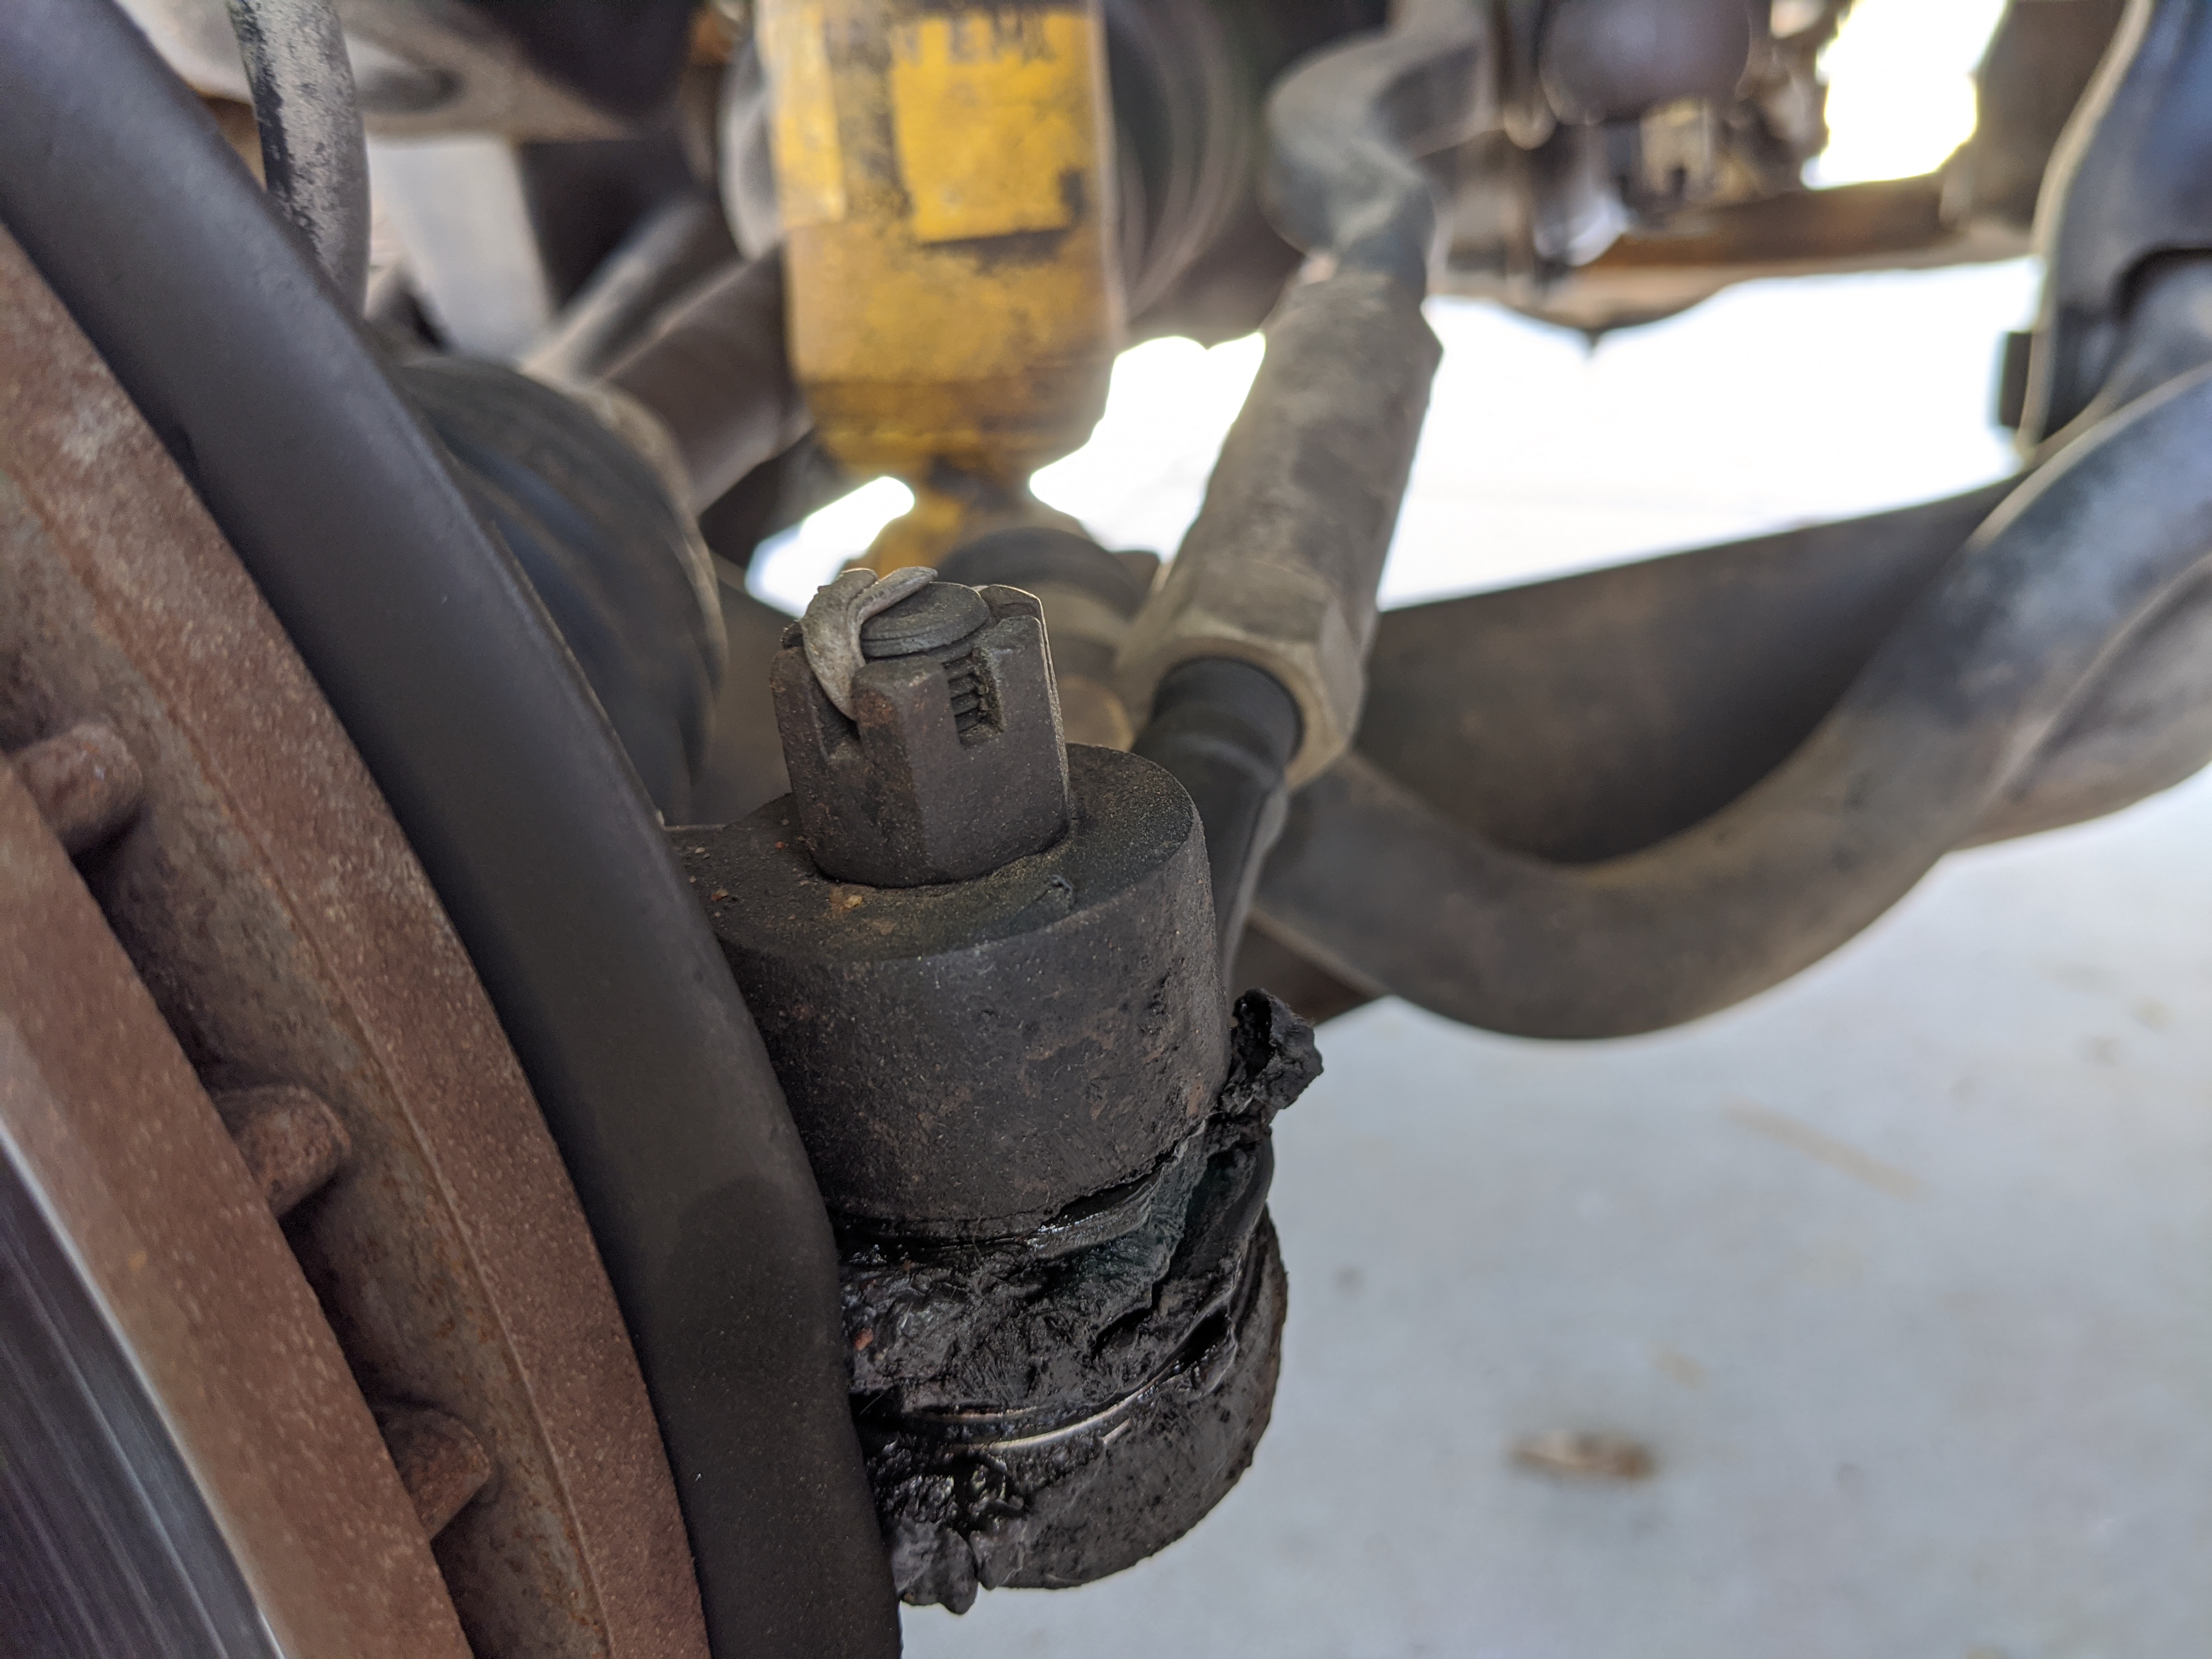
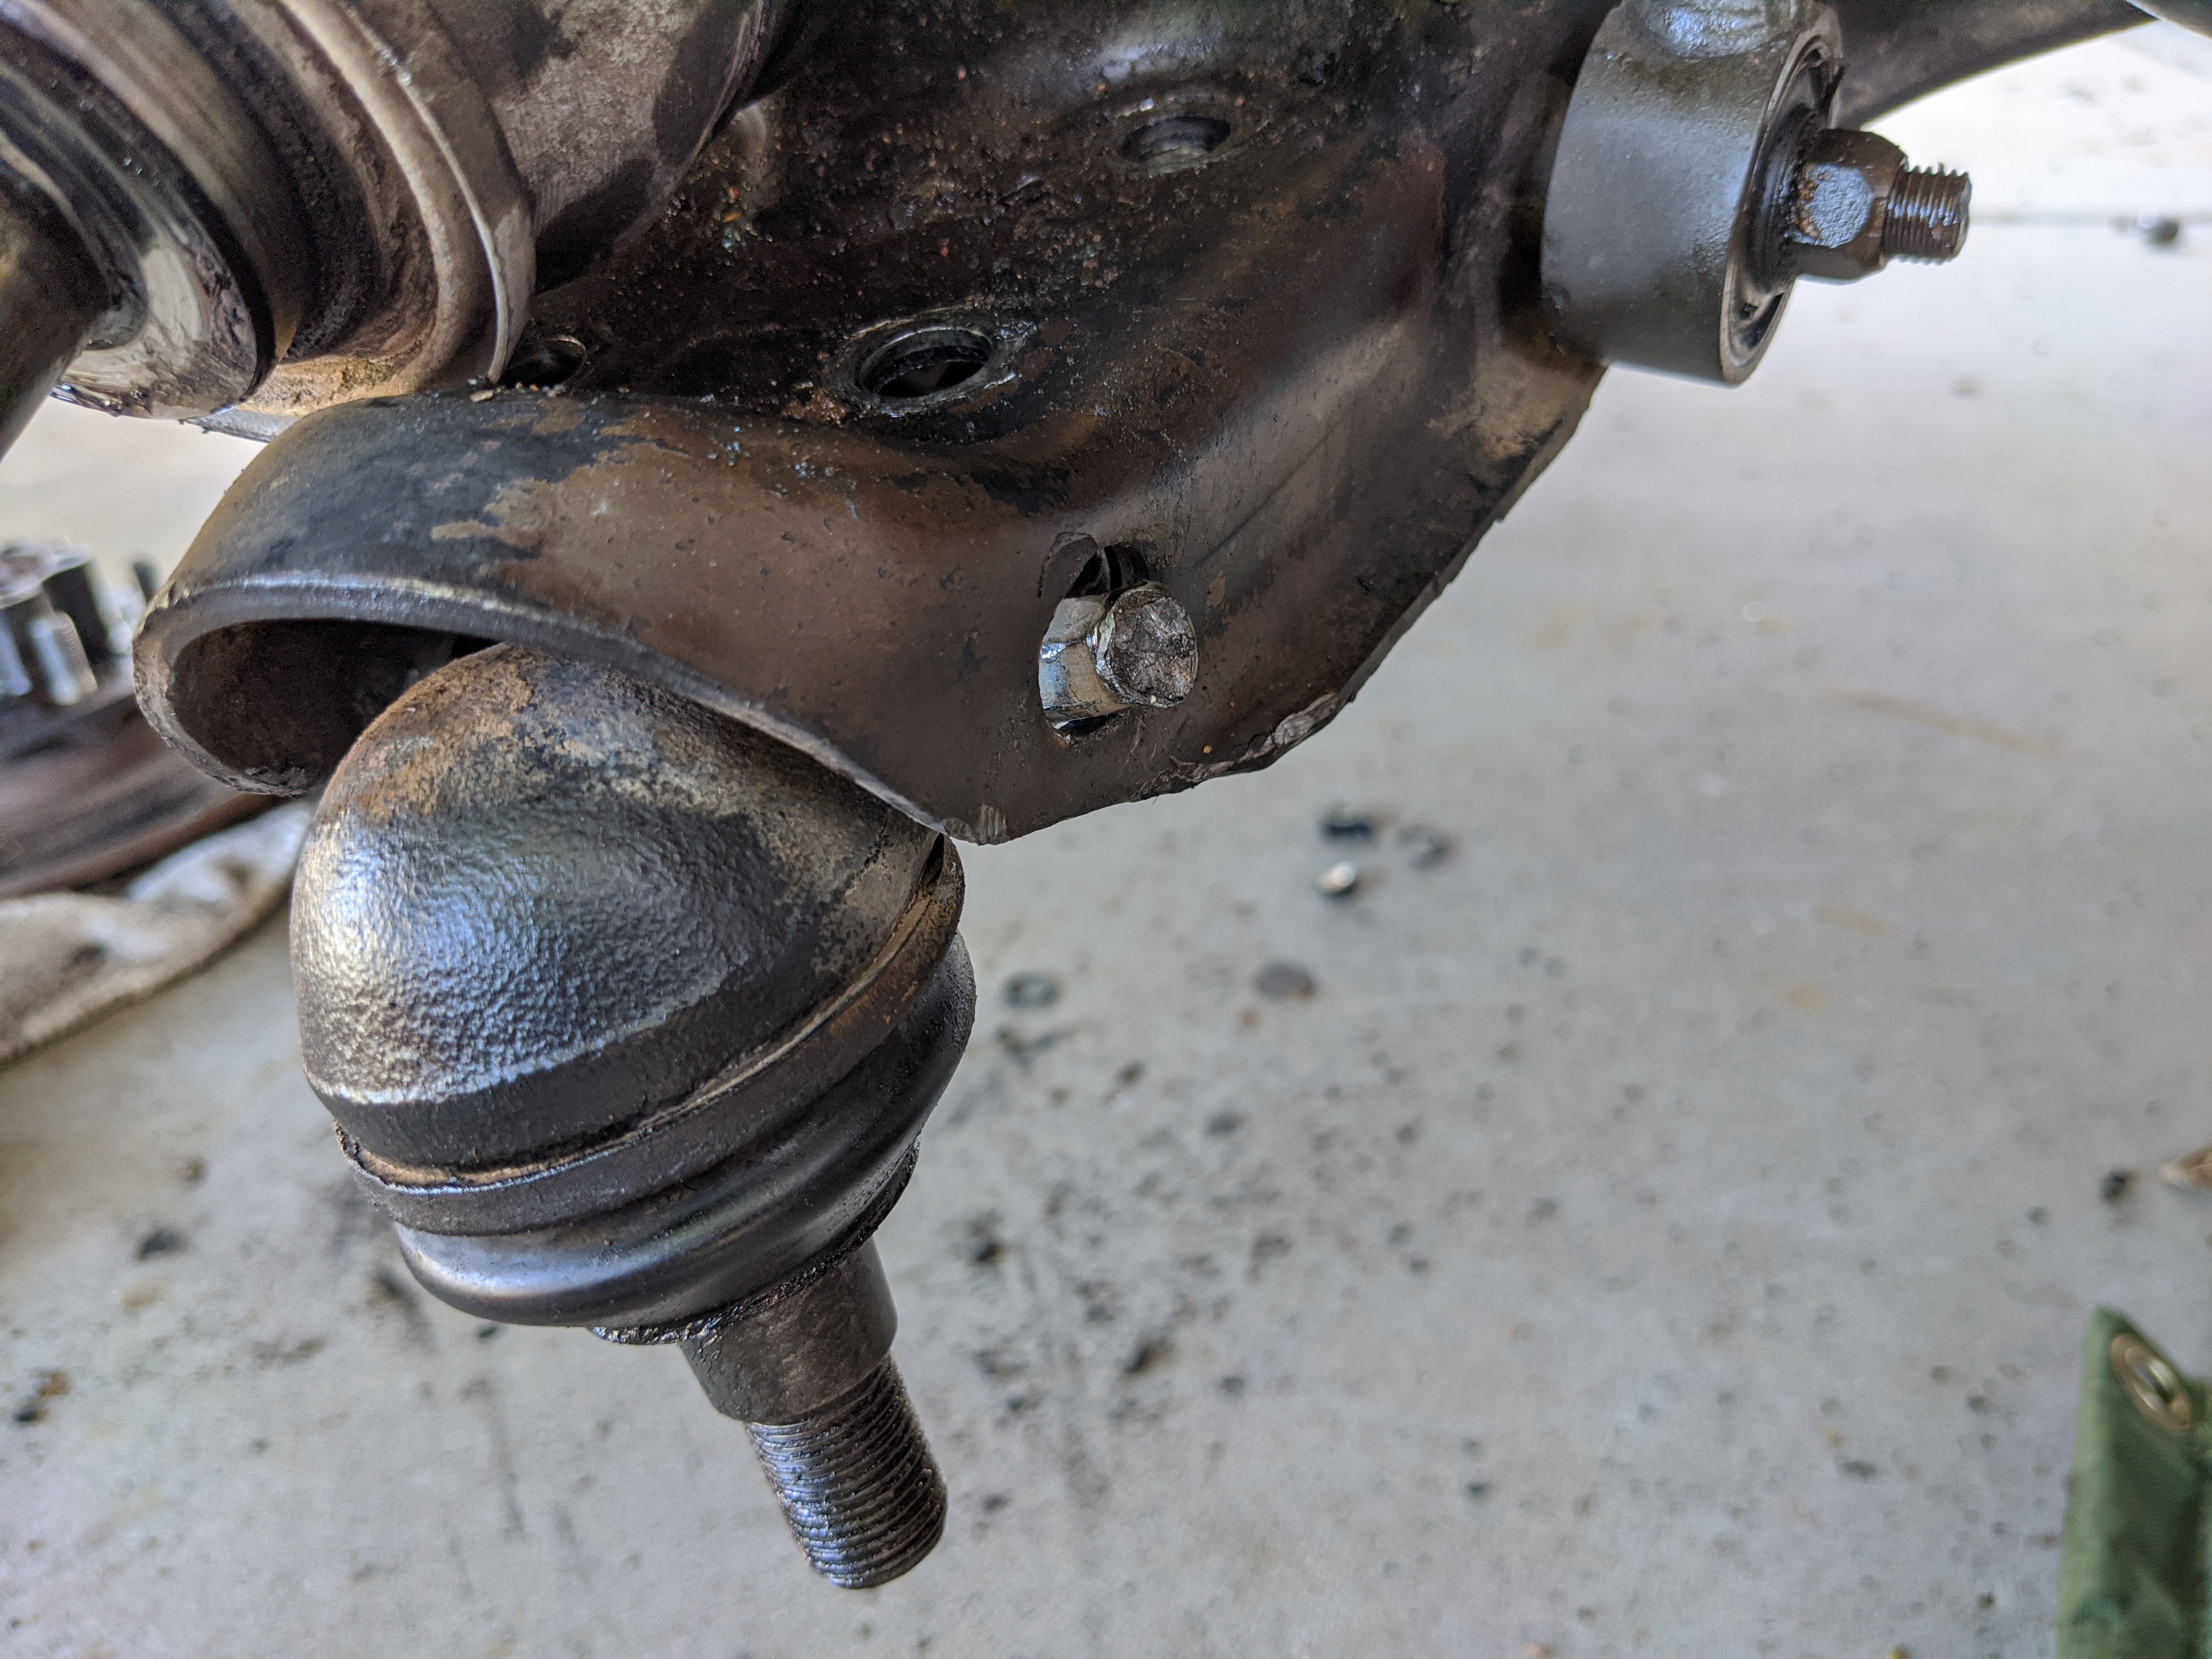
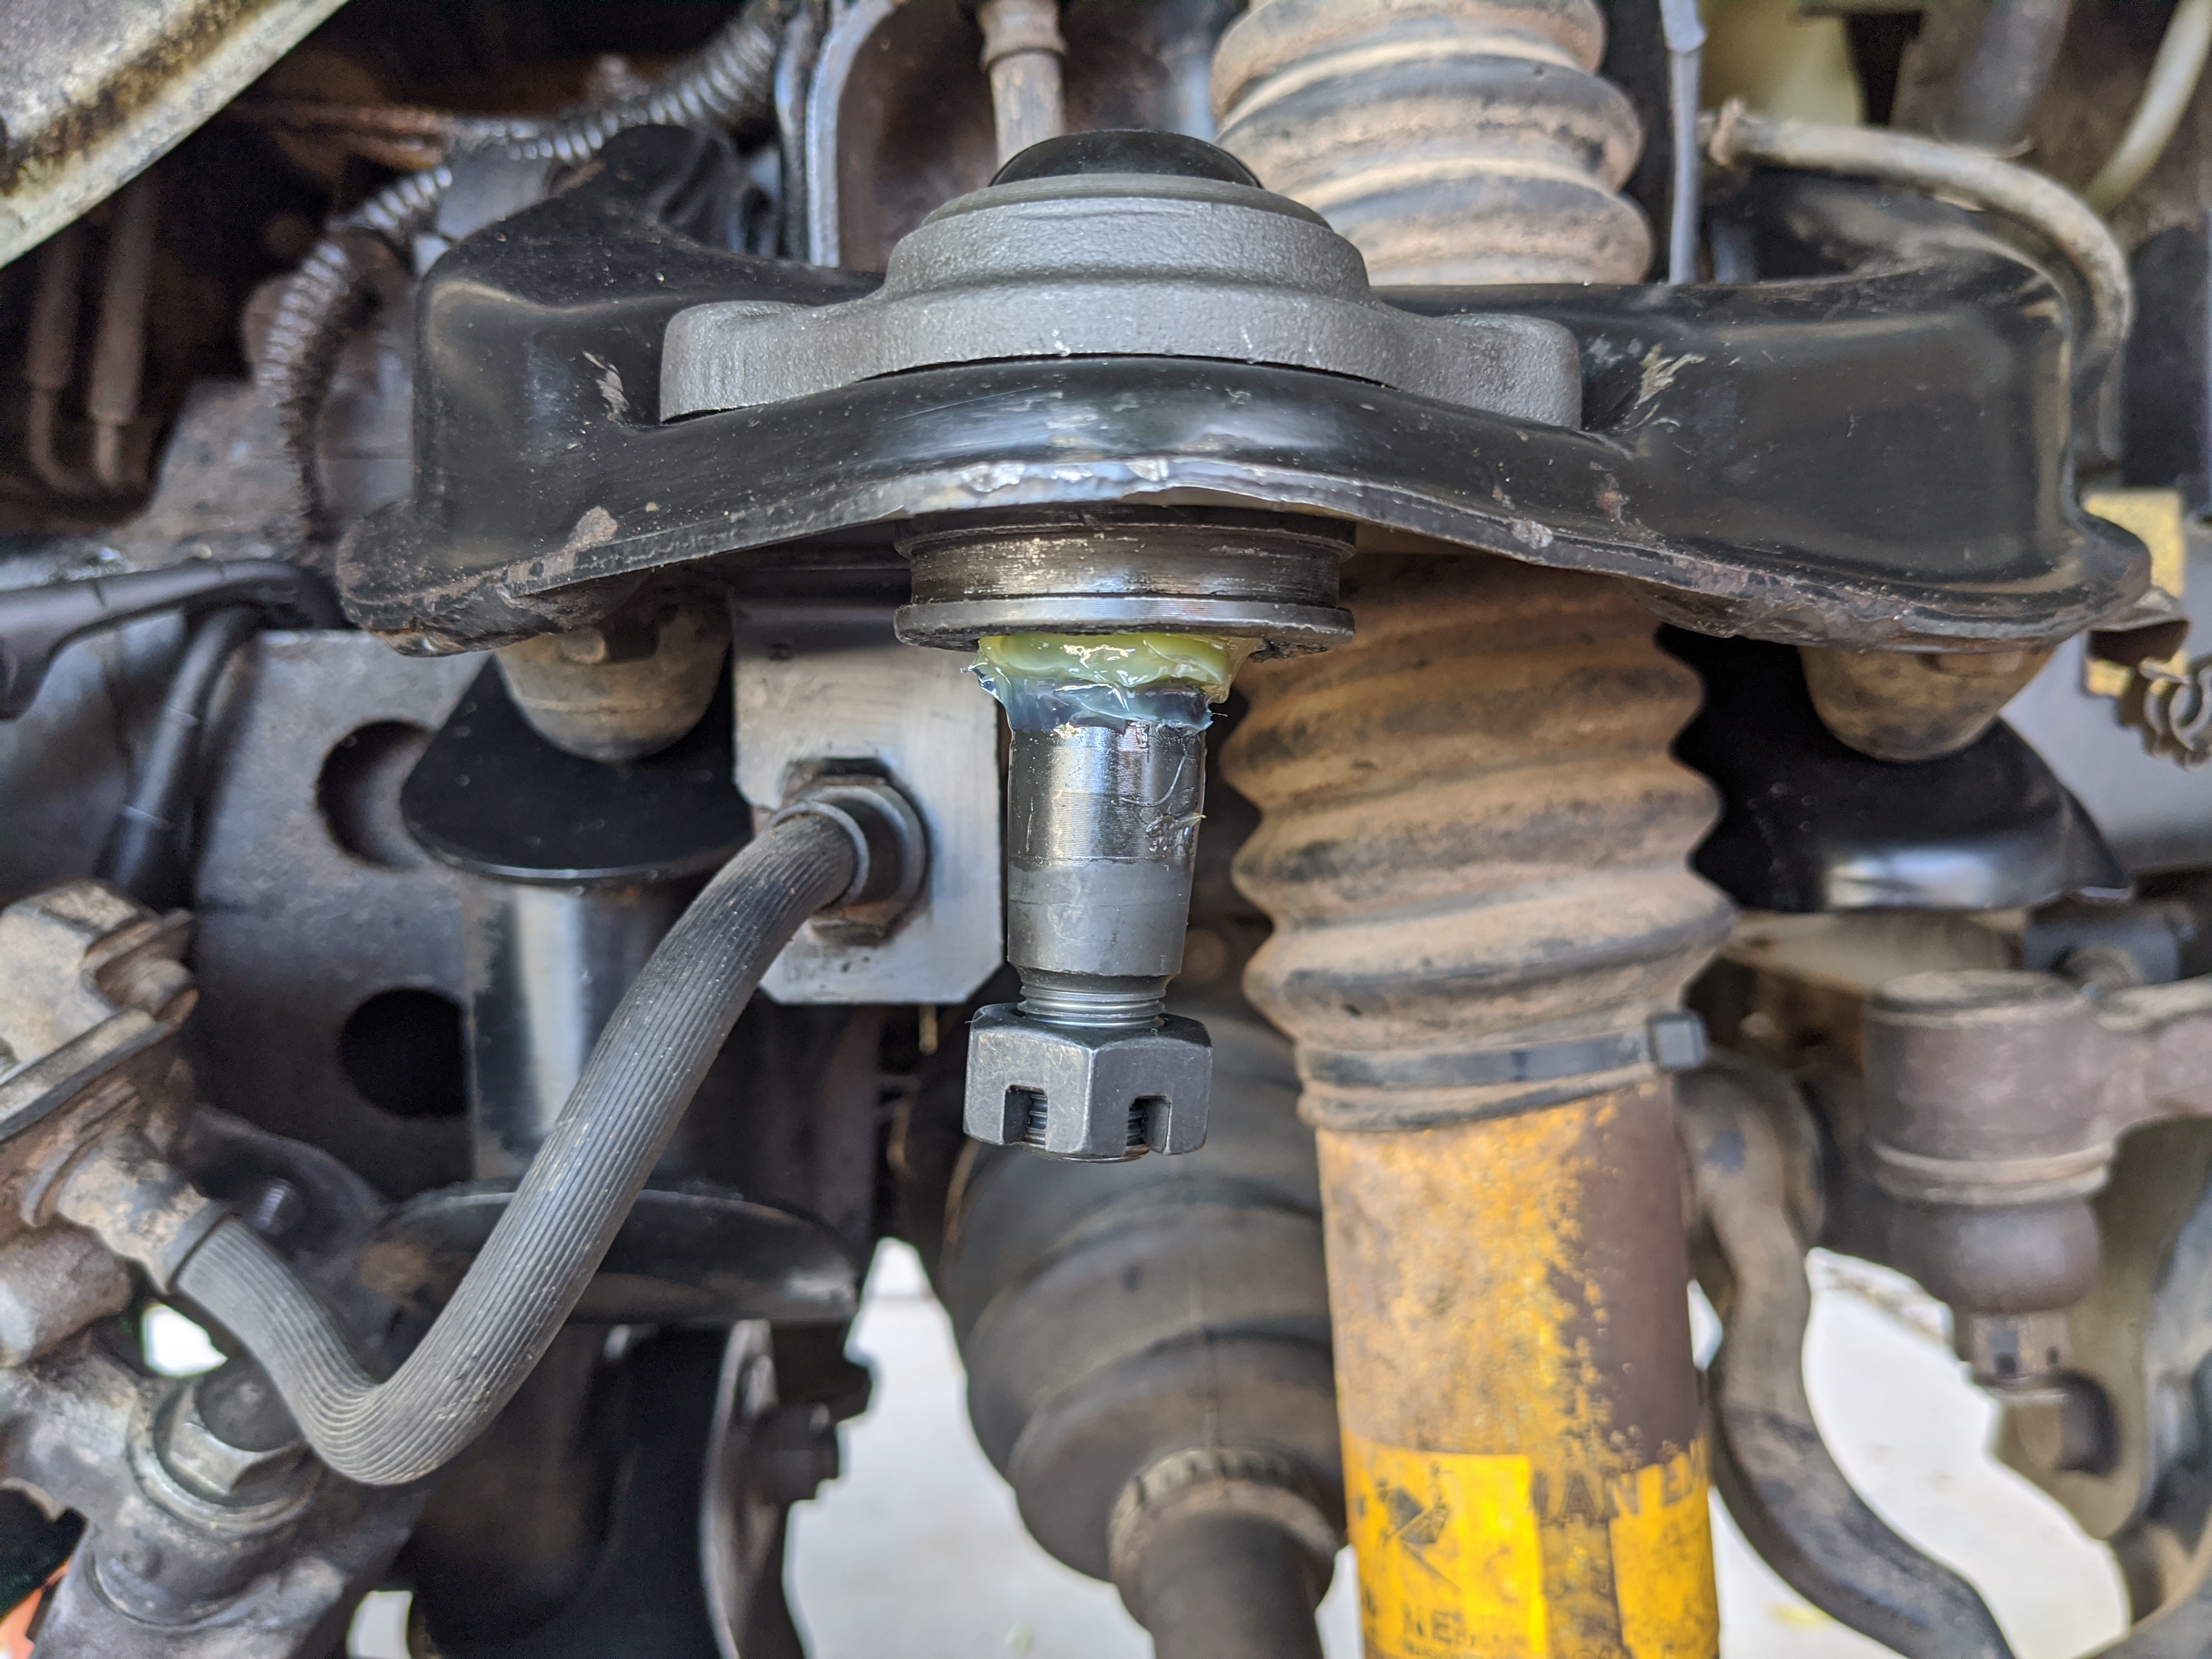
While I suspected the lower ball joint was the source of my creaking and popping, the upper ball joint was clearly a goner. Just look at this sadness.
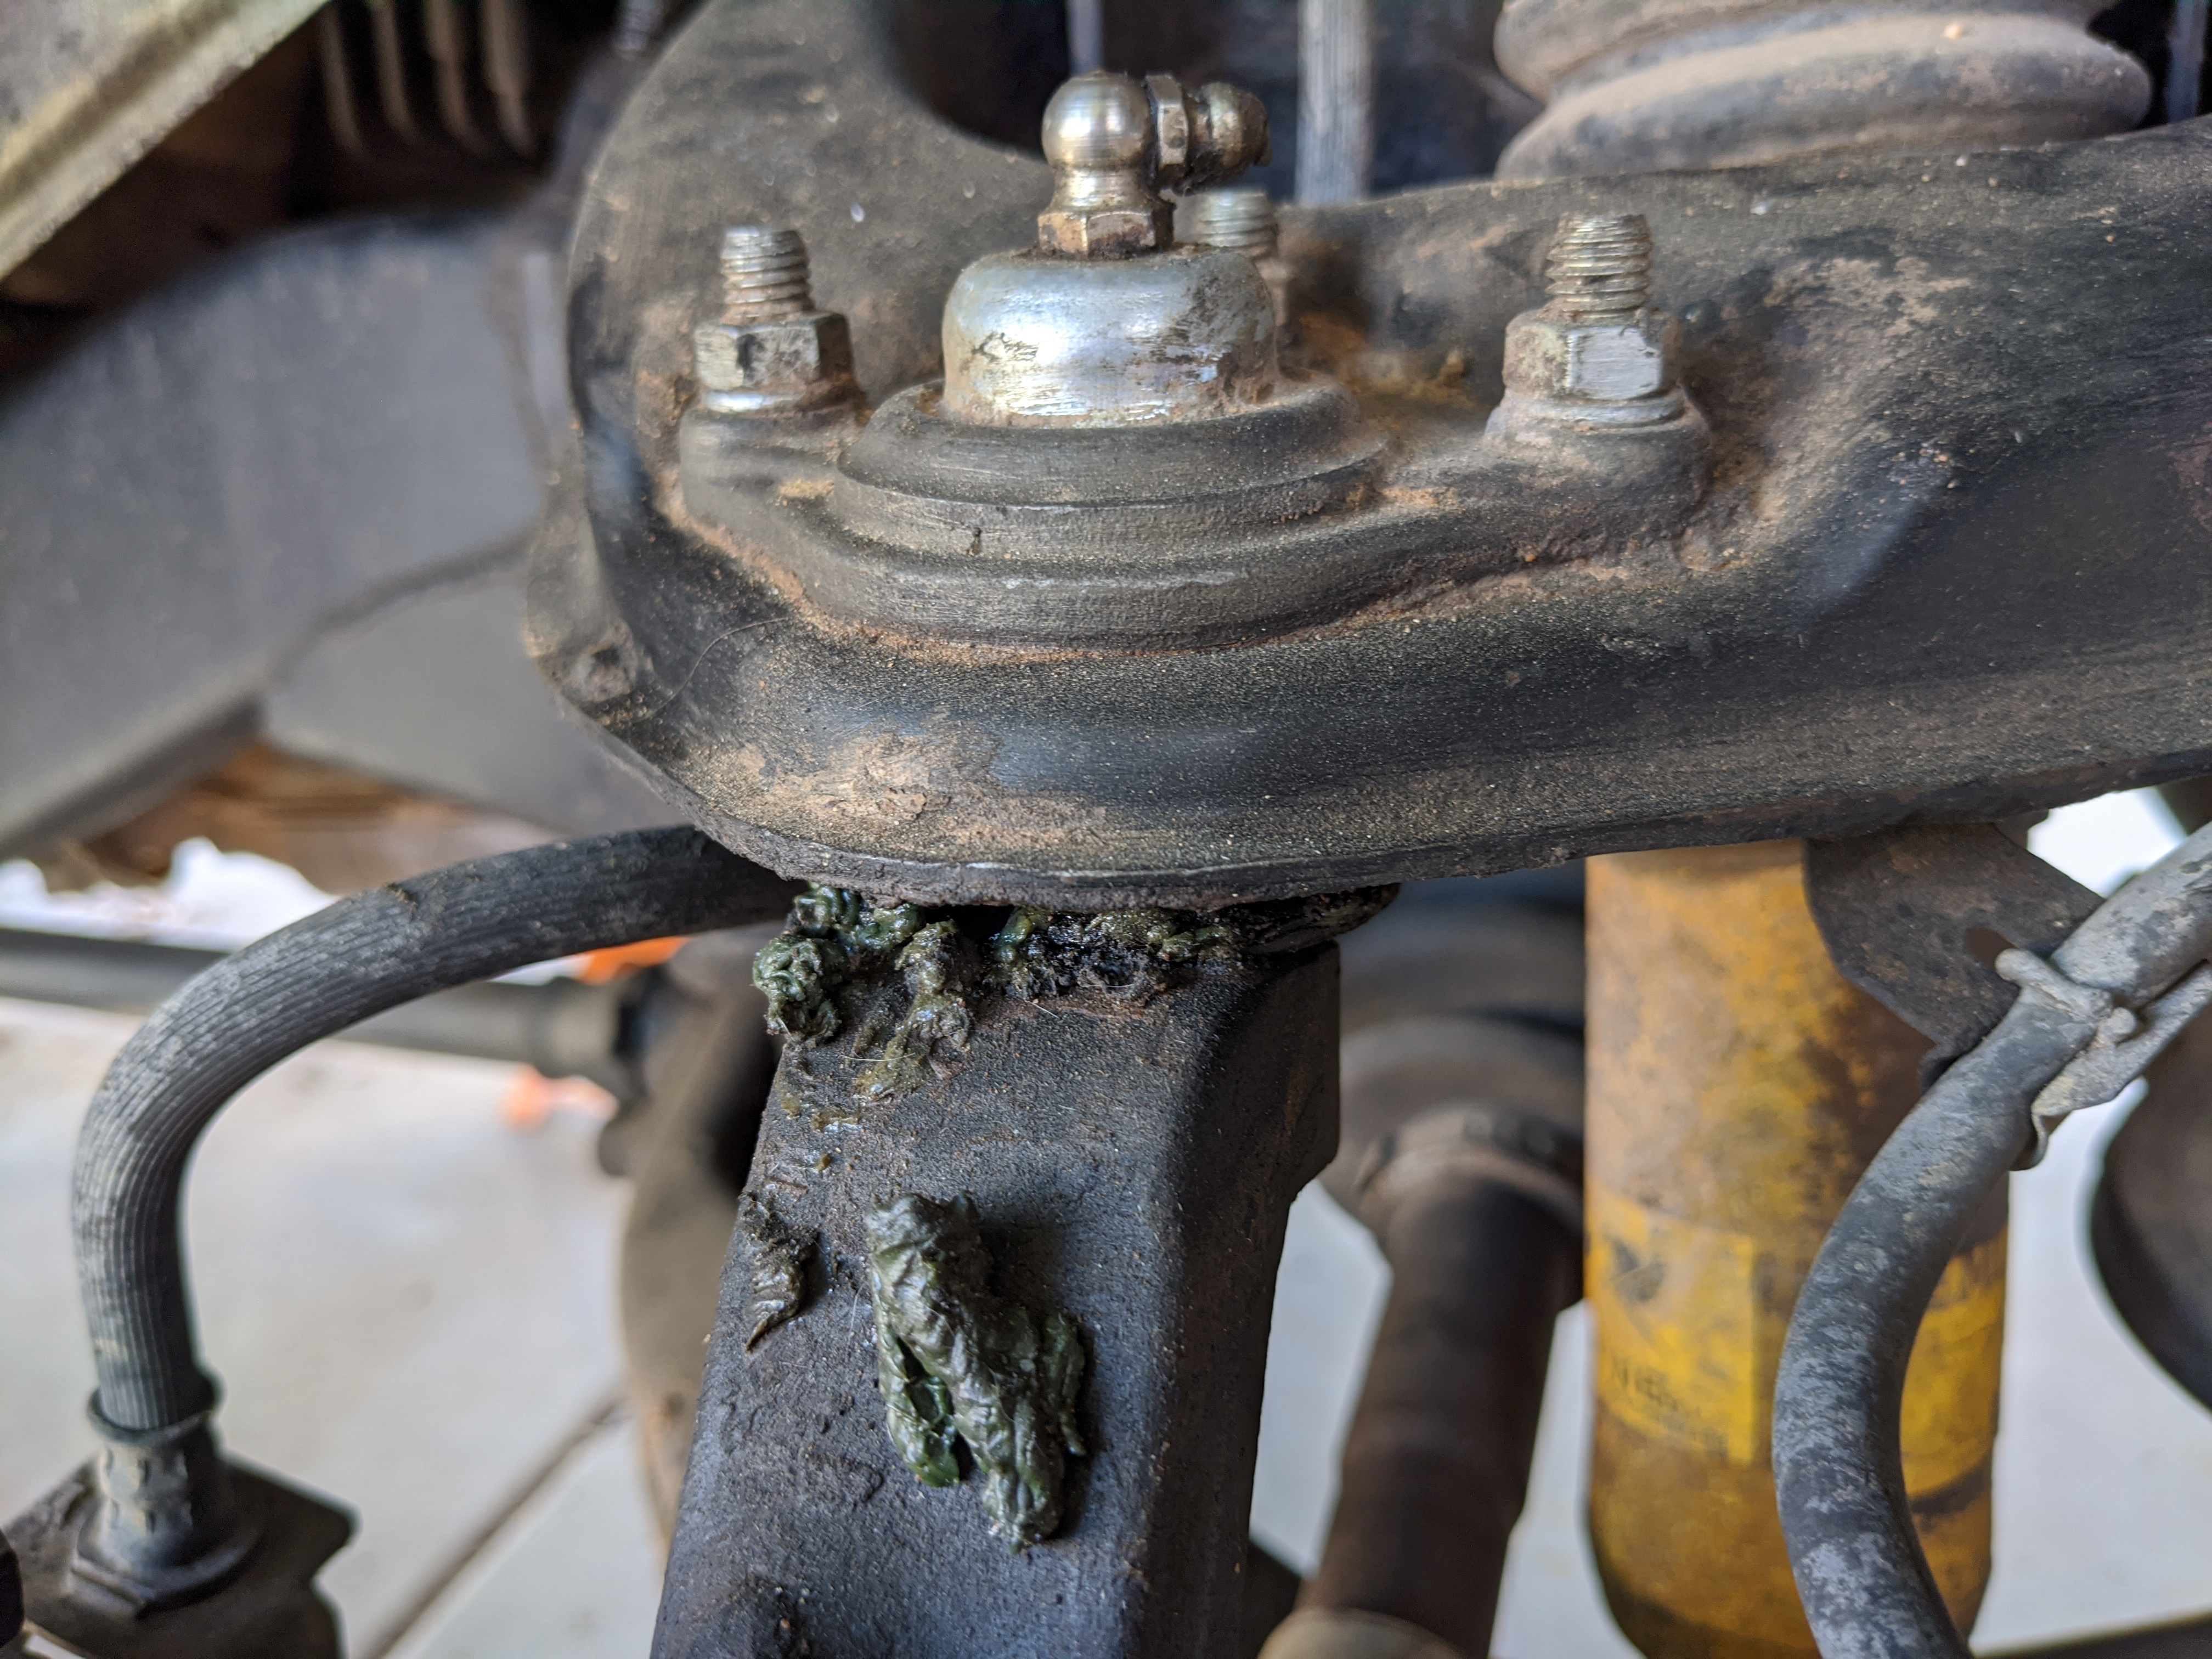
And you can see why I decided to replace the outer tie rod ends at the same time.
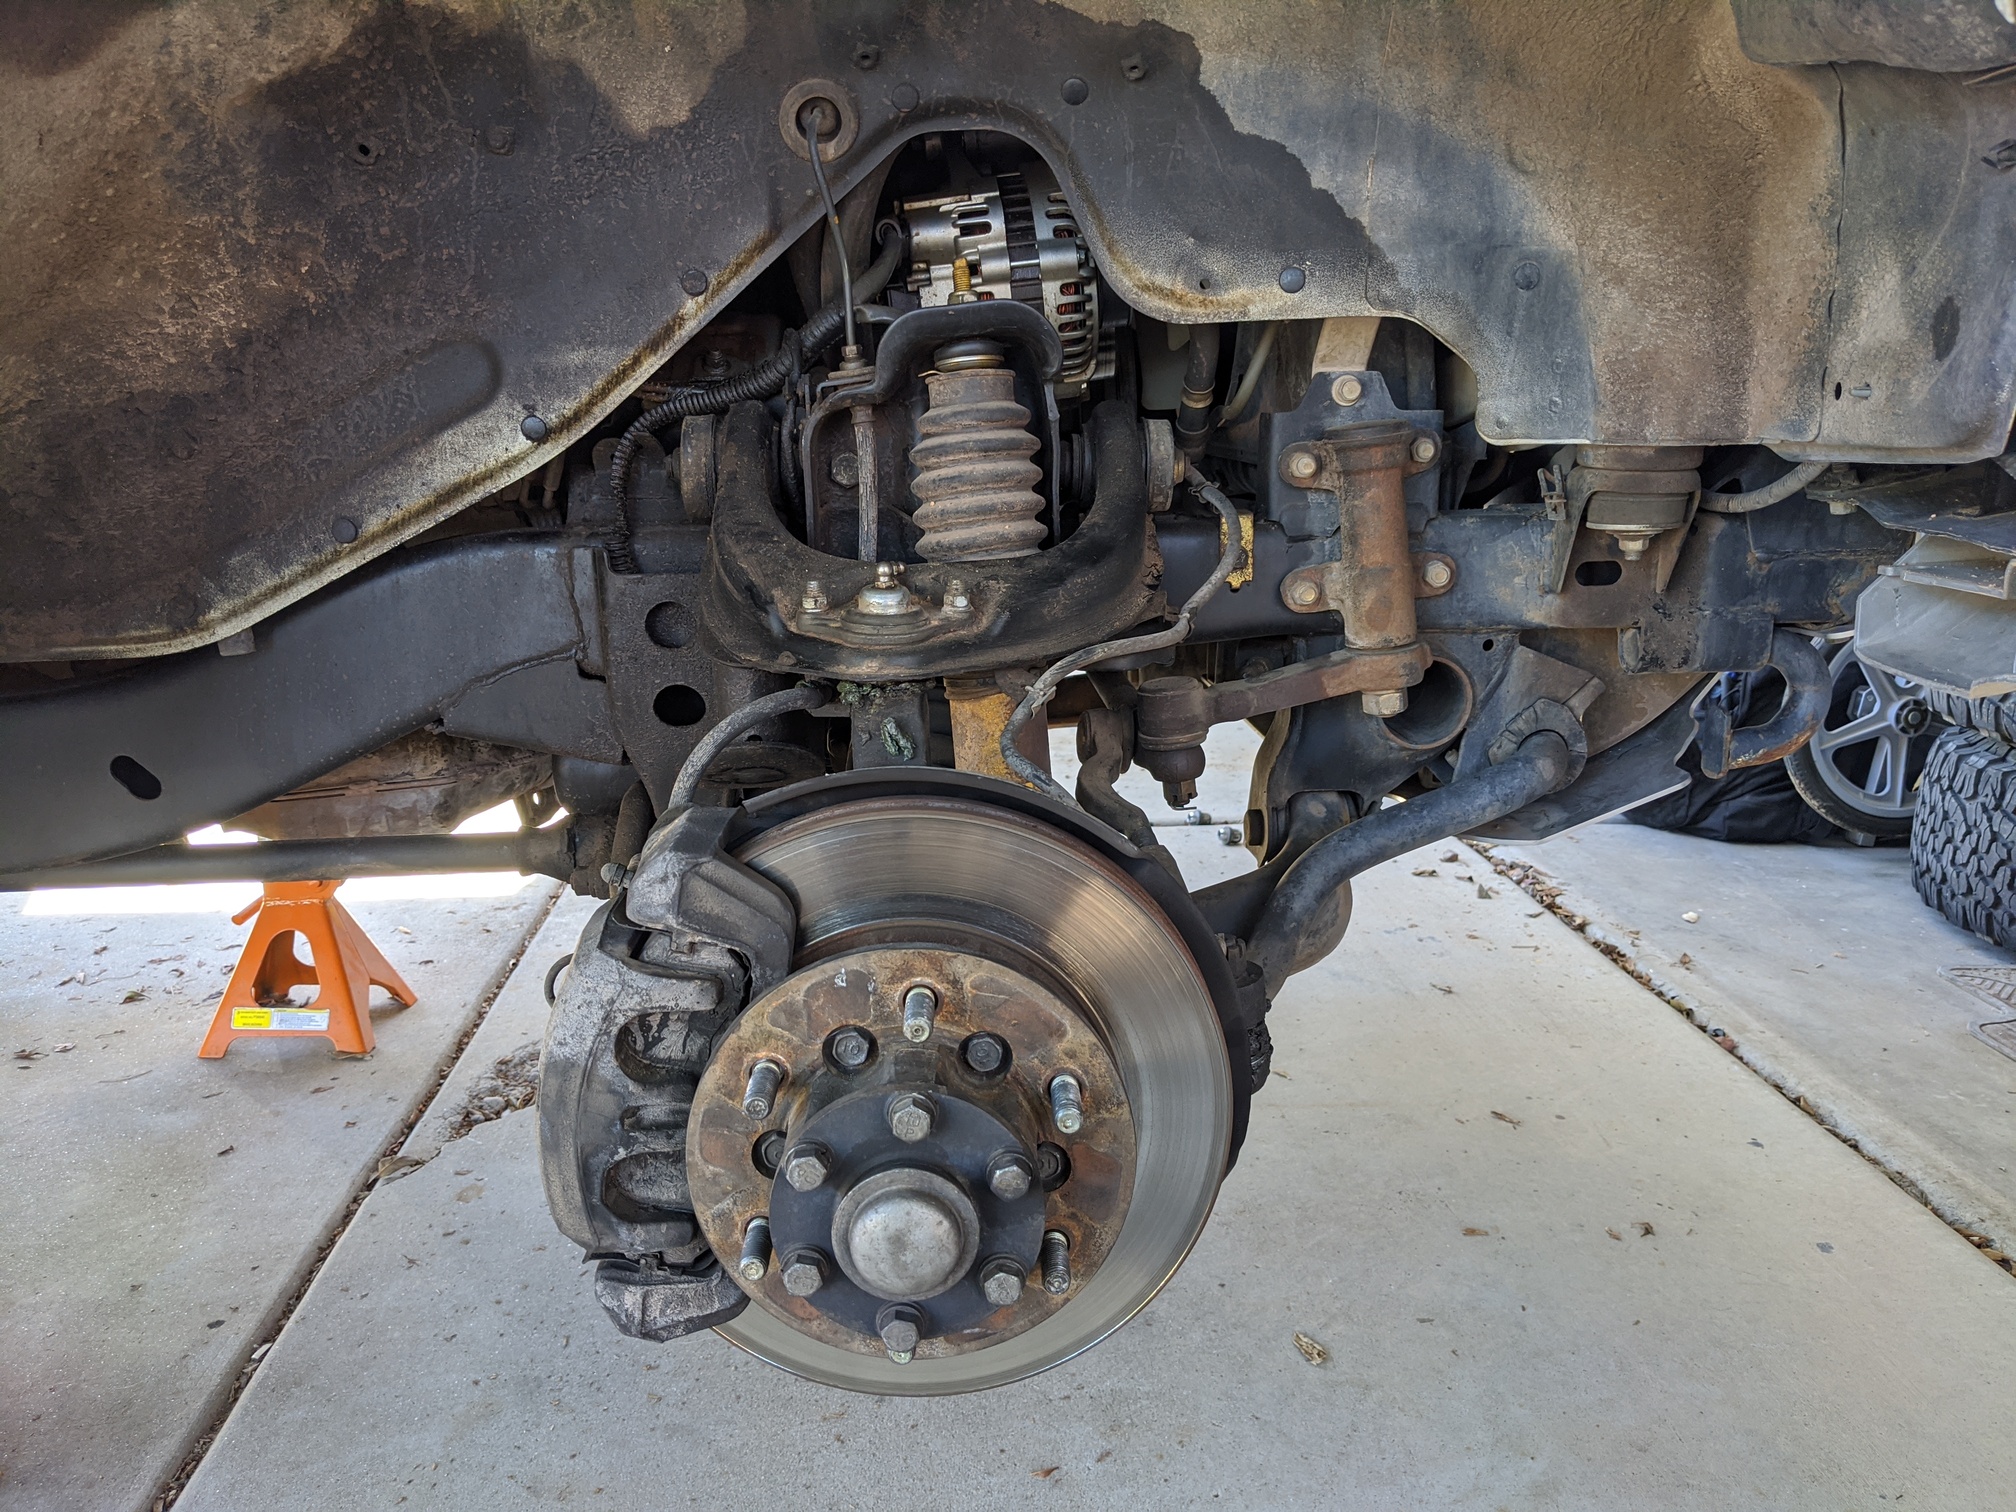
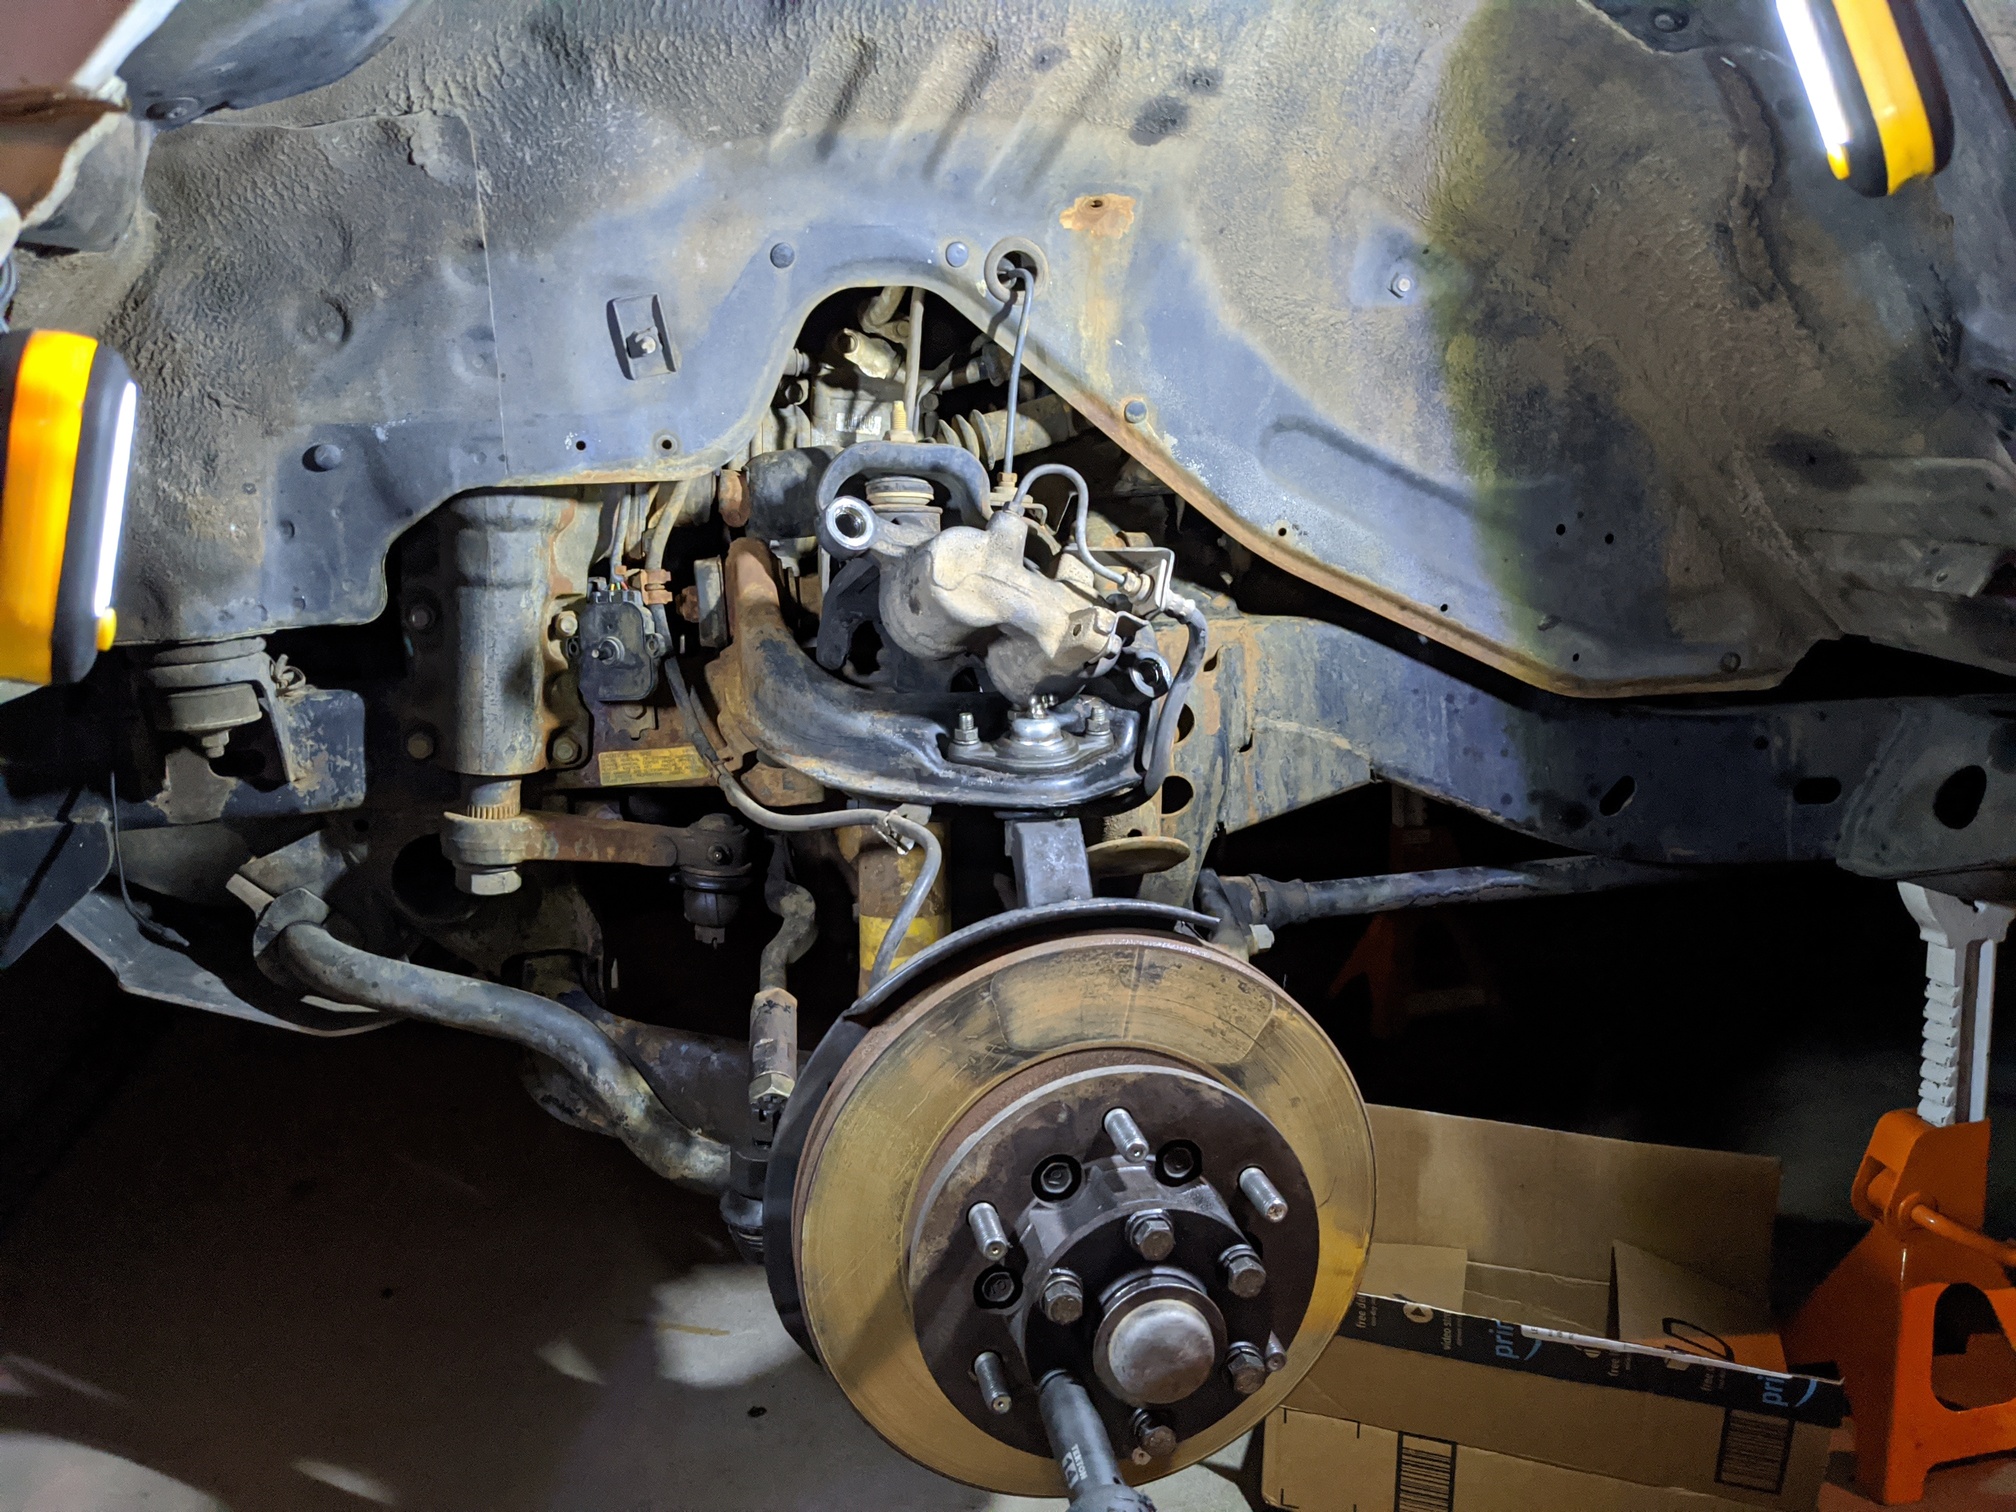
General disassembly pictures showing me riding dirty.
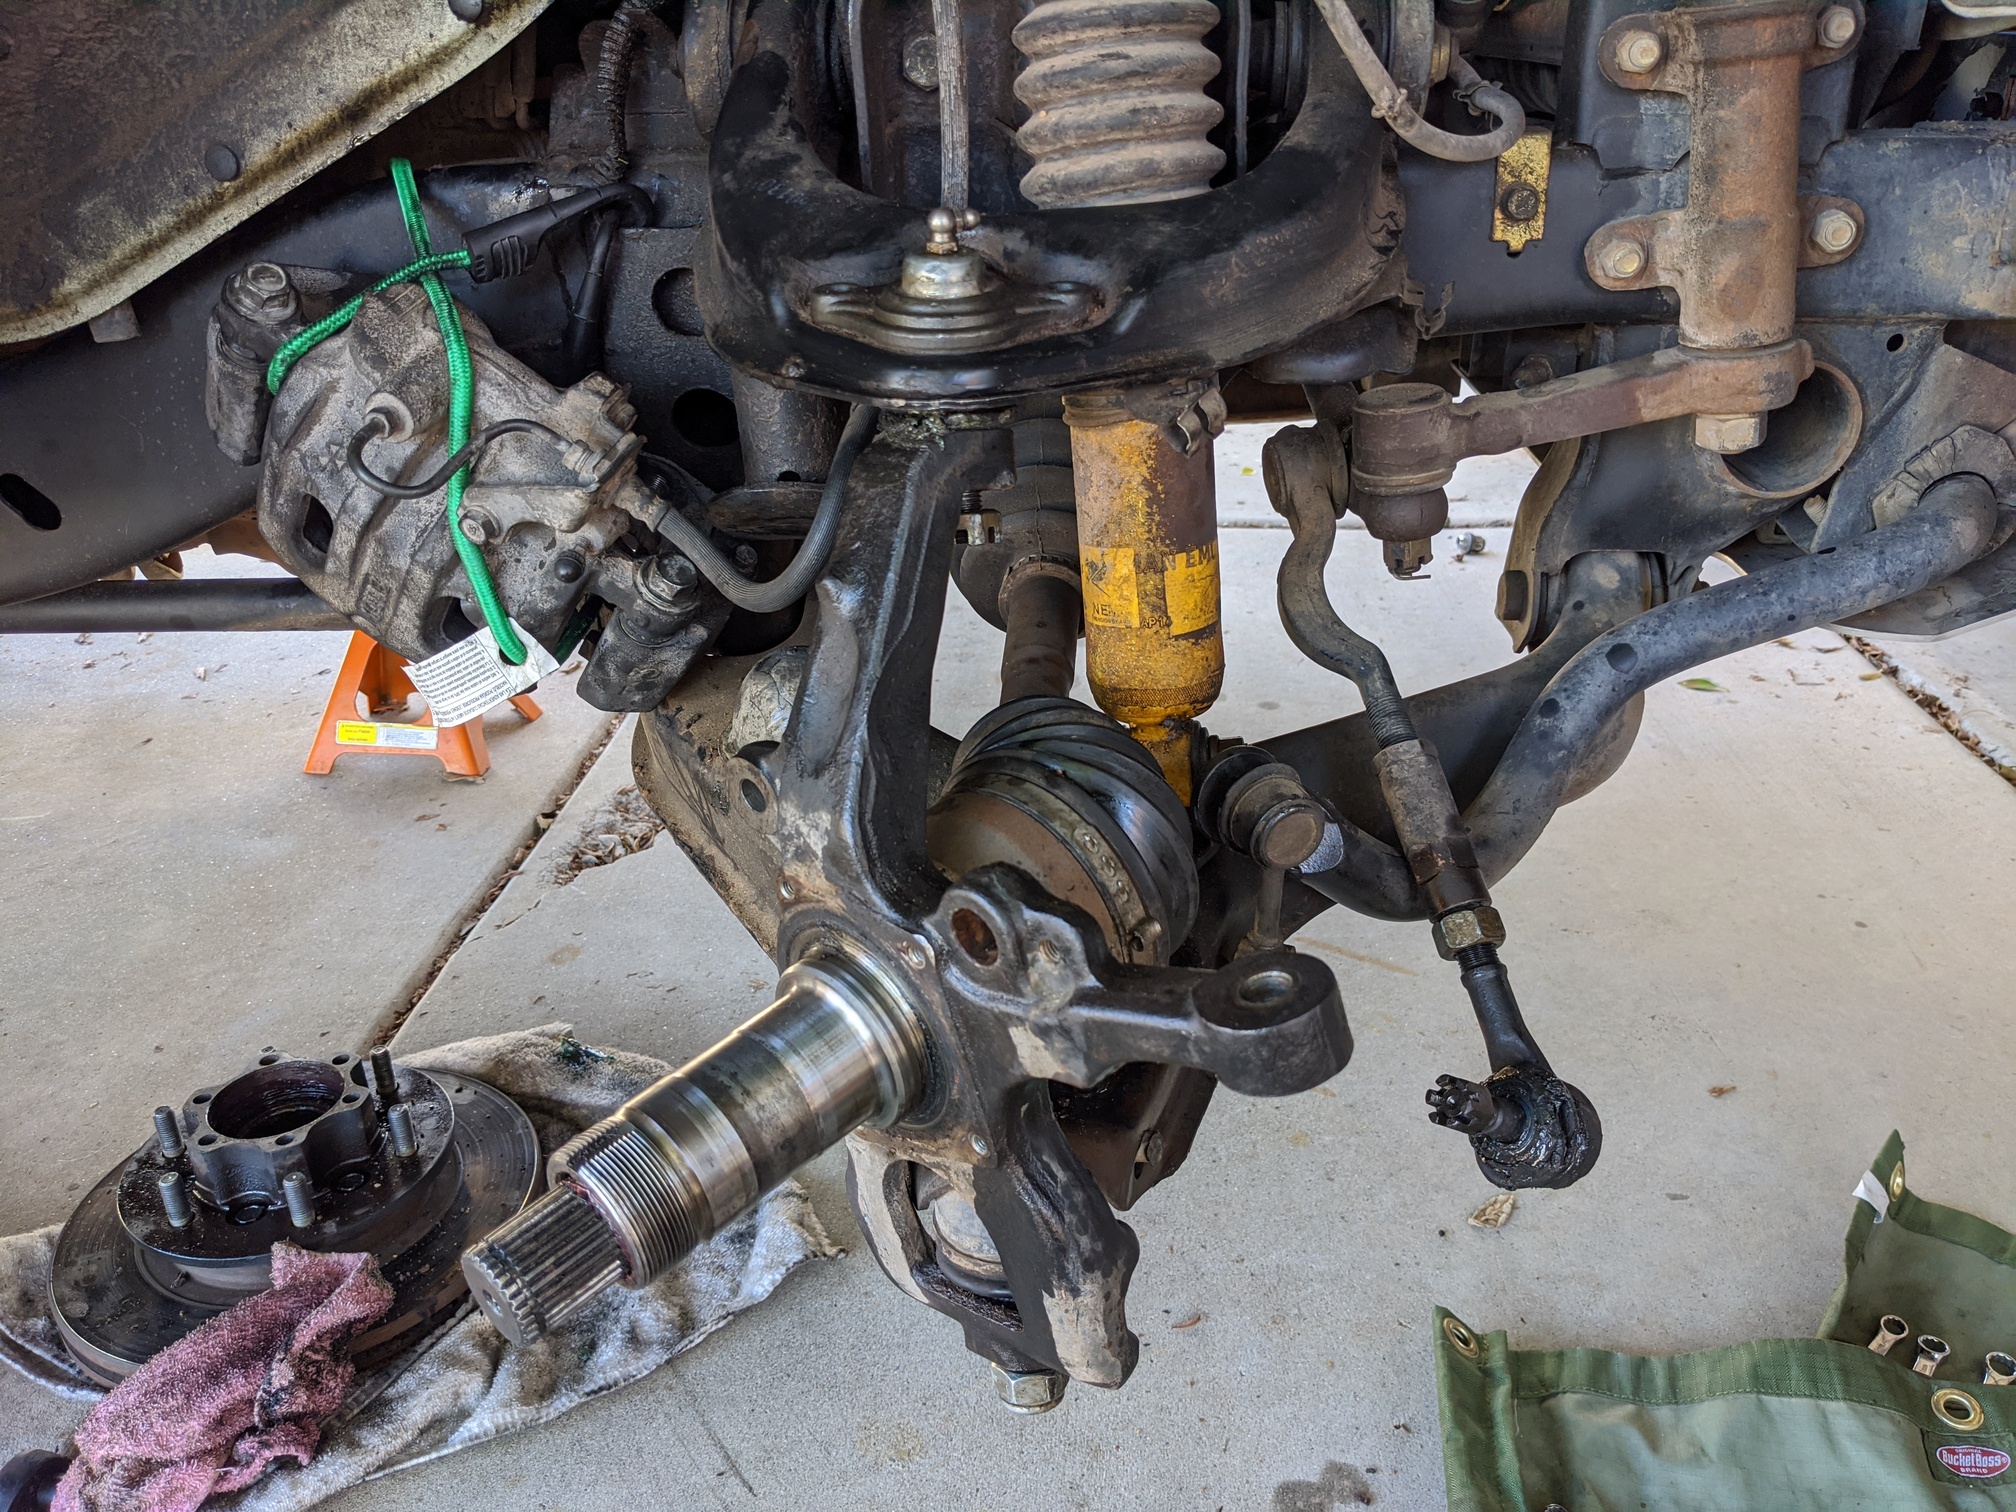
And then it was time to beat on the upper ball joint. @humming generously shared two-plus cases of ball joint tools with me. Unfortunately, I couldn’t get any of them into place to even try them. The CV and spindle were always in the way.
Thanks all the same, brother!
Hit the upper control arm in the wrong spot and you munch it. Hit it (enough times) in the right spot and magic happens.
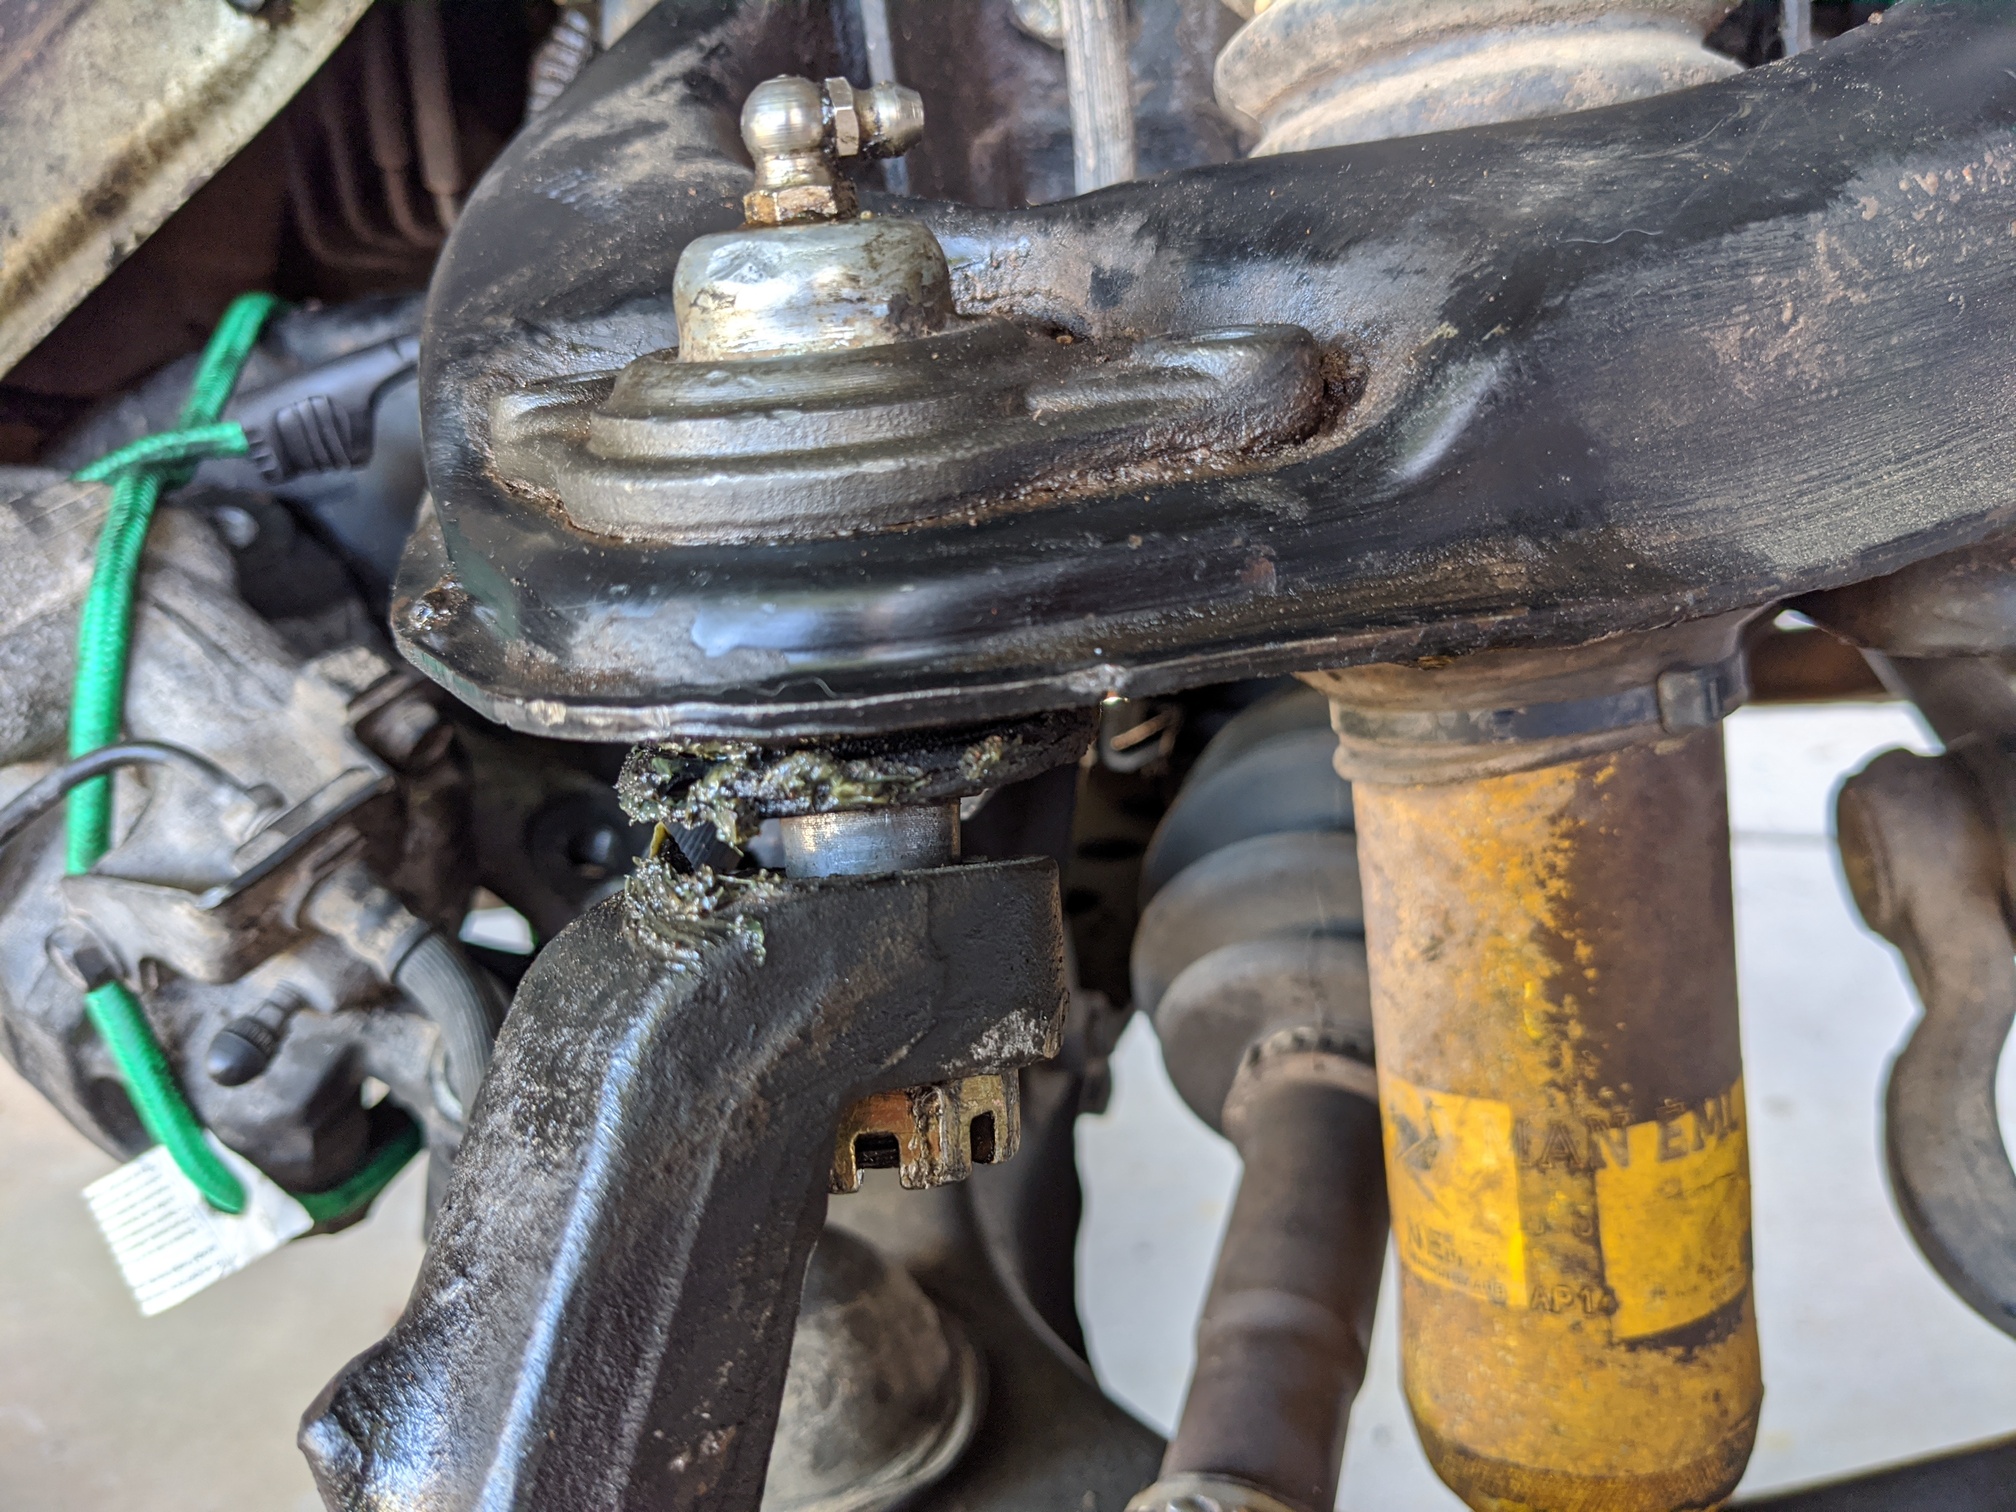
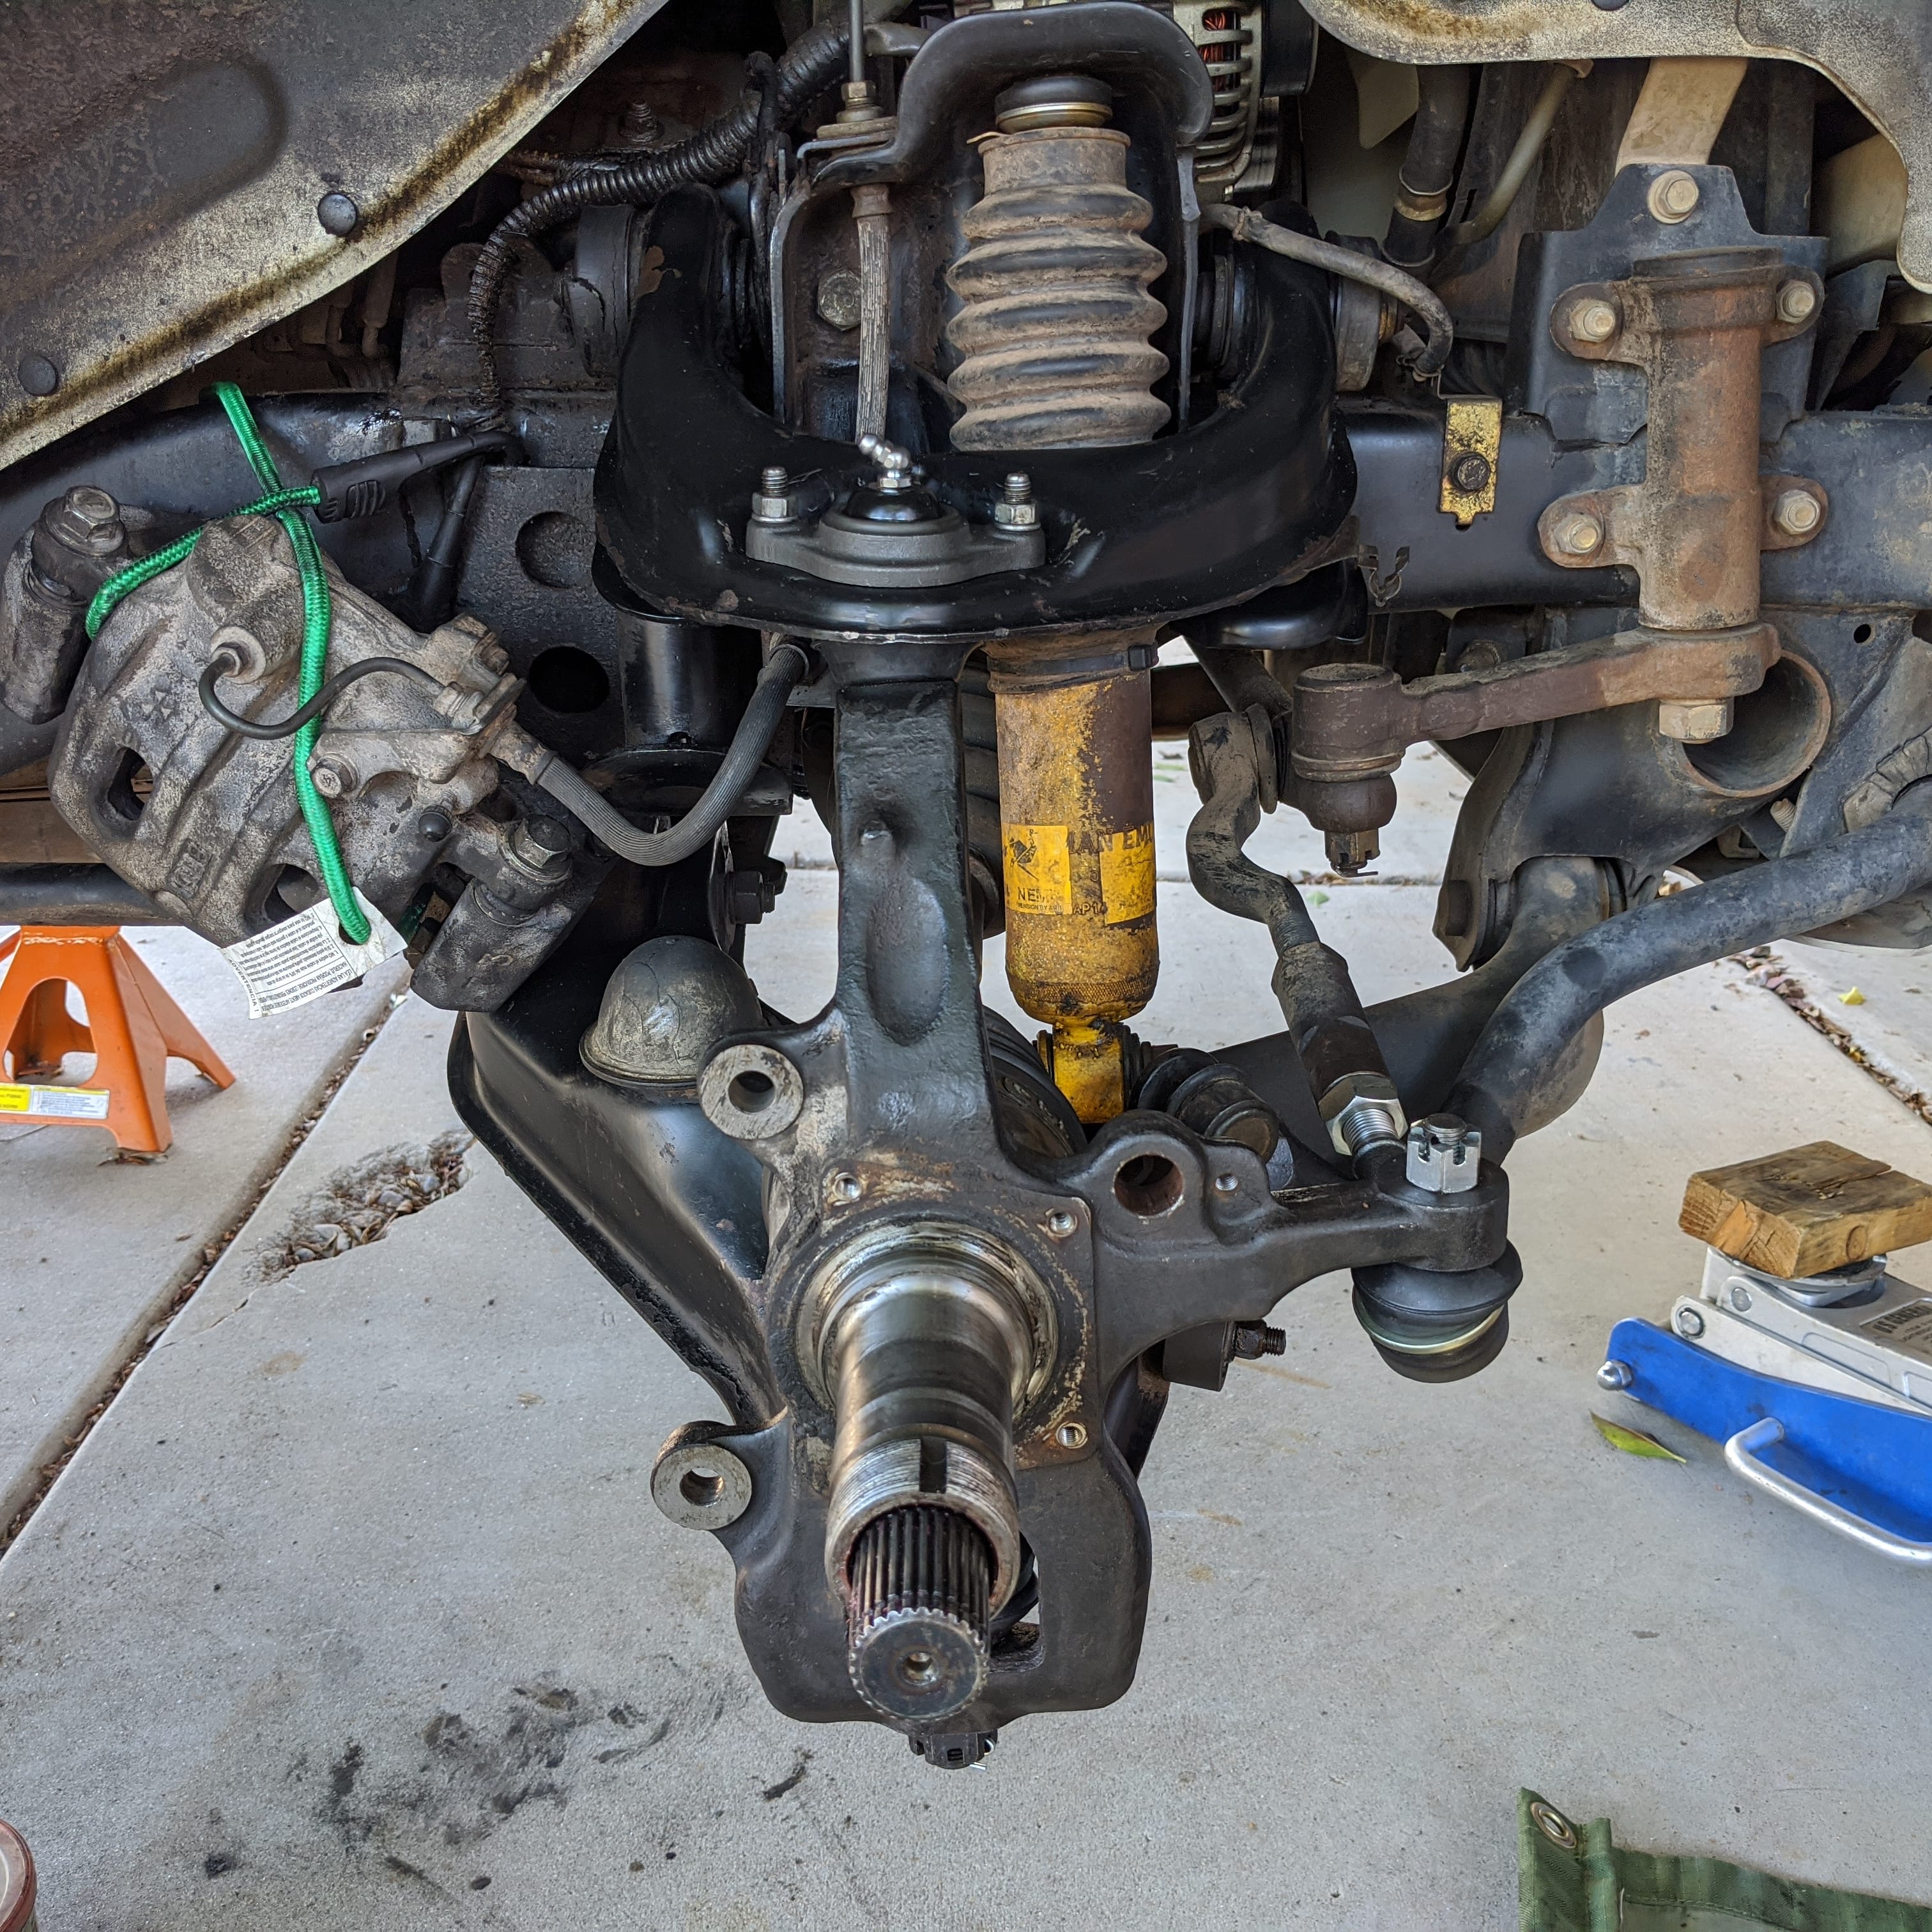
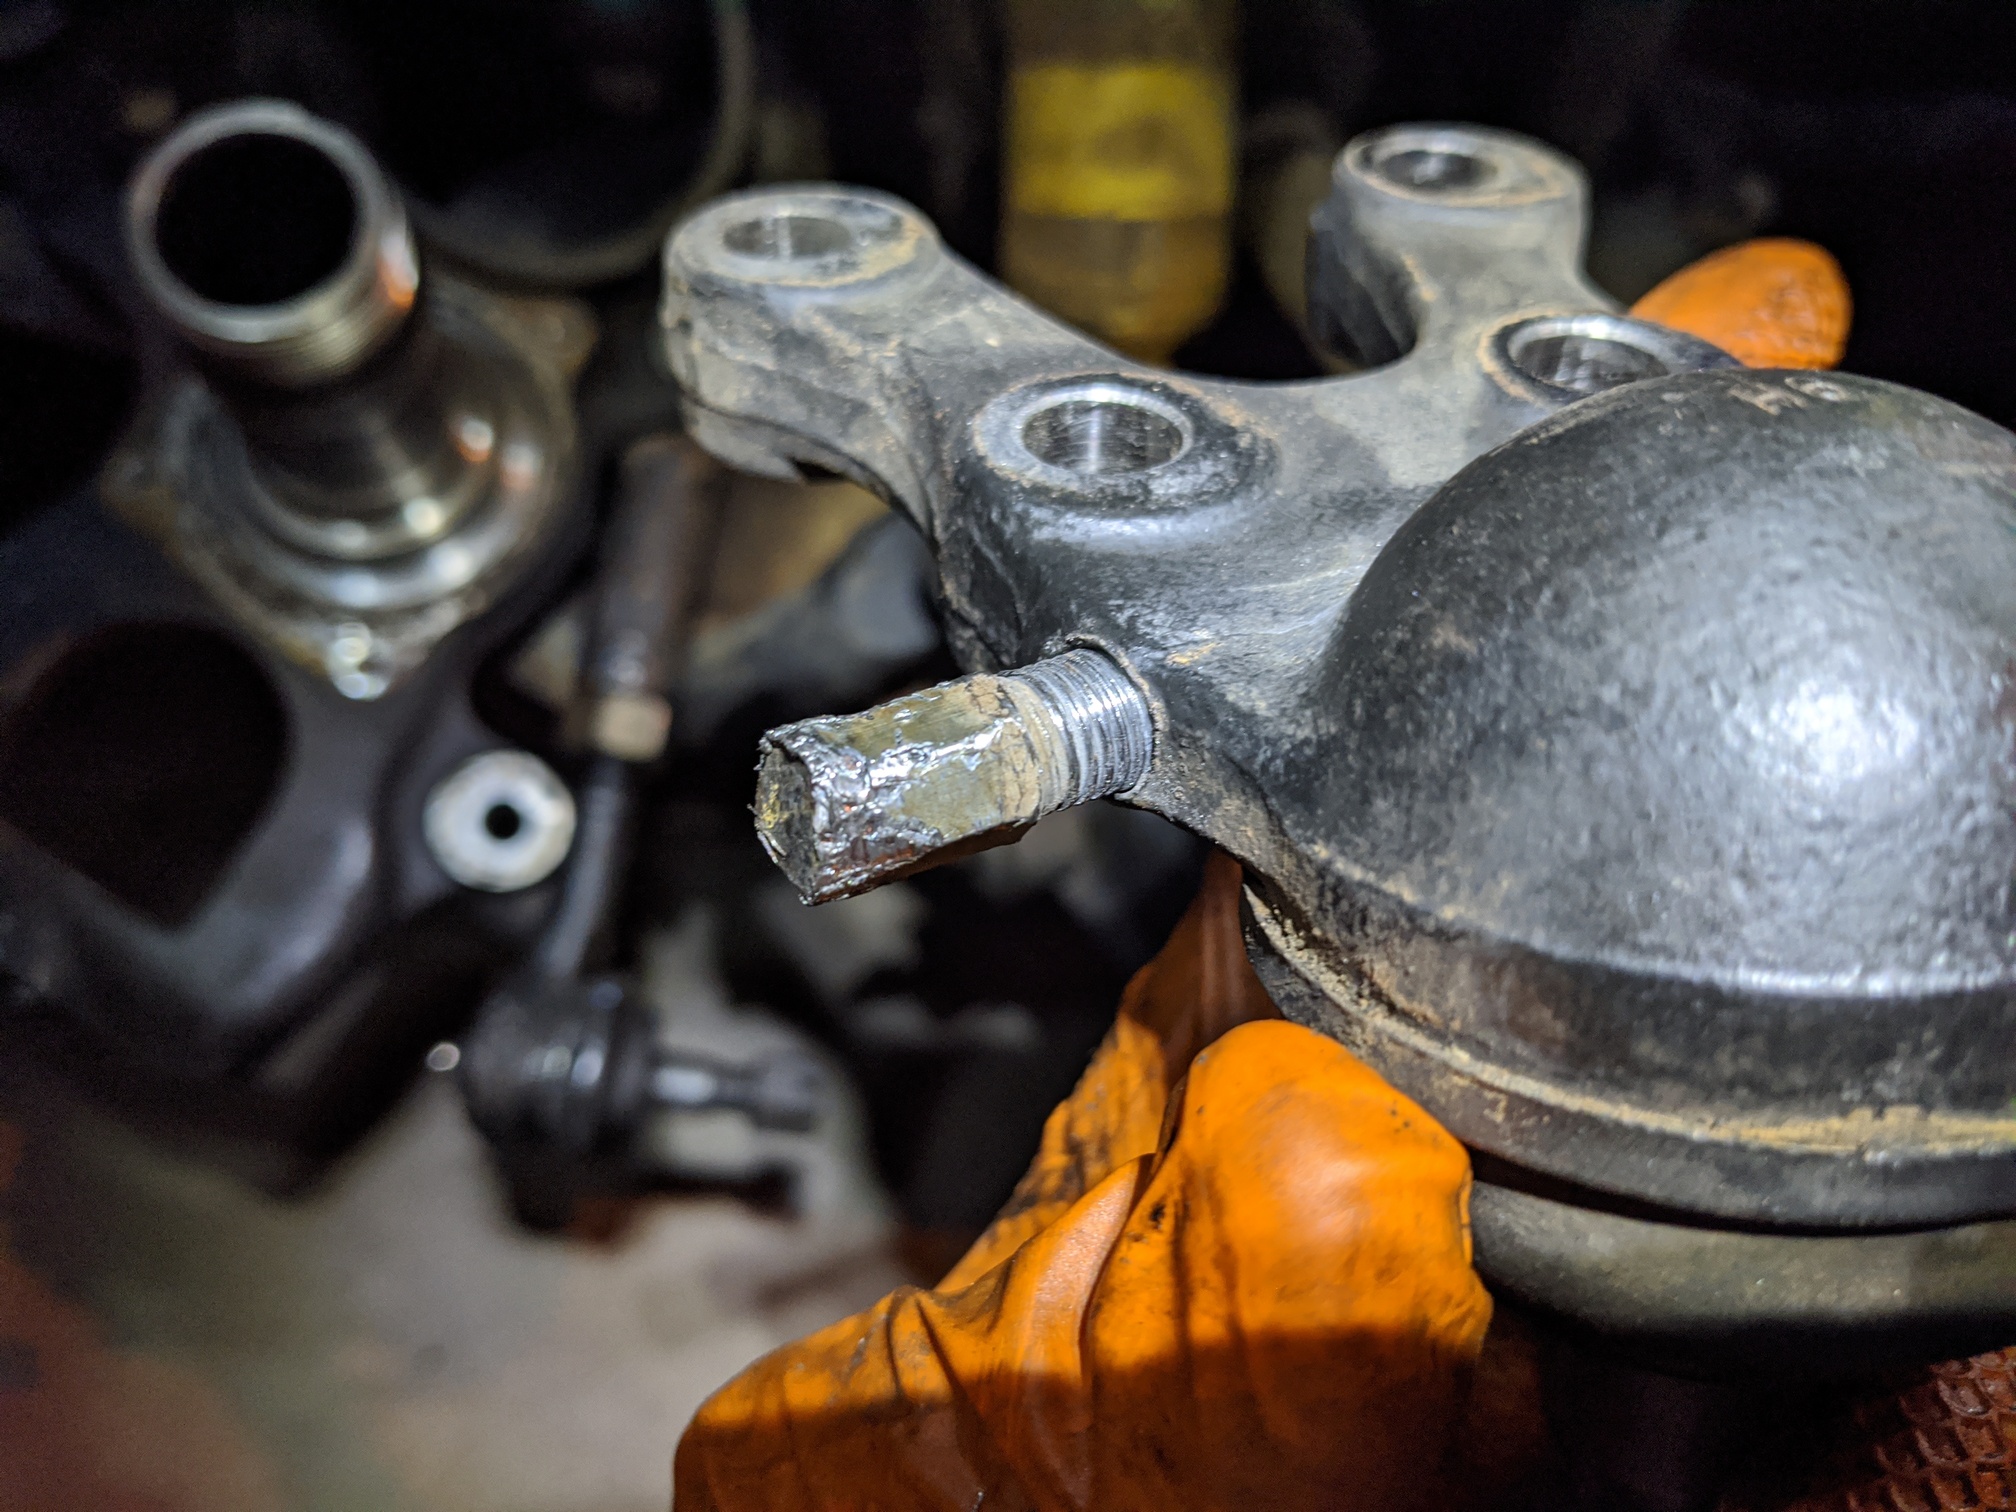
With the upper ball joint out, I was able to swing the spindle clear and attack the lower ball joint. The four bolts were easy enough, but the “security stud” was mashed on the end and somewhere between a 10mm and 11mm, so I had to use vice grips to get it out.
And that’s when I noticed I’m missing a nut on my exhaust.

Anyway, I was running out of time (told V I’d stop at 1600), so I loosely installed the tie rod end real quick.
One of these was an AC Delco for $28 shipped from Amazon. The other was a NAPA unit I got locally for $52 because Amazon was out of stock on the Delco and the $25 Beck Arnley wouldn’t arrive for two weeks.
Thanks for the advice @MrGalantguy!
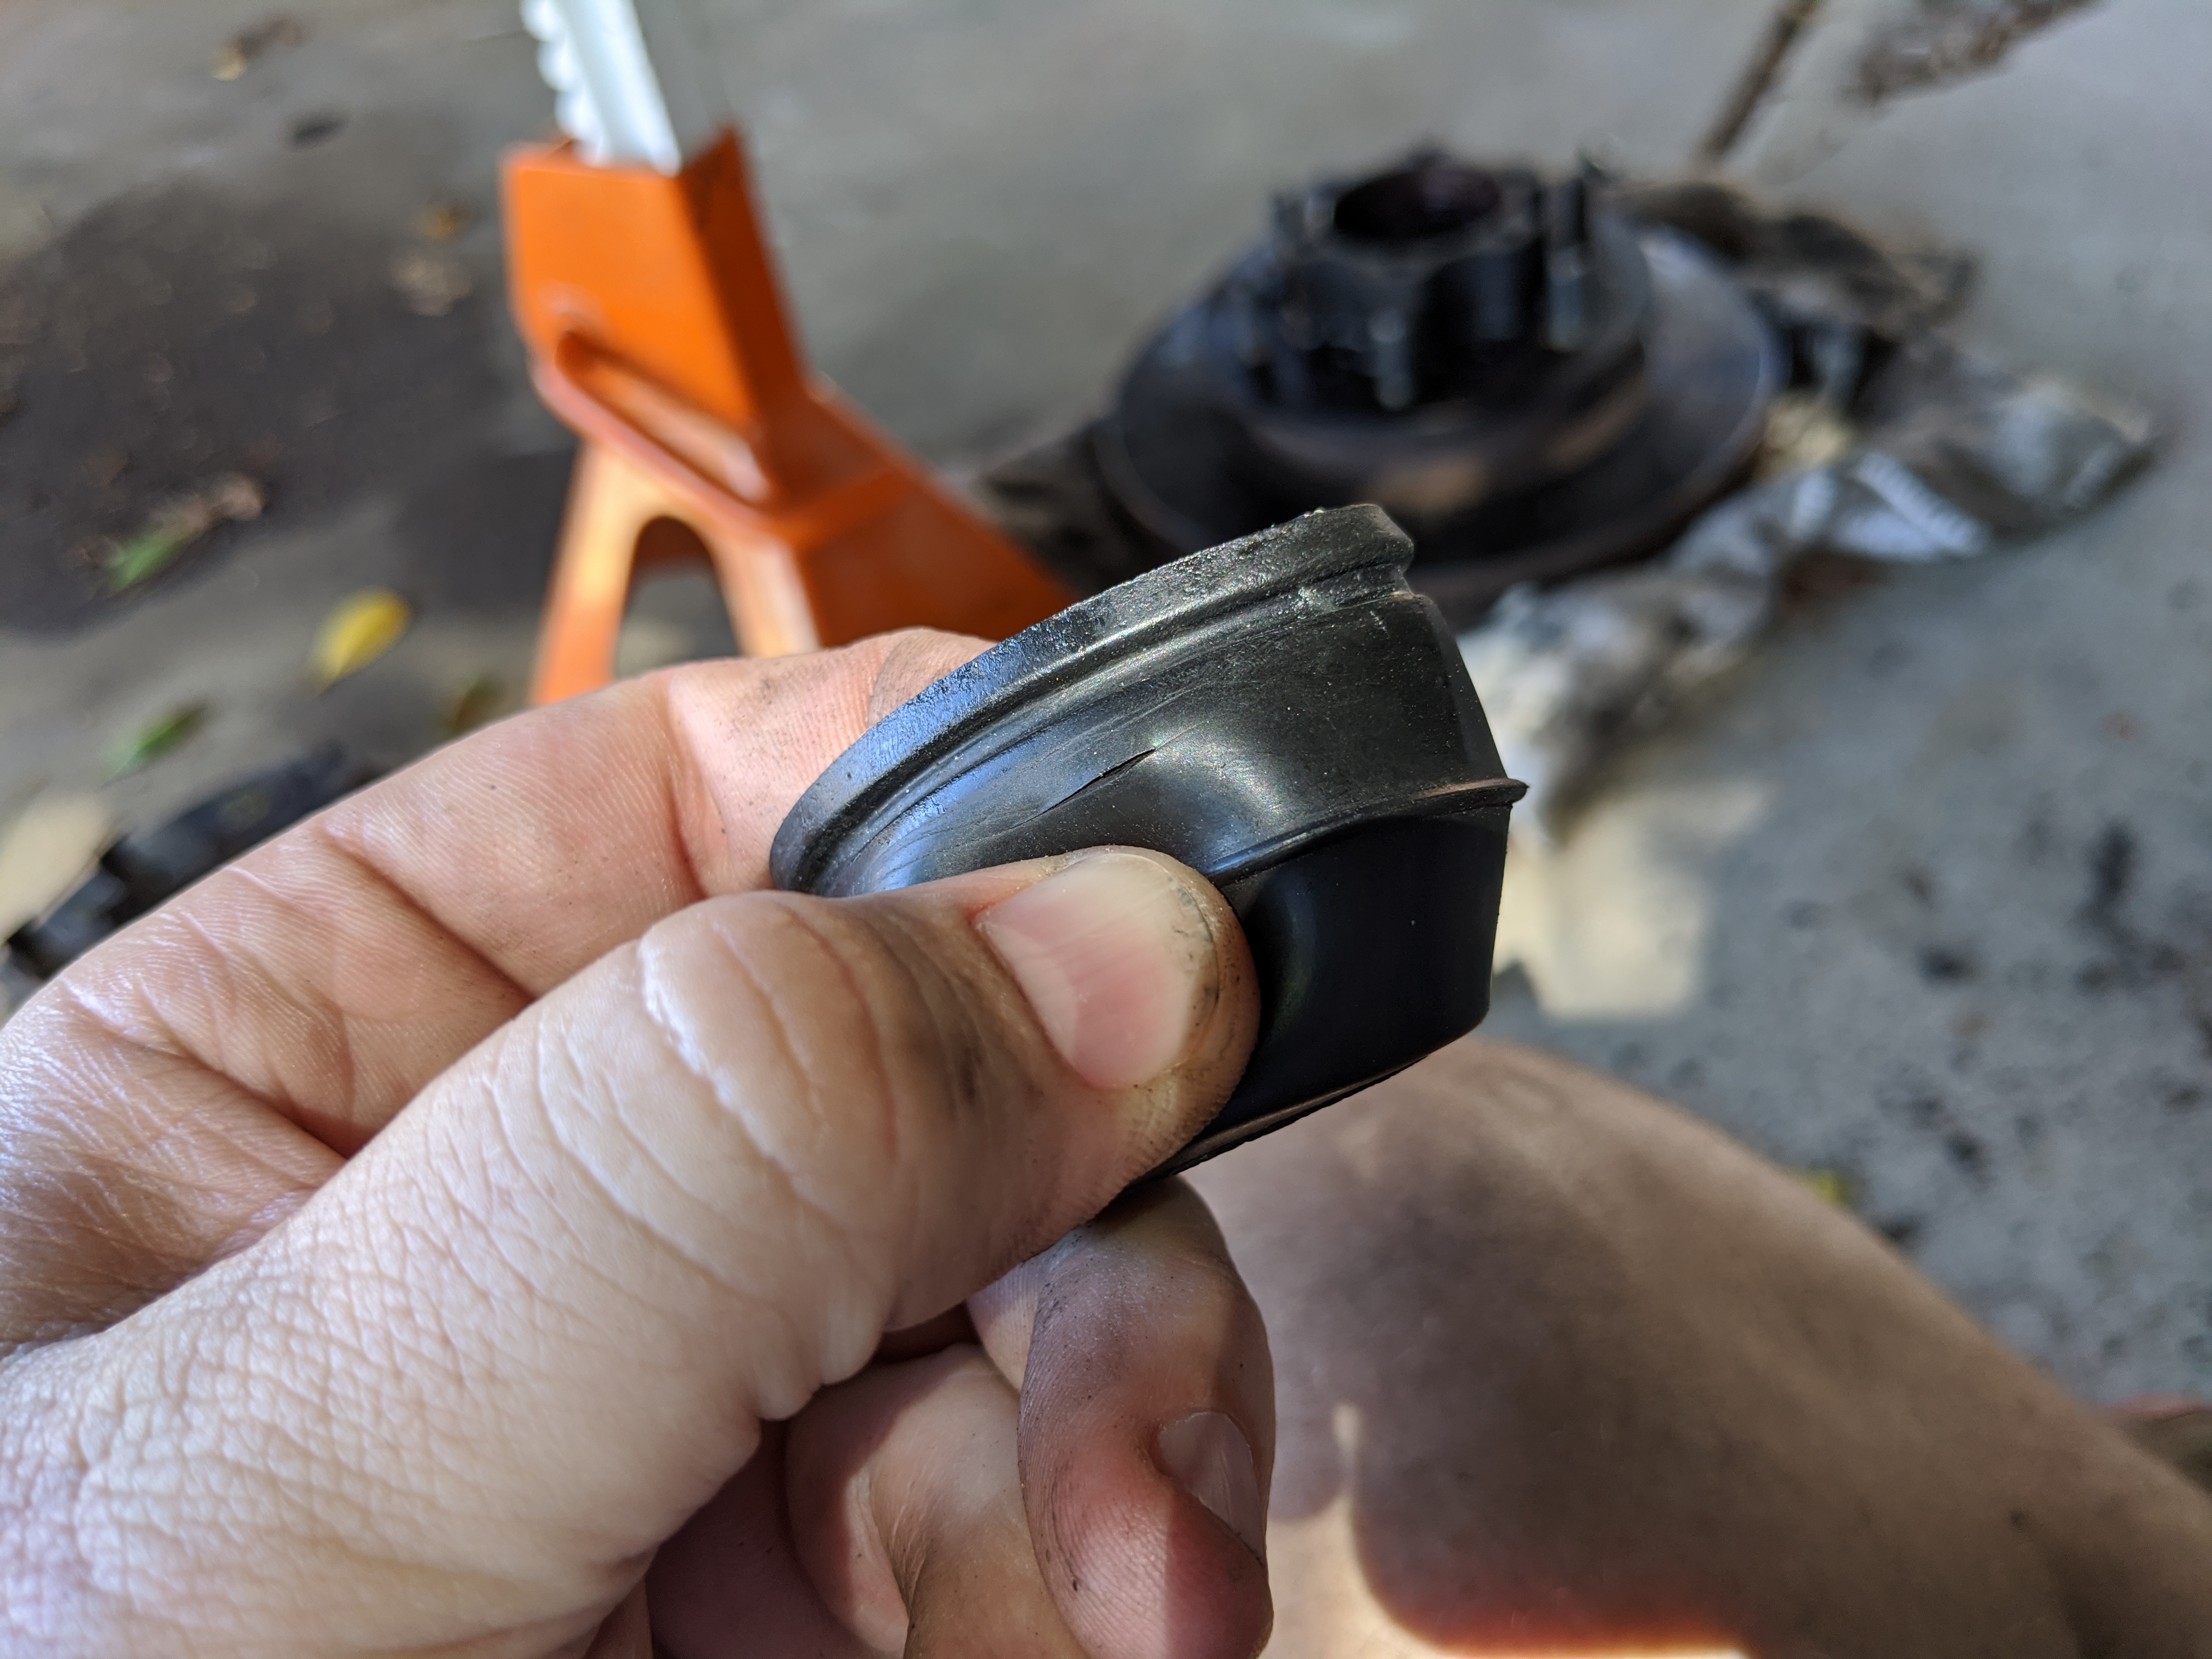
Finally, new lower ball joint installed into the LCA, I wanted to get the new upper installed into the UCA. It’s a tight fit. I knew I should stop and remove the boot before slicing it trying to force it into the arm.
Too late.
Josh at ADD suggested silicone from Home Depot. @racedinanger suggested crazy glue. I had crazy glue.
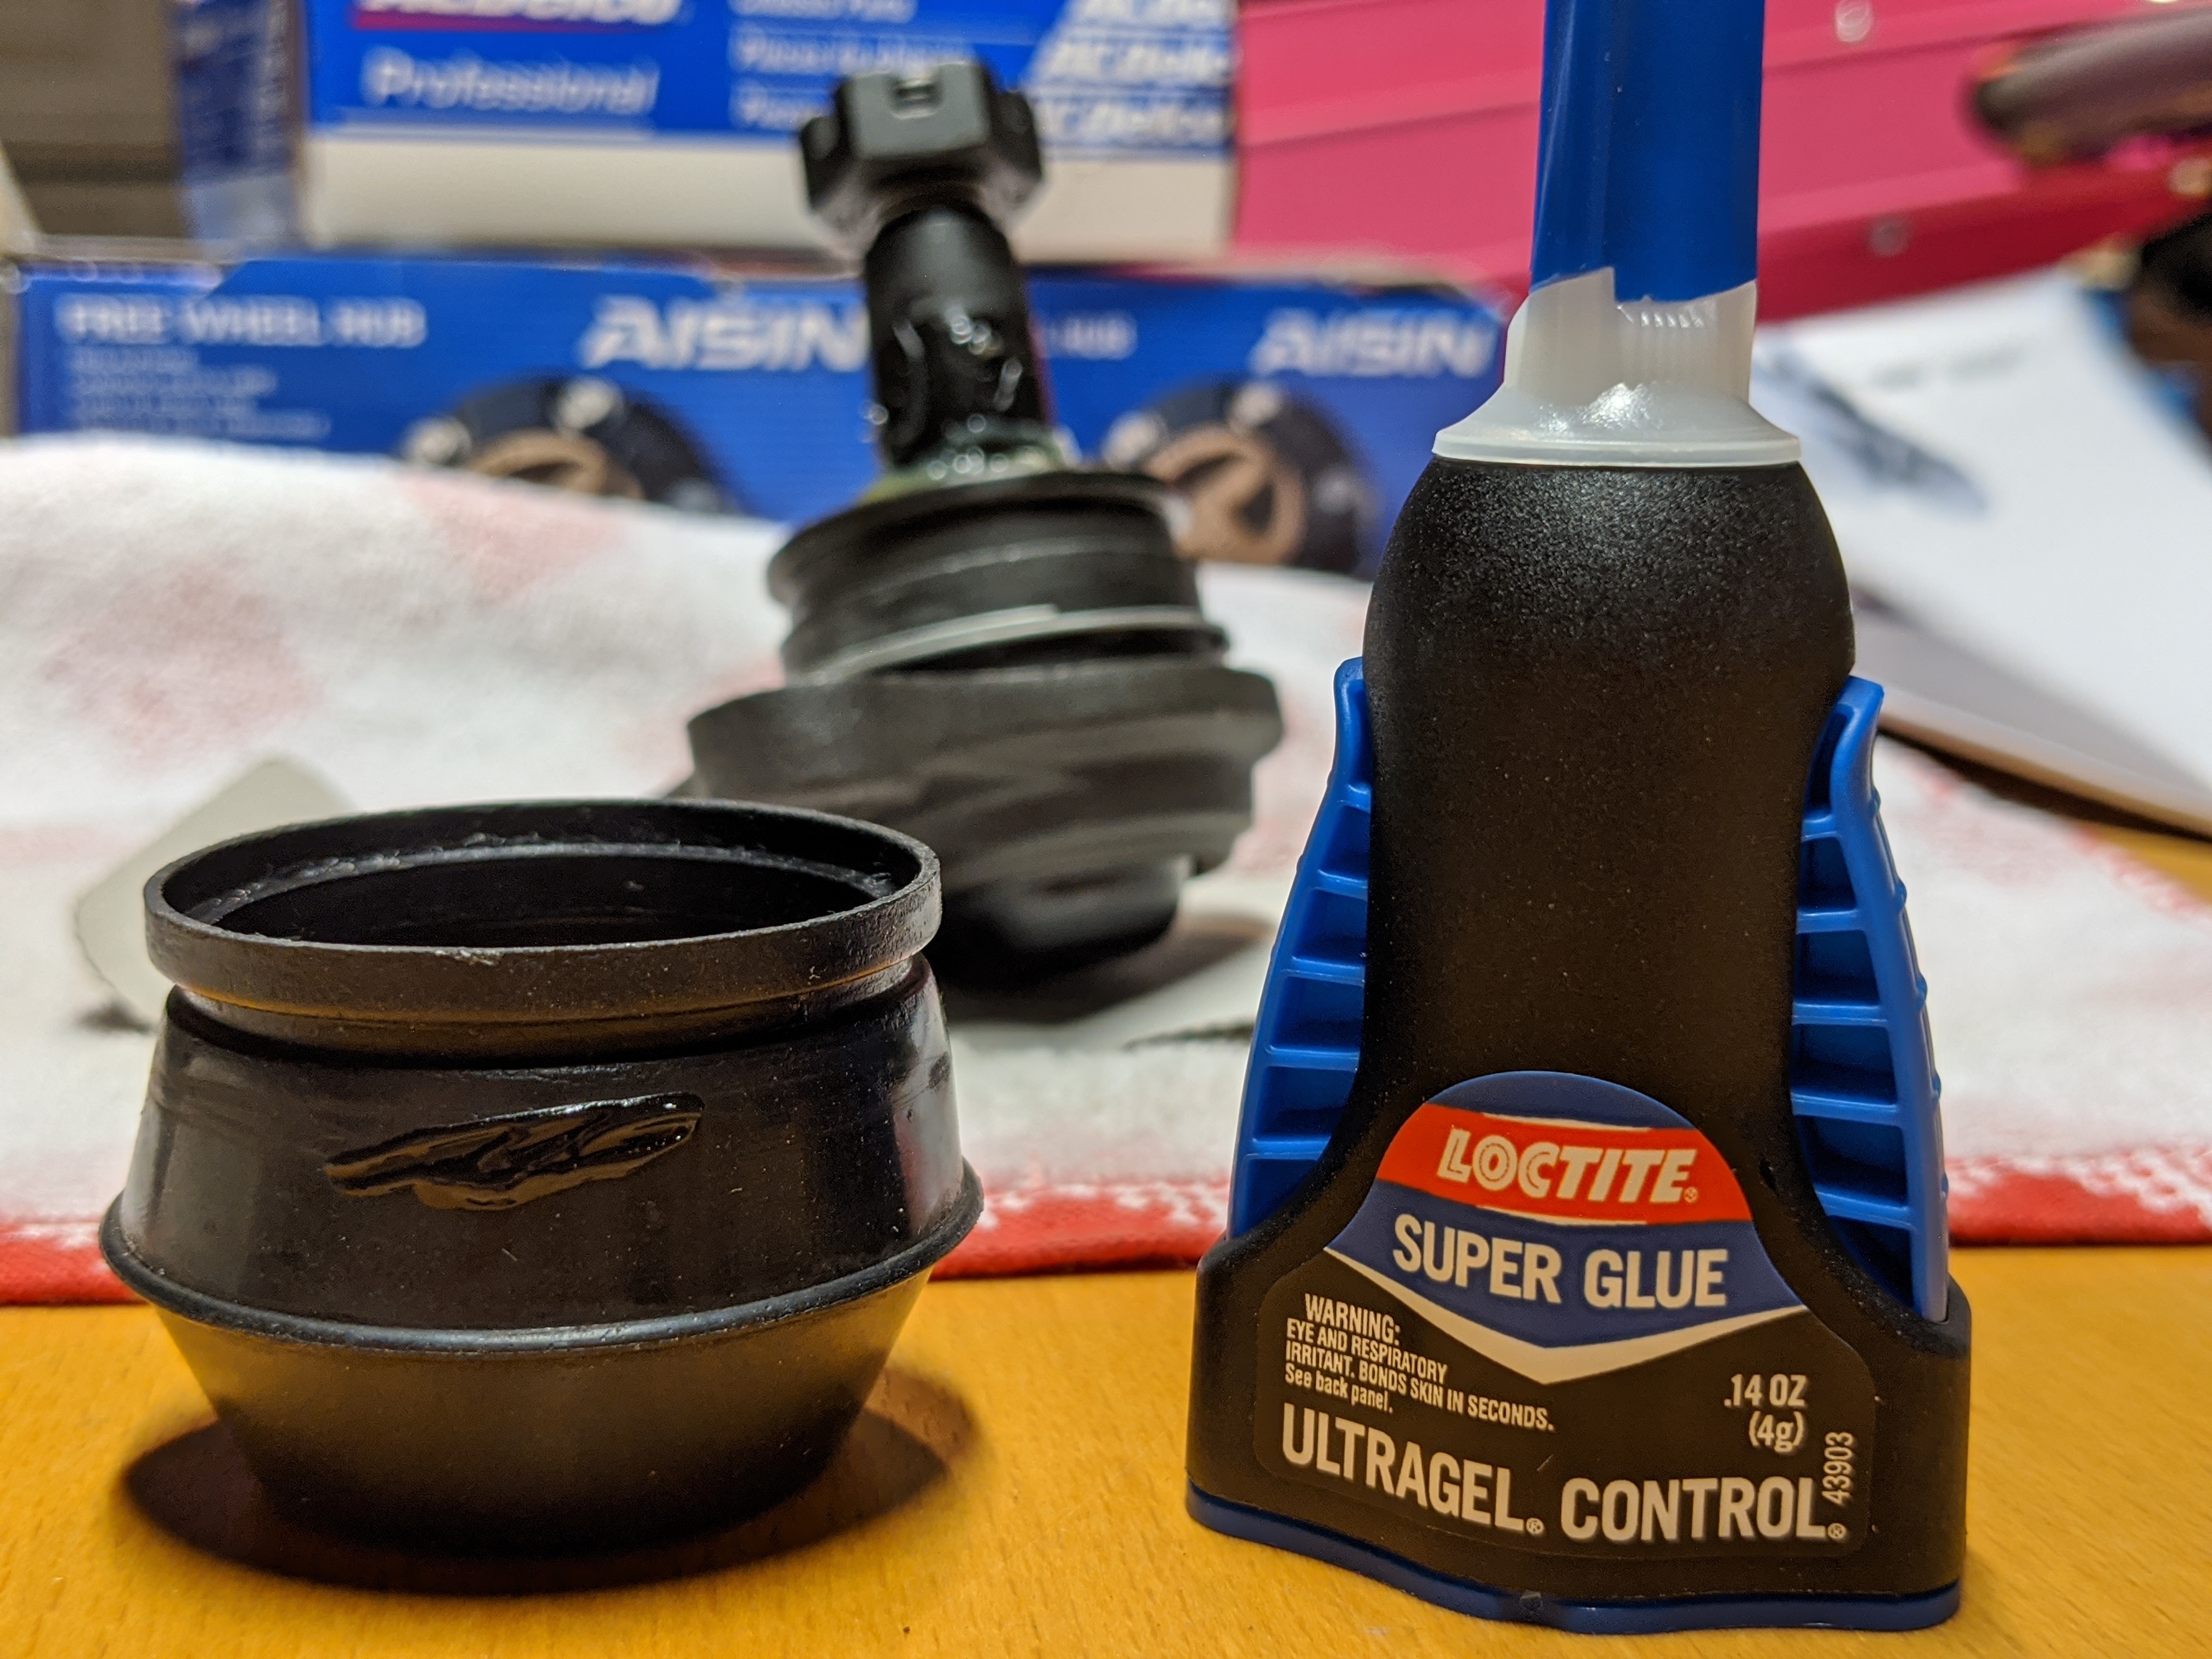
This concluded Day One
3 Likes
Bummer the tools didn’t help, sorry man!
1 Like
Day Two
Two steps forward. Two steps back.
I only had about three hours today, so I decided to take it easy and not let anything stress me out. At first, I didn’t even get the tools out. I just wanted to see how much of a fight the upper ball joint would be, even without the boot. It slipped effortlessly into place. Reinstalling the boot was a piece of cake.
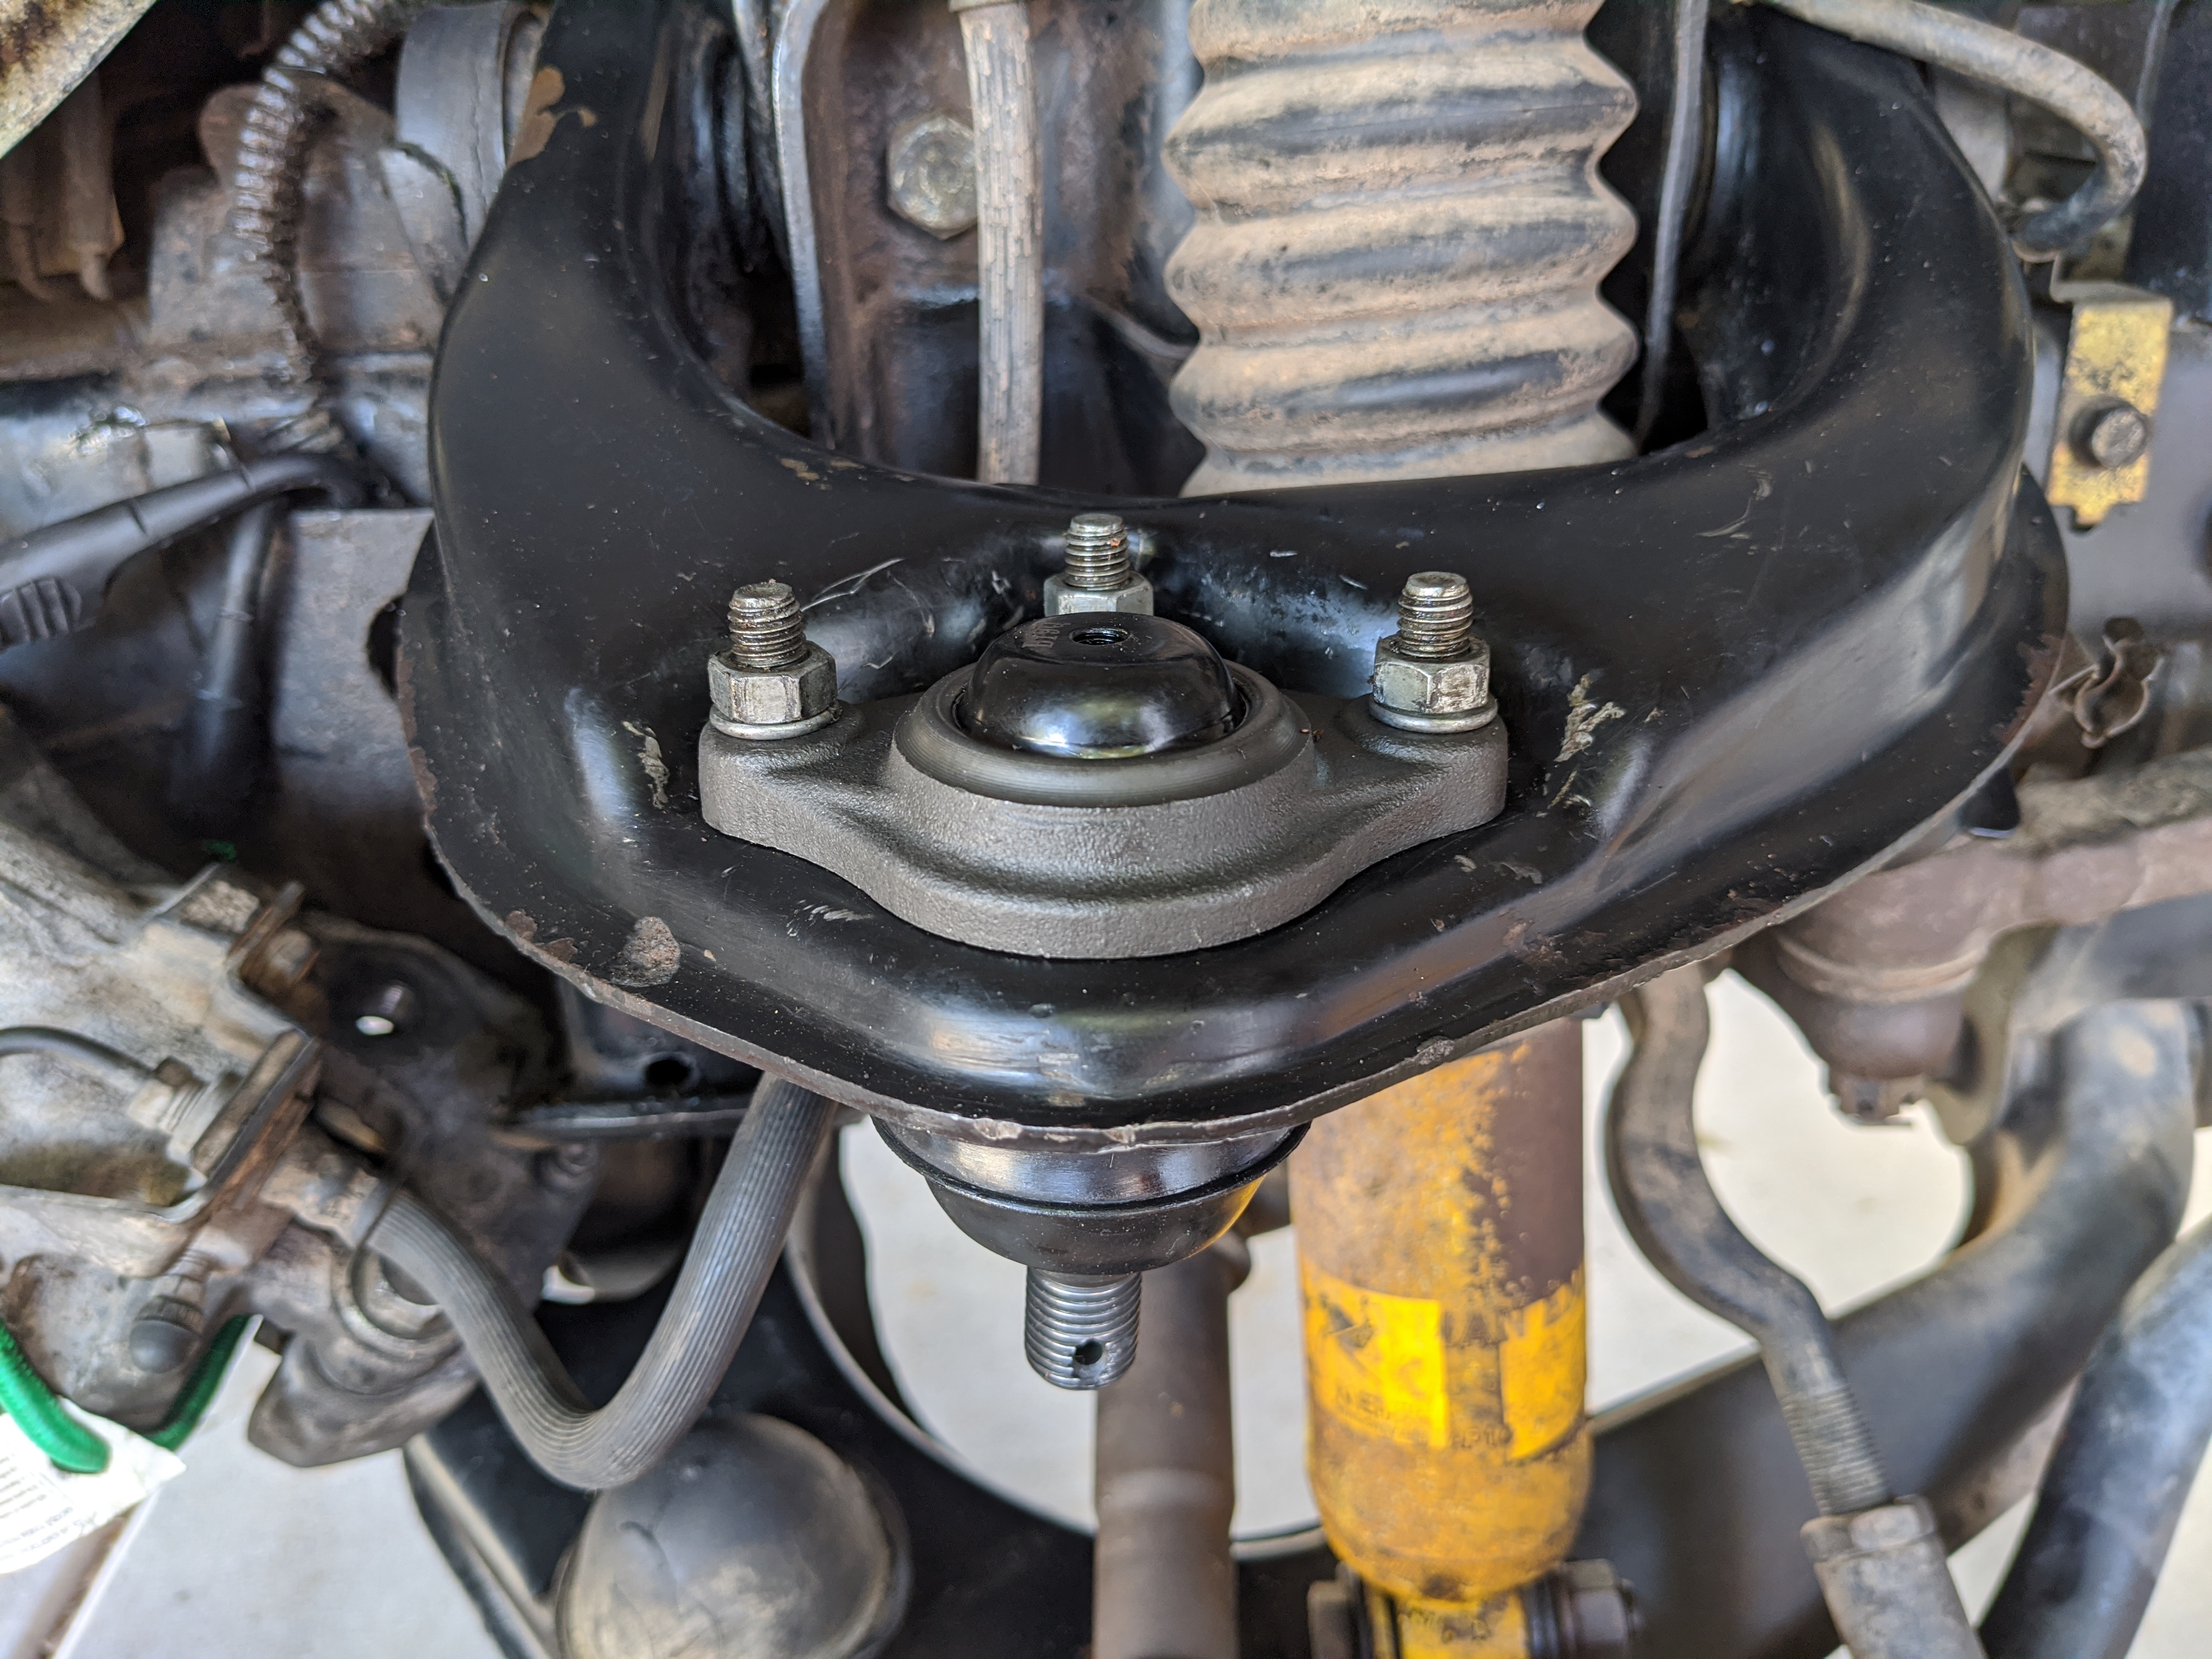
That was easy!
I got the tools out and settled in for an hour or so if tinkering. Not like I’m going anywhere for a couple weeks, right?
Two steps back: You know how you have to use a jack to compress the strut so you can get the upper ball joint started? Well when I did that–the freaking lower control arm bushing creaked. So while the upper ball joints and outer tie rod ends were donezo and the manual hubs are cool, none of this work solved the creaking noise–and I’m gonna have to tear it all down again once I get bushings.
Manual hubs look pretty good, though.
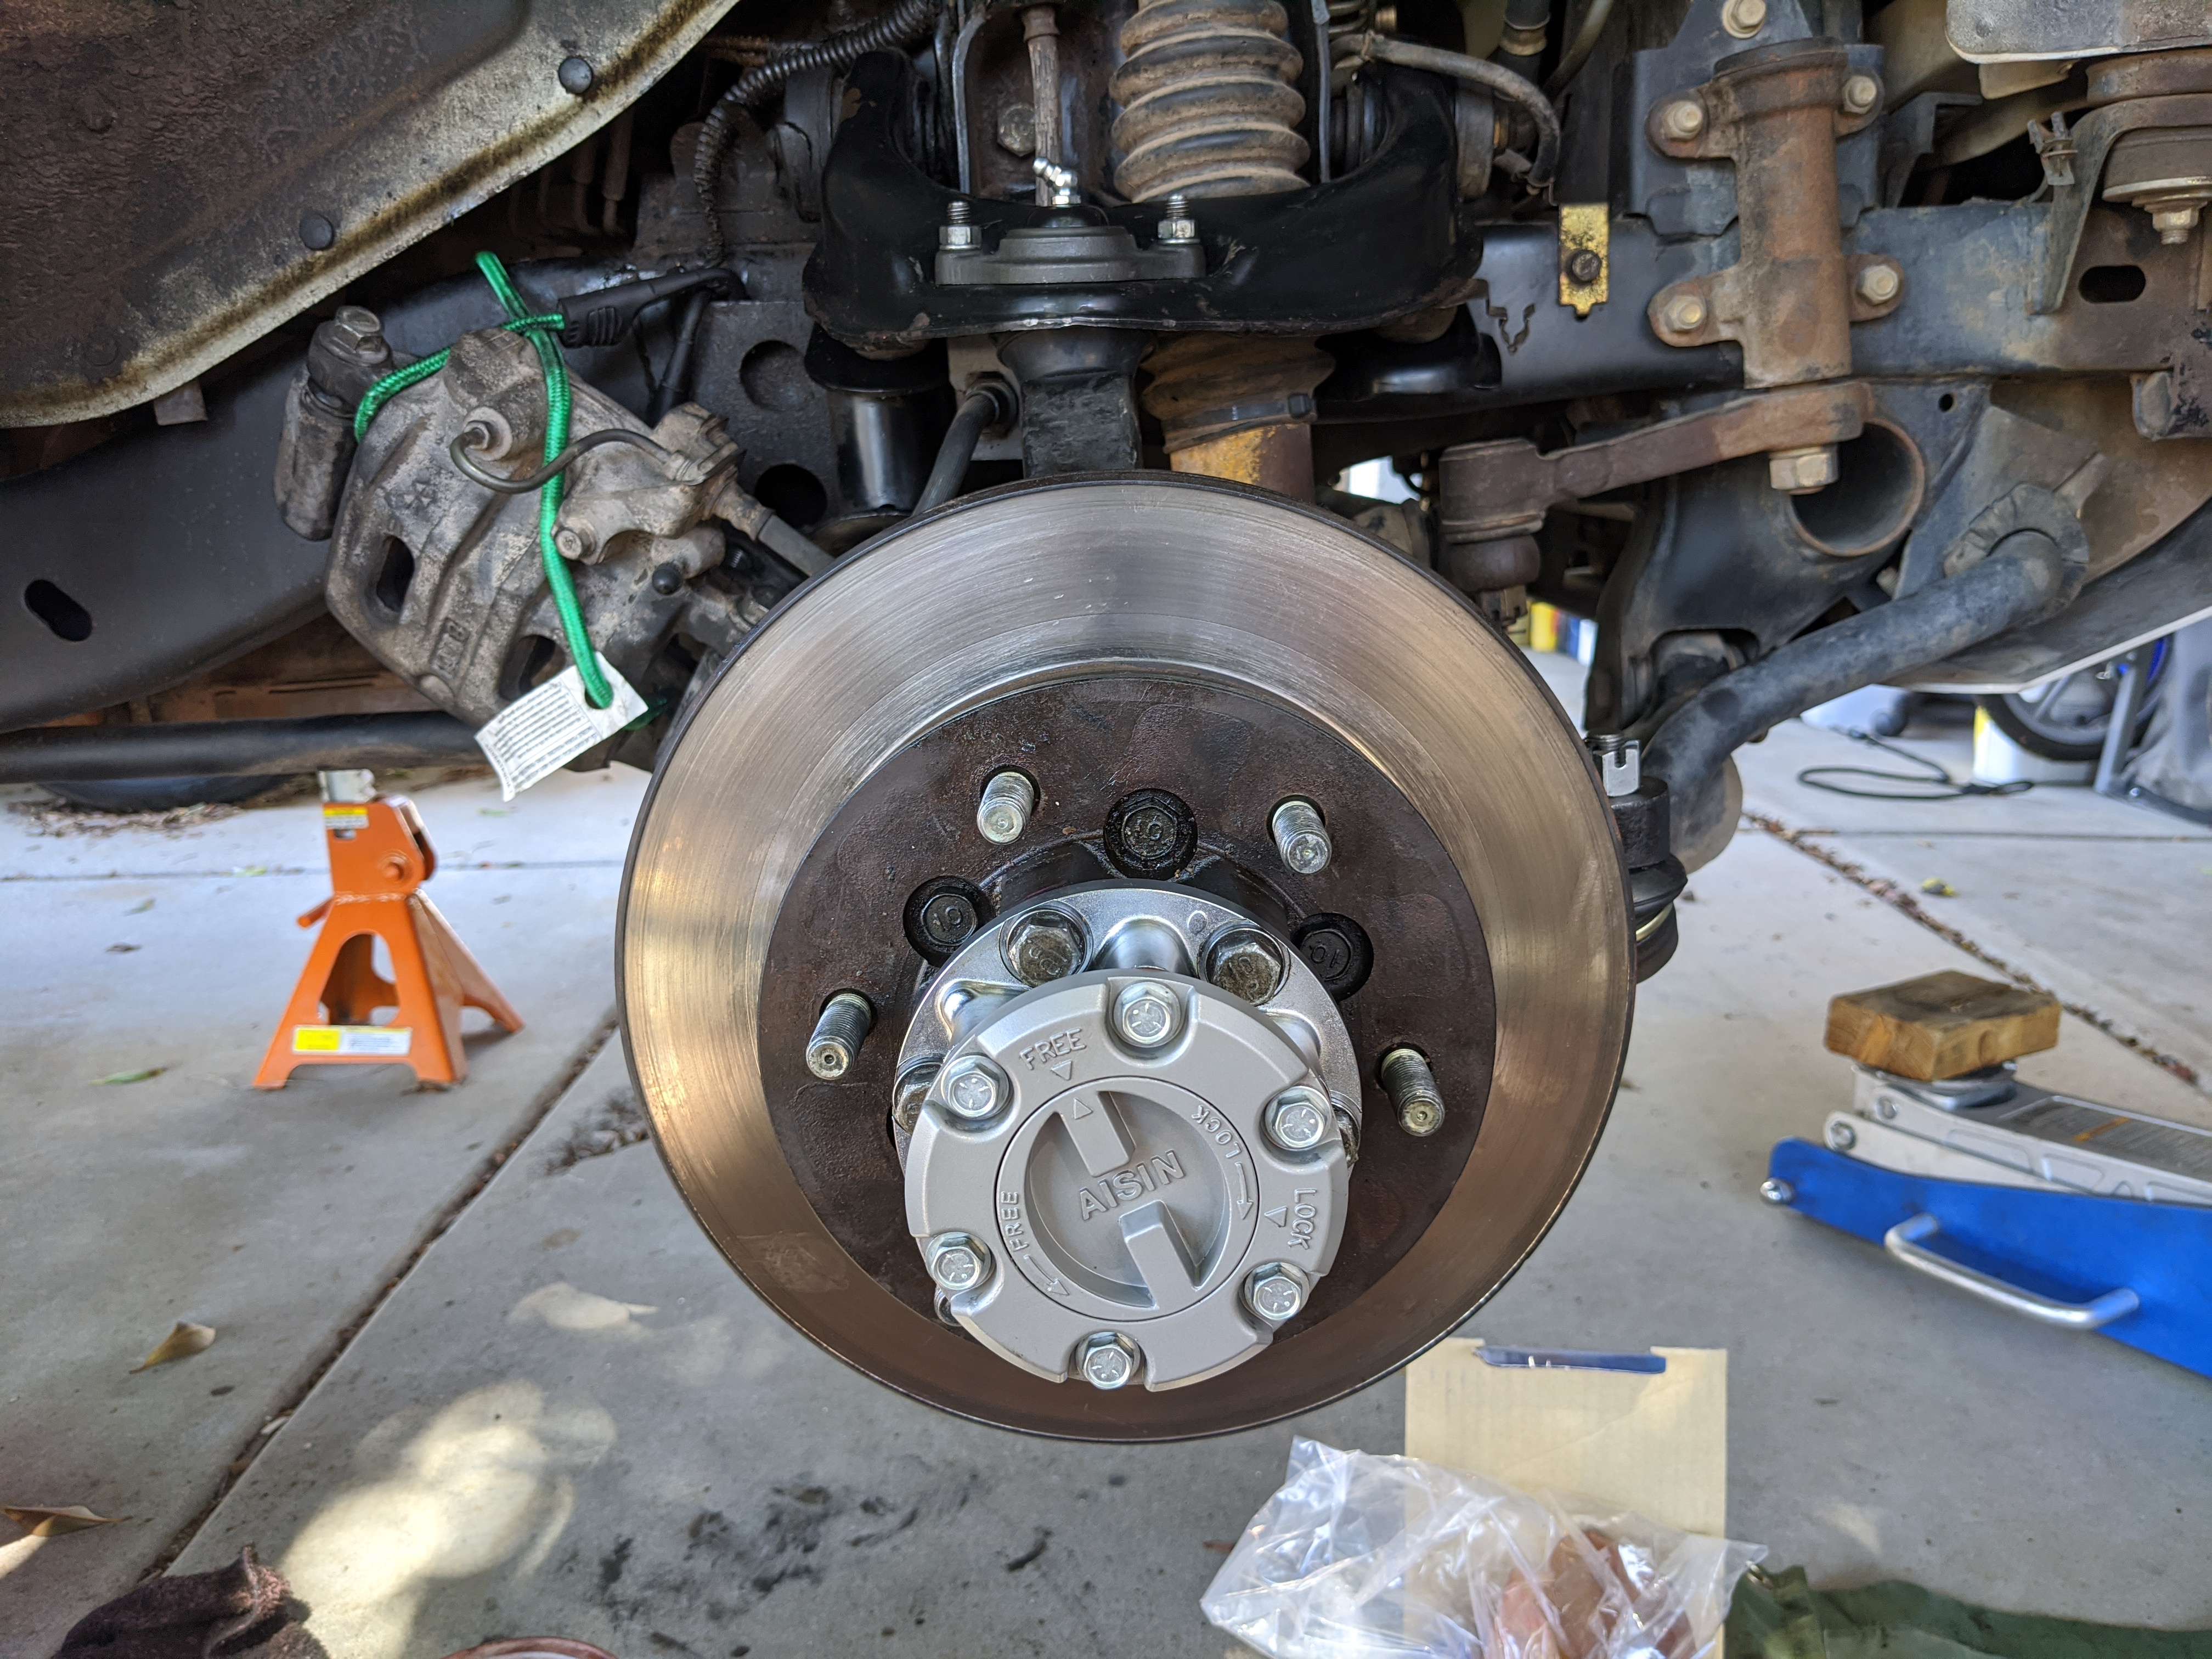
One side done. Kinda.
The ABS sensor was kinda rusted into the spindle and I literally destroyed it trying to remove it. (Ultimately chiseled it out of the bore with a hammer and a screwdriver.) And I didn’t notice I’d forgot the brake rotor back shield until I was torquing the manual hub cover bolts. Considering it’s all gonna come back out in a few weeks, I’m not too concerned.
I ended the day pressure washing both sides. The control arm bushings were caked in greasy mud. I know it’s wishful thinking, but it would be real nice if blasting all that garbage out with 1400psi of water, then liberally spraying things down with silicone quieted it down for a couple months.
PS: Remind me to grease all the zerks before I put the wheels back on!
2 Likes
The Other Side
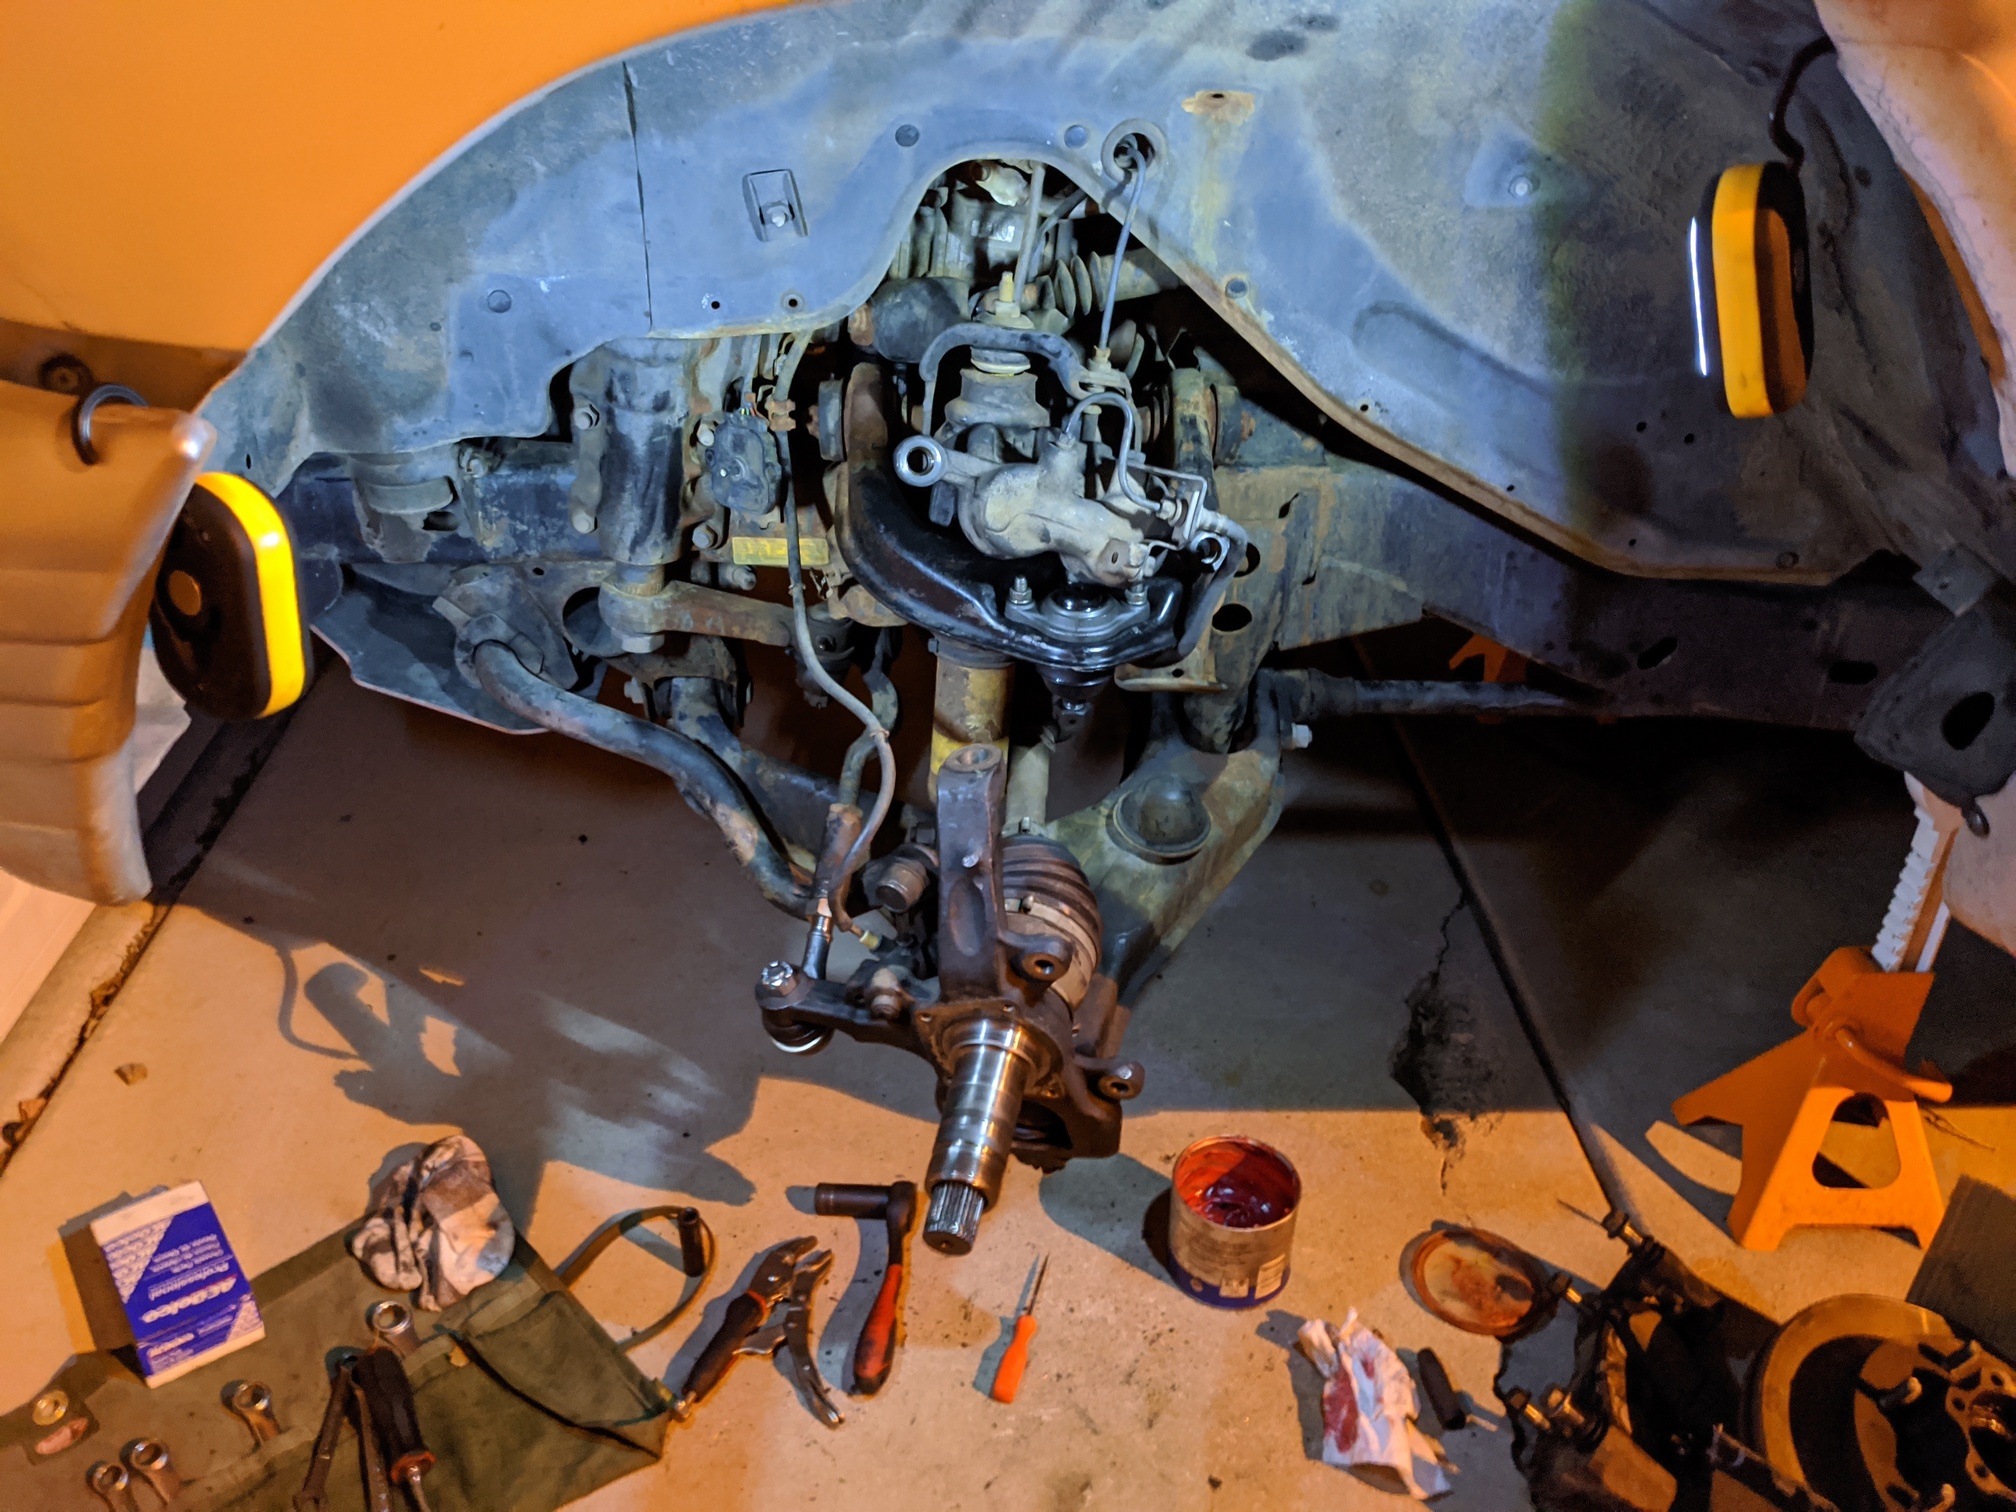
After dinner tonight, I went out and buzzed a bunch of things loose with the impact. Then, in front of a Phoenix garage after the kid went to bed, I took the tools out and set up a couple lights to chip away at the other side…
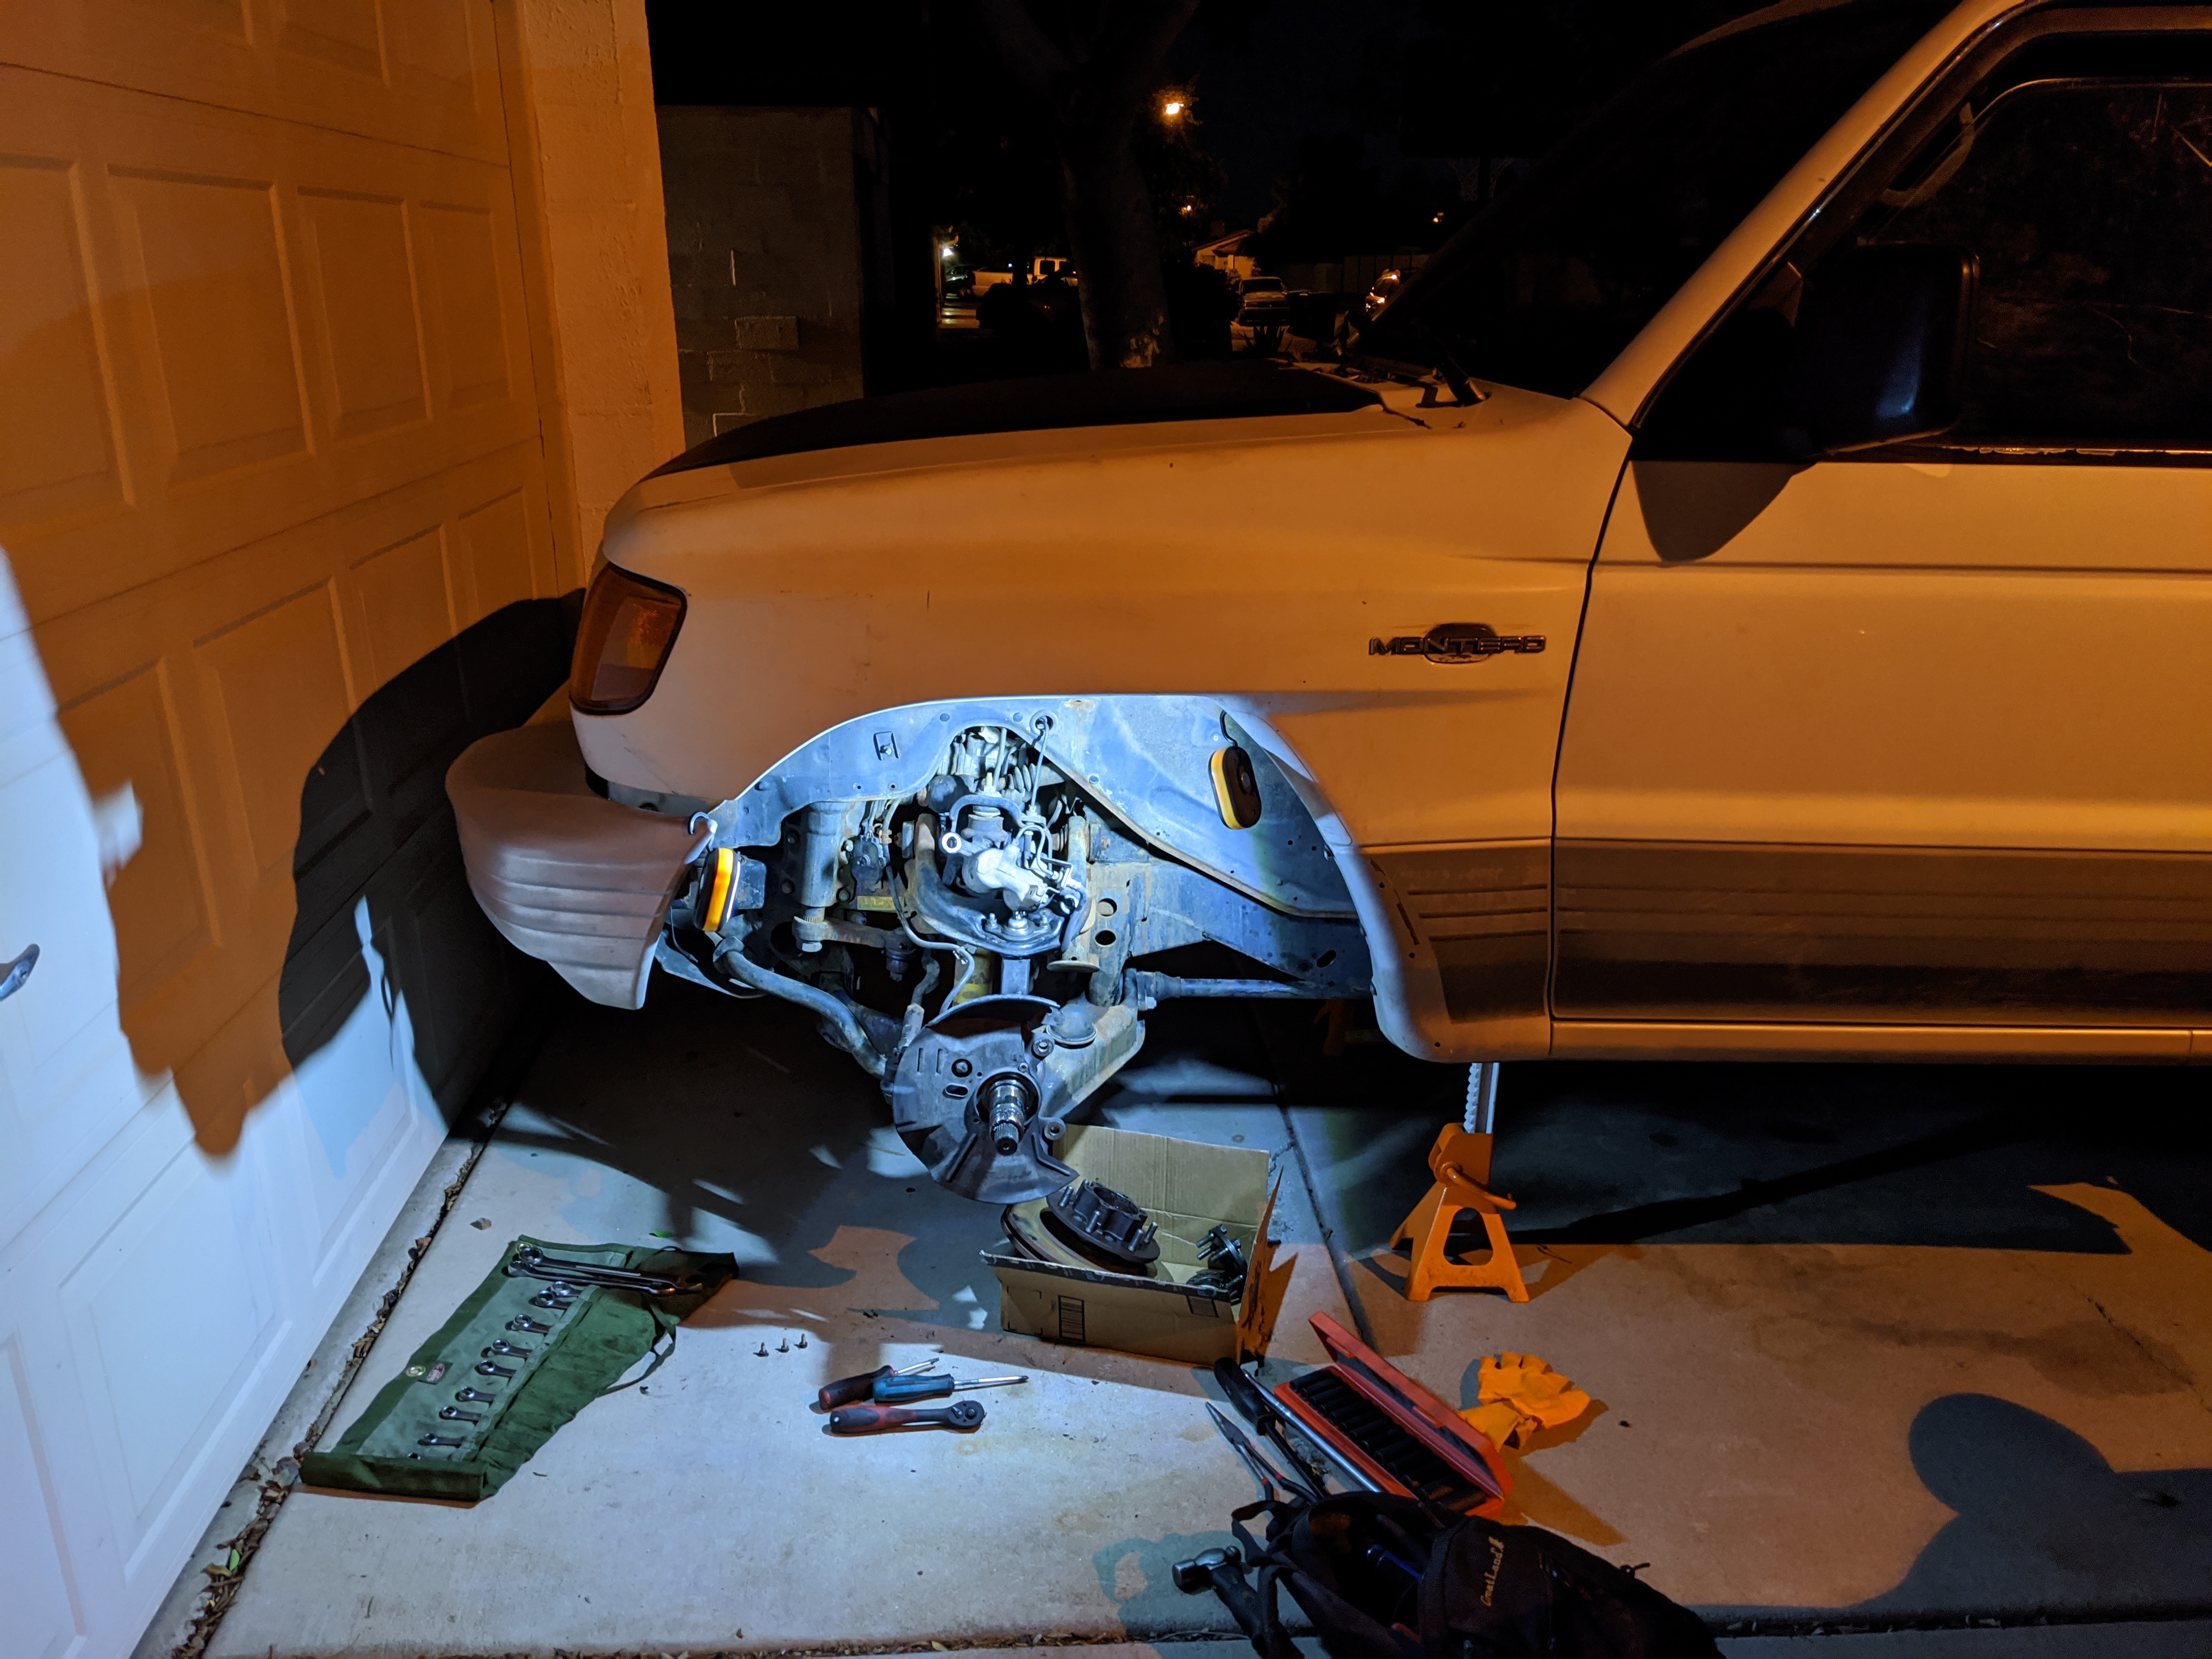
Not bad for about 90 minutes of work. This side is going quite a bit faster! Tomorrow I’ll sneak out for hammer time and see about popping the tie rod and ball joints free.
Won’t be long now!
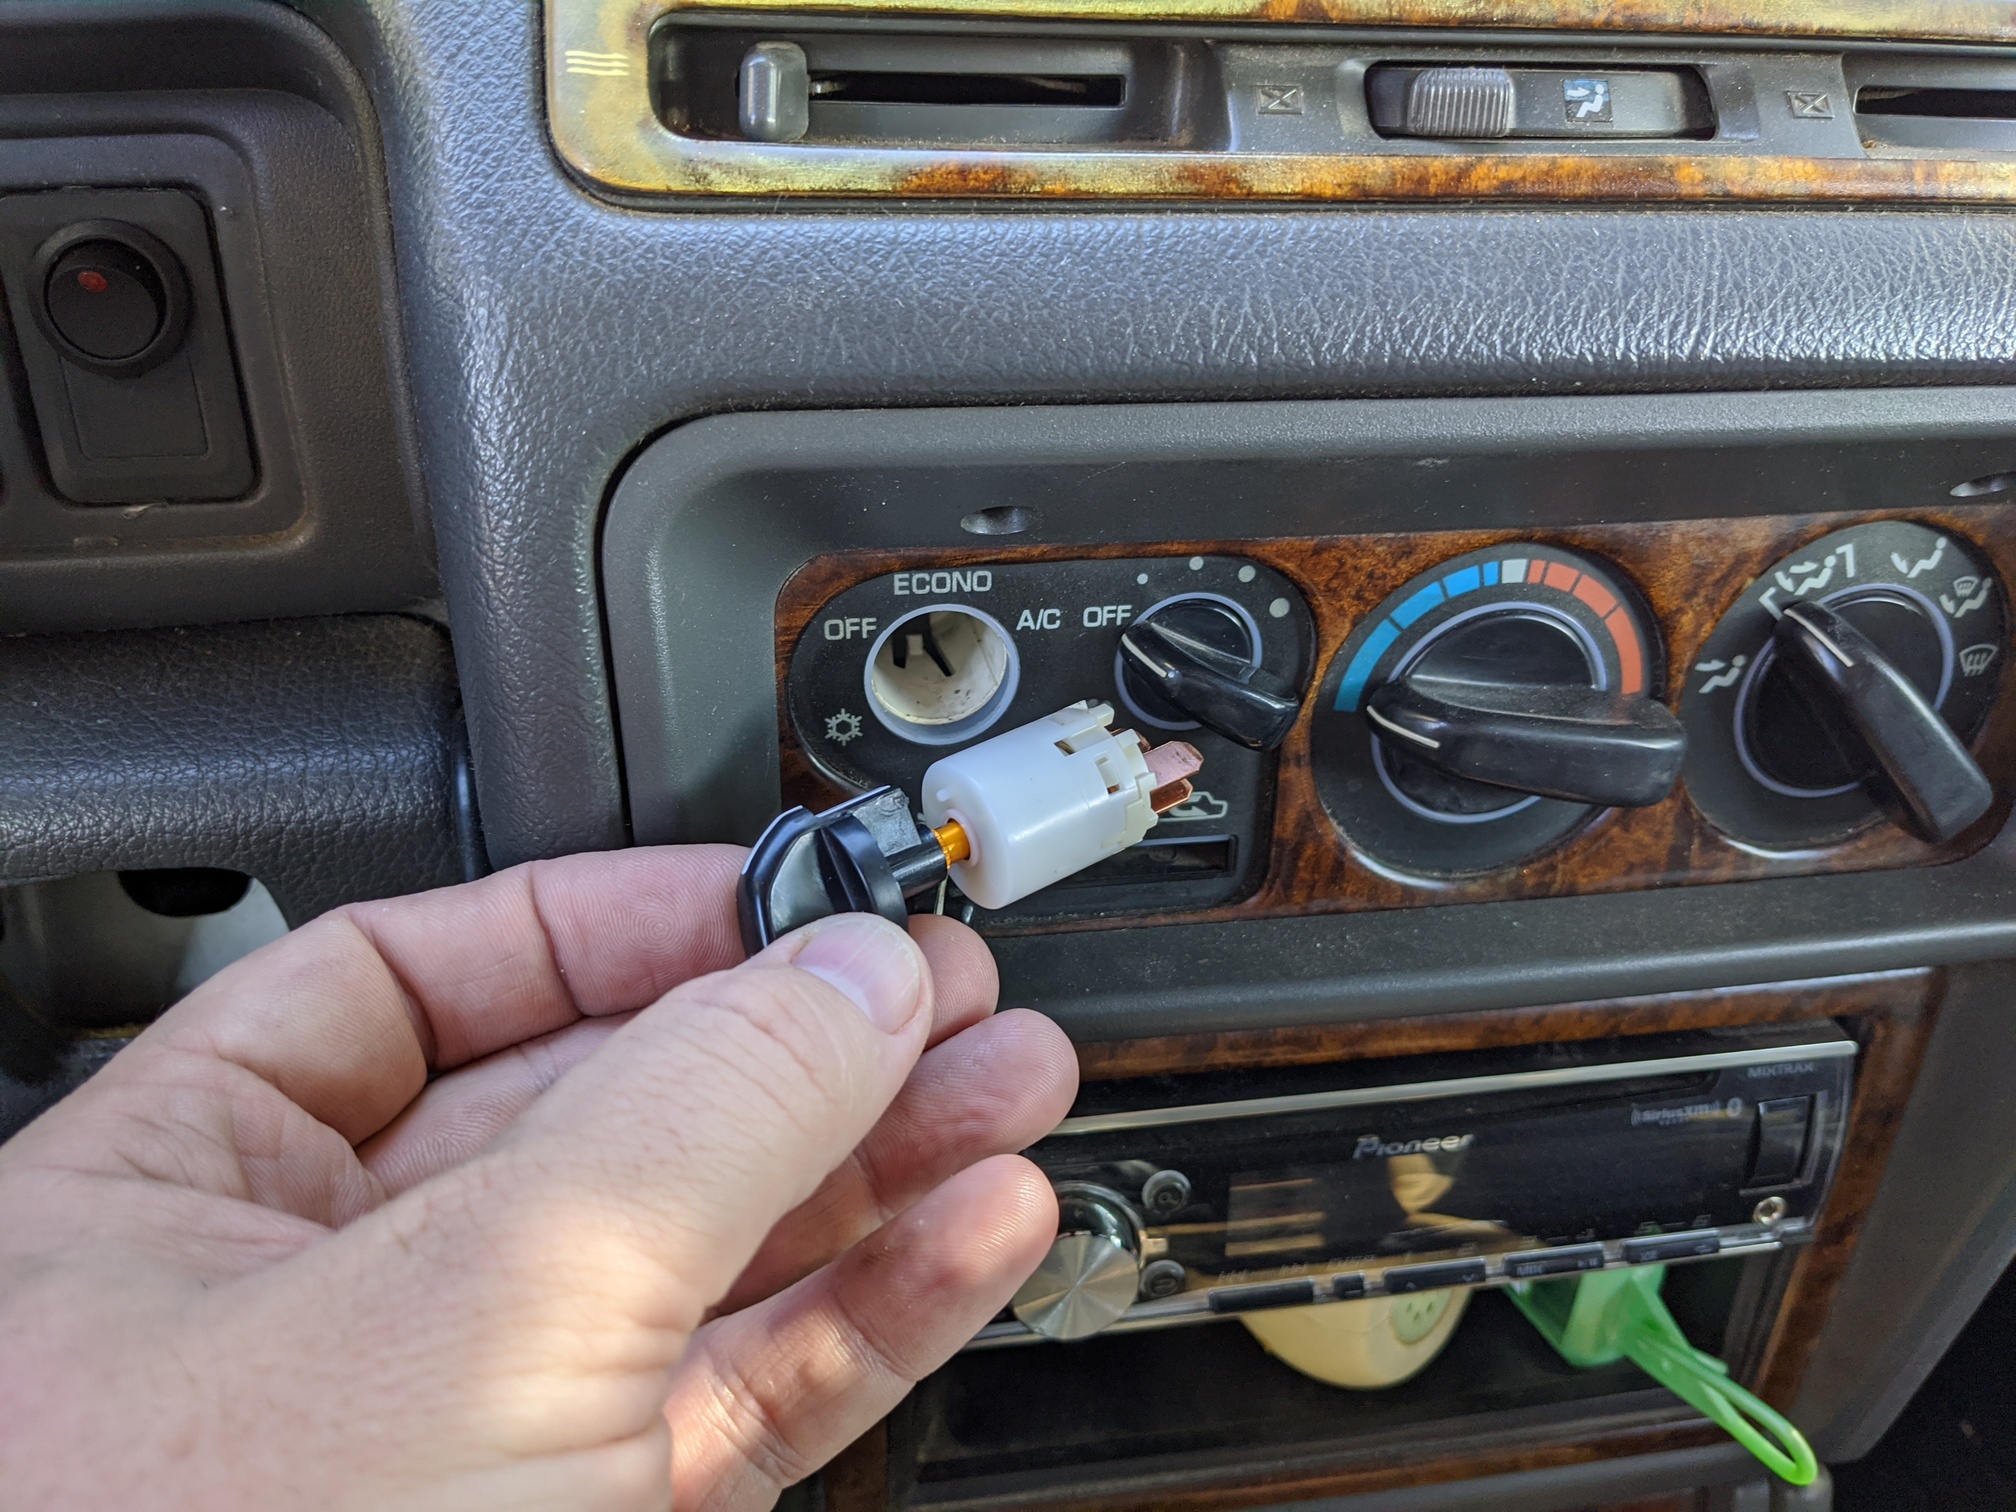
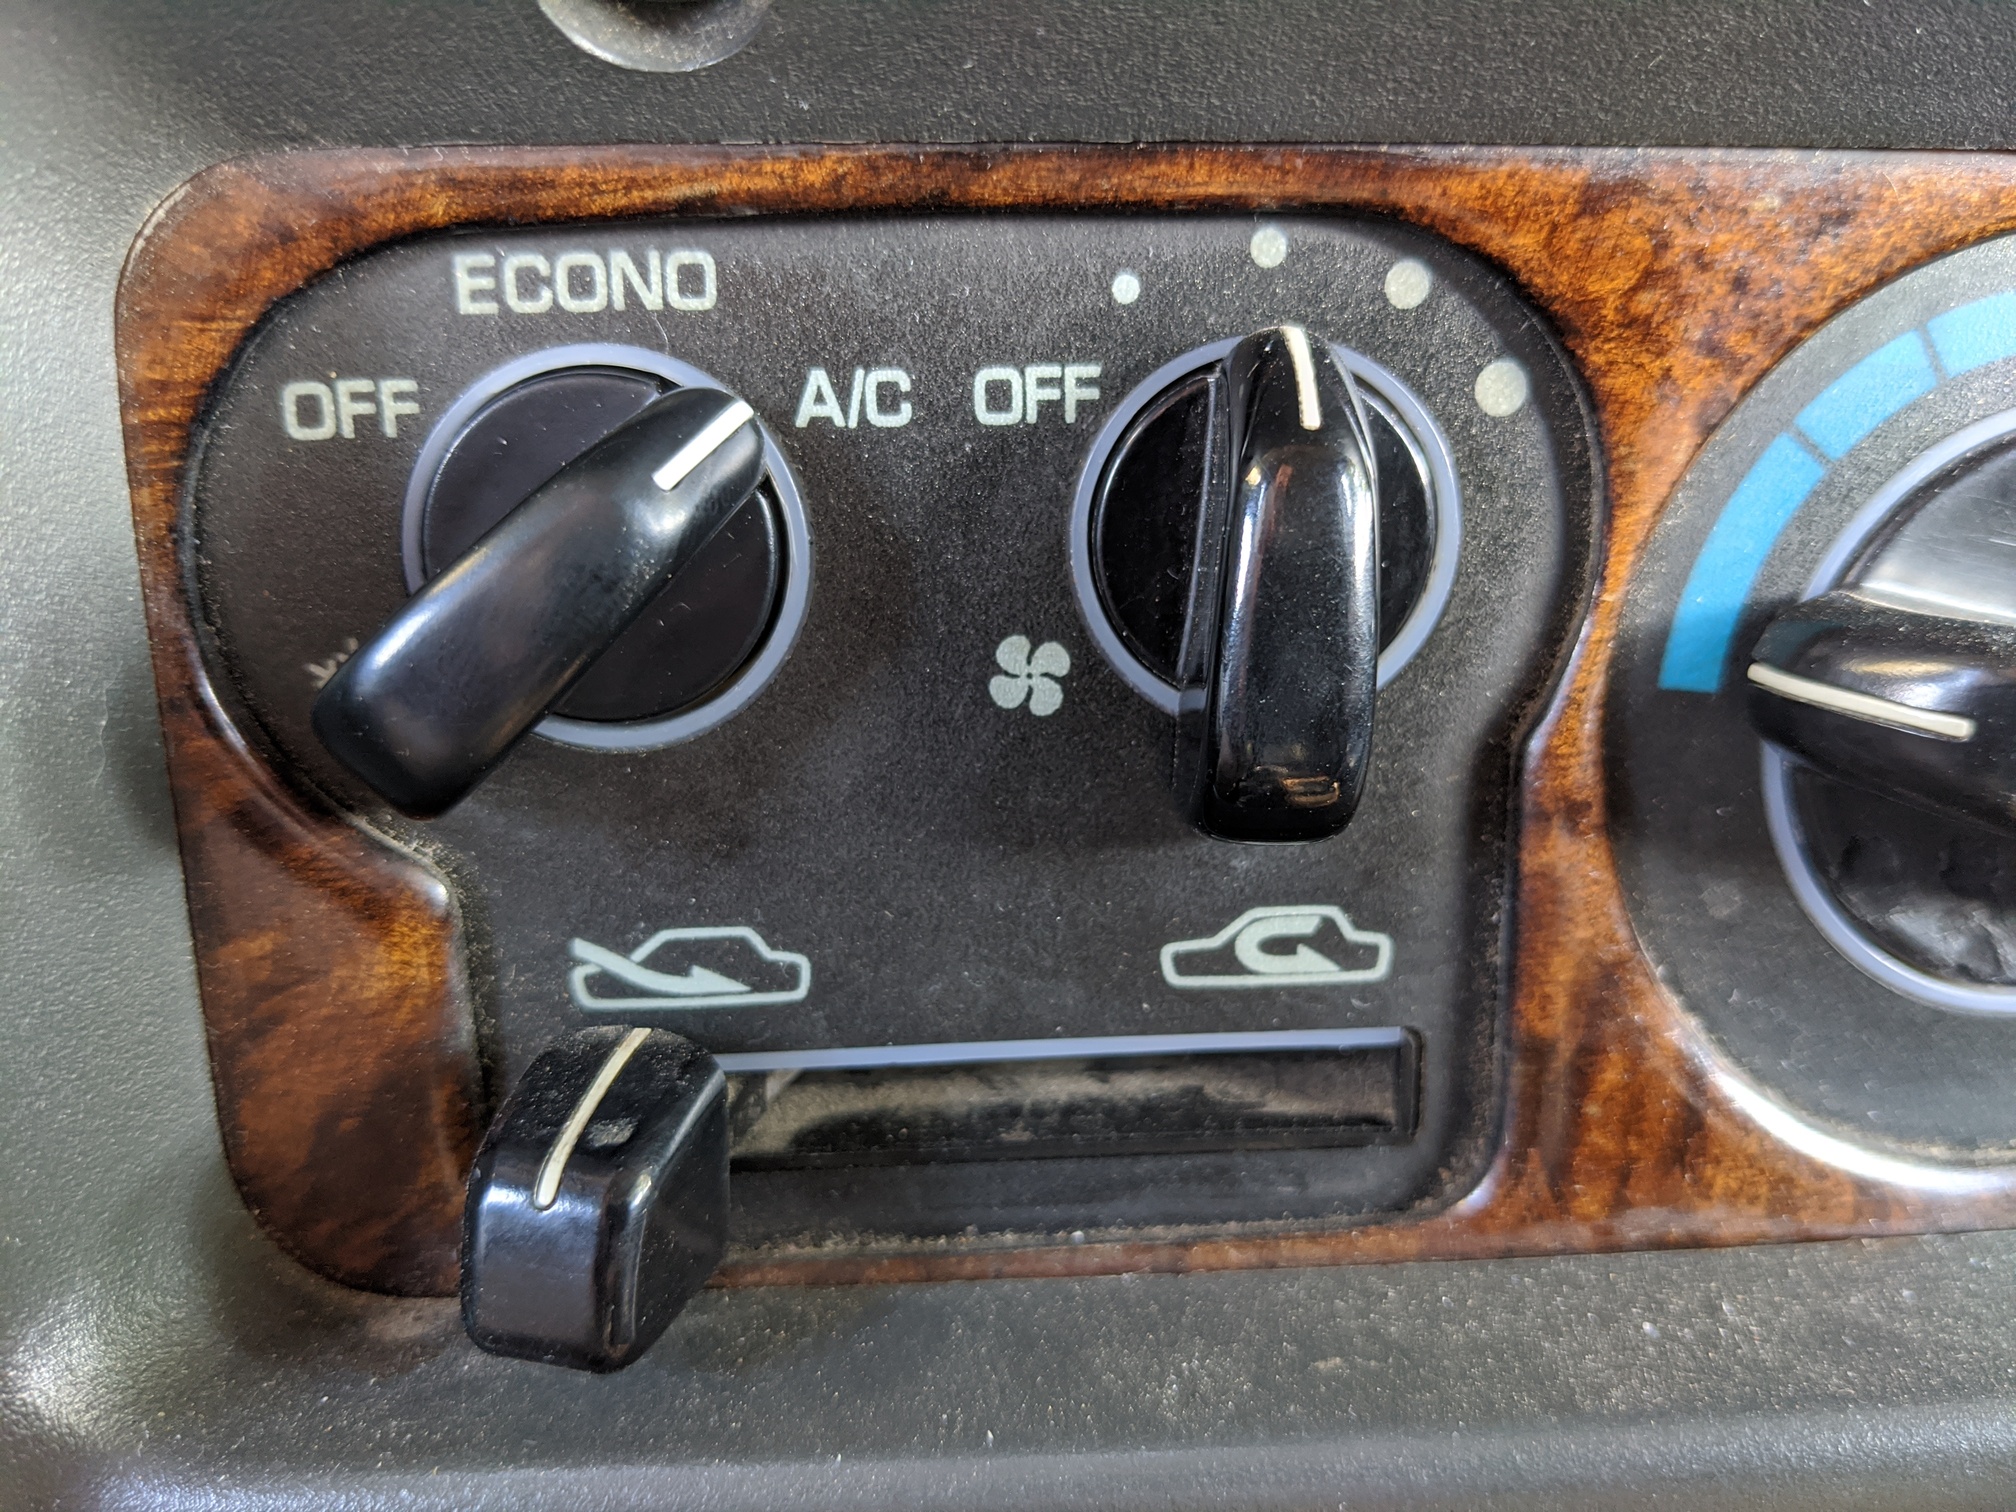
Oh! And my AC switch showed up, so I’ll have AC for the drive to the alignment shop when it’s all back together. Woot!
3 Likes
Done!
Went out last night and threw a few things together.
The previous owner really did a number on the security stud. I had to use vice grips to get it out.
I would’ve got quite a bit further, but ironically couldn’t get the zerk fitting into the lower ball joint last night, so I had to finish it all up this afternoon.
I grabbed the wrong blue handle when I reached for the jack.
But I got it all back together and took it for a test drive…
Oh, and I enjoyed ice cold air conditioning during my test drive!
Unfortunately, the creaking noise ended up being the LCA bushing, so I’ll have to pull it all back out again this summer. Even so, progress was made and I’m happy with it.
3 Likes
Firestone called and asked me to reschedule my alignment for Tuesday so they can have their master tech do the job. Much as I wanted it done today, when they put it like that…
The creaking is already making me crazy. Maybe it sounds even worse now that I’ve put to much work into the front end? I dunno.
@MrGalantguy I had a brief chat with Josh about bushings. He said the Siberians were the hot setup–more durable than OE rubber, but in a softer durometer than typical polyurethane. Only reason he doesn’t carry them is they pressured him to order $20k in inventory and, when he couldn’t do it, they dropped him as a distributor.
I pulled up the Siberian USA site and did some shopping. $160-ish shipped for uppers and both lowers. Thinking that was a little high, I did some more shopping
I checked Mitsubishi Parts Warehouse, where I got my OE AC switch, for the OE bushings. They only sell the lowers, and it came out to about $100 before tax and shipping. (They’re in Florida, by the way. RC Hill or something like that.)
I checked NAPA. They only had the lowers too. And wanted $134+tax for them.
So I’ve got the Siberians inbound now. 
Oh, and I also got tired of trying to figure out how to make something like this myself and just bought one from eBay. Figure I can power this entire shebang with the high beams switch and be done with it. Wo0t!
1 Like
223,900
- front end alignment
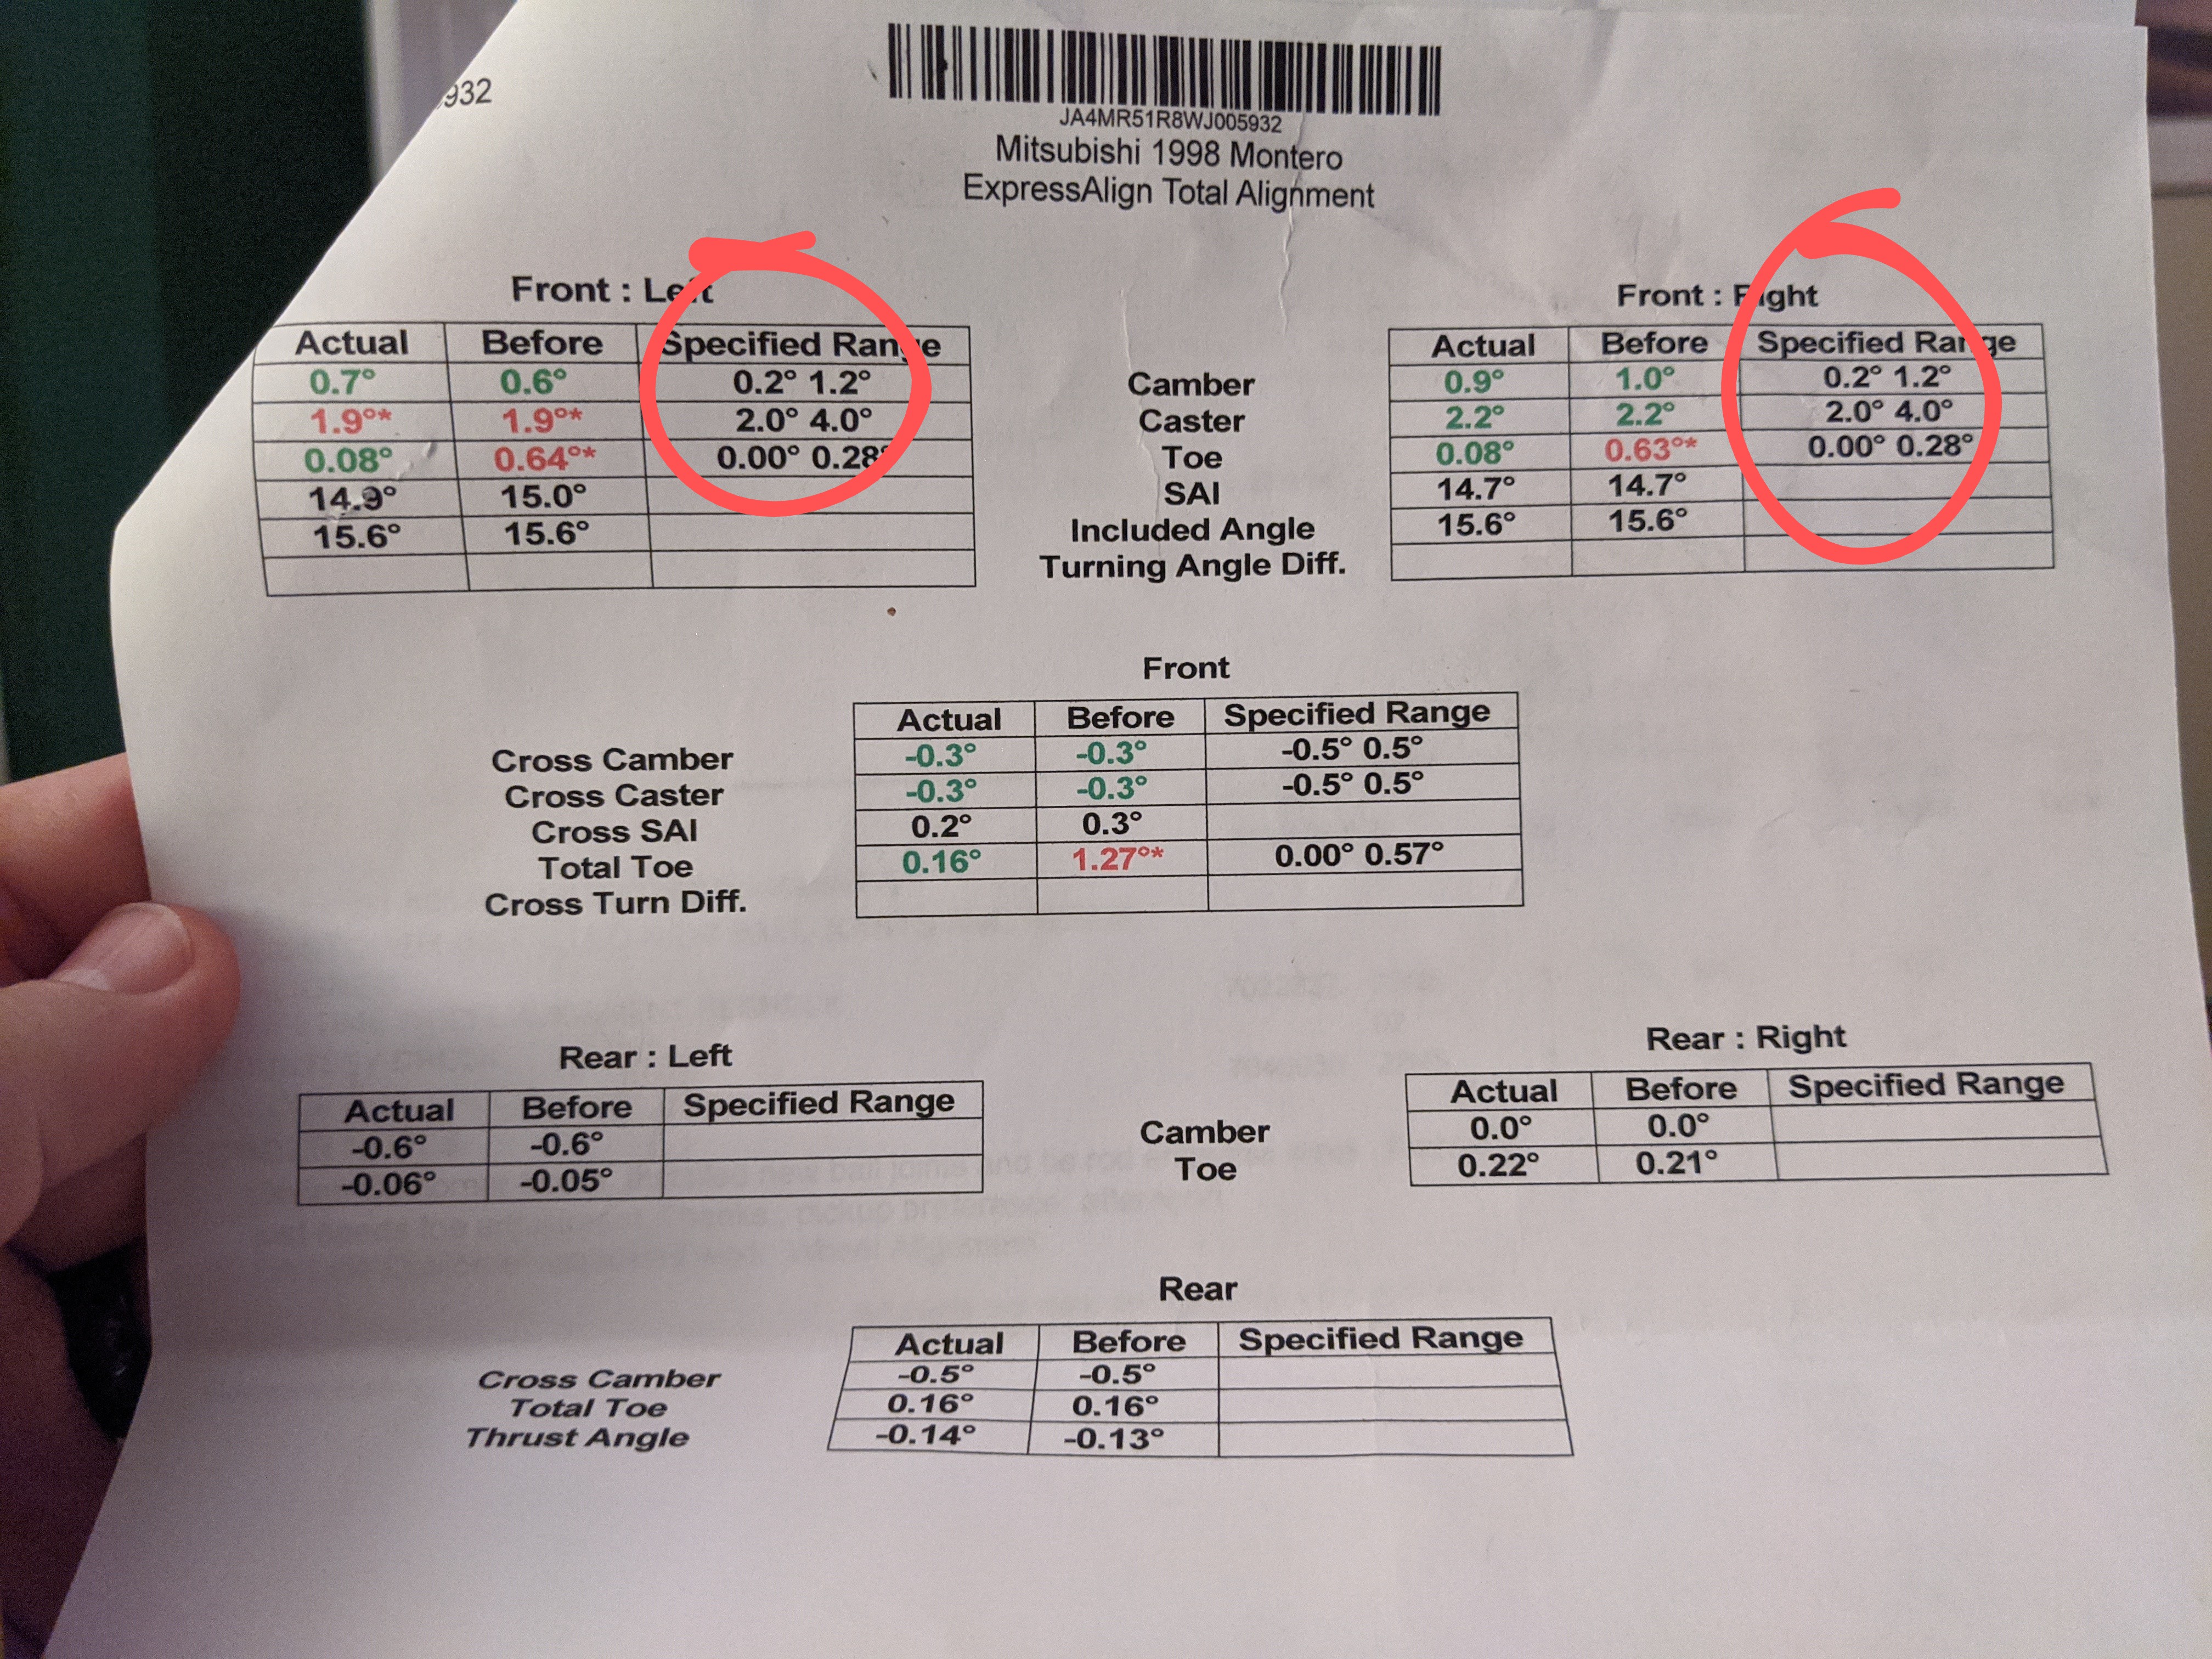
Dropped Fezzik off for a quick front end alignment today at the local Firestone. (I’ve got a lifetime alignment deal with them.) While ol’ Fez definitely drives much better, I’d like to better understand the numbers.
The Report
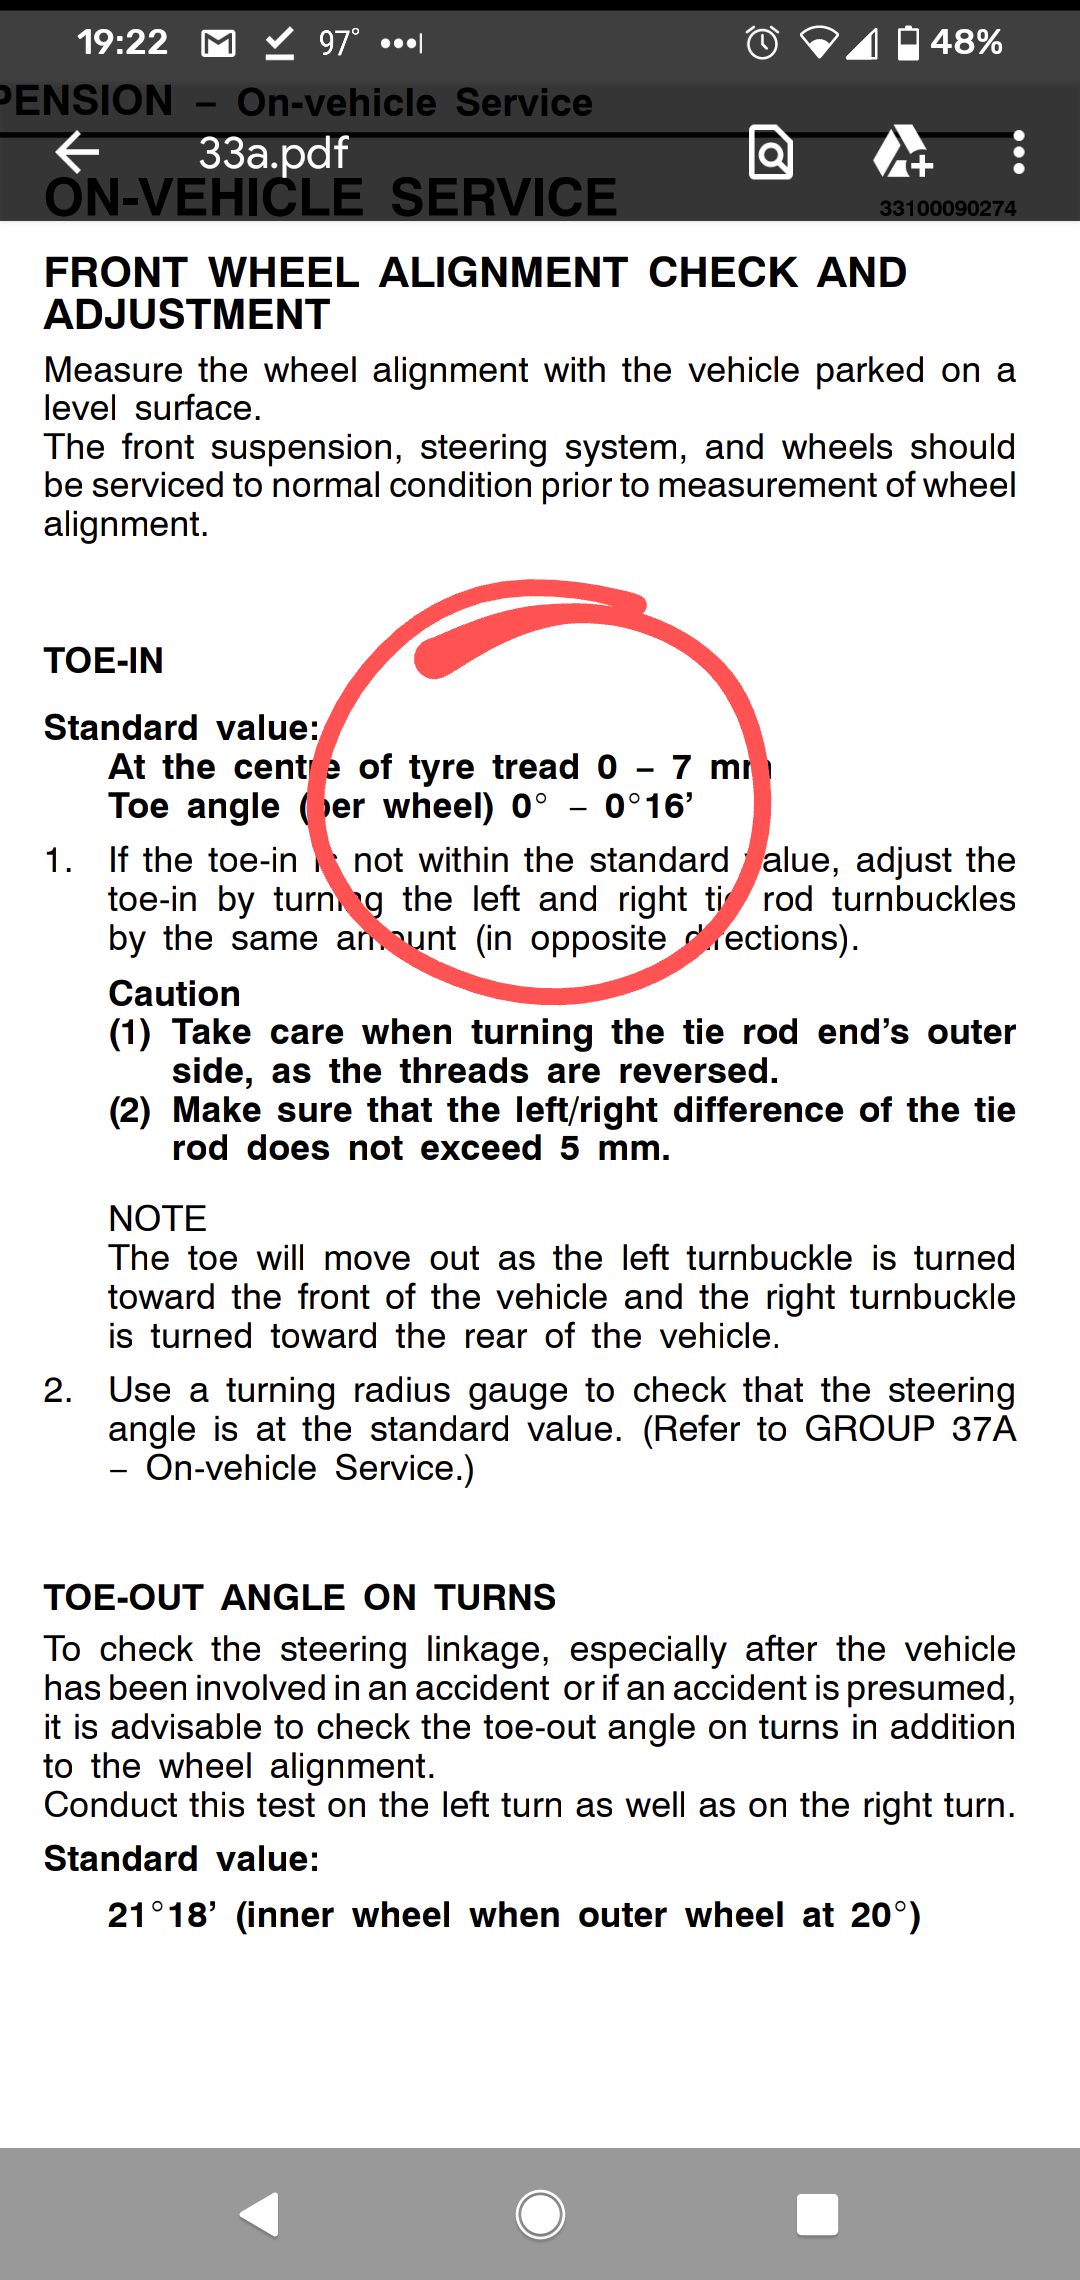
The FSM
Pretty sure I’m correct this reads “zero degrees to zero degrees, sixteen minutes”, but how does that translate to pure decimal range "0.00°-0.28° in the report?
Likewise with the camber and caster numbers. The report suggests 2.0°-4.0°, but I don’t know how to compare that to, say, the “two degree, forty minutes plus or minus one degree” caster spec in the FSM?
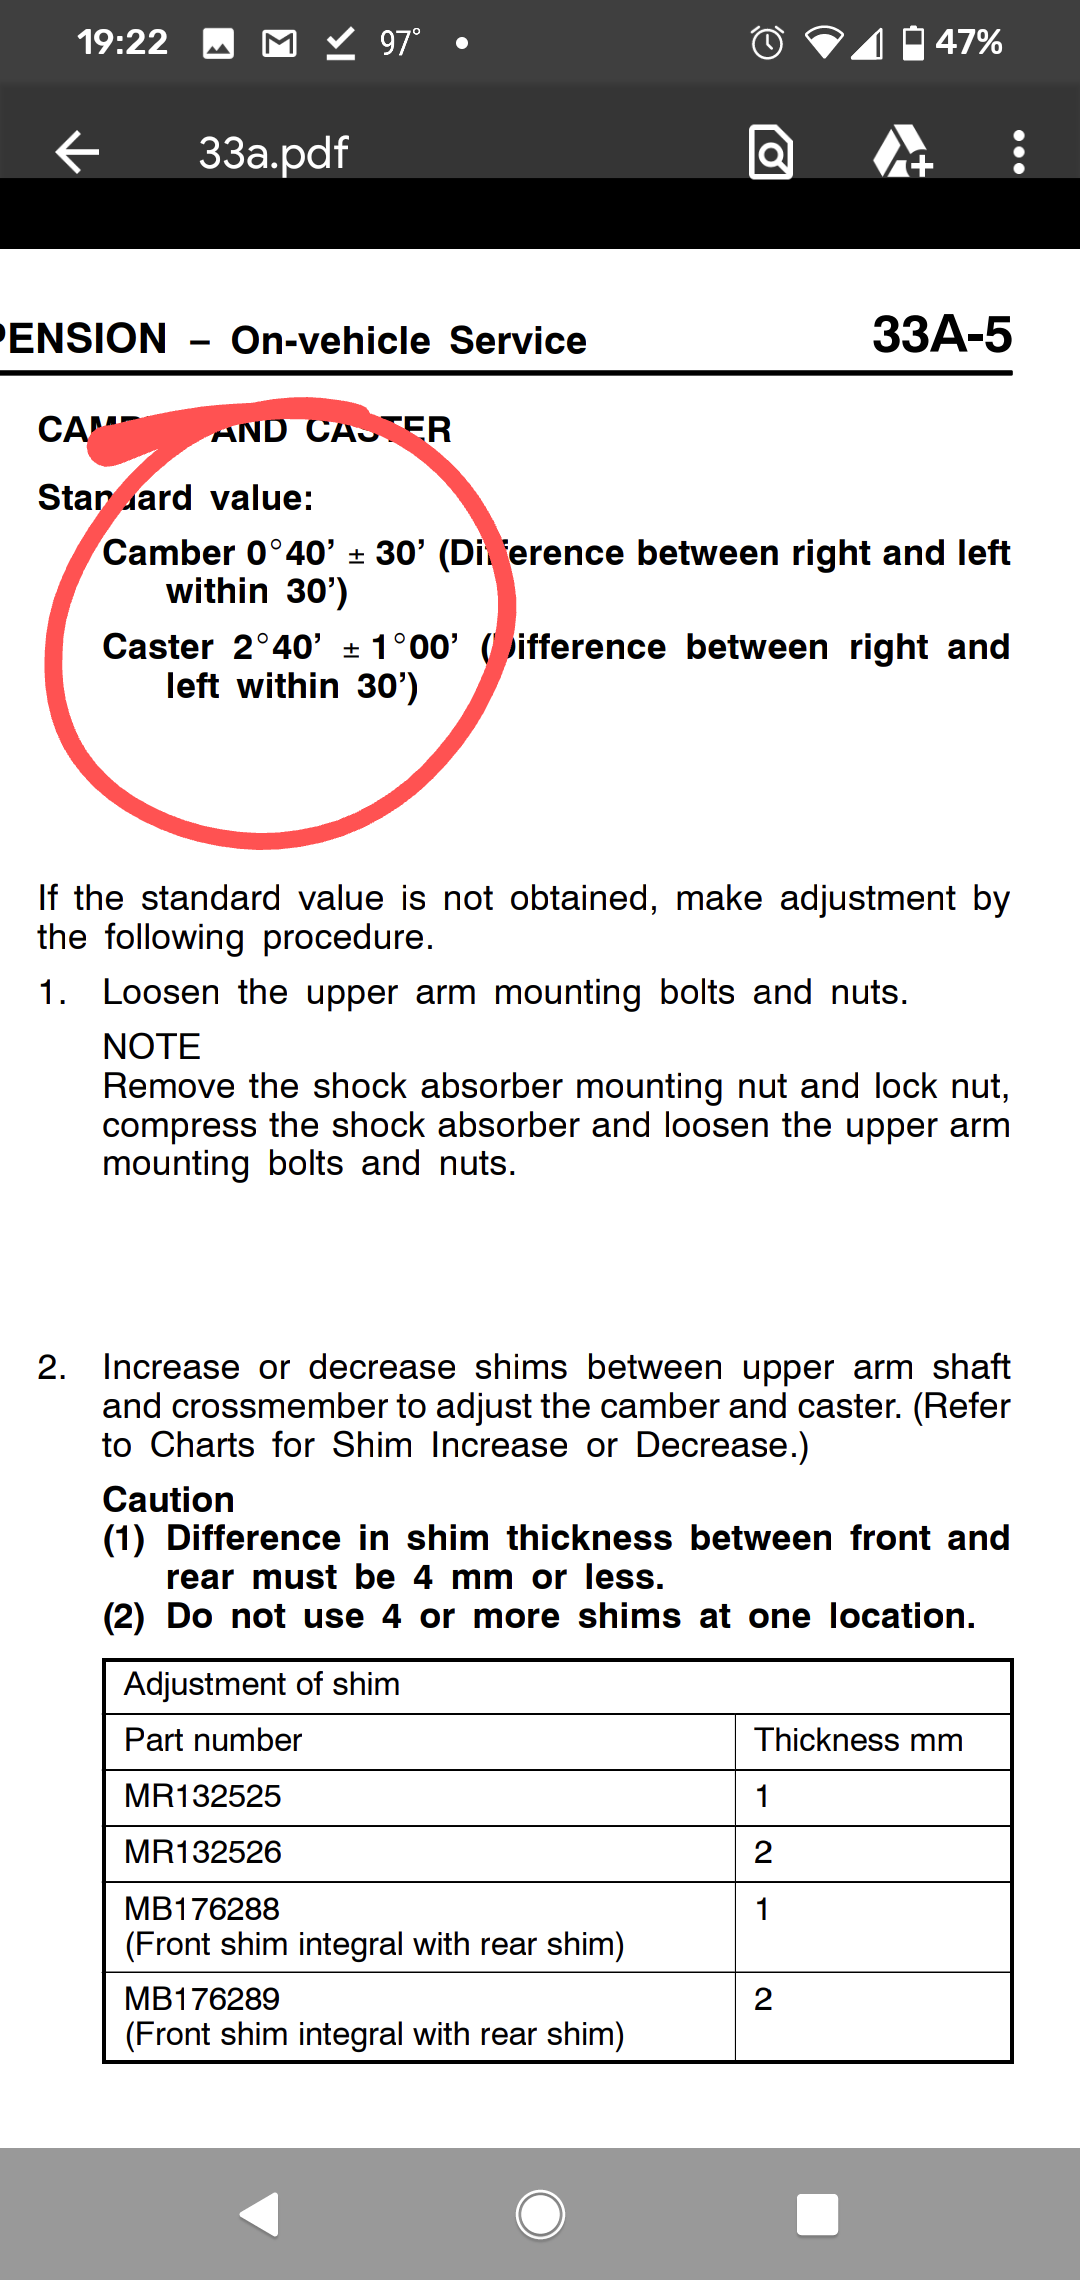
Do I treat 1.0° like a clock face, meaning “thirty minutes” is halfway around? E.g., 1°30’ == 1.5°?
Fezzik was clearly in a front offset collision before I got him. The front left fender is a sloppy respray and there’s Bondo in there under the headlight. I’m not sure if I should be having them shim things up better or if I need to chain that corner to a big tree somewhere and throw it in reverse.
Not urgent, since I’ll be replacing the control arms this summer, but I don’t know if I should be more concerned. Could mis-indexed torsion bars cause variances (one side higher to account for driver weight, for example-- @ChazzLayne might recall Cordes crawling under Fezzik and cranking that torsion arm to correct ride height the night we installed the AL livery)? Or a tired pitman arm on the steering box?
Appreciate any advice. Thanks.
Took ol’ Fez camping this weekend. He did alright.
Control arm bushings creaked and complained the whole time, but new Siberian bushings are inbound. Assuming I can find a set of arms to prep, I like to think I can have the job done in a weekend (before we get called back into the office). Fingers crossed.
It was really nice testing out my new locking hubs on the trail. Didn’t even remotely need 4WD where I was, but it was nice to confirm they worked as expected. A solid install. And call me crazy, but I feel like 4H/4HLc/4LLc engaged almost immediately, which was a first for me. Most confidence I’ve had in my 4WD system in four years.
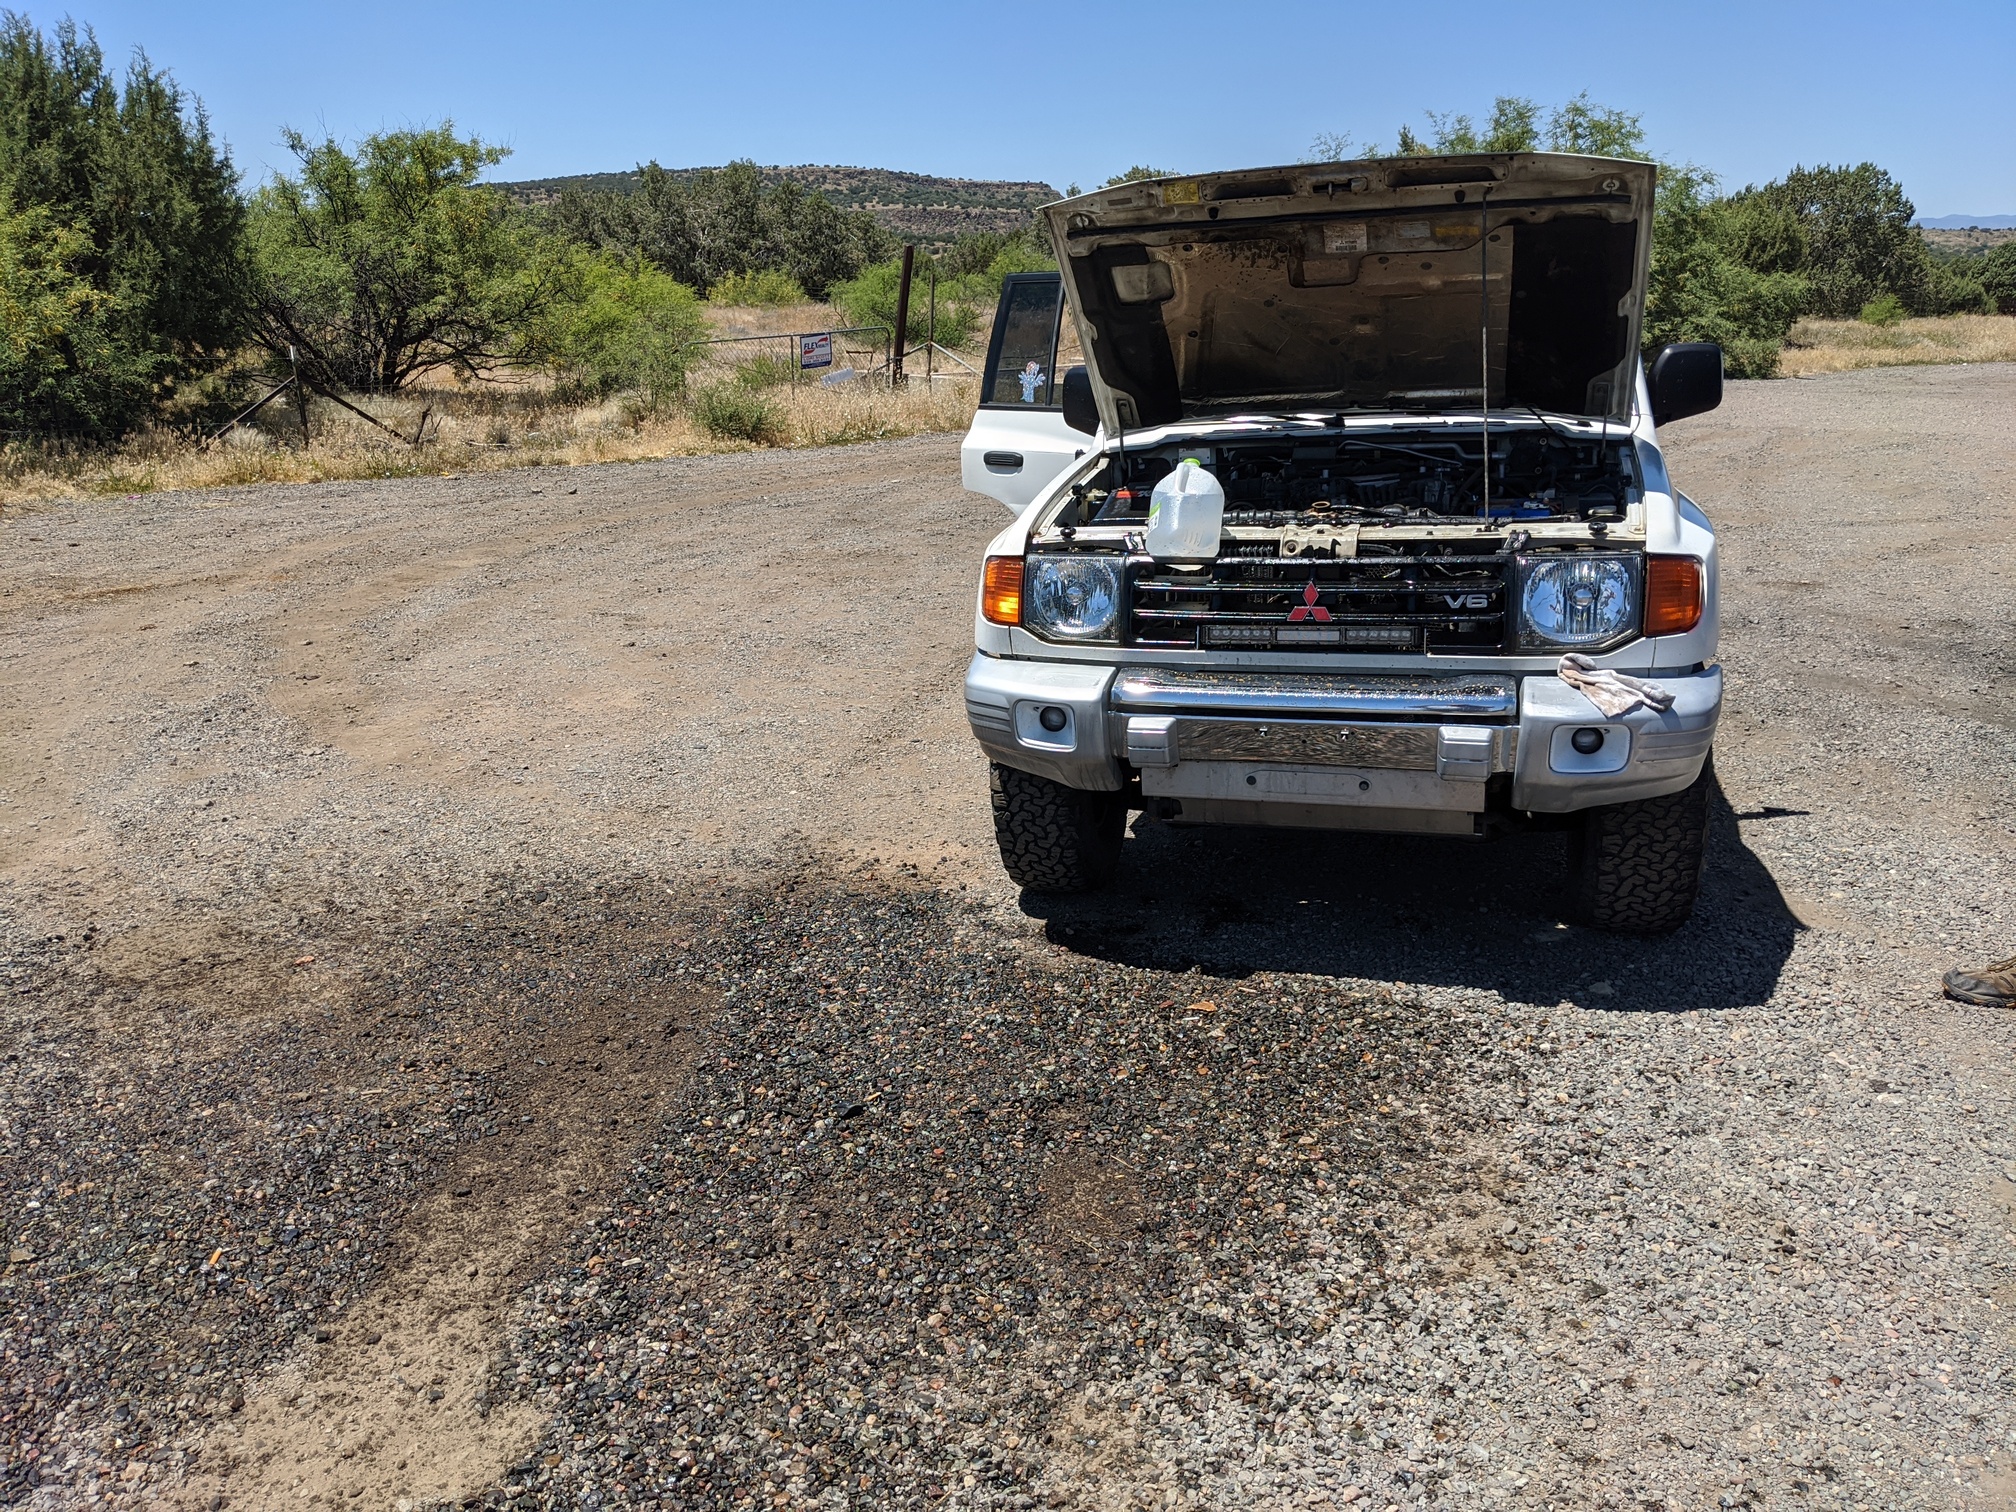
Downside, though, I’m losing coolant somewhere. And it doesn’t appear to be leaking. In my rush to get out the door on time Friday morning, I neglected to check the radiator. An hour outside of town, doing 60-ish uphill in 100°F/38°C weather, the AC stopped blowing cold.
My first thought was the compressor or a pressure switch died, but then I noticed my temp gauge doing the fast sweeps back and forth between low and midway. (It never went above normal.) Engine performance seemed normal, but when I pulled up the coolant temp data on my logger, it was pegged at 238°F/114°C. Considering I have a 190°, OE thermostat installed, I knew that was no good.
Pulled over (no shade, ugh), shut him down, and popped the hood. Overflow bottle was full, but the usual rusty mud water. (No oil, thank goodness.) I grabbed an old sock wedged into the headlight sprayer bottle and cracked the radiator cap. You know, to vent steam before I opened it. As there was not so much a hiss when I did so, I foolishly assumed I’d run the radiator dry.
Not the mister system I was wanting on a hot afternoon. And the eruption was visibly nasty, like brown, rusty filth. Ugh.
I’m going to look into borrowing a pressure tester to see if I can figure out where my coolant’s going. Then I’m going to drain it, pull the thermostat, and try flushing it in the driveway. And then I’m going to refill with distilled water and CLR, drive it, drain it, refill with more of the same, and repeat a couple times until the drainage is clean/clear before I put real coolant in there.
Can’t have a sketch cooling system on an Arizona vehicle. No bueno…
3 Likes
224,XXX
- troubleshooting cooling system
Considering I’ve got less than 25,000 miles on this engine, I was desperately hoping my loss of coolant was a small–external–leak somewhere. I borrowed a pressure tester from Brother Keith and got after it.
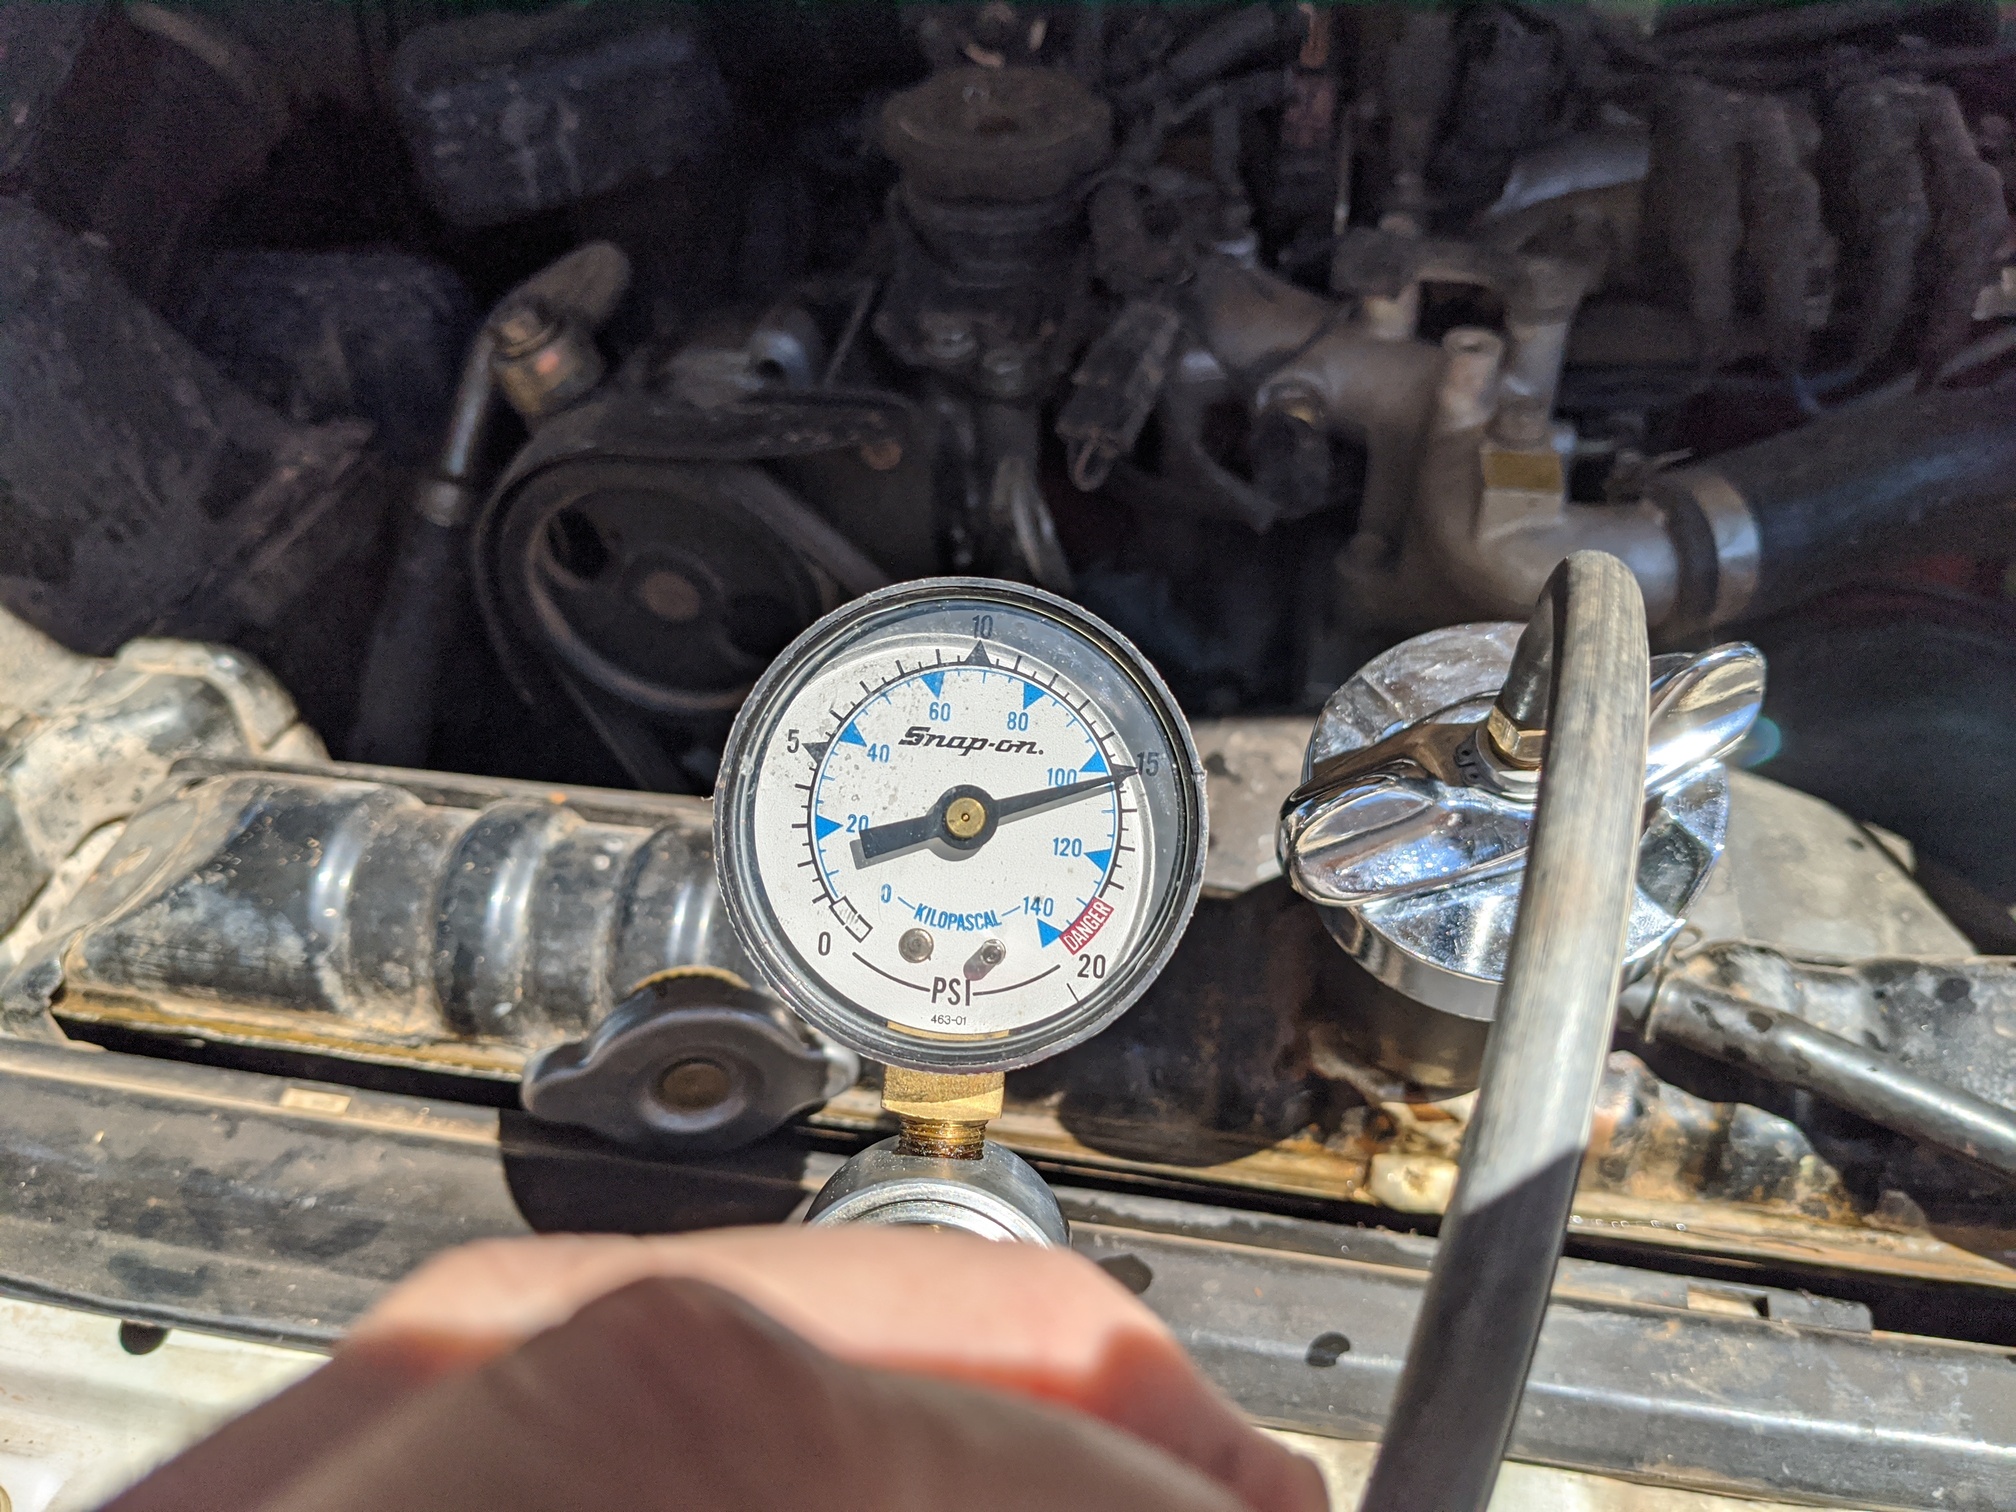
My first attempt scared me, as the system was bleeding pressure at the rate of about 3psi per minute–with no visible leaks–but a second attempt likely sealed properly and held 15psi for several minutes.
In that time, I spied with my little eye a tiny leak at the upper radiator hose on the thermostat housing.
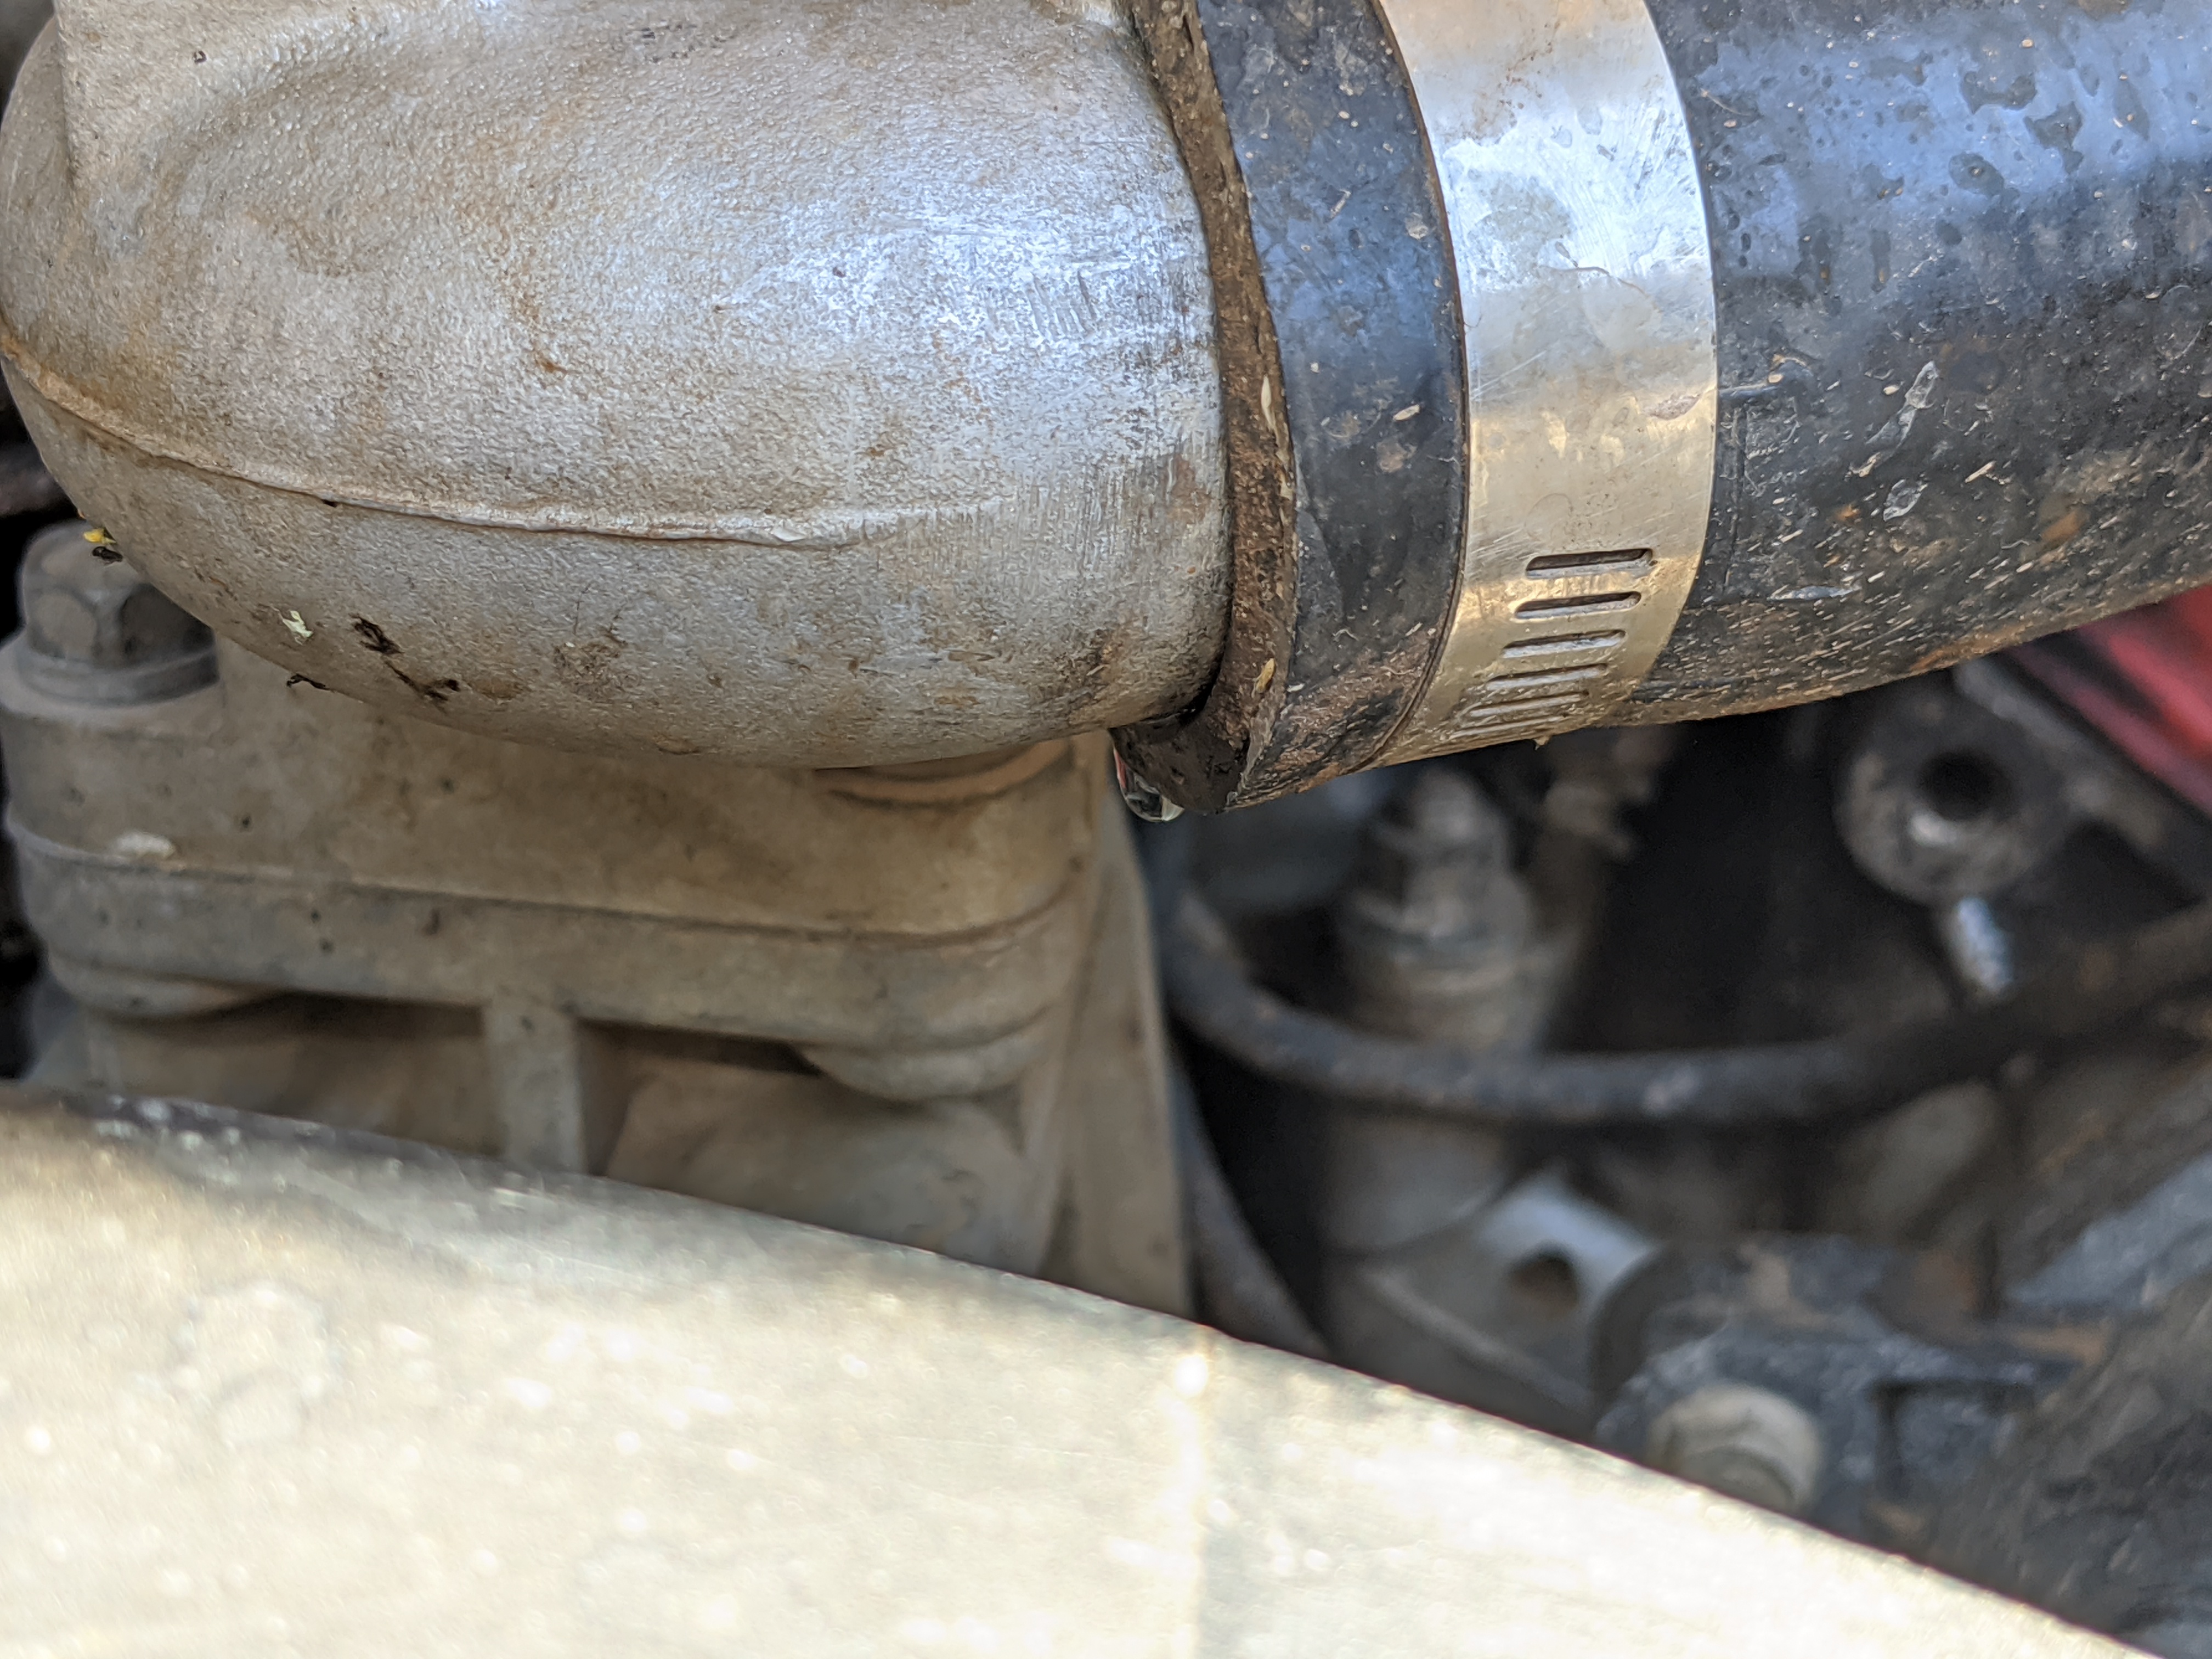
Relieved, I loosened and reset the upper hose clamp, then set about draining and refilling the system with water every couple days to do a flush without pulling freeze plugs.
Then, the night before the camping trip, I drained an refilled with 50/50 mix. Thought I was good to go, barring another drain and refill with water and CLR prior to installing a new radiator, hoses, and cap.
Loaded up the truck for camp–and overheated twice before I got out of town. 
Starting to give real thought to selling Fezzik. Love this truck, but getting really tired of his shit. Maybe it’s time for a Delica with a warranty?
Gonna replace the TPS (persistent P0120 code and poor fuel economy suggest fuel delivery may be out of whack) and install the new cooling system parts first, but if that doesn’t solve this, I’m looking at gearing, water pump, or head gasket.
Not sure right now.
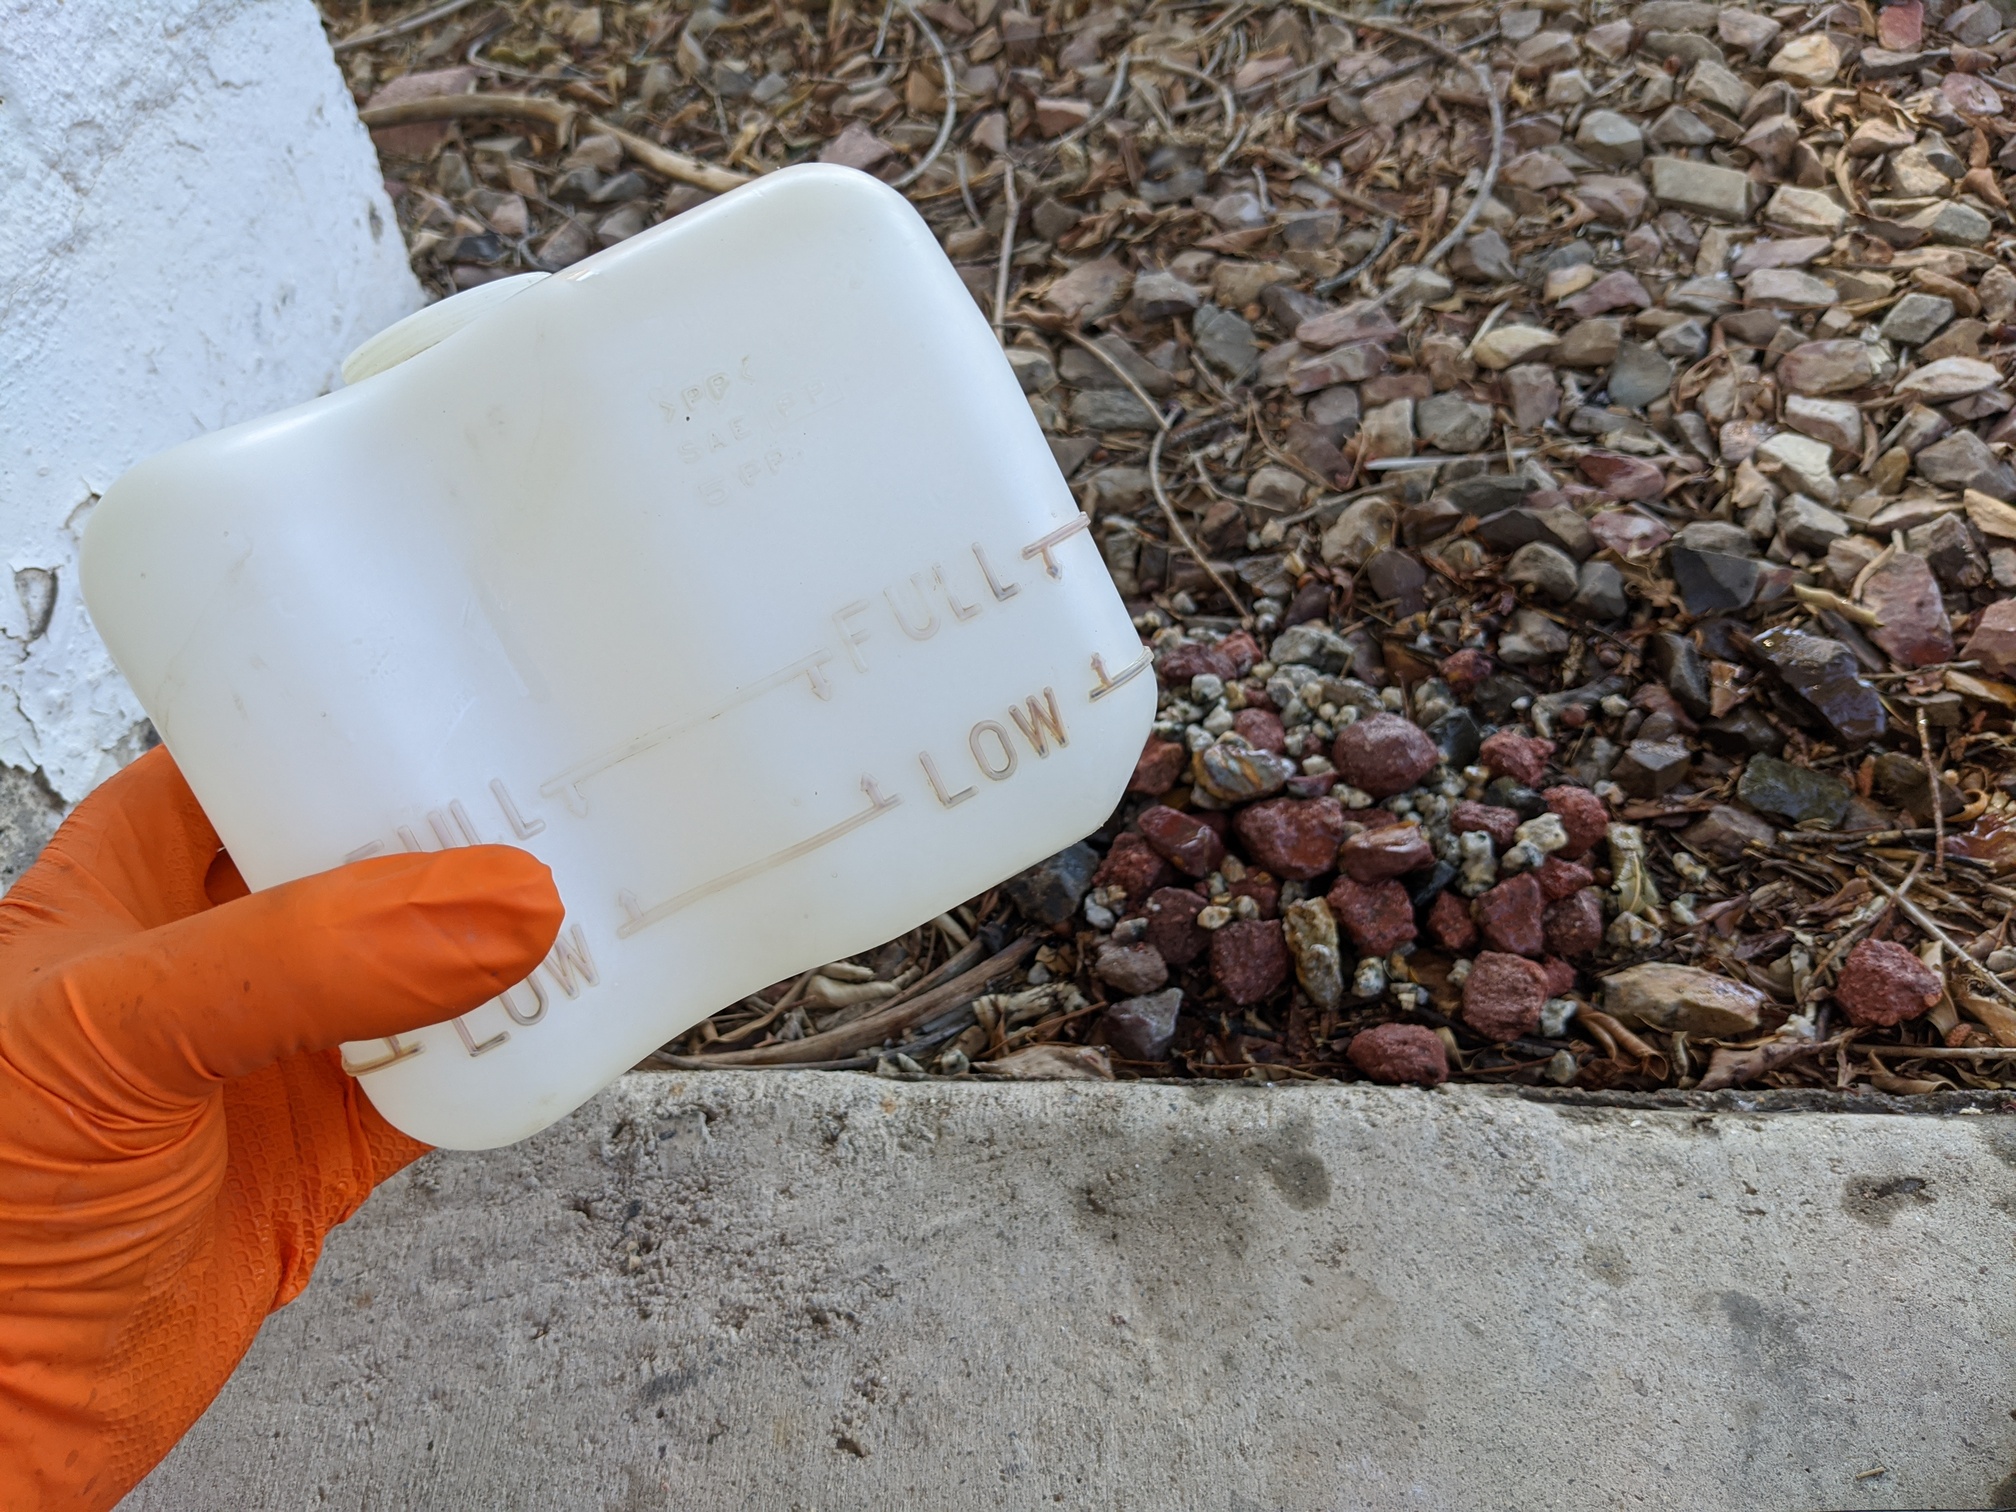
In the meantime, cleaned my overflow bottle. A handful of pea gravel (abrasive), 1/3 simple green, 1/3 water, and shook it for 20-30 minutes. Worked great!
1 Like
Dumb question, I know, but definitely no air in the system? The Disco will overheat like that after a coolant change unless I put it nose-up on a 40* incline with a 15* side angle to the passenger side and run it at 2,500 RPM for 20 minutes to get every last hint of air out of the system.
I love the pea gravel trick. I suddenly feel the need to pull every fluid tank from every vehicle and clean them all…
1 Like
Not a dumb question at all. I know I’m getting air in the system. The concern is where the coolant’s going to allow that.
I know I had a slight leak at one hose. There could be others. It’s pushing into the overflow, but if water’s escaping elsewhere, what’s to stop air entering, right?
Also doesn’t help that my coolant is so dirty and rusty. There’s no oil in it and it doesn’t smell like fuel so I’m hesitant to spend six hours pulling the intake manifold to do a cold compression test–even if it could mean peace of mind.
I reviewed the FSM, which laid out a different process than I’m used to.
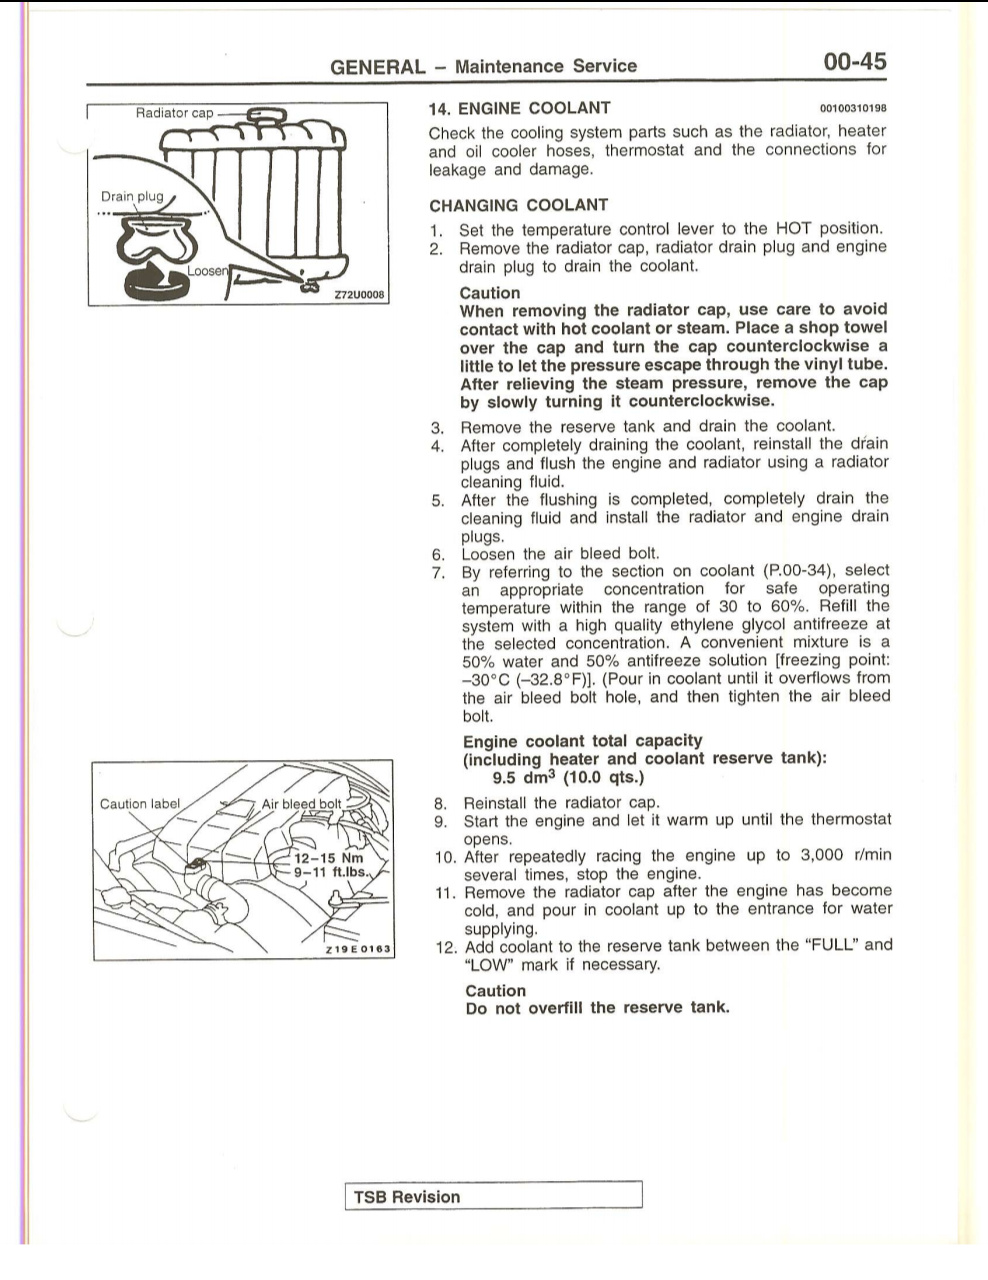
Last night, for the first time, I did it by the book.
- Drained the radiator.
- Filled overflow to spec.
- Removed the bleed screw.
- Filled radiator with 50/50 & water.
- Test drove with heater running. Cruising around the block in second gear to repeatedly rev to 3000rpm half a dozen times.
- Shut it down and left it alone.
This morning, for the first time in years, I pulled the cap and found the radiator was topped up (albeit dirty, nasty rust water). Overflow was still sitting between cold and hot and clean.
I’m going to keep draining and refilling this way every couple days until I get the new radiator. Will do a few days with CLR to hopefully clean things out.
2 Likes
Took the truck for a test drive this afternoon. It was 107°F/ 42°C. I watched the coolant temp climb from 120 to 200±-but he never overheated. 
I still think the temp was a bit high, though. Then again, I’ve got a 190° thermostat and the temp spent most of the time between 203° and 210°.
I took a screenshot as I was nearing my exit. 70mph. 105°F/41°C. Cruising on flat tarmac with the AC running full blast.
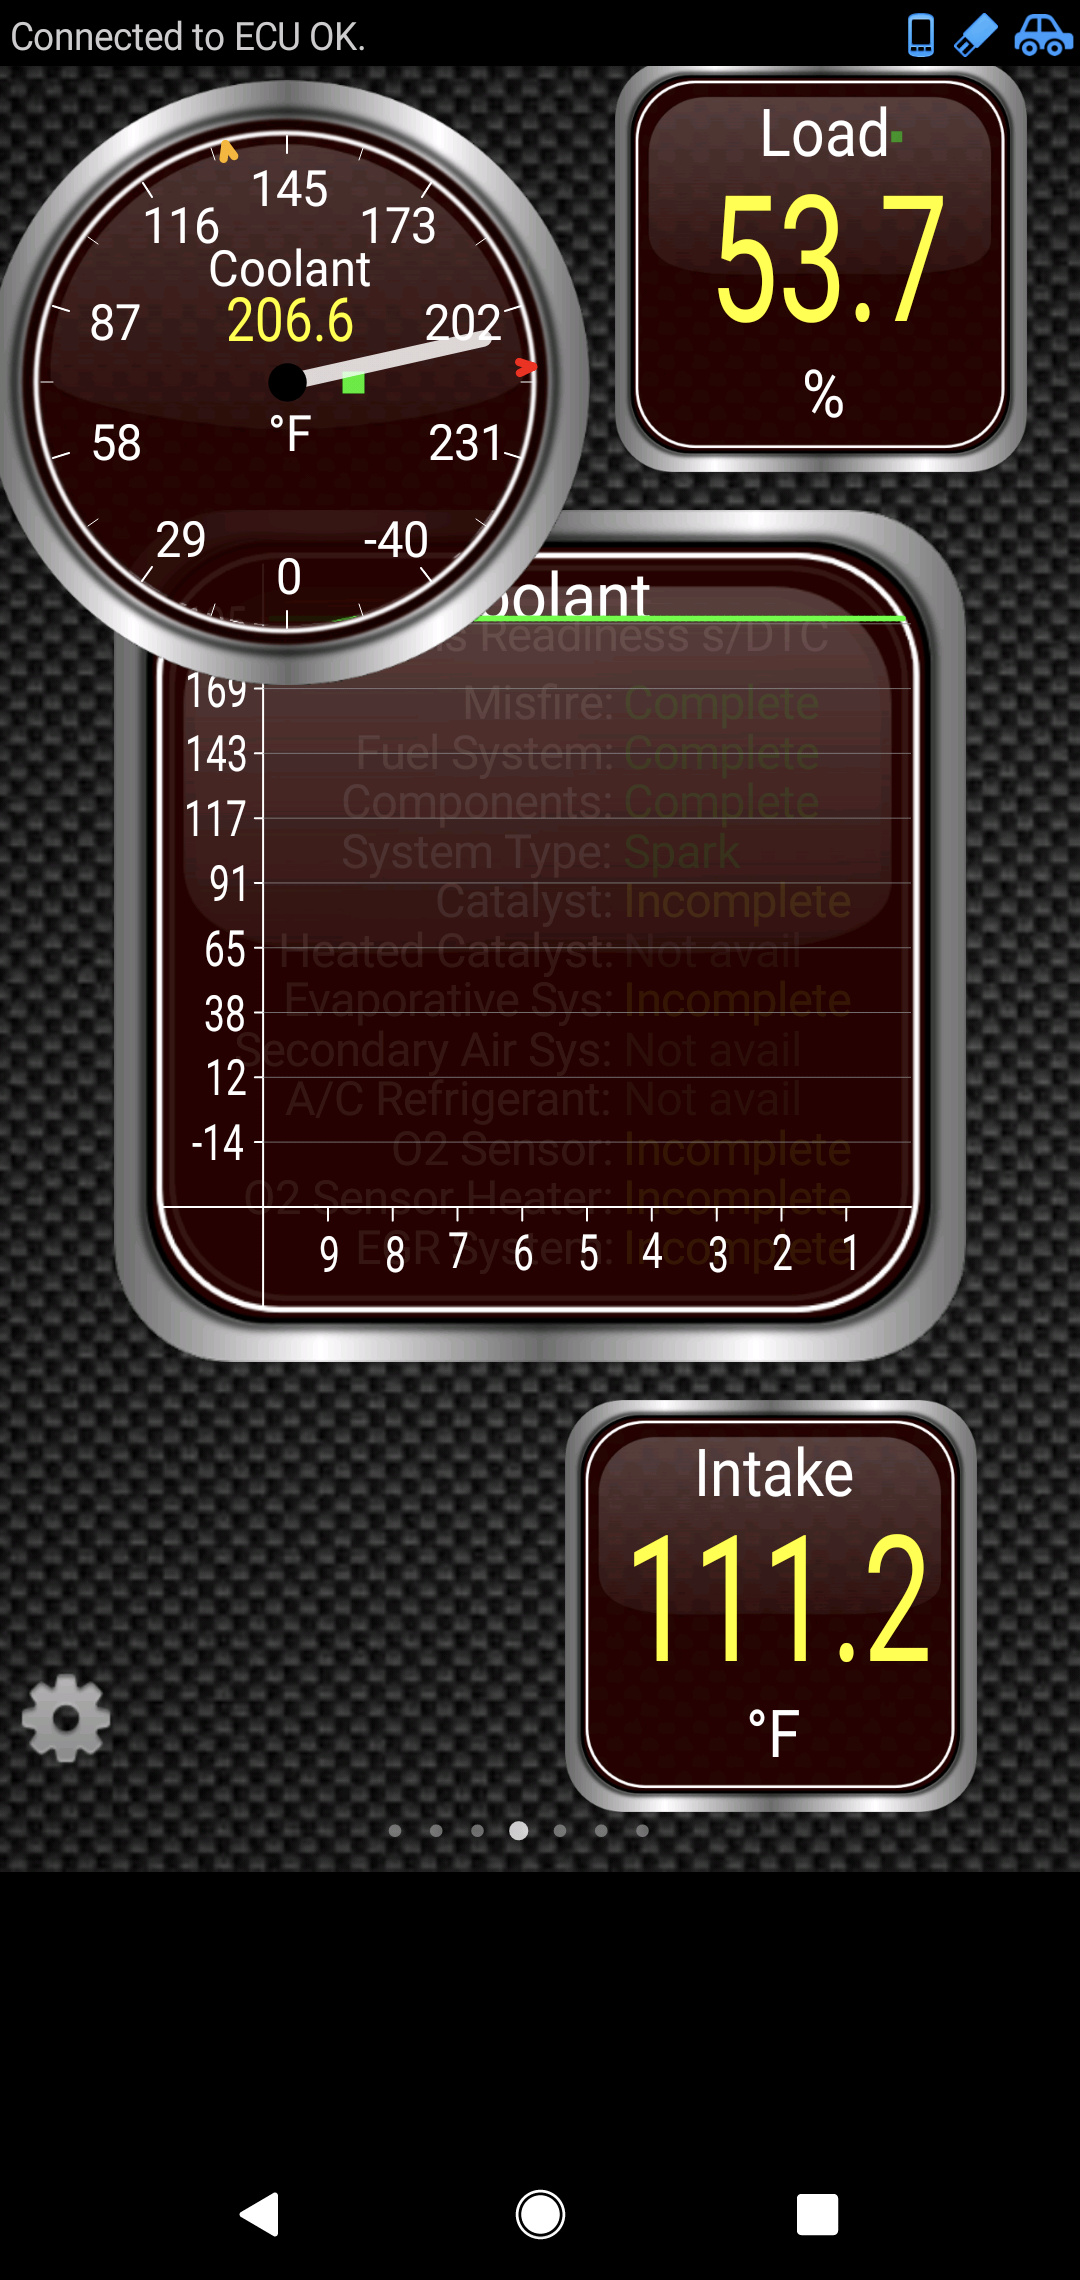
So I’m thinking it might have been air in the system, but here’s the thing–is TPS used to calculate engine load? I don’t have any frame of reference–and I know shoving 4,000lbs of steel through the wind at 70mph takes effort–but it feels like engine load shouldn’t be that high? Back home, idling in the driveway with all accessories off, I was still seeing 22-24% load.
And then, introducing yet another delightful variable into the mix, when I turned the AC back on to see how it impacted load at idle, it wouldn’t freaking come on. Could it be the brand new, OEM, Genuine Mitsubishi switch I installed last month? Or is the system low or cycling too much to accommodate low refrigerant?
Ugh.
1 Like