Landcruiser 70 series Rust-o-Mod: "OLBETSY ZX"

Oh man. These are all the things I wanna be doing right now. Feels like I should probably focus on the tcase leak and rear end rebuild first. #schucks

Considering Season 3 GIF by Portlandia

24-to-12V sounds like no joke. I’ll be interested in seeing how this comes together.

(“Mattress heater”, he says.) :cowboy_hat_face:

Well… Water tank will be here tomorrow. And I ordered a switch panel that I should get in a few days.

I’ve been playing around with different configurations lately, because it will soon be time to bolt everything down. Up to now my 3rd batt has been strapped down inside a plastic ammo case, with some temporary wiring provisions on top, but it’s time to install it, since the elec will get a little more sophisticated with the addition of a victron DC-DC 24/12 converter/charger that is also on the way.

My plan seems to be leading towards an electrical compartment in the space between the drawers. This puts the heavy battery inline or slightly forward of the rear axle, and at the exact centerline of the rig. Plus it leaves room for other accessories down the road such as inverter, solar charge controller, etc. Then I simply deck it in, along with the space to the sides of the drawers, and I have all kinds of storage…

1 Like

I love that sentiment. Weight distribution and balance are important. Especially when it comes to heavier components. That said, if you often wheel solo or the missus weighs much less than you, what about locating it more starboard? Is there room ahead of the propane tank? Just thinking loaded balance, ya know?

Love this coming together.

I’ve got the missus by at least 50 pounds. But it’ll generally be me by myself. Or my small dog.

But loaded will see propane (small 5pounder) dry food box, and recovery gear on one side in back, and full fridge plus kitchen items on the other side. This should be almost identical weights on either side, so the battery being neutral and forward as much as possible seems a good idea.

I dunno. Could change my mind at any point. Lol.

Progress is being made despite a quarantine brought on by you know what…

Battery in battery tunnell…

Fabrication of a panel to hold switches has started.

The water tank has arrived!

3 Likes

Switch panel is now cut in.

Battery tie down is getting there…

3 Likes

This is the kinda stuff I’m looking forward to doing. Looks great, Phil.

How you feeling?

1 Like

I’d say I’m 100%? But its been a deep freeze the whole holidays. Today it warmed up to -27C, but with a windchill of -38. So not a lot getting done. Even with heaters, it takes a while to get it up to working temps.

But yesterday I said screw it - and pumped up the heaters anyways. And made some progress.

Pulled everything out of the back, and got working on the deck. Cut out a circle for the propane bottle to sit in. Also finally cut an access hatch for the storage bin that’s been covered by base plate since the fall.
While it was easy access, I screwed down the battery hold downs too. This will make more sense when it goes back in. (water tank is sitting at the back for reference.)

3 Likes

If you look closely under my switch pod thingy, you can see the finger hole which will allow me to pull the hatch. The understorage goes all the way across at the back, so it would be a shame to completely seal it up. I’m picturing an air hose, maybe tow straps? We’ll see once everything else is in place.

Here is the access panel pulled - I let the OE carpet go into the cavity so the space will be quieter in case there are rattly bits in there.

Creating a top has proven tricky. I want to have a level panel in between the drawer tops, but they both slide, and the slide is a few inches below the top. My plan has evolved over the months, but what I’ve decided on is a bracket at the back (just visible in the pic above) which will serve as the hinge point for the panel (the back face of the drawers comes up level with the slides, so I was able to attach my bracket as a bridge across the 7 inches between them).

At the front, under the switch pod’s lid, I riveted angle to both drawers. This will hold the switch pod metal from underneath, while giving support to the wood panel that will rest on top (will use a pocket on top of the metal, to level up the panel.

Here’s a mockup. No carpet attached yet, but I do have it on hand, to match the drawer tops.
I’ll be able to access the “electrical tunnel” by lifting up the center panel…

3 Likes

Man, this looks so good, Phil. Am I understanding right you have to slide it all out to access under storage cubbies?

Nope. The drawers aren’t installed in this pic. Drawers slide out. Tops also slide out to access things that are strapped to the top easier, like fridge . Understorage is under the deck and is accessed through the hatch I cut out.

Maybe this makes more sense? There’s also a slide out cutting board on each drawer for extra horizontal space… The board can slide out with or without the drawer, or the sliding top.

2 Likes

Quite a bit warmer today, owing to the Chinook. So I had to take advantage.

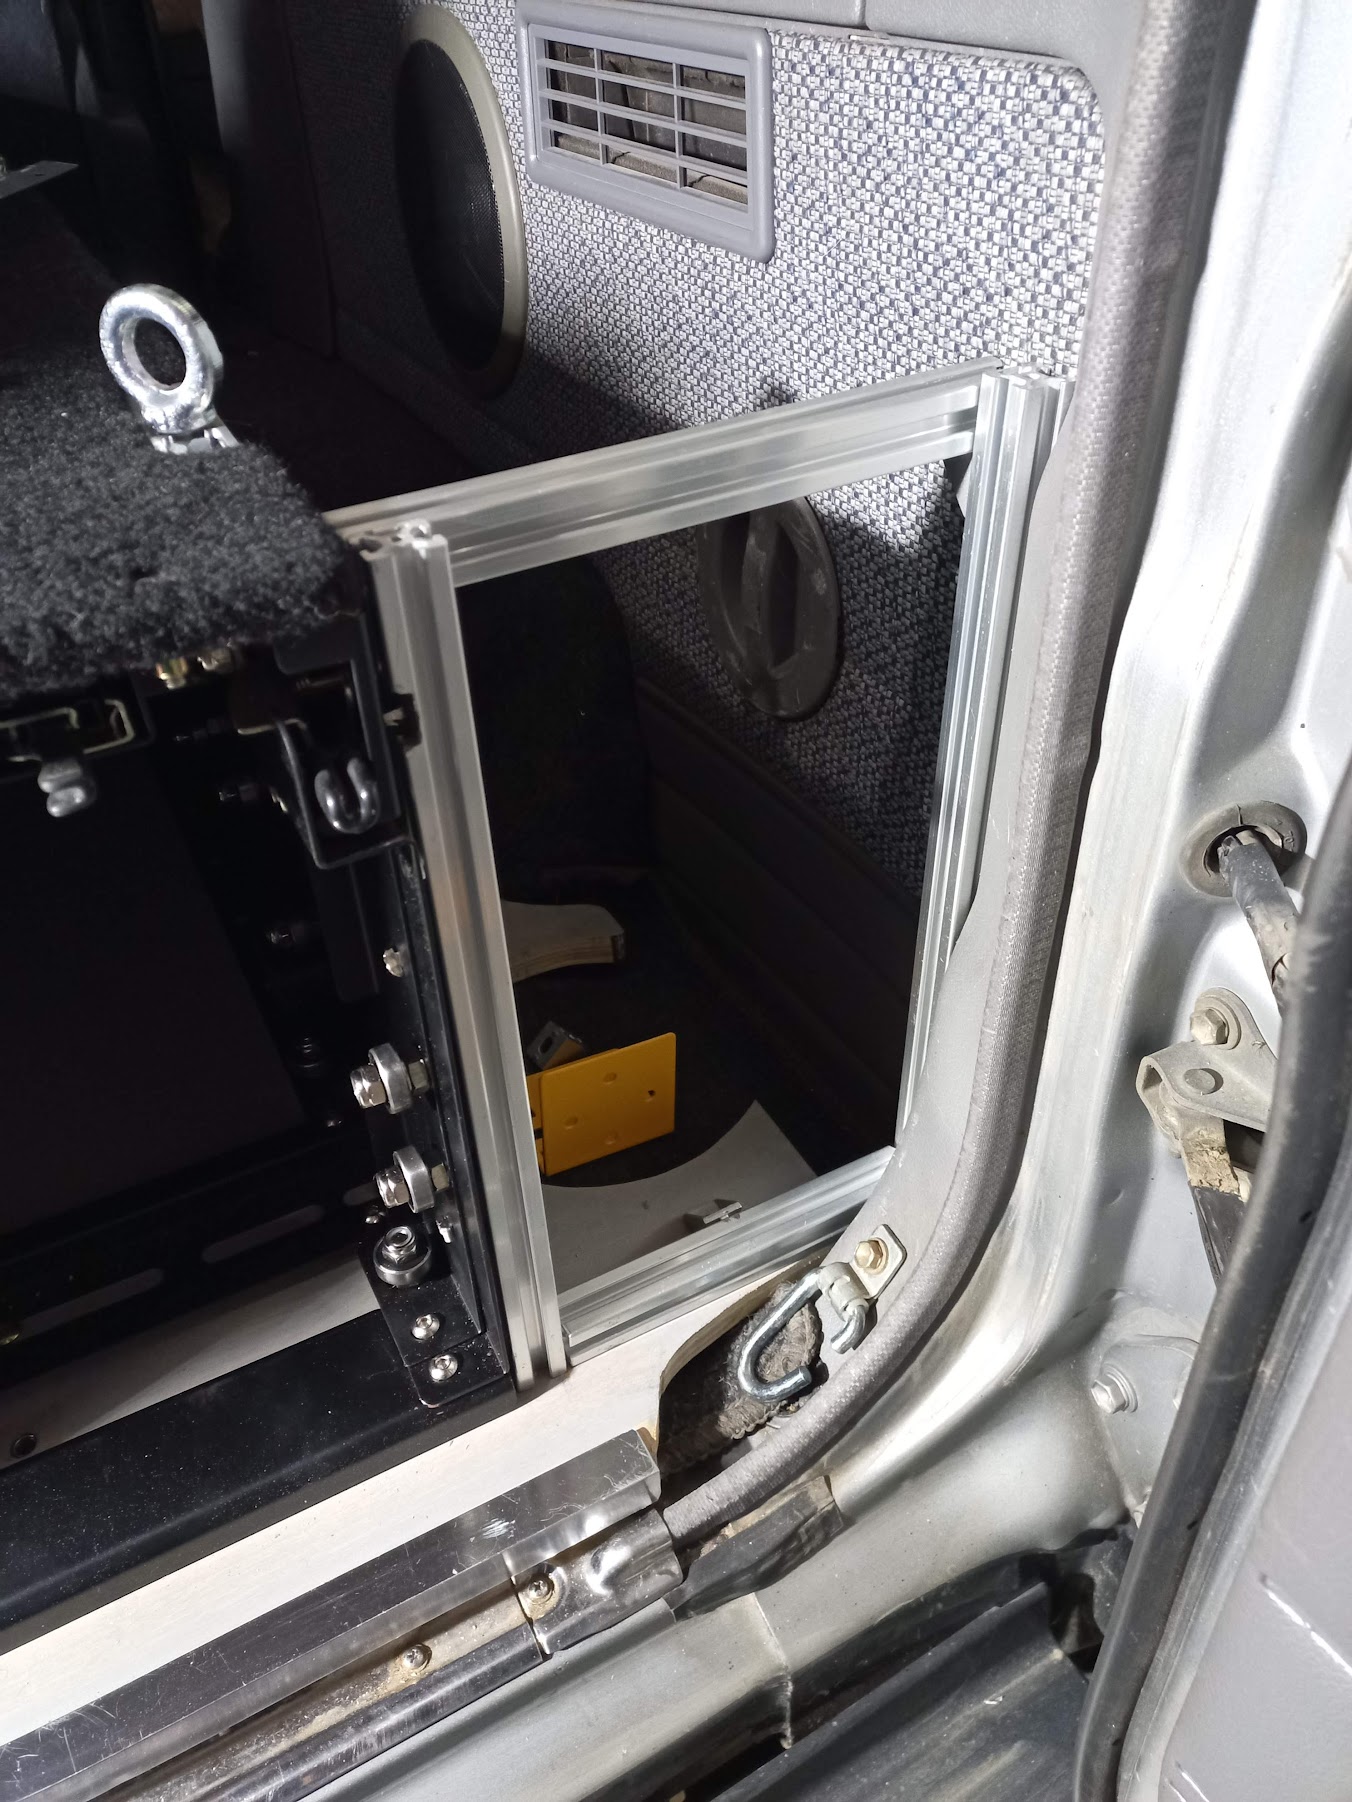
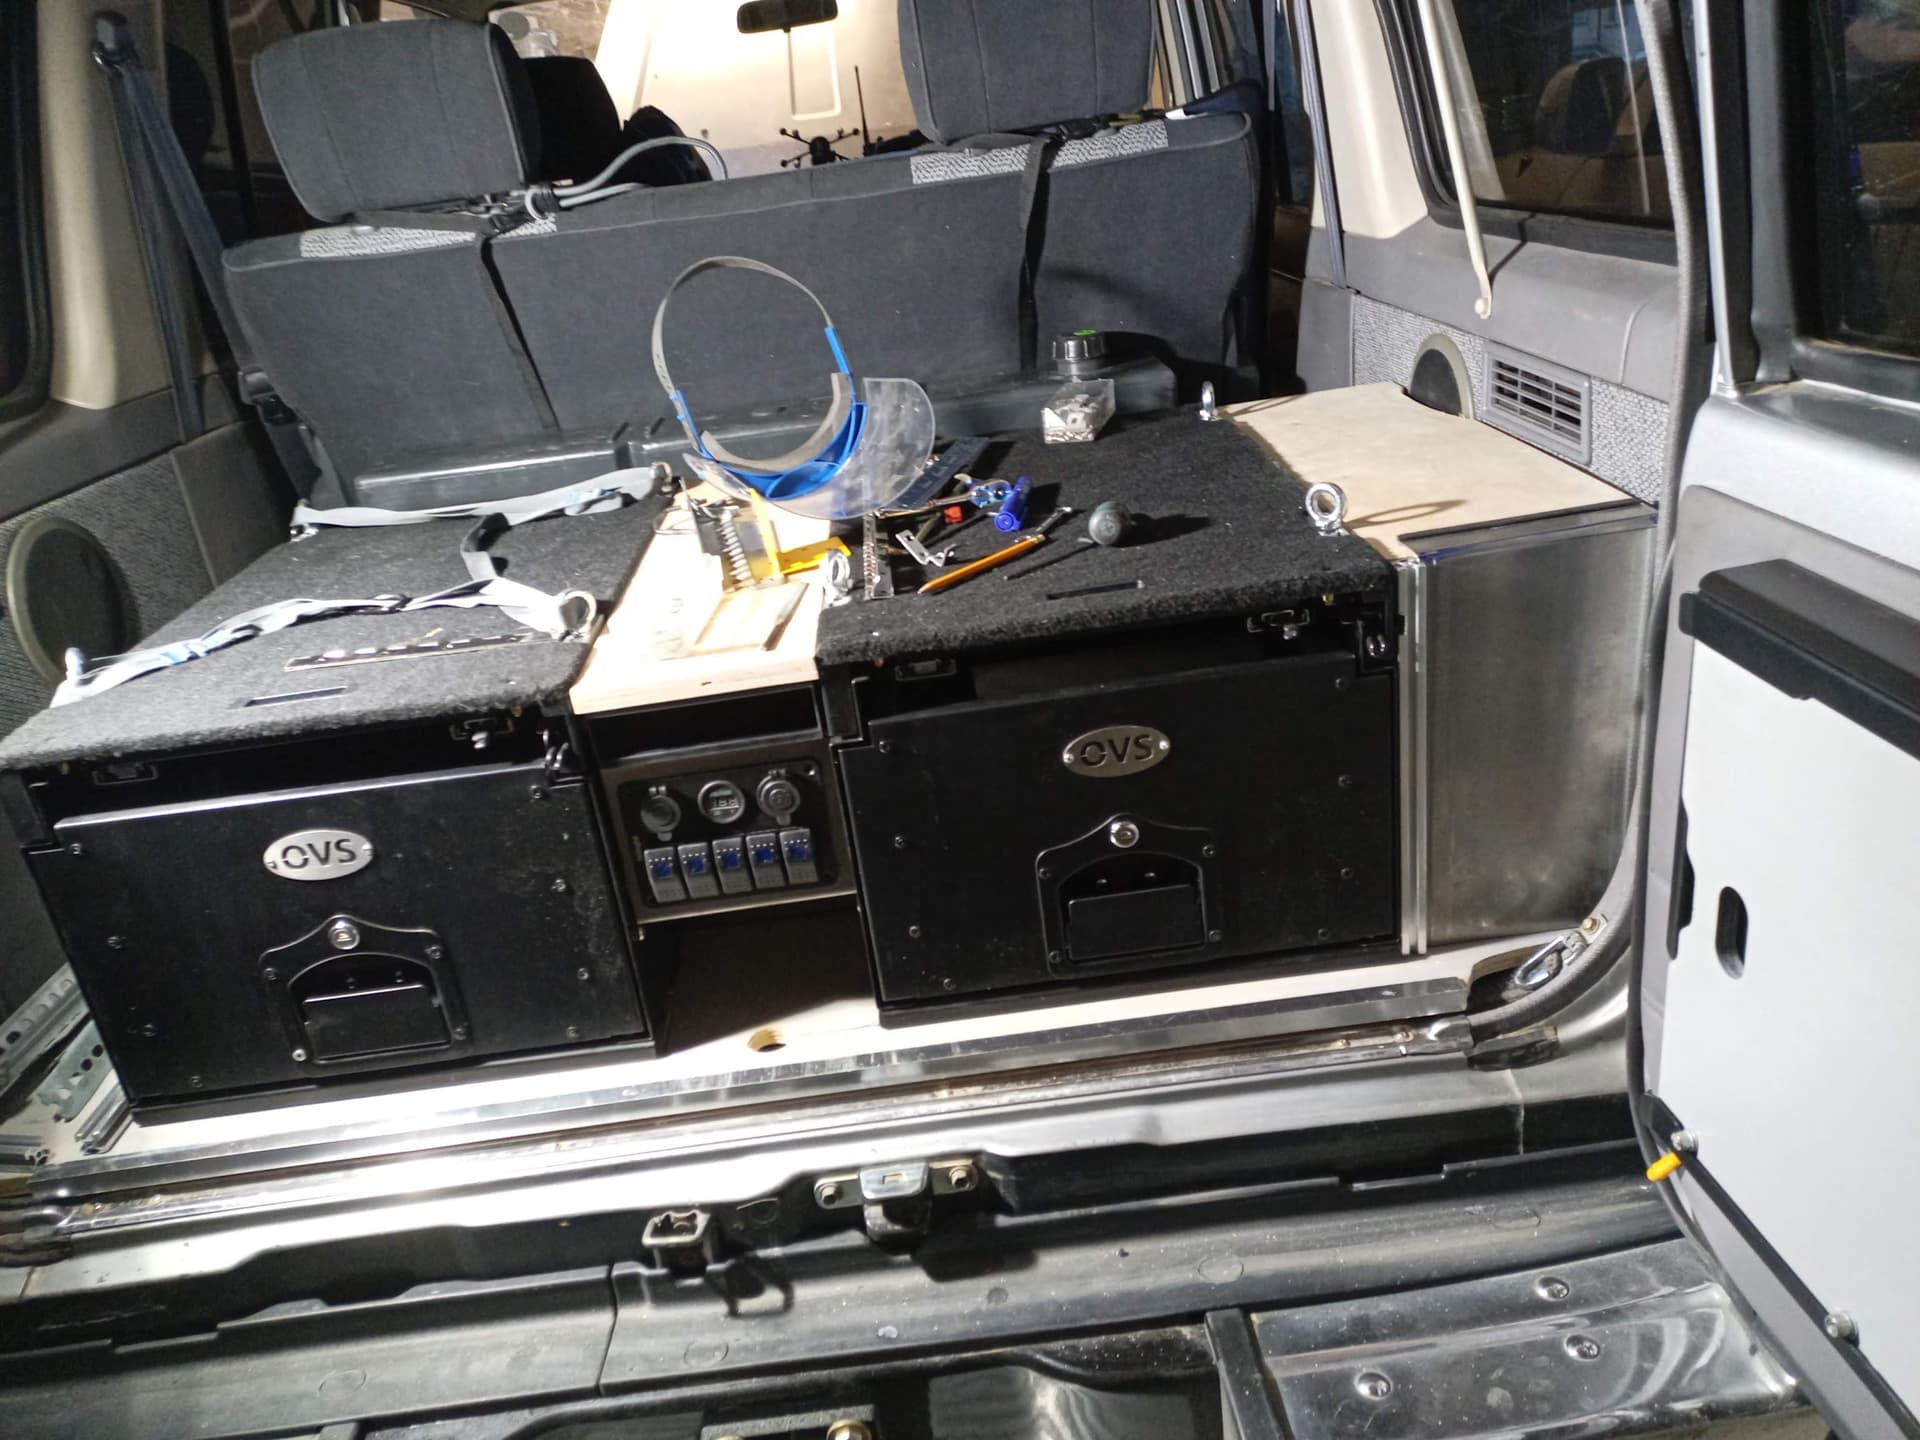
Made some progress with the rear drawer deck. I had some 8020 extrusion laying around, and decided to try to use it for the rear compartments. Started off with a frame…

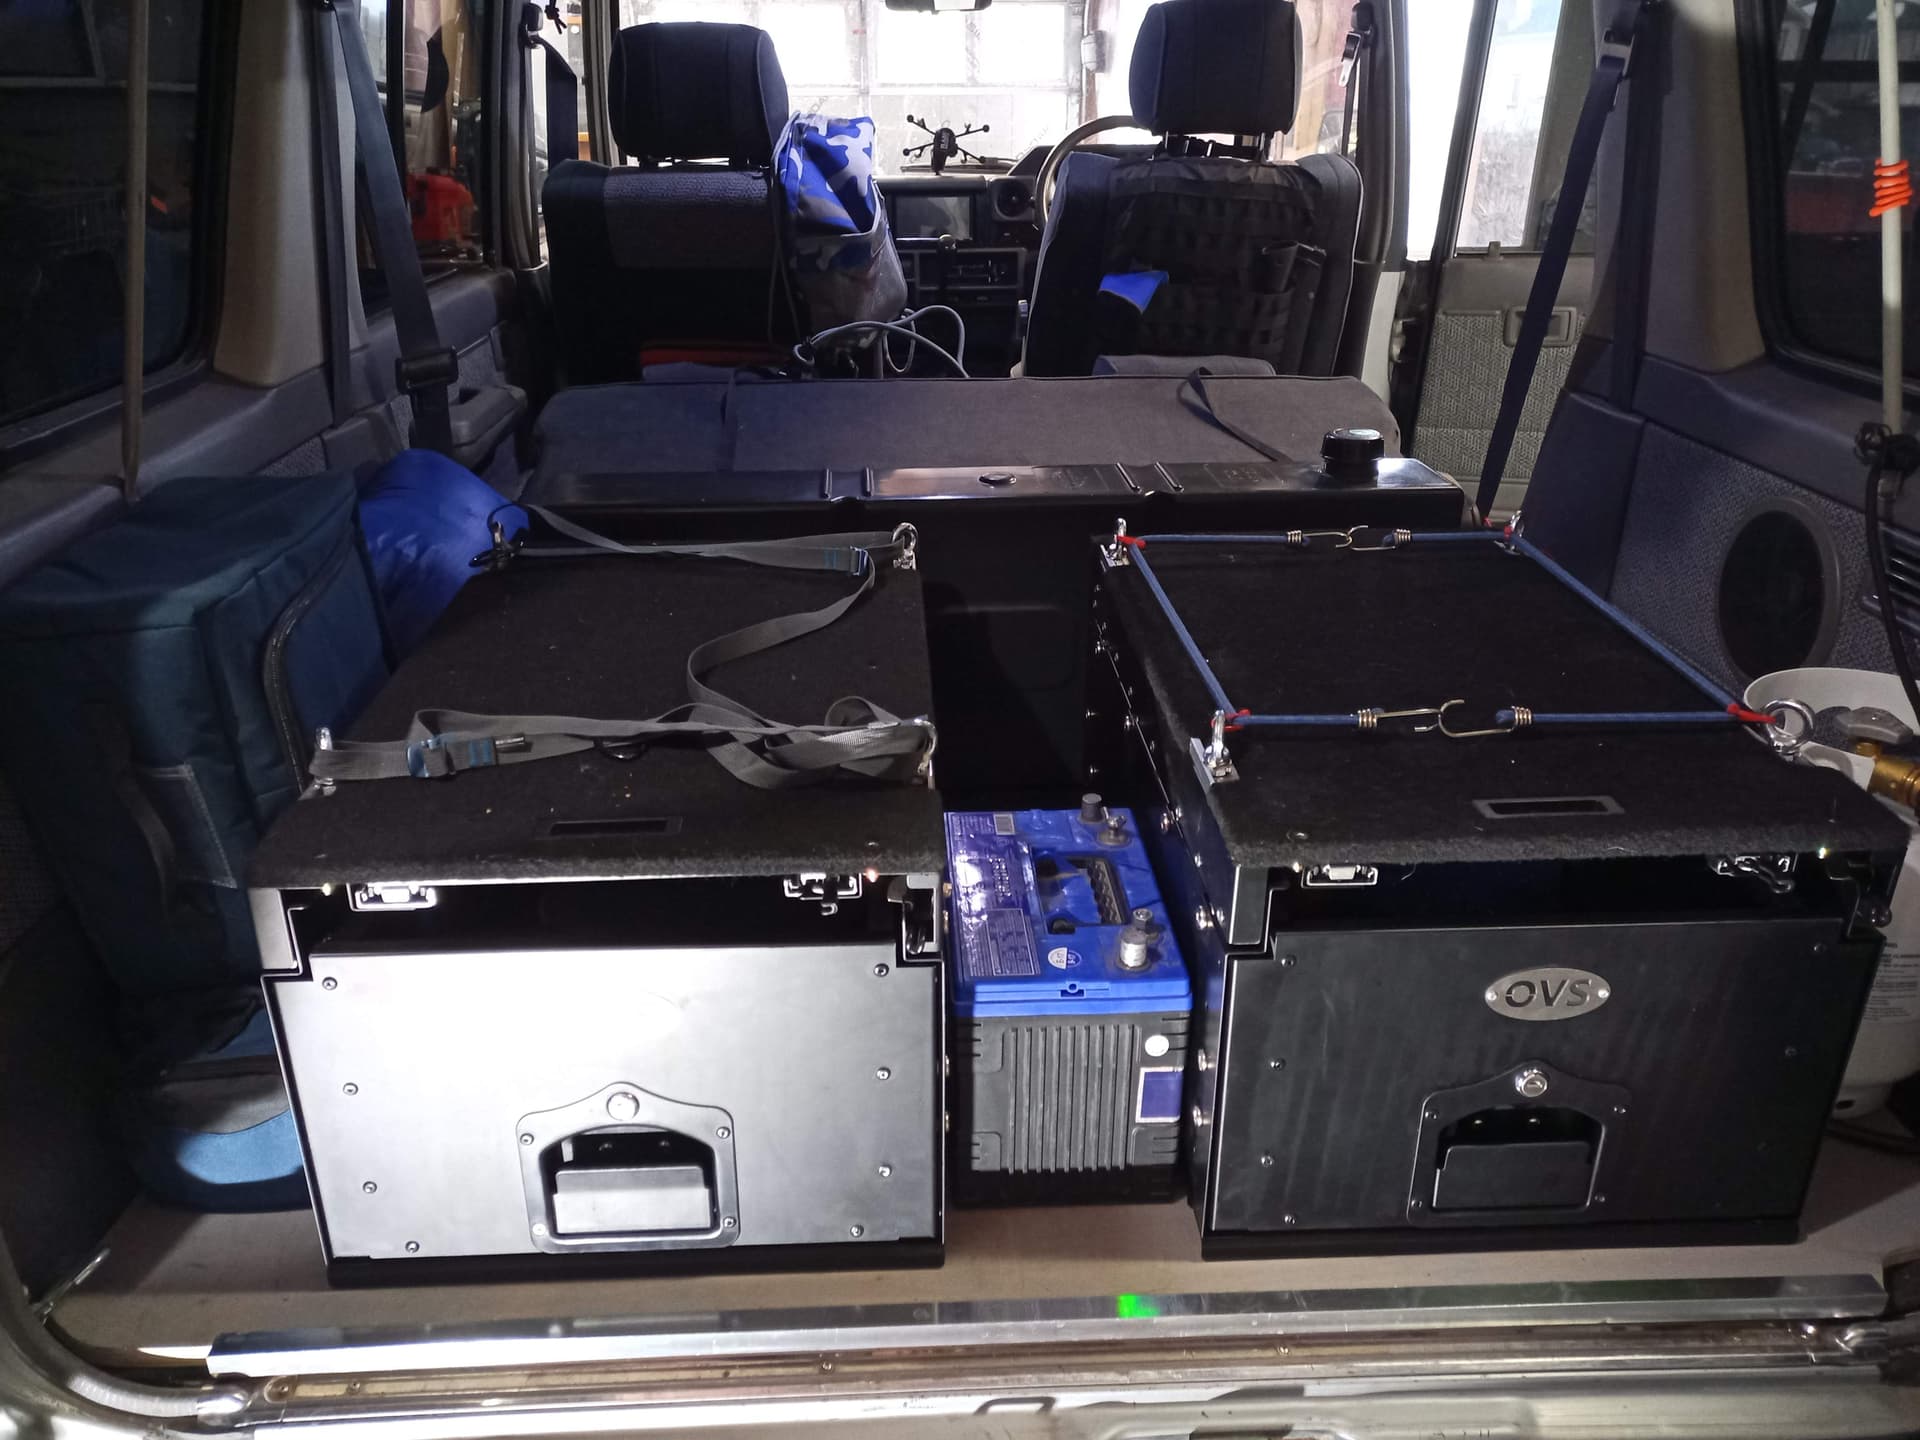
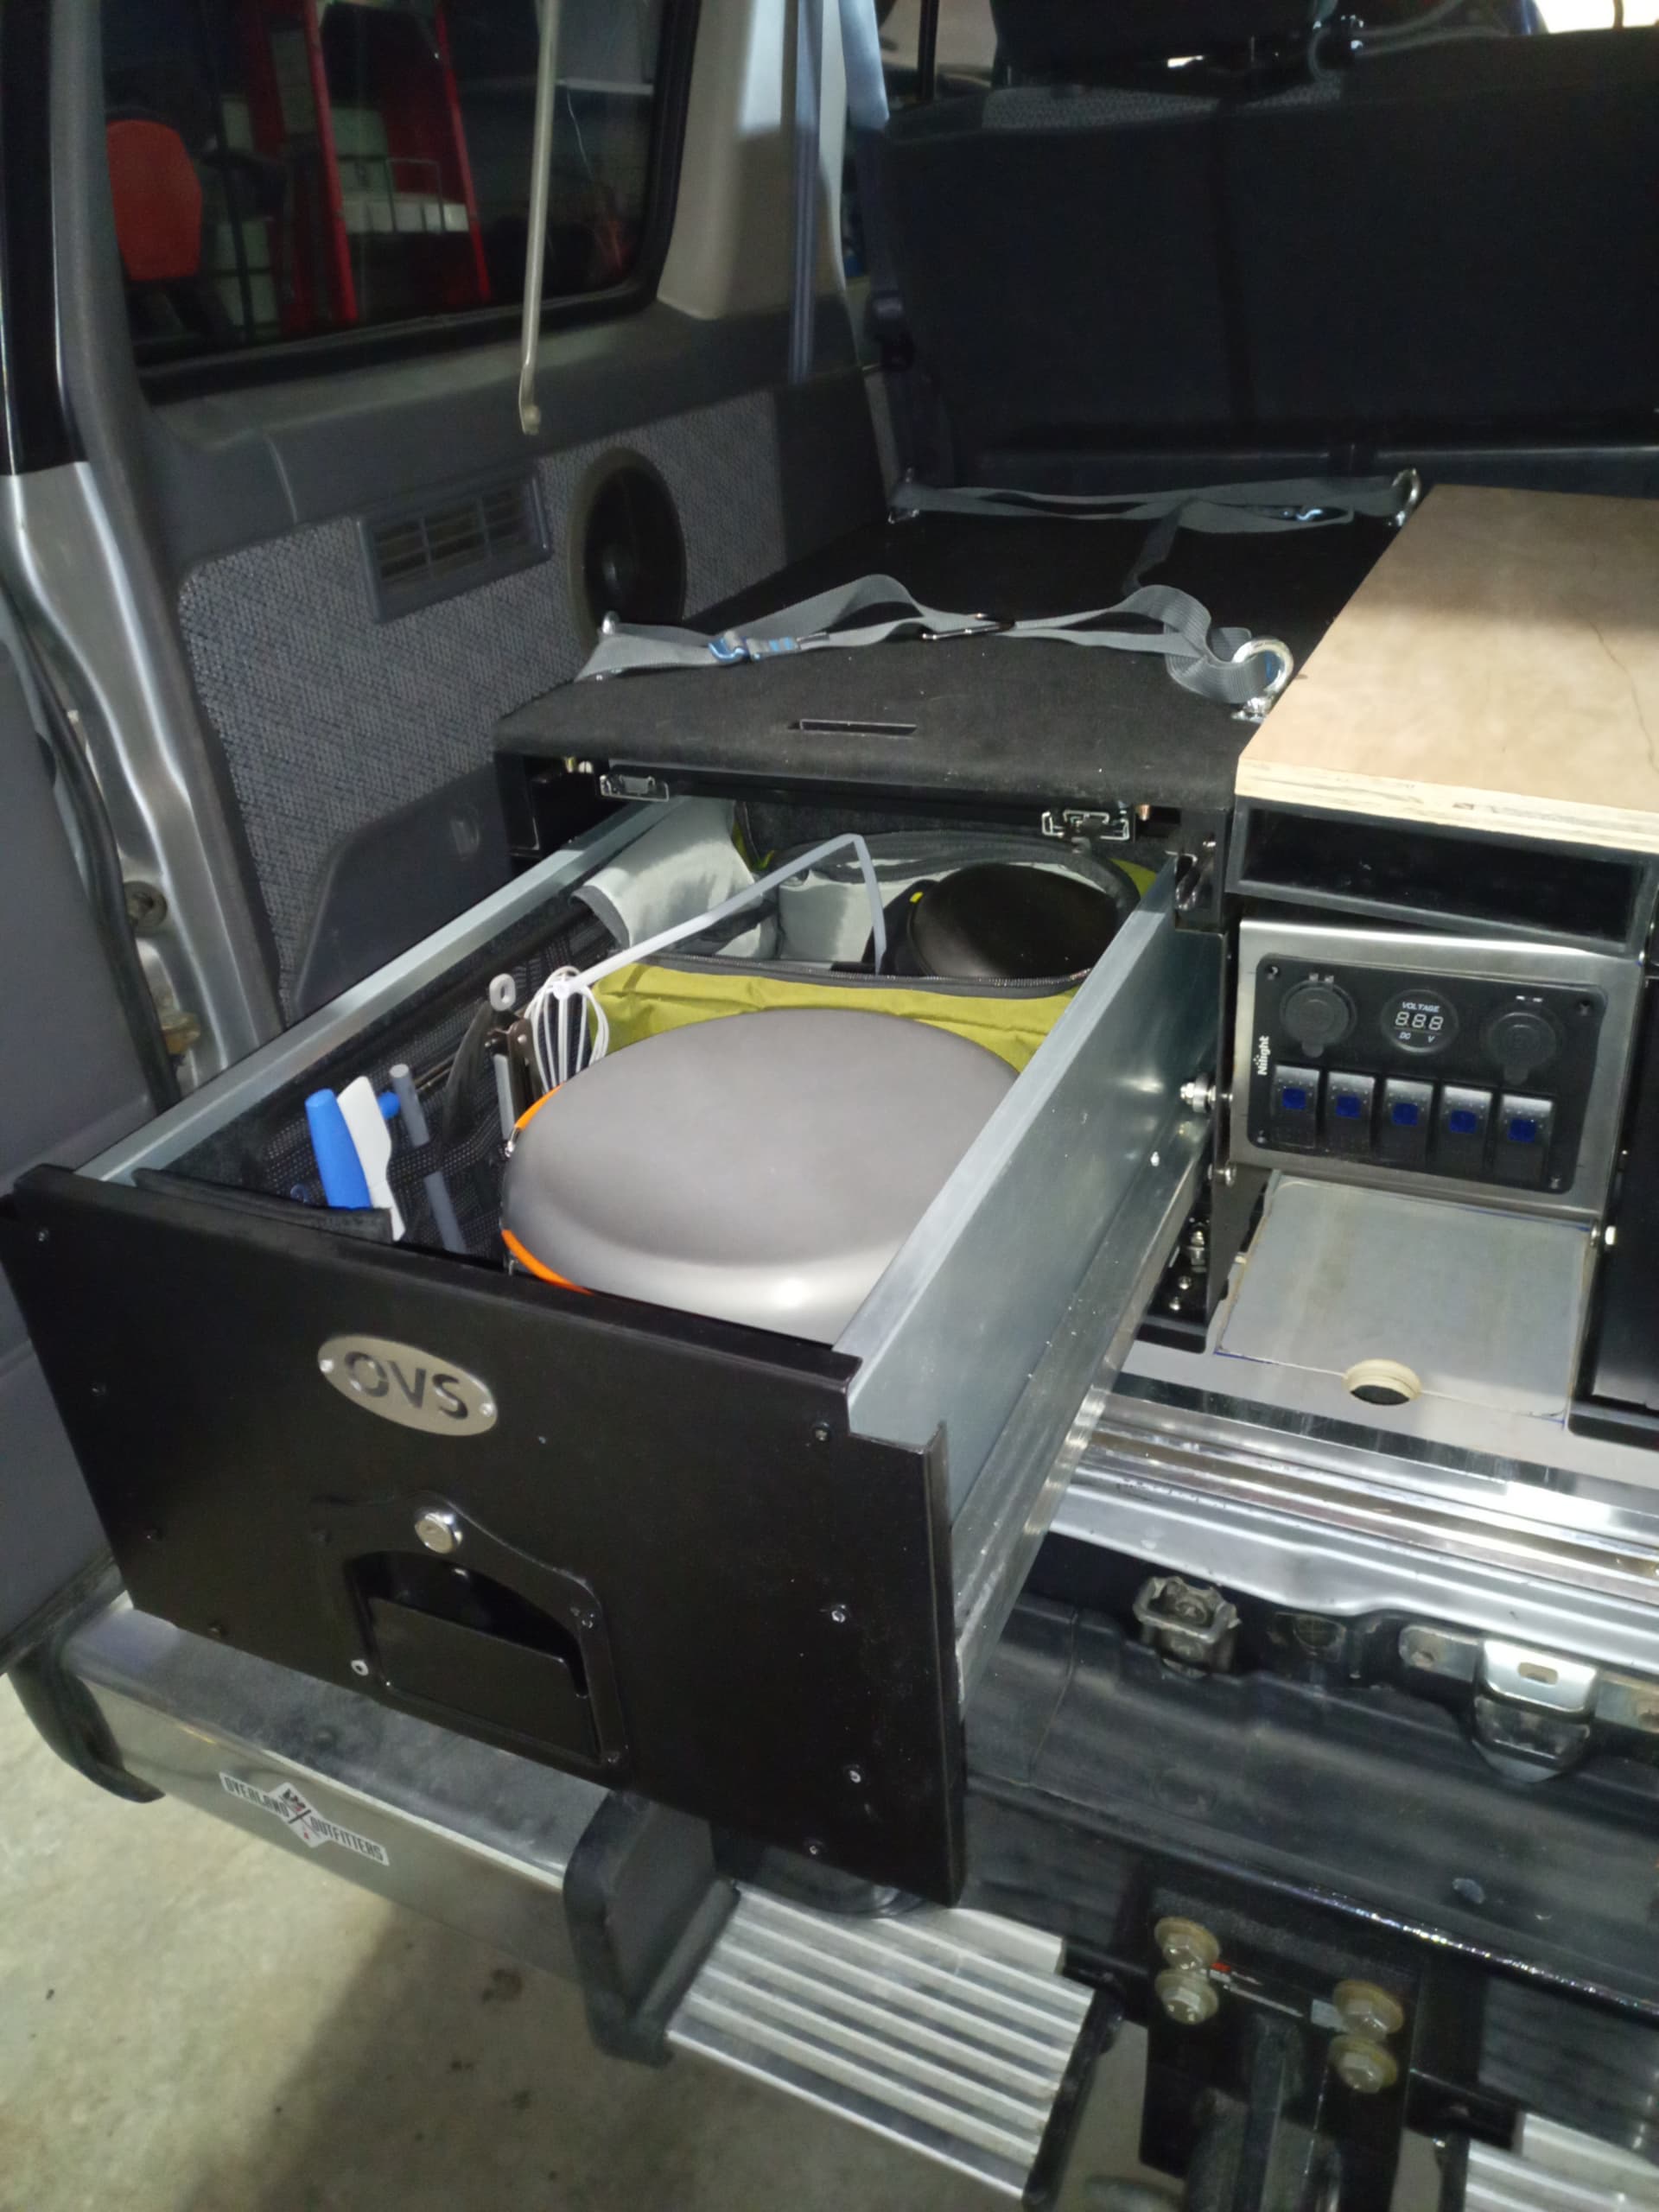
The idea on this side is to make easy access to front and top, to allow for using the propane hose, and also to be able to lift the tank out for filling. And of course its not a simple matter of attaching the top deck to the tops of the drawers, since as I mentioned, they slide. So the deck needed to be completely independent of the drawer.

Okay, tank fits in! So far so good.

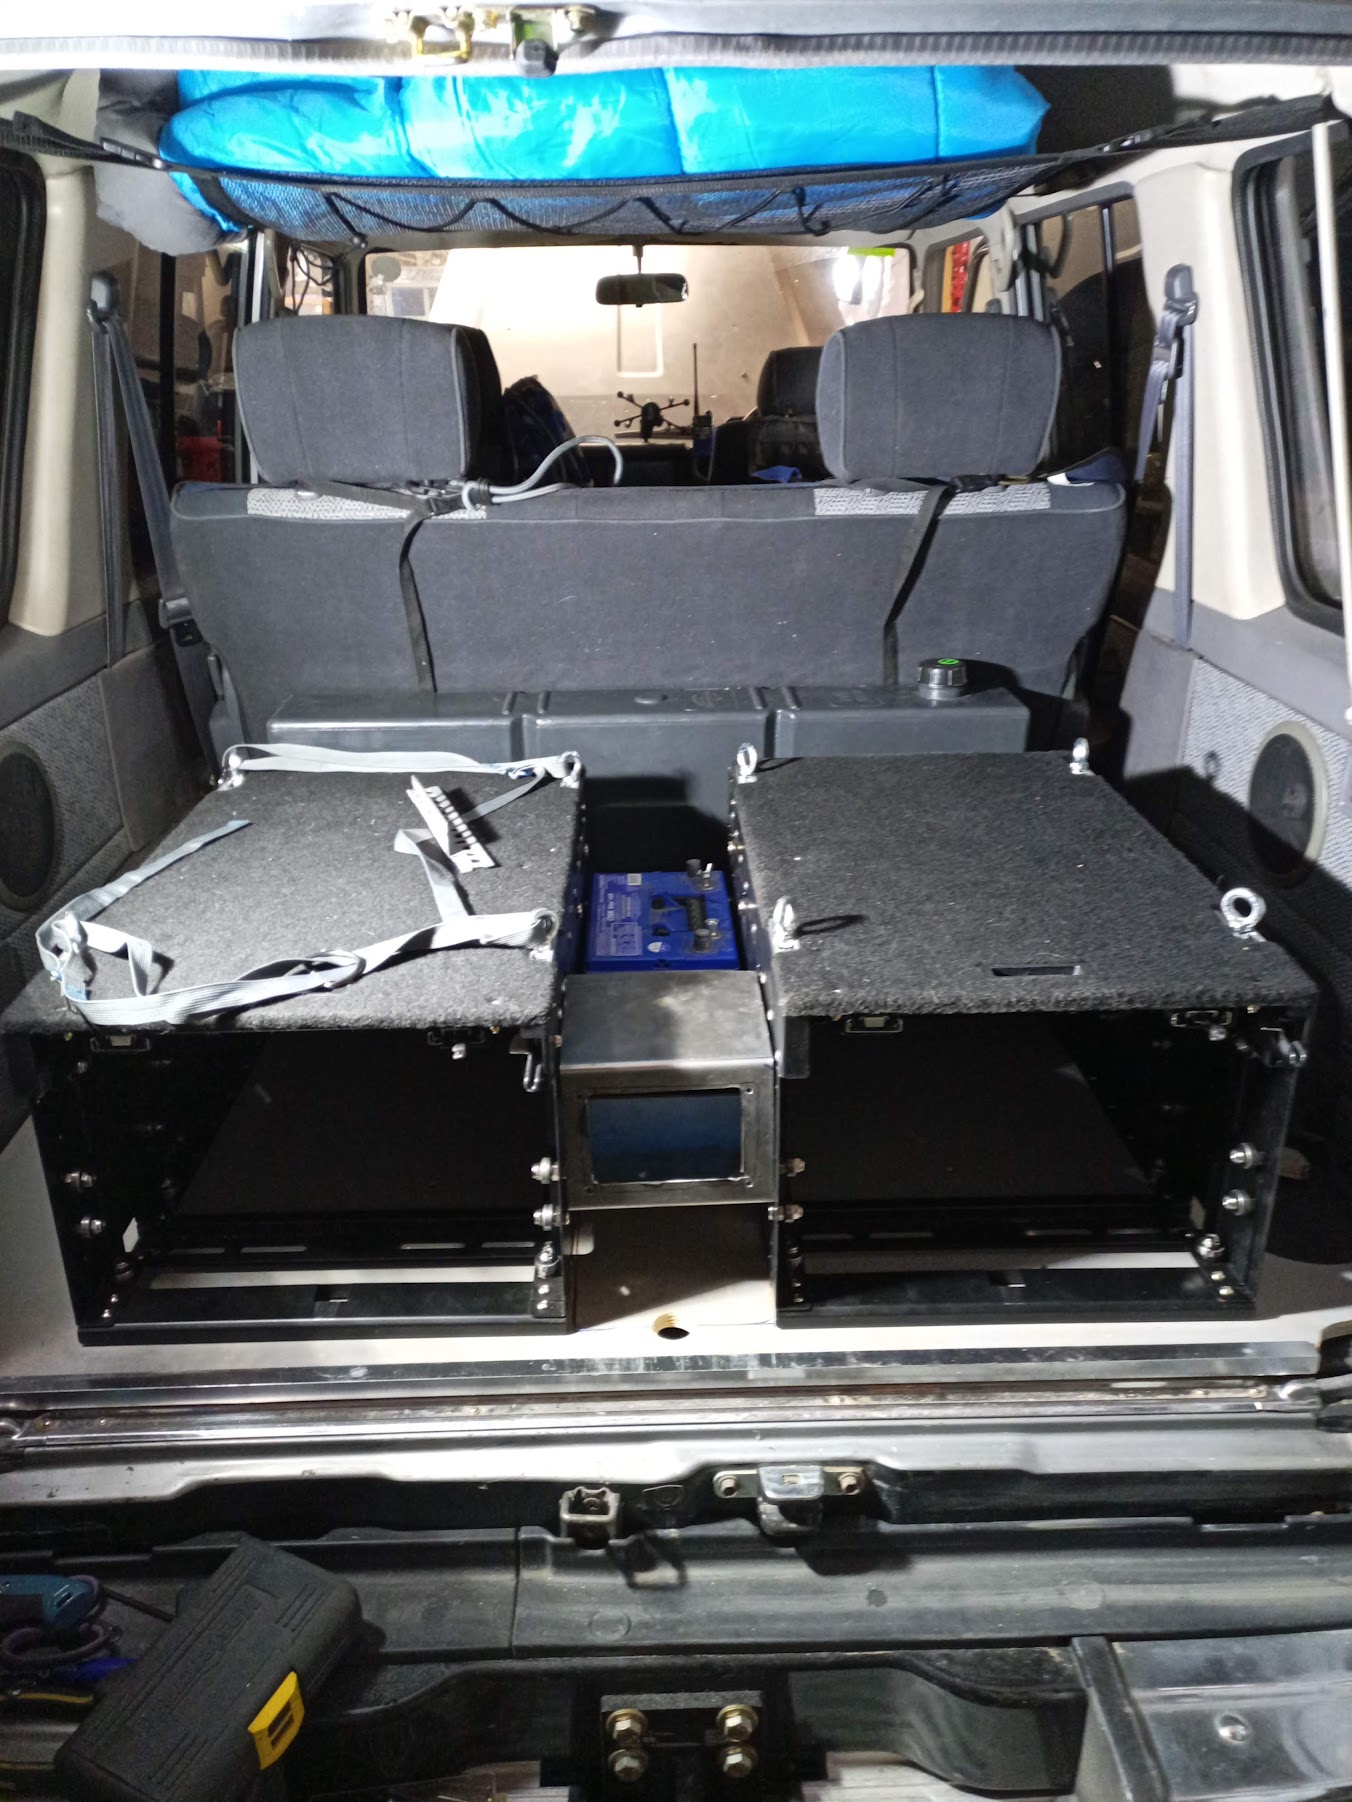
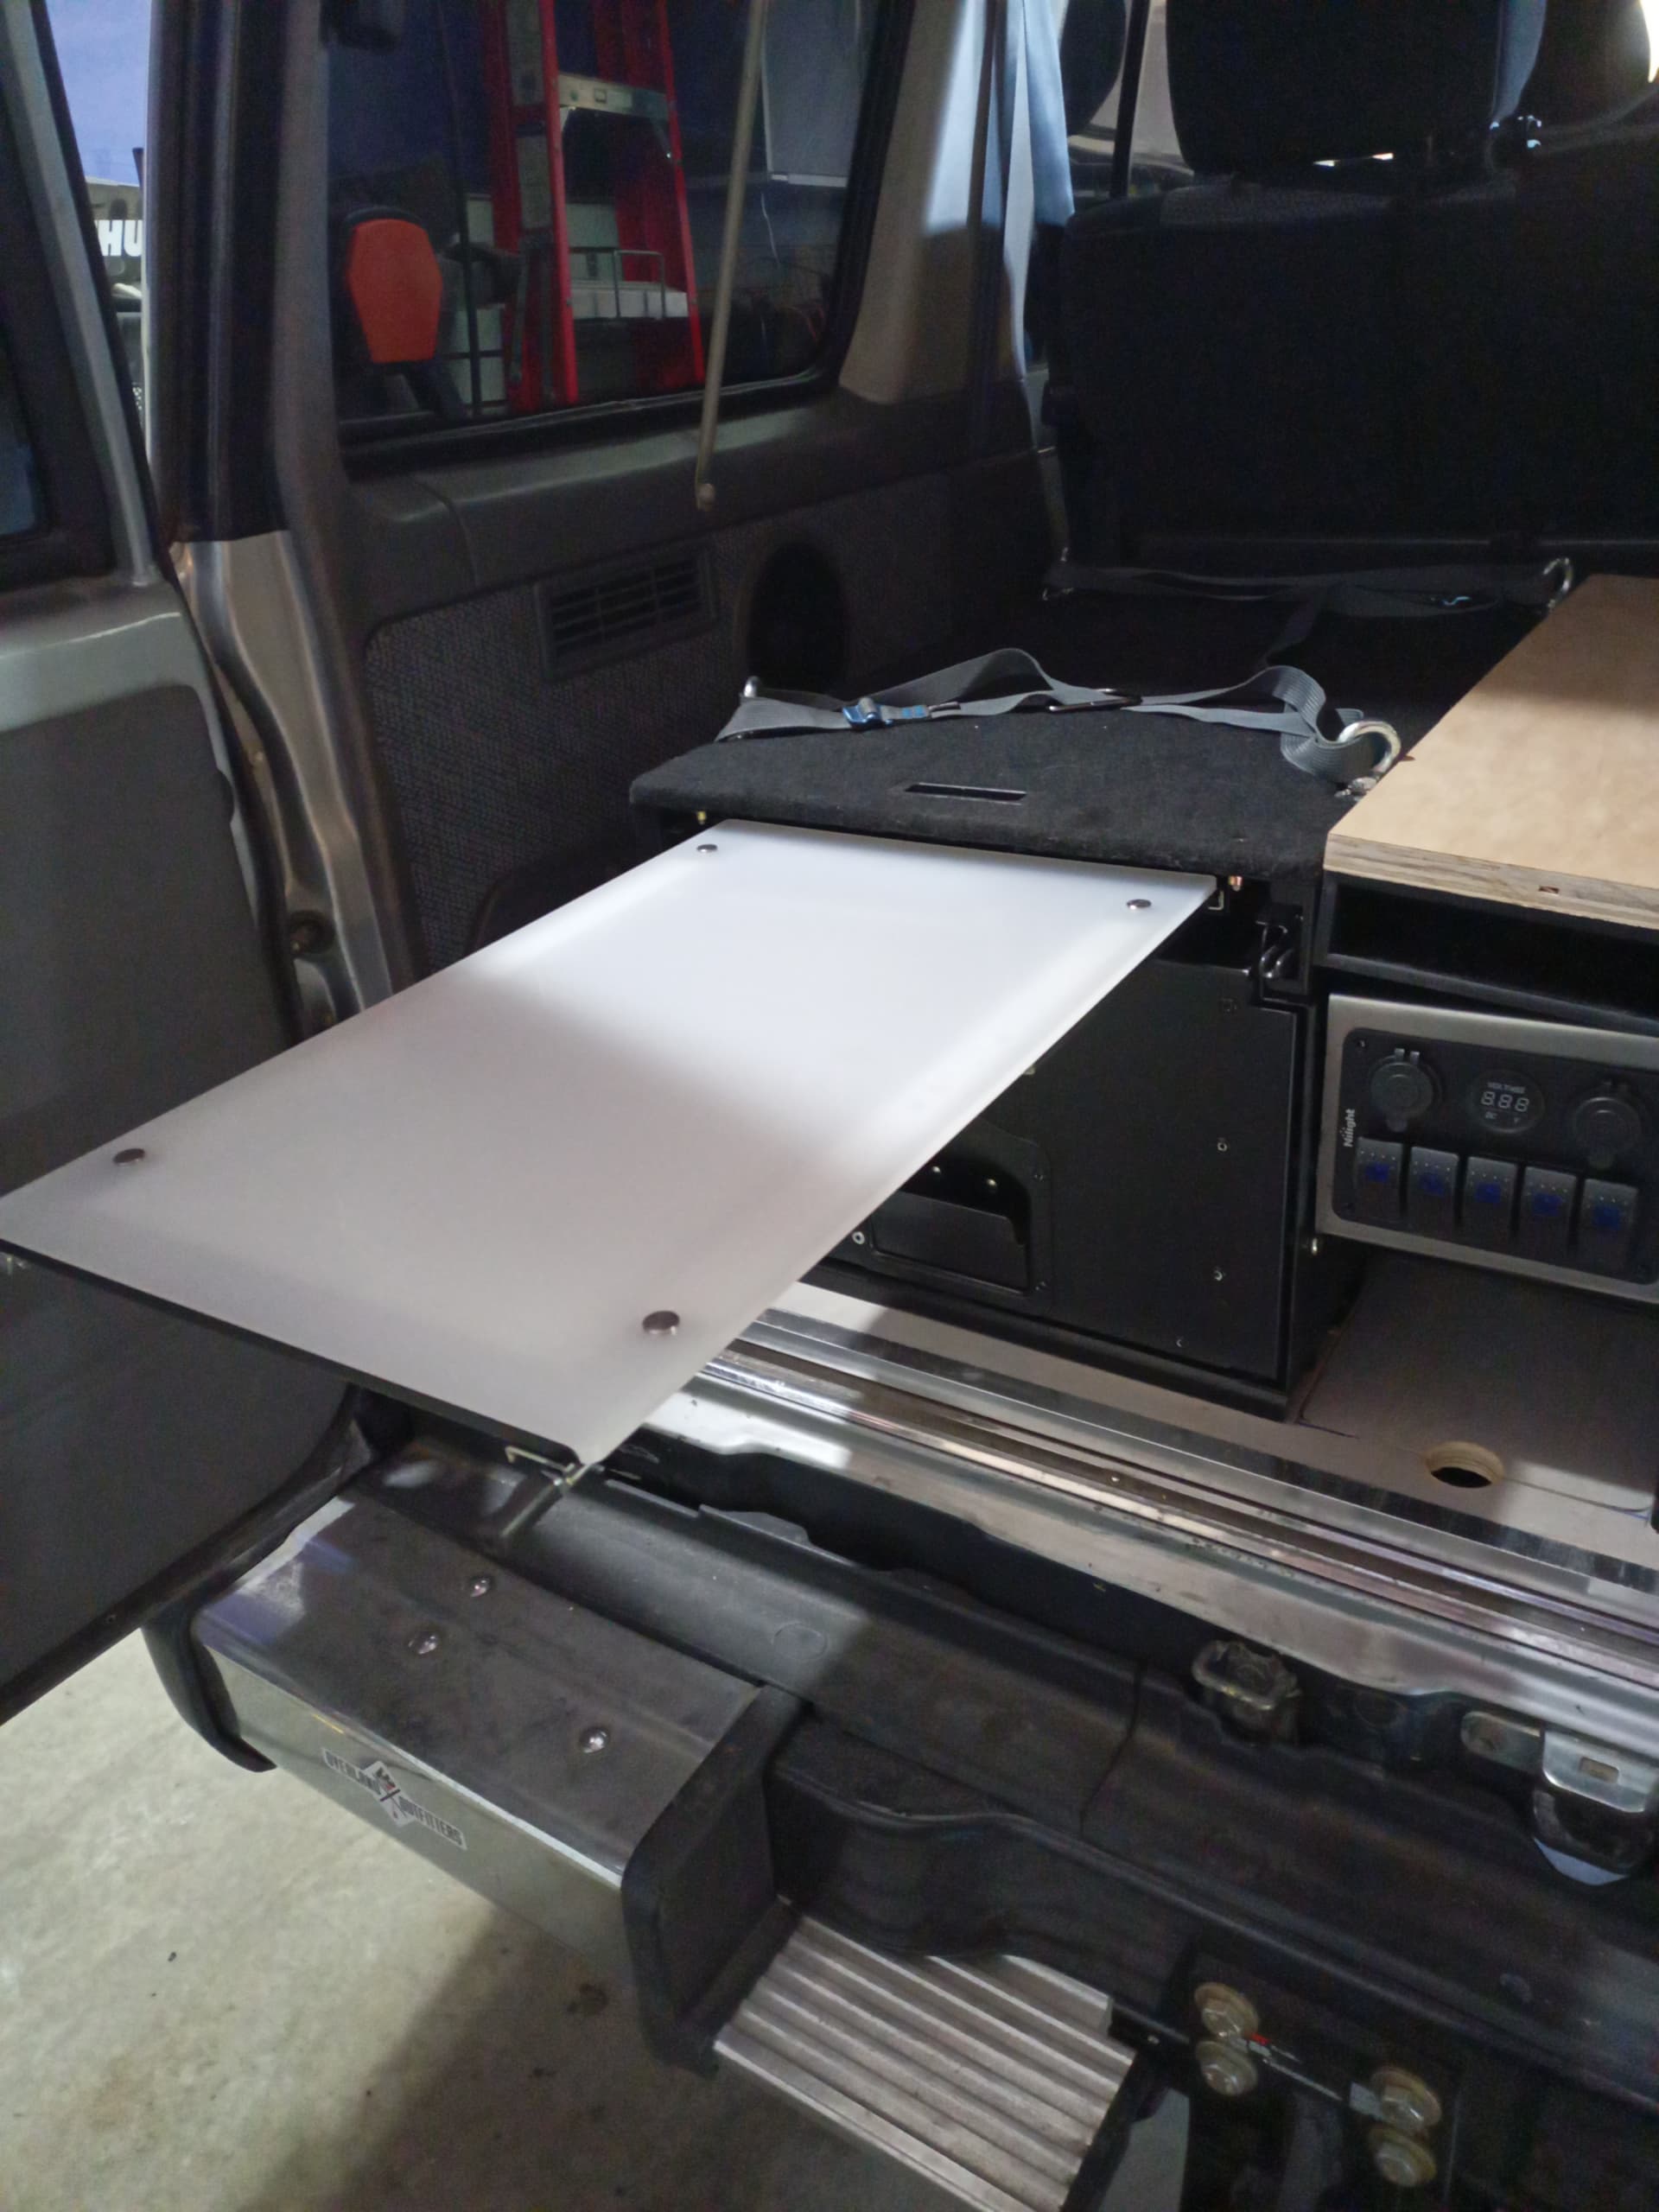
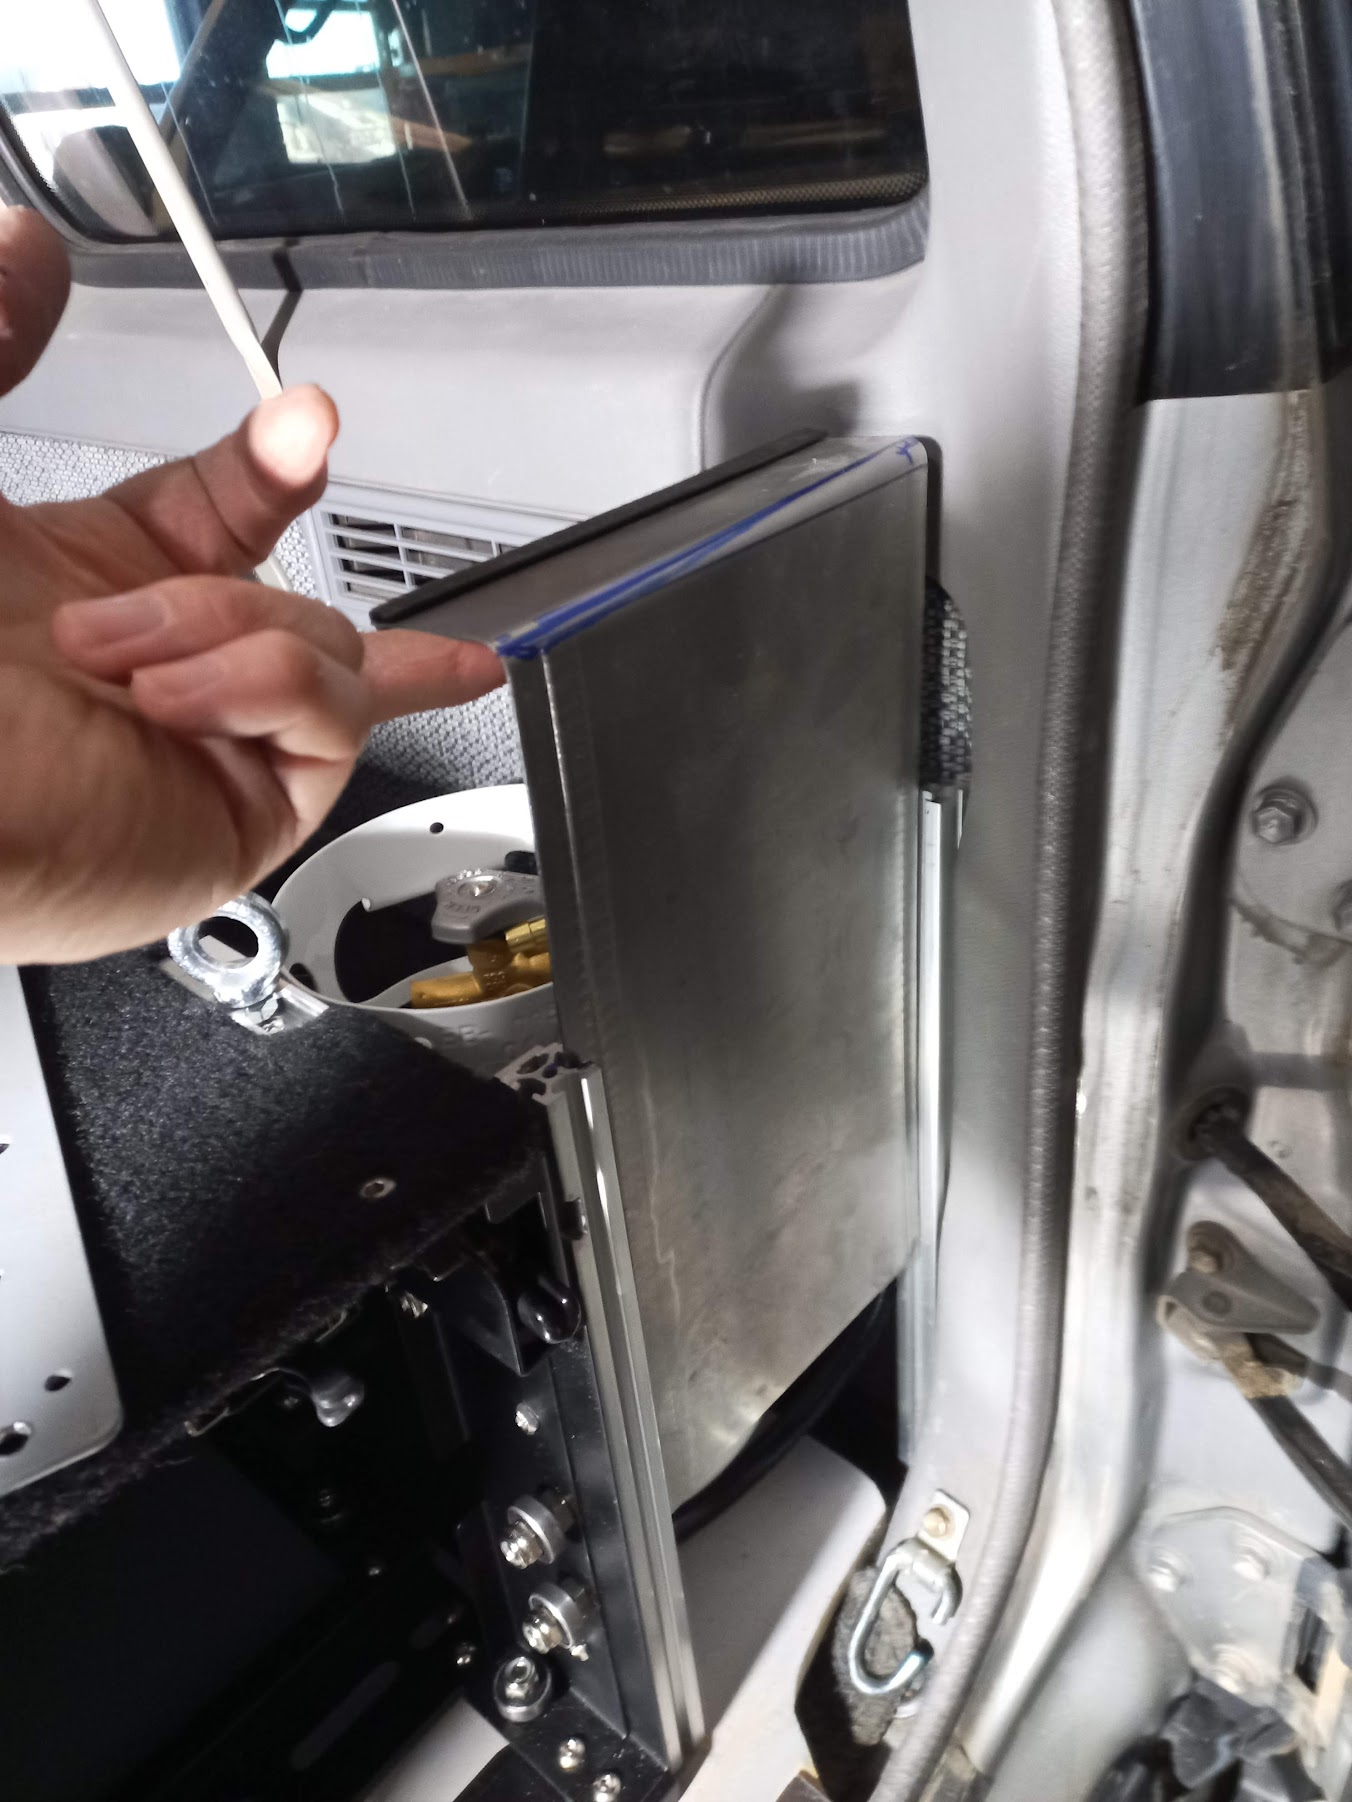
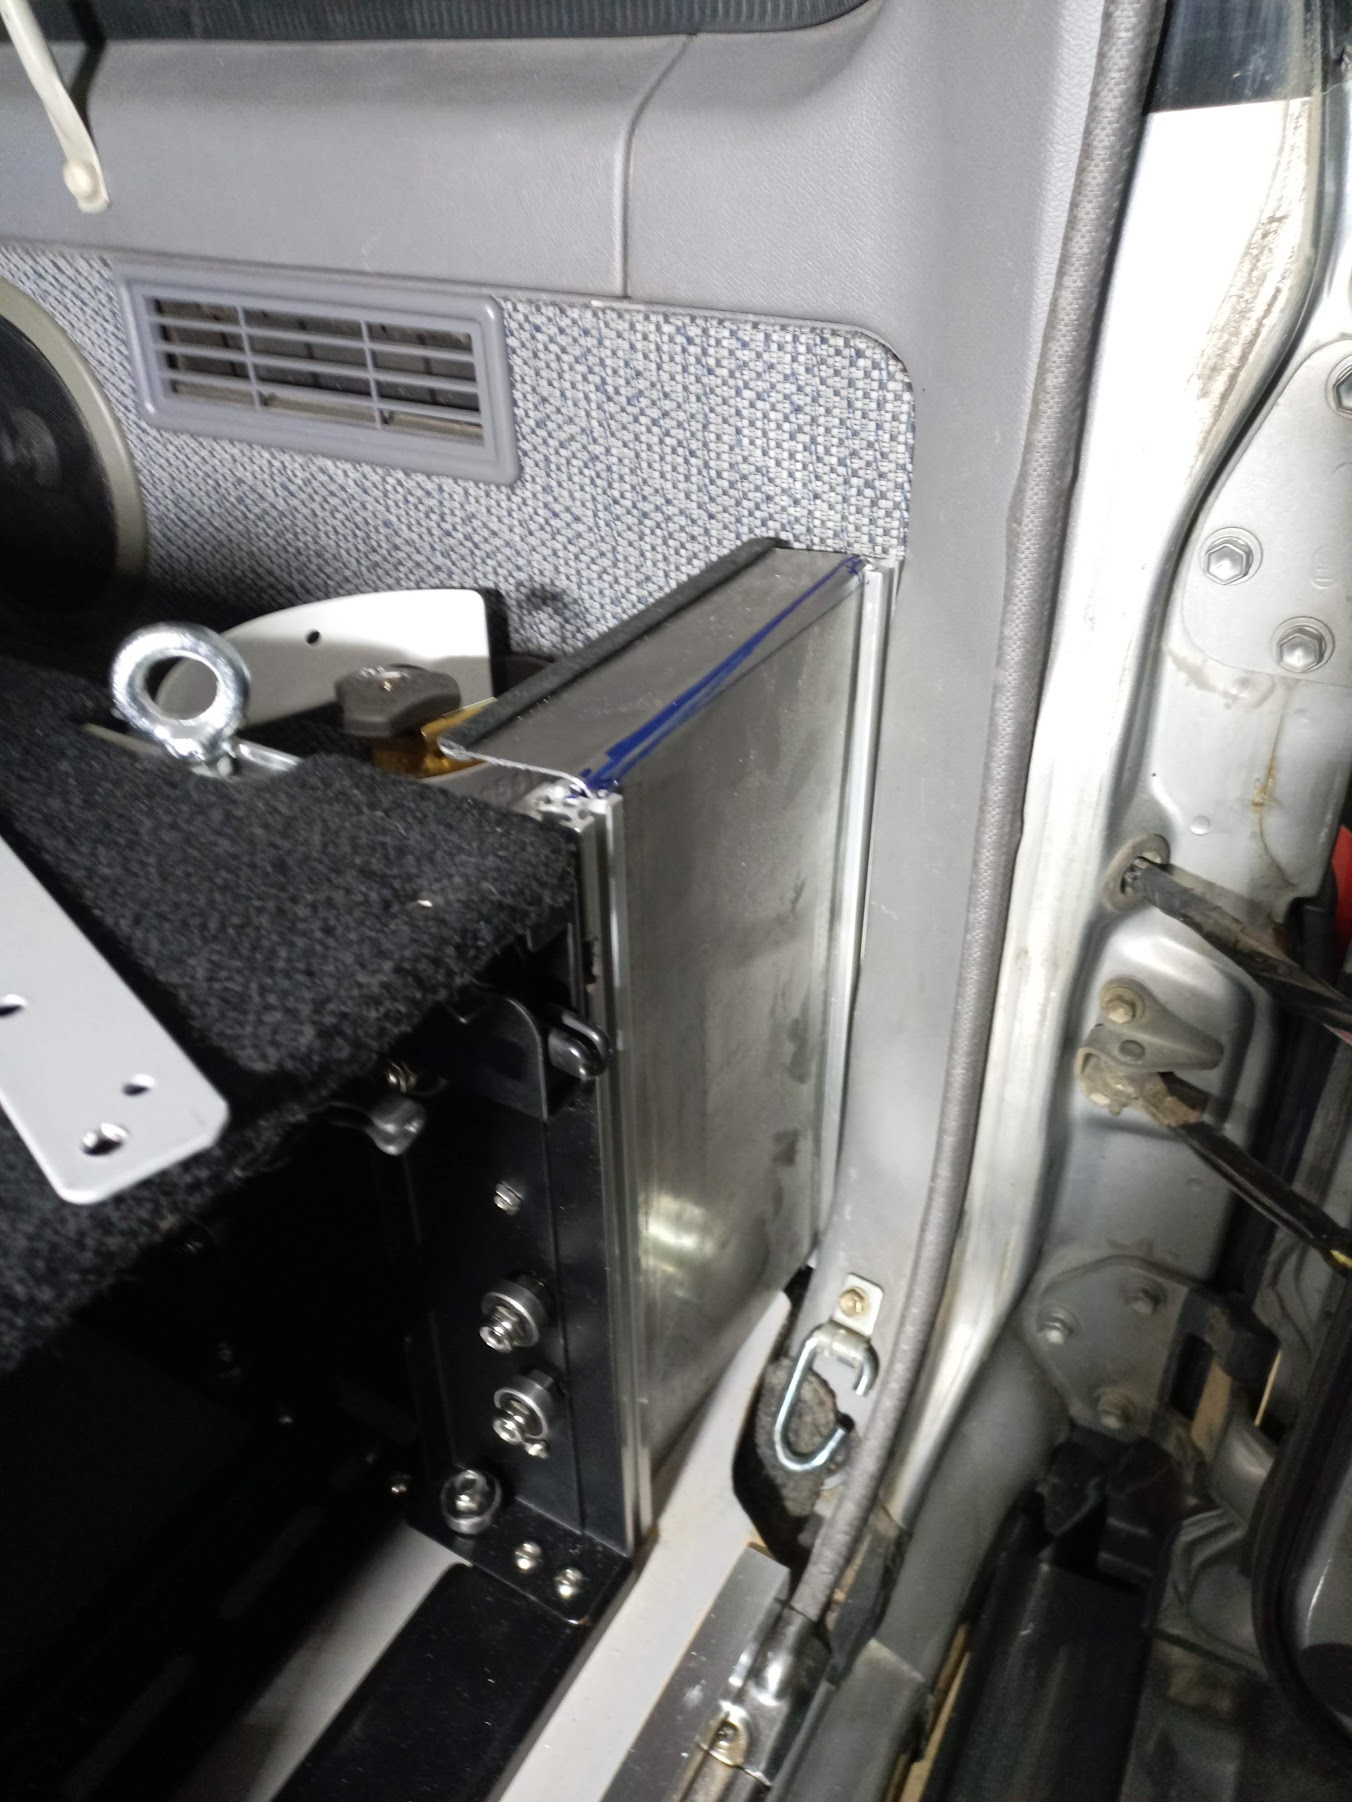
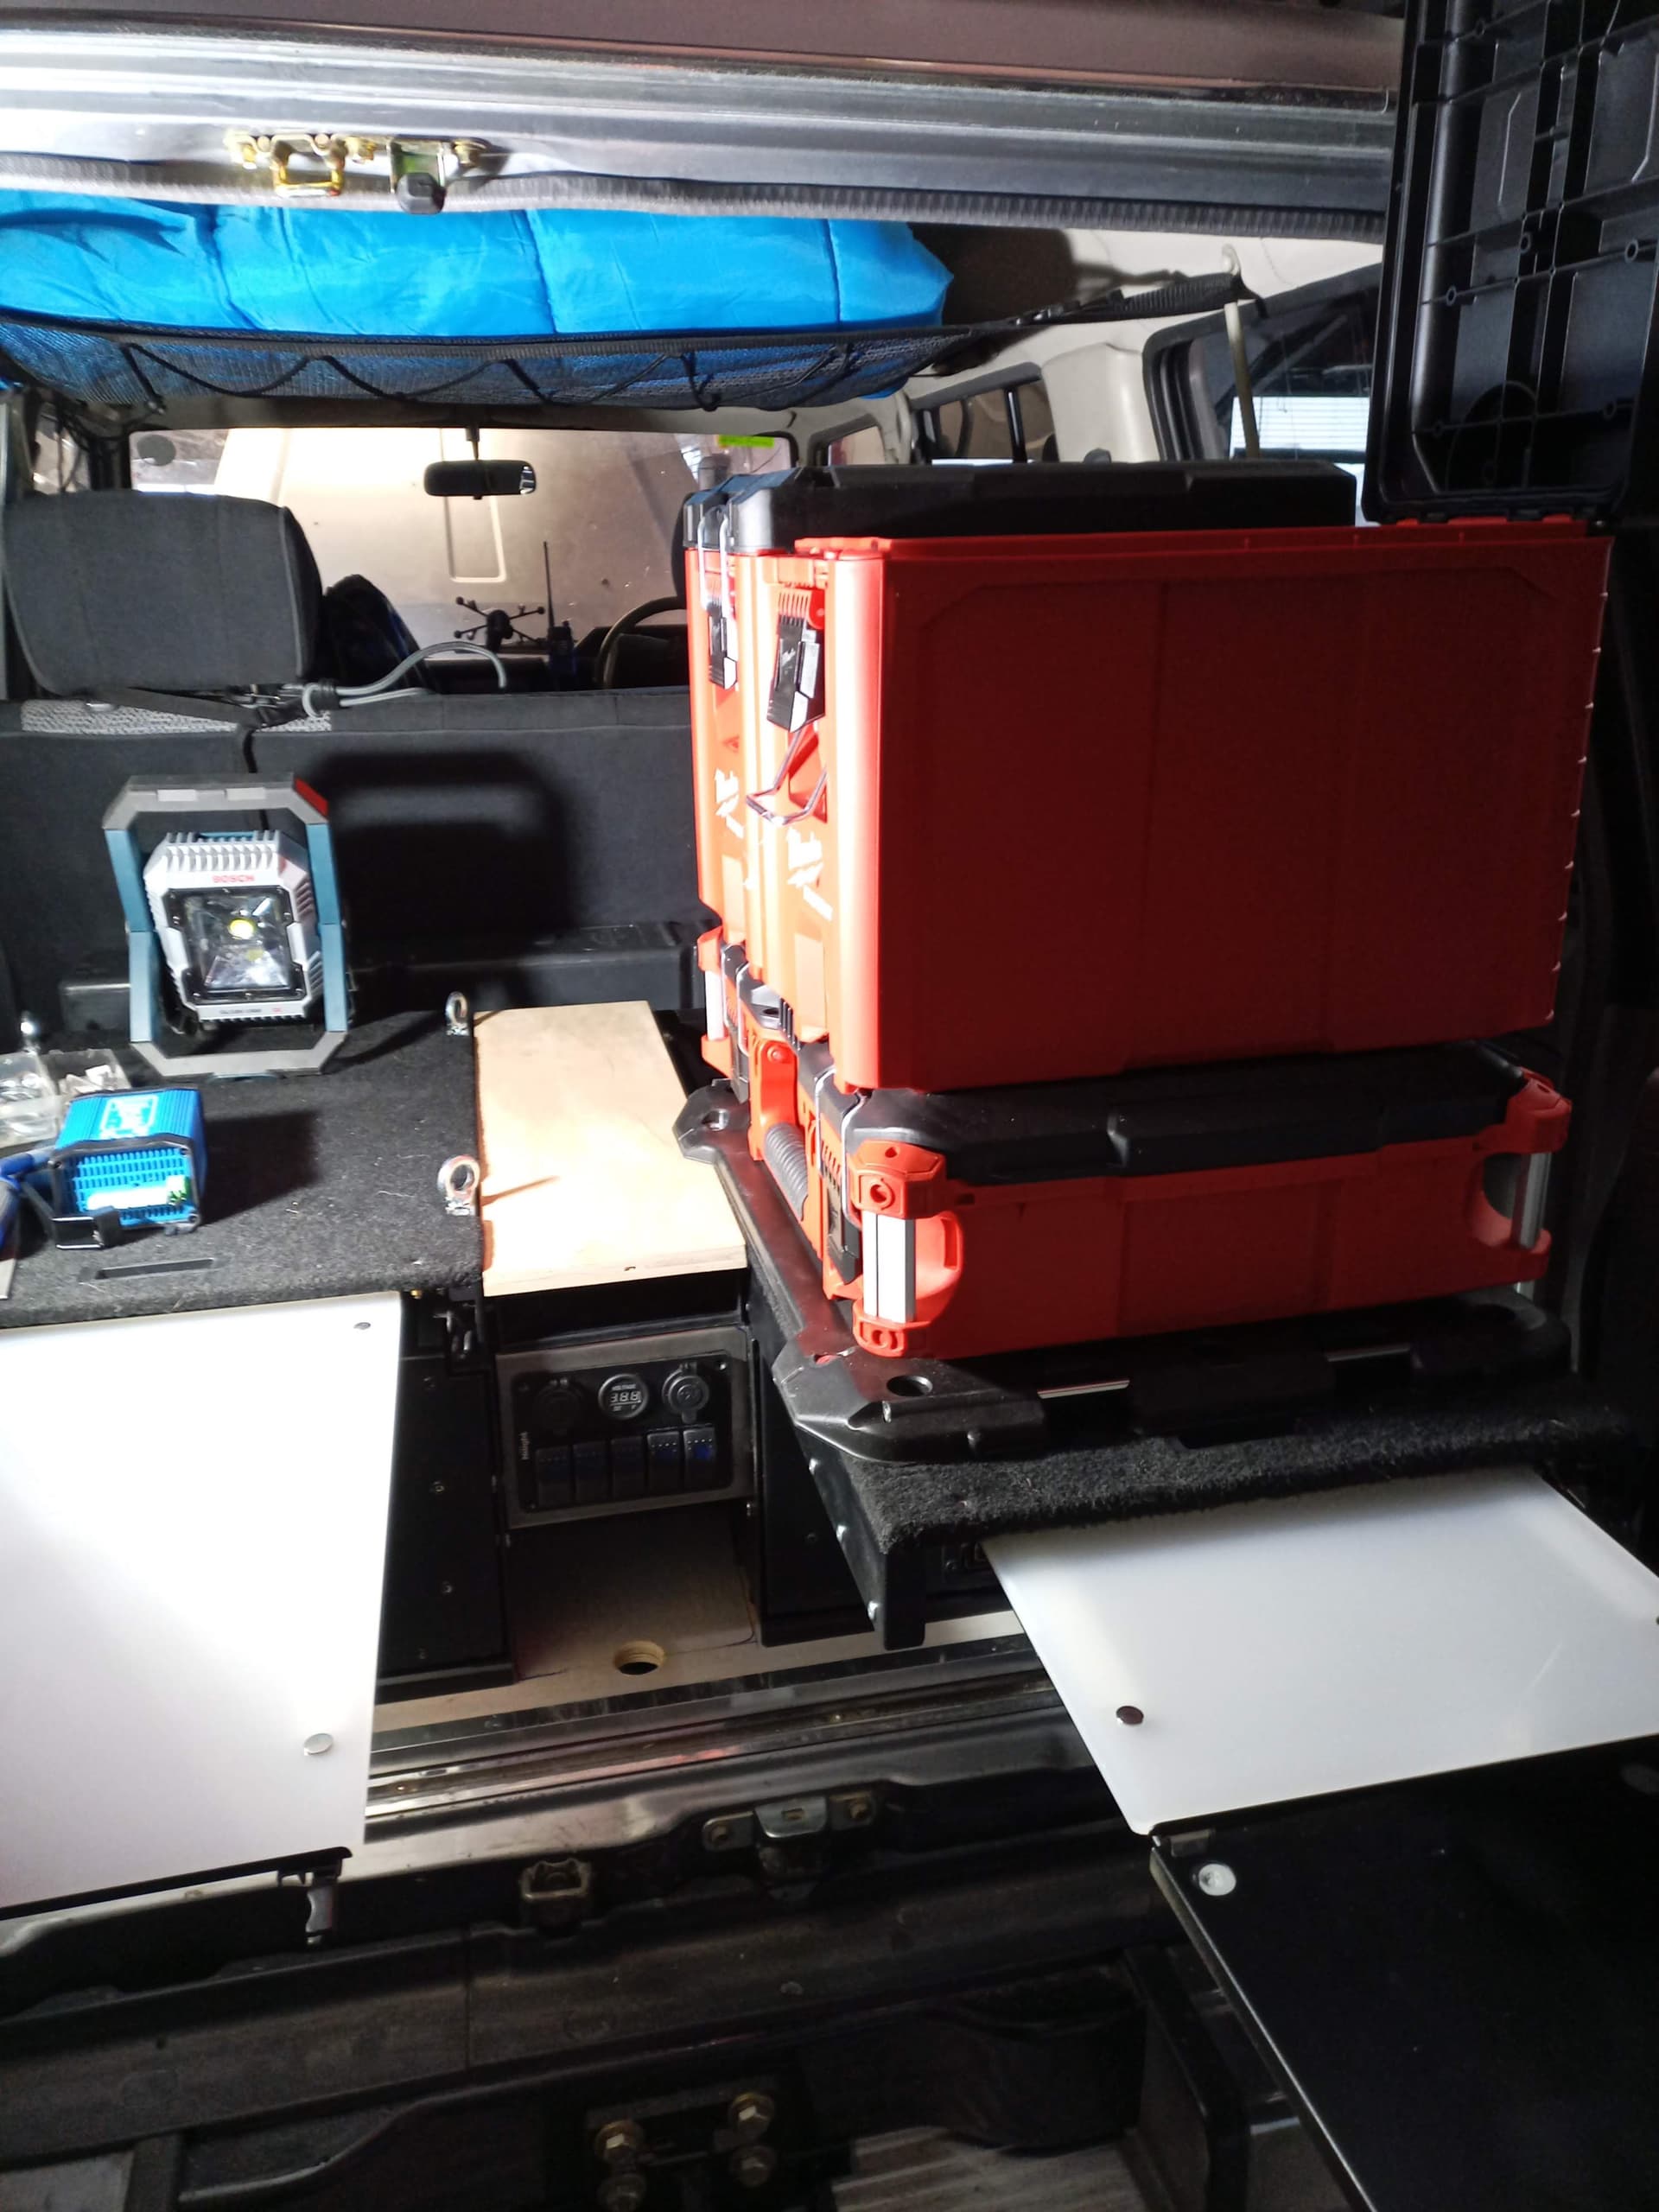
Cut/bent a piece of metal and used my fancy edge tool up and down each side to give it a little more rigidity, although 18 ga sheet is pretty solid as it is, for this application. Then filed and massaged until it would slide into the grooves, with a little tension to reduce rattles.

Obviously still needs finishing, i.e. carpet, paint, etc. But lets get the structure done first.

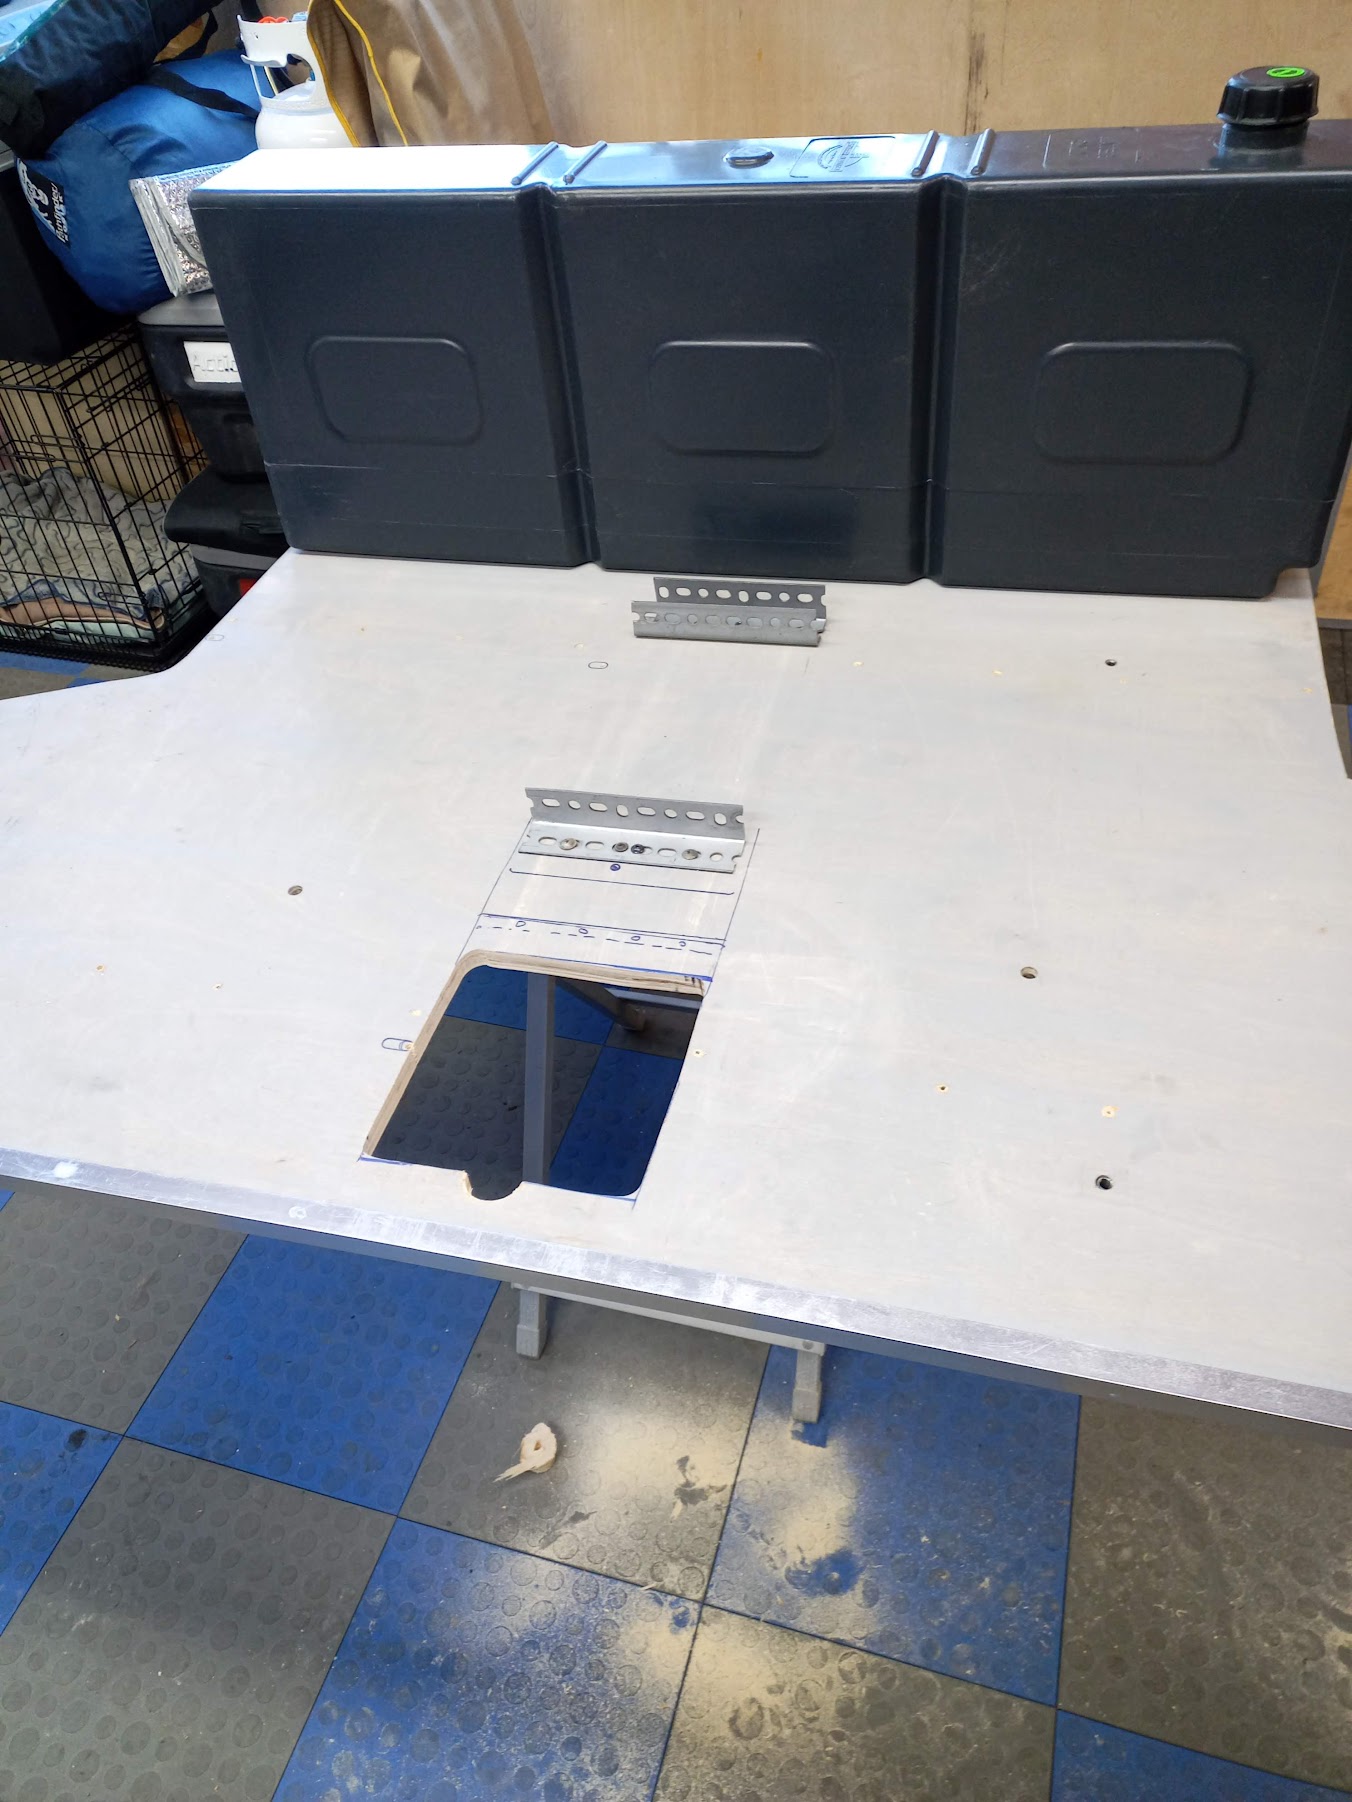
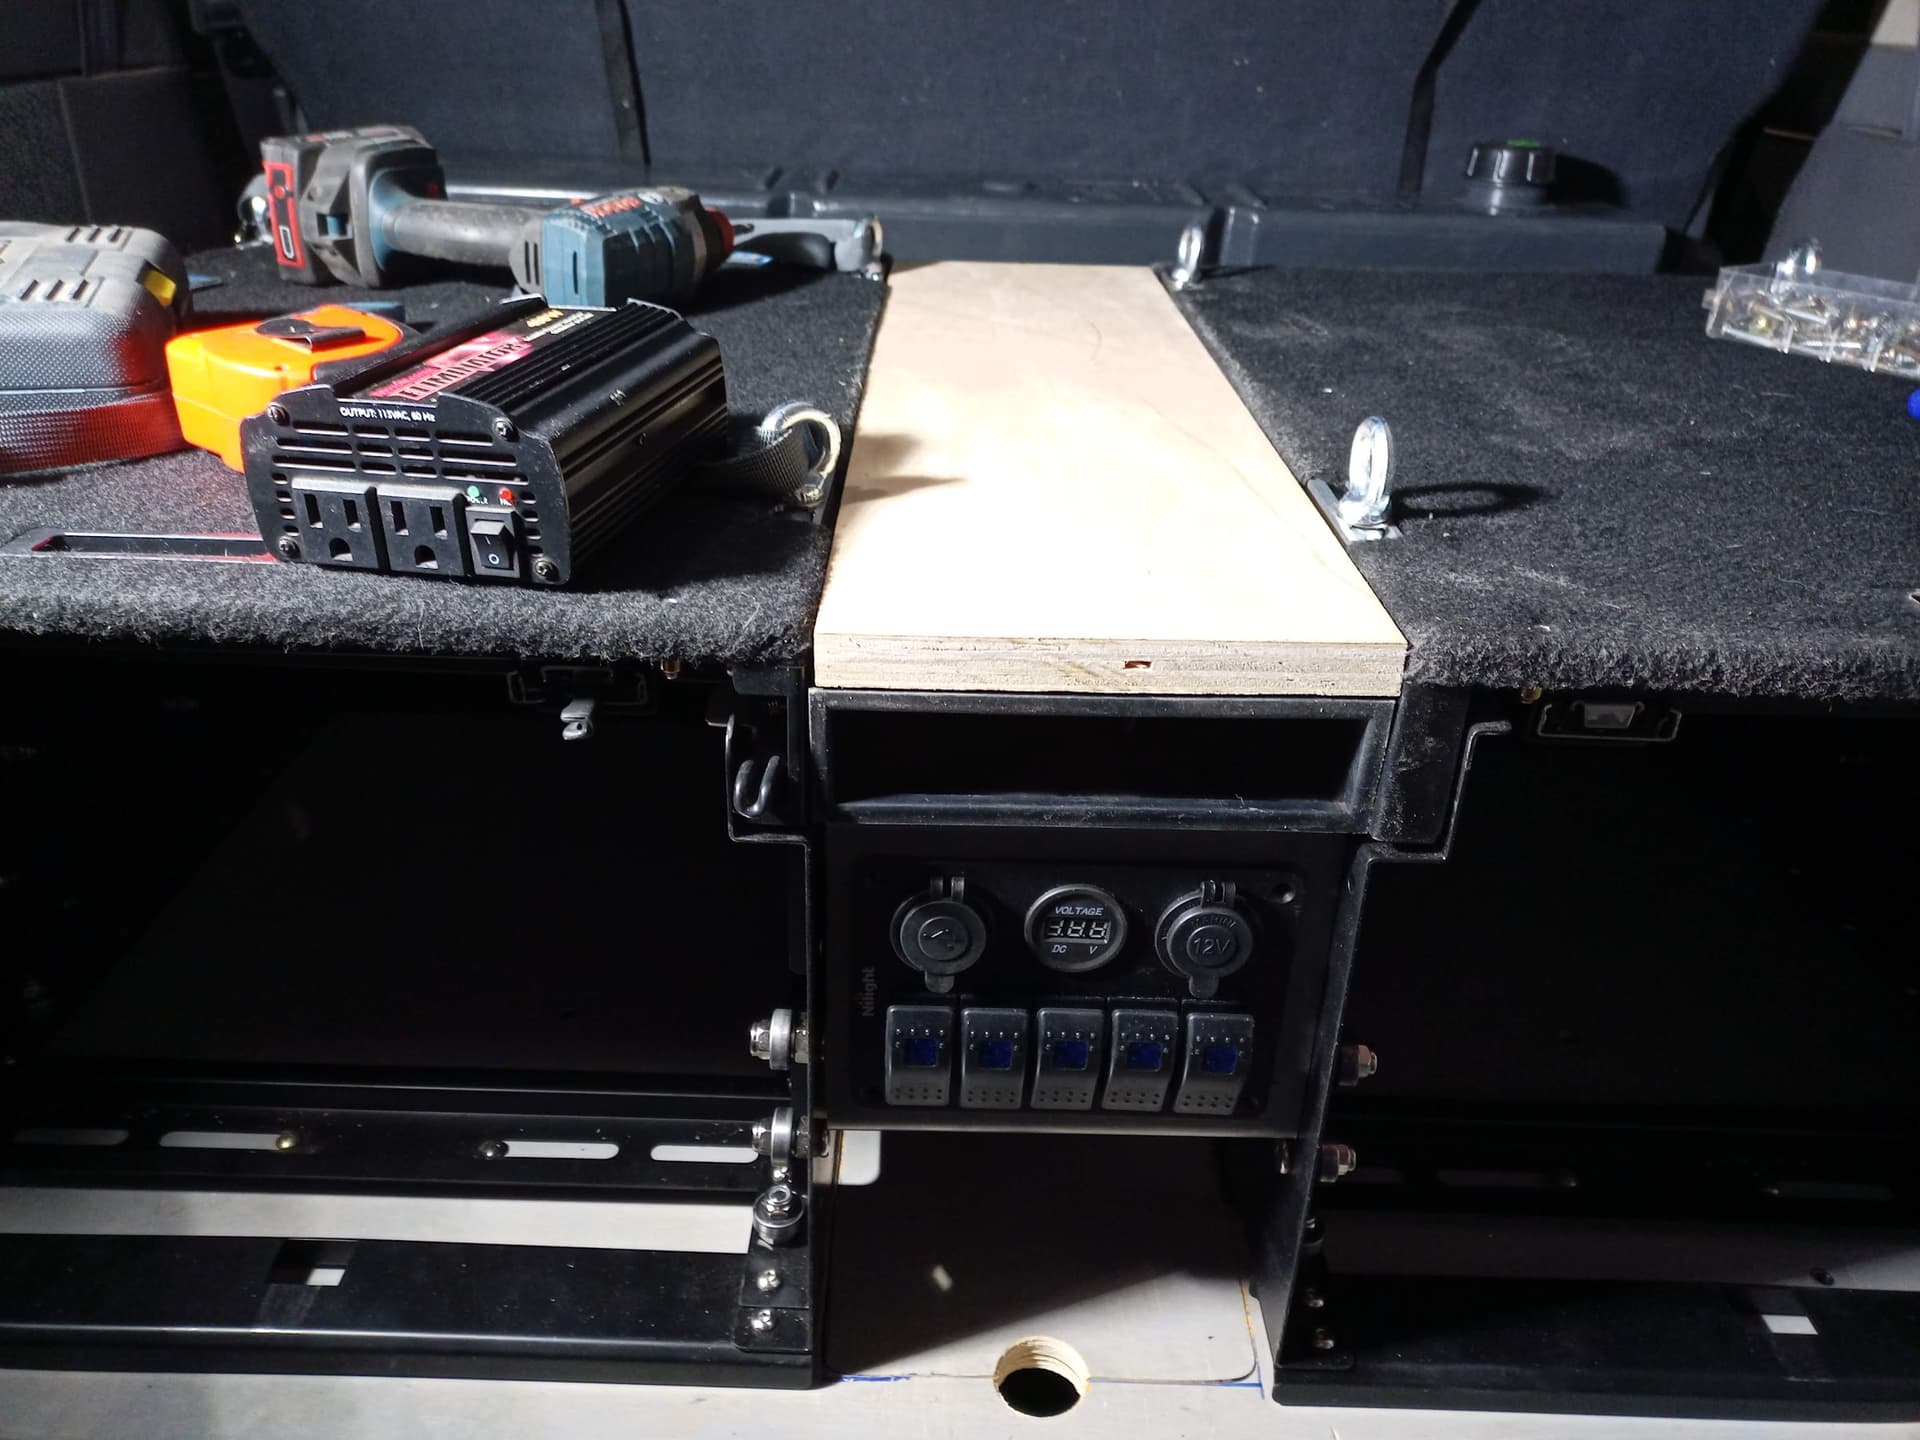
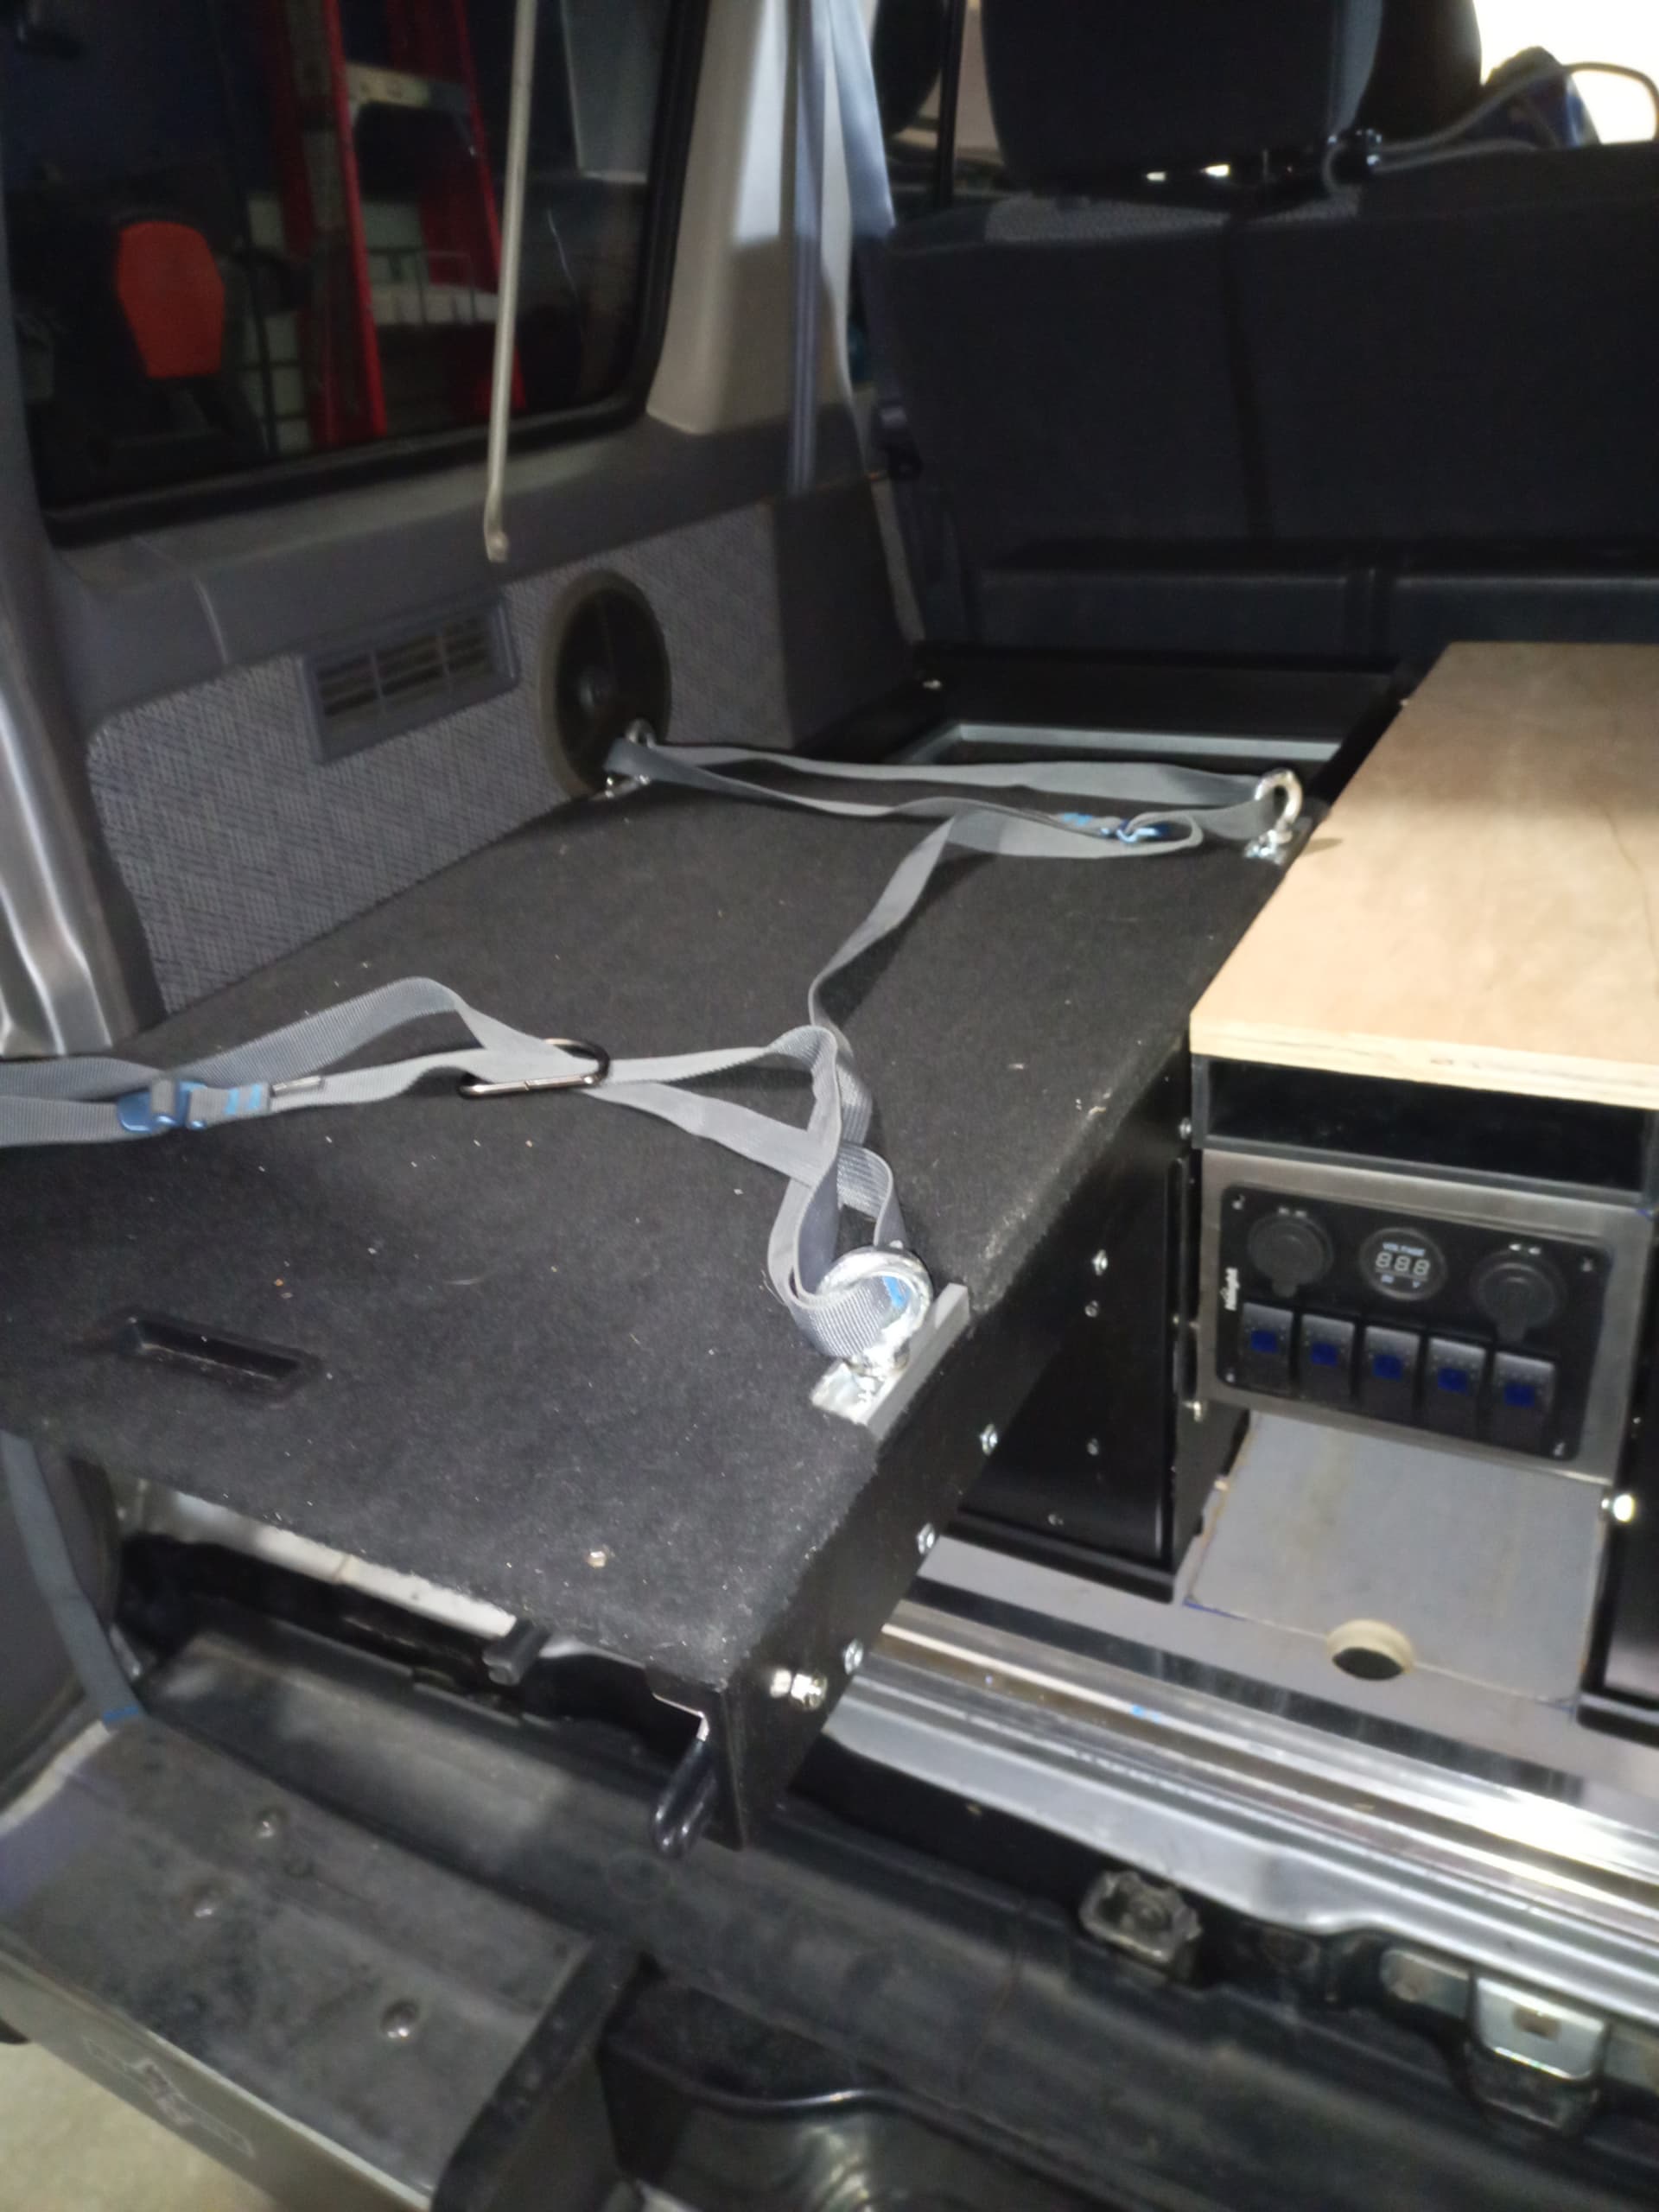
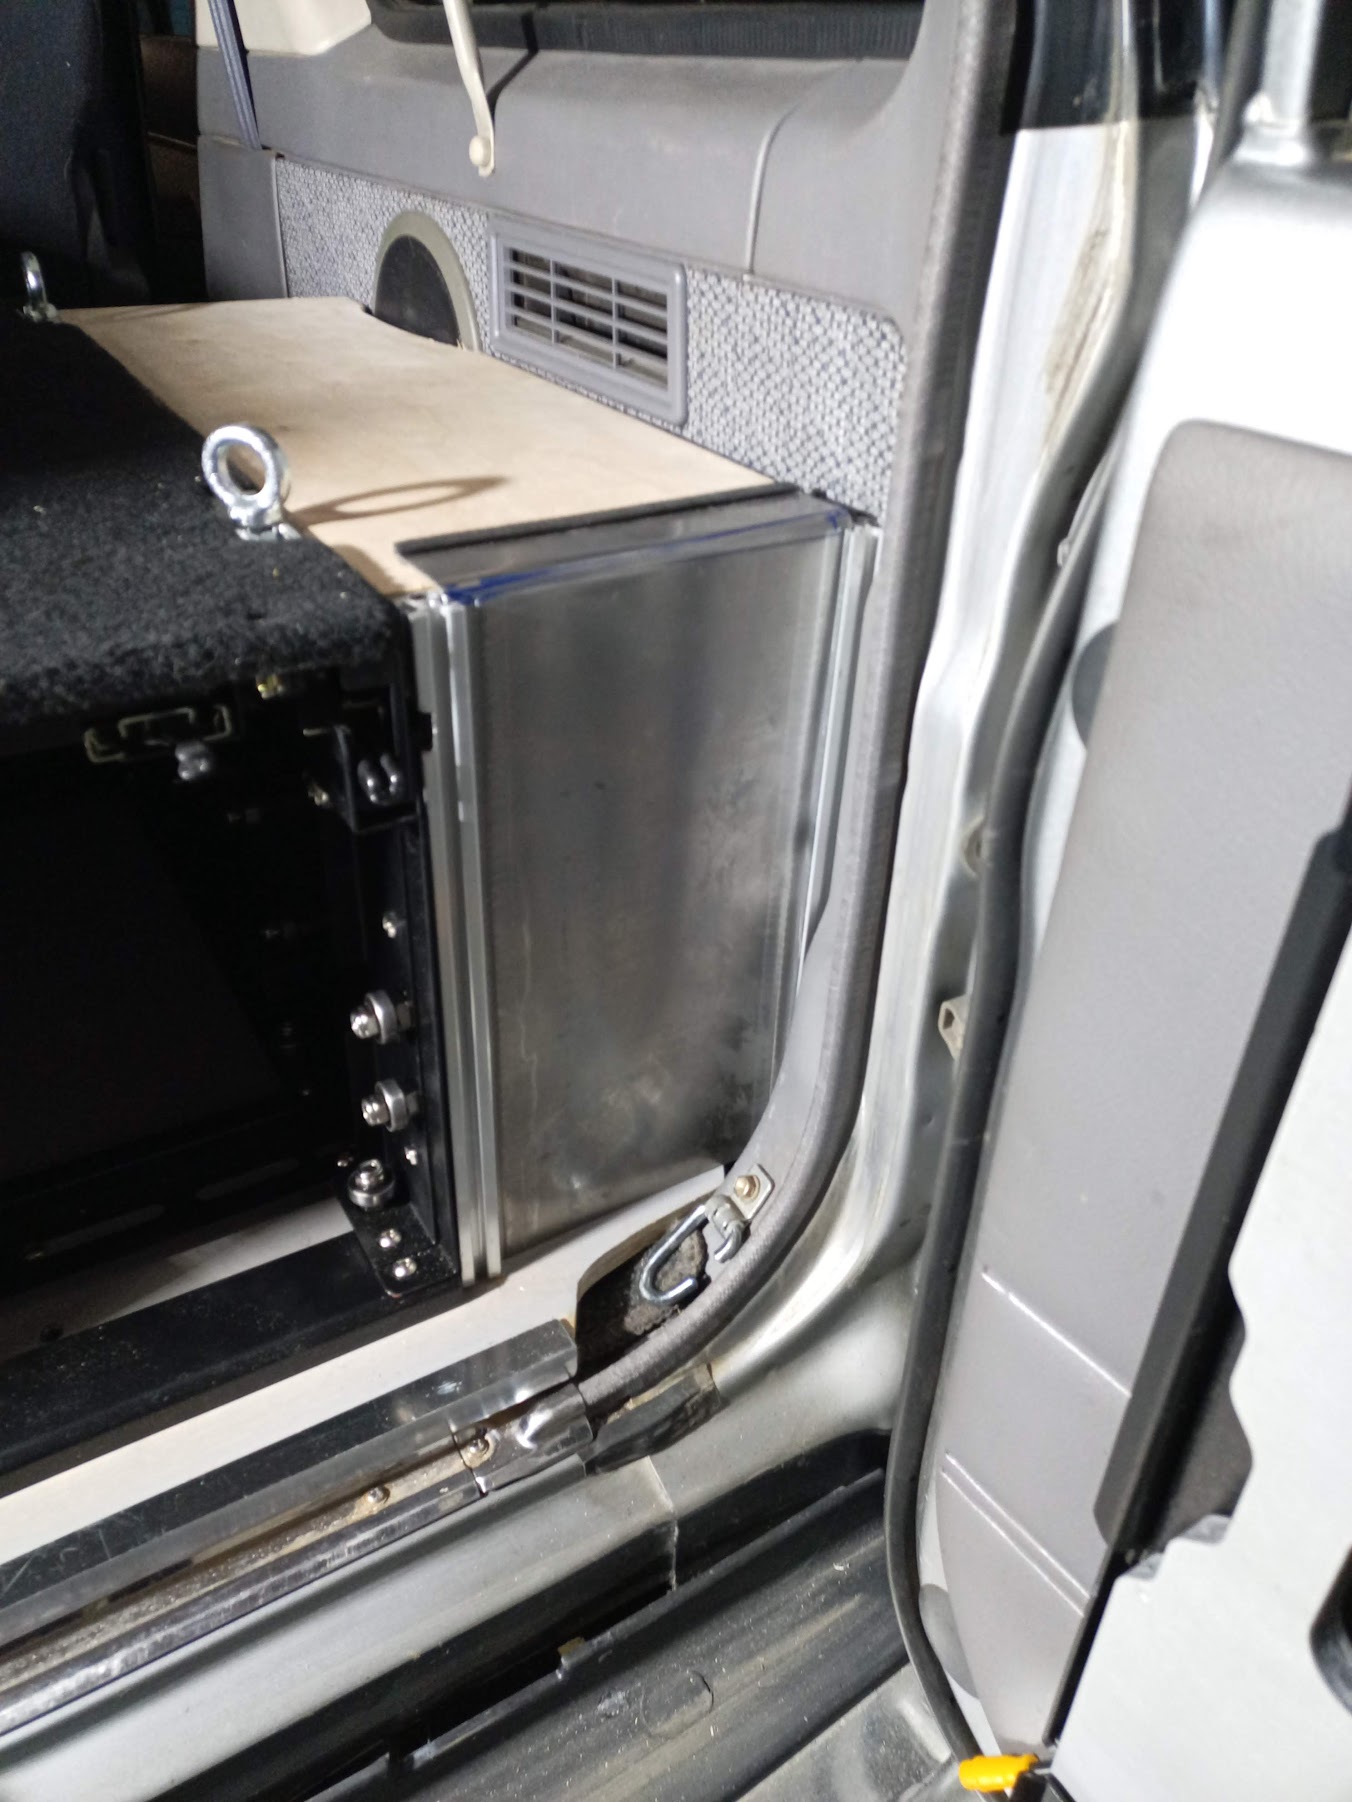
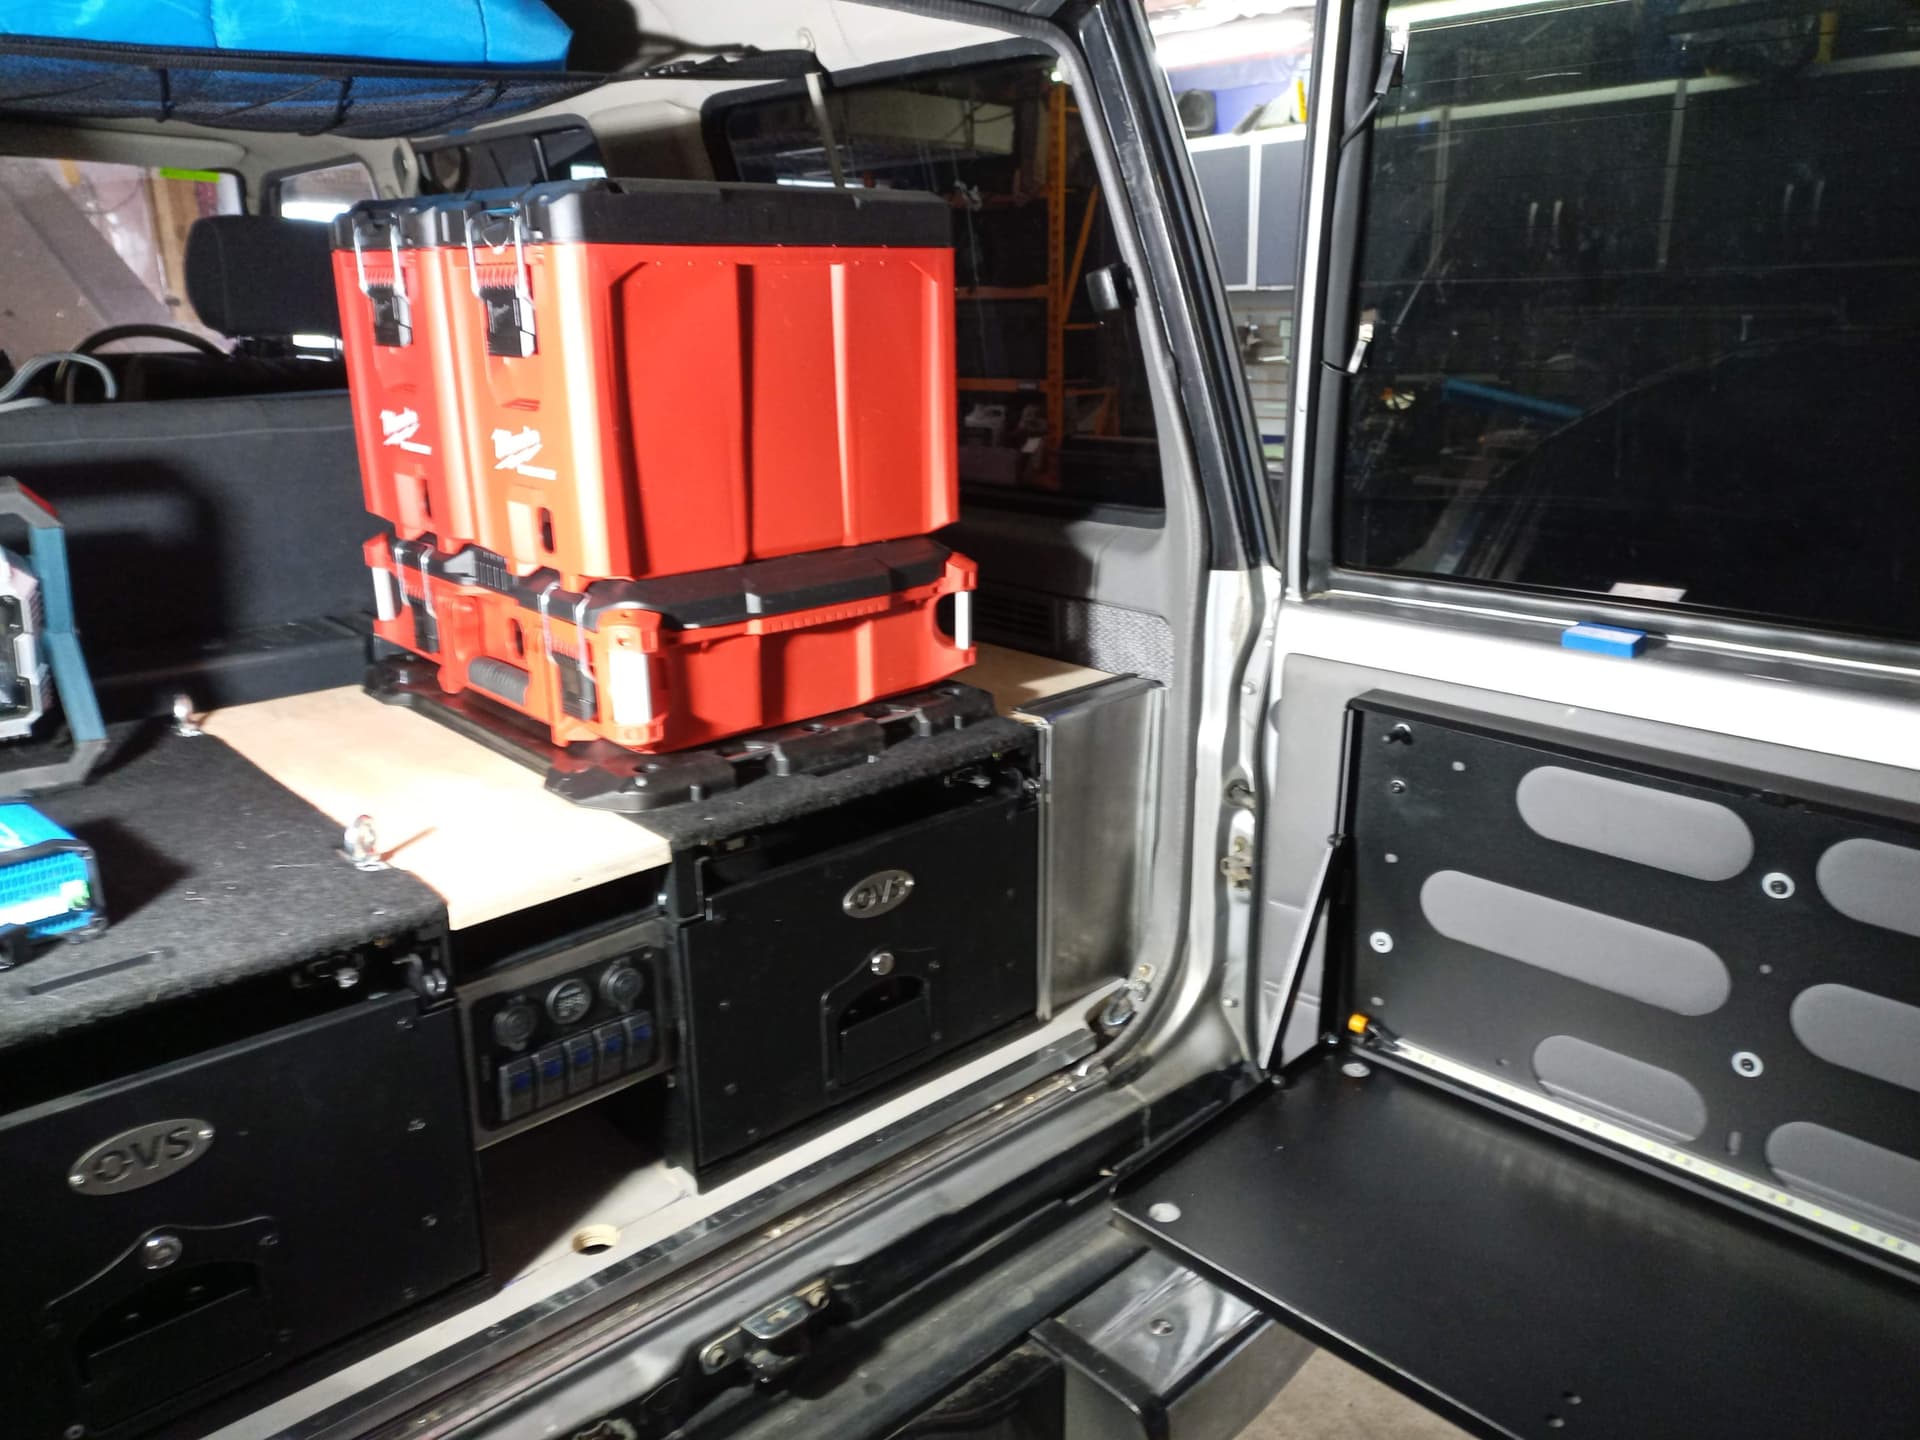
Okay, on to the top. 3/4" plywood gets the call.

That doesn’t look too bad?

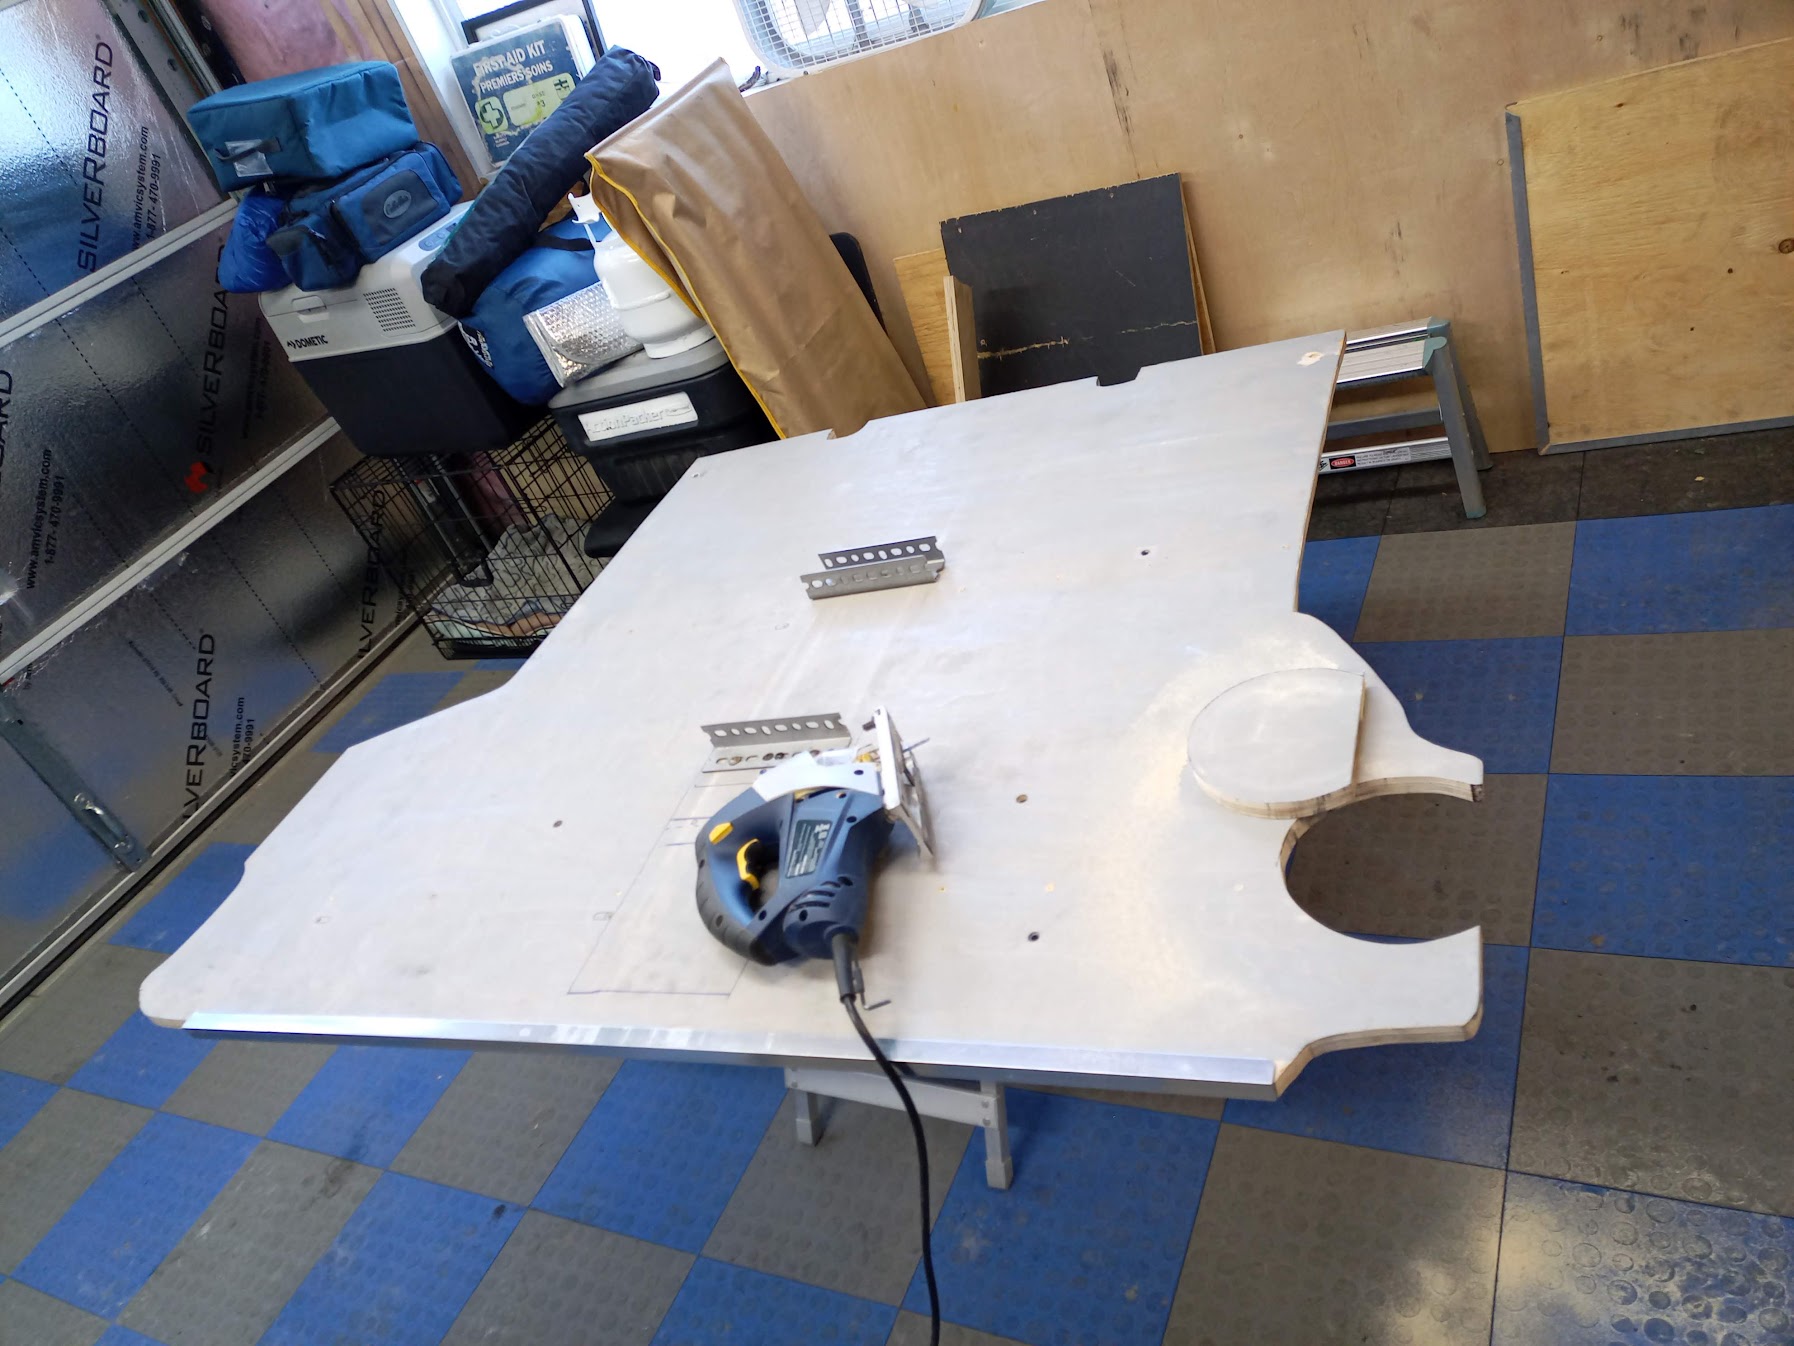
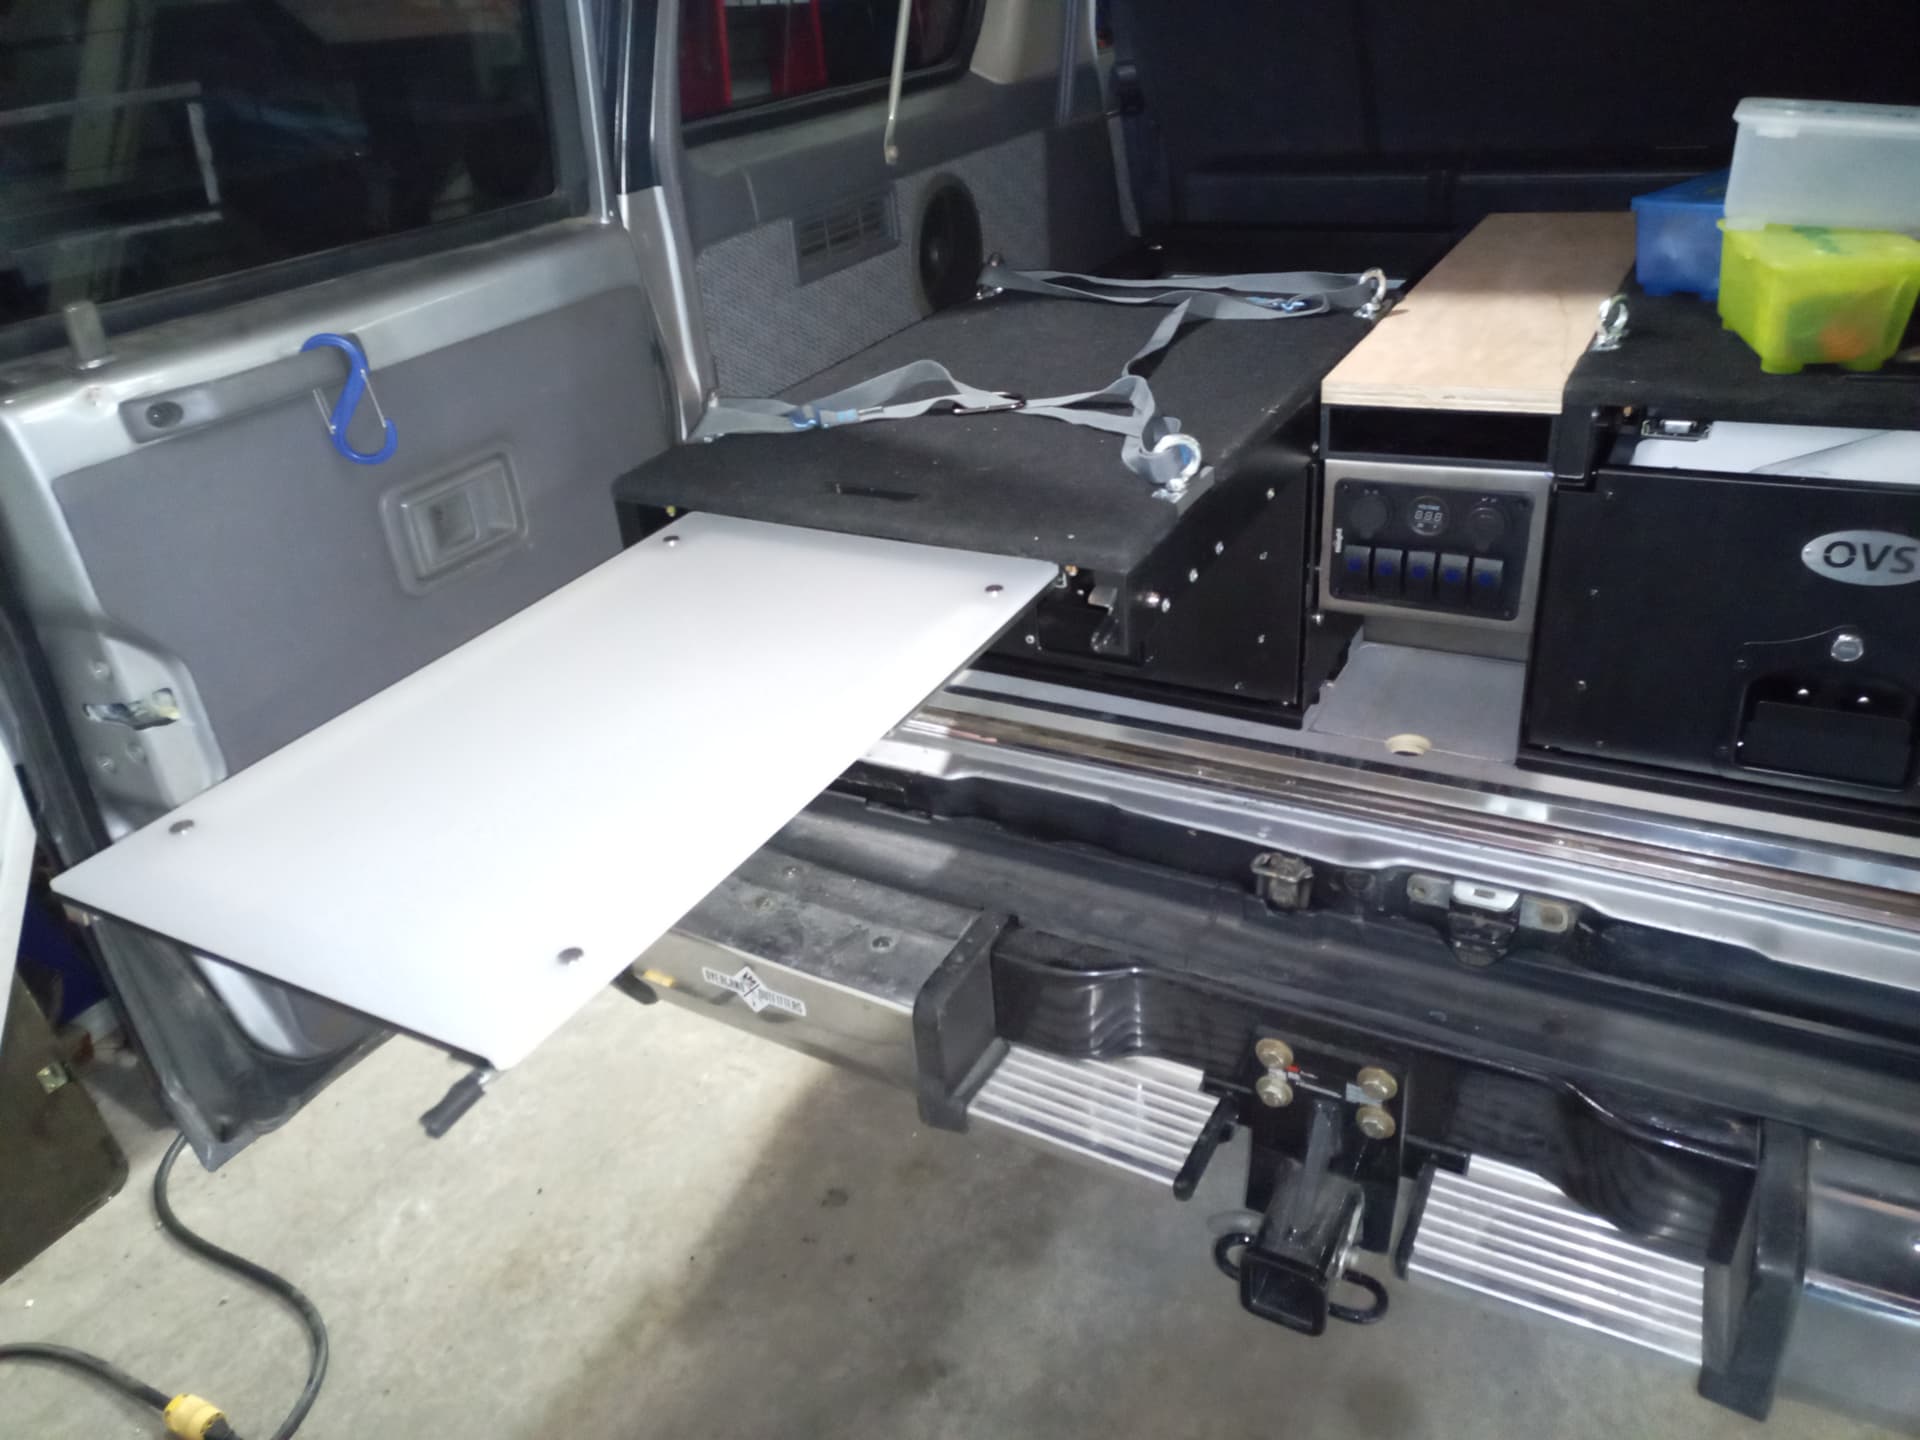
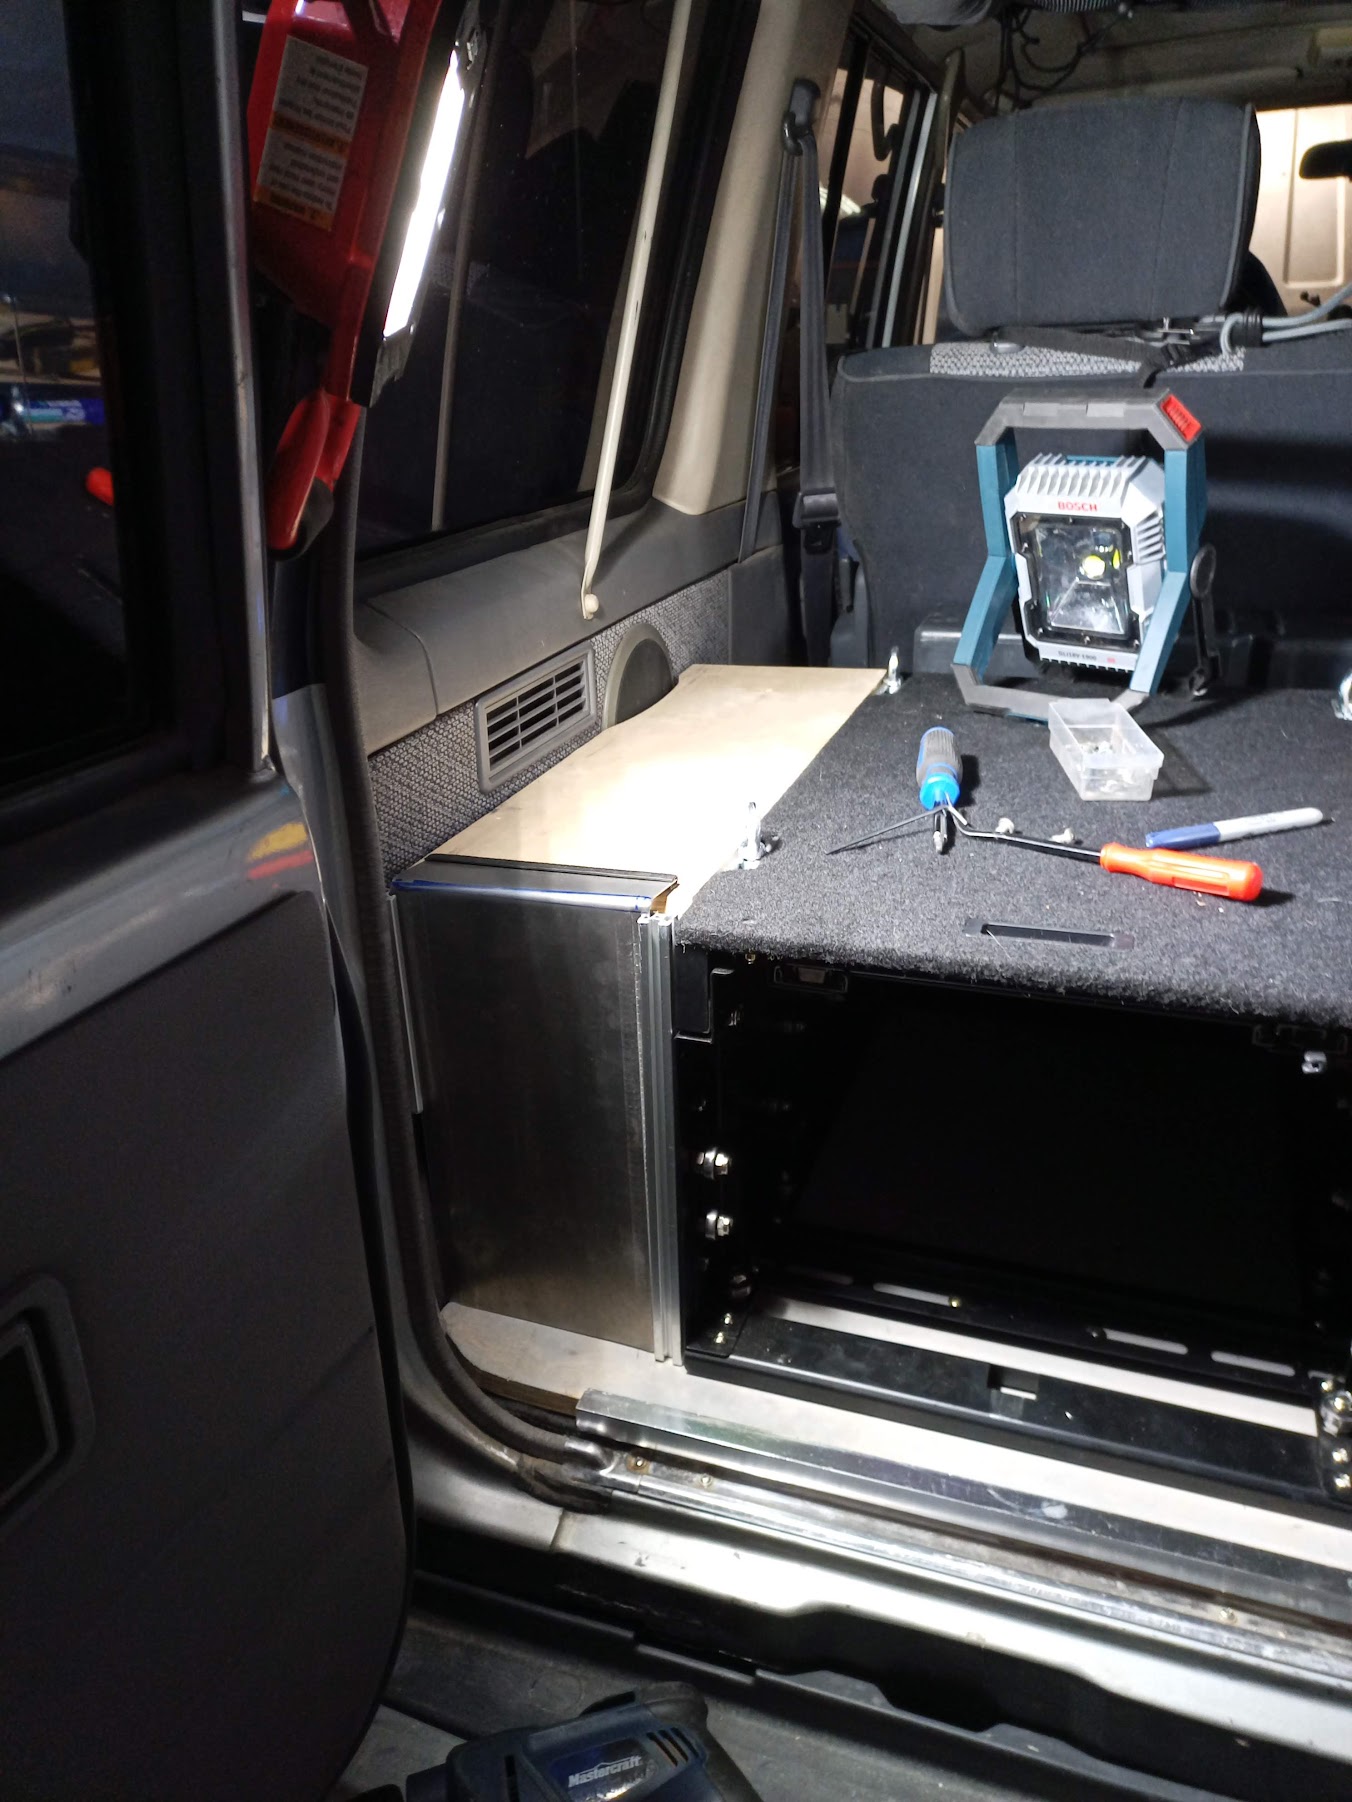
Thought I’d start the other side, and after a much quicker mess about with 8020, the framework was done. My jigsaw crapped out (20 years old) so I figured I’d simply flip the right side wood over, and try it, along with my already bent metal. LOL. It fit EXACTLY on the left side too! Hehehe. Not planned, but I guess that’s a good thing in case I have it all apart and put them back wrong?

That’ll do it for today. Can’t wait to put the carpet on top and make it look a little more polished, but not there yet…

3 Likes

One more with the drawers back in place, for an overall feel so far.

Also, I finally found a solution for the non-fridge side, to keep food and supplies in. Up until now I’ve been using two Rubbermaid Action packers on the drawer top, but the taper on the sides makes it difficult to put them side by side and then they have to be bungi’ed down as well. So… enter Milwaukee’s PACKOUT system: interlocking boxes that snap into a baseplate, but separate with a button press. Something like this…

They’re on order… :crazy_face:

3 Likes

Oh wow, dude! This looks great!

Before you go too far with the propane side, could you make the top the slider? If it clears the door, it could make for a nice work surface/table. Then again, your kitchen is formidable at this point.

And I was just looking at the stackable tool cases at Homie D’s the other day and thinking how cheap they were. I eat looking at the Rigid brand, but yeah. What an excellent idea!

So the packout models are almost twice as much as the rigid and quite a bit more even than the DeWalt tough system, but… The form factor is perfect, and the way they lock together is nicer… We shall see.

As far as the propane compartment, much of it resides behind the rear curvature or the edge of the back door itself, so nothing would have room to slide out of there. Actually, if you look at the RHS vertical edge of the drawer, that is the absolute furthest right something can be installed yet slide and clear the door. I also need to be able to clear the back door table as well. So many moving parts. Lol.

The idea with this compartment is that access from the top will only be when the tank needs filling, so pretty infrequently. But my plan is to leave the tank in situ while using it to fuel my stove which will sit on the tailgate dropdown table. So I’ll slide the front cover off to run the hose, and when done with stove I simply tuck the hose back in and slide the front on again. On top I’ll probably have tie downs so things can get stored there.

Function has dictated every piece so far, so form may or may not come into play. Lol.

Absolutely fabulous!


Totally worth it.

2 Likes

Oh yeah. Those look great.

Parts arrived the day before yesterday (without duty or gst assessed!). Yesterday was the day to install. Put new housing on, plus new o-ring on water drain.

Time for a test drive?

Need to start it up first.

Looooong crank on startup, which I’d expect. Then ran good, minimal smoke. Went out the alley and up the hill, where I felt some hestitation at 2k rpm. Uh oh. Maybe some residual trapped air?

Another lap around the block. Better. May as well go for it. Just out of town and onto a secondary road. Up to 100kph. All good: almost no smoke except under WOT. Again, expected.

So. It appears this particular drama is solved. Air ingress, and fuel pressure loss via the filter heater and possibly the fuel plunger. Fixed both by replacing the unit with new.

To be certain… Need to do another cold start this morning and ensure it’s still golden. Fingers crossed!

2 Likes

Cold start yesterday. Back to drawing board. White smoke, running rough, etc. Sigh.