Landcruiser 70 series Rust-o-Mod: "OLBETSY ZX"

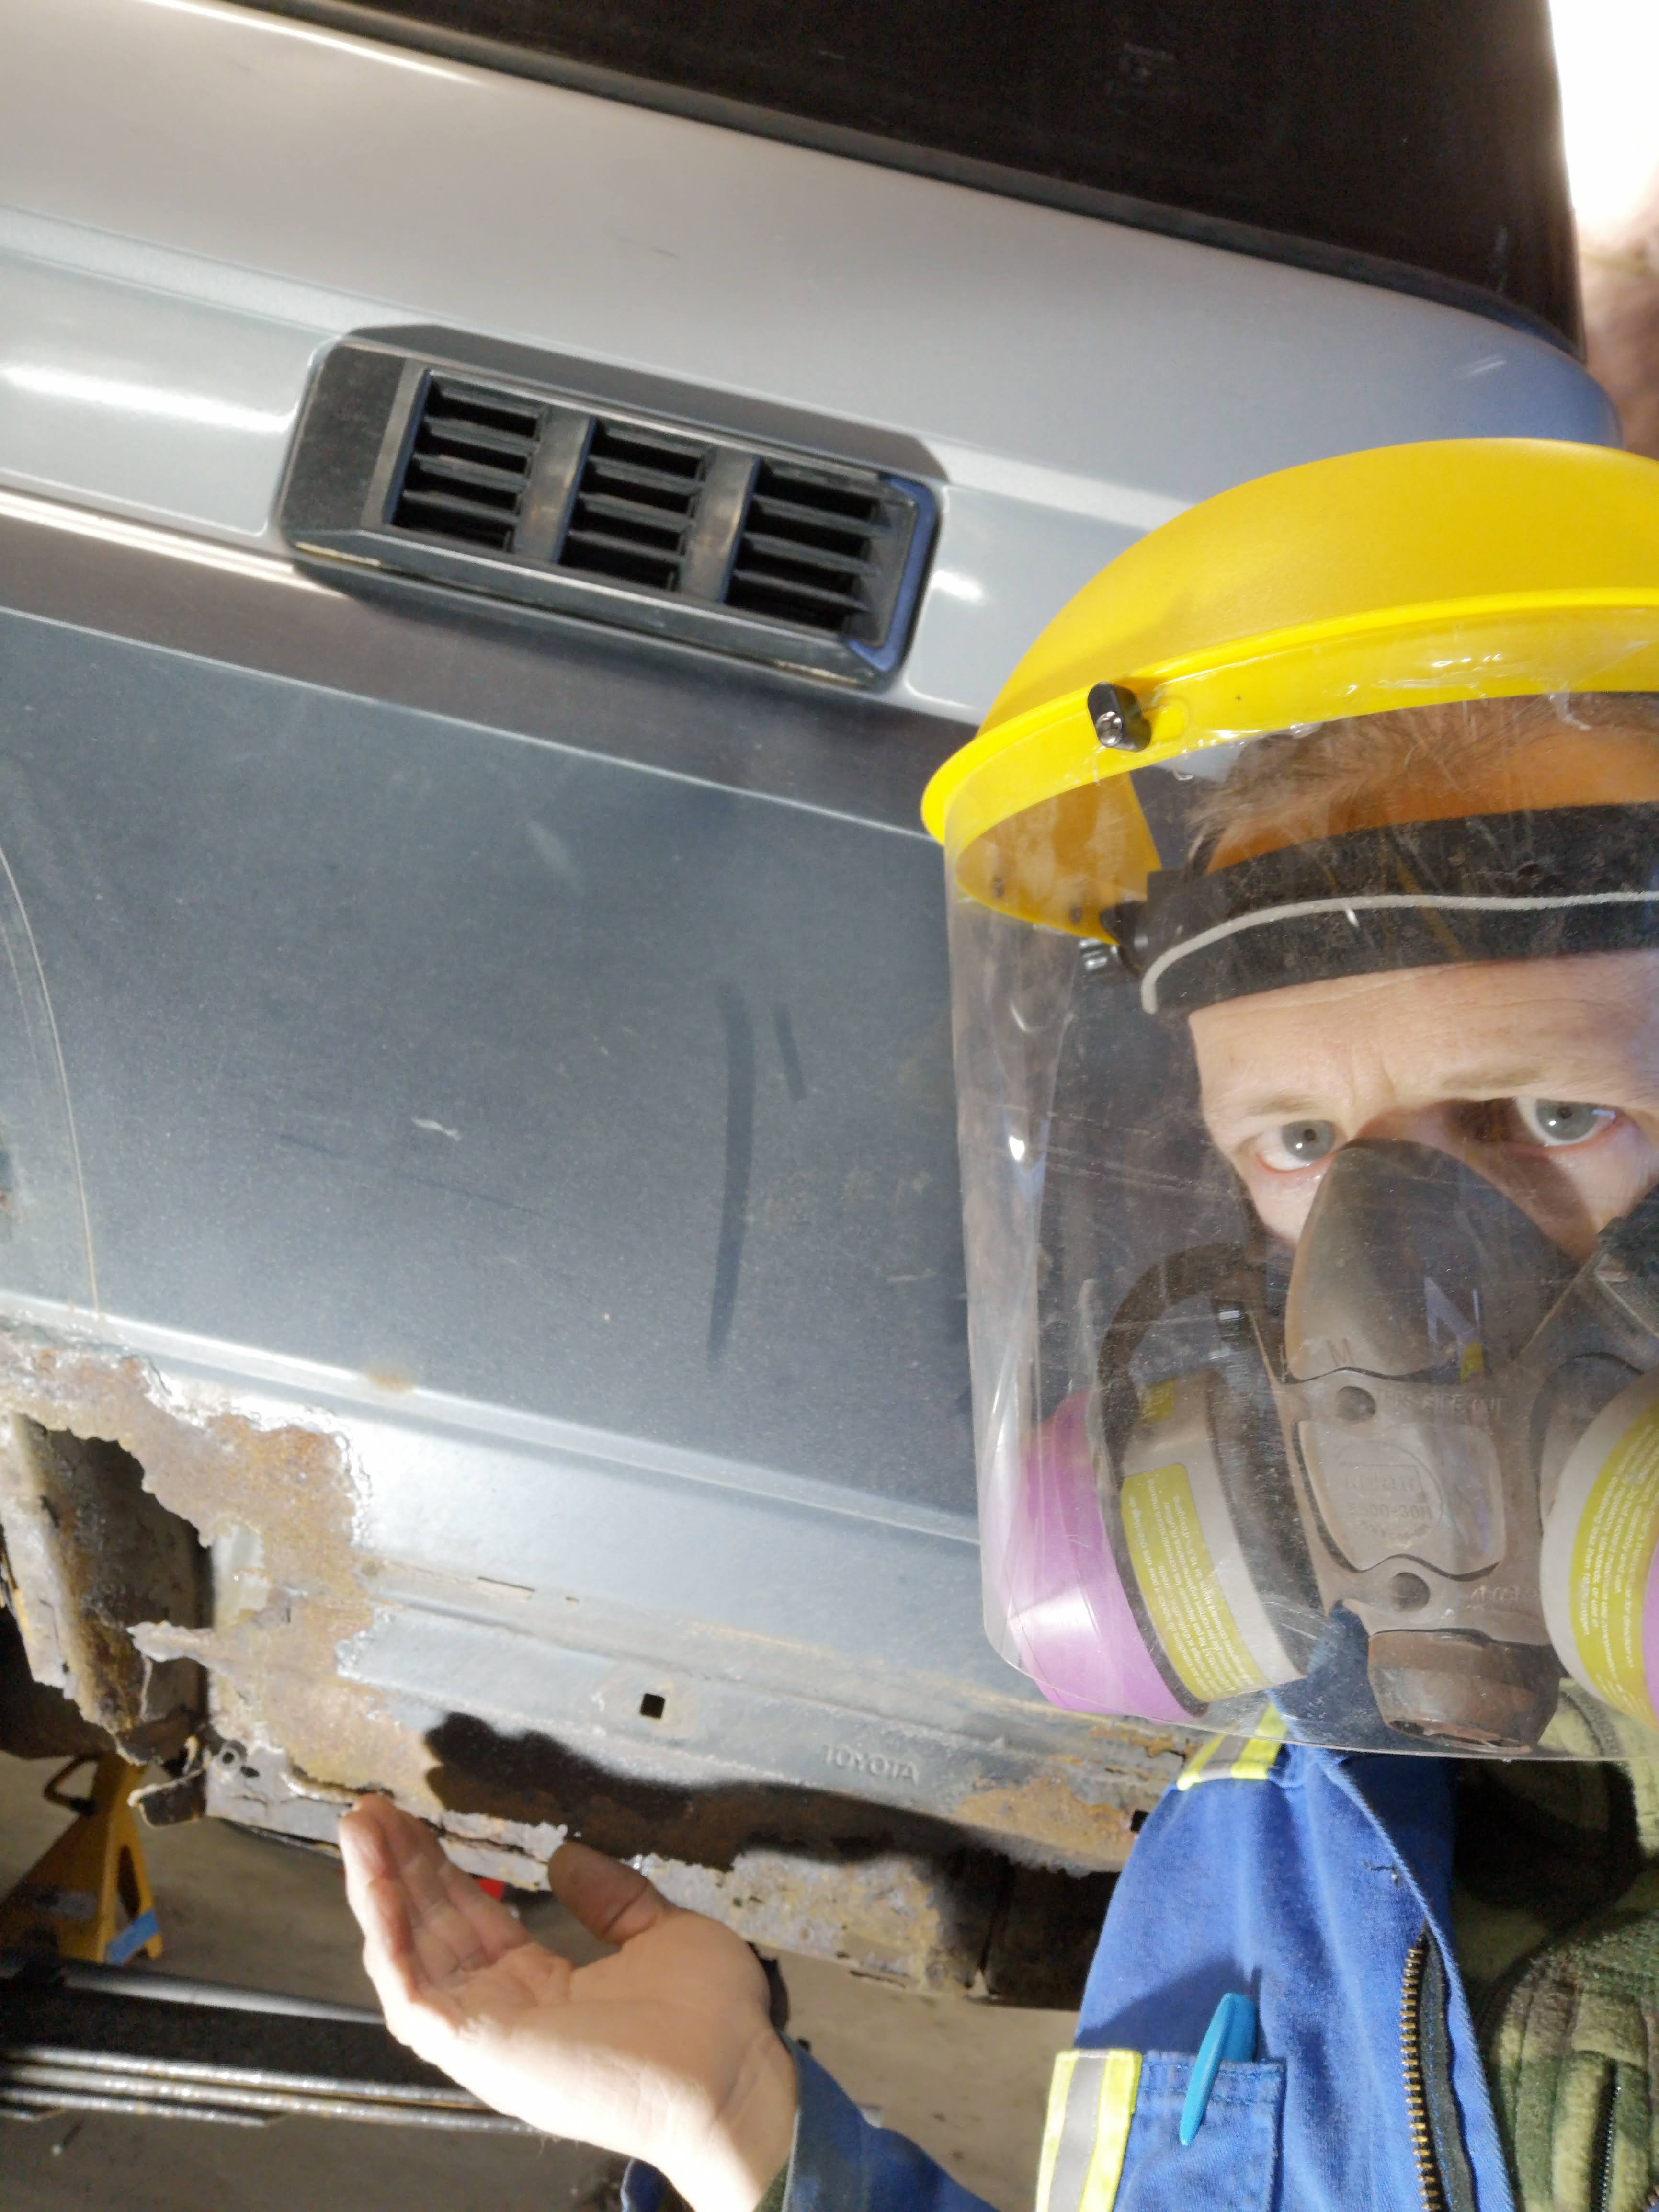
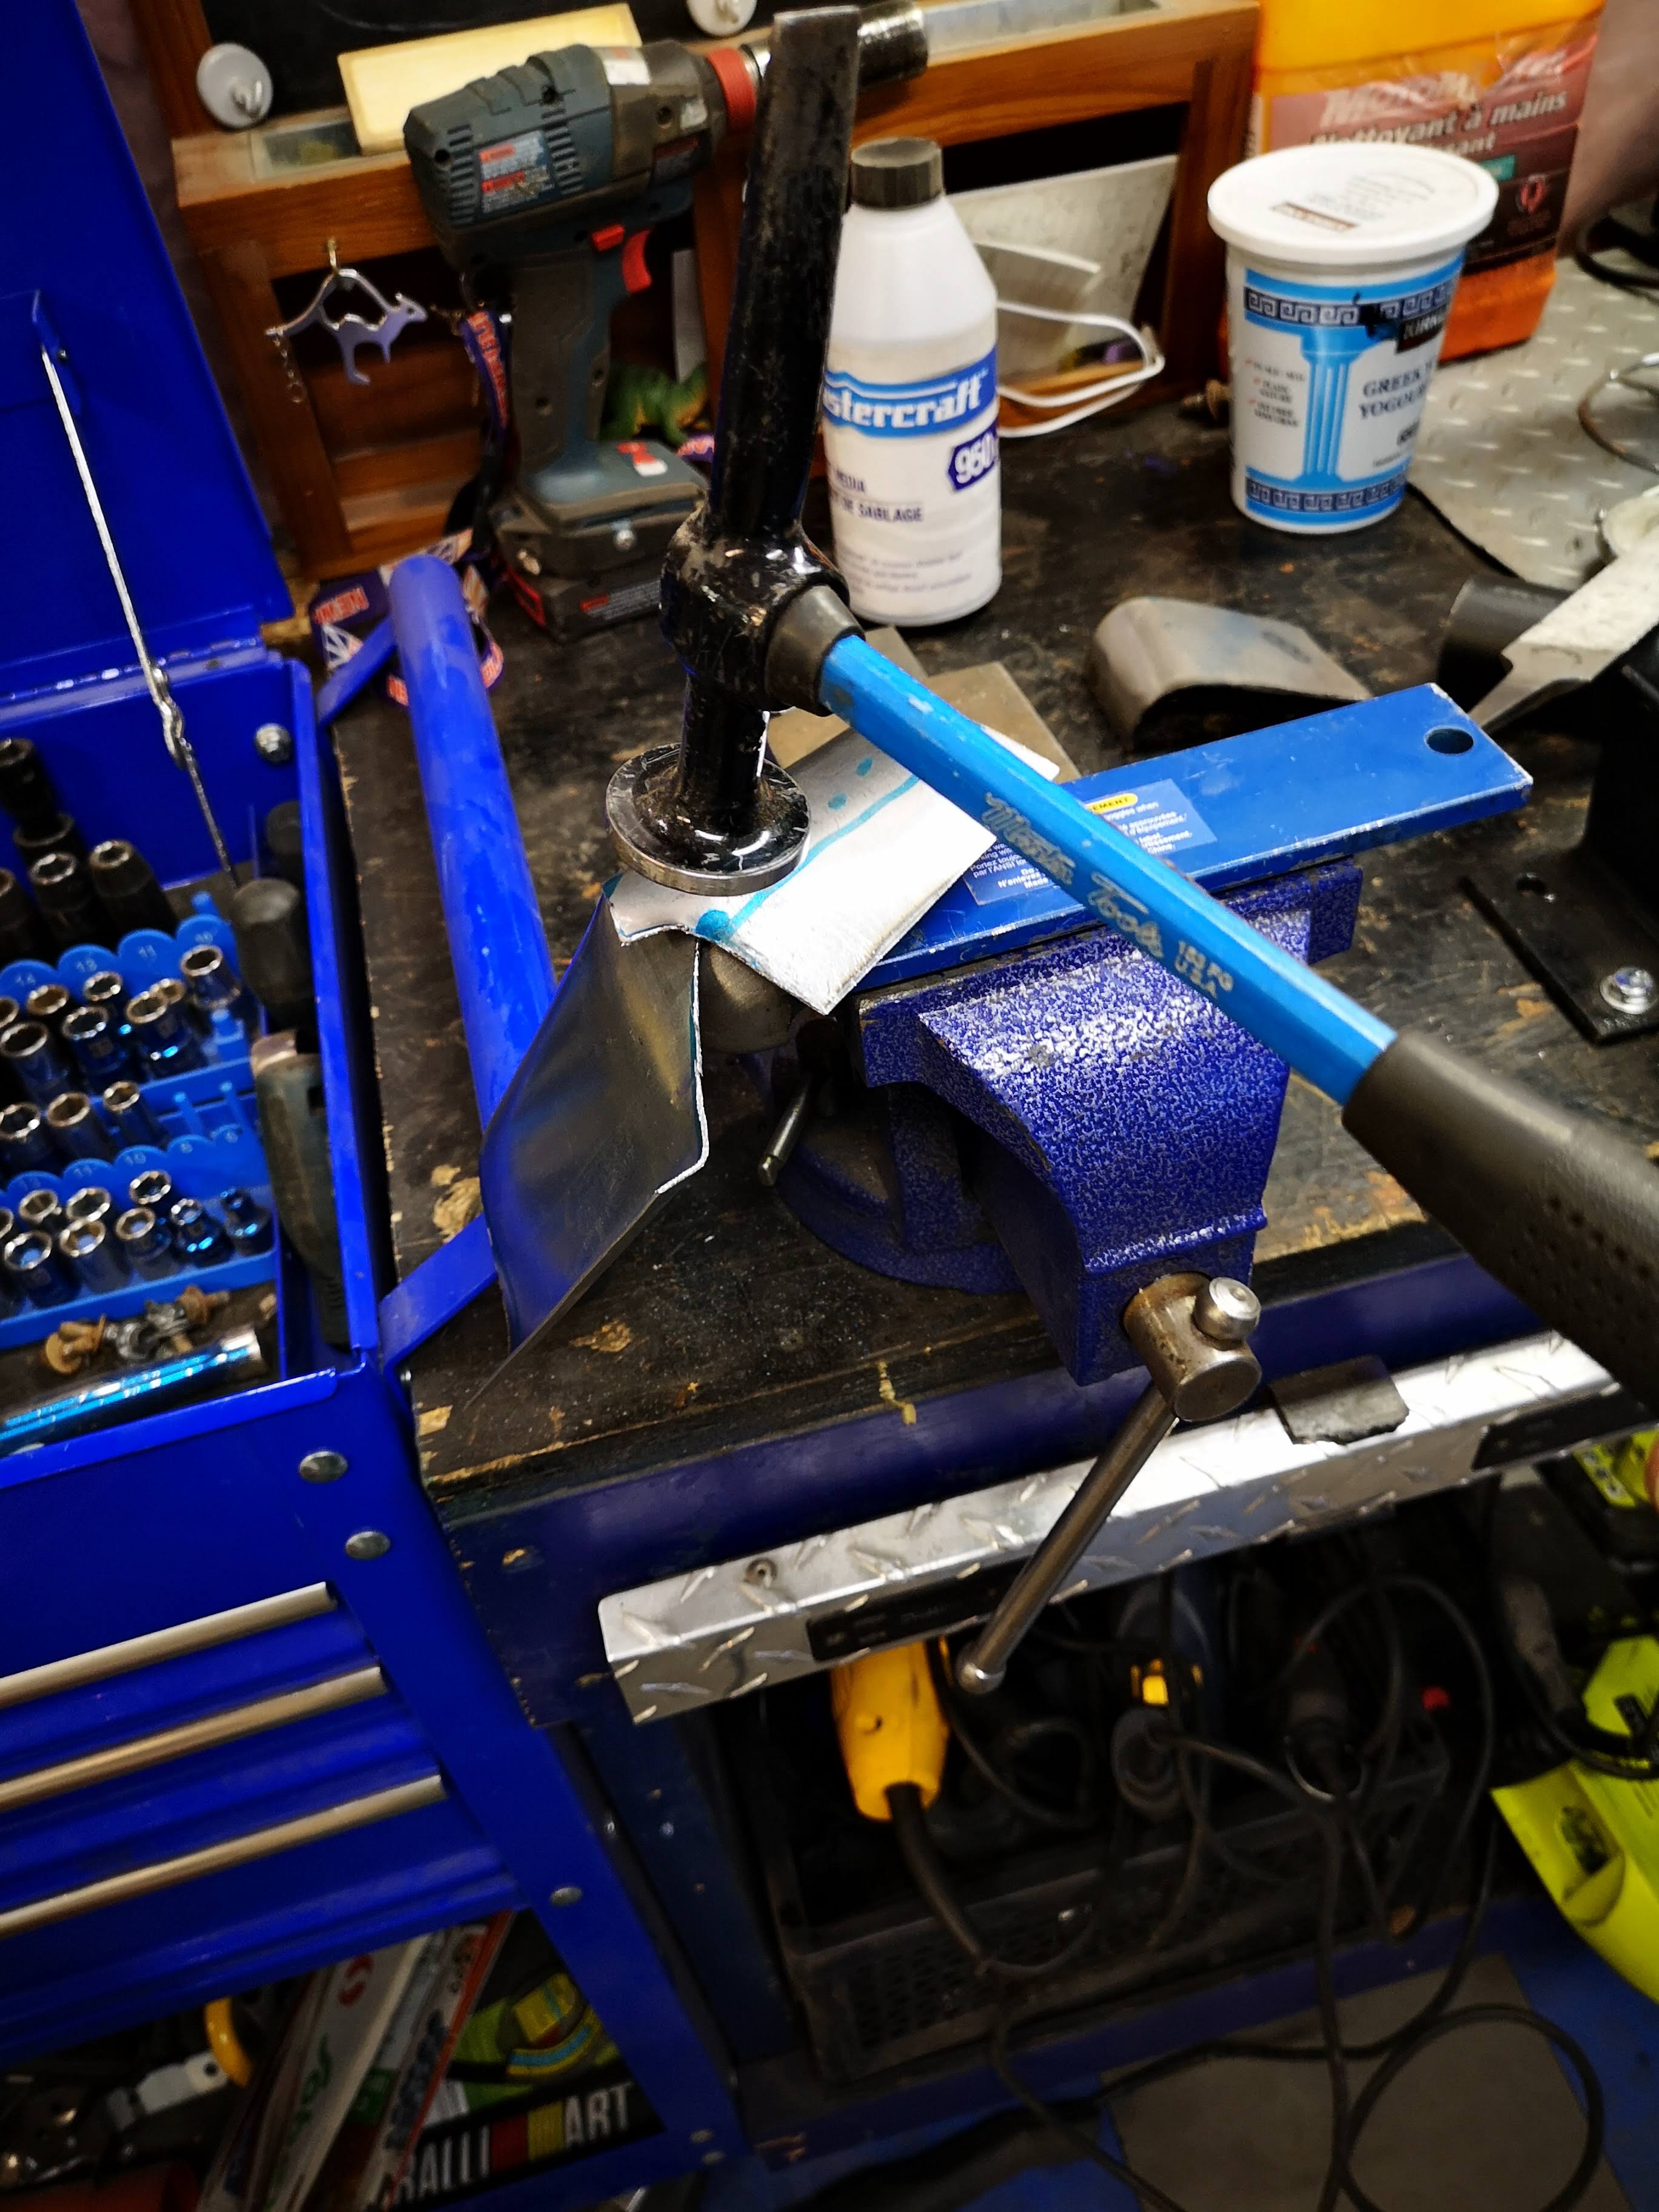
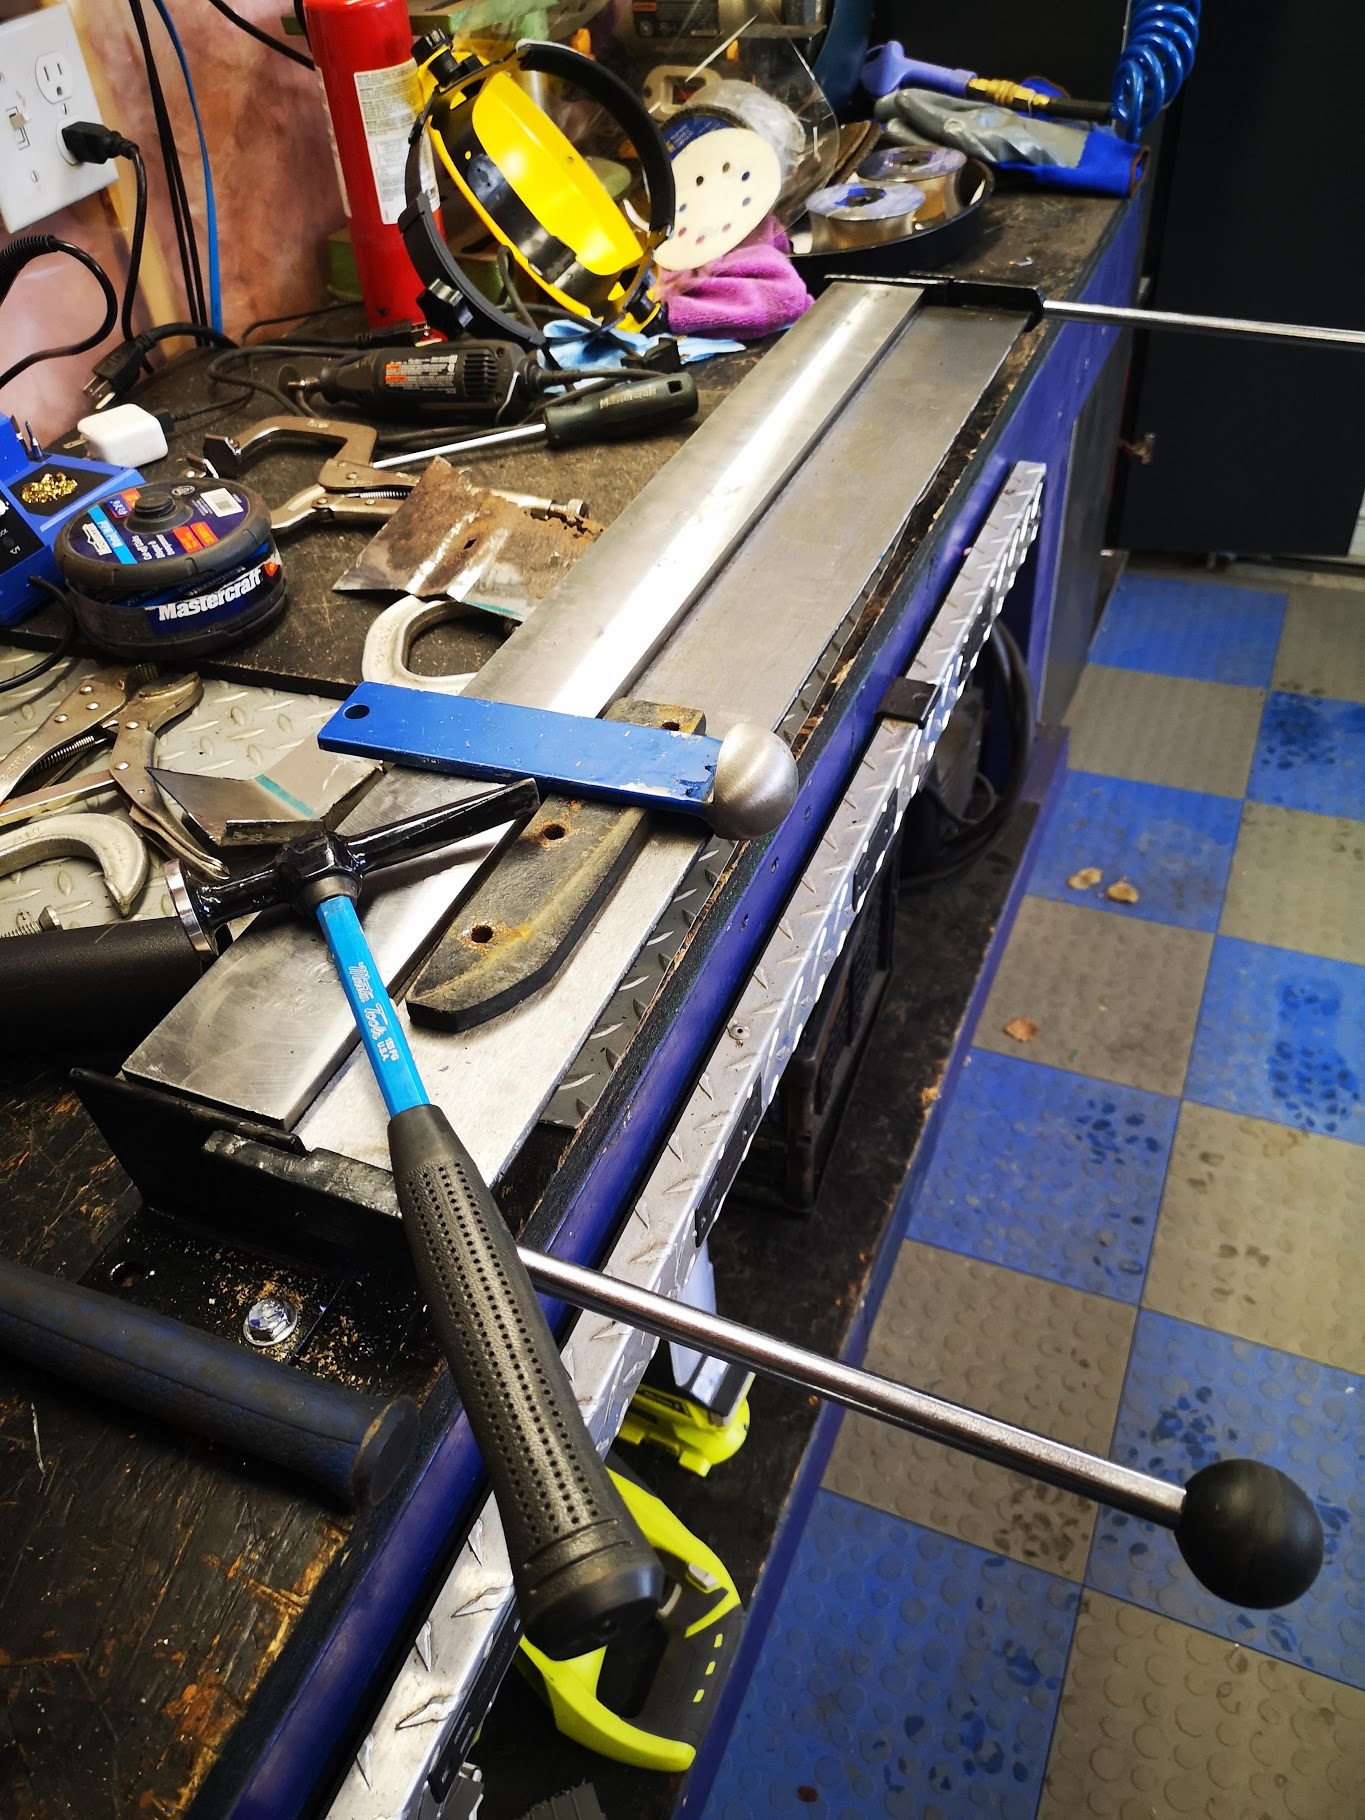
Been getting busy the past few days, cutting, grinding, bending, and hammering. Got some bodywork tools, a body hammer, a sheet metal bender, and oh yeah, heat in my garage! So it’s time to get the old 70 series back in shape.

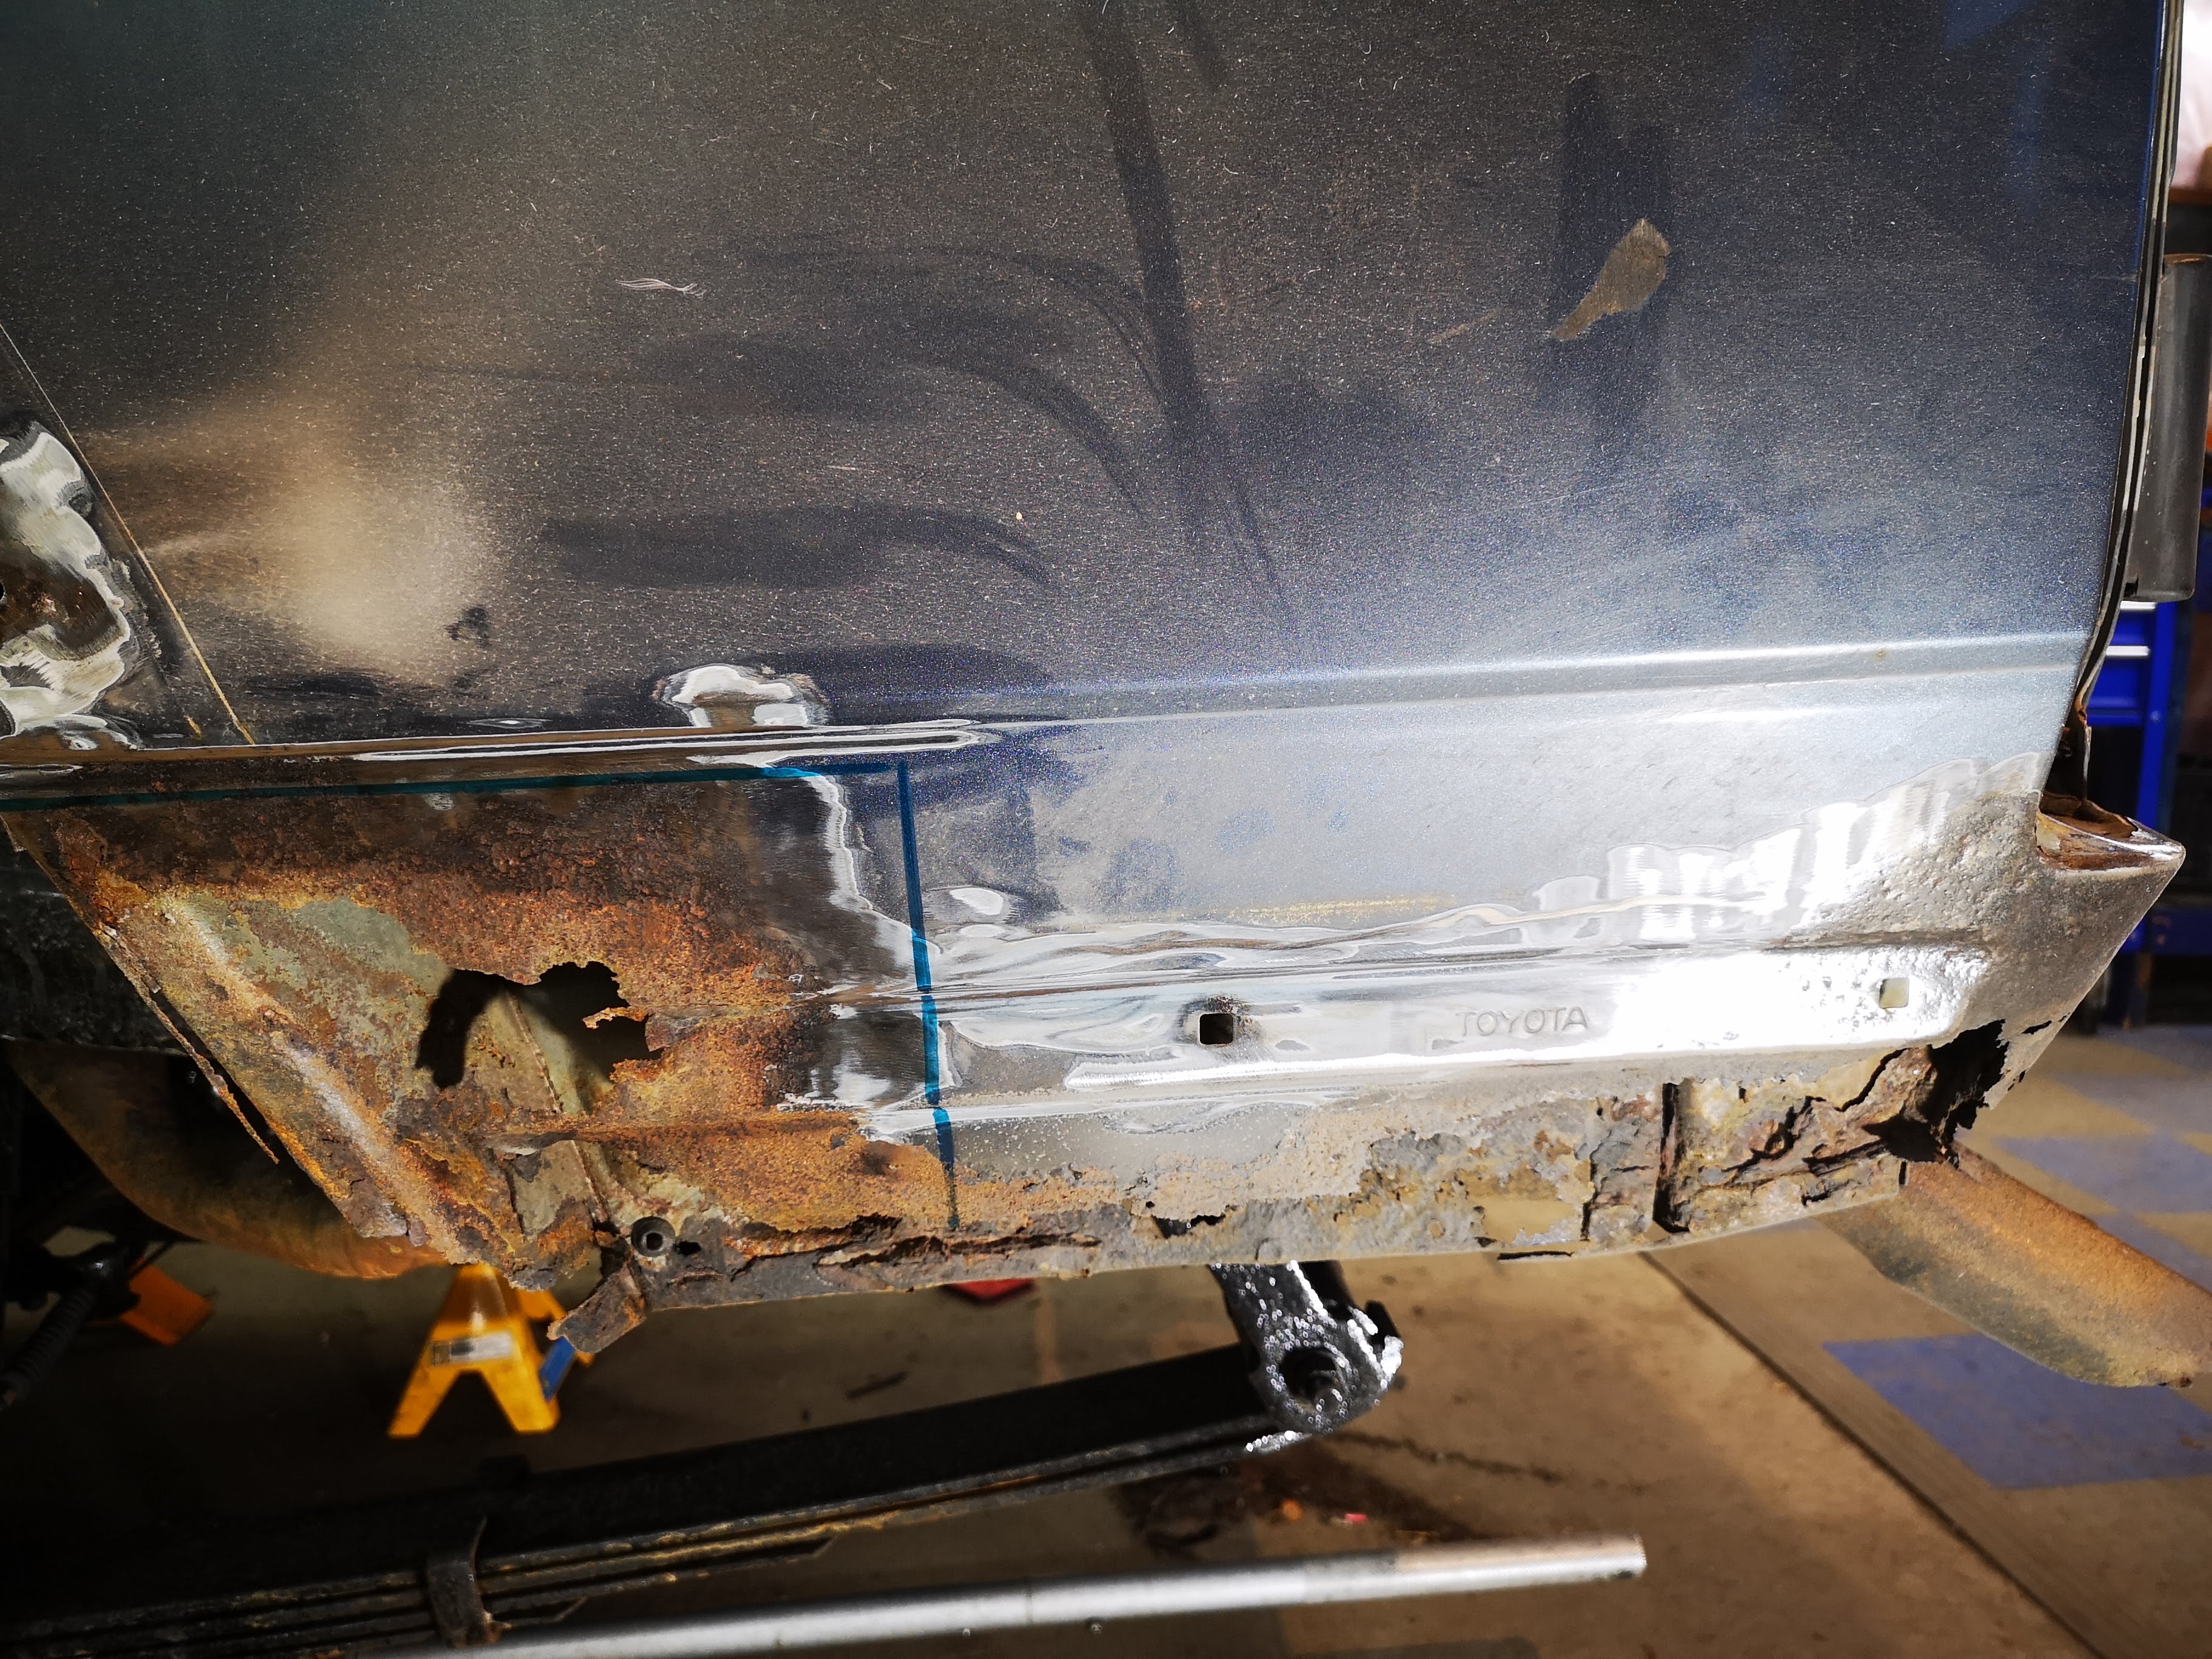
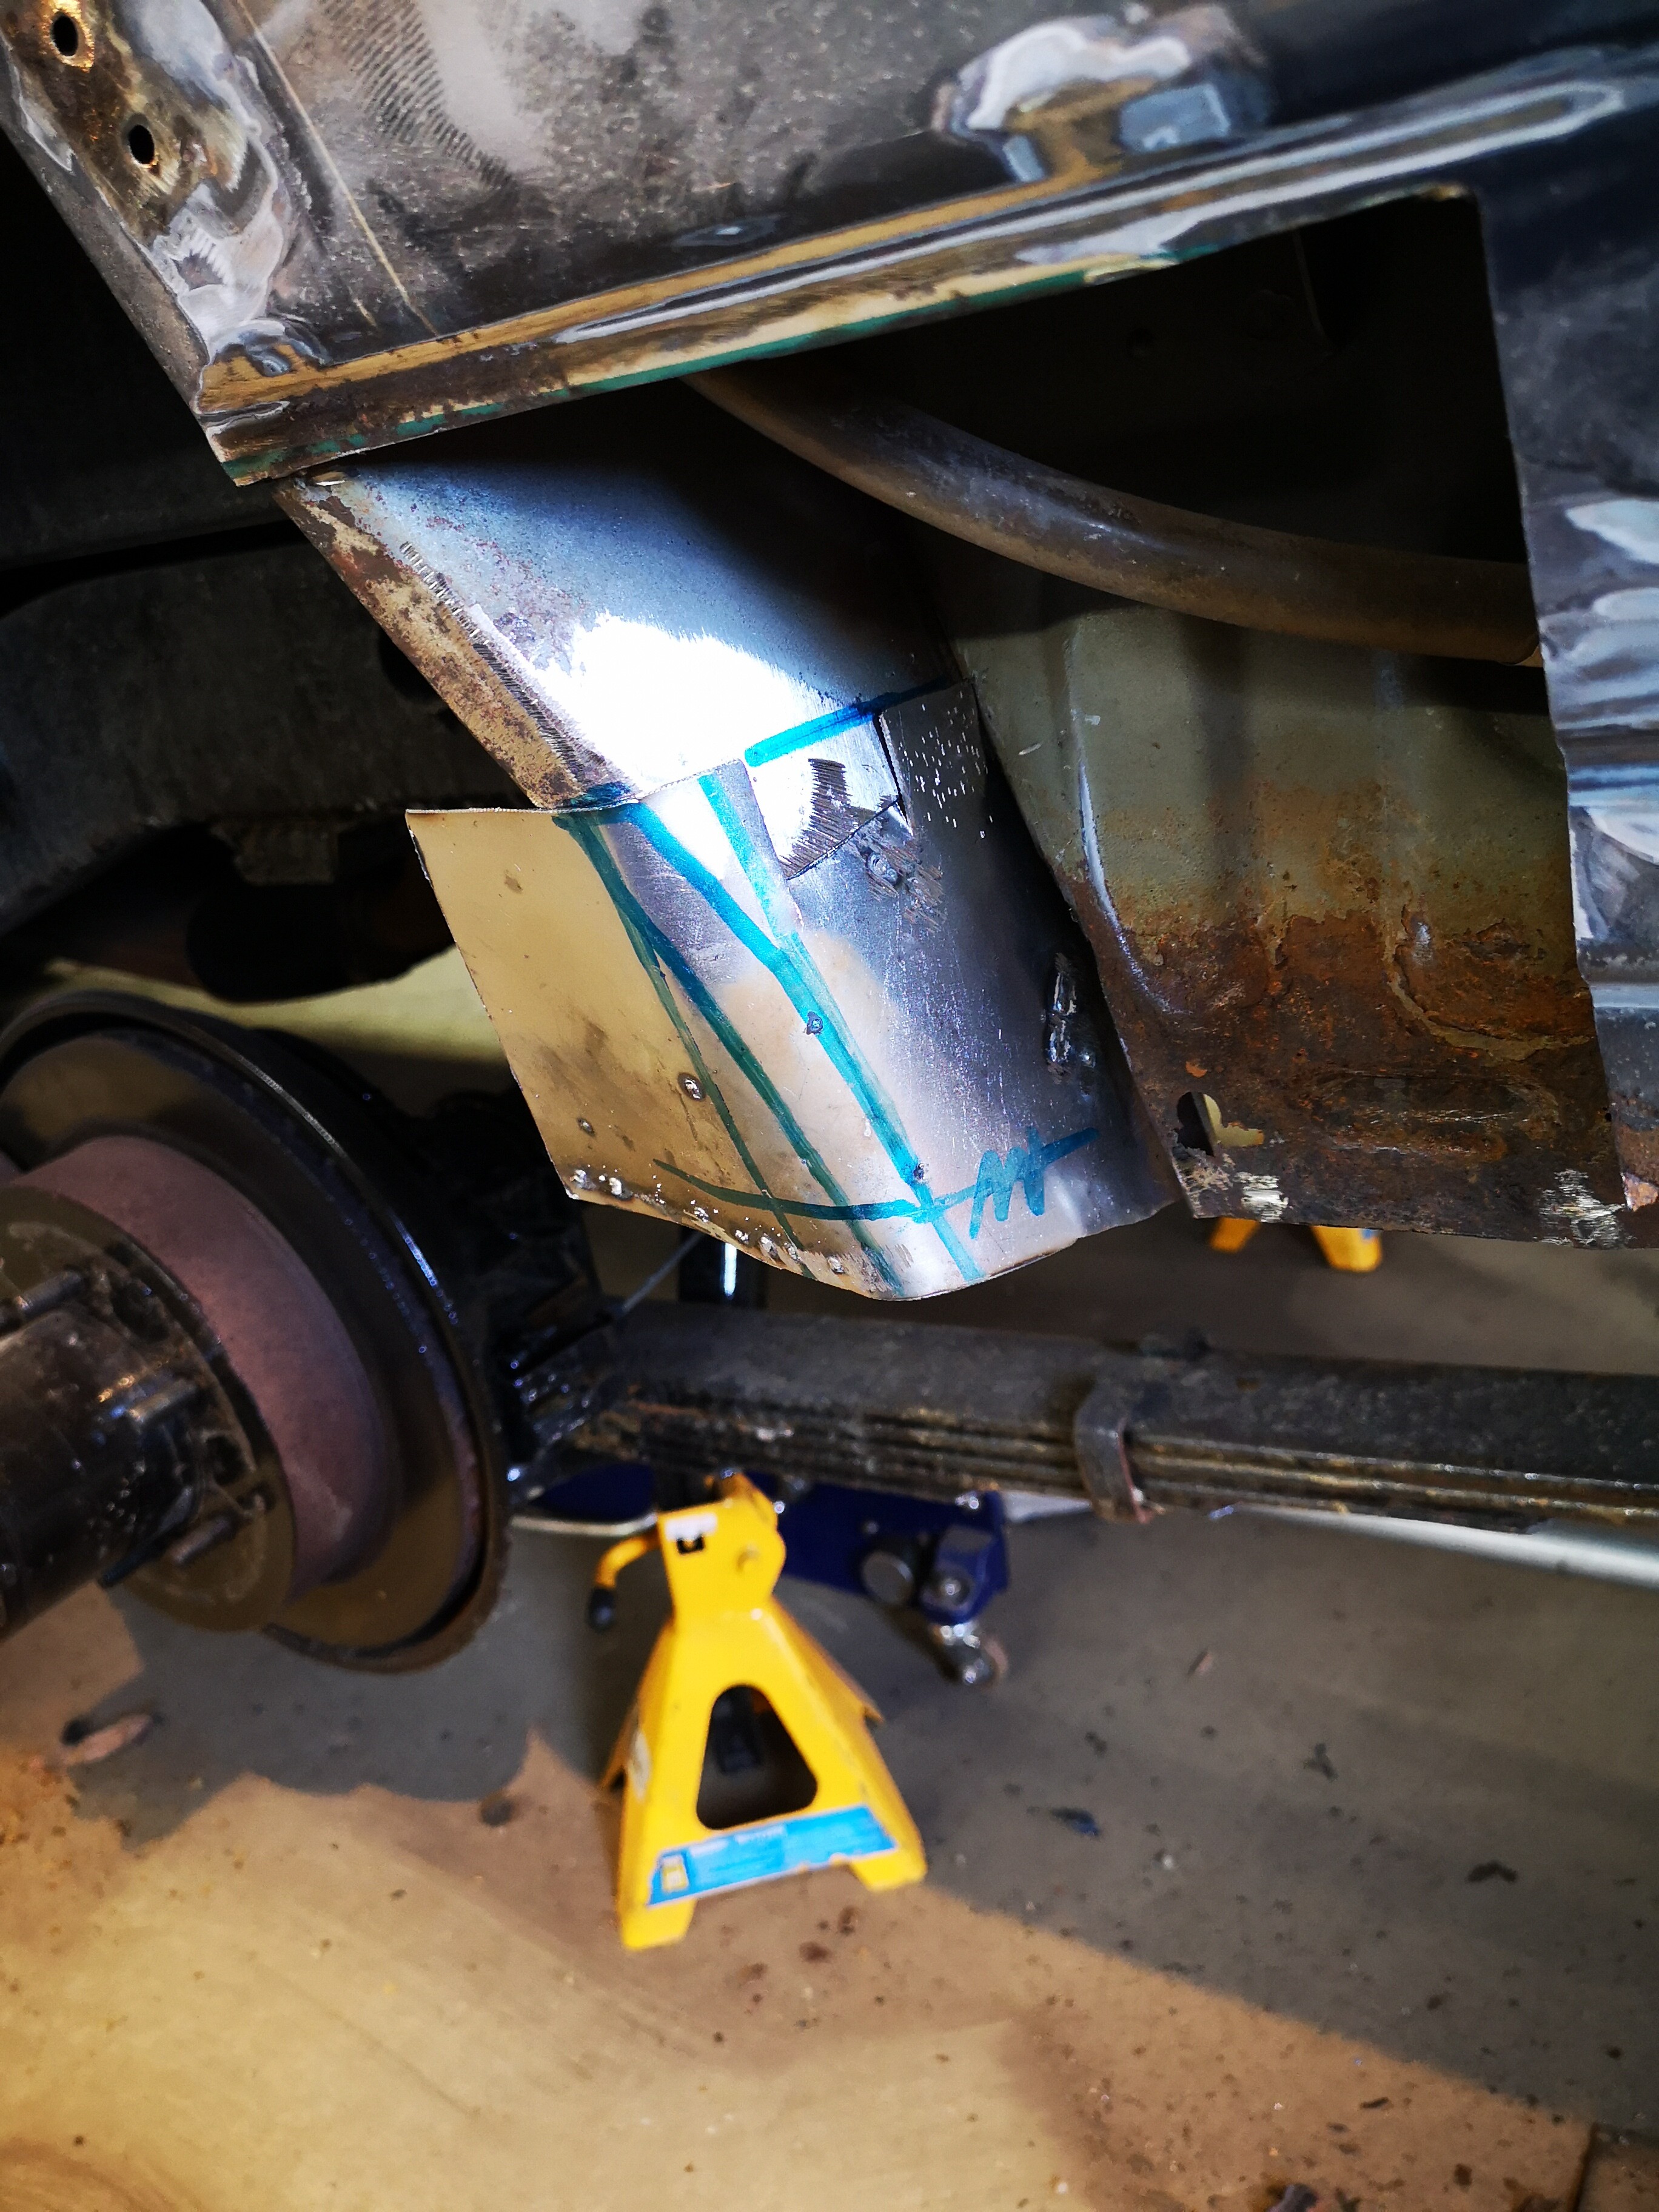
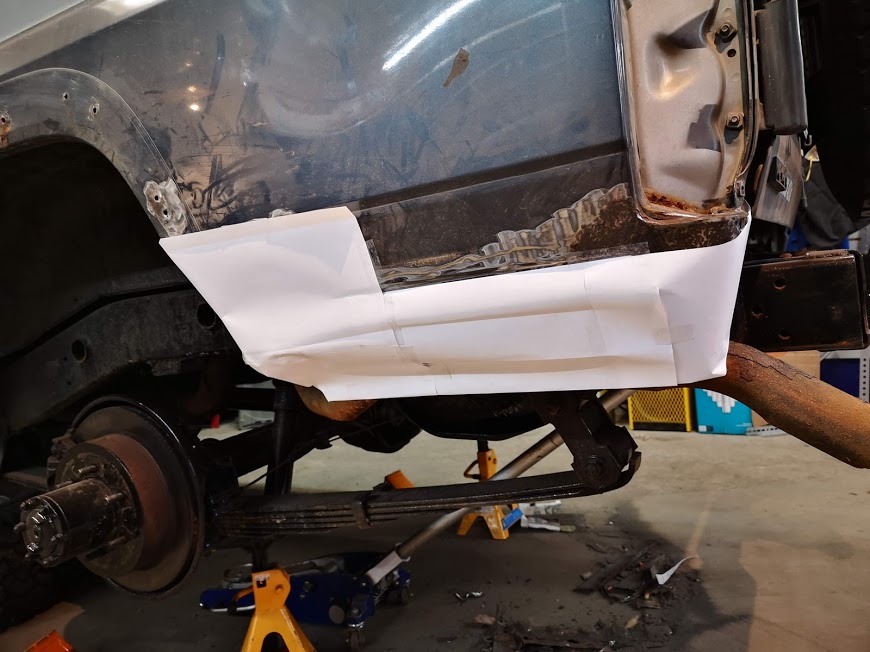
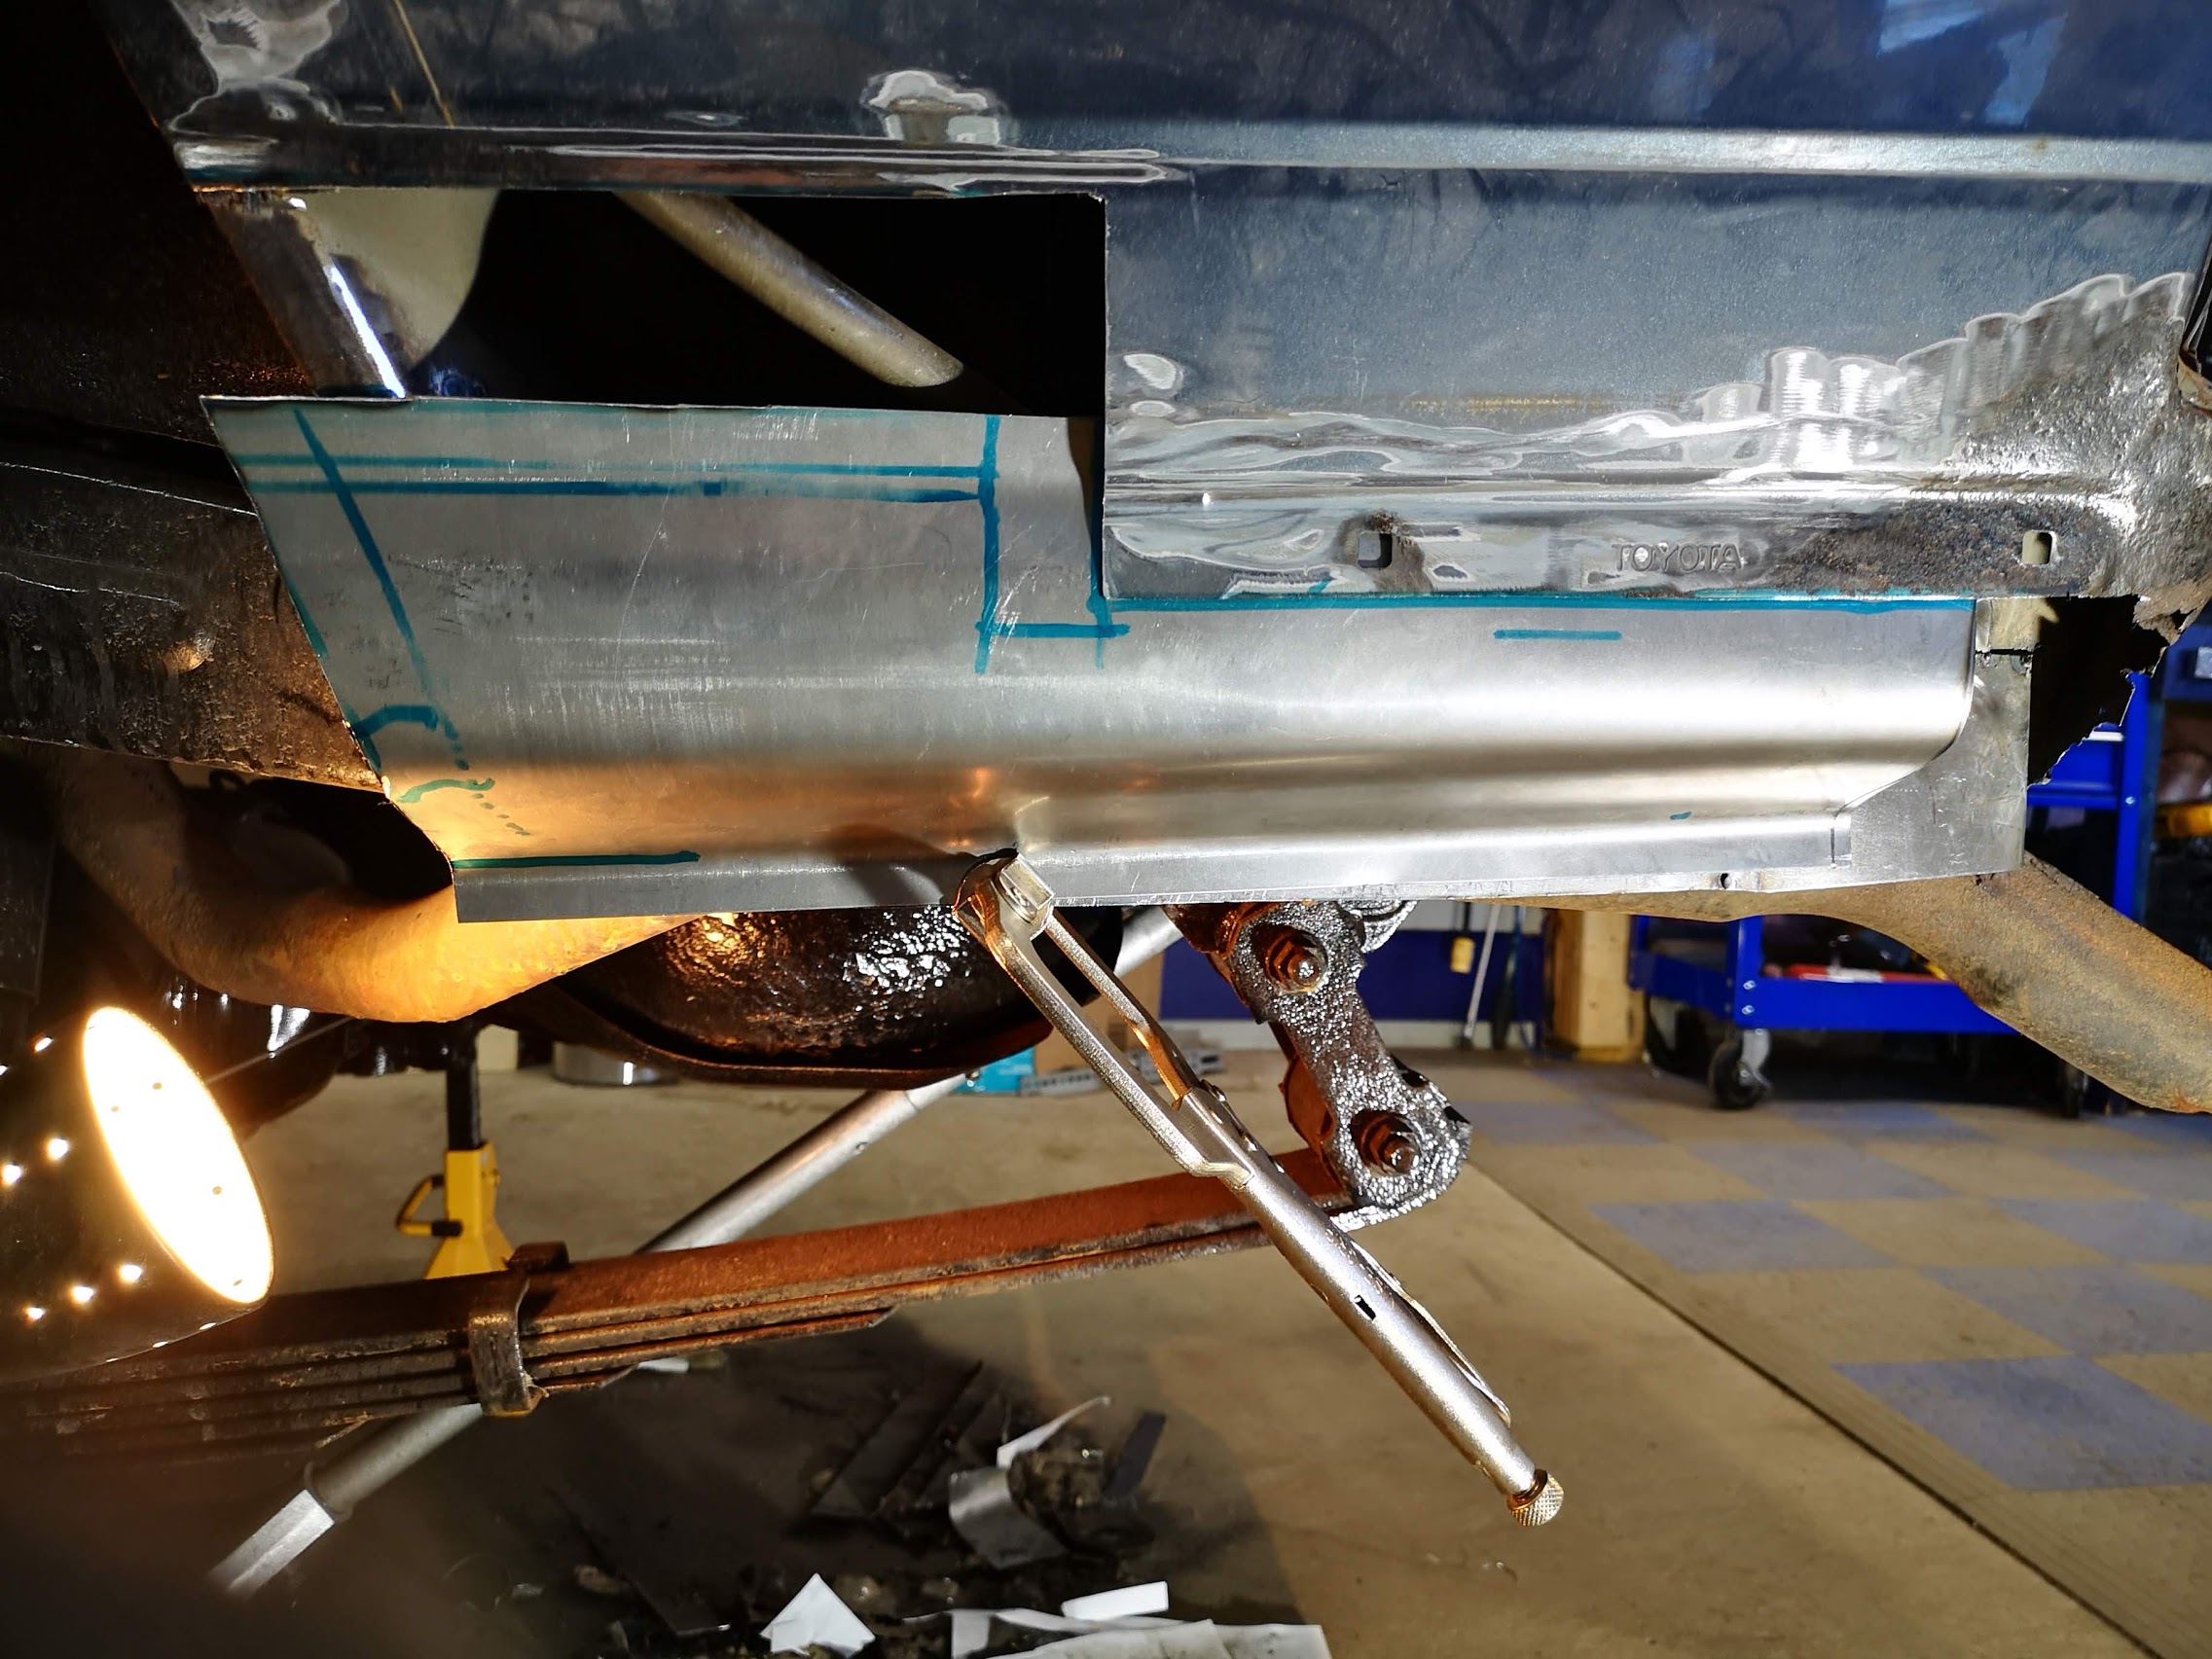
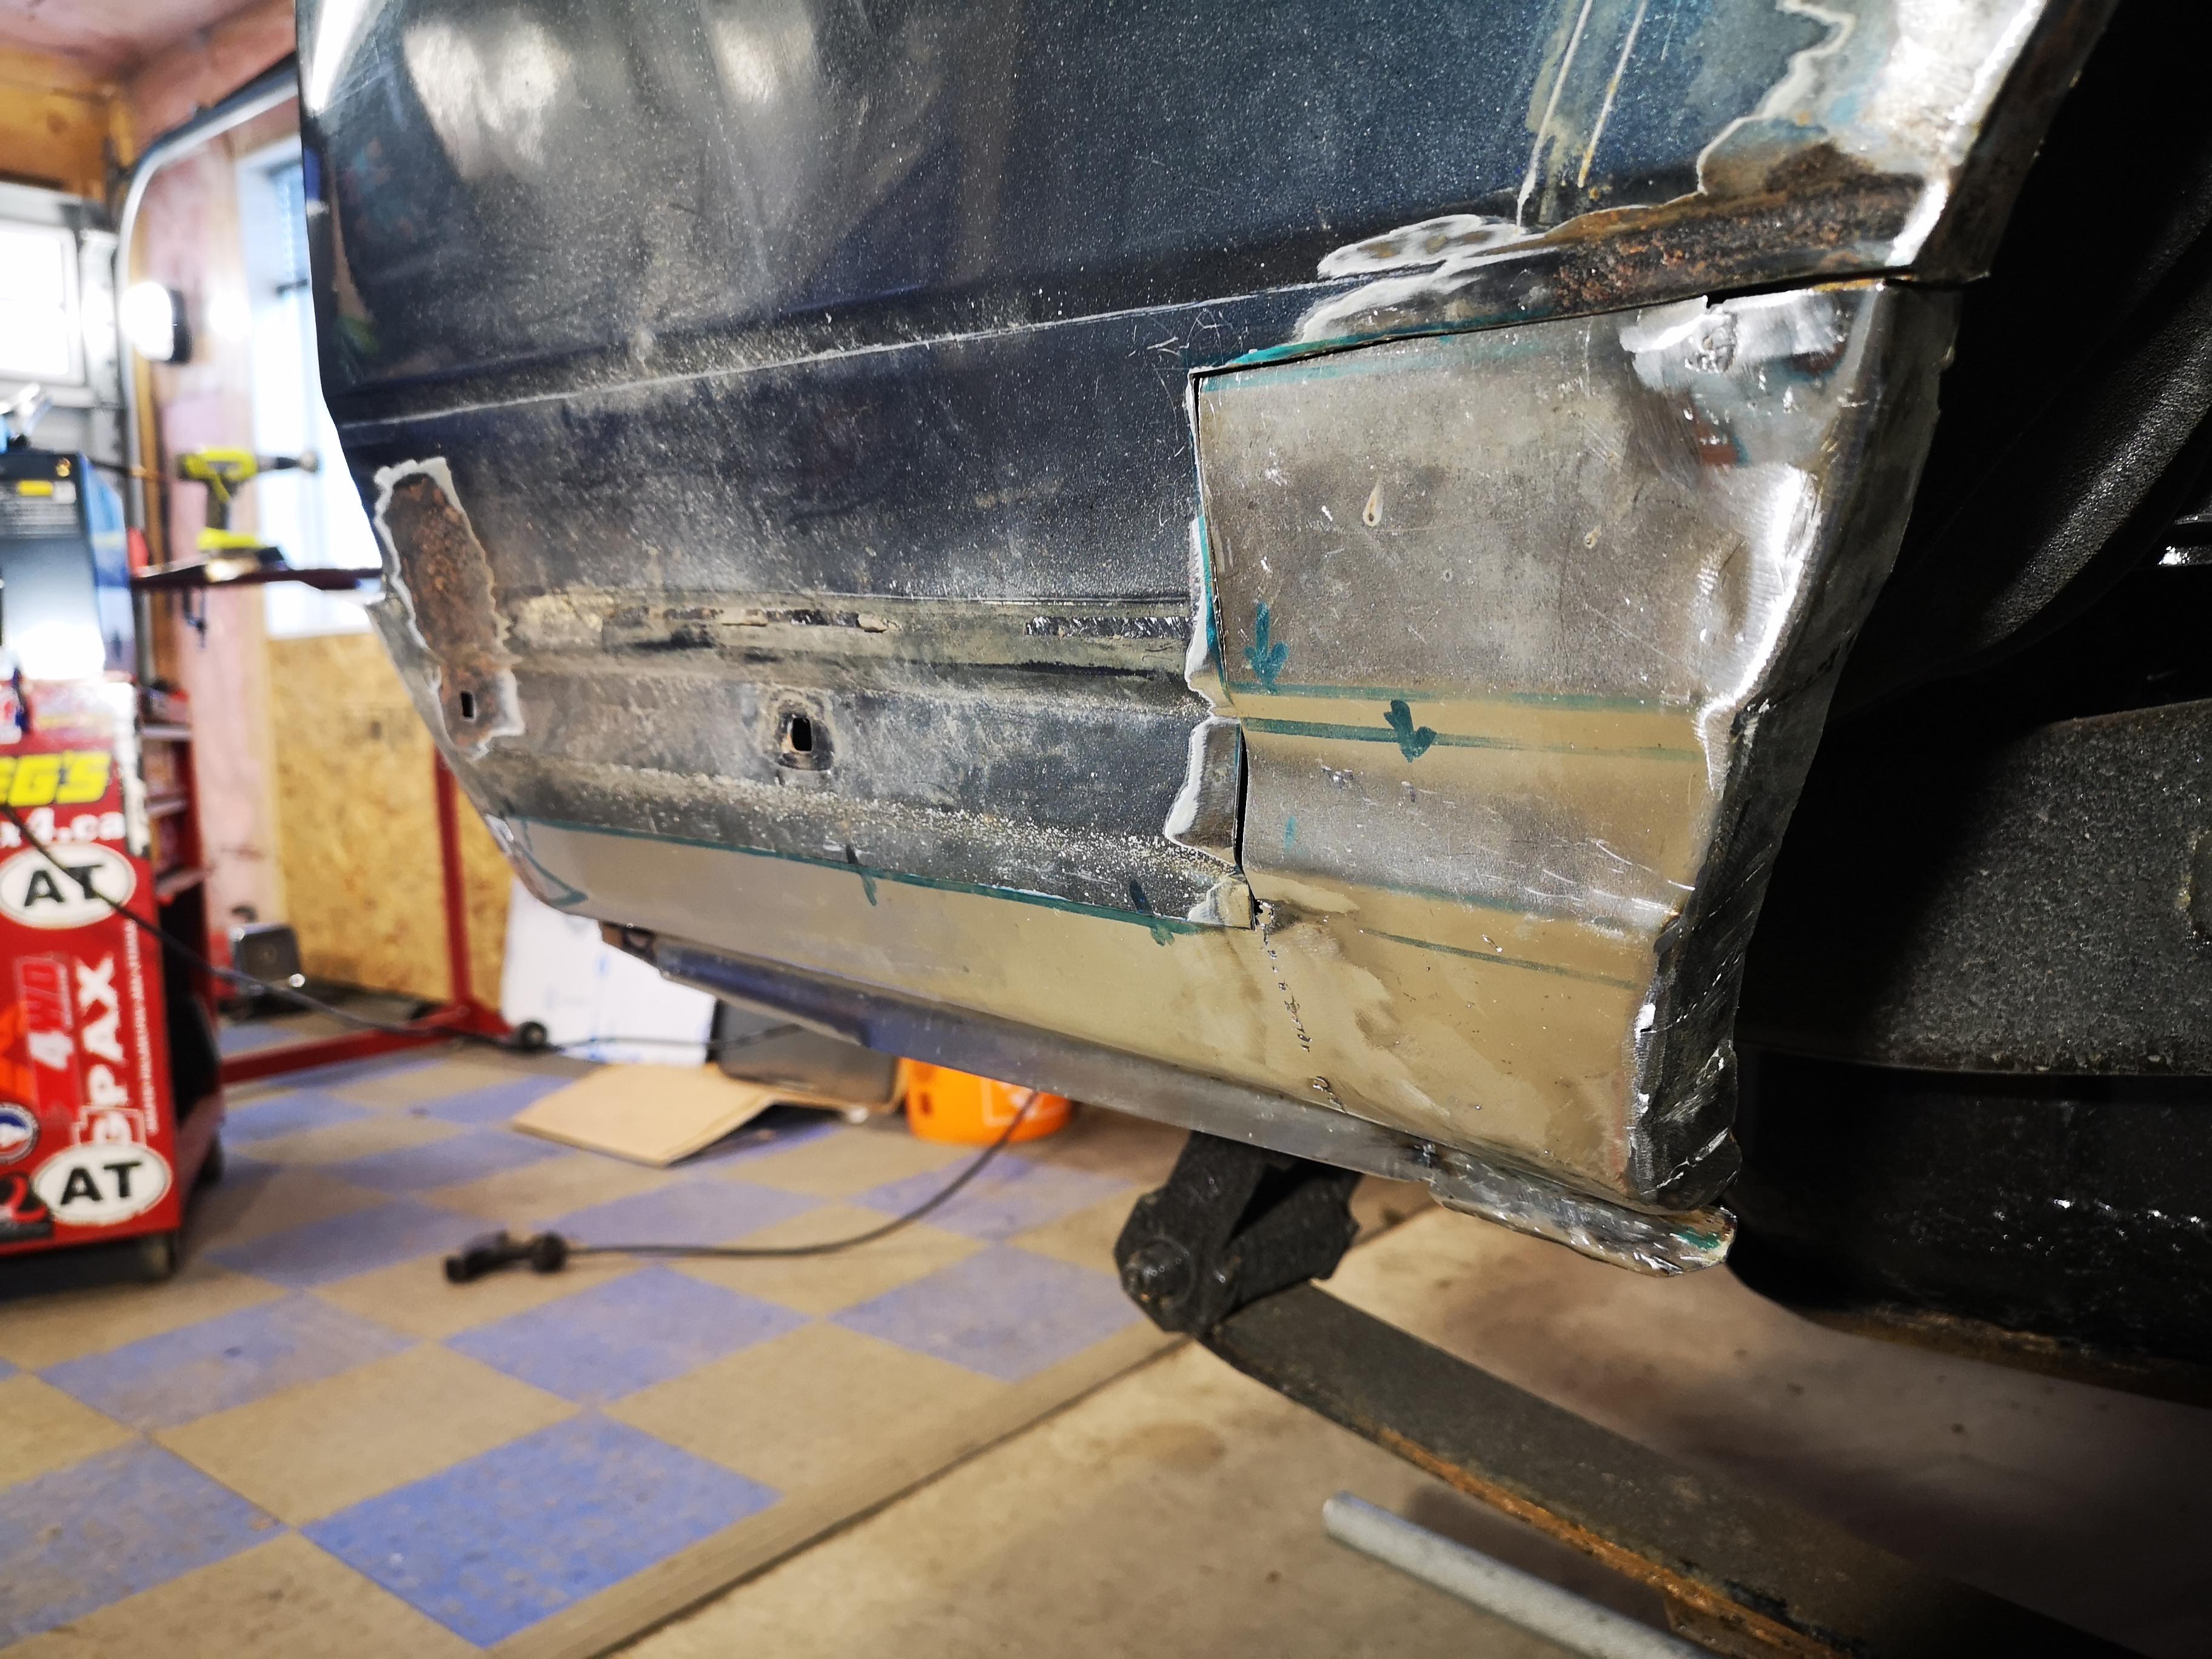
I decided to do the left rear quarter in two pieces. And of course I attempted what appeared to be the easier piece first. Here’s what I came up with (clamped in place for now)

I think I’m going to lap weld the top edge, butt weld the sides, and use panel glue on the bottom where it meets the lower edge. But I keep changing my mind on this. We’ll see…

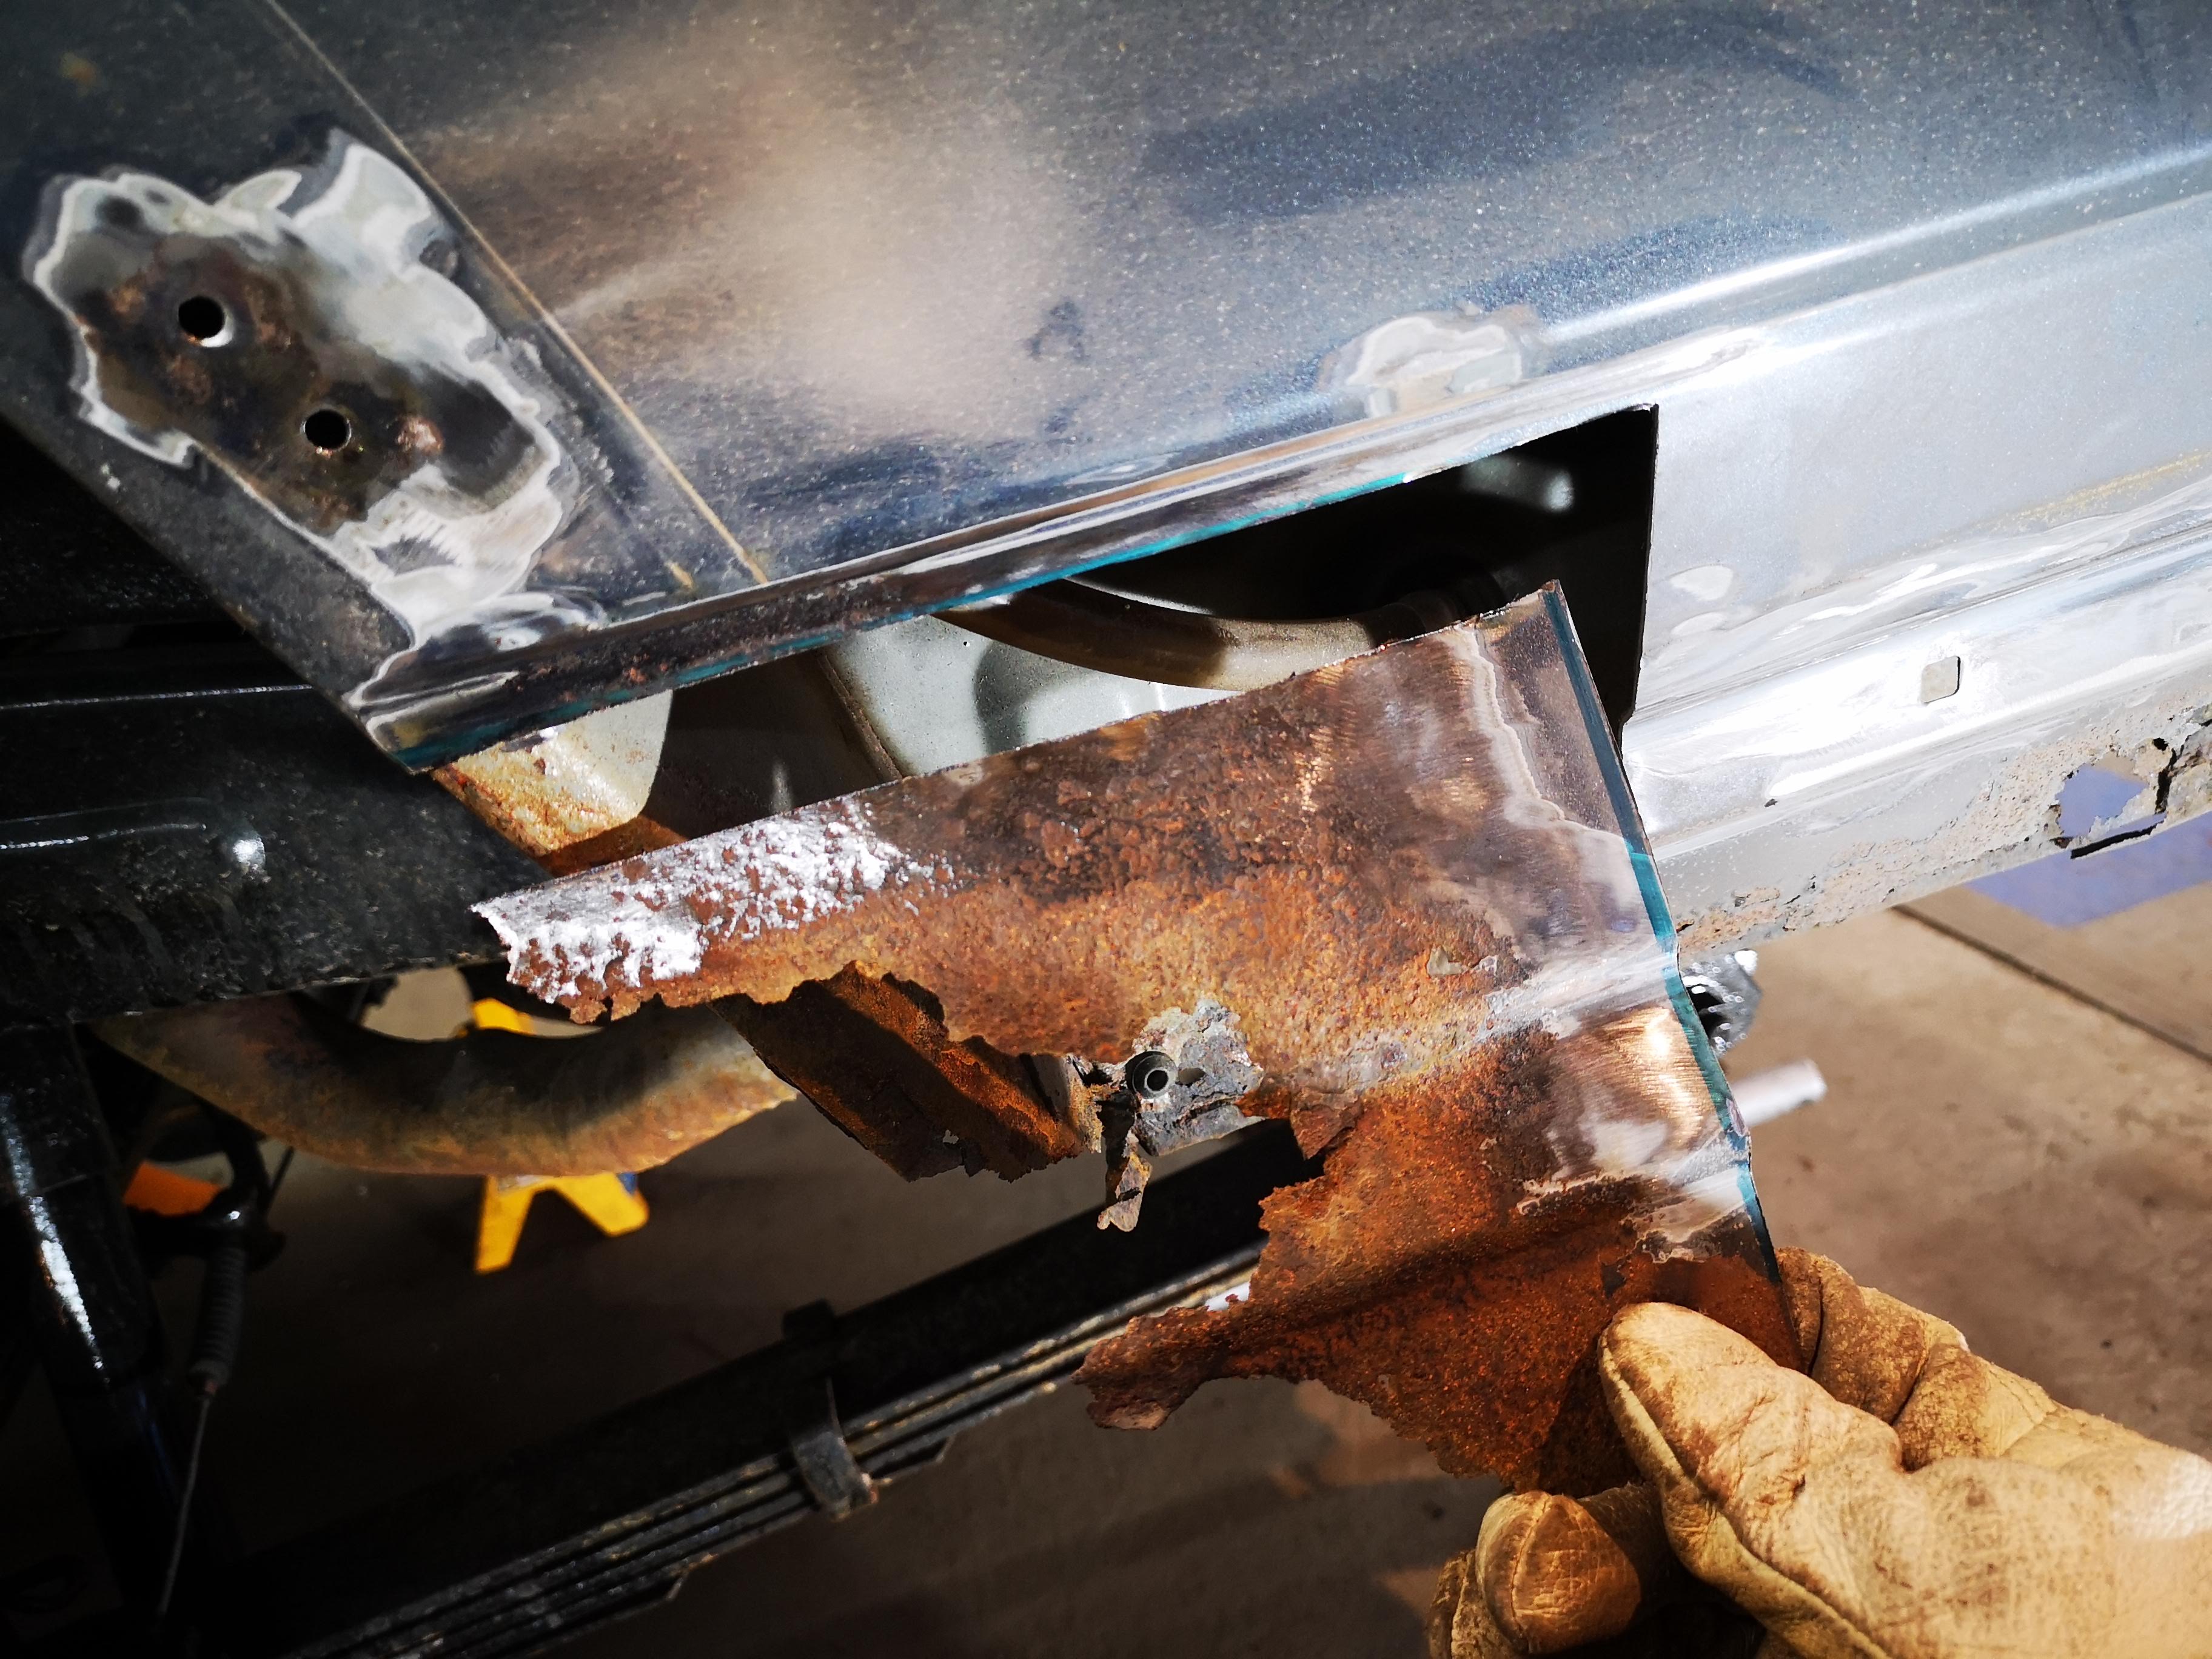
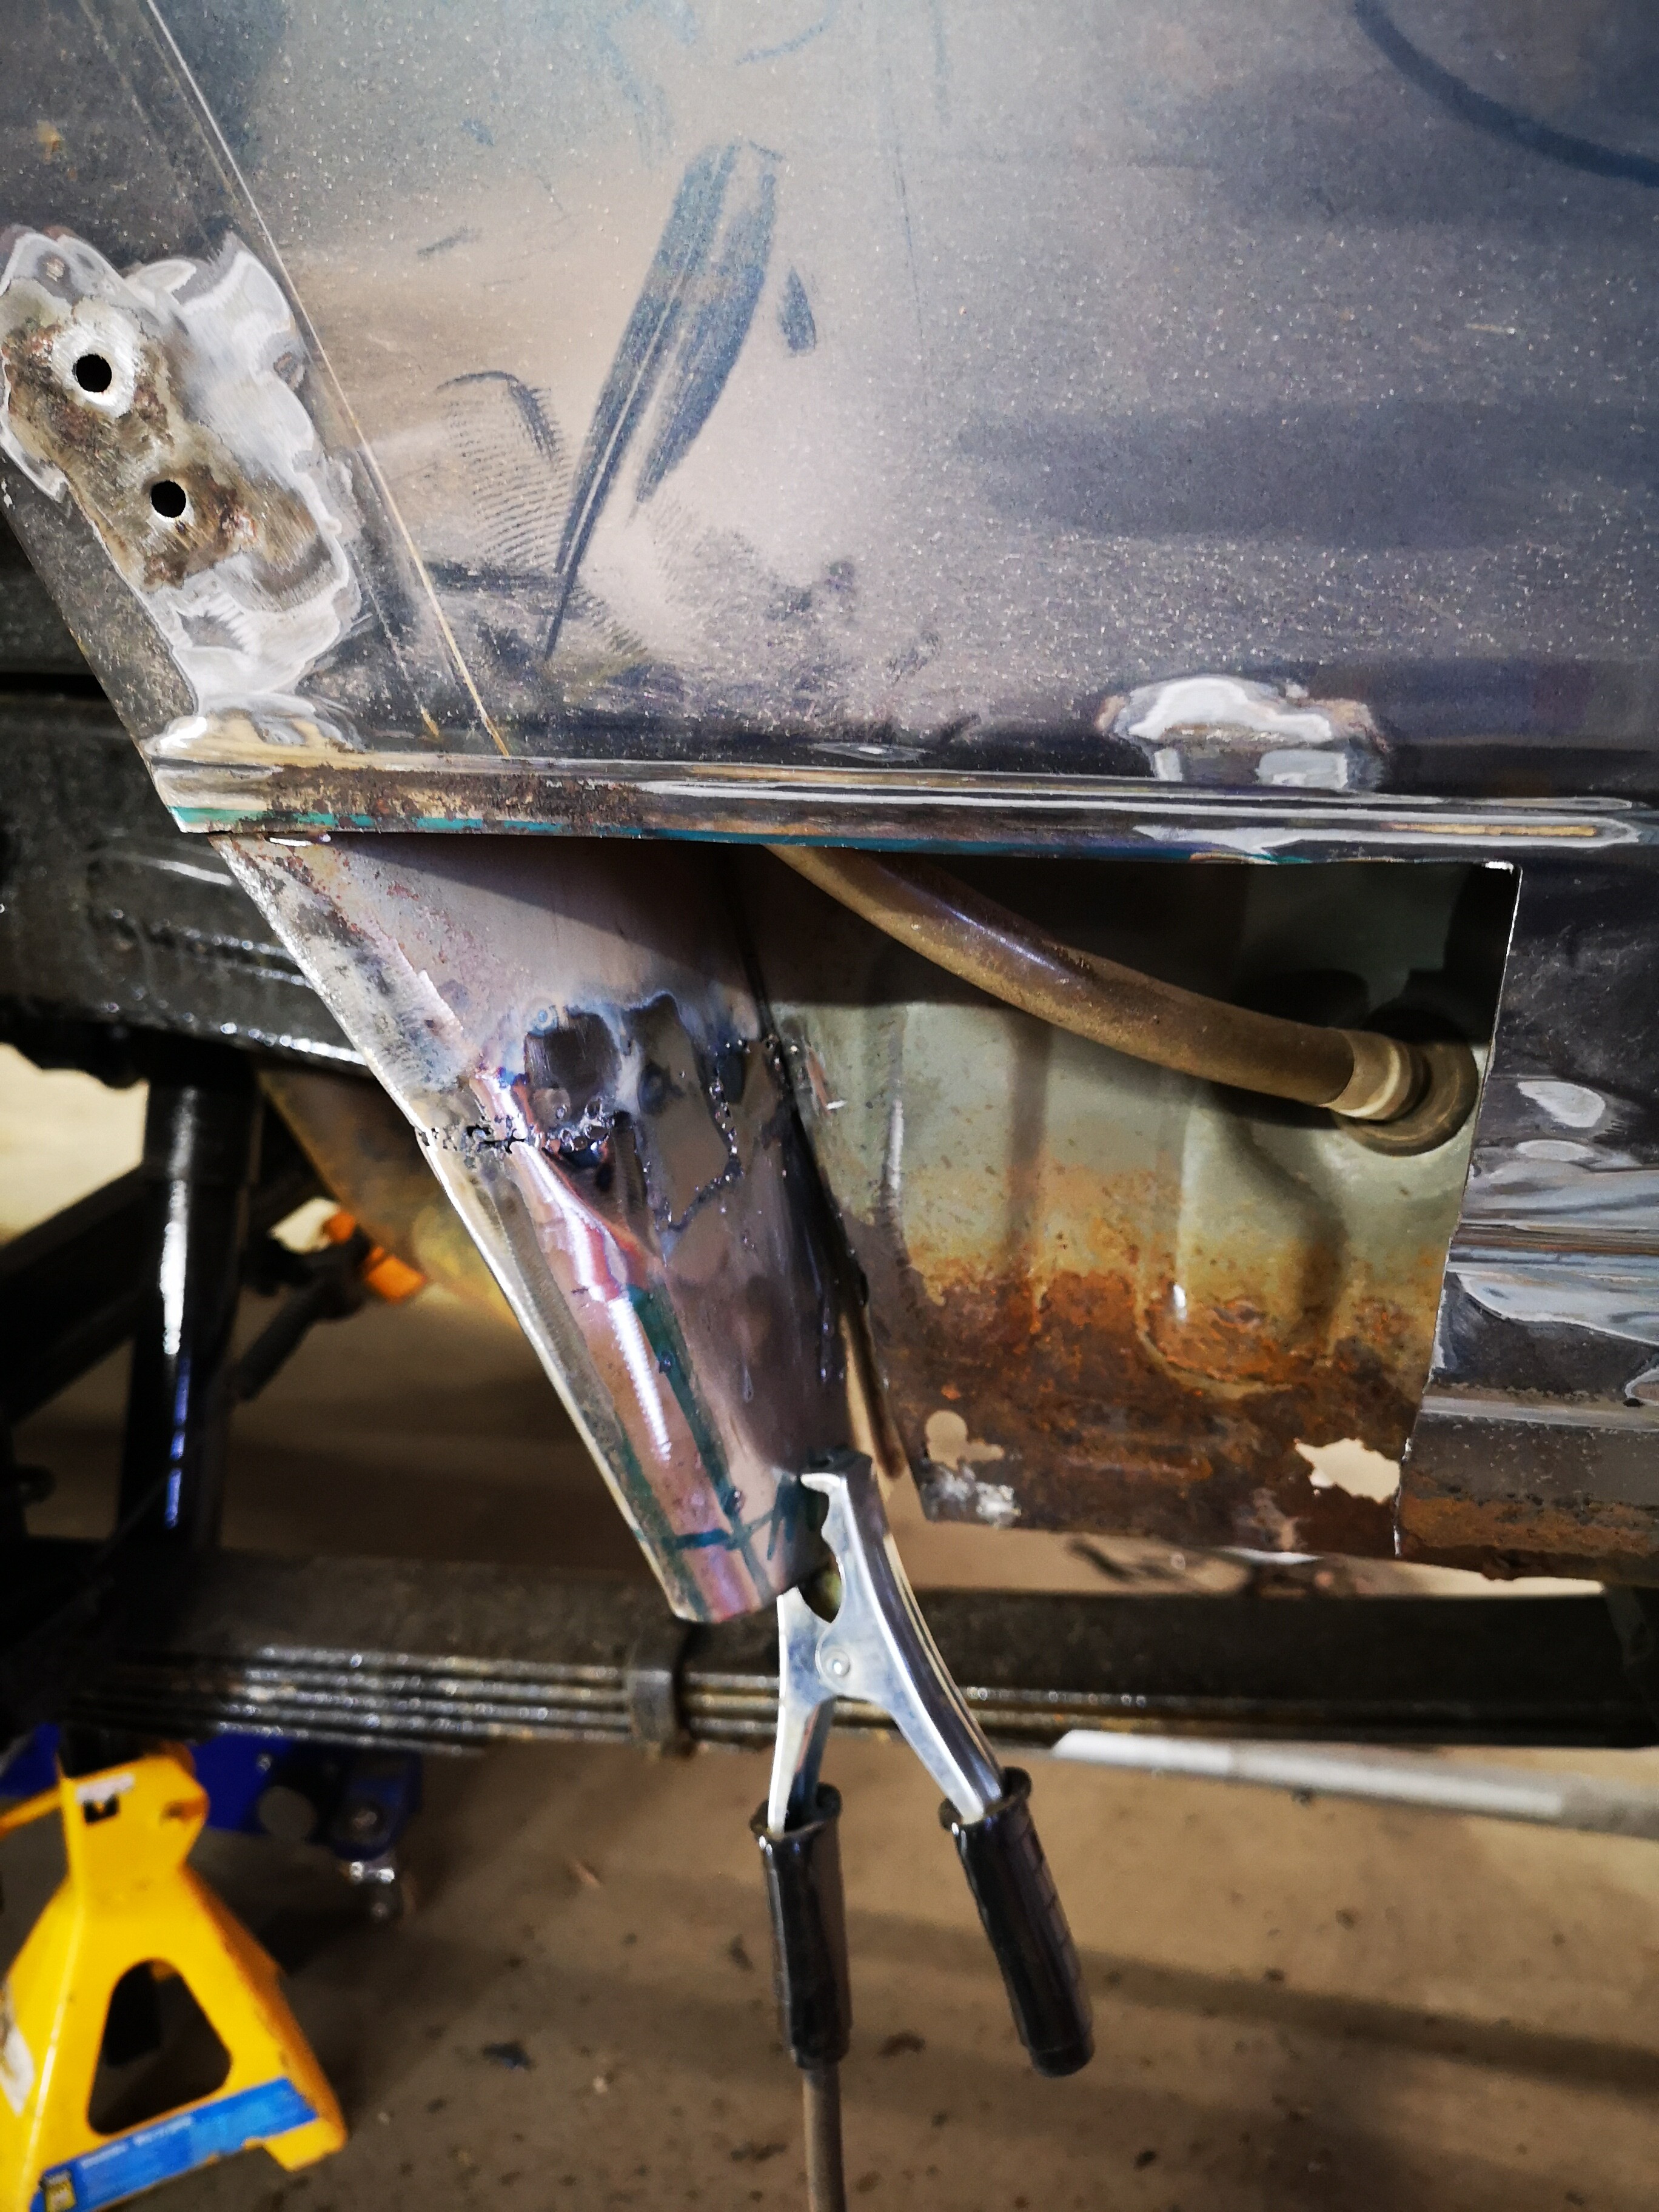
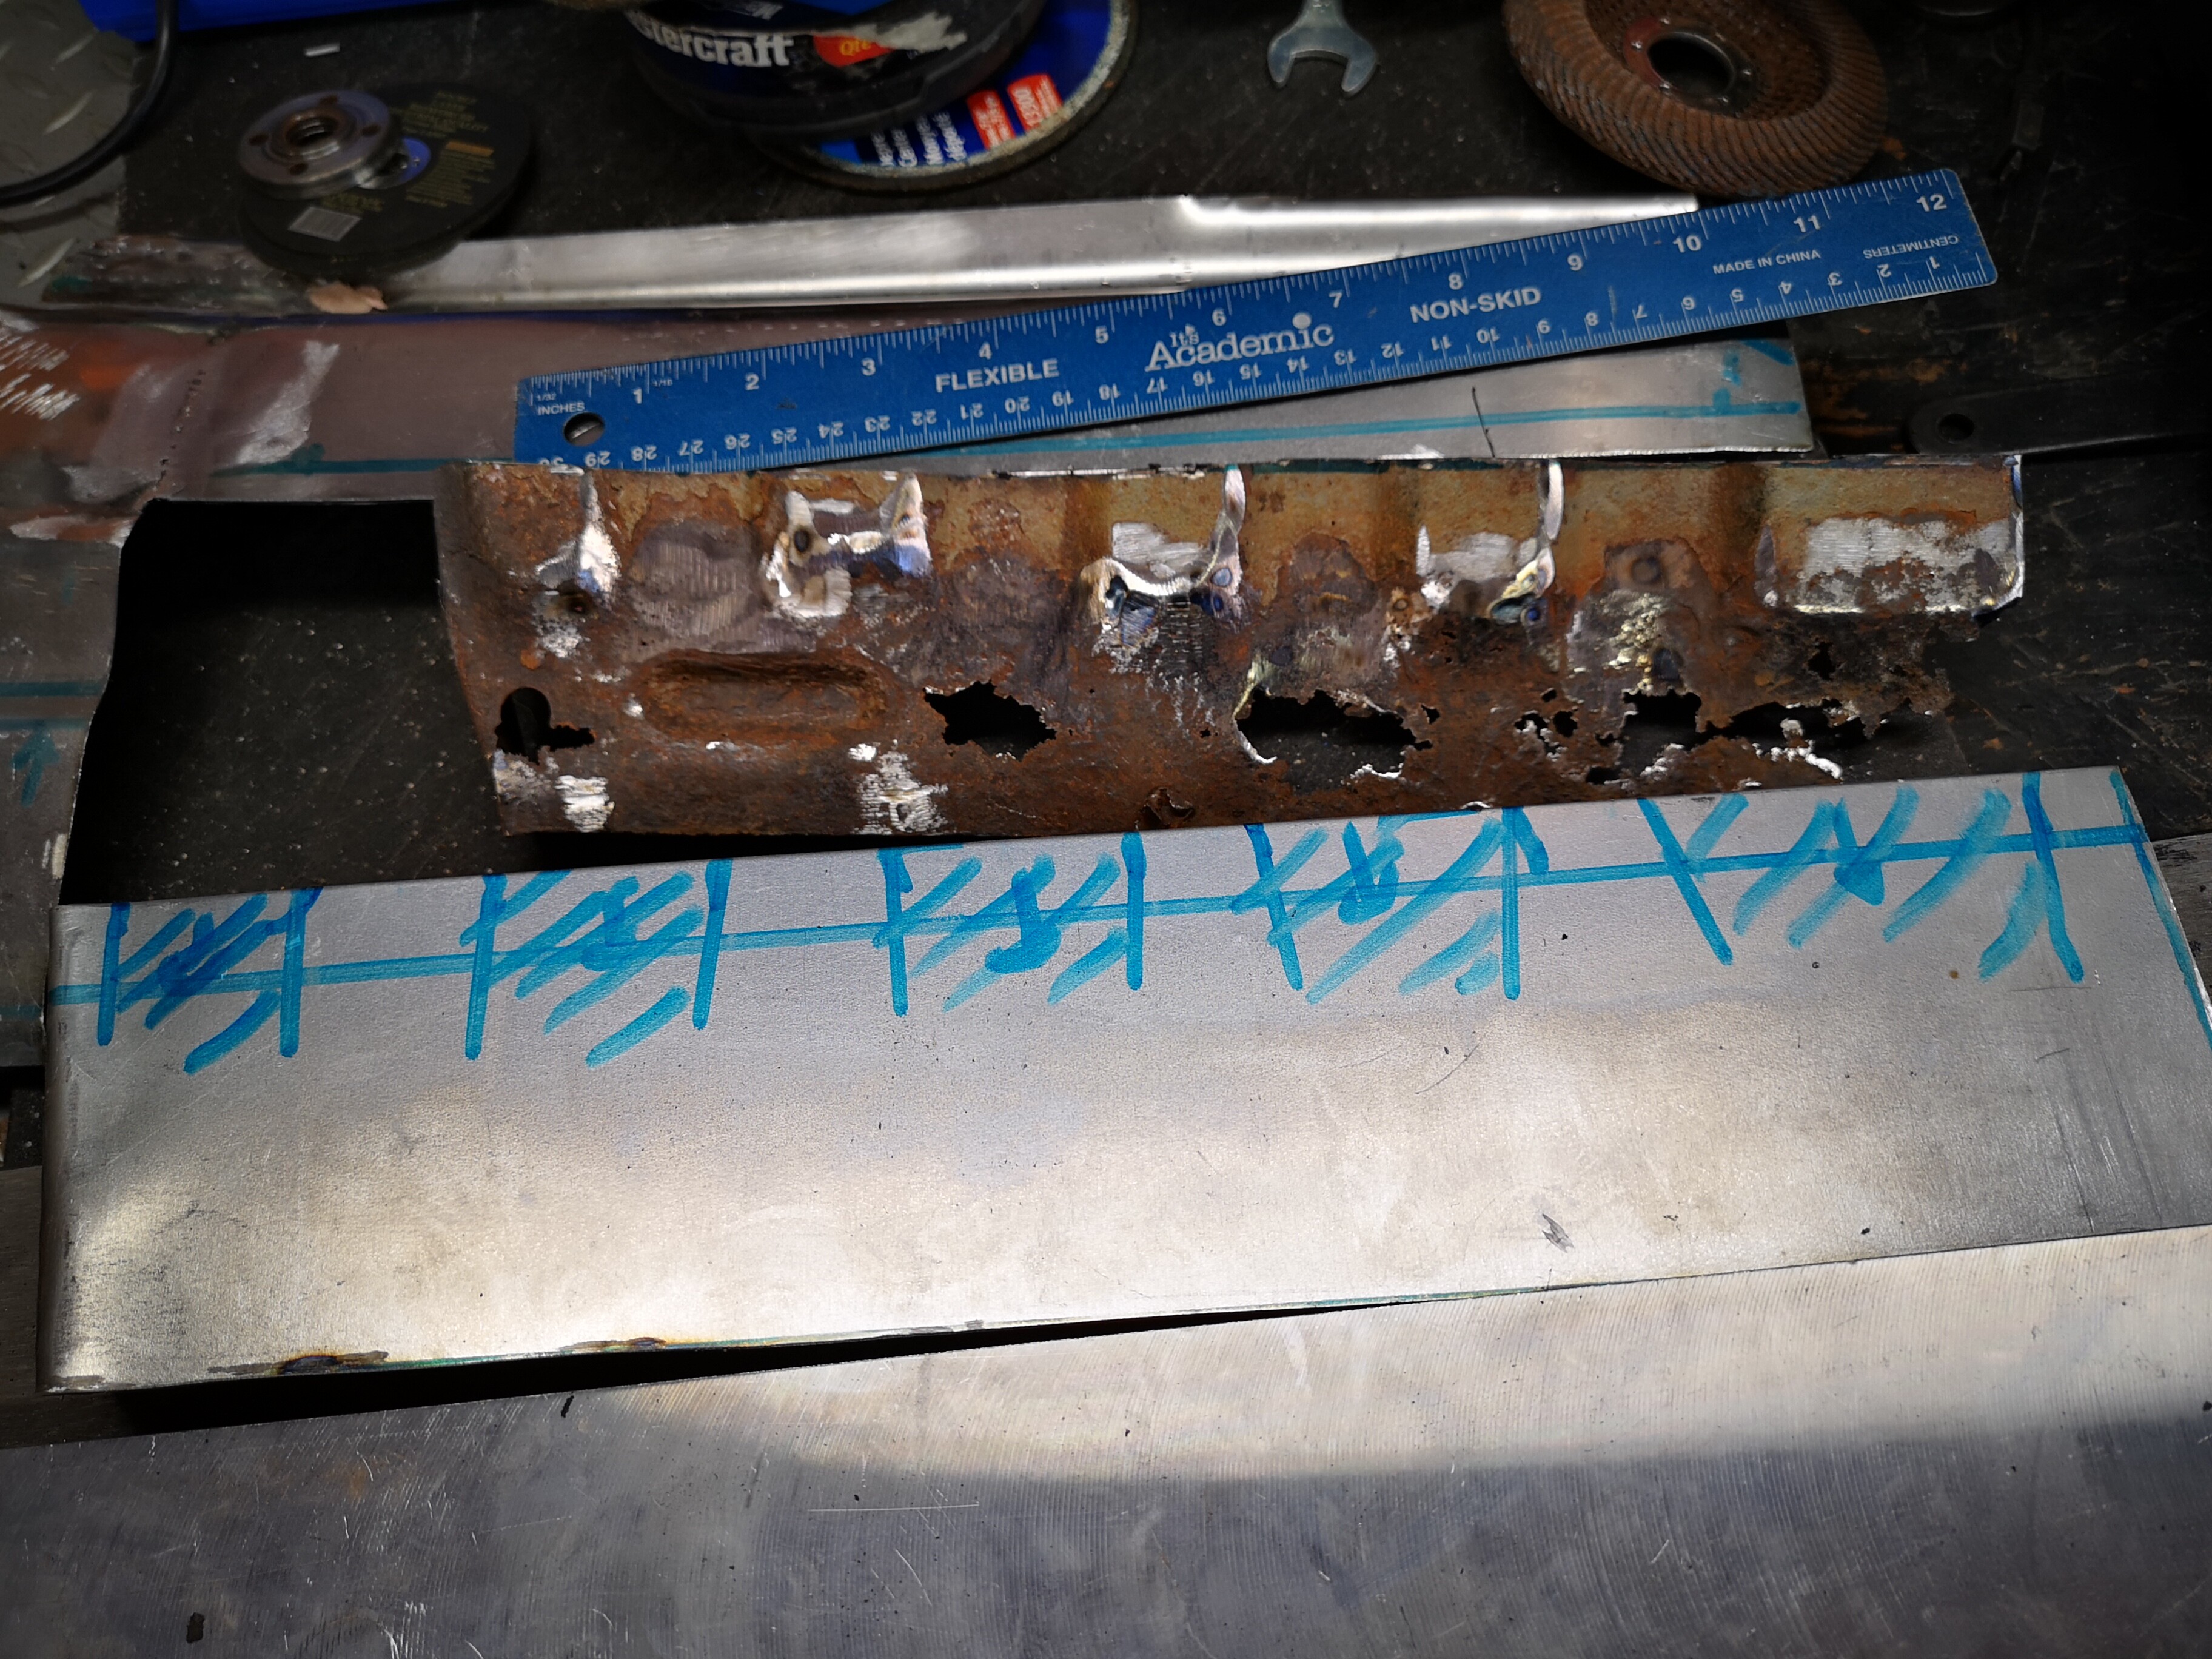
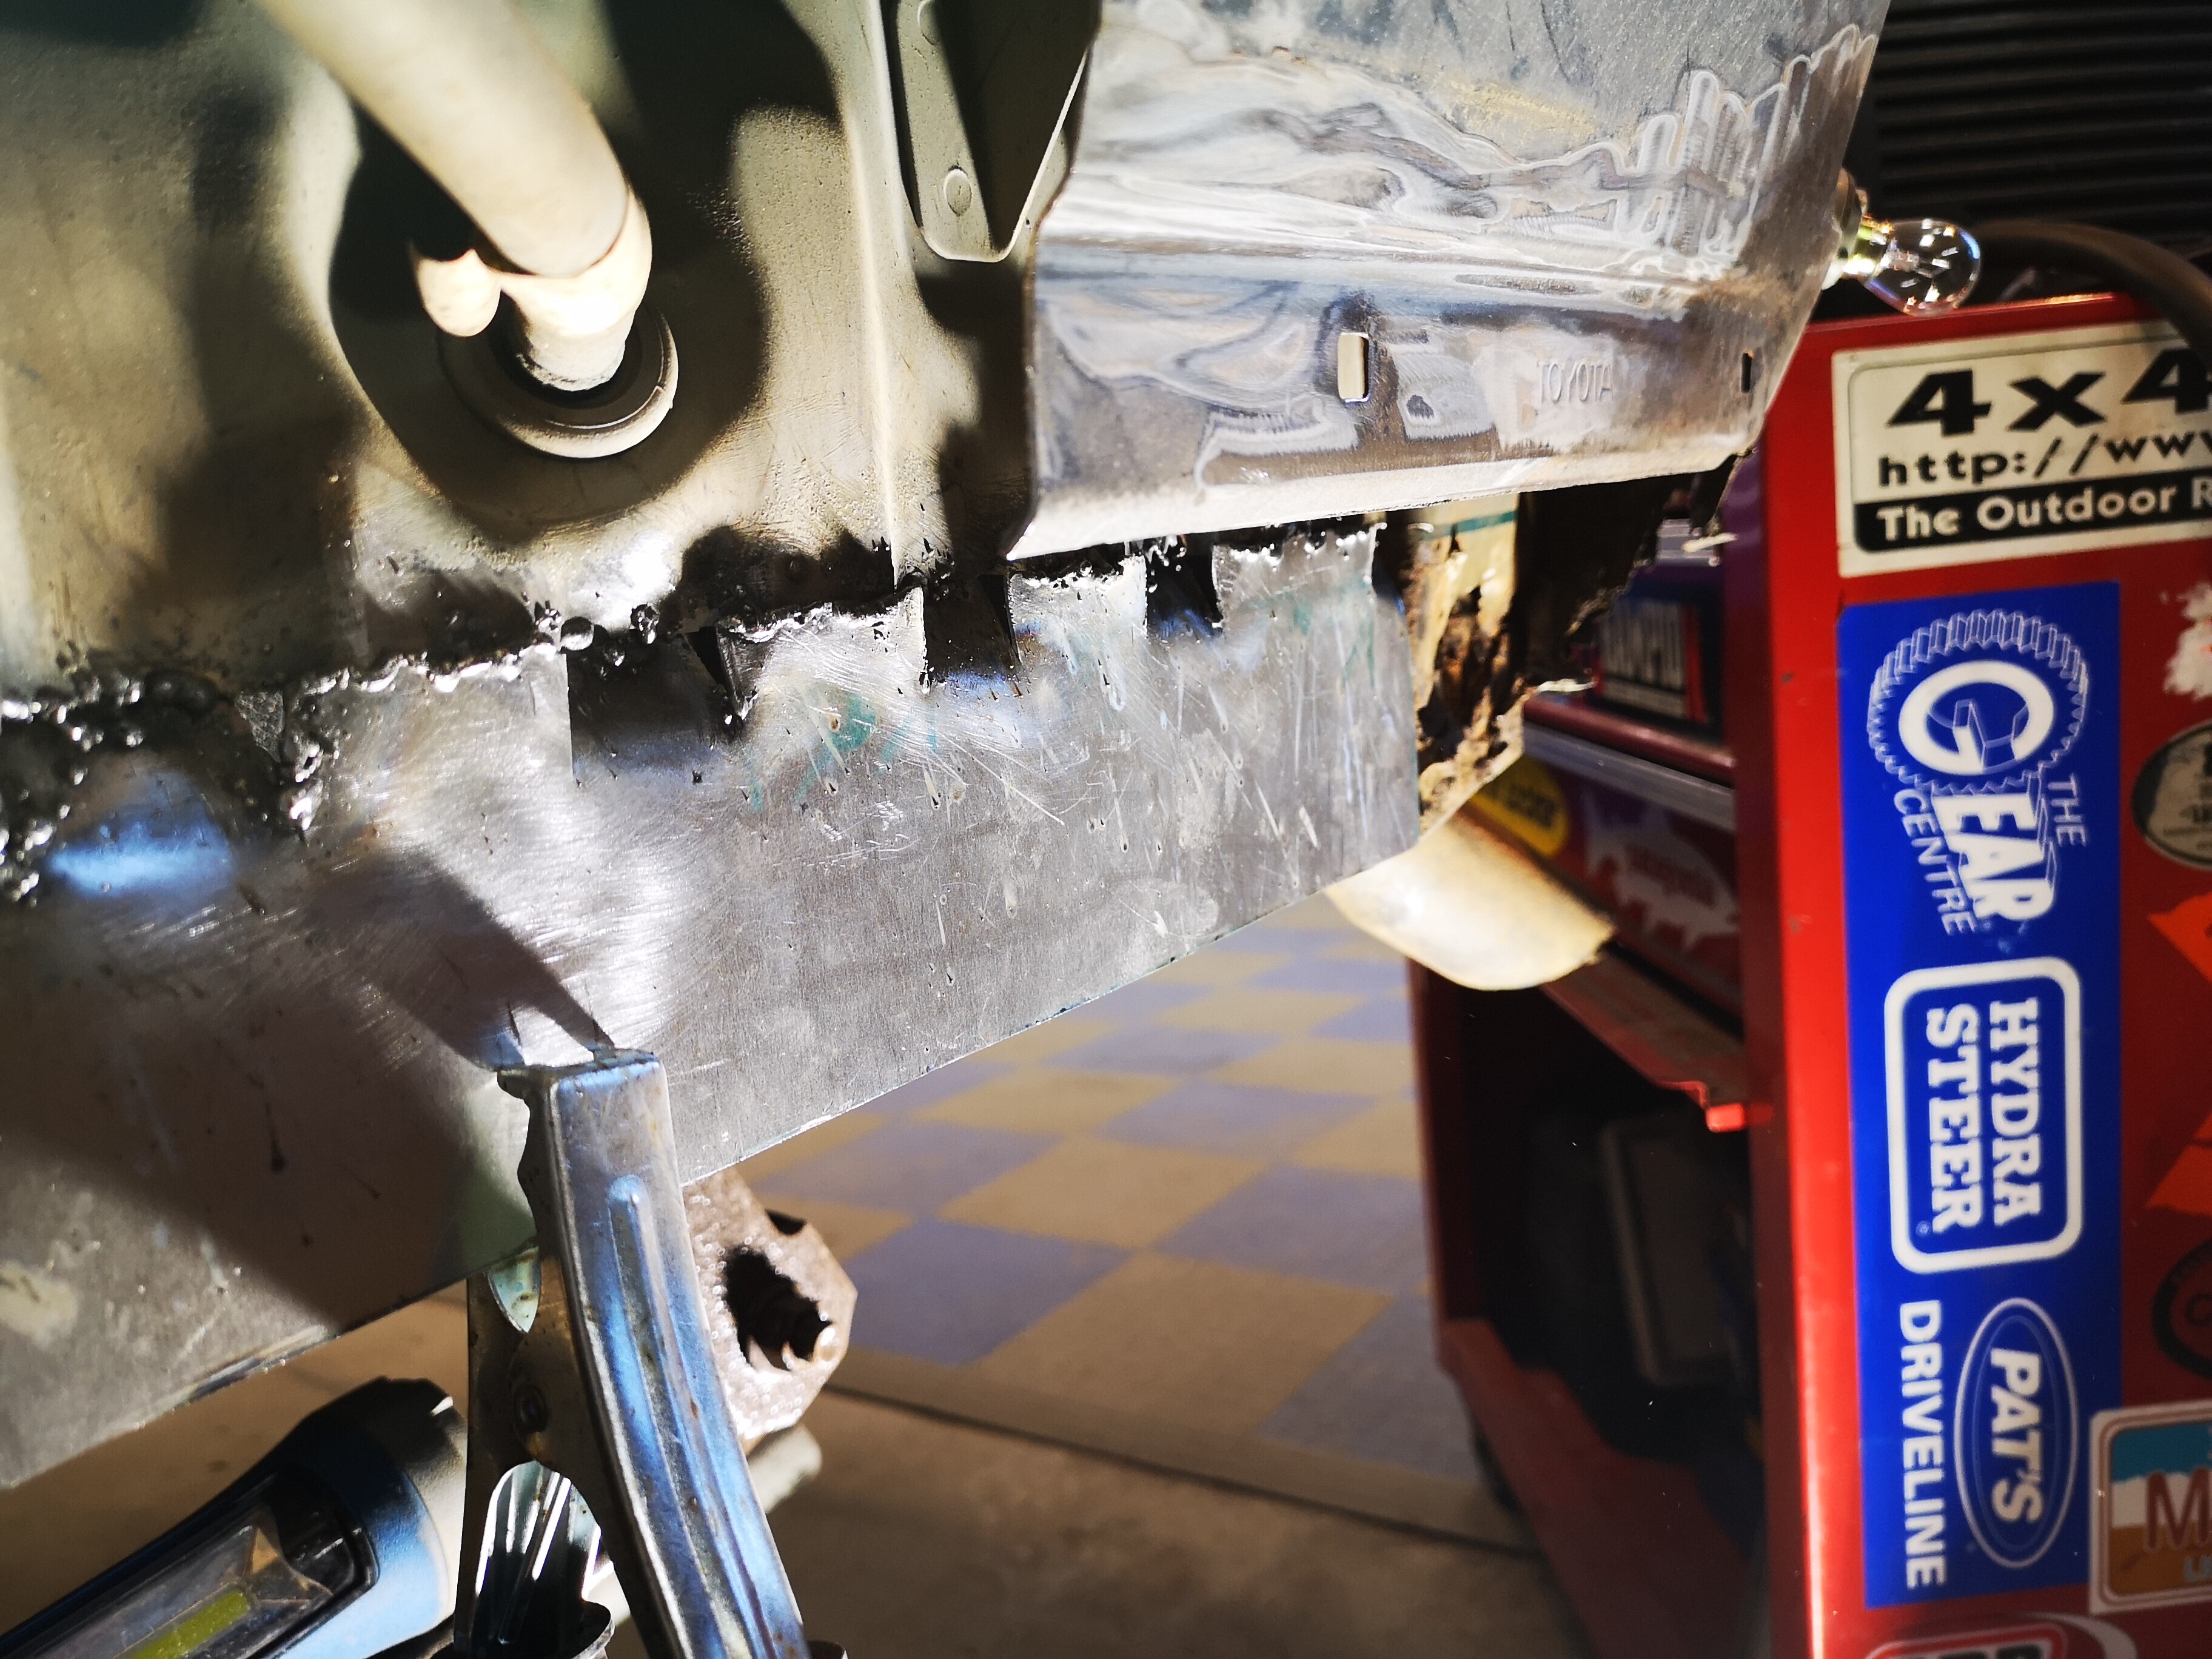
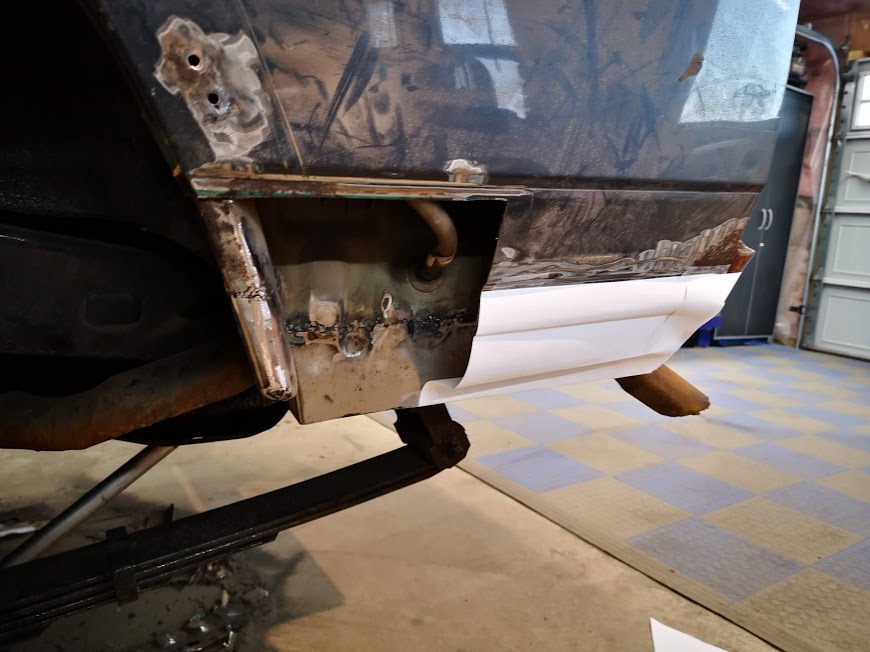
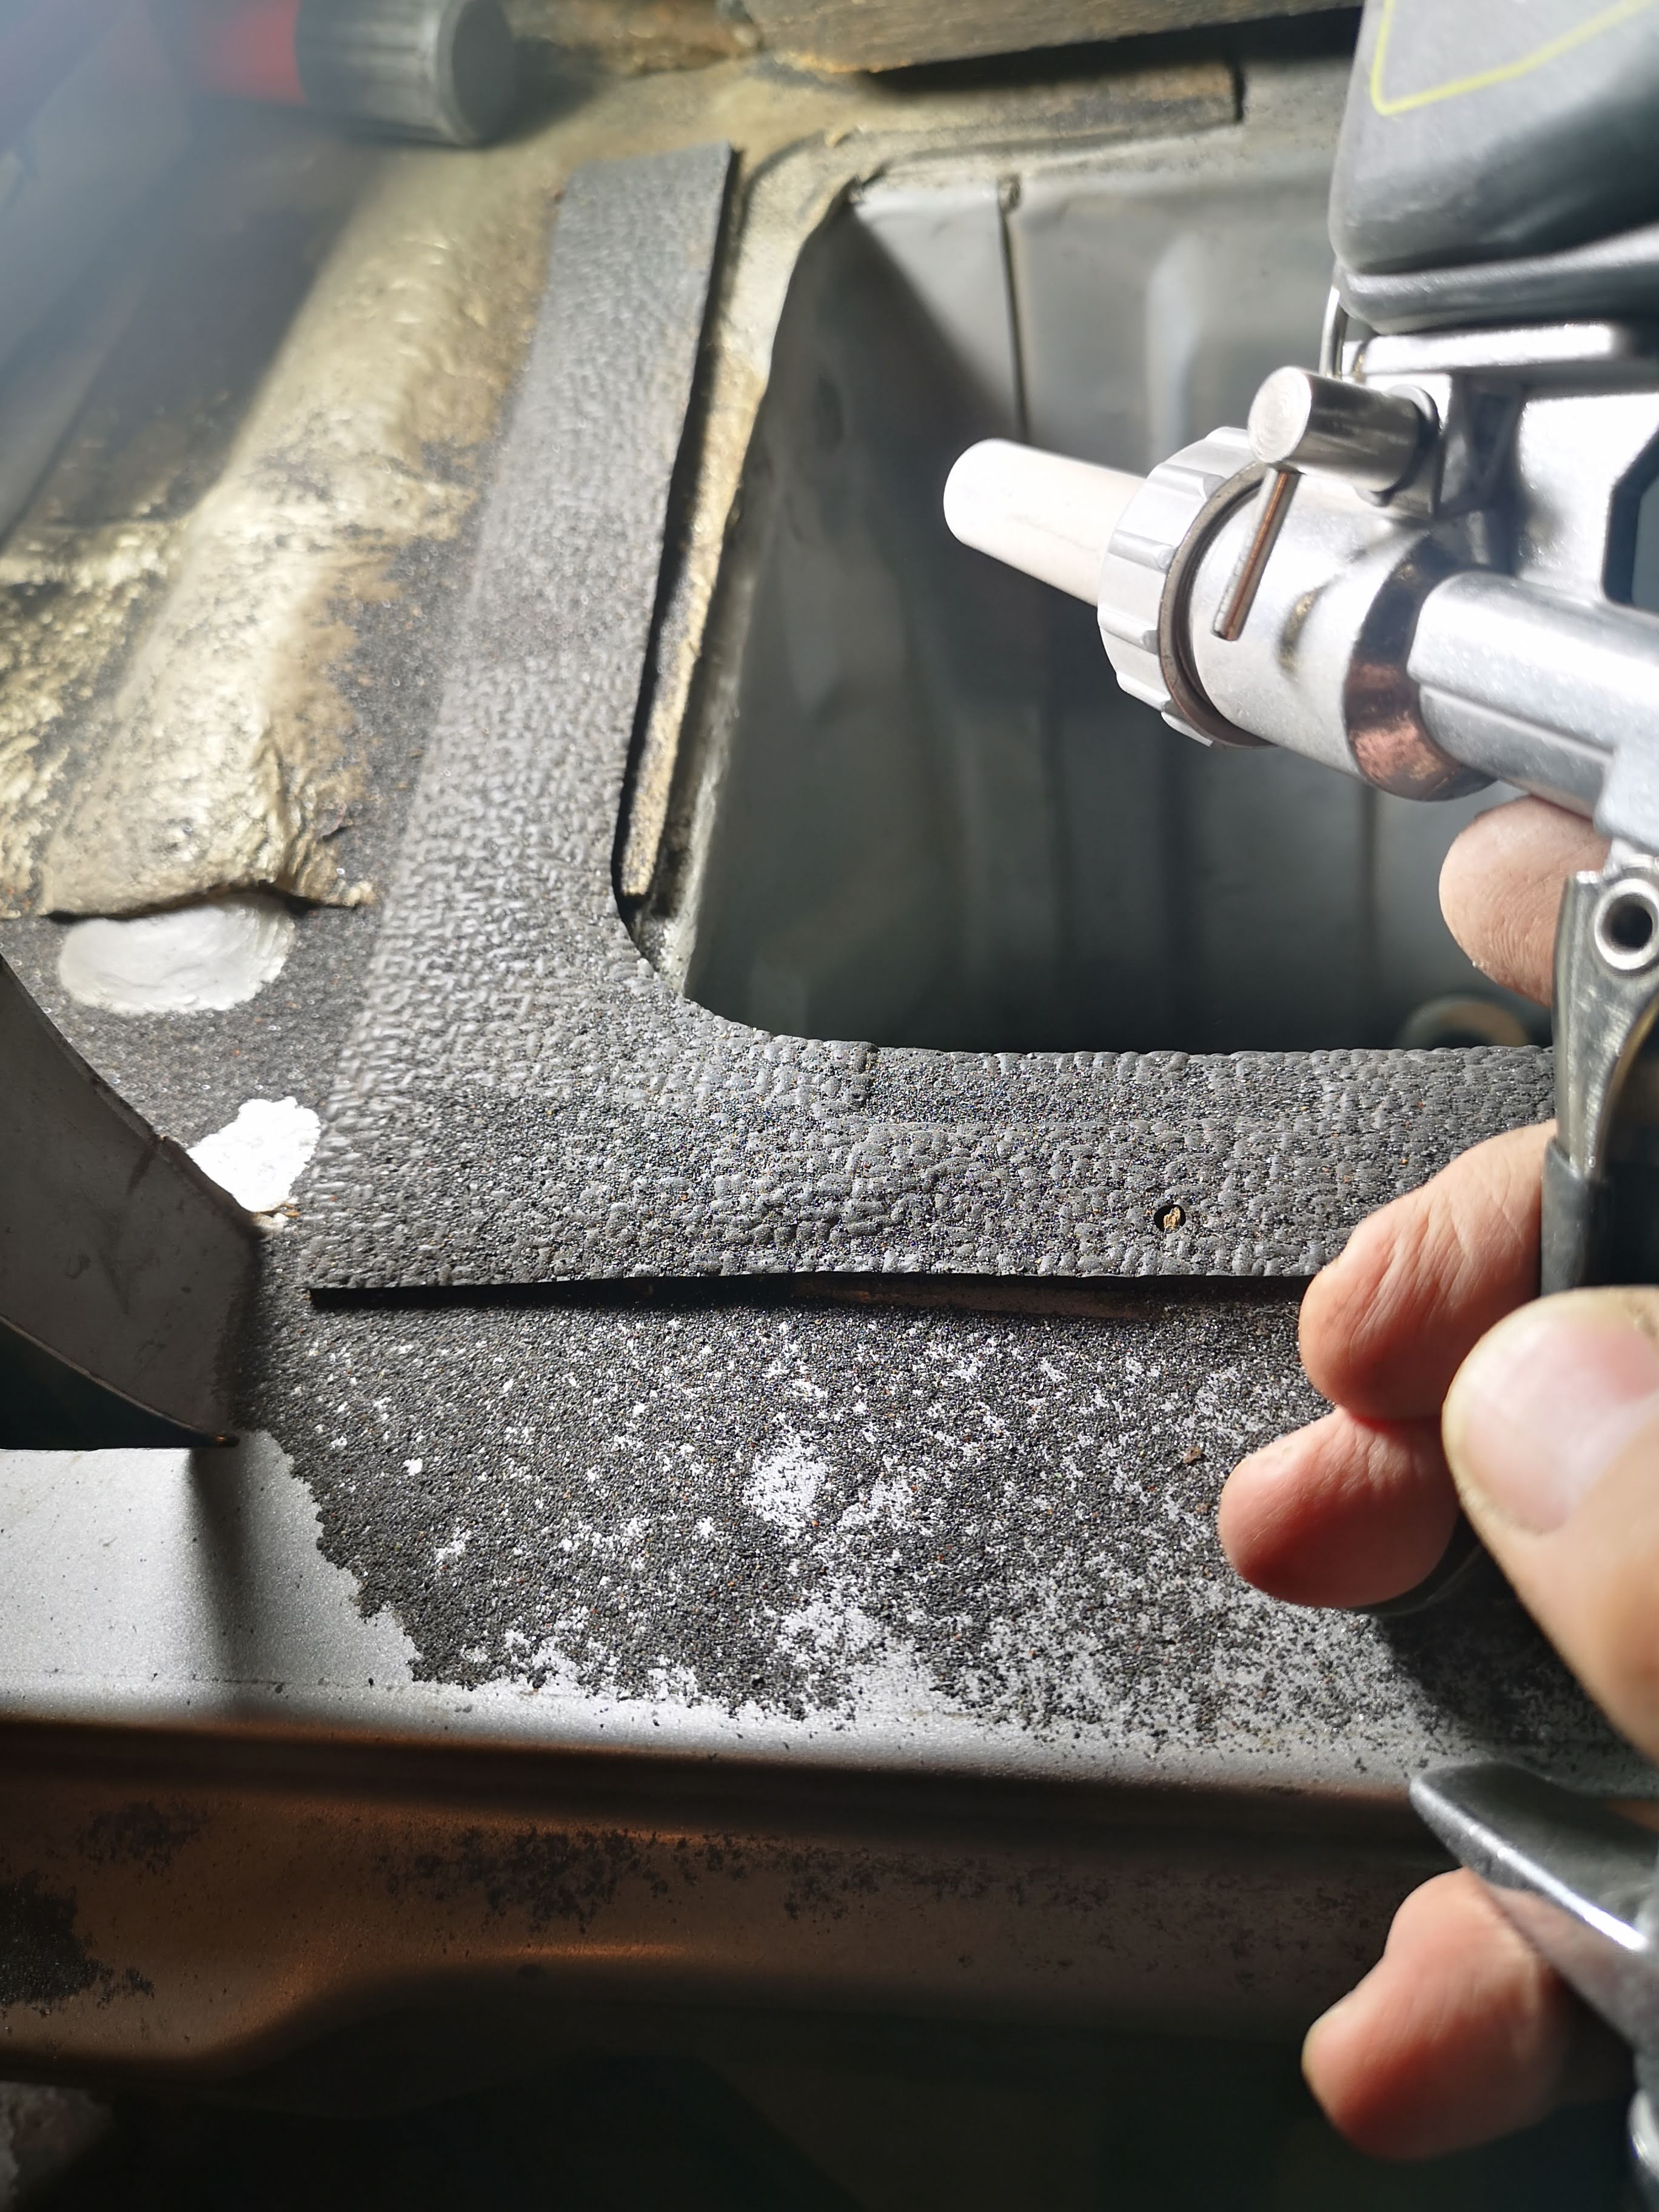
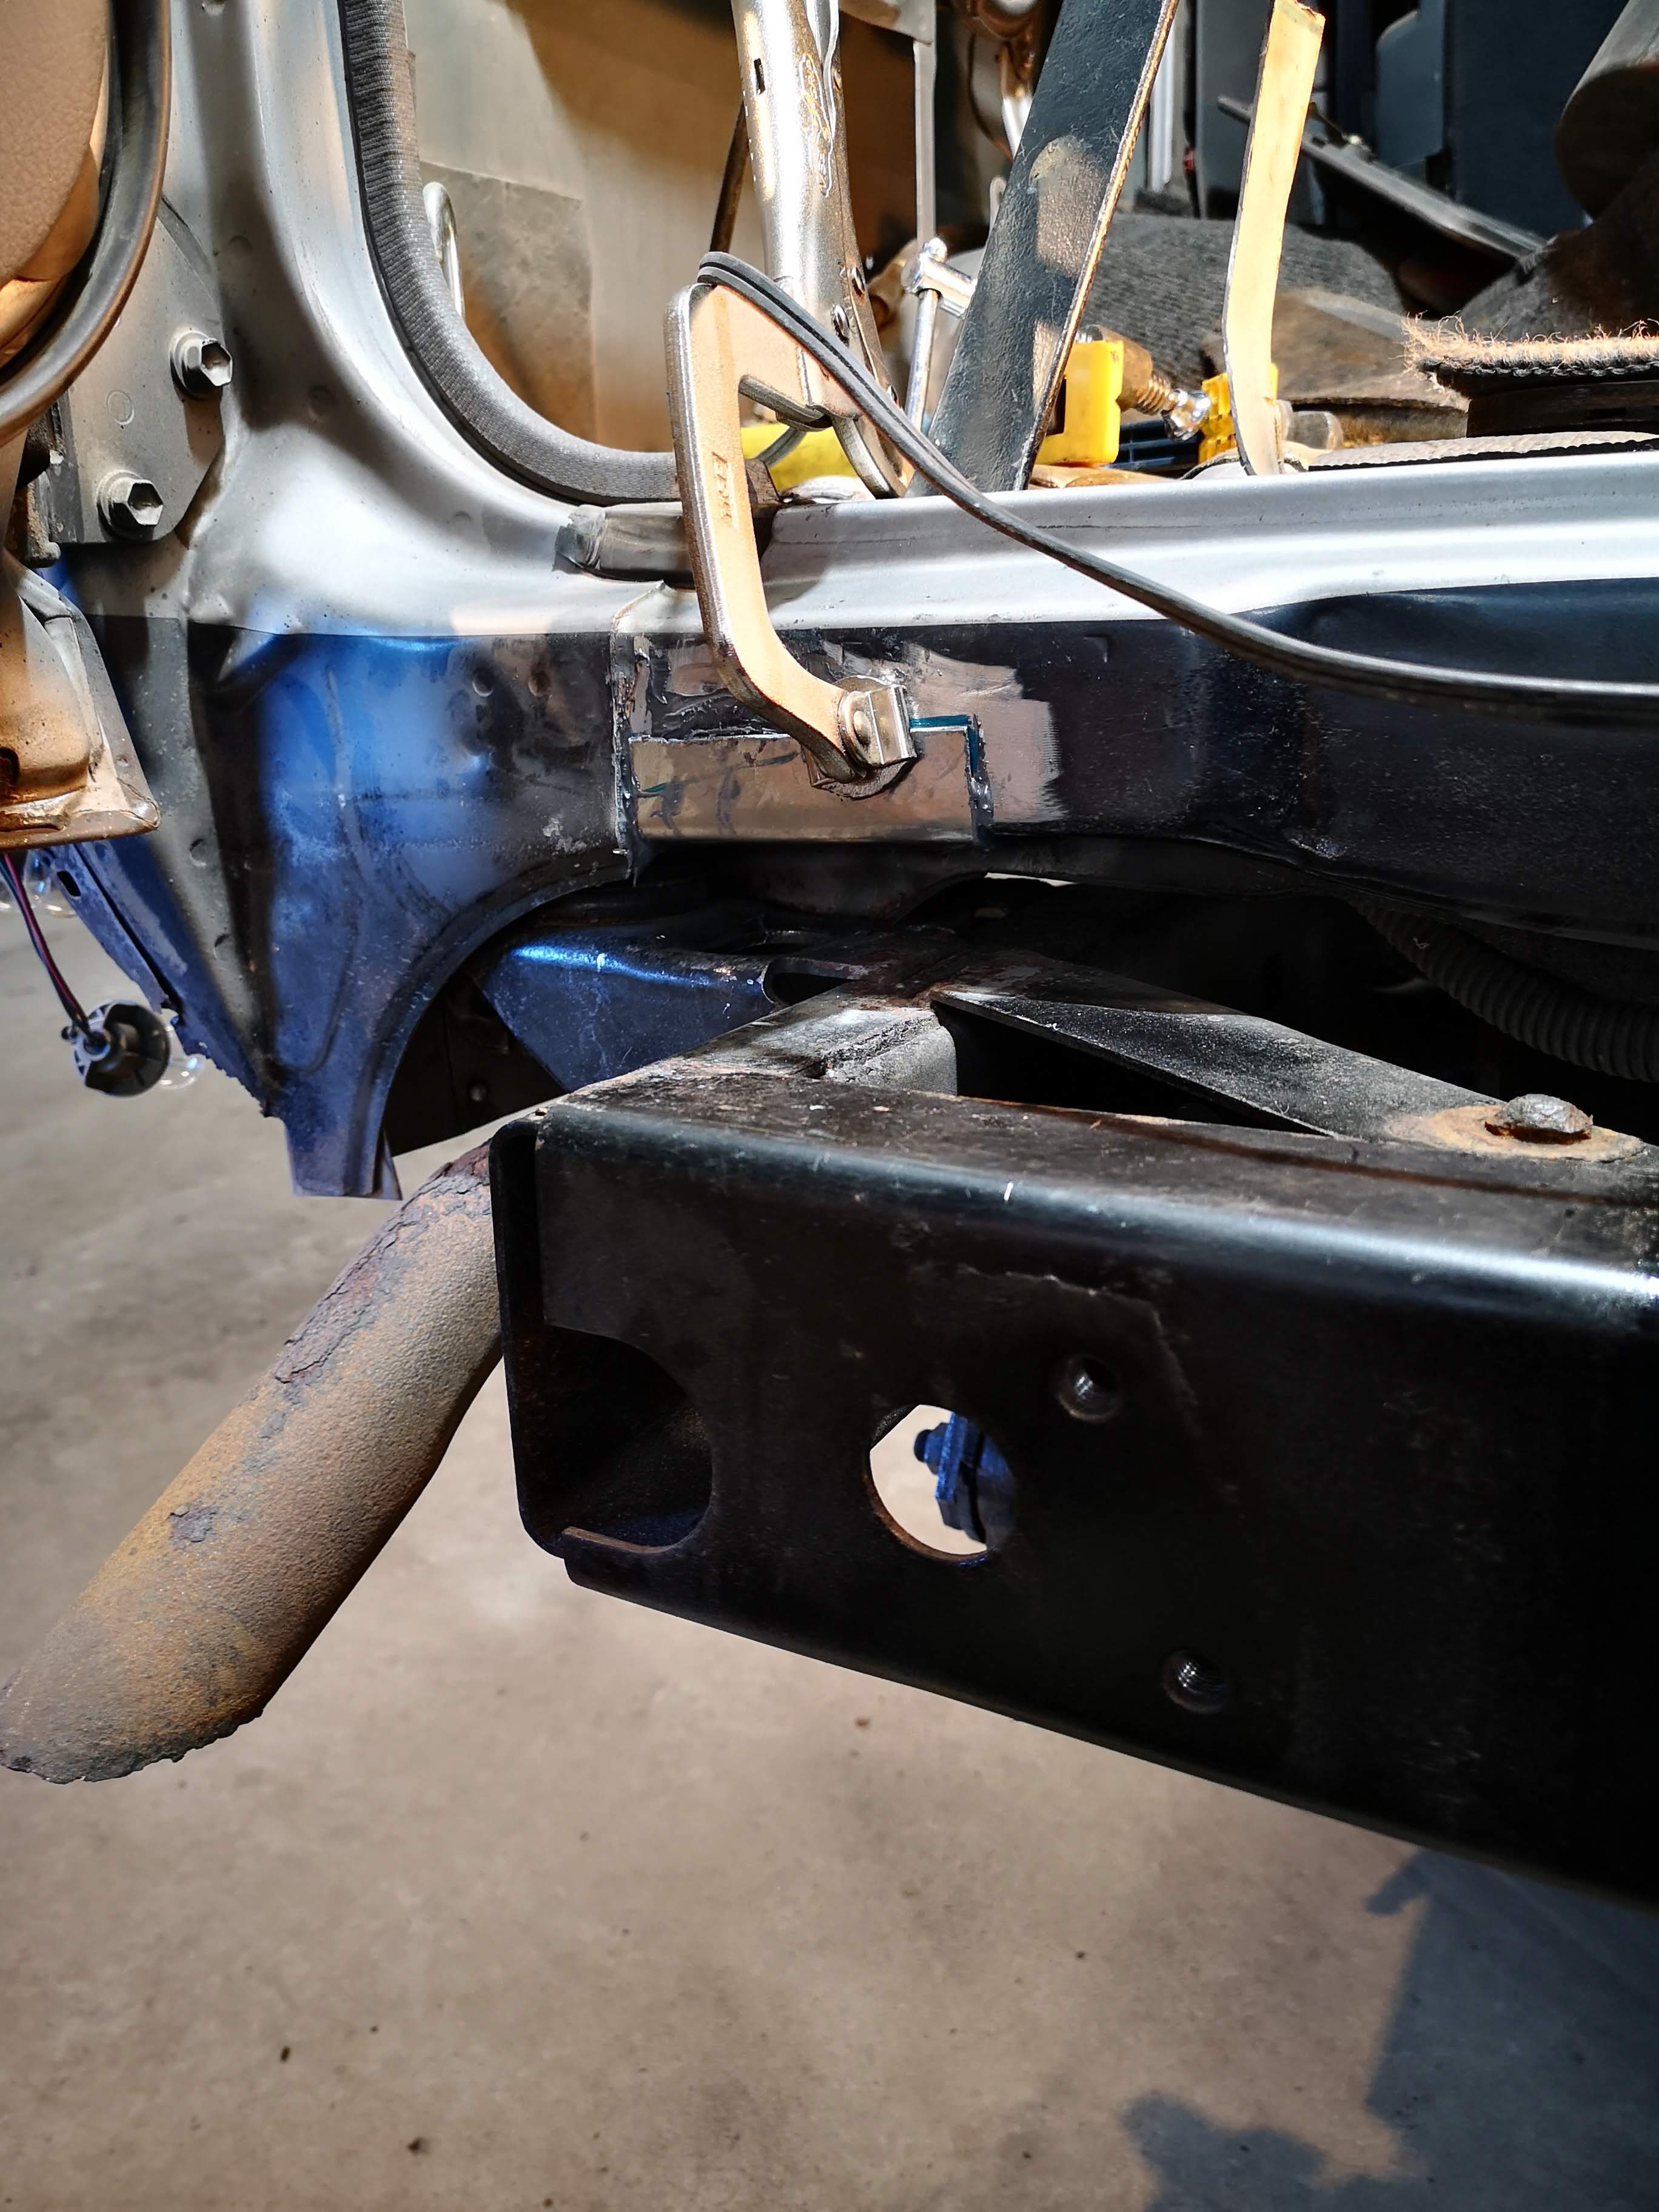
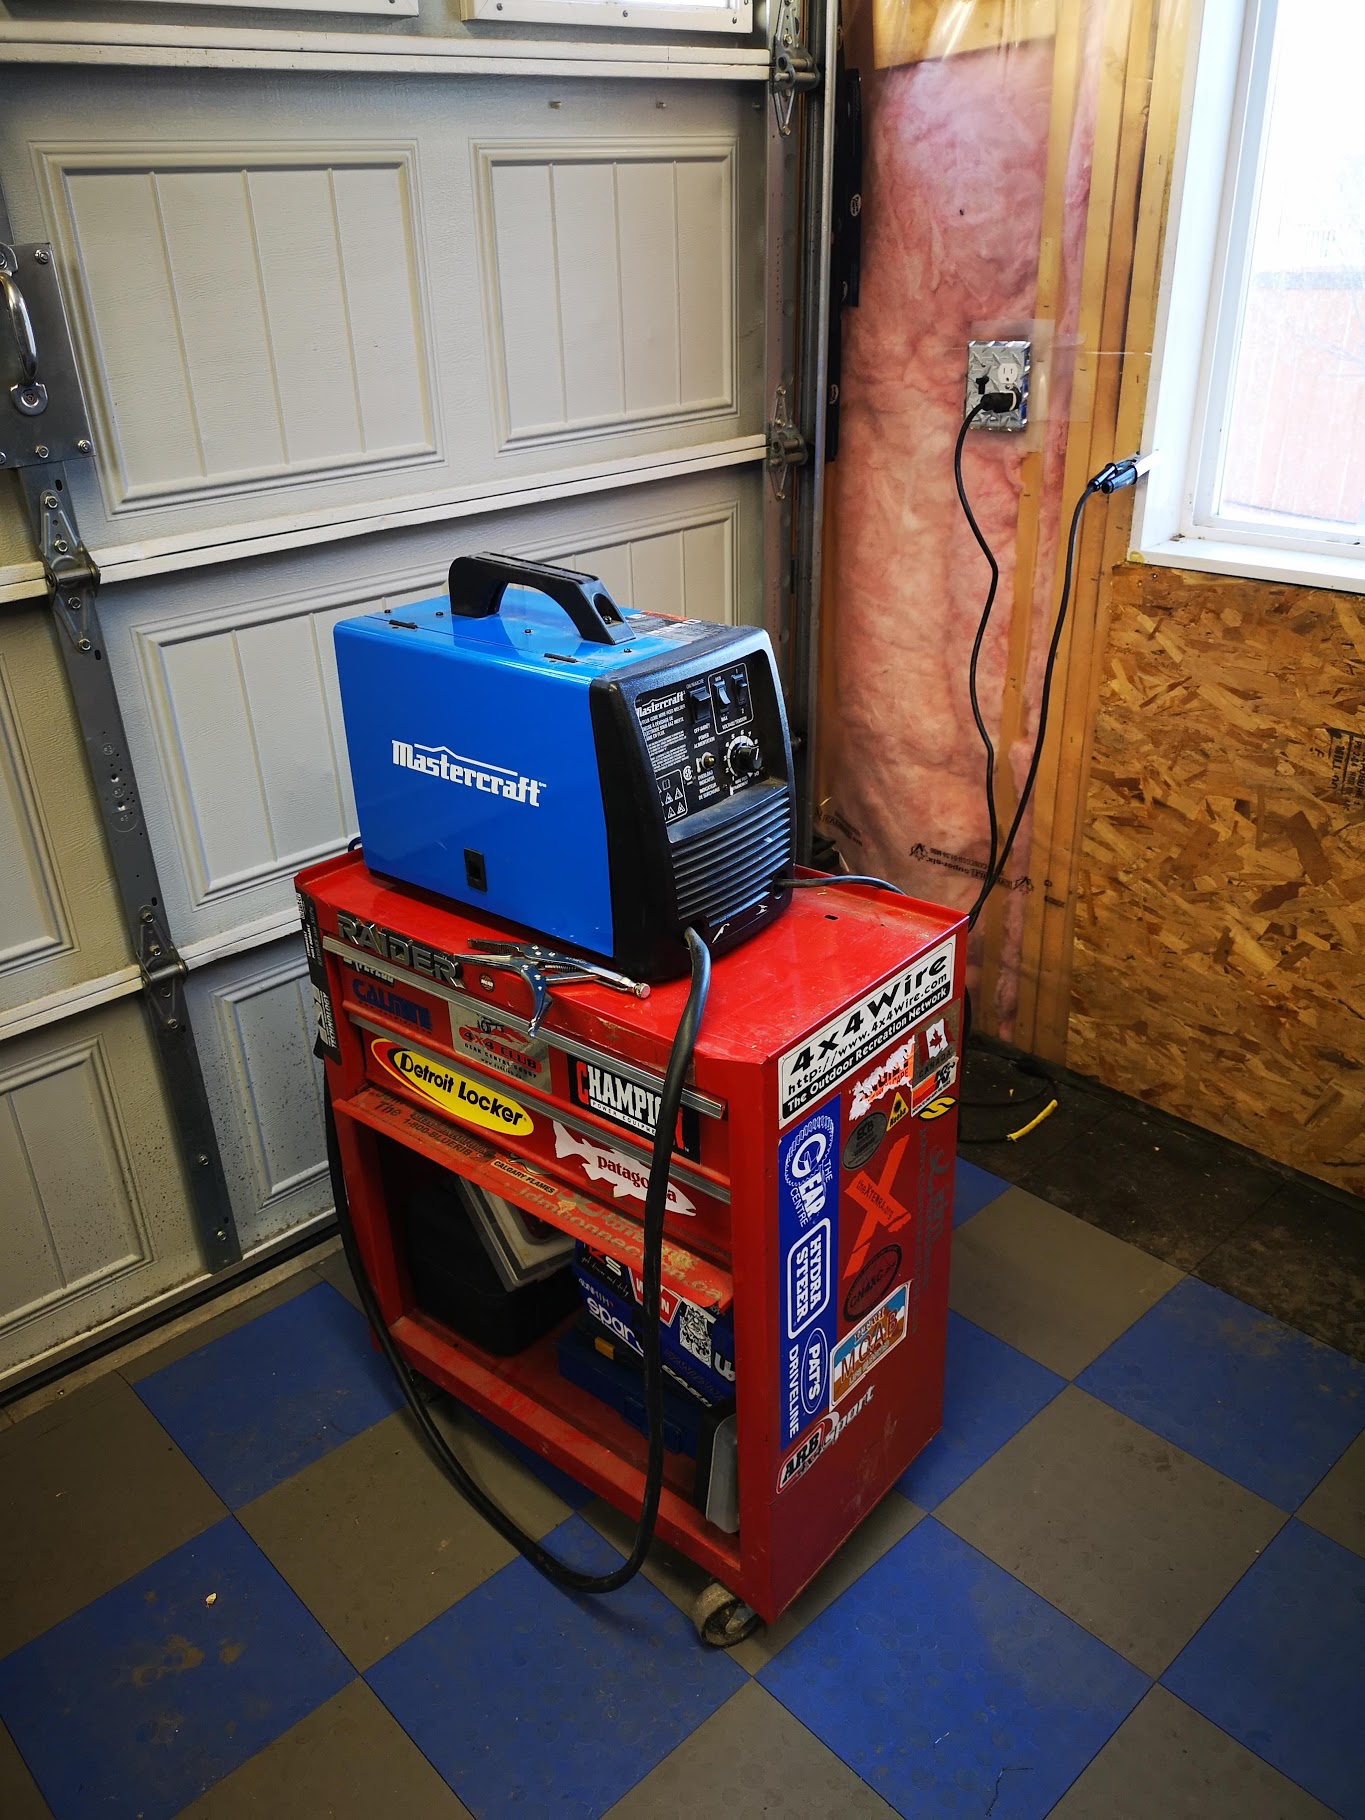
The section forward of this was way trickier. It was behind the flare, and so suffered a lot more rust-through. I have a good many hours into bending this piece. Meanwhile, my welder has been sitting collecting dust, and still in the packaging since Christmas of 2015 or 16, so I thought it was time. Five minutes after my amazon welding helmet came this afternoon (don’t laugh), I was burning up sheet metal. I’ve got flux core 0.30, and I’m using 18 guage, so its a little tricky dialling it in, but we’re getting there.


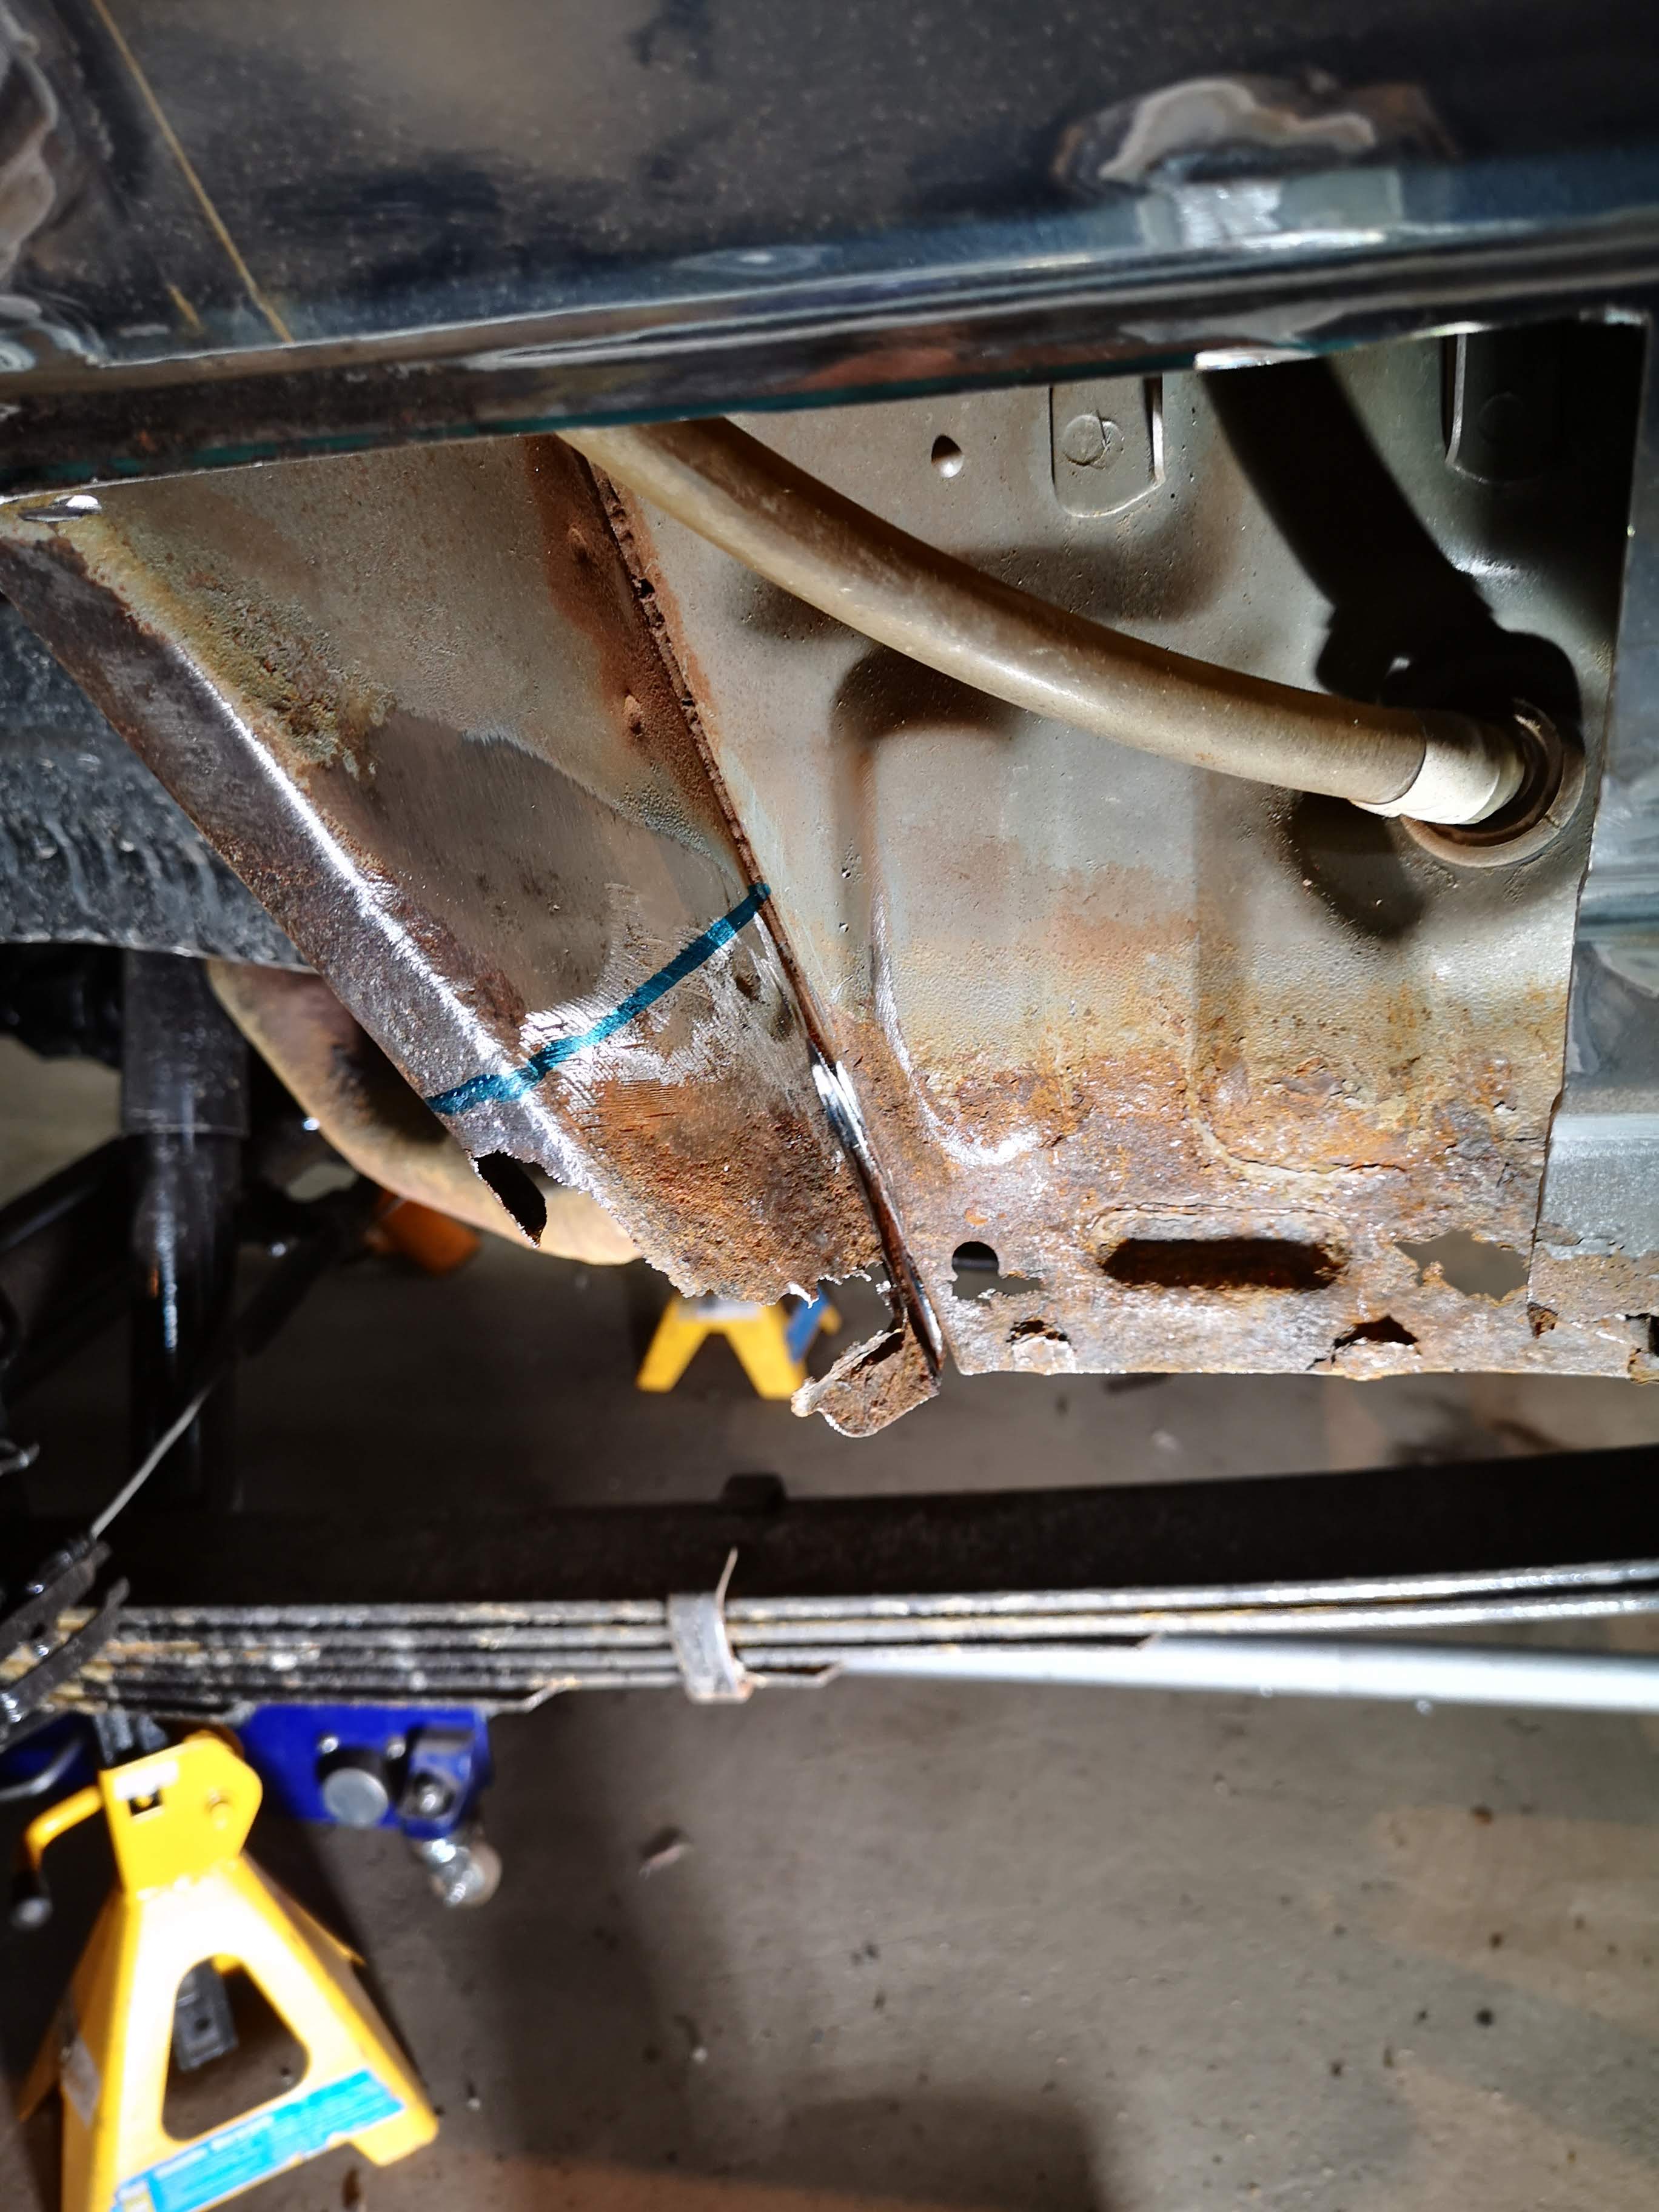
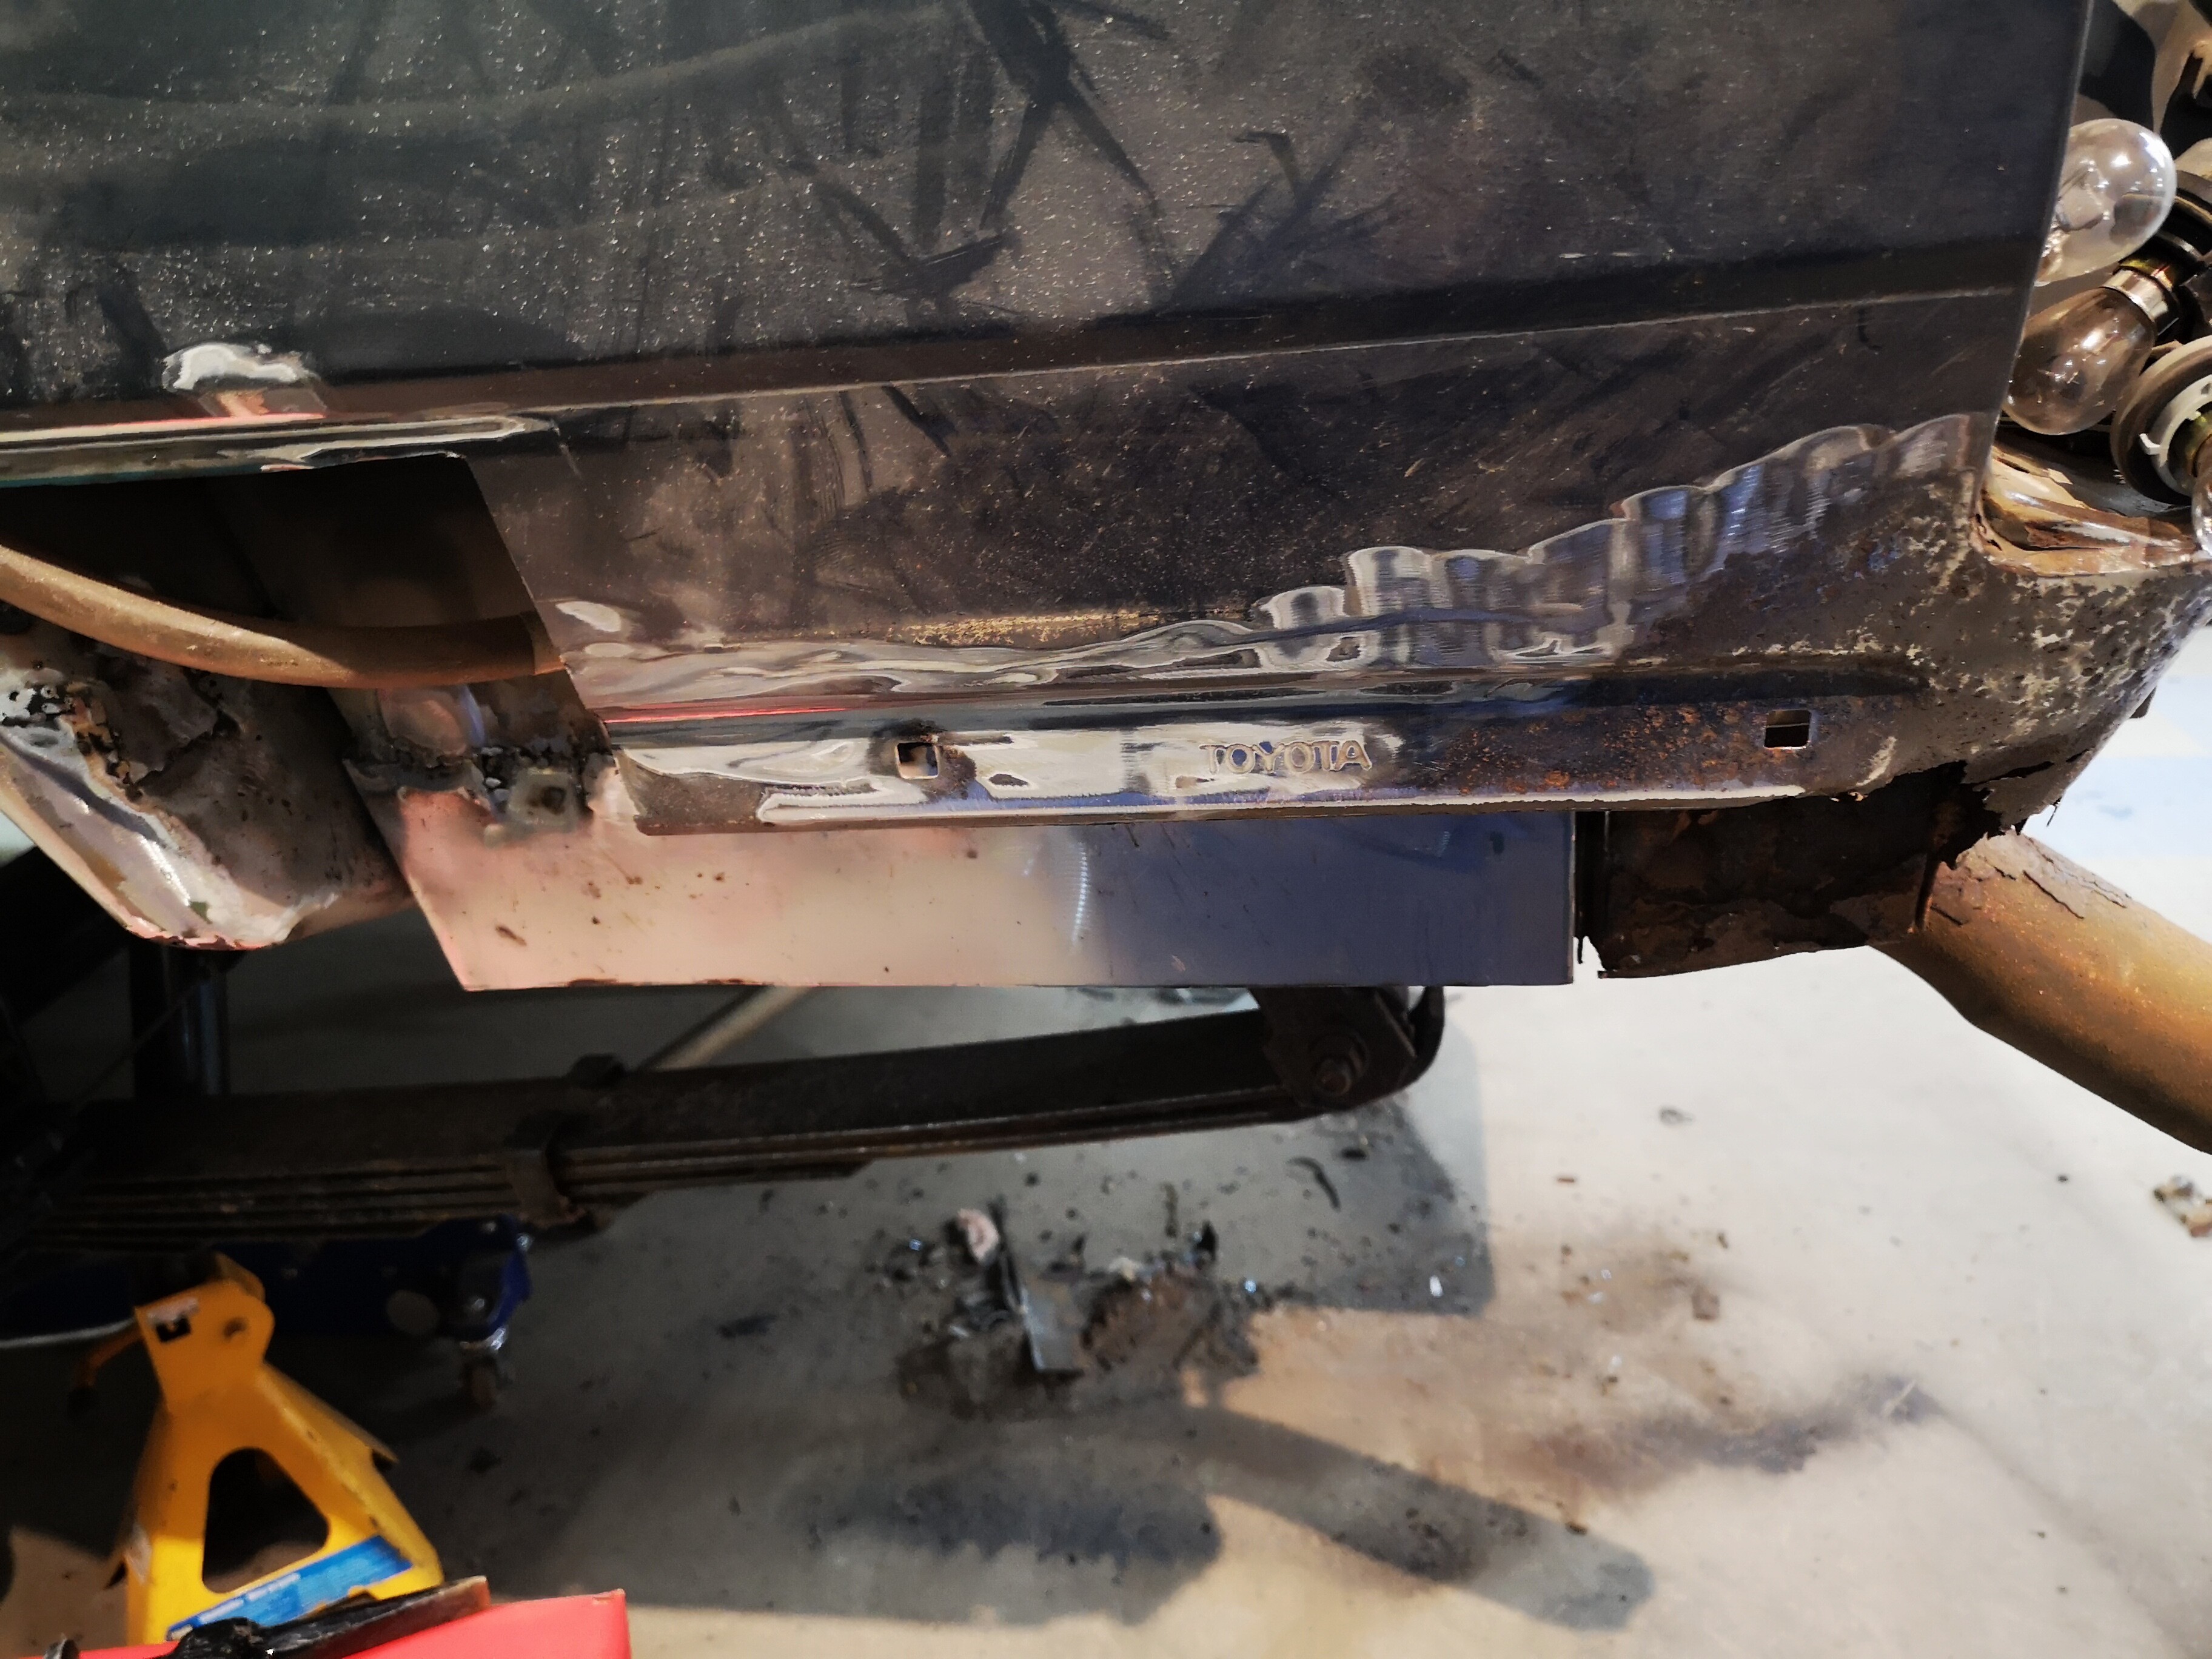
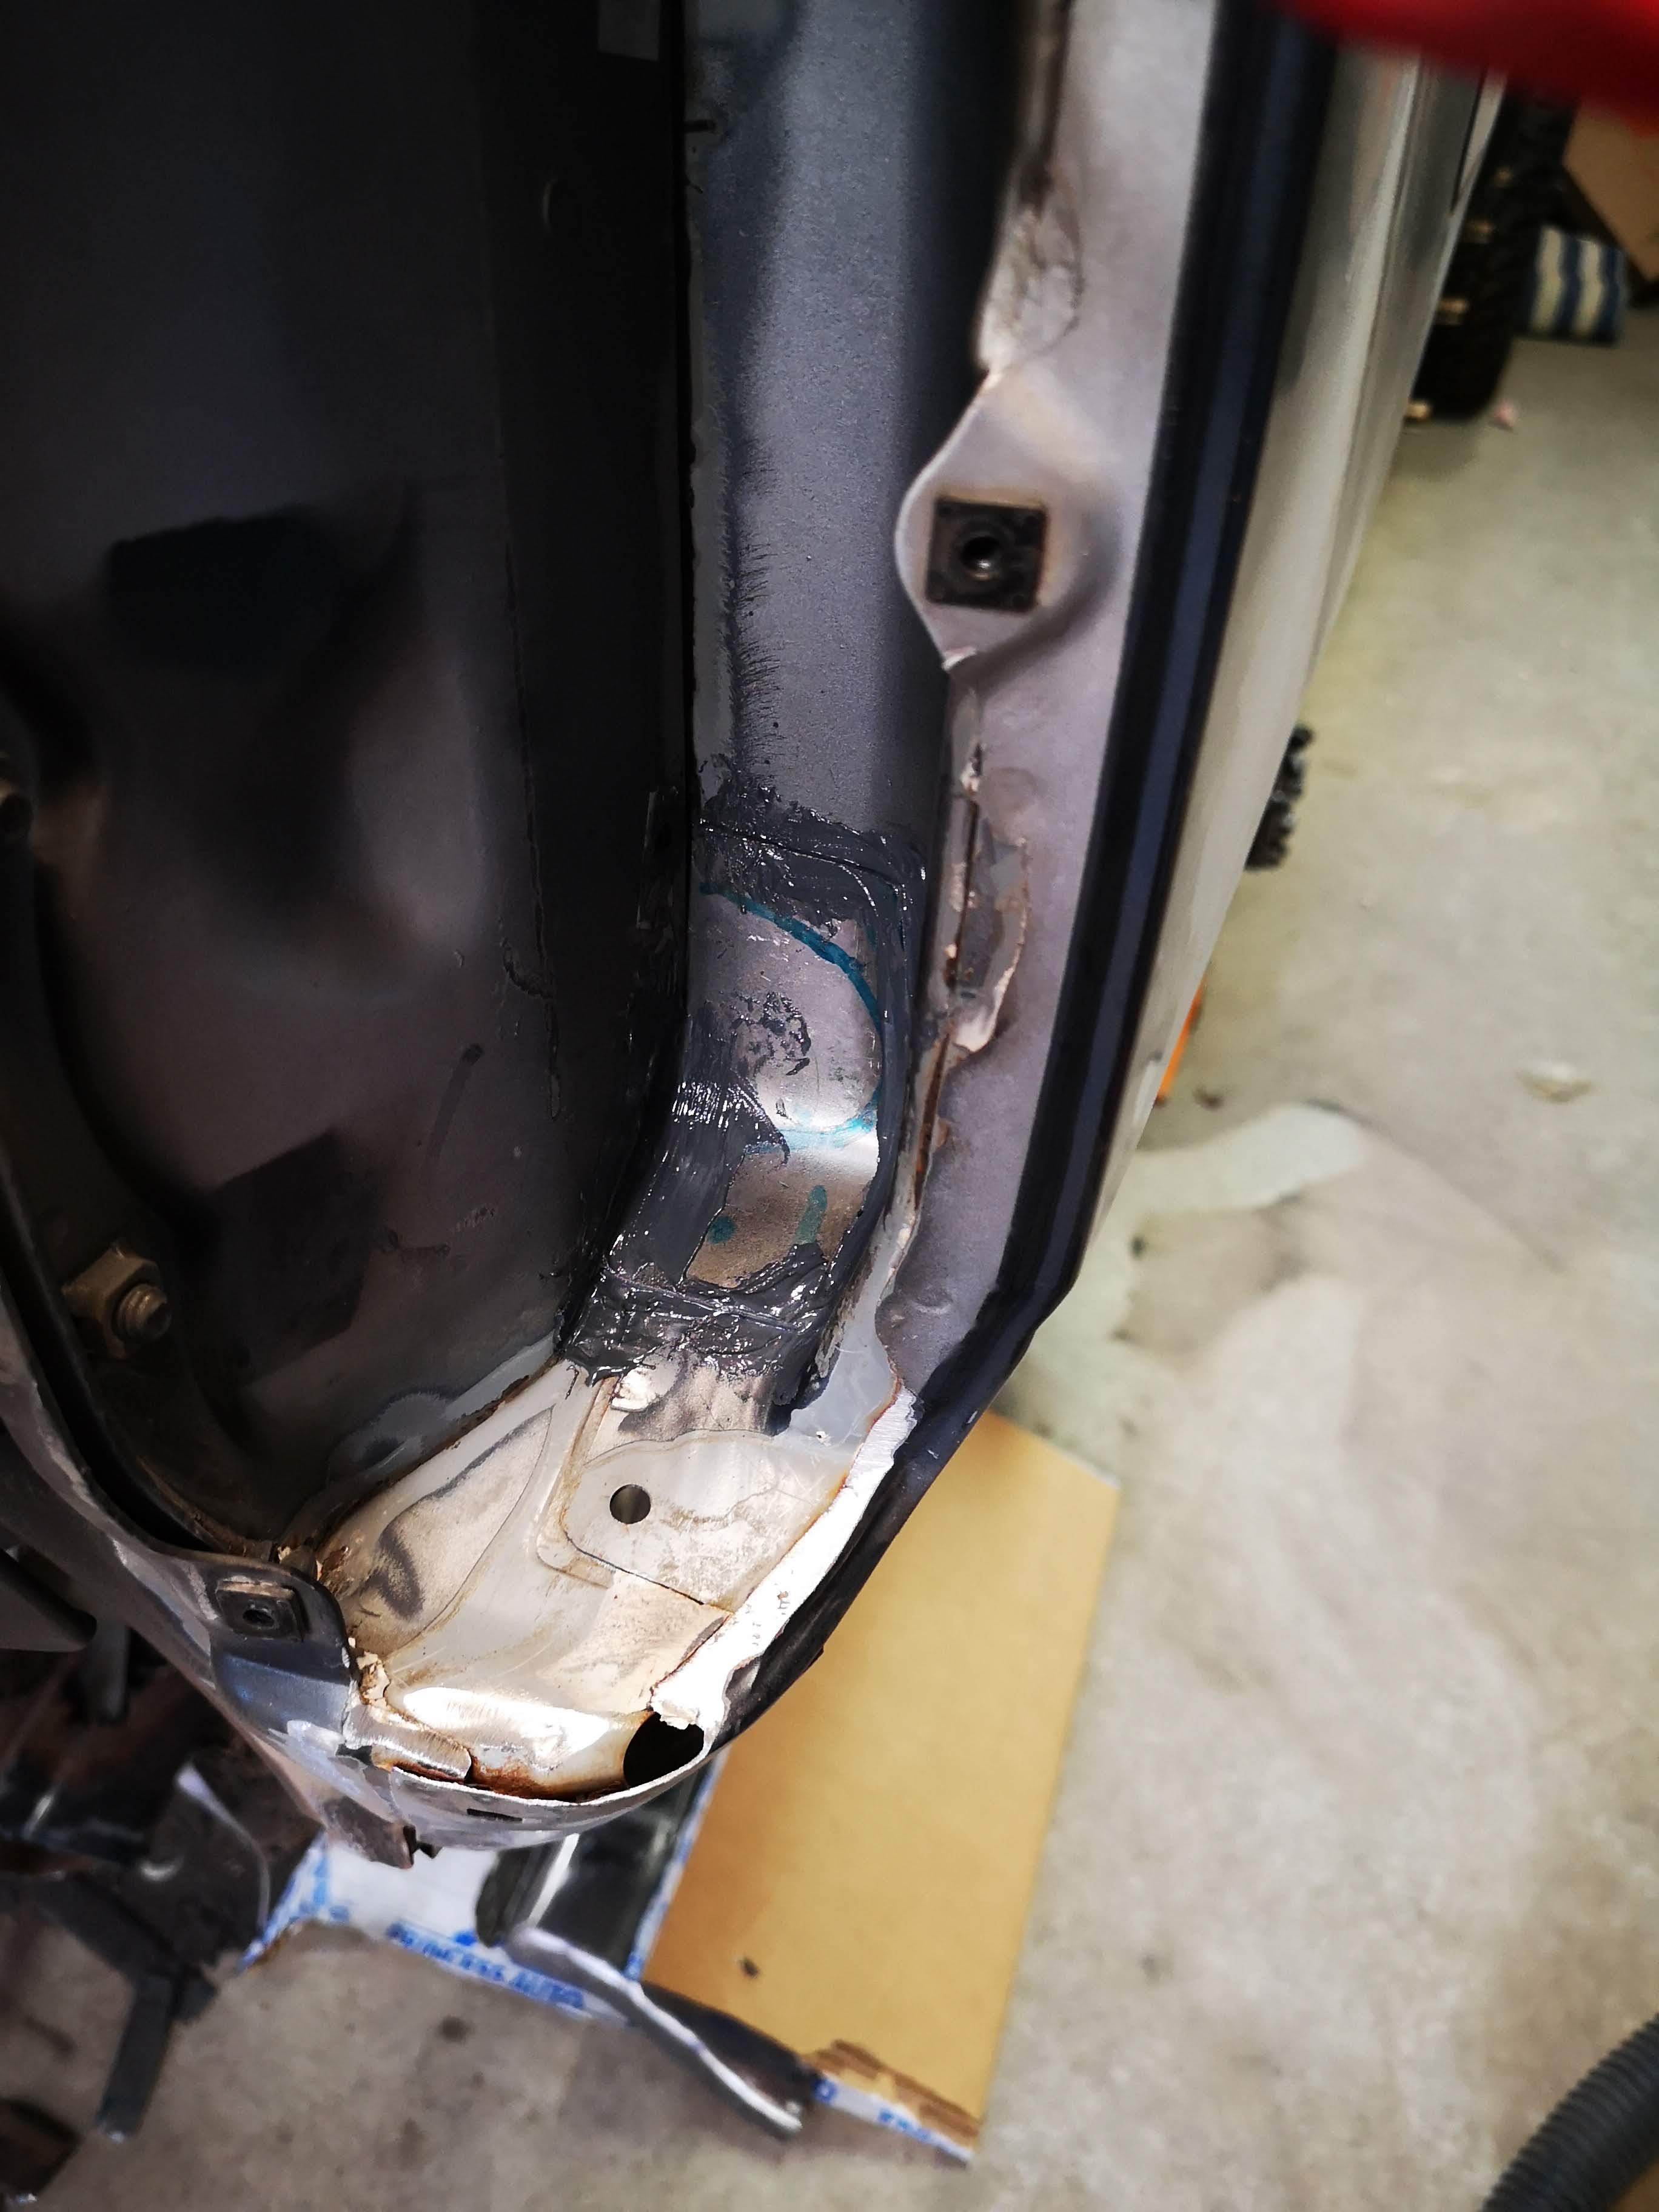
Once I figured I wouldn’t blow holes in everything, I got after my newly fabbed rear quarter/corner. Here’s how it sits this evening, after welding up the tabs along the side where it wraps into the wheel well (that side is facing the camera)

This is fun, and a great way to spend my holidays. Once this piece is where I want it, I’m thinking about welding the two fabbed pieces together on the bench, before welding them to the truck. That way I can get to both sides.

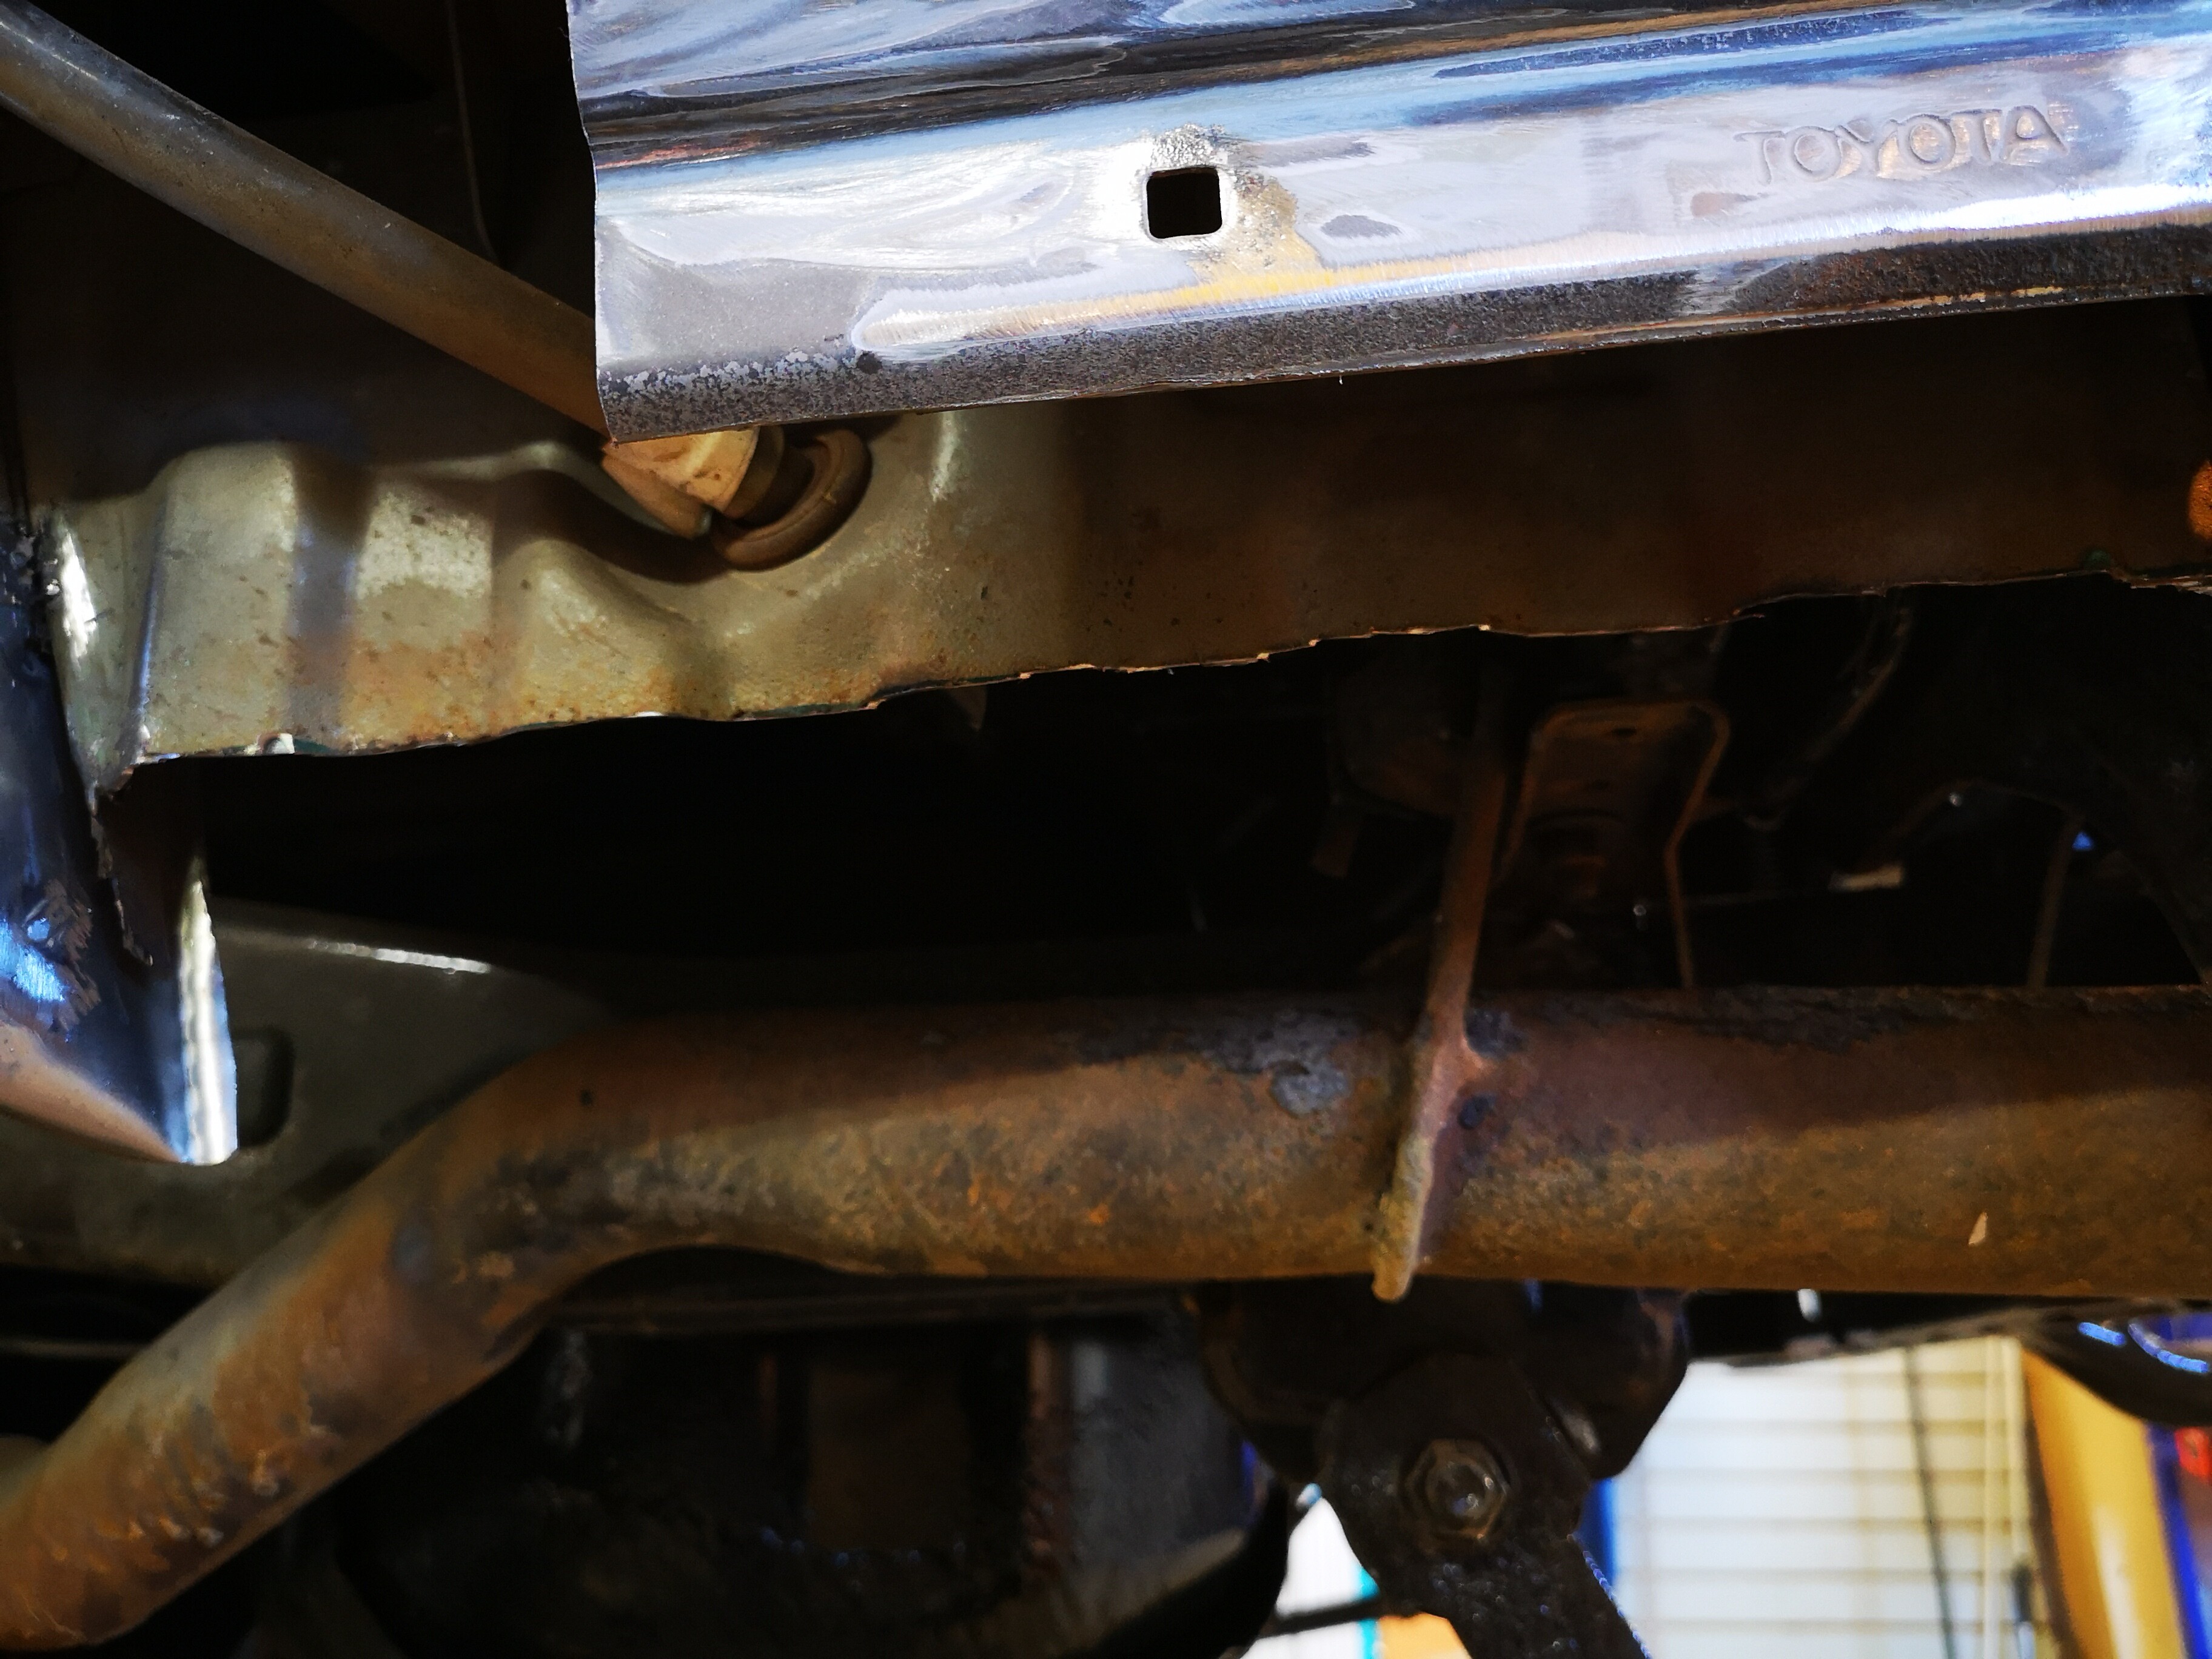
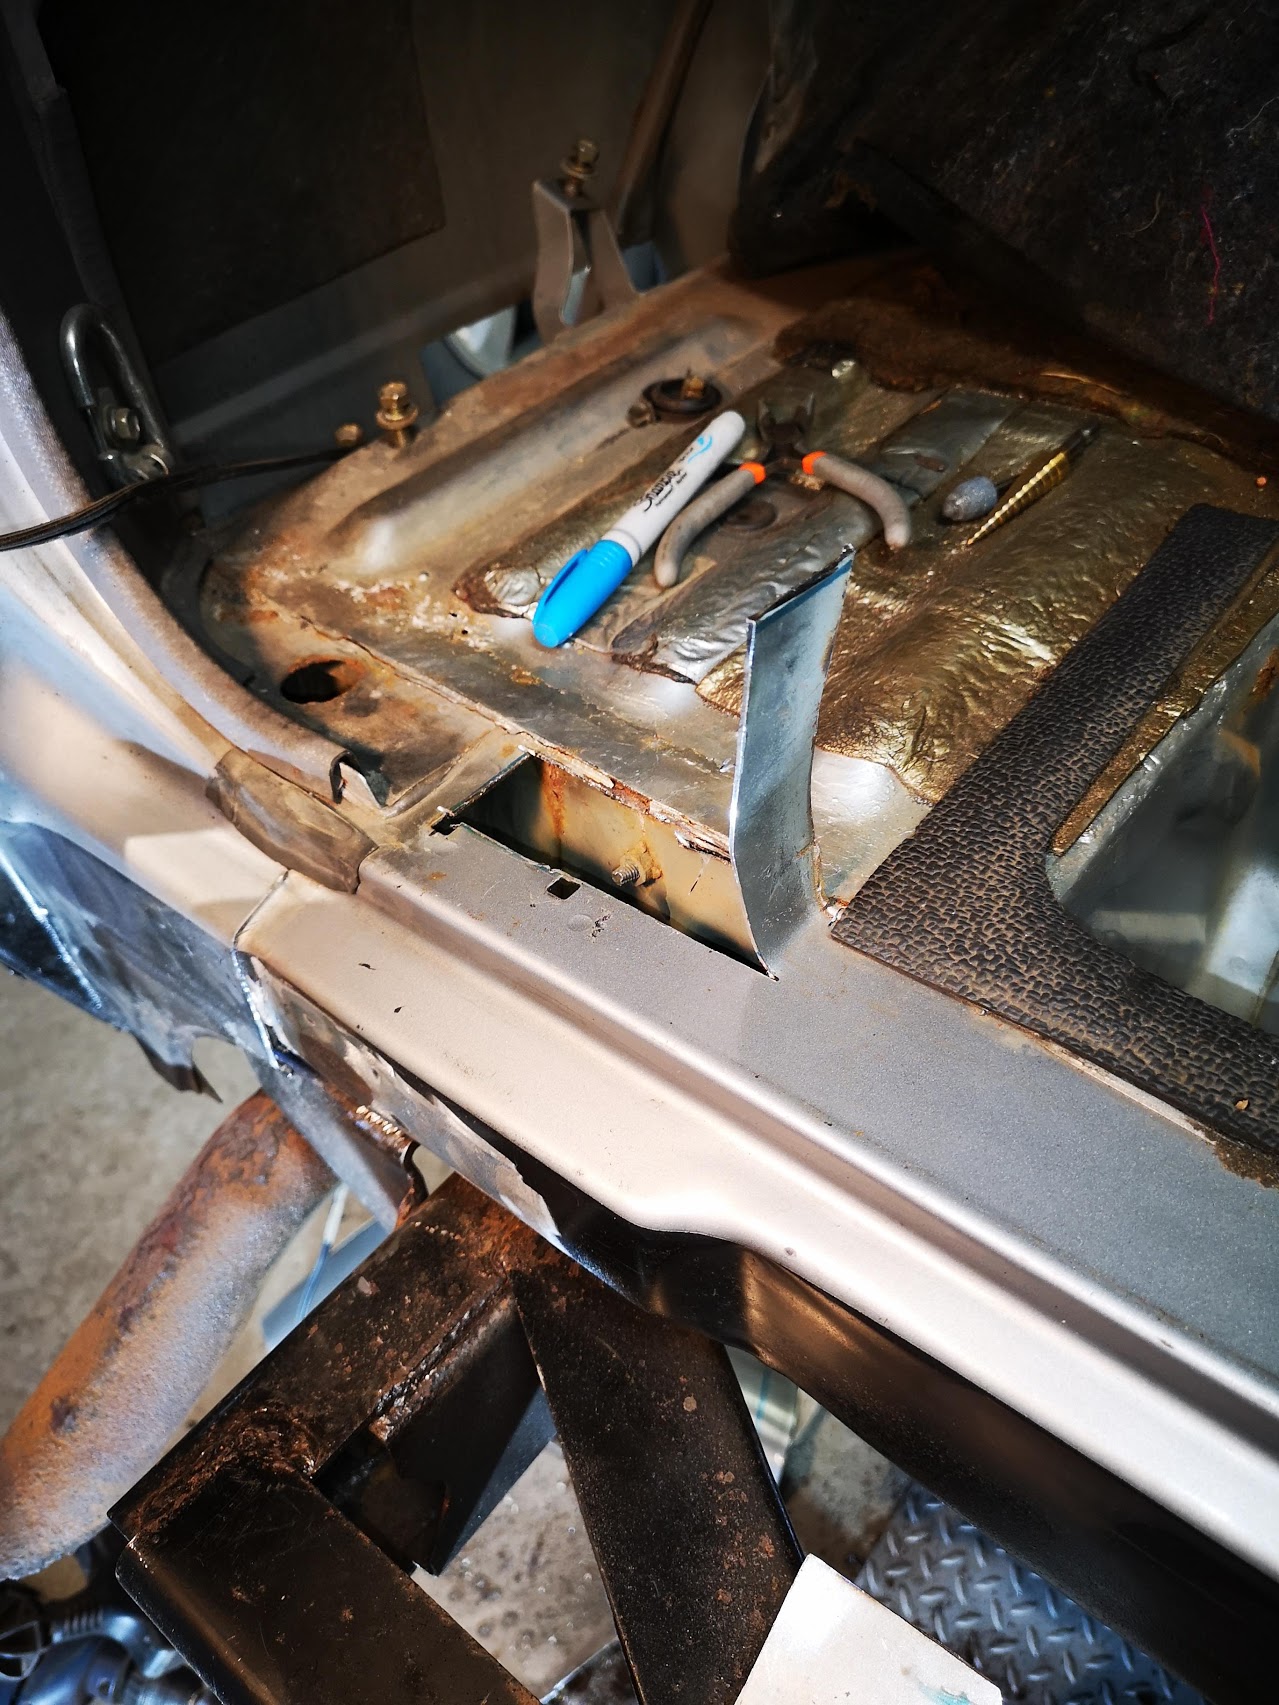
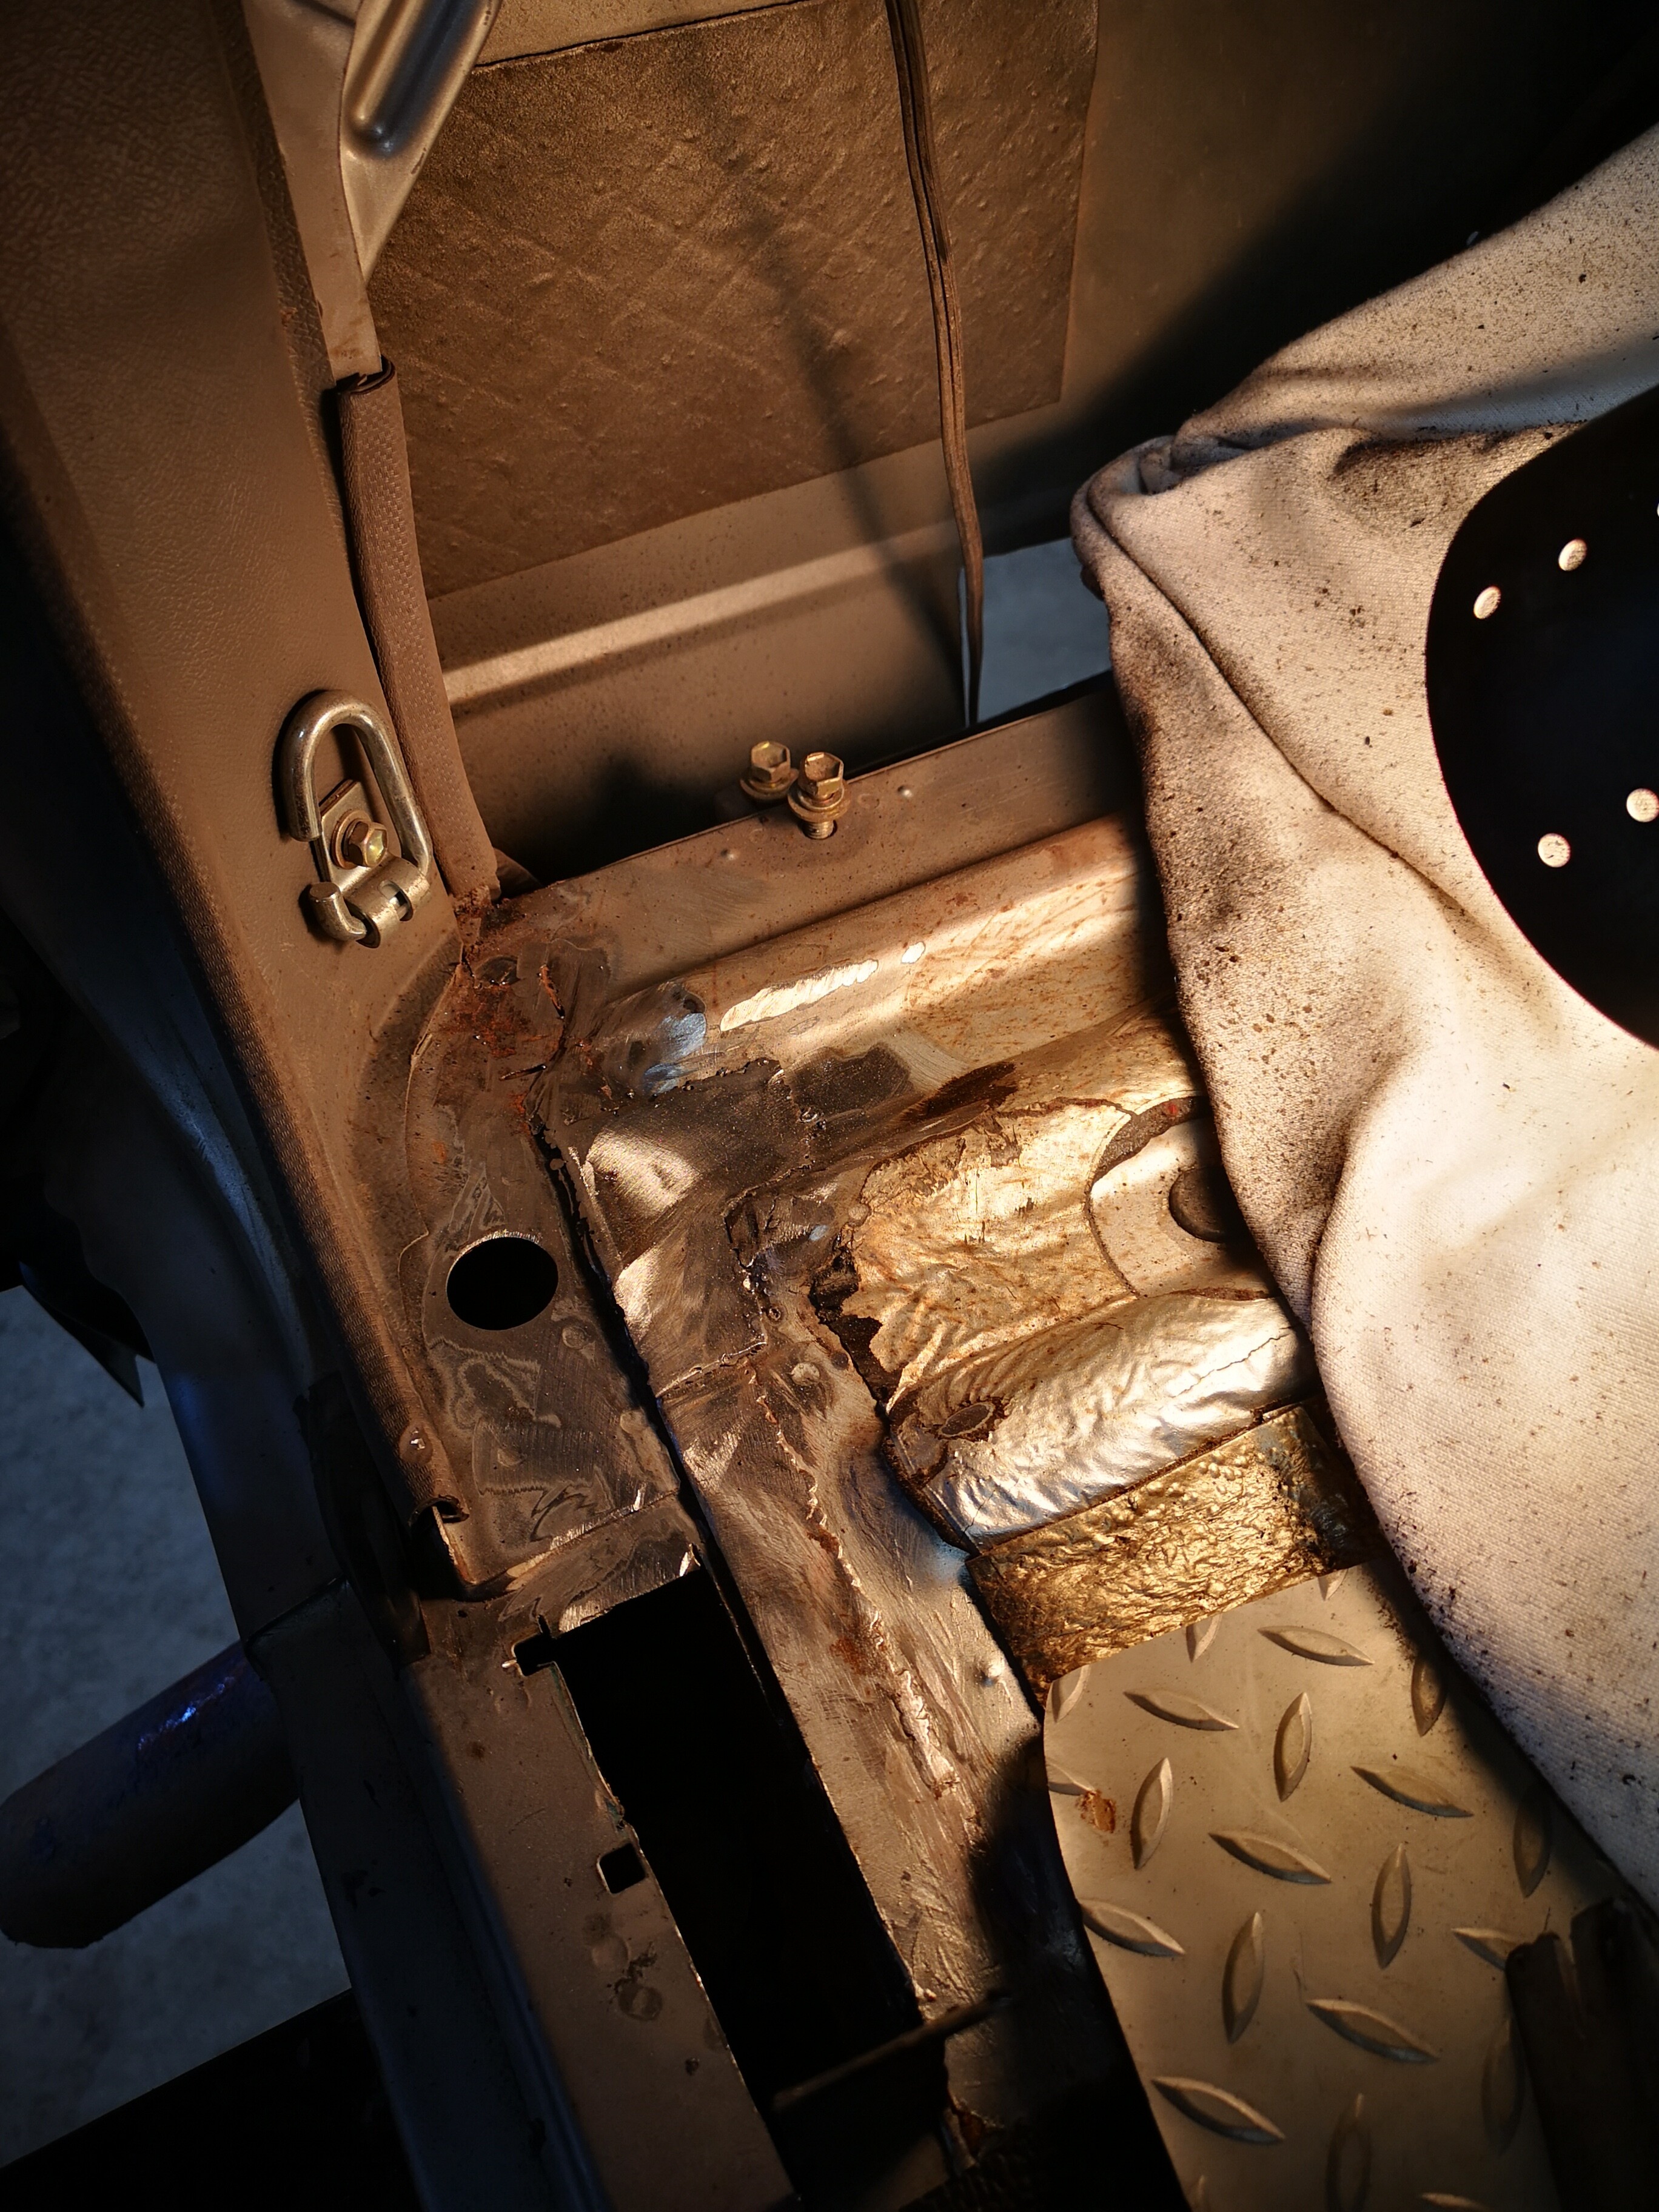
This is all new to me, and it’s by no means professional, but it’ll be behind the flares and the rear bumper anyways so my goal is for it to last, not rust through again in a few years.

4 Likes

That’s INCREDIBLE, Phil. You truly are next level.

When you write this up for the magazine, I hope you’ll include some backstory about why you waited 4-5 years to open the welder (even to practice), and how you came to your metal fab skills. If you could include any words advice or encouragement for the rookie explorers (“Rex”) in the audience that would be outstanding.

This is beyond what I was expecting. And you told us you were doing it. Lol

3 Likes

I think next level might be overstating my skill level. Lol. But it is fun.

Today I got ambitious (okay more ambitious) and stitched the two pieces I’ve fabbed so far, together. Then I realized there was one small section that could be a little longer in one spot. When it was all said and done, it looked like this:

Once I attacked it with my flap disc and plugged a few pinholes, it really did look like the three pieces of metal were one piece.

What I’ve realized is that I’m a poor (well inexperienced) welder, but a passable grinder. :joy: So that’s half the battle.

15°C in my garage this afternoon, and -6°C outside. Beautiful!

I’ve done mostly all I can with the right rear quarter, until I get coatings and paint so… Time to move to the worser side (yes, I know worser isn’t a word, but in this case… Necessary). The lower left rear quarter is gone. Kaput. No metal. And the inner piece is partly gone too. Rear wrap around corner is also bad. I gingerly hunted for good metal with my flap disc, and was left wanting. Lol.

4 Likes

Okay, skip this post if the sight of rust makes you squeamish.

Last chance! Don’t say I didn’t warn ya!

It’s worse than I hoped, but not as bad as it could’ve been I guess? The good news is that the rust is mostly confined to the places where flares let it accumulate unchecked. The line delineates my first (but not last) cut.

And chop!

Inner lower wheel well is also gonna need some rebuilding…

4 Likes

Today was a long day with little to show. I moved over the left side, where there isn’t much to work with. I ended up taking pics of the RHS and then using the mirror edit to try to picture what should’ve been there. Of course having the fuel filler on one side didn’t help either.

I ended up making a new piece for the wheel well today. It’s a small piece, but without it I wouldn’t have a guide as to where the new lower quarter would wrap around… Although there’s no lower quarter either, so it’s chicken and egg…

Anyways… I started by throwing a piece in there…

Then I doctored it up, and made some tabs…

And tacked it into place.

The rolled edge on the bottom was giving me troubles, and my welding was quite spattery today (welding to the old metal of the truck today, different from brand new sheet on the bench). After a bunch of iterations, I ended up with this (view from inside the wheel well.) It’s not pretty, but it’ll be mostly covered anyway.

(The yellow circle is the part I added to what was left of the original piece)

Note, the rusty vertical piece you see in the pics will be cut out, but I want to get a lower panel mocked up first, so I have something to go by. That’ll be the last piece I cut out.

3 Likes

Looking good, Phil. I can’t imagine needing to do that kind of repair. And yet, something tells me, one day, I will. :cold_face:

1 Like

Yesterday I had a few hours so I went after that inner vertical piece that was rusting on the bottom edge.
First I cut it out.

(In the above pic I’m holding the newly liberated rusty piece below the cut line.)

Part of me wanted to just leave it, and give myself more clearance at the back. But right now the goal is to get her back as close to stock as possible. So I needed to make a new piece. Not easy with the corrugations stamped in there at the factory…

Let’s do some doodling…

Then I cut some slots to allow the metal to reach the edges all the way across. I wasn’t going to be making one solid piece here when the welding was done. I know my limitations. But I did want it to be strong enough to hold my new lower quarter, once I made one. The slots would hopefully allow the edges to be close enough to tack it most of the way along the seam.

Here’s where we ended up yesterday.

It’s pretty nasty looking where the two pieces meet. But it will be inside the panel anyways. And the goal here was strength, which I appear to have achieved. It will get coated with por15 before it’s closed up for good.

Next challenge is the corner and the area below the light where the outer sheetmetal makes a nice curve. Not gonna be easy. Oh. Then there’s also that pesky outer lower quarter which I have no template for since it was too far gone when I got the truck.

3 Likes

Its easy to get overwelmed when doing a project that feels like it is beyond your skill set. But I’m trying to put that out of my mind as a attempt to tackle this one step at a time. Today I needed to finish the inside structure, with this nasty corner…

My grinder died yesterday, so I had to borrow my BIL’s until my new one comes (Sunday). Then today my last thin cutoff wheel grenaded. So I’m stuck using a dremel or a thick cutoff wheel. Or snips. Neither are great options. My compressor is not powerful enough to keep the spin up on my little die grinder, although I do have discs for it. Sonova…

Despite the obstacles, today I cut out the corner, and figured out a way to build a new corner. My welds worked a little better today, and once i had finished grinding, I was happy to see a nice edge and good penetration. By the time I’d swept up, my inner corner was looking like this:

Much better. Still need to paint all this stuff, but one step at a time.

Feeling like I needed to see some actual progress, and also feeling a bit nervous that I wouldn’t be able to take the next step (the outer panel) I ran in and got some paper, and got to work, mocking up a panel.

Hmmm… Maybe I can do this after all? Tomorrow I’m going to tackle this. Likely in more than one piece…

Since paper is not going to be robust enough to survive what I have planned for this rig… :innocent:

My start with the back outer corner first, since its the part I’ve been the most worried about, since I started…

4 Likes

Given the extent of this build, and the amount of things I’m going to have to learn along the way, I’ve started putting this together as an ongoing story as well.

First entry will be:
How to… Project Adventure?
1991 JDM Landcruiser Build (Part 1)

Yes, the title is a play on words, for those who can read things multi-dimensionally. :crazy_face:

3 Likes

Got some work done on the LHS today. It’s going to be as difficult as I thought.

Way too many compound curves, lines, etc. So far it’s looking like three, maybe four pieces in total, by the time I’m done? We’ll see…

Not real nice yet. Wish I knew what in tarnation I was doing…

4 Likes

I don’t know, it’s pretty damn amazing, thus far. We are all our own worst critics and all. But, as someone who has played around with these tools, but never tried to actually deliver on this kind of extensive bodywork, your rough work is heads and shoulders above my talents.

3 Likes

I concur. Looking at this work, I’m blown away at what you’re doing for fun on the weekends. In my mind, it might just be easier to outlaw salt on the roads. :stuck_out_tongue:

@boostedinaz any advice or tips for sheetmetal repair? I know you’ve got some tricks up your sleeves…

3 Likes

Ah shucks fellas. It ain’t no thang… :kissing_closed_eyes:

In all honesty, every time I walk around this thing, I see something else I want to touch up in some way. I feel like I’ll never ever get it finished. Which is opposite to the point of getting it - so that I wouldn’t worry about a little ding/scratch/dent/flaw here and there. So… I definitely need a mindset adjustment here for sure.

In any event, tonight (we were out today) was ANOTHER first time trying a new process.

SANDBLASTING!

I’ve had this little gun/hopper since before the welder. And it sat collecting dust.

But tonight?

I got some media, filled that bad boy up and MADE some dust. Holy crap - it’s a messy proposition. It did what I wanted it to do, went through two containers in minutes, and have media all over the place, but it was effective. Felt like my pressure washer, only dirtier when I was done instead of cleaner. Yikes.

Its effective for sure, but holy crap I’ve got a lot of shop vaccking to do tomorrow.

2 Likes

BTW, this was precipitated by some rust I hadn’t seen before. Found it yesterday, and it gave me pause. It was only accessible from underneath, and was mostly blocked by the frame’s rearmost crossmember, all the way at the back. It was a section about the size of a Twoonie (Canadian 2 dollar coin) and was that kind of rust that you poke at it and it comes away in flakes until a hole appears. I couldn’t get to it from the top, and it was too tight at the bottom. After wringing my hands for a while, I finally came up with a solution. Make an 'access hatch". Desperate times and all that…

Once I could get in from the top, I was able to get limited access here and there. I used the following tools, from top and bottom, once I got things started:

Cutoff wheel (grinder)
Dremel cutting disc (okay, there were about seven)
Bastard file ( I don’t know if it was in fact a bastard file, but I wanted to say it - and it was a bastard of a job)
Sawzall. It started as “just because” but it actually helped. Awfully small hole to be jinking around a giant “wrecking blade” but it did what it had to.
Dremel with stone
Tin snips (left and right)
Crowbar
Die grinder.

By the time I was done, I had gotten ALL the rust out, and was left with a hole through two layers of metal, from above and below (that’s why it had swelled up so much). I finished the day by making a patch for the bottom, and plan to make another for the top. Its a pretty tight for welding in there, so my plan is a combo of a few tacks and some two part epoxy to make the patch permanent, and sealed. Then cover the whole bit with POR15.

The sandblasting was actually necessary to clean the edges of the hole I was left with, before I started sealing it up. Sandblaster cleaned up the hole right down to silver shiny edges. Okay, dull, but not rusty.

Here’s my patch, laid in place for now. It covers the hole on the bottom, and wraps up around the back. Another patch will go in from the top side, then I’ll seal it all up, and then close up my custom access panel again.

I think my wife felt bad for me after my discovery - she came out with lunch for me.

Laughable pic, yes. Those are THE safety glasses from back when I was attempting easy little things like snorkels.

2 Likes

Made some real progress today. Put in my RHS tail light cavity patch. Patched and sealed up the new surprise hole, with a patch from top and bottom. And finally… Began to shape and mold the lower LHS corner that I’ve been dreading since I got the truck. It’s not finished yet. But it is starting to look like something …

3 Likes

Welded the accessible part of my patch today, and checked the rest of my work from yesterday. The resin hardened up nicely.

Also decided to put a patch in rear floor in lieu of covering it over… Was a couple of small holes but now it’s new metal.

These are incremental steps forward but it is progress. Tomorrow I’m hoping to paint inside the cavity I opened and then seal it back up. After that I want to get back to shaping my rear quarter.

2 Likes

Okay, first of all, you look great, Phil. But I gotta ask what you’re wearing and where you got it. I mean, is that the official uniform of the Canadian school teacher? Or maybe this is Mr. Powerfist taking a break from fighting the crimes of rust and corrosion? :cowboy_hat_face:

1 Like

Lol… Nomex coveralls. Fireproof, and very handy when welding and grinding. I’ve burned through three sets of gloves, but not even a mark on these bad boys.

2 Likes

That’s hardcore, dude. I wonder if that would count as fire resistant enough for motorsport? :smiley:

You’re making excellent progress. I love it.

2 Likes

Nomex is pretty much the standard for everything fire proof textile. The best stuff is Nomex. Pretty rad Phil. Id guess that came from Canadian oil sand suppliers?

1 Like